© GLP German Light Products
Rev. 20210331-1
Rev. 20210331-1
Safety Instructions
!
!
Important: This process deletes all individual
custom settings. Note that you will lose
connection to your controller!
Linking to a CRMX Transmitter
Loading Factory Backup
Transport Lock
Whenever CRMX is enabled and the fi xture
is not already linked, the device searches for
a CRMX transmitter. To link the device with a
new CRMX transmitter, unlink the device and
start the linking process at the transmitter.
• Follow all applicable safety regulations when installing and using this
product.
• Secure this product against falling by using a safety attachment when
installing overhead.
• Do not operate the product in high temperatures or direct sunlight.
• Do not apply power to a product or battery charger that is damaged or
deformed.
• Do not expose the product or charger to water or humidity.
• The product and charger contain no user-serviceable parts. Do not try
to open or modify them.
• Do not look directly into the light output. Looking into the output at
close range may cause eye injury or irritation.
• Be ready for the product to light up suddenly when a command is sent
via remote control, signal gets lost or external power is switched off.
• Do not look at the LEDs with a magnifying glass or other optical
instrument that may concentrate the light output.
• Use only optical accessories that are supplied or approved by GLP.
• The product can become hot during normal operation. Take pre-
cautions to prevent accidental physical contact with the product. Allow
to cool before handling.
• Ensure free airfl ow and adequate ventilation around the product.
• Do not illuminate surfaces and objects that are less than 0.3 m (1 ft.)
from the product.
• Keep the product away from fl ammable or volatile materials.
• This product contains a rechargeable one cell lithium-ion battery rated
3.7 V / 10,000 mAh.
• Respect all applicable laws and regulations for the transport, storage
and disposal of batteries.
• Do not expose the battery to fi re or heat. Protect it from physical shocks.
Do not allow it to come into contact with water. Do not short-circuit
a lithium-ion battery or you may cause a battery explosion.
• Recharge the battery immediately when it is discharged.
• Charge the battery at an ambient temperature of between 15°C (59°F)
and 35°C (95°F).
• Leave the product’s container or fl ightcase open during charging.
• Charge the battery fully before storing the product. Partially charged
batteries lose capacity. Charge the battery every six months when the
product is not in use.
• Do not connect a battery charger to a product that may be damaged or
faulty.
• If the battery becomes faulty or will not hold a charge, replace it with
an original spare part from GLP only. The battery must be serviced by
authorized personnel only.
• Send the product to an authorized recycling center at the end of its life-
time. Do not dispose of the product or battery with household waste.
Send the product’s packaging for recycling.
If fi xture is powered on: Press and hold the Enter button for
10 seconds. Fixture loads factory backup. All custom settings and
individual confi guration are returned to factory default settings.
If the fi xture is switched on and not connected to power,
pressing and holding Menu and Enter buttons simultaneously
for 10 seconds puts the fi xture into Transport Lock mode. This
locks all control buttons for long-term storage and safe trans-
portation.
To unlock the fi xture, connect it to power using the charging
ports or USB.
Unlinked device
CRMX Transmitter with
active linking process
Unlinked device
1. Switch on the device.
2. Set fi xture to CRMX control:
Menu > Signal Settings > Signal Source: CRMX
3. Unlink fi xture:
Menu > Signal Settings > CRMX Link : Link / Unlink
4. Start linking process at CRMX transmitter
(read transmitter’s user manual)
The fi xture is shipped from factory with
Transport Lock enabled. Connect the
fi xture to power before fi rst use.
For further detailed information look up the user manual PDF
available for download on our website www.glp.de
Charging
Switching on / off
Connect the device to power using either its USB-C con-
nector and a standard USB charging power supply (not
included) with minimum 1 amp power or the optional GLP
Creative Light Docking Station (not included).
Charge the product to 100 % before fi rst use.
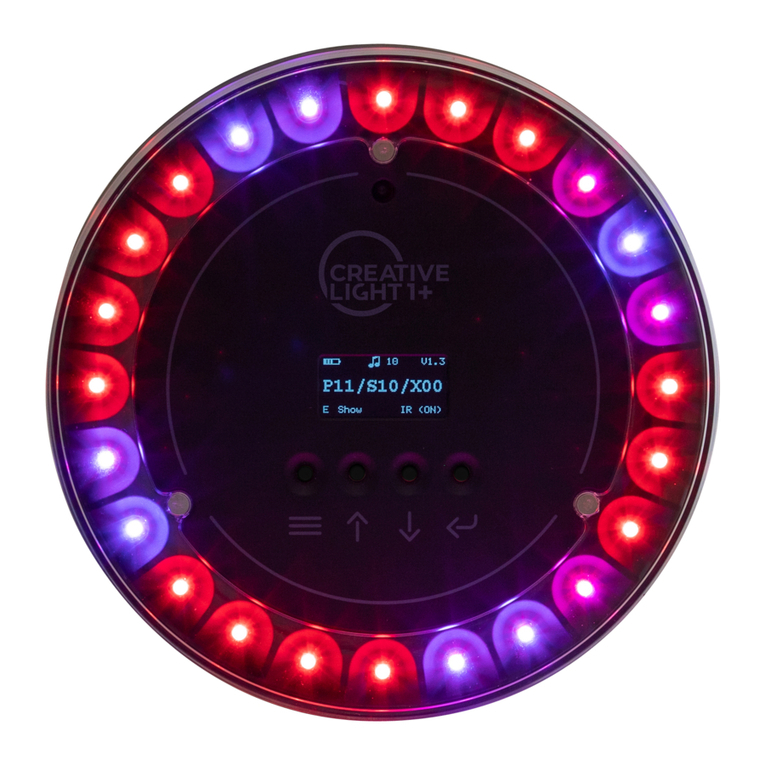
First LED pixel fl ashing green: charging in progress
First LED pixel constant green: charging process fi nished, 100% charged
Switch the fi xture on and off by pressing and holding the
left Menu button for 3 seconds. Increasing / decreasing
white pixels indicate the fi xture starting up or shutting down.
Menu button
(press & hold for 3 sec)
Signal Sources
The Creative Light 1 Plus can be controlled in three different signal source modes:
Don’t forget to set the Control Mode and DMX
Address when linking to the CRMX transmitter.
Manual Mode (IR Remote Control)
Manual Mode lets you manually control the Creative Light 1 Plus via the integrated con-
trol panel or the included IR remote control unit. You can set a background color and
add pattern macro effects on top of the background. Sound2Light for automatic color
changing is also available.
Don’t forget to set the Control Mode and DMX
Address when linking to the CRMX transmitter.
CRMX (DMX via LumenRadio CRMX)
Using LumenRadio CRMX lets you connect the Creative Light 1 Plus to any Lumenradio
CRMX-compatible DMX transmitter. This lets you control the fi xture with a standard
DMX signal and integrate it into an existing DMX infrastructure. CRMX operating mode
lets you control many more parameters, gives a wider selection of integrated effect
patterns and offers individual pixel control. In this mode, the indicator CRMX appears in
the bottom right corner of the display.
Important Note: By default the fi xture is set to Signal Source: CRMX and No-Signal:
Manual Control. This means the fi xture automatically switches to manual control
(IR remote) if no valid CRMX signal is being received or the fi xture is not linked to CRMX.
You can change this setting in the fi xture’s control menus under Signal Settings /
Signal Source and Fixture Settings / No-Signal Behavior.
GLP Creative Light App via GLP iQ.Mesh
The Creative Light 1 Plus lets you create light scenes using the GLP Creative Light App
and innovative GLP iQ.Mesh technology. Set Signal Source to GLP iQ.Mesh and open the
GLP Creative Light App to link the Creative Light 1 Plus and get control.
The device shows its current confi guration status as followed:
1 pixel rotating red: device unlinked to iQ.Mesh
1 pixel rotating green: device linked to iQ.Mesh
For more information please see the guidance in the GLP Creative Light App.
You can always switch between signal sources by pressing and holding the
Down button for 3 seconds.
You can always switch between signal sources by pressing and holding the
glp.de
more info:
Enter button
(press & hold for 10 sec)
Enter buttonMenu button
(press & hold both
for 10 sec)
