GMC GPHC21 User manual

900W
2-IN-1 POLE SAW & TRIMMER
GPHC21
2-IN-1 ELEKTRISCHE HEGGENSCHAAR EN
KETTINGZAAG MET VERLENGSTEEL
TRONÇONNEUSE ET TAILLE-HAIE SUR PERCHE
TELESKOP-HECKENSCHERE MIT ASTKETTENSÄGE
2 IN 1 SEGA & TAGLIASIEPE
CORTASETOS Y MOTOSIERRA ELÉCTRICA 2 EN 1
515017_Z1MANPRO1.indd 1 10/12/2014 14:37

1 2 3 4 5 6 7 8 9
1011
12
22
23
18 19
20
21
24
2526
13 14 15
16
17
515017_Z1MANPRO1.indd 2 10/12/2014 14:37

27
28
38
37
39
29
30
31
36
32
33
35
35
A B C D
EF G H
515017_Z1MANPRO1.indd 3 10/12/2014 14:37

I II
-45° ~ -90°
45° ~ 90°
60° ± 10°
I
MNOP
J K L
515017_Z1MANPRO1.indd 4 10/12/2014 14:37

5
English 6
Nederlands 14
Français 22
Deutsch 30
Italiano 38
Español 46
900W
2-IN-1 POLE SAW & TRIMMER
GPHC21
515017_Z1MANPRO1.indd 5 10/12/2014 14:37

6
GB
Wear hearing protection
Wear eye protection
Wear breathing protection
Wear head protection
Wear hand protection
Read instruction manual
Wear protective clothing
Wear protective shoes
Keep bystanders
15m away!
Beware of blade thrust
Warning: Sharp blades or teeth!
DO NOT use in rain or
damp environments!
Always disconnect from the power
supply when adjusting,changing
accessories, cleaning, carrying out
maintenance and when not in use!
Beware of ying objects
Chain oil
Original Instructions
Thank you for purchasing this GMC tool. This manual contains information necessary for safe and
effective operation of this product. This product has unique features and, even if you are familiar
with similar products, it is necessary to read this manual carefully to ensure you fully understand the
instructions. Ensure all users of the tool read and fully understand this manual.
Guarantee
To register your guarantee visit our web site at
www.gmctools.com and enter your details*.
Your details will be included on our mailing list (unless indicated otherwise) for information on future
releases. Details provided will not be made available to any third party.
Battery Guarantee
GMC batteries are guaranteed for 6 months. If a defect occurs on a registered battery during the
term of the Battery Guarantee, due to material or manufacturing fault, then GMC will replace it free of
charge. This guarantee does not apply to commercial use nor does it extend to normal wear and tear
or damage as a result of accident, abuse or misuse.
Purchase Record
Date of Purchase:
Model: GPHC21
Serial Number:
(located on motor housing)
Retain your receipt as proof of purchase.
If registered within 30 days of purchase GMC guarantees to the purchaser of this product that if any
part proves to be defective due to faulty materials or workmanship within 24 MONTHS from the date
of original purchase, GMC will repair or, at its discretion, replace the faulty part free of charge. This
guarantee does not apply to commercial use nor does it extend to normal wear and tear or damage as
a result of accident, abuse or misuse.
* Register online within 30 days of purchase.
Terms & conditions apply.
This does not affect your statutory rights.
Description of Symbols
The rating plate on your tool may show symbols. These represent important information about the
product or instructions on its use.
Do not touch the blades before
the machine is disconected from
the supply and the blades have
come to complete stop.
Disconect the plug from the power
prior to clearing a blockage.
WARNING:
Moving parts can cause crush
and cut injuries
Always beware of the
danger from overhead electric-
power line, keep a safe distance
at least 10M from the power line.
Caution!
Beware of falling objects
Class II construction
(double insulated for additional
protection)
Conforms to relevant legislation
and safety standards.
Environmental Protection
Waste electrical products should
not be disposed of with household
waste. Please recycle where
facilities exist. Check with your
local authority or retailer for
recycling advice.
515017_Z1MANPRO1.indd 6 10/12/2014 14:37

GB
7
CE Declaration of Conformity
The undersigned: Mr Darrell Morris
as authorised by: GMC
Declares that
Identication code: GPHC21
Description: 2 In 1 Pole Hedge Trimmer & Chainsaw
Conforms to the following directives and standards:
• Machinery Directive 2006/42/EC
• Low Voltage Directive 2006/95/EC
• EMC Directive 2004/108/EC
• Outdoor Noise Directive 2000/14/EC
• RoHS Directive 2011/65/EU
• EN 60745-1:2009+A11
• EN ISO 10517:2009
• EN 55014-1:2006+A1+A2
• EN 55014-2:1997+A1+A2
• EN 61000-3-2:2006+A1+A2
• EN 61000-3-3:2008
Applied Conformity Evaluation Method
2000/14/EG
Sound Power Level dB (A)
Measured: 90
Guaranteed: 102
Notied body: TÜV Rheinland
The technical documentation is kept by: GMC
Date: 10/11/14
Signed:
Darrell Morris
Managing Director
Name and address of the manufacturer:
Powerbox International Limited, Company No. 06897059. Registered address:
Central House, Church Street, Yeovil, Somerset BA20 1HH, United Kingdom.
VVolts
~ Alternating current
A Ampere
n0No load speed
Hz Hertz
W, kW Watt, kilowatt
/min or min-1 (revolutions or reciprocation) per minute
Voltage: 230-240V~, 50Hz
Power: 900W
Handle rotation: 5 Click positions: -90°/-45°/0°/45°/90°
Cable length: 10m
Ingress protection: IP20
Protection class:
Extension pole length: 500mm
Chainsaw pruner
No load speed: 6900min-1
Guide Bar: AP08-36-507P
Chain pitch: 3⁄8"(9.53mm)
Chain Length: 36"(914.4mm)
Chain Speed: 13m/s
Chain oil type: Specialised saw chain oil
(bio-degradable)
Oil tank capacity: 135ml
Overall Length: 2m (2.5m with extension)
Weight (chainsaw): 4.9kg
Hedge trimmer
No load speed: 1000min-1
Blade length: 480mm
Effective cutting length: 410mm
Overall tool length: 2m (2.5m with extension)
Teeth pitch: 31mm
Weight (hedge trimmer): 4.9kg
Sound and vibration information:
Sound Pressure (chainsaw) LPA: 90.35dB(A)
Sound Power (chainsaw) LWA: 102.36dB(A)
Sound Pressure (hedge trimmer) LPA: 90dB(A)
Sound Power (hedge trimmer) LWA: 101dB(A)
Uncertainty K: 3dB
Weighted vibration (chainsaw front handle) ah: 3.146m/s2
Weighted vibrfation (chainsaw rear handle) ah: 2.219m/s2
Uncertainty K: 1.5m/s2
Specication
The sound intensity level for the operator may exceed 85dB(A) and sound protection measures
are necessary.
As part of our ongoing product development, specications of GMC products may alter
without notice.
515017_Z1MANPRO1.indd 7 10/12/2014 14:37

8
GB
WARNING: Always wear ear protection where the sound level exceeds 85dB(A) and limit the time of
exposure if necessary. If sound levels are uncomfortable, even with ear protection, stop using the tool
immediately and check the ear protection is correctly tted and provides the correct level of sound
attenuation for the level of sound produced by your tool.
WARNING: User exposure to tool vibration can result in loss of sense of touch, numbness, tingling
and reduced ability to grip. Long term exposure can lead to a chronic condition. If necessary, limit
the length of time exposed to vibration and use anti-vibration gloves. Do not operate the tool with
hands below a normal comfortable temperature, as vibration will have a greater effect. Use the gures
provided in the specication relating to vibration to calculate the duration and frequency of operating
the tool.
Sound and vibration levels in the specication are determined according to EN60745 or similar
international standards. The gures represent normal use for the tool in normal working conditions. A
poorly maintained, incorrectly assembled, or misused tool, may produce increased levels of noise and
vibration. www.osha.europa.eu provides information on sound and vibration levels in the workplace
that may be useful to domestic users who use tools for long periods of time.
General Safety
WARNING Read all safety warnings and all instructions. Failure to follow the warnings and
instructions may result in electric shock, re and/or serious injury.
WARNING: This appliance is not intended for use by persons (including children) with reduced,
physical or mental capabilities or lack of experience or knowledge unless they have been
given supervision or instruction concerning use of the appliance by a person responsible for
their safety. Children must be supervised to ensure that they do not play with the appliance.
Save all warnings and instructions for future reference.
The term "power tool" in the warnings refers to your mains-operated (corded) power tool or battery-
operated (cordless) power tool.
1) Work area safety
a) Keep work area clean and well lit. Cluttered or dark areas invite accidents.
b) Do not operate power tools in explosive atmospheres, such as in the presence of
ammable liquids, gases or dust. Power tools create sparks which may ignite the dust or
fumes.
c) Keep children and bystanders away while operating a power tool. Distractions can cause
you to lose control.
2) Electrical safety
a) Power tool plugs must match the outlet. Never modify the plug in any way. Do not use any
adapter plugs with earthed (grounded) power tools. Unmodied plugs and matching outlets
will reduce risk of electric shock.
b) Avoid body contact with earthed or grounded surfaces, such as pipes, radiators, ranges
and refrigerators. There is an increased risk of electric shock if your body is earthed or
grounded.
c) Do not expose power tools to rain or wet conditions. Water entering a power tool will increase
the risk of electric shock.
d) Do not abuse the cord. Never use the cord for carrying, pulling or unplugging the power
tool. Keep cord away from heat, oil, sharp edges or moving parts. Damaged or entangled
cords increase the risk of electric shock.
e) When operating a power tool outdoors, use an extension cord suitable for outdoor use.
Use of a cord suitable for outdoor use reduces the risk of electric shock.
f) If operating a power tool in a damp location is unavoidable, use a residual current device
(RCD) protected supply. Use of an RCD reduces the risk of electric shock.
3) Personal safety
a) Stay alert, watch what you are doing and use common sense when operating a power tool.
Do not use a power tool while you are tired or under the inuence of drugs, alcohol or
medication. A moment of inattention while operating power tools may result in serious personal
injury.
b) Use personal protective equipment. Always wear eye protection. Protective equipment such
as dust mask, non-skid safety shoes, hard hat, or hearing protection used for appropriate
conditions will reduce personal injuries.
c) Prevent unintentional starting. Ensure the switch is in the off-position before connecting
to power source and/or battery pack, picking up or carrying the tool. Carrying power tools
with your nger on the switch or energising power tools that have the switch on invites accidents.
d) Remove any adjusting key or wrench before turning the power tool on. A wrench or a key
left attached to a rotating part of the power tool may result in personal injury.
e) Do not overreach. Keep proper footing and balance at all times. This enables better control
of the power tool in unexpected situations.
f) Dress properly. Do not wear loose clothing or jewellery. Keep your hair, clothing and
gloves away from moving parts. Loose clothes, jewellery or long hair can be caught in moving
parts.
g) If devices are provided for the connection of dust extraction and collection facilities,
ensure these are connected and properly used. Use of dust collection can reduce dust-related
hazards.
4) Power tool use and care
a) Do not force the power tool. Use the correct power tool for your application. The correct
power tool will do the job better and safer at the rate for which it was designed.
b) Do not use the power tool if the switch does not turn it on and off. Any power tool that
cannot be controlled with the switch is dangerous and must be repaired.
c) Disconnect the plug from the power source and/or the battery pack from the power tool
before making any adjustments, changing accessories, or storing power tools. Such
preventive safety measures reduce the risk of starting the power tool accidentally.
d) Store idle power tools out of the reach of children and do not allow persons unfamiliar
with the power tool or these instructions to operate the power tool. Power tools are
dangerous in the hands of untrained users.
e) Maintain power tools. Check for misalignment or binding of moving parts, breakage of
parts and any other condition that may affect the power tool’s operation. If damaged, have
the power tool repaired before use. Many accidents are caused by poorly maintained power
tools.
f) Keep cutting tools sharp and clean. Properly maintained cutting tools with sharp cutting edges
are less likely to bind and are easier to control.
g) Use the power tool, accessories and tool bits etc. in accordance with these instructions,
taking into account the working conditions and the work to be performed. Use of the power
tool for operations different from those intended could result in a hazardous situation.
5) Service
a) Have your power tool serviced by a qualied repair person using only identical
replacement parts. This will ensure that the safety of the power tool is maintained.
515017_Z1MANPRO1.indd 8 10/12/2014 14:37

GB
9
Electrical Chain Saw Safety
WARNING: Chainsaws are potentially dangerous machines which can cause major injury if used by
untrained people
WARNING: It is recommended that this tool is ALWAYS supplied via Residual Current Device (RCD)
with a rated residual current of 30mA or less.
• Keep all parts of the body away from the saw chain when the chainsaw is operating. Before
you start the chainsaw, make sure the saw chain is not contacting anything. A moment of
inattention while operating chainsaws may cause entanglement of your clothing or body with the
saw chain
• Always hold the chainsaw with your right hand on the rear handle and your left hand on
the front handle. Holding the chainsaw with a reversed hand conguration increases the risk of
personal injury and should never be done
• Wear safety glasses and hearing protection. Further protective equipment for head, hands,
legs and feet is recommended. Adequate protective clothing will reduce personal injury from
ying debris or accidental contact with the saw chain
• Do not operate a chainsaw in a tree. Operation of a chainsaw while in a tree may result in
personal injury
• Always keep proper footing and operate the chainsaw only when standing on xed, secure
and level surface. Slippery or unstable surfaces such as ladders may cause a loss of balance or
control of the chainsaw
• Hold the power tool by insulated gripping surfaces only because the saw chain may
contact hidden wiring or its own cord. Saw chains contacting a "live" wire may make exposed
metal parts of the power tool "live" and could give the operator an electric shock
• When cutting a limb that is under tension, be alert for spring back. When the tension in the
wood bres is released the spring loaded limb may strike the operator and/or throw the chainsaw
out of control
• Use extreme caution when cutting brush and saplings. The slender material may catch the
saw chain and be whipped toward you or pull you off balance
• Carry the chainsaw by the front handle with the chainsaw switched off and away from
your body. When transporting or storing the chainsaw always t the guide bar cover.
Proper handling of the chainsaw will reduce the likelihood of accidental contact with the moving
saw chain
• Follow instructions for lubricating, chain tensioning and changing accessories. Improperly
tensioned or lubricated chain may either break or increase the chance for kickback
• Keep handles dry, clean, and free from oil and grease. Greasy, oily handles are slippery
causing loss of control.
• Cut wood only. Do not use chainsaw for purposes not intended. For example: do not use
chainsaw for cutting plastic, masonry or non-wood building materials. Use of the chainsaw
for operations different than intended could result in a hazardous situation
• DO NOT allow children or pets near the work area. Untrained bystanders are dangerous and
can cause distraction, when in the vicinity of an operational chainsaw
• Check that other people are a safe distance away from your work area before starting to
cut. When tree felling, all other people should be a minimum distance equal to twice the height
of the tree away
• DO NOT work alone. Always ensure that there is someone nearby to help in the event of an
emergency
• DO NOT use this product in wet conditions. Ensure that material to be cut is dry before starting
work, to minimize the risk of electrocution
• Use of this tool requires the use of gloves, eye/face protection, dust mask, ear defenders,
hard hat, and sturdy clothing. Chainsaws are dangerous, it is important to eliminate the risk of
blade to skin contact
• When felling trees, always plan an escape route before cutting. Ensure that there is a clear
space behind you, at least twice as far as the tree is tall. The escape route should be clear of all
obstructions
• ALWAYS keep the saw chain properly lubricated; keep covered when not in use. Ensuring
the saw chain is in good working condition lowers the risk of kickback as well as increasing the
saw chains lifespan
• ALWAYS check the workpiece for foreign objects, and the work area for fencing, cables
etc. Interaction with foreign objects during cutting increases the risk of kickback occurring. Only
use this chainsaw to cut wood. Be sure that it is safe to cut before beginning a job
• NEVER pass arms or legs below the blade when cutting. Always stand back from the cutting
area, whilst maintaining a stable position
• Be prepared for the possibility of kickback. Under some circumstances, if used incorrectly, the
chainsaw may be thrown back towards the user. Correct use and maintenance will signicantly
reduce the chance of kickback occurring
• If the chainsaw jams, switch off immediately. Allow the motor to come to a complete stop
before attempting to clear jammed material
• Be aware that some wood dust is toxic. This is especially likely if you are cutting wood treaded
with stains, or preservatives. If you are unsure of what treatments your wood may have had, do
not cut
• Assess your own physical condition. Using a chainsaw, even a smaller model, is physically
demanding. Do not start a job unless you are condent that you are t and strong enough to
complete it. Never use a chainsaw when tired, unwell, or under the inuence of any kind of drugs
or alcohol
• If using a chain saw for the rst time. It is recommended that the operator, as a minimum,
should practice cutting of logs on a saw horse supporting device.
• Disconnect the plug from the power source immediately. If the cable is damaged or cut.
Hedge Trimmer Safety
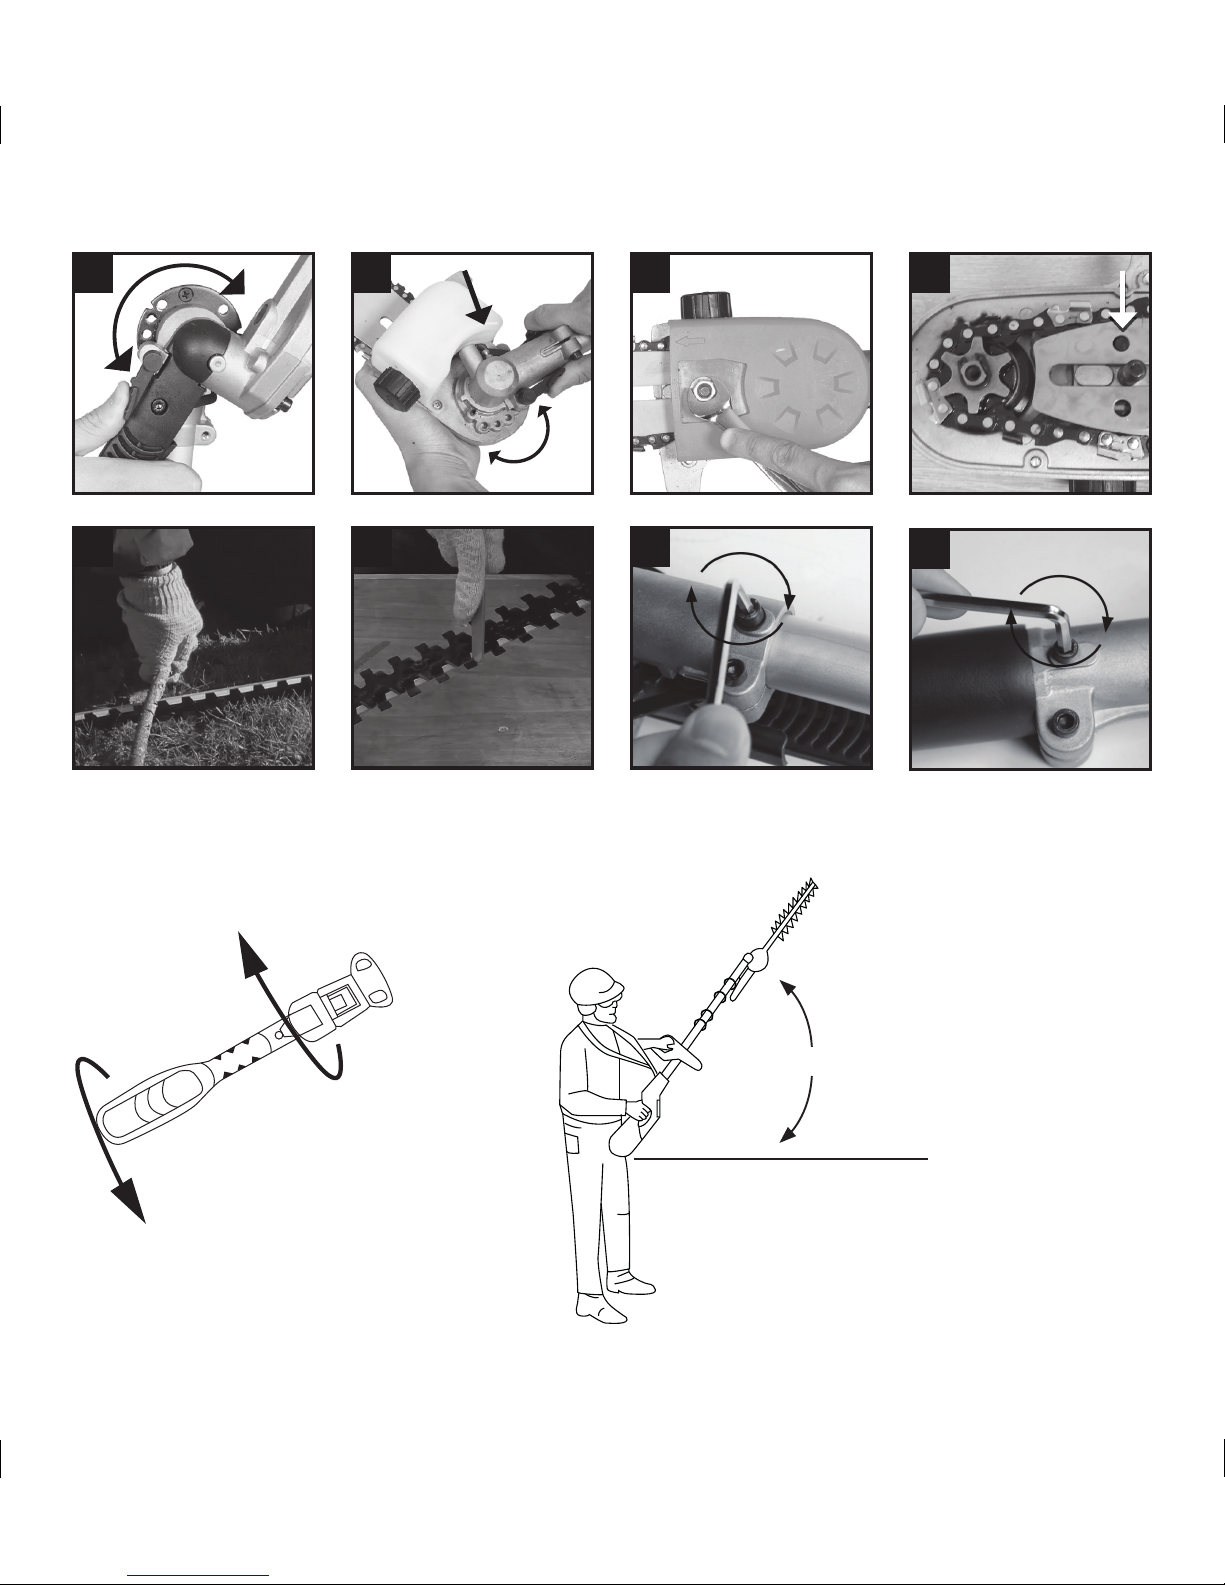
• ALWAYS use adequate protective equipment, including cut-resistant gloves, eye protection, solid
shoes and cut-resistant trousers when working with this hedge trimmer
• Connect hedge trimmers and other power tools used outdoors exclusively to power points
protected by a RCD
• DO NOT use the hedge trimmer in the rain or in damp conditions
• If power cord is cut or damaged, remove the mains plug from the power point IMMEDIATELY
WARNING: Failure to do so can lead to electrocution and other serious injuries or death.
• Keep hands and ngers well away from the blades
• Always hold the hedge trimmer securely with both hands on the handles when working with the
device
• Disconnect the hedge trimmer from the power supply before cleaning, removing obstructions or
carrying out maintenance. DO NOT attempt to free a jammed blade before the machine has been
disconnected from the power supply
• Disconnect the hedge trimmer from the power supply immediately when nishing work or if work
is interrupted. If you are interrupted when operating the trimmer, complete the process and switch
off before turning your attention away from the hedge trimmer
• This hedge trimmer has been designed to cut soft, new growth and should NOT be used on thick
branches, hard wood or for other forms of cutting
• This product requires the use of two hands to ensure safe operation
• Never allow untrained users or children to use the hedge trimmer
• Inspect the area to be cut before starting. Remove any objects or debris that could be thrown,
jammed or become entangled in the blades
• Adopt a stable stance always keeping the hedge trimmer in front of your body
• Grip the front handle bar switch with one hand. With the other hand grip the rear handle and with
your ngers squeeze the trigger switch
• Allow the cutting blades to reach full speed before commencing the cut
• When cutting always move in a forward direction. Never move backwards while operating the
hedge trimmer in case you could fall over unseen obstacles
• Never work towards people or solid objects such as walls, trees or vehicles etc.
• If the blade stalls during cutting, stop the hedge trimmer immediately and disconnect it from the
mains supply before investigating the cause. Remove any jammed debris from the blades and
examine them for damage before re-commencing cutting. Always replace any damaged blades.
515017_Z1MANPRO1.indd 9 10/12/2014 14:37

10
GB
Product Familiarisation
1. Pole Connector Socket
2. Pole Hand Grip 1
3. Pole Hand Grip 2
4. Strap Connector
5. Twist Switch
6. Twist Collar
7. Safety Switch
8. Main Handle
9. Motor Vents
10. Mains cable
11. Trigger
12. Hedge Trimmer Blades
13. Hedge Trimmer Angle Wheel
14. Angle Unlock Switch
15. Angle Handle
16. Ball-Bearing Locking Mechanism
17. Protective cap
18. Saw Chain
19. Guide Bar
20. Oil Tank
21. Angle Wheel Unlock Switch
22. Ball-Bearing Locking Mechanism
23. Protective Cap
24. Chainsaw Angle wheel
25. Sprocket Cover
26. Oil Tank Cap
27. Hedge Trimmer Blade Guard
28. Chainsaw Blade Guard
29. Pole Locking Knobs (2)
30. Shoulder Strap Connector
31. Hex Key
32. Shoulder Strap
33. Shoulder Strap Safety Catch
34. Handle Swivel Bar
35. Pole Handle
36. Pole Extension
37. Chain Oil Fill Indicator
38. Chain Tensioner
39. Angle Release Lever
Intended Use
Mains-powered portable 2-in-1 hedge trimmer and pruner (chainsaw) with extended reach. Suitable
for trimming hedges, bushes and shrubs and cutting/pruning small trees and minor branches of larger
trees. Only suitable for domestic use. Not suitable for commercial, industrial or hire use.
Unpacking Your Tool
• Carefully unpack and inspect your new tool. Familiarise yourself with all its features and functions
• Ensure that all parts of the tool are present and in good condition. If any parts are missing or
damaged, have such parts replaced before attempting to use this tool
Before Use
WARNING: Ensure the tool is disconnected from the power supply before attaching or changing any
accessories, or making any adjustments.
Assembly
1. Fit a Pole Locking Knob (29) to the Pole Connector Socket (1) as shown in Image A. Do not fully
tighten - allow some slack so the intended tool head can t. Repeat for the Pole Extension (36).
The Pole Extension is shown with pre-tted Pole Locking Knob
2. Fit the Pole Handle (35) to the section of the pole between Pole Hand Grip (2) and (3). Release
the Handle Swivel Bar (34) as shown in Image B and then fasten to the pole as shown in Image C
using the supplied bolts, washers and hex key
3. Assemble the Shoulder Strap (32) by tting the Shoulder Strap Connector (30) and Shoulder
Strap Safety Catch (33) as shown in Image D and E and then attach to the Strap Connector (4)
as shown in Image F
4. To t the Pole Extension (36), Pruner/Chainsaw or Hedge Trimmer, rst remove the Protective
Cap (17 or 23) if tted.
5. Fit the Pole Extension (36) rst if required. This extends the reach by 500mm
6. Slot the drive end with the exposed pin into the Pole Connector Socket (1) as shown in Image G,
until the ball-bearing clicks into position in the exposed hole; then tighten the Pole Locking Knob
to secure the Pole Extension
7. Repeat this procedure with either the Hedge Trimmer or Pruner tool head, making sure the ball-
bearing clicks into position and the Locking Knob is tightened to secure the whole assembly
8. Check the tool is rigid and not exing
9. Loosen the Locking Knob and push in the ball-bearing to remove before pulling apart ( Image H)
Conguring for use
Handle rotation
The handle can be rotated from 0 to 45° and 90°, right or left, to select the required handle angle (ve
stop positions in total). Push in the Twist Switch (5) and rotate to the required position, then release
the Twist Switch to lock. See Fig. I
Hedge Trimmer
Altering the hedge trimmer angle
The hedge trimmer angle can be adjusted by raising the pin that secures the Hedge Trimmer Angle
Wheel (13)
1. Press the Angle Unlock Switch (14) as shown in Image I, and use the Angle Handle (15) to move
the hedge trimmer head to the required angle.
2. Release the Angle Unlock Switch to allow the pin to re-secure the angle of trimmer head in one of
the hole positions of the Trimmer Angle Wheel
Pruner – Chainsaw
Filling with chain oil
WARNING: Be careful not to spill any oil. Thoroughly clean away any spilled chain oil, even if bio-
degradable chain oil is used. Be aware of slipping hazards!
1. Clean the chain Oil Tank (20) exterior area and remove all wood dust and dirt
2. Open the Oil Tank Cap (26) by turning it anticlockwise
3. Fill with specialised chain saw oil. DO NOT overll. The Chain Oil Fill Indicator (37) indicates the
maximum ll level
4. Immediately ret the Oil Tank Cap, and close by turning it clockwise until hand-tight and sealed
Adjusting chain tension
WARNING: ALWAYS wear cut-proof gloves when touching or handling the saw chain.
Note: The Chain Tensioner (38) only needs to be adjusted in small increments to give different
variations of chain tension. DO NOT over/under tighten.
1. Turn the Chain Tensioner in a clockwise direction using the supplied Hex Key (31) until the
chain is tensioned to a point that allows the chain to be raised in the middle of the Guide Bar by
approximately 2mm.
• If the Saw Chain (3) sags, or if drive links can be pulled out of the Guide Bar then the chain
tension is incorrect
515017_Z1MANPRO1.indd 10 10/12/2014 14:37

GB
11
WARNING: Over-tightening the Saw Chain will risk rupture during operation. There should be some
play in the Saw Chain, but not enough for the drive links to leave the Guide Bar. The chain must
ALWAYS be allowed to move freely and easily on the Guide Bar.
Operation
WARNING: ALWAYS wear eye protection, adequate respiratory and hearing protection, as well as
suitable gloves, when working with this tool.
WARNING: For outdoor use, only extension cables certied for the purpose must be used. Check the
supply and extension cord for signs of damage or ageing. Do not use the product if power cords are
damaged or worn
WARNING: If used for any other purpose not detailed in these operating instructions, there may be a
risk of damage to the hedge trimmer or serious injury to the user.
WARNING: If the cord becomes damaged during use, disconnect the tool from the power supply
IMMEDIATELY. DO NOT touch the cord before the plug has been removed from the electrical socket.
WARNING: Do not allow the blade to make contact with fencing wire or any other object that could
cause damage.
WARNING: DO NOT use the tool in the rain or store in wet conditions.
IMPORTANT: Make sure the shoulder strap is correctly adjusted for the operator and always wear
it in use.
Switching on and off
1. Push the Safety Switch (7) forward and squeeze the Trigger (11) to switch on
2. 2Release the Trigger to switch off
Hedge Trimmer
WARNING:
Cutting
1. Assume a secure position, using two hands to hold the trimmer, and switch on (see ‘Switching
on and off’)
2. ALWAYS allow the blade to reach full speed before commencing the cut
3. Always move in a forward direction
WARNING: DO NOT move backwards during operation, as unseen obstacles may cause you to
fall. DO NOT cut towards solid objects such as walls, trees or vehicles.
WARNING: If the blade stalls during cutting, switch off the hedge trimmer immediately, and
disconnect it from the power supply, before investigating the cause. Remove any jammed debris
from the blades, and examine them for any damage before recommencing cutting.
4. Trim both sides of the hedge, starting at the bottom
5. Pass the blade lightly through the surface of the hedge. Do not attempt to cut too deep
6. Trim the top of the hedge last
Note: For older hedges that require substantial cutting, use the pruner/chainsaw head to cut the
thicker branches and nish off with the hedge trimmer.
Shaping
• Trim the hedge so it is wider at the bottom than the top. This will improve light penetration and
promotes healthy growth
• Narrow the hedge approximately 100mm for every metre in height
IMPORTANT: Work with an angle no more than 60° from horizontal as shown in Fig. II
Pruner – Chainsaw
Cutting instructions
WARNING: In order to maintain control of the saw, ALWAYS maintain secure footing. NEVER work
from a ladder or similar contraptions that are potentially insecure. NEVER use the saw above shoulder
height.
• Always check before use that there is sufcient chainsaw oil in the Oil Tank (20) and monitor the
oil level during use. The Oil Tank will be depleted after only a few minutes of operation and needs
frequent re-lling. Do not attempt to reduce the rate of oil use it is set optimally at the factory and
no adjustments are necessary
• On rst switch on, place the chainsaw blade close to a plain surface, possibly a path and run the
tool for a few seconds. Ensure spots of oil have dropped onto that surface to ensure the chain is
being correctly lubricated
• ALWAYS hold the pruner/chainsaw with both hands when the motor is running. Keep hands clean
and gloves free of oil, grease and dirt
• Do not exceed a 60° working angle and work within the angles shown in Fig. II. There is a danger
of fallen branches dropping onto the operator or causing a trip hazard if this angle is exceeded
• Thin branches can be cut off with one single cut. To prevent the branch from slivering and
buckling, the branch should be cut off in several pieces
• The electric pruner is equipped with a low-kickback chain and is designed for minimal kickback.
Nevertheless, some kickback cannot be avoided when cutting with the upper tip of the blade. Be
prepared for some kickback when using this area of the blade or hitting another branch with this
area. Always hold the unit rmly in both hands
• When cutting off larger branches, rst cut into the branch from below at the point where you
intend to cut off the branch from above. The cut should go from one third to halfway through the
branch. This prevents the branch from buckling when you cut into the branch from the top outside
the rst cut. Last, cut off the stump with one clean cut
• NEVER attempt to cut any material other than wood
• Never allow the saw chain to come into close proximity of bystanders or animals. Maintain a
distance of at least 15m
• During use, make sure the Saw Chain does not make contact with foreign objects (e.g. stone,
nails, wire, etc.), as this may cause violent reactive forces and could cause damage to the tool
and injury to the user
Pruning
• For optimum pruning performance, guide the blade teeth at an angle of approximately 15° to
the hedge
• Achieve a uniform height by stretching a piece of string along the edge of the hedge for guidance;
then simply cut away all growth projecting above the line
Accessories
• A range of accessories and personal protective equipment (PPE) are available from your GMC
stockist. Spare parts can be obtained from toolsparesonline.com
Maintenance
WARNING: ALWAYS disconnect from the power supply before carrying out any inspection,
maintenance or cleaning.
Cleaning
• Keep the tool clean at all times. Dirt and dust will cause internal parts to wear quickly, and will
shorten the machine’s service life. Clean the body of the machine with a soft brush, or dry cloth. If
available, use clean, dry, compressed air to blow through the ventilation holes
• Use a mild detergent and a damp cloth to clean parts contaminated with oil. Rinse with fresh
water and dry thoroughly
• Keep all electric and electronic components dry at all times
Lubrication
• After cleaning, lubricate moving parts using a suitable spray lubricant
• Regularly lubricate the chain, Guide Bar and sprocket
General inspection
• Regularly check that all the xing screws are tight
• Inspect the supply cord of the tool, prior to each use, for damage or wear. Repairs should be
carried out by an authorised GMC service centre. This advice also applies to extension cords
used with this tool
515017_Z1MANPRO1.indd 11 10/12/2014 14:37

12
GB
Hedge Trimmer
Maintaining the blades
WARNING: Wear sturdy, cut-resistant gloves at all times when handling the blades.
• Remove any deposits with a brush after every use, and apply a light lm of lubricant spray to
the blade
• Periodically check the blades for sharpness and inspect for damage
• The blade teeth can be sharpened using a at le. Sharpen the cutting edges only, see Image N
Note: If you are unsure about how to sharpen the blades, have the hedge trimmer
sharpened by a professional.
• If there is signicant blade damage, have the blades replaced by an authorised GMC service
centre
Removing a blockage in the blades
• Do not force the blockage out at a different angle to the blade. Instead carefully slide out in line
with the blade to prevent damage. See Image M for a typical blockage. The blockage must be
removed at exactly the same angle that it entered the blade. It is important the atness between
the two blades is maintained for normal operation, which may become damaged if the blockage
is incorrectly removed
Abnormal vibration and noise
• If there is any abnormal vibration and noise it is possible some screws may be working loose.
Re-tighten the screws shown in Images O & P.
Pruner – Chainsaw
WARNING: If oil is removed during maintenance, ll into a suitable sealed container and dispose of
according to laws and regulations.
WARNING: ALWAYS switch the chainsaw off and wait until all components have completely cooled,
before cleaning or carrying out any maintenance.
WARNING: Some of the maintenance procedures described in this manual require some general
technical skills and expertise. This chainsaw MUST ONLY be serviced by people with the necessary
competence and skill level. If in doubt, have the machine serviced by an authorised GMC service
centre.
WARNING: Maintenance not covered by this manual MUST be carried out by an authorised GMC
technician. Attempting such maintenance or repairs will void the warranty.
WARNING: Use only genuine replacement parts approved by GMC for maintenance and repair. Use
of parts by others manufacturers may cause serious or fatal injury.
Maintaining the Guide Bar and Chain
WARNING: ALWAYS wear cut-proof gloves when touching the saw chain.
1. Slacken the chain using the Chain Tensioner (38)
2. Remove the Sprocket Cover (25) by removing the securing nut. See Image K
3. Carefully remove the saw chain and guide bar and inspect the sprocket for wear or damage. See
Image L which shows the sprocket on the left
4. Clean the whole area thoroughly, then lubricate the sprocket with a suitable maintenance spray
5. Clean the Guide Bar then carefully check for damage along the slot that runs around the guide
bar. Make sure it is clean. If necessary use a le to remove any raised metal that obscures the
slot and could cause the chain to catch
6. Check the saw chain for damage and clean thoroughly
7. Ret the guide bar and chain, ensuring the chain is correctly orientated. Ensure the guide bar ts
over the chain tensioner pin as indicated in Image L, then ret the Sprocket Cover
8. Finally, follow the chain tensioning instructions in ‘Before Use’
• Regularly inspect the sprocket for wear and damage
• Return the chainsaw to an authorised GMC service centre to replace a worn or damaged
Sprocket
WARNING: NEVER t a new Saw Chain to a worn sprocket, or a worn saw chain to a new sprocket.
Brushes
• Over time the carbon brushes inside the motor may become worn
• Excessively worn brushes may cause loss of power, intermittent failure, or visible sparking
• If you suspect that the brushes may be worn, have them replaced at an authorised GMC service
centre
Storage
• Store carefully in a secure, dry place out of the reach of children
• Always Fit the Hedge Trimmer Blade Guard (27) over the hedge trimmer and the Chainsaw Blade
Guard (28) over the Chain Saw Guide Bar for storage
Disposal
Always adhere to national regulations when disposing of power tools that are no longer functional and
are not viable for repair.
• Do not dispose of power tools, or other waste electrical and electronic equipment (WEEE), with
household waste
• Contact your local waste disposal authority for information on the correct way to dispose of
power tools
• Oil is a hazardous waste and has to be treated as such. Oil must not be disposed of with
household waste. Improper disposal may be regarded a criminal offence in your country. Contact
your local authority or dealer for correct disposal procedures for oil.
515017_Z1MANPRO1.indd 12 10/12/2014 14:37

GB
13
Problem Possible cause Solution
No function when Trigger (11) is operated
No power Check power supply
Defective Trigger Replace the On/Off Trigger Switch at an authorised GMC service
centre
Intermittent power cut-out Replace the On/Off Trigger Switch at an authorised GMC service
centre
Gradual power loss, intermittent cut-out Worn/ faulty motor brushes Replace using supplied spare brush set (see ‘Brushes’), or return to
an authorised GMC service centre
Chainsaw does not cut effectively, and produces ne saw dust
Saw Chain (18) blunt Sharpen or replace the Saw Chain
Chain oil tank empty Rell chain oil
Chain oil delivery too low Ensure chain oil path is not blocked with debris and clear debris
Chain tensioned incorrectly set Correct chain tension in ‘Tensioning the chain’
Hedge trimmer does not operate
Power is off Switch power on
Mains socket faulty Use another socket
Extension cable damaged Inspect cable, replace if damaged
Fuse faulty/blown Replace fuse
Hedge trimmer operates intermittently
Extension cable damaged Have the hedge trimmer serviced by an authorised GMC service
centre
Internal wiring damaged Have the hedge trimmer serviced by an authorised GMC service
centre
One or both switches defective Have the brushes replaced by an authorised GMC service centre
Carbon brushes worn
Motor operates but blades remain stationary Internal fault Have the hedge trimmer serviced by an authorised GMC service
centre
Blade becomes hot during use
Blade blunt Sharpen blade or return hedge trimmer to an authorised GMC
service centre for blade replacement
Blade damage Return the hedge trimmer to an authorised GMC service centre for
blade replacement
Too much friction Apply lubricant
Excessive vibrations or noise Internal fault Have the hedge trimmer serviced by an authorised GMC service
centre
If the above troubleshooting solutions fail, contact your dealer or an authorised GMC service centre.
Troubleshooting
515017_Z1MANPRO1.indd 13 10/12/2014 14:37

14
NL
Vertaling van de originele instructies
Hartelijk dank voor de aanschaf van dit GMC- gereedschap. Deze instructies bevatten informatie die
u nodig hebt voor een veilige en doeltreffende bediening van dit product. Dit product heeft unieke
kenmerken. Zelfs als u bekend bent met gelijksoortige producten dient u deze handleiding zorgvuldig
door te lezen, zodat u in staat bent alle voordelen te benutten. Houd deze handleiding bij de hand
en zorg ervoor dat alle gebruikers van dit gereedschap de handleiding hebben gelezen en volledig
hebben begrepen.
Garantie
Om uw garantie te registreren, gaat u naar onze website op
www.gmctools.com en voert u uw gegevens in*.
Uw gegevens worden opgeslagen in onze mailinglist (tenzij u anders aangeeft) voor informatie over
nieuwe producten. De ingevulde gegevens worden aan geen enkele derde partij beschikbaar gesteld.
Accu garantie
GMC accu’s zijn voorzien van 6 maanden garantie. Wanneer er binnen de garantieperiode een fout
optreedt dankzij een materiaal- of fabrieksfout, vervangt GMC/ de accu gratis. Deze garantie heeft
geen betrekking op commercieel gebruik en strekt zich niet uit tot normale slijtage of schade ten
gevolge van een ongeluk, verkeerd gebruik of misbruik.
Aankoopgegevens
Datum van aankoop:
Model: GPHC21
Serienummer:
(bevindt zich op motorbehuizing)
Bewaar uw aankoopbon als aankoopbewijs.
Indien dit product wordt geregistreerd binnen 30 dagen na aankoop, garandeert GMC de koper van
dit product dat indien een onderdeel defect is vanwege fouten in materiaal of uitvoering binnen 24
maanden na de datum van de oorspronkelijke aankoop, GMC het defecte onderdeel gratis repareert
of, naar eigen inzicht, vervangt. Deze garantie heeft geen betrekking op commercieel gebruik en
strekt zich niet uit tot normale slijtage of schade ten gevolge van een ongeluk, verkeerd gebruik of
misbruik.
*Registreer online binnen 30 dagen na aankoop.
Algemene voorwaarden zijn van toepassing.
Dit tast uw wettelijke rechten niet aan.
Beschrijving symbolen
Op het gegevensplaatje van uw gereedschap kunnen zich symbolen bevinden. Deze
vertegenwoordigen belangrijke productinformatie en gebruiksinstructies.
Draag gehoorbescherming
Draag een veiligheidsbril
Draag een stofmasker
Wear head protection
Draag handschoenen
Lees de handleiding
Draag beschermende kleding
Draag beschermende schoenen
Houd omstanders op 15 m afstand!
Kans op stuwkracht
Waarschuwing:
scherpe bladen of tanden!
Gebruik niet de regen of in vochtige
omstandigheden!
Ontkoppel de machine van
de stroombron voor het maken van
aanpassingen, het verwisselen van
accessoires, het schoonmaken, het
uitvoeren van onderhoudt en
wanneer de machine niet in
gebruik is!
Kijk uit voor rondvliegende objecten
Kettingolie
Ontkoppel de machine van
de stroombron en wacht tot
de bladen volledig stil staan
voordat u deze aanraakt.
Ontkoppel van de stroombron
voordat u de verstopping
verwijdert.
WAARSCHUWING:
Bewegende delen kunnen
ernstig letsel veroorzaken.
Kijk te allen tijde uit voor
elektriciteitssnoeren. Houd een
veilige afstand van minimaal
10 m.
Voorzichtig!
Kijk uit voor vallende objecten
Beschermingsklasse II
(dubbel geïsoleerd)
Voldoet aan de relevante
wetgeving en veiligheidsnormen
Milieubescherming
Elektrische producten mogen
niet met het normale huisvuil
worden weggegooid. Indien de
mogelijkheid bestaat, dient u
het product te recyclen. Vraag
de plaatselijke autoriteiten of
winkelier om advies betreffende
recyclen.
515017_Z1MANPRO1.indd 14 10/12/2014 14:37

NL
15
EG-verklaring van overeenstemming
De ondergetekende: Mr. Darrell Morris
Gemachtigd door: GMC
Verklaart dat
Identicatienummer: 515017
Beschrijving: 2-in-1 heggenschaar en kettingzaag
Voldoet aan de volgende richtlijnen:
• Machinerichtlijn 2006/42/EG
• Richtlijn laagspanning 2006/95/EG
• Elektromagnetische verenigbaarheid 2004/108/EG
• Richtlijn 2000/14/EG Geluidsemissie buitenmaterieel
• RoHS-richtlijn 2011/65/EU
• EN 60745-1:2009+A11
• EN ISO 10517:2009
• EN 55014-1:2006+A1+A2
• EN 55014-2:1997+A1+A2
• EN 61000-3-2:2006+A1+A2
• EN 61000-3-3:2008
Toegepaste evaluatie methode
2000/14/EG: Annex V
Geluidsniveau dB(A)
Gemeten: 90
Gegarandeerd: 102
Keuringsinstantie: TÜV Rheinland
De technische documentatie wordt bijgehouden door: GMC
Datum: 10-11-2014
Handtekening:
Darrell Morris
Algemeen directeur
Naam en adres van fabrikant:
Powerbox International Limited, handelsregister nummer 06897059. Geregistreerd adres: Central
House, Church Street, Yeovil, Somerset BA20 1HH, Verenigd Koninkrijk
Specicaties
De geluidsintensiteit voor de bediener kan 85 dB(A) overschrijden en de gehoorbescherming
is noodzakelijk.
Met het oog op onze aanhoudende productontwikkeling kunnen de specicaties van GMC
producten zonder voorafgaande kennisgeving worden gewijzigd.
VVolts
~ Alternating current
A Ampere
n0No load speed
Hz Hertz
W, kW Watt, kilowatt
/min or min-1 (revolutions or reciprocation) per minute
Spanning: 230-240 V~, 50 Hz
Vermogen: 900 W
Handvat rotatie: 5 klikposities: -90°/-45°/0°/45°/90°
Stroomsnoer lengte: 10 m
Beschermingsgraad: IP20
Beschermingsklasse:
Verlengsteel lengte: 500 mm
Kettingzaag
Onbelaste snelheid: 6900 min-1
Zaagarm: AP08-36-507P
Ketting tandsteek: 3⁄8″ (9.53 mm)
Kettinglengte: 36"(914.4 mm)
Ketting snelheid: 13 m/s
Kettingolie type: Speciale zaagketting olie
(biologisch afbreekbaar)
Olietank capaciteit: 135 ml
Totale lengte: 2 m (2,5 m met verlengsteel)
Gewicht : 4,9 kg
Heggenschaar
Onbelaste snelheid: 1000 min-1
Blad lengte: 480 mm
Effectieve zaaglengte: 410 mm
Totale machine lengte: 2 m (2,5 m met verlengsteel)
Tandsteek: 31 mm
Gewicht: 4,9 kg
Geluid en trilling:
Geluidsdruk (kettingzaag) LPA: 90,35 dB(A)
Geluidsvermogen (kettingzaag) LWA: 102,36 dB(A)
Geluidsdruk (heggenschaar) LPA: 90 dB(A)
Geluidsvermogen (heggenschaar) LWA: 101 dB(A)
Onzekerheid K: 3 dB
Trilling (kettingzaag voorhandvat) ah: 3,146 m/s2
Trilling (kettingzaag achter handvat) ah: 2,219 m/s2
Onzekerheid K: 1,5 /s2
515017_Z1MANPRO1.indd 15 10/12/2014 14:37

16
NL
WAARSCHUWING: Bij een geluidsintensiteit van 85 dB(A) of hoger is het dragen van
gehoorbescherming en het limiteren van de blootstellingstijd vereist. Bij oncomfortabel hoge
geluidsniveaus, zelfs met het dragen van gehoorbescherming, stopt u het gebruik van de machine
onmiddellijk. Controleer de pasvorm en het geluiddempingsniveau van de bescherming.
WAARSCHUWING: Blootstelling aan trilling resulteert mogelijk in gevoelloosheid, tinteling en een
vermindert gripvermogen. Langdurige blootstelling kan leiden tot chronische condities. Limiteer de
blootstellingsduur en draag anti-vibratie handschoenen. Vibratie heeft een grotere invloed op handen
met een temperatuur lager dan een normale, comfortabele temperatuur. Maak gebruik van de
informatie in de specicaties voor het bereken van de gebruiksduur en frequentie van de machine.
Geluid- en trillingsniveaus in de specicatie zijn vastgesteld volgens EN60745 of een gelijksoortige
internationale norm. De waarden gelden voor een normaal gebruik in normale werkomstandigheden.
Een slecht onderhouden, onjuist samengestelde of onjuist gebruikte machine produceert mogelijk
hogere geluids- en trillingsniveaus. www.osha.europa.eu biedt informatie met betrekking tot geluids-
en trillingsniveaus op de werkplek wat mogelijk nuttig is voor regelmatige gebruikers van machines.
Algemene veiligheid voor elektrisch gereedschap
WAARSCHUWING Lees alle bediening- en veiligheidsvoorschriften. Het niet opvolgen van alle
voorschriften die hieronder vermeld staan, kan resulteren in een elektrische schok, brand en/of ernstig
letsel.
WAARSCHUWING: De machine is niet geschikt voor gebruik door personen met een verminderde
mentale of fysieke gesteldheid of een gebrek aan ervaring, tenzij de persoon wordt begeleid of
geïnstrueerd door een persoon verantwoordelijk voor de veiligheid
Bewaar deze voorschriften voor toekomstig gebruik.
De term “elektrisch gereedschap” in alle hieronder vermelde waarschuwingen heeft betrekking op
uw elektrische gereedschap dat op de stroom is aangesloten (met een snoer) of met een accu wordt
gevoed (snoerloos).
Kinderen mogen niet met de machine spelen
1) Veiligheid in de werkruimte
a) Houd de werkruimte schoon en zorg voor een goede verlichting. Rommelige en donkere
ruimtes leiden vaak tot ongelukken.
b) Werk niet met elektrisch gereedschap in explosieve omgevingen, bijvoorbeeld in de
aanwezigheid van ontvlambare vloeistoffen, gassen of stof. Elektrisch gereedschap brengt
vonken teweeg die stof of dampen kunnen doen ontbranden.
c) Houd kinderen en omstanders uit de buurt wanneer u elektrisch gereedschap bedient.
Door aeiding kunt u de controle over het gereedschap verliezen.
2) Elektrische veiligheid
a) De stekkers van het elektrische gereedschap moeten passen bij het stopcontact. Pas de
stekker niet aan. Gebruik geen adapterstekkers bij geaard elektrisch gereedschap.
Het gebruik van ongewijzigde stekkers en passende stopcontacten vermindert het risico op een
elektrische schok.
b) Vermijd lichamelijk contact met geaarde oppervlakken zoals pijpen, radiatoren, fornuizen
en koelkasten. Het risico op een elektrische schok neemt toe als uw lichaam geaard wordt.
c) Laat elektrisch gereedschap niet nat worden. Wanneer elektrisch gereedschap nat wordt,
neemt het risico op een elektrische schok toe.
d) Beschadig het snoer niet. Gebruik het snoer nooit om het elektrisch gereedschap te
dragen, te trekken of om de stekker uit het stopcontact te trekken. Houd het snoer uit
de buurt van hitte, olie, scherpe randen of bewegende delen. Een beschadigde of in de knoop
geraakte snoer verhoogt het risico op een elektrische schok toe.
e) Wanneer u elektrisch gereedschap buiten gebruikt, maak dan gebruik van een
verlengsnoer dat geschikt is voor gebruik buitenshuis. Gebruik een verlengsnoer dat geschikt
is voor gebruik buitenshuis om het risico op een elektrische schok te verminderen.
f) Indien het onvermijdelijk is elektrisch gereedschap te gebruiken in een vochtige omgeving,
gebruik dan een energiebron met een aardlekschakelaar (Residual Currency Device). Het
gebruik van een RCD vermindert het risico op een elektrische schok.
3) Persoonlijke veiligheid
a) Blijf alert en gebruik uw gezonde verstand wanneer u elektrisch gereedschap bedient.
Gebruik het elektrisch gereedschap niet wanneer u vermoeid bent of onder invloed bent
van drugs, alcohol of medicijnen. Onoplettendheid tijdens het bedienen van elektrisch
gereedschap kan leiden tot ernstig letsel.
b) Maak gebruik van persoonlijke bescherming. Draag altijd een veiligheidsbril. Passende
bescherming voor de omstandigheden, zoals een stofmasker, niet-slippende veiligheidsschoenen
een helm of gehoorbescherming, vermindert het risico op persoonlijk letsel.
c) Zorg ervoor dat het apparaat niet per ongeluk wordt gestart. Controleer of de schakelaar
in de ‘uit’ stand staat voordat u de stekker in het stopcontact steekt. Het dragen van
elektrisch gereedschap met uw vinger op de schakelaar of het aansluiten op de stroom van
elektrisch gereedschap met de schakelaar ingeschakeld kan tot ongelukken leiden.
d) Verwijder alle stel- of moersleutels voordat u het elektrische gereedschap inschakelt.
Een moer- of stelsleutel die zich op een draaiend onderdeel van het elektrische gereedschap
bevindt, kan leiden tot letsel.
e) Reik niet te ver. Blijf altijd stevig en in balans staan. Zo houdt u meer controle over het
elektrische gereedschap in onverwachte situaties.
f) Draag geschikte kleding. Draag geen loshangende kleding of sieraden. Houd haren,
kleding en handschoenen uit de buurt van bewegende delen. Loshangende kleding, sieraden
en los hangende haren kunnen vast komen te zitten in bewegende delen.
g) Als er onderdelen voor stofafvoer- en stofverzameling worden meegeleverd, sluit deze dan
aan en gebruik deze op de juiste wijze. Het gebruik van deze onderdelen kan het risico op stof
gerelateerde ongelukken verminderen.
4) Gebruik en verzorging van elektrisch gereedschap
a) Forceer elektrisch gereedschap niet. Gebruik elektrisch gereedschap dat geschikt is voor
het werk dat u wilt uitvoeren. Geschikt elektrisch gereedschap werkt beter en veiliger op een
passende snelheid.
b) Gebruik het elektrische gereedschap niet als de schakelaar van het apparaat niet in- en
uitschakelt. Elektrisch gereedschap dat niet bediend kan worden met de schakelaar is gevaarlijk
en moet gerepareerd worden.
c) Haal de stekker uit het stopcontact voordat u instellingen aanpast, toebehoren verwisselt
of het elektrische gereedschap opbergt. Dergelijke voorzorgsmaatregelen verminderen het
risico op het per ongeluk starten van het elektrische gereedschap.
d) Berg elektrisch gereedschap dat niet in gebruik is op buiten bereik van kinderen en laat
mensen die niet bekend zijn met het elektrische gereedschap of met deze instructies het
elektrische gereedschap niet bedienen. Elektrisch gereedschap is gevaarlijk in de handen van
onervaren gebruikers.
e) Onderhoud uw elektrisch gereedschap. Controleer op foutieve uitlijning of het vastslaan
van bewegende delen, gebroken onderdelen en elke andere afwijking die de werking van
het elektrische gereedschap zou kunnen beïnvloeden. Indien het elektrische gereedschap
beschadigd is, moet u het laten repareren voordat u het weer gebruikt. Veel ongelukken
worden veroorzaakt door slecht onderhouden elektrisch gereedschap.
f) Houd snijwerktuigen scherp en schoon. Goed onderhouden snijwerktuigen met scherpe
messen slaan minder snel vast en zijn gemakkelijker te bedienen.
g) Gebruik het elektrische gereedschap, de accessoires en onderdelen, etc. volgens deze
instructies en volgens bestemming voor het specieke type elektrisch gereedschap, en
houd daarbij rekening met de werkomstandigheden en het uit te voeren werk. Gebruik van
elektrisch gereedschap voor werkzaamheden die verschillen van die waarvoor het apparaat
bestemd is, kan leiden tot gevaarlijke situaties.
5) Onderhoud
a) Laat uw elektrische gereedschap onderhouden door een gekwaliceerde vakman en
gebruik alleen identieke vervangstukken. Zo bent u er zeker van dat de veiligheid van het
elektrische gereedschap gewaarborgd blijft.
515017_Z1MANPRO1.indd 16 10/12/2014 14:37

NL
17
Elektrische kettingzaag veiligheid
Waarschuwing: Kettingzagen zijn potentieel erg gevaarlijk en kunnen ernstige verwondingen
veroorzaken
WAARSCHUWING: Het is aanbevolen te allen tijden gebruik te maken van een aardlekschakelaar
met een maximale reststroom van 30 mA
• Houd alle lichaamsdelen uit de buurt van de zaagketting wanneer de machine is
ingeschakeld. Voordat u de machine inschakelt zorgt u ervoor dat deze volledig vrij van
contact is. Een moment van onoplettendheid resulteert mogelijk in contact tussen de zaagketting
en kleding of lichaamsdelen van de gebruiker
• Houd de machine met beide handen vast, met uw rechter hand op het achterste handvat en
uw linker hand op het voorste handvat. Houd de machine niet met de handen omgekeerd vast
waar de kans op persoonlijk letsel groter is
• Het dragen van een veiligheidsbril, gehoorbescherming, handbescherming,
hoofdbescherming, beenbescherming en een veiligheidshelm is aanbevolen. De juiste
beschermende uitrusting beschermt de gebruiker tegen rondvliegend afval en contact met de
zaagketting
• Gebruik de machine niet in een boom. Dit resulteert mogelijk in ernstige ongelukken
• Zorg dat u op een stevige ondergrond staat en een juiste houding aanneemt bij het
gebruik van de machine. Gladde en onstabiele ondergronden als ladders zorgen mogelijk voor
balansverlies en controleverlies over de machine
• Houd de machine te allen tijde bij de geïsoleerde grip vast, waar de machine mogelijk in
contact komt met stroomdraad of het eigen stroomsnoer. Wanneer de machine in aanraking
komt met stroomdraad, komen metalen onderdelen van de machine onder stroom te staan wat
kan resulteren in elektrische schok
• Bij het zagen van takken onder spanning, dient u bewust te zijn van de kans op terugveren.
Wanneer de spanning in de houtvezels vrij komt, schiet de tak mogelijk in de richting van de
gebruiker en kan de controle over de machine verloren raken
• Ben uiterst voorzichtig bij het zagen van bosjes en jonge bomen. Dunne takjes worden
mogelijk door de ketting gegrepen en zo in de richting van de gebruiker gevuurd
• Draag de machine aan het voor handvat, met de machine uitgeschakeld en uit de buurt van
uw lichaam. Bij het transporteren of opbergen van de machine plaatst u de beschermkap
over de zaagarm. De juiste hantering van de machine vermindert de kans op ongelukken en
persoonlijk letsel
• Volg de instructies betreft het smeren en spannen van de ketting en het vervangen van
accessoires. Onjuiste smering en spanning van de ketting resulteert mogelijk in ketting breuk
en terugslag
• Houd de handvaten droog, schoon en vrij van olie en vet. Vettige handvaten zijn erg glad, wat
mogelijk resulteert in controleverlies
• Gebruik de machine enkel voor het zagen van hout. Gebruik de machine niet voor
onbestemde doeleinden, als het zagen van plastic en beton. Het gebruik voor onbestemde
doeleinden resulteert mogelijk in gevaarlijke situaties
• Houdt kinderen en dieren uit de buurt van de werkomgeving. Ongetrainde omstanders leiden
de gebruiker mogelijk af wat erg gevaarlijk kan zijn
• Zorg ervoor dat omstanders op veilige afstand blijven. Bij vallende bomen horen omstanders
minimaal op dubbele boomlengte afstand te blijven
• Werk niet alleen. Zorg voor de nabije aanwezigheid van een persoon die kan helpen in geval
van nood
• Gebruik de cirkelzaag niet in natte omstandigheden. Controleer of het te zagen materiaal
droog is om de kans op elektrocutie te minimaliseren
• Draag tijdens het gebruik van de cirkelzaag beschermende handschoenen, een
veiligheidsbril, een stofmasker, gehoorbeschermers, een veiligheidshelm en
beschermende kleding. Kettingzagen zijn erg gevaarlijk. Het risico op blad en huidcontact dient
voorkomen te worden
• Bij het kappen van bomen plant u eerst een vluchtroute. Zorg voor een vrije ruimte achter u,
minimaal 2 keer zo lang als de lengte van de boom. De vluchtroute hoort vrij van obstakels te zijn
• Houdt het zaagblad te allen tijde gesmeerd en afgeschermd wanneer niet in gebruik. Een
kettingzaag die in goede staat verkeerd minimaliseert de kans op terugslag en maximaliseert de
levensduur
• Controleer het werkgebied op verborgen objecten als hekwerk, kabels etc. Contact met
verborgen objecten vergroot de kans op terugslag. Gebruik de machine enkel voor het zagen
van hout
• Passeer handen en benen tijdens het zagen niet onder het zaagblad. Houdt een stevige
positie aan uit de buurt van het zaaggebied
• Ben bewust van de kans op terug. In sommige omstandigheden, bij een onjuist gebruik van
de zaag, bestaat de kans op terugslag (de zaag wordt teruggeworpen in de richting van de
gebruiker). Juist gebruik en onderhoud verminderd de kans op terugslag aanzienlijk
• Wanneer de zaag bekneld raakt, schakelt u deze onmiddellijk uit. Laat de motor volledig tot
stilstand komen voordat u de zaag vrij maakt
• Ben bewust van de kans op giftig zaagsel. Bij enige twijfel over behandelingen die het hout
wellicht heeft ondergaan, zaagt u het hout niet
• Beoordeel uw geestelijke toestand. Het gebruik van een kettingzaag is geestelijk veeleisend.
Gebruik de zaag niet wanneer u niet sterk en t genoeg bent om de taak te voltooien. Gebruik
geen kettingen bij vermoeidheid, wanneer u zich onwel voelt of wanneer u onder de invloed bent
van alcohol en/of drugs
• Wanneer u de kettingzaag voor het eerst gebruikt is het aanbevolen minimaal het zagen van
houtblokken op een zaagbok te oefenen
• Ontkoppel de machine onmiddellijk van de stroombron. Wanneer het stroomsnoer
beschadigd is
Heggenschaar veiligheid
• De vereiste beschermende uitrusting, waaronder handschoenen, een veiligheidsbril, stevige
schoenen en een werkbroek, hoort te allen tijde gedragen te worden
• De heggenschaar en andere buitenmachines mogen enkel op stopcontacten met een
aardlekschakelaar aangesloten worden
• Gebruik de machine niet in de regen of in vochtige omstandigheden
• Wanneer het stroomsnoer beschadigd is, trekt u de stekker onmiddellijk uit het stopcontact
WAARSCHUWING: doet u dit niet, dan kan dit leiden tot serieus letsel, elektrocutie en in het
ergste geval tot de dood
• Houd uw handen en vingers uit de buurt van het blad
• Houd de heggenschaar stevig met beide handen op de handvaten vast
• Ontkoppel de machine van de stroombron voordat u deze schoonmaakt, obstructies verhelpt of
enig onderhoud uitvoert. Verhelp een vastgelopen blad niet voordat de machine is ontkoppeld
van de stroombron
• Ontkoppel de machine van de stroombron wanneer het werk voltooid is, of onderbroken wordt.
Wanneer het werk onderbroken wordt, maakt u de handeling af voordat u de machine uitschakelt
• De machine is ontworpen voor het snoeien van zachte, nieuwe groei en mag niet gebruikt worden
voor het snoeien van dikke takken
• Voor een veilig gebruik houdt u de machine met beide handen vast
• Ongetrainde personen en kinderen mogen de machine niet gebruiken
• Inspecteer het te snoeien gebied voordat u met het werk begint. Verwijder enige voorwerpen die
door/in de machine weggeschoten, gegrepen en gewikkeld kunnen worden/raken
• Zorg dat u stevig staat en de machine te allen tijde voor u houd
• Houd de schakelaar op het voorste handvat met de ene hand vast en knijp de trekker schakelaar
met de vingers van de andere hand op het andere handvat in
• Laat het blad op volledige snelheid komen
• Beweeg te allen tijde in een voorwaartse beweging. Beweeg nooit achterwaarts, waar u over
onopgemerkte voorwerpen kunt struikelen
• Gebruik de machine niet in de buurt van andere personen en vaste voorwerpen als muren,
bomen of voertuigen
• Wanneer het blad tijdens gebruik vast loopt, stopt u de machine onmiddellijk en ontkoppeld u
de machine van de stroombron voordat u het probleem onderzoekt. Verhelp het probleem en
controleer op enige beschadiging voordat u het werk voortzet. Vervang beschadigde bladen
515017_Z1MANPRO1.indd 17 10/12/2014 14:37

18
NL
Productbeschrijving
1. Verlengsteel koppeling
2. Verlengsteel handgrip 1
3. Verlengsteel handgrip 2
4. Riem koppeling
5. Draaischakelaar
6. Draaikraag
7. Veiligheidsschakelaar
8. Hoofdhandvat
9. Motor ventilatiegleuven
10. Stroomsnoer
11. Trekker schakelaar
12. Heggenschaarblad
13. Heggenschaar hoekwiel
14. Hoek ontgrendelschakelaar
15. Hoekhandvat
16. Ballager vergrendelmechanisme
17. Beschermdop
18. Zaagketting
19. Zaagarm
20. Olietank
21. Hoekwiel ontgrendelschakelaar
22. Ballager vergrendelmechanisme
23. Beschermdop
24. Kettingzaag hoekwiel
25. Tandwiel kap
26. Olietank dop
27. Heggenschaar bladbeschermer
28. Kettingzaag bladbeschermer
29. Steel vergrendelknoppen (2)
30. Schouderriem koppeling
31. Inbussleutel
32. Schouderriem
33. Schouderriem veiligheidsband
34. Handvat draaimechanisme
35. Steelhandvat
36. Verlengsteel
37. Kettingolie schaalverdeling
38. Ketting spanner
39. Hoek ontgrendelschakelaar
Gebruiksdoel
2-in-1 elektrische heggenschaar en kettingzaag met verlengt bereik. Geschikt voor het snoeien van
heggen, bosjes en struiken en voor het kappen/zagen van kleine bomen en kleine takken van grote
bomen. Enkel geschikt voorhuishoudelijk gebruik. Niet geschikt voor commercieel, industrieel en
huur gebruik.
Het uitpakken van uw gereedschap
• Pak uw machine uit. Inspecteer het en zorg dat u met alle kenmerken en functies vertrouwd raakt
• Controleer of alle onderdelen aanwezig zijn en in goede staat verkeren. Als er onderdelen
ontbreken of beschadigd zijn, zorg dan dat deze vervangen worden voor u dit toestel /
gereedschap gebruikt
Voor gebruik
WAARSCHUWING: Zorg ervoor dat de machine ontkoppeld is van de stroombron voordat u
accessoires verwisselt of verstellingen maakt
Montage
1. Plaats een steel vergrendelknop (29) in de verlengsteel koppeling (1), als afgebeeld in Afb. A.
Draai de knop niet volledig vast – zodat de gewenste kop past. Herhaal voor de verlengsteel (36).
De verlengsteel wordt afgebeeld met de vergrendelknop bevestigd
2. Plaats het handvat (35) tussen de twee verlengsteel handgrips (2+3). Laat het handvat
draaimechanisme (34) los, als afgebeeld in Afb. B en draai deze op de steel vast als afgebeeld in
Afb. C, met behulp van de inbegrepen bouten, sluitringen en moeren
3. Stel de schouderriem (32) samen door de schouderriem koppeling (30) en veiligheidsband (33)
te bevestigen als afgebeeld in Afb. D+E. Bevestig de schouderriem op de koppeling (4) als
afgebeeld in Afb. F
4. Om de verlengsteel (36), kettingzaag of heggenschaar te bevestigen, verwijdert u eerst de
beschermdop (17 of 23)
5. Bevestig de verlengsteel (36) eerst wanneer vereist. Dit verlengt het bereik 500 mm
6. Schuif het aandrijving uiteinde met de pin in de verlengsteel koppeling (1) als afgebeeld in Afb. G,
tot de ballager in positie klikt, in de opening. Draai de vergrendelknop vast om de steel in positie
te vergrendelen
7. Herhaal deze stap met de kettingzaag- of heggenschaarkop. Zorg er voor dat de ballager te allen
tijde vastklikt en de vergrendelknop te allen tijde vastgedraaid wordt
8. Controleer de stevigheid van de samenstelling
9. Draai de vergrendelknop los en druk de ballager in om de samenstelling te ontkoppelen (Afb. H)
Conguratie tijdens gebruik
Handvat rotatie
Het handvat kan van 0 tot 45° en 90°, links en rechts gedraaid worden voor het selecteren van de
optimale handvathoek (vijf stopposities). Druk de draaischakelaar (5) in en roteer het handvat in de
gewenste positie. Laat de schakelaar los om het handvat te vergrendelen (Afb. I)
Heggenschaar
Het aanpassen van de heggenschaarhoek
De heggenschaarhoek kan veranderd worden door de pin die het heggenschaar hoekwiel (13)
vergrendeld te verhogen
1. Druk de hoek ontgrendelschakelaar (14) in als afgebeeld in Afb. I en gebruik het hoekhandvat
(15) om de heggenschaar in de gewenste hoek te positioneren
2. Laat de hoek ontgrendelschakelaar los zodat de pin de heggenschaarkop in één van de gaten
van het hoekwiel kan vergrendelen
Kettingzaag
Het vullen met kettingolie
WAARSCHUWING: Ben voorzichtig bij het vullen van de olietank. Maak gemorst olie grondig schoon.
Gemorst olie is een uitglijdgevaar!
1. Maak de machine rond de dop van de olietank (20) schoon en verwijder al het stof en vuil
2. Draai de dop (26) linksom los
3. Vul de tank met kettingolie. Vul de tank niet te ver. De kettingolie schaalverdeling (37) geeft het
maximale niveau weer
4. Draai de dop na het vullen onmiddellijk vast
Het aanpassen van de kettingspanning
WAARSCHUWING: Bij het hanteren van de zaagketting is het dragen van beschermende
handschoenen verplicht
Let op: De kettingspanner (38) dient enkel ligt aangepast te worden voor het verstellen van de
kettingspanning. De ketting dient niet te los of te strak gespannen te worden
1. Draai de kettingspanning met behulp van de inbussleutel (31) rechtsom tot de ketting juist
gespannen is. Een juist gespannen ketting is in het midden van zaagarm ongeveer 2 mm omhoog
te trekken
515017_Z1MANPRO1.indd 18 10/12/2014 14:37

NL
19
• Wanneer de zaagketting (3) verslapt of wanneer de kettingschakels uit de zaagarm getrokken
kunnen worden is de kettingspanning incorrect
WAARSCHUWING: Een te strak gespannen ketting kan tijdens het gebruik breken. De ketting dient
genoeg speling te hebben, maar niet genoeg om de ketting uit te zaagarm te kunnen trekken. De
ketting dient te allen tijde soepel en vrij over de zaagarm te kunnen bewegen
Gebruik
WAARSCHUWING: Bij het gebruik van de machine is het dragen van de geschikte bescherende
uitrusting, waaronder gehoorbescherming en beschermende handschoenen aanbevolen
WAARSCHUWING: Maak enkel gebruik van verlengsnoeren die geschikt zijn voor het uit te voeren
werk. Controleer het stroomsnoer en verengsnoeren op beschadiging en slijtage. Gebruik de machine
niet wanneer het stroomsnoer beschadigd of versleten is
WAARSCHUWING: Het gebruik voor doeleinden die niet in deze handleiding beschreven zijn,
resulteert mogelijk in de beschadiging van de machine en persoonlijk letsel
WAARSCHUWING: Wanneer het stroomsnoer tijdens gebruik beschadigd raakt, ontkoppel u de
machine onmiddellijk van de stroombron. Raak het stroomsnoer aan voordat de stekker uit de
stroombron verwijderd is
WAARSCHUWING: Het blad mag niet in contact komen met prikkeldraad, of enig ander materiaal/
voorwerp wat de machine kan beschadigen
WAARSCHUWING: Gebruik de machine niet in de regen en berg de machine niet in vochtige/natte
omstandigheden op
BELANGRIJK: De schouderriem dient juist afgesteld te zijn en te allen tijde gebruikt te worden
Het in- en uitschakelen van de machine
1. Duw de veiligheidsschakelaar (7) naar voren en knijp de trekker schakelaar (11) in
2. Laat de trekker schakelaar los om de machine uit te schakelen
Heggenschaar
WAARSCHUWING:
Snoeien
1. Zorg ervoor dat u stevig staat en houdt de machine met beide handen vast
2. Schakel de machine in en wacht tot het blad volledig op snelheid is voordat u met het snoeien
begint
3. Beweeg de machine altijd in een voorwaartse beweging
WAARSCHUWING: Beweeg de machine tijdens gebruik nooit achterwaarts. U struikelt mogelijk
over ongeziene objecten. Zaag niet in de richting van vaste objecten als muren, bomen of
voertuigen
WAARSCHUWING: Wanneer het blad tijdens gebruik plots stopt, schakelt u de machine
onmiddellijk uit en ontkoppeld u deze van de stroombron. Verwijder enig vastgelopen tuinafval en
controleer of het blad beschadigd is voordat u het snoeien voortzet
4. Snoei beide zijden van de heg, van onder naar boven
5. Maak meerdere lichte doorgangen in plaats van één diepe doorgang
6. Snoei de bovenzijde van de heg
Let op: Maak bij het snoeien van dikke heggen gebruik van een hand snoeischaar voordat u de
machine gebruikt
Vormgeven
• Snoei de heg zodat deze breder is aan de onderkant dan aan de bovenkant. Dit verbeterd
lichtopname en de groei van de heg
• Maak de heg 100 mm smaller voor elke meter in hoogte
BELANGRIJK: Werk in een hoek tot 60° van horizontaal, als afgebeeld in Afb. II
Kettingzaag
Zaaginstructies
WAARSCHUWING: Zorg ervoor dat u stevig staat en de machine goed vast houd om de controle
over de machine te behouden. Sta niet op een trap of ladder bij het gebruik van de machine en
gebruik de machine niet boven schouderhoogte
• Controleer voor gebruik of de machine voorzien van genoeg olie en houdt het olieniveau tijdens
gebruik van de machine in de gaten. De olietank is na enkele gebruiksminuten lee gen dient
regelmatig bijgevuld te worden. Probeer het olieverbruik niet te verlagen. Het verbruik is optimaal
ingesteld en dient niet verandert te worden
• Wanneer de machine voor de eerste keer ingeschakeld wordt, richt u het blad in een vrij pad en
laat u de machine voor enkele seconden onbelast lopen. Wanneer oliedruppels van het blad op
de grond vliegen wordt de ketting juist gesmeerd
• Houdt de kettingzaag te allen tijde met beide handen vast. Houd uw handen schoon en
handschoenen vrij van vuil, vet en olie
• Werk binnen de hoeken, afgebeeld in Fig. II en overschrijd de 60° werkhoek niet. Wanneer u
deze werkhoek overschrijdt bestaat de kans dat taken bovenop de gebruiker vallen
• Dunne takken kunnen in één keer gezaagd worden. Dikke en lange takken dienen in
verschillende doorgangen gezaagd worden
• De machine is voorzien van een lage terugslag ketting en is ontworpen voor het geven van
minimale terugslag. Niet alle terugslag kan echter voorkomen worden. Houdt de machine te
allen tijde stevig vast om terugslag, vooral bij het gebruik van het uiteinde van de zaagarm, op
te vangen
• Bij het zagen van grote takken, maakt u eerst een kleine snede aan de onderkant van de tak, op
de plek waar u de tak van bovenaf af wilt zagen. Zaag tot 1/3 of halverwege de tak. Zo voorkomt
u het knikken van de tak wanneer u deze van de bovenkant af zaagt. Zaag de stronk in één
nette snede
• Gebruik de kettingzaag enkel voor het zagen van hout
• Houdt de zaagketting uit buurt van personen en dieren. Houdt omstanders minimaal op 15 m
afstand
• Zorg ervoor dat de machine tijdens gebruik niet in contact komt met vreemde voorwerpen (als
steen, spijkers, staaldraad, etc.), waar dit de machine ernstig kan beschadigen en kan leiden tot
ernstig persoonlijk letsel
Snoeien
• Voor optimale snoeiprestaties geleid u de tanden in een hoek van ongeveer 15° door de heg
• Span een touw langs de volledige lengte van de heg voor het behouden van een gelijk gesnoeide
heg
Accessoires
• Verschillende beschermingsmiddelen zijn verkrijgbaar bij uw GMC handelaar. Reserve
onderdelen zijn verkrijgbaar op toolsparesonline.com
Onderhoud
WAARSCHUWING: Ontkoppel de machine van de stroombron voordat u de machine schoonmaakt
of enig onderhoud uitvoert
Schoonmaak
• Houd uw machine te allen tijde schoon. Vuil en stof doen de interne onderdelen snel slijten, wat
de levensduur aanzienlijk vermindert. Maak de machine met een zachte borstel of droge doek
schoon. Gebruik wanneer mogelijk zuivere, droge perslucht om door de luchtgaten te blazen
• Maak de behuizing met een vochtige doek en een licht schoonmaakmiddel schoon. Gebruik geen
alcohol, benzine of hardnekkig schoonmaakmiddel
• Gebruik geen bijtende stoffen voor het schoonmaken van plastic onderdelen
Smeren
• Smeer alle bewegende onderdelen regelmatig met een geschikt smeermiddel
• De ketting, zaagarm en het tandwiel dienen regelmatig gesmeerd te worden
Algemene inspectie
• Controleer regelmatig of alle bevestigingsmiddelen nog goed vast zitten. Door vibratie kunnen ze
na enige tijd los gaan zitten
• Inspecteer het stroomsnoer voor elk gebruik op slijtage en beschadiging. Reparaties
dienen uitgevoerd worden bij een geautoriseerd GMC service center. Dit geld tevens voor
verlengsnoeren, gebruikt met de machine
515017_Z1MANPRO1.indd 19 10/12/2014 14:37

20
NL
Heggenschaar
Het onderhouden van het blad
WAARSCHUWING: Bij het hanteren van het snoeiblad is het dragen van beschermende
handschoenen verplicht
• Verwijder enig vuil na elk gebruik met een borstel en voorzie het blad met een lichte smeerspray
laag
• Controleer regelmatig of het blad scherp genoeg is en of het blad beschadigd is
• De bladtanden kunnen met een platte vijl geslepen worden. Slijp enkel de snijranden (Zie Afb. N)
Let op: Wanneer u enigszins onzeker bent betreft de juiste slijpwijze, laat u het blad door een
professional slijpen
• Wanneer het blad beschadigd is, laat u het bij een geautoriseerd service center vervangen
Het verwijderen van blokkeringen
Forceer de blokkering niet uit het snoeiblad. Probeer de blokkering voorzichtig, parallel aan het blad,
te verwijderen. Zie Afb. M voor een typische blokkering. De blokkering dient in dezelfde hoek als dat
het, het blad in gegaan is verwijdert te worden. Het is belangrijk de vlakheid tussen de twee bladen te
behouden. De vlakheid wordt mogelijk aangetast wanneer blokkeringen onjuist verwijderd worden
Abnormale trilling en geluid
In geval van abnormale trilling en/of geluiden, zitten schroeven mogelijk los. Draai alle schroeven
goed vast, als afgebeeld in Afb. O+P
Snoeien – kettingzaag
WAARSCHUWING: Wanneer olie tijdens onderhoud verwijderd word, bergt u het in een geschikte
container op en verwijderd u de olie volgens plaatselijke wetgeving
WAARSCHUWING: Schakel de machine uit en laat alle onderdelen volledig afkoelen voordat u enig
onderhoud uitvoert
WAARSCHUWING: Verschillende onderhoudsprocedures, beschreven in deze handleiding, vereisen
technische kennis en vaardigheden. De kettingzaag dient enkel onderhouden te worden door mensen
met de juiste kennis en vaardigheden. Wanneer u enigszins twijfelt, laat u de machine bij een
geautoriseerd service center onderhouden
WAARSCHUWING: Onderhoud wat niet in deze handleiding beschreven wordt, dient uitgevoerd
te worden door een geautoriseerde technicus. Het uitvoeren van dit soort onderhoud ontkracht de
garantie
WAARSCHUWING: Maak enkel gebruik van reserve onderdelen die door GMC gekeurd zijn voor
onderhoud en reparaties. Het gebruik van andere reserve onderdelen leid mogelijk tot ernstige en
mogelijk fatale ongelukken
Het onderhouden van de zaagarm en zaagketting
WAARSCHUWING: Bij het hanteren van de zaagketting is het dragen van beschermende
handschoenen verplicht
1. Verslap de kettingspanning met gebruik van de inbussleutel (38)
2. Verwijder de tandwiel kap (25) door de vergrendelmoer te verwijderen (Afb. K)
3. Verwijder de zaagketting en zaagarm voorzichtig en controleer of het tandwiel versleten of
beschadigd is (Afb. L)
4. Maak het tandwiel gebied volledig schoon en smeer het tandwiel grondig met gebruik van een
geschikt smeermiddel
5. Maak de zaagarm schoon en controleer of deze beschadigd is. Zorg ervoor dat de armgroef
volledig schoon is en vrij is van beschadigingen. Gebruik wanneer nodig een vijl om de gleuf
schoon te maken
6. Maak de zaagketting grondig schoon en controleer of deze beschadigd is
7. Bevestig de zaagarm en ketting, waarbij de ketting juist over de zaagarm valt. Zorg ervoor dat de
zaagarm over de spanpin valt, als afgebeeld in Afb. L. Bevestig de tandwiel kap
8. Volg de instructies voor het spannen van de ketting opControleer het tandwiel regelmatig op
beschadiging en slijtage
9. Laat een versleten of beschadig tandwiel bij een geautoriseerd service center vervangen
WAARSCHUWING: Bevestig een nieuwe zaagketting nooit op een beschadigd of versleten tandwiel,
of een beschadigde of versleten ketting op een nieuw tandwiel
Borstels
• Na verloop van tijd zullen de koolborstels in de motor verslijten.
• Bij overmatige slijtage van de borstels verliest de motor mogelijk vermogen, start het niet meer,
en/ of produceert het overmatig vonken.
• Wanneer u vermoedt dat de borstels versleten zijn, laat u deze bij een erkend GMC service
center vervangen
Opberging
• Berg de machine op een droge en veilige plek, buiten het bereik van kinderen op
• Plaats de heggenschaar bladbeschermer over het heggenschaarblad en de kettingzaag
bladbeschermer over het kettingzaagblad voordat u deze opbergt
Verwijdering
Bij de verwijdering van machines die niet langer functioneel en niet te repareren zijn, neemt u de
nationale voorschriften in acht
• Machines en ander elektrisch en elektronisch afval mag niet met uw huishoudelijk afval worden
weggegooid
• Neem contact op met uw gemeente voor informatie betreffende de verwijdering van machines
• Olie is schadelijk en dient als schadelijk behandelt te worden. Olie dient niet met uw huishoudelijk
afval weggegooid te worden. Onjuiste verwijderen wordt mogelijk gezien als een crimineel
misdrijf. Neem contact op met uw plaatselijke autoriteiten betreft een juiste verwijdering van olie
515017_Z1MANPRO1.indd 20 10/12/2014 14:37
Table of contents
Languages: