GMC 30CC User manual

30CC
PETROL LINE STRIMMER
LTP30
30 CM3 BENZINE GRASTRIMMER
DÉBROUSSAILLEUSE À ESSENCE 30 CM3
BENZIN-FREISCHNEIDER, 30 CM3
TAGLIAERBA A FILO, A BENZINA, 30CC
DESBROZADORA A GASOLINA 30 CM3
469258_Z1MANPRO1.indd 1 25/04/2016 09:02

1
2
3
45
67
8910
11
12
13
14 19 20
21
18
17
16
15
22
28
27
26
25
24
23
469258_Z1MANPRO1.indd 2 25/04/2016 09:02

A
E
I
M
B
F
J
C
G
K
D
H
L
469258_Z1MANPRO1.indd 3 25/04/2016 09:02

469258_Z1MANPRO1.indd 4 25/04/2016 09:02

30CC
PETROL LINE STRIMMER
LTP30
English 6
Nederlands 14
Français 22
Deutsch 30
Italiano 40
Español 48
469258_Z1MANPRO1.indd 5 25/04/2016 09:02

6
GB
Introduction
Thank you for purchasing this GMC tool. This manual contains information necessary for safe and
effective operation of this product. This product has unique features and, even if you are familiar
with similar products, it is necessary to read this manual carefully to ensure you fully understand the
instructions. Ensure all users of the tool read and fully understand this manual.
Guarantee
To register your guarantee visit our web site at
www.gmctools.com and enter your details*.
Your details will be included on our mailing list (unless indicated otherwise) for information on future
releases. Details provided will not be made available to any third party.
Purchase Record
Date of Purchase:
Model: LTP30
Serial Number:
(located on motor housing)
Retain your receipt as proof of purchase.
If registered within 30 days of purchase GMC guarantees to the purchaser of this product that if any
part proves to be defective due to faulty materials or workmanship within 24 MONTHS from the date
of original purchase, GMC will repair or, at its discretion, replace the faulty part free of charge. This
guarantee does not apply to commercial use nor does it extend to normal wear and tear or damage
as a result of accident, abuse or misuse.
* Register online within 30 days of purchase.
Terms & conditions apply.
This does not affect your statutory rights.
Original Instructions
Wear hearing protection
Wear eye protection
Wear breathing protection
Wear head protection
Wear hand protection
Read instruction manual
Wear protective shoes
Risk of fire!
Hot surfaces - DO NOT touch!
Risk of explosion!
WARNING: Moving parts can cause crush and cut injuries
Caution!
DO NOT use indoors or in closed spaces!
NO open flames!
NO smoking!
Conforms to relevant legislation and safety standards.
Environmental Protection
Tools powered by petrol based internal combustion engines must not
be disposed of with household waste. Please recycle where facilities
exist. Check with your local authority or retailer for recycling advice.
Description of Symbols
The rating plate on your tool may show symbols. These represent important
information about the product or instructions on its use.
469258_Z1MANPRO1.indd 6 25/04/2016 09:02

GB
7
Model: LTP30
Engine type: Air-cooled, 2-stroke
Displacement: 30cc
No load speed: 7800min-1
Max. power output: 1000W (1.34hp)
Fuel/oil mix ratio: 40:1
Ignition: Electronic
Spark plug: Torch l8rtc
Fuel tank capacity: 500ml
Cutting path diameter: 430mm
Line cord diameter: 2mm
Net weight: 5.2kg
As part of our ongoing product development, specifications of GMC products may alter without
notice.
Sound and vibration information:
Sound Pressure LPA:
Idle: 76.1dB(A)
Racing: 96.5dB(A)
Sound Power LWA: 112dB(A)
Uncertainty K: 3dB
Weighted vibration ah(main handle):
Idle: 2.475m/s2
Racing: 9.839m/s2
ah(auxiliary handle):
Idle: 3.192m/s2
Racing: 8.935m/s2
Uncertainty K: 1.5m/s2
The sound intensity level for the operator may exceed 85dB(A) and sound protection measures
are necessary.
Specification
WARNING: Always wear ear protection where the sound level exceeds 85dB(A) and limit the time
of exposure if necessary. If sound levels are uncomfortable, even with ear protection, stop using the
tool immediately and check the ear protection is correctly fitted and provides the correct level of
sound attenuation for the level of sound produced by your tool.
WARNING: User exposure to tool vibration can result in loss of sense of touch, numbness, tingling
and reduced ability to grip. Long-term exposure can lead to a chronic condition. If necessary, limit
the length of time exposed to vibration and use anti-vibration gloves. Do not operate the tool with
hands below a normal comfortable temperature, as vibration will have a greater effect. Use the
figures provided in the specification relating to vibration to calculate the duration and frequency of
operating the tool.
Sound and vibration levels in the specification are determined according to EN60745 or similar
international standards. The figures represent normal use for the tool in normal working conditions.
A poorly maintained, incorrectly assembled, or misused tool, may produce increased levels of noise
and vibration. www.osha.europa.eu provides information on sound and vibration levels in the
workplace that may be useful to domestic users who use tools for long periods of time.
Technical Abbreviations Key
CE Declaration of Conformity
The undersigned: Mr Darrell Morris
as authorised by: GMC Tools
Declares that
This declaration has been issued under the sole responsibility of the manufacturer.
The object of the declaration is in conformity with the relevant Union harmonisation
Legislation.
Identification code: LTP30
Description: 30cc Petrol Line Strimmer
Conforms to the following directives and standards:
• Machinery Directive 2006/42/EC
• EMC Directive 2014/30/EU
• Outdoor Noise Directive 2000/14/EC
• EN ISO 11806-1:2011
• EN ISO14982:2009
Applied Conformity Evaluation Method
2000/14/EC : Annex III
Sound Power Level dB (A)
Measured: 94
Guaranteed: 118
Notified body: Intertek
The technical documentation is kept by: GMC Tools
Date: 19/04/2016
Signed:
Mr Darrell Morris
Managing Director
Name and address of the manufacturer:
Powerbox International Limited, Company No. 06897059. Registered address:
Central House, Church Street,Yeovil, Somerset BA20 1HH, United Kingdom.
VVolts
~Alternating current
AAmpere
n0No load speed
Hz Hertz
W, kW Watt, kilowatt
/min or min-1 (revolutions or reciprocation) per minute
469258_Z1MANPRO1.indd 7 25/04/2016 09:02

8
GB
General Safety
WARNING Read all safety warnings and all instructions. Failure to follow the warnings and
instructions may result in electric shock, fire and/or serious injury.
WARNING: This appliance is not intended for use by persons (including children) with
reduced, physical or mental capabilities or lack of experience or knowledge unless they
have been given supervision or instruction concerning use of the appliance by a person
responsible for their safety. Children must be supervised to ensure that they do not play with the
appliance.
Save all warnings and instructions for future reference.
1) Work area safety
a) Keep work area clean and well lit. Cluttered or dark areas invite accidents.
b) Do not operate tools in explosive atmospheres, such as in the presence of flammable
liquids, gases or dust.
c) Keep children and bystanders away while operating a powered tool. Distractions can
cause you to lose control.
2) Personal safety
a) Stay alert, watch what you are doing and use common sense when operating a powered
tool. Do not use a powered tool while you are tired or under the influence of drugs,
alcohol or medication. A moment of inattention while operating a powered tool may result in
serious personal injury.
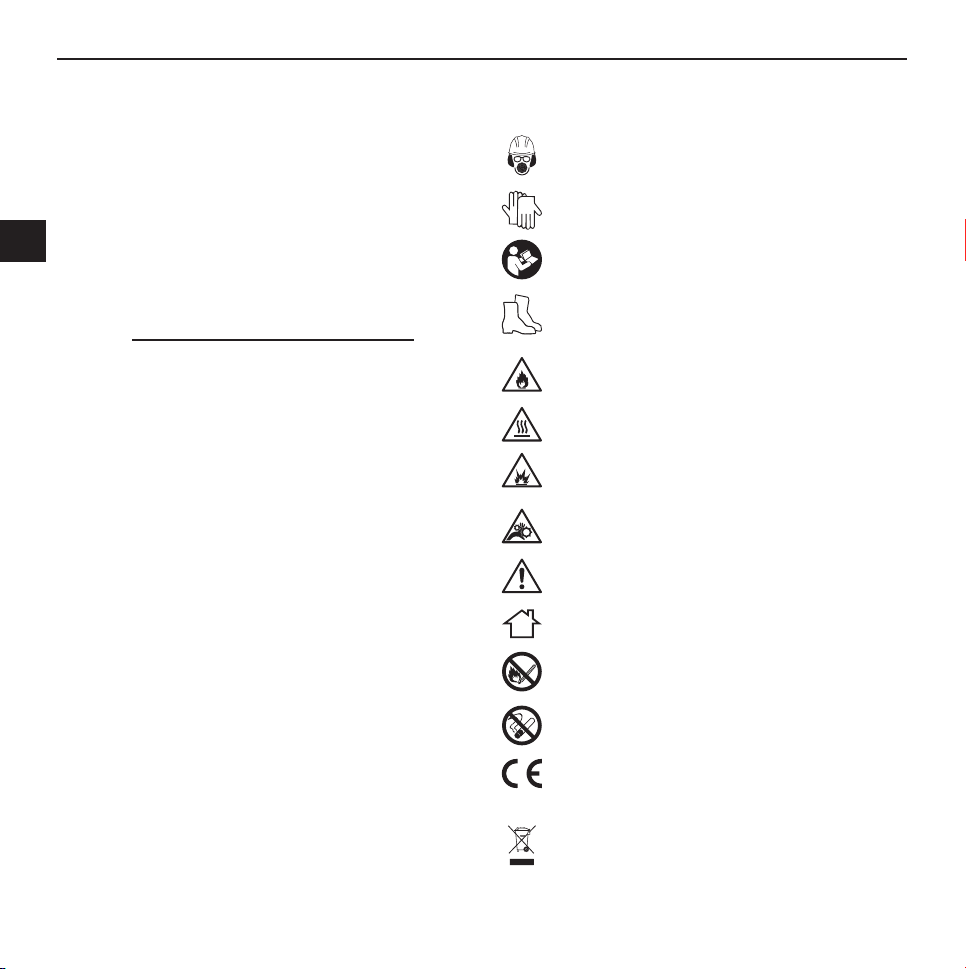
b) Use personal protective equipment. Always wear eye protection. Protective equipment
such as dust mask, non-skid safety shoes, hard hat, or hearing protection used for appropriate
conditions will reduce personal injuries.
c) Prevent unintentional starting. Ensure the switch is in the off-position when not operating the
tool and make use of other safety features which prevent unintentional starting
d) Remove any adjusting key or wrench before turning the powered tool on. A wrench or a
key left attached to a rotating part of the tool may result in personal injury.
e) Do not overreach. Keep proper footing and balance at all times. This enables better control
of the tool in unexpected situations.
f) Dress properly. Do not wear loose clothing or jewellery. Keep your hair, clothing and
gloves away from moving parts. Loose clothes, jewellery or long hair can be caught in
moving parts.
g) If devices are provided for the connection of dust extraction and collection facilities,
ensure these are connected and properly used. Use of dust collection can reduce dust-
related hazards.
WARNING: User exposure to tool vibration can result in loss of sense of touch, numbness, tingling
and reduced ability to grip. Long term exposure can lead to a chronic condition. If necessary limit
the length of time exposed to vibration. Use the figures provided in the specification relating to
vibration if provided to calculate the duration and frequency of operating the tool. The 2002/44/EC
directive relating to vibration in the workplace may provide useful information even for domestic
use of tools. In the first instance of feeling uncomfortable due to vibration STOP using the tool
immediately.
WARNING: Always wear ear protection where the sound level exceeds 85dB(A) and limit the time
of exposure if necessary. If sound levels are uncomfortable even with ear protection stop using the
tool immediately and check the ear protection is correctly fitted and provides the right level of sound
attenuation for the level of sound produced by your tool.
3) Tool use and care
a) Maintain tools. Check for misalignment or binding of moving parts, breakage of parts
and any other condition that may affect the tool’s operation. If damaged, have the tool
repaired before use. Many accidents are caused by poorly maintained tools.
b) Keep cutting tools sharp and clean. Properly maintained cutting tools with sharp cutting
edges are less likely to bind and are easier to control.
c) Use the tool’s accessories and tool bits etc. in accordance with these instructions, taking
into account the working conditions and the work to be performed. Use of the tool for
operations different from those intended could result in a hazardous situation.
4) Service
a) Have your tool serviced by a qualified repair person using only identical replacement
parts. This will ensure that the safety of the tool is maintained.
Internal Combustion Engine Safety
Dangerous environment
• Do not use petrol tools in damp or wet conditions, or expose them to rain. Provide adequate
surrounding work space and keep area well lit.
• Do not use petrol tools where there is a risk of explosion or fire from combustible material,
flammable liquids, flammable gases, or dust of an explosive nature
Switch off
• Ensure that the engine has stopped before attaching any accessories to the tool
• If the tool stops unexpectedly ensure that the power is switched off and the engine is not
running before attempting to check the tool
Running-in the engine
• New tools should be used at moderate speed
• Do not maintain high engine speed until the engine is completely run-in
• The engine will not be capable of developing maximum power until the end of the running-in
period
• When first using the tool, periodically stop and check that all nuts and screws are securely
fastened and tighten them as necessary
• Do not use fuels containing methanol or ethanol, as these may cause internal damage to the
fuel tank and fuel lines
Warning
• Never leave the tool running unattended
• Never leave the machine unattended when parts are still hot
Servicing
• We recommended that your tool is serviced shortly after its first use
• In normal use, have the tool serviced regularly
• Do not modify any of the components of this tool. To do so would invalidate your guarantee, and
could result in injury to yourself or others around you
• Always have your tool serviced at an authorized service centre
Storage
• Clean the tool completely after use
• Be careful not to damage the fuel tank, or fuel lines, when it is placed on the ground
• Ensure that the tool will not be subject to impact damage; any damage could cause the tool to
become unsafe
• Store the tool away from direct sunlight
• Ensure that fuel and oil is stored in a safe place, away from heat, direct sunlight or any source
of ignition
• Whenever the machine is likely to be out of use for an extended period of time, proceed as
follows:
• Empty the fuel tank completely
• Protect all metal engine parts from corrosion by coating them with oil
• Remove the spark plug, put a few drops of oil into the cylinder and then pull the recoil starter 2
to 3 times in order to distribute the oil evenly
469258_Z1MANPRO1.indd 8 25/04/2016 09:02

GB
9
• Replace the spark plug
• Never store the machine where children may gain access to it
THIS PRODUCT PRODUCES POISONOUS EXHAUST FUMES AS SOON AS THE ENGINE IS RUNNING.
THESE GASES MAY BE COLOURLESS AND ODOURLESS. TO REDUCE THE RISK OF SERIOUS
OR FATAL INJURY, NEVER RUN THE MACHINE INDOORS, OR IN POORLY VENTILATED AREAS.
ENSURE PROPER VENTILATION WHEN WORKING IN TRENCHES OR OTHER CONFINED SPACES.
Line Strimmer Safety
WARNING: Petrol fumes are combustible, DO NOT SMOKE when handling/using this tool
• Always check the work area for hidden objects, fencing, cables etc. Ensure that the material to
be cut does not contain any objects. Be sure that it is safe to cut before starting the job
• Always wear appropriate safety equipment. Use of this tool requires gloves, protective shoes,
eye or face protection, dust mask, ear defenders, hard hat, and sturdy clothing
• Assess your own physical condition. Using a brush cutter or line strimmer, even a smaller model,
is physically demanding. Do not start a job unless you are confident that you are fit and strong
enough to complete it. Never use a brush cutter/line strimmer when tired, unwell, or under the
influence of any kind of drugs or alcohol
• Check that other people are a safe distance away from the work area before starting to cut.
Never allow children or pets near to the work area
• Do not use this product in wet conditions. Ensure that material to be cut is dry before starting
work
• Do not use this tool if any guards are missing or damaged
• This tool should only be used in an upright position, with the spool or blade close to the ground
• Walk slowly when carrying this tool. Freshly cut grass or brush is slippery, and may conceal
trip hazards
• Only use correct nylon strimmer line or specialist blades. Attempting to use any other kind of
cutting accessory is highly dangerous
• Never pass arms or legs near to the blade when cutting. Always stand in a stable position, well
back from the cutting area
• If the brush cutter jams, switch off immediately. Allow the engine to completely stop before
attempting to clear jammed material
• Be prepared for the possibility of kickback. In some circumstances, if used incorrectly, the
brush cutter may be thrown back towards the user. Correct use and regular maintenance will
significantly reduce the chance of kickback occurring
• Always stop the tool before crossing gravel paths or roads
• Do not run the engine in ill-ventilated, confined spaces.There is a danger of poisoning by
exhaust gases
• Turn the engine off before putting the strimmer down. Do not transport the strimmer with the
engine running
• Keep all screws and fasteners tight. Never operate the equipment when it is improperly adjusted
or not completely and securely assembled. Only use approved cutting attachments
• Maintain your balance. NEVER cut or trim on a hill or slope if there is the slightest of slipping or
losing firm footing
• Keep all parts of your body and clothing away from the cutting line when starting or running
the engine. Before starting the engine, ensure the cutting line will not come into contact with
any obstacles
• Always keep the debris shield/guard, cutting line, and engine free from build-up of debris
• Never attempt to fuel the line strimmer if the fuel system components are damaged or are
leaking
• Never smoke or light any fires near the line strimmer or fuels
• Never place flammable material close to the engine exhaust
Product Familiarisation
1. Cutting Guard Mount
2. Lower Drive Shaft
3. Shaft Securing Knob
4. Locating Pin
5. Clamping Mechanism
6. Auxiliary Handle
7. Throttle Assembly
8. Ignition Switch
9. Lock-Off Lever
10. Throttle
11. Handle
12. Recoil Starter
13. Strap Mount
14. Upper Drive Shaft
15. Choke Lever
16. Choke Position Indicator
17. Air Box Cover
18. Primer Bulb
19. Ignition Lead
20. Exhaust
21. Fuel Tank
22. Fuel Cap
23. Line Length Regulator
24. Cutting Guard
25. Cutting Head Assembly
26. Line Reel
27. Cutting Line
28. Cutting Head Securing Knob
Accessories (not shown):
• Shoulder Strap
• Hex Bolt
• Hex Nut
• Spark Plug Tool
• 2 x Hex Key
Intended Use
Line strimmer powered by a 30cc 2-stroke engine, for trimming grass and light shrubbery in the
garden. Features a variable throttle for moderating cutting speed, and dual handles for increased
user comfort and control.
Unpacking Your Tool
• Carefully unpack and inspect your tool. Fully familiarise yourself with all its features and functions
• Ensure that all parts of the tool are present and in good condition. If any parts are missing or
damaged, have such parts replaced before attempting to use this tool
469258_Z1MANPRO1.indd 9 25/04/2016 09:02

10
GB
Before Use
WARNING: Never undertake any assembly or maintenance operations whilst the engine is
running. Ensure the Ignition Switch (8) is in the STOP position.
Assembling the shaft
1. Slide the Cutting Guard (24) over the Lower Drive Shaft (2) (Image A)
2. Fasten the Cutting Guard to the Cutting Guard Mount (1) using the provided Hex Bolt, Hex Nut,
and Hex Key, (Image B)
3. Loosen the Shaft Securing Knob (3)
4. Align the Locating Pin (4) with the hole in the Clamping Mechanism (5), (Image C)
5. Depress the Locating Pin and insert the Lower Drive Shaft into the Clamping Mechanism. The
Locating Pin should protrude through the hole in the Clamping Mechanism (Image D)
Note: Ensure the internal spindle correctly locates. Resistance will be felt when connecting the drive
shafts if the internal spindle fails to connect properly.
6. Fasten the shafts together by tightening the Shaft Securing Knob
Fitting the auxiliary handle
1. Remove the two Hex Bolts securing the clamp of the Auxiliary Handle (6) using the provided
Hex Key
2. Fit the Auxiliary Handle over the Upper Drive Shaft (14) and adjust the orientation and positioning
to suit the operator
3. Reinstall the Hex Bolts to secure in positon
Filling with fuel
WARNING: NEVER fill the Fuel Tank (21) with fuel whilst the engine is running. Switch off the engine
and wait until it has cooled before refuelling.
WARNING: Always use extreme care when handling fuel. Fuel is highly flammable.
WARNING: Do not use petrol which contains ethanol or methanol as it may damage the fuel lines
and other engine components.
Note: Use a 40:1 petrol to oil mixture only in this 2-stroke motor. Not following this guideline could
cause the strimmer to wear prematurely.
• Use fresh unleaded petrol. You must use 100% synthetic oil specifically made for heavily
stressed 2-stroke engines
1. Mix the petrol and oil in a suitable petrol-compliant container. Never mix fuel directly in the line
strimmer Fuel Tank
2. Place the unit on its side on the ground or on a sturdy flat surface, so that the Fuel Cap (22) is
facing upwards, and wipe any debris from around the Fuel Tank opening
3. Unscrew the Fuel Cap and pour the mixture into the Fuel Tank with the aid of a funnel
Note: Be careful not to spill any mixture. If this happens, wipe the spill with a clean rag.
4. When refuelling is finished, immediately refit the Fuel Cap and close by turning it clockwise
5. Before starting the engine, move at least 3m away from the area where the Fuel Tank has been
filled up in order to minimise any risk of fire
Operation
WARNING: ALWAYS wear eye protection, adequate respiratory and hearing protection, as well
as suitable gloves, when working with this tool.
Running in the engine
• During the first 5 hours of work, run the engine at low or medium speed
• The engine will reach its maximum power at the end of the run-in period
Starting the engine
1. Move the Ignition Switch (8) to the on position marked ‘I’
2. Align the Choke Lever (15) with the blue bar on the Choke Position Indicator (16) to close the
choke in preparation for cold starting (Image E)
Note: The above step is only necessary when starting the engine from cold.
3. Depress the Primer Bulb (18) approximately 6 times (Image F), to feed the fuel into the
carburettor
4. Place the strimmer on the floor, and hold in position by placing your foot on the Handle (11) with
a small amount of pressure
Note: Applying too much pressure whilst securing the strimmer on the floor may damage the
Cutting Guard (24). Only light pressure is required to oppose the force exerted whilst pulling the
Recoil Starter (12).
5. Pull the Recoil Starter approximately 2-3 times until the engine starts
6. Align the Choke Lever with the red bar on the Choke Position Indicator (Image G) to open the
choke for normal (warm) operation
Note: If the engine cuts-out at this point, restart in the conventional manner by leaving the choke in
the open position and pulling the Recoil Starter.
7. Leave the engine to run at idle for approximately 10 seconds as part of the warm-up procedure
Stopping the engine
WARNING: The Cutting Line (27) will continue to rotate for a few seconds after the engine has
stopped.
1. Release the Throttle (10) and allow the engine to idle for a few moments
2. Move the Ignition Switch (8) to the off position marked ‘STOP’
3. Throttle operation
• Whilst holding the Handle (11) with your leading hand, depress the Lock-Off Lever (9) and
squeeze the Throttle to accelerate the strimmer and increase the velocity of the Cutting Line
(27)
Using the strimmer
WARNING: ALWAYS wear eye protection, adequate respiratory and hearing protection, as well
as suitable gloves, when working with this tool.
• The Shoulder Strap should be positioned over the operator’s left shoulder, with the right hand
grasping the Handle (11) for control over the Throttle Assembly (7) and the left hand positioned
on the Auxiliary Handle (6) to control the positioning of the Cutting Head Assembly (25)
Note: If necessary, refer to ‘Fitting the auxiliary handle’ for instructions on how to adjust the Handle.
• Ensure the Cutting Head Assembly is parallel to the ground
• This strimmer is suitable for cutting grass, weeds and shrubbery
• Examine the territory and determine the desired cutting height. Hold the Cutting Head Assembly
at the desired height to achieve an even cutting result
• Move the strimmer in a controlled sweeping motion from side to side
• Operate alone without assistance. Do not allow anyone within a 15m radius from the operator
• Ensure you have a firm footing when using the strimmer
• Do not operate in wet conditions or when raining
• Ensure the engine is off and Ignition Switch (8) in the STOP position before attempting to remove
any foreign objects or vegetation wound around the Cutting Head Assembly
• The Line Reel (26) has a bump-feed mechanism. To advance the Cutting Line (27), bump the
Cutting Head Securing Knob (28) onto the ground whilst maintaining a moderate engine speed
Note: If the Cutting Head Assembly does not properly extend the Cutting Line: turn off the engine,
allow the Cutting Head Assembly to come to a complete stop and move the Ignition Switch (8) to the
STOP position before inspecting the head.
469258_Z1MANPRO1.indd 10 25/04/2016 09:02

GB
11
Accessories
• A range of accessories and consumables, including Strimmer Line Seven Star, Heavy Duty
Strimmer Line, and a 4-Point Harness, is available from your GMC stockist. Spare parts can be
obtained from toolsparesonline.com
Maintenance
WARNING: ALWAYS wear adequate personal protective equipment, including eye protection and
oil/fuel-resistant gloves, when carrying out maintenance on this strimmer. ALWAYS ensure proper
ventilation.
WARNING: Work away from naked flames, DO NOT smoke, and ensure petrol fumes or spilled fuel
cannot reach potential ignition sources.
WARNING: If fuel or oil is removed during maintenance, fill into suitable sealed containers and
dispose of according to laws and regulations.
WARNING: ALWAYS switch the engine off and wait until all components have completely cooled,
before cleaning or carrying out any maintenance
Note: The maintenance schedule should be adjusted according to use and environment. If the tool
is used frequently, and/or if it is used in harsher environments, shorter maintenance intervals are
required.
Cutting line installation
Removing the spool assembly:
1. Ensure the engine is off and Ignition Switch (8) is in the STOP position
2. Hold the Cutting Head Assembly (25)
3. Twist the Cutting Head Securing Knob (28) and remove the Cutting Head Assembly (Image H)
Replacing the cutting line:
1. With the Cutting Head Assembly disassembled, remove any remaining Cutting Line (27) from
the Line Reel
2. Cut a 6m length of 2mm Cutting Line
3. Insert the middle of the Cutting Line into the slit located in the centre of the Line Reel (26)
(Image I)
4. Wrap the Cutting Line halves around the two Line Reel partitions in the direction indicated on
the top of the Line Reel (Image J)
Installing the spool:
1. Thread the loose ends of the Cutting Line through the holes in the Cutting Head Assembly (25)
2. Reinstall the Line Reel into the Cutting Head Assembly
3. Reattach the Cutting Head Assembly to the Lower Drive Shaft (2) and secure in place using the
Cutting Head Securing Knob (28)
Note: Ensure the hexagonal recess on the Cutting Head Assembly is fully located on the hexagonal
section of the Lower Drive Shaft
4. After changing the Cutting Line, run the strimmer under no load for at least a minute to make
sure that the line and the tool are both operating correctly
Note: Only use Cutting Line spool that has been recommended by the manufacturer (see
‘Accessories’)
Spark plug maintenance
1. To gain access to the spark plug, first remove the Ignition Lead (19), located on top of the motor
unit (Image K)
2. Remove the Spark Plug, using the provided Spark Plug Tool, (Image L)
3. Install the new Spark Plug by hand, then tighten the final ¼ turn using the provided Spark Plug
Tool
Air filter maintenance
Note: Accumulated dust in the air filter will reduce engine efficiency, increase fuel consumption and
allow abrasive particles to pass into the engine. Remove the air filter and clear regularly.
1. Remove the Air Box Cover (17), by unscrewing the Phillips head screw located on the front
(Image M), and lifting the cover off by pinching the sides
2. Tap the filter to remove light surface dust
3. Wash out heavy deposits in a suitable solvent
4. Once dry, replace the filter and the Air Box Cover, and fasten using the Phillips head screw
Fuel filter maintenance
• The Fuel Tank (21) is fitted with a filter situated at the end of the fuel pipe. This can be picked
out for inspection through the opening behind the Fuel Cap (22), with a piece of hooked wire
or similar
Description Work to be carried
out Before each use After 1 month/first 20
hours
Every 3 months/50
hours
Every 6 months
/100 hours
Every 12months/
300 hours
Air filter
Inspection X
Cleaning X
Spark plug Cleaning & adjusting X
Combustion chamber Cleaning
X
(Authorised GMC
service centre only)
Fuel lines Inspection & cleaning X
Fittings & fasteners Check, tighten &
replace if necessary X
Maintenance Schedule
469258_Z1MANPRO1.indd 11 25/04/2016 09:02

12
GB
• Check the fuel filter periodically, according to the maintenance schedule. Do not allow dust to
enter the Fuel Tank.A clogged filter will make the engine more difficult to start and can cause
abnormalities in engine performance
• Replace the filter when dirty
• When the inside of the Fuel Tank is dirty, clean it by rinsing it out with petrol
General inspection
• Regularly check that all the fixing screws are tight
Cleaning
• Keep your tool clean at all times. Dirt and dust will cause internal parts to wear quickly, and
shorten the machine’s service life. Clean the body of your machine with a soft brush, or dry
cloth. If available, use clean, dry, compressed air to blow through the ventilation holes
• Clean the tool casing with a soft damp cloth using a mild detergent. Do not use alcohol, petrol
or strong cleaning agents
• Never use caustic agents to clean plastic parts
Lubrication
• Slightly lubricate all moving parts at regular intervals with a suitable spray lubricant
Storage
• Store this tool carefully in a secure, dry place out of the reach of children
• Always transport and store fuels in an approved container
• Mix only enough fuel for your immediate needs. If fuel must be stored longer than 30 days, it
should first be treated with a stabiliser or a similar product
Whenever storing for a long period of time, proceed as follows:
• Empty the Fuel Tank (21) completely
• Protect all metal engine parts from corrosion by coating them with oil
• Remove the spark plug, put a few drops of oil into the cylinder and then pull the Recoil Starter
(12) 2 to 3 times in order to distribute the oil evenly. Replace the spark plug
Disposal
Always adhere to national regulations when disposing of power tools that are no longer functional
and are not viable for repair.
• Do not dispose of power tools, or other waste electrical and electronic equipment (WEEE), with
household waste
• Contact your local waste disposal authority for information on the correct way to dispose of
power tools
469258_Z1MANPRO1.indd 12 25/04/2016 09:02

GB
13
Troubleshooting
Problem Possible cause Solution
Poor quality cut
The grass is too high or too thick Focus on less concentrated patches of grass, and progress slowly
Vegetation is wrapped around the Cutting Head Assembly (25) Switch off the machine, wait for the Cutting Head Assembly to stop
rotating, and remove entangled vegetation
Power loss or sudden stopping of the engine No fuel in the tank Refill Fuel Tank (21). See ‘Filling with fuel’
Dirty/blocked fuel filter Clean the fuel filter and remove blockage, see ‘Fuel filter
maintenance’
Dirty/blocked air filter Clean the air filter and remove blockage, see ‘Air filter maintenance’
Excessive carbon deposits within the engine, cylinder or
Exhaust (20)
Authorised GMC service centre only
469258_Z1MANPRO1.indd 13 25/04/2016 09:02

14
NL
Introductie
Hartelijk dank voor de aanschaf van dit GMC- gereedschap. Deze instructies bevatten informatie
die u nodig hebt voor een veilige en doeltreffende bediening van dit product. Dit product heeft
unieke kenmerken. Zelfs als u bekend bent met gelijksoortige producten dient u deze handleiding
zorgvuldig door te lezen, zodat u in staat bent alle voordelen te benutten. Houd deze handleiding bij
de hand en zorg ervoor dat alle gebruikers van dit gereedschap de handleiding hebben gelezen en
volledig hebben begrepen.
Garantie
Om uw garantie te registreren, gaat u naar onze website op
www.gmctools.com en voert u uw gegevens in*.
Uw gegevens worden opgeslagen in onze mailinglist (tenzij u anders aangeeft) voor informatie
over nieuwe producten. De ingevulde gegevens worden aan geen enkele derde partij beschikbaar
gesteld.
Aankoopgegevens
Datum van aankoop:
Model: LTP30
Serienummer:
(bevindt zich op motorbehuizing)
Bewaar uw aankoopbon als aankoopbewijs.
Indien dit product wordt geregistreerd binnen 30 dagen na aankoop, garandeert GMC de koper van
dit product dat indien een onderdeel defect is vanwege fouten in materiaal of uitvoering binnen 24
maanden na de datum van de oorspronkelijke aankoop, GMC het defecte onderdeel gratis repareert
of, naar eigen inzicht, vervangt. Deze garantie heeft geen betrekking op commercieel gebruik en
strekt zich niet uit tot normale slijtage of schade ten gevolge van een ongeluk, verkeerd gebruik of
misbruik.
*Registreer online binnen 30 dagen na aankoop.
Algemene voorwaarden zijn van toepassing.
Dit tast uw wettelijke rechten niet aan.
Vertaling van de originele instructies
Draag gehoorbescherming
Draag een veiligheidsbril
Draag een stofmasker
Draag een veiligheidshelm
Draag handschoenen
Lees de handleiding
Draag beschermende schoenen
Brandgevaar!
Warme oppervlakken – RAAK NIET AAN!
Explosiegevaar!
WAARSCHUWING: Bewegende delen kunnen ernstig letsel veroorzaken.
Voorzichtig!
NIET binnen, of in gesloten ruimtes gebruiken!
GEEN open vlammen!
NIET roken!
Voldoet aan de relevante wetgeving en veiligheidsnormen
Milieubescherming
Elektrische producten mogen niet met het normale huisvuil worden weggegooid.
Indien de mogelijkheid bestaat, dient u het product te recyclen. Vraag de plaatselijke
autoriteiten of winkelier om advies betreffende recyclen.
Beschrijving symbolen
Op het gegevensplaatje van uw gereedschap kunnen zich symbolen bevinden. Deze
vertegenwoordigen belangrijke productinformatie en gebruiksinstructies.
469258_Z1MANPRO1.indd 14 25/04/2016 09:02

NL
15
Specificaties
Technische afkortingen en symbolen
EG-verklaring van overeenstemming
De ondergetekende: Mr. Darrell Morris
Gemachtigd door: GMC Tools
Verklaart dat
Deze verklaring wordt verstrekt onder de volledige verantwoordelijkheid van de fabrikant.
Het hierboven beschreven voorwerp is conform de desbetreffende communautaire
harmonisatiewetgeving
Identificatienummer: LTP30
Beschrijving: 30 cm3benzine grastrimmer
Voldoet aan de volgende richtlijnen:
• Machinerichtlijn 2006/42/EG
• Elektromagnetische verenigbaarheid 2004/30/EG
• Richtlijn geluidsemissie 2000/14/EG
• EN ISO 11806-1:2011
• EN ISO14982:2009
Toegepaste evaluatie methode
2000/14/EG: Annex III
Geluidsniveau dB(A)
Gemeten: 94
Gegarandeerd: 118
Keuringsinstantie: Intertek
De technische documentatie wordt bijgehouden door: GMC Tools
Datum: 19-04-2016
Handtekening:
Darrell Morris
Algemeen directeur
Naam en adres van fabrikant:
Powerbox International Limited, handelsregister nummer 06897059. Geregistreerd adres:
Central House, Church Street,Yeovil, Somerset BA20 1HH, Verenigd Koninkrijk
WAARSCHUWING: Bij een geluidsintensiteit van 85 dB(A) of hoger is het dragen van
gehoorbescherming en het limiteren van de blootstellingstijd vereist. Bij oncomfortabel hoge
geluidsniveaus, zelfs met het dragen van gehoorbescherming, stopt u het gebruik van de machine
onmiddellijk. Controleer de pasvorm en het geluiddempingsniveau van de bescherming.
WAARSCHUWING: Blootstelling aan trilling resulteert mogelijk in gevoelloosheid, tinteling en een
vermindert gripvermogen. Langdurige blootstelling kan leiden tot chronische condities. Limiteer
de blootstellingsduur en draag anti-vibratie handschoenen. Vibratie heeft een grotere invloed op
handen met een temperatuur lager dan een normale, comfortabele temperatuur. Maak gebruik
van de informatie in de specificaties voor het bereken van de gebruiksduur en frequentie van de
machine.
Geluid- en trillingsniveaus in de specificatie zijn vastgesteld volgens EN60745 of een gelijksoortige
internationale norm. De waarden gelden voor een normaal gebruik in normale werkomstandigheden.
Een slecht onderhouden, onjuist samengestelde of onjuist gebruikte machine produceert mogelijk
hogere geluids- en trillingsniveaus. www.osha.europa.eu biedt informatie met betrekking tot
geluids- en trillingsniveaus op de werkplek wat mogelijk nuttig is voor regelmatige gebruikers van
machines.
VVolt
~Wisselspanning
AAmpère
n0Onbelaste snelheid
Hz Hertz
W, kW Watt, kilowatt
/min of min-1 Meters per seconde (trilling)
Model: LTP30
Motor type: Luchtgekoeld, 2-takt
Inhoud: 30 cm3
Onbelaste snelheid: 7800 min-1
Max. motor vermogen: 1000 W (1,34 pk)
Brandstof/olie verhouding 40:1
Ontsteking: Elektronisch
Bougie: Torch l8rtc
Brandstoftank capaciteit: 500 ml
Snoeidiameter: 430 mm
Repeteerstarter lijndiameter: 2 mm
Gewicht: 5,2 kg
Met het oog op onze aanhoudende productontwikkeling kunnen de specificaties van GMC
producten zonder voorafgaande kennisgeving worden gewijzigd.
Geluid en trilling:
Geluidsdruk LPA:
Stationair: 76,1 dB(A)
Actief: 96,5 dB(A)
Geluidsvermogen LWA: 112 dB(A)
Onzekerheid K: 3 dB
Trilling ah(hoofdhandvat):
Stationair: 2,475 m/s2
Actief: 9,839 m/s2
ah(hulphandvat):
Stationair: 3,192 m/s2
Actief: 8,935 m/s2
Onzekerheid K: 1,5 m/s2
Met het oog op onze aanhoudende productontwikkeling kunnen de specificaties van Silverline
producten zonder voorafgaande kennisgeving worden gewijzigd.
469258_Z1MANPRO1.indd 15 25/04/2016 09:02

16
NL
Algemene veiligheid
WAARSCHUWING Lees alle bediening- en veiligheidsvoorschriften. Het niet opvolgen van alle
voorschriften die hieronder vermeld staan, kan resulteren in een elektrische schok, brand en/of
ernstig letsel.
WAARSCHUWING: De machine is niet geschikt voor gebruik door personen met een
verminderde mentale of fysieke gesteldheid of een gebrek aan ervaring, tenzij de persoon
wordt begeleid of geïnstrueerd door een persoon verantwoordelijk voor de veiligheid
Bewaar deze voorschriften voor toekomstig gebruik.
1) Veiligheid in de werkruimte
a) Houd de werkruimte schoon en zorg voor een goede verlichting. Rommelige en donkere
ruimtes leiden vaak tot ongelukken.
b) Gebruik het gereedschap niet in explosieve atmosferen, als in de aanwezigheid van vlam bare
vloeistoffen, gassen en stof.
c) Houd kinderen en omstanders uit de buurt wanneer u elektrisch gereedschap bedient.
Door afleiding kunt u de controle over het gereedschap verliezen.
2) Persoonlijke veiligheid
a) Blijf alert en gebruik uw gezonde verstand wanneer u elektrisch gereedschap bedient.
Gebruik het elektrisch gereedschap niet wanneer u vermoeid bent of onder invloed bent
van drugs, alcohol of medicijnen. Onoplettendheid tijdens het bedienen van elektrisch
gereedschap kan leiden tot ernstig letsel.
b) Maak gebruik van persoonlijke bescherming. Draag altijd een veiligheidsbril.
Passende bescherming voor de omstandigheden, zoals een stofmasker, niet-slippende
veiligheidsschoenen een helm of gehoorbescherming, vermindert het risico op persoonlijk
letsel.
c) Voorkom onopzettelijk starten. Zorg ervoor dat de schakelaar in de uit-stand staat wanneer
het gereedschap niet gebruikt wordt en maak gebruik van andere voorzorgsmaatregelen om
onopzettelijk starten te voorkomen
d) Verwijder alle stel- of moersleutels voordat u het elektrische gereedschap inschakelt.
Een moer- of stelsleutel die zich op een draaiend onderdeel van het elektrische gereedschap
bevindt, kan leiden tot letsel.
e) Reik niet te ver. Blijf altijd stevig en in balans staan. Zo houdt u meer controle over het
elektrische gereedschap in onverwachte situaties.
f) Draag geschikte kleding. Draag geen loshangende kleding of sieraden. Houd haren,
kleding en handschoenen uit de buurt van bewegende delen. Loshangende kleding,
sieraden en los hangende haren kunnen vast komen te zitten in bewegende delen.
g) Als er onderdelen voor stofafvoer- en stofverzameling worden meegeleverd, sluit deze
dan aan en gebruik deze op de juiste wijze. Het gebruik van deze onderdelen kan het risico
op stof gerelateerde ongelukken verminderen.
WAARSCHUWING: Bloodstelling aan trilling kan leiden tot gevoelloosheid, tintelen en verminderde
grip bekwaamheid. Op de lange termijn kan het leiden tot chronische condities. Limiteer de lengte
van blootstelling aan trilling. Gebruik de gegevens in de specificaties van het gereedschap om de
gebruiksduur en –frequentie te berekenen. De 2002/44-EEG richtlijn met betrekking tot trilling in
de werkruimte bevat mogelijk bruikbare informatie. Bij een oncomfortabel gebruik ten gevolge van
trilling stopt u onmiddellijk met het gebruik van het gereedschap
WAARSCHUWING: Wanneer het geluidsniveau boven de 85 dB(A) reikt is het dragen
van gehoorbescherming een must. Wanneer geluidsniveaus, zelfs tijdens het dragen van
gehoorbescherming, oncomfortabel hoog zijn, stop dan met het gebruiken van het gereedschap en
controleer of het juiste dempingsniveau gegeven wordt
3) Gebruik en verzorging
a) Het onderhouden van gereedschap. Controleer op een verkeerde uitlijning of binden
van bewegende onderdelen, beschadiging aan onderdelen en andere condities wat het
gebruik beïnvloed. In geval van beschadiging, vervangt u het gereedschap onmiddellijk.
Vele ongelukken worden veroorzaakt door slecht onderhouden gereedschap
b) Houd snijwerktuigen scherp en schoon. Goed onderhouden snijwerktuigen met scherpe
messen slaan minder snel vast en zijn gemakkelijker te bedienen.
c) Gebruik de accessoires in overeenstemming met deze instructies, waarbij rekening
gehouden wordt met de werkomstandigheden en het uit te voeren werk. Het gebruik van
het gereedschap voor taken, anders dan waarvoor het bestemd is, kan resulteren in gevaarlijke
situaties
4) Onderhoud
a) Laat uw gereedschap onderhouden door een gekwalificeerde vakman en gebruik alleen
identieke vervangstukken.
Veiligheid interne verbranding
Gevaarlijke omgeving
• Gebruik benzinegereedschap niet in vochtige of natte omstandigheden, en stel het niet bloot aan
regen. Zorg voor voldoende werkruimte en verlichting.
• Gebruik benzinegereedschap niet op plaatsen met ontploffings- of brandgevaar omwille van
brandbaar materiaal, vloeistoffen, gassen of stof van explosieve aard.
Uitschakelen
• Zorg ervoor dat de motor is uitgeschakeld voordat u accessoires op het gereedschap bevestigd.
• Als het gereedschap onverwacht stopt, wacht dan tot de motor gestopt is met draaien voordat u
het gereedschap inspecteert.
Inlopen van de motor
• Laat de motor wanneer het gereedschap nieuw is op een matig toerental draaien.
• Laat de motor pas op volle toeren draaien als hij volledig is ingelopen.
• De motor zal pas aan het eind van de inloopperiode op maximaal vermogen lopen.
• Wanneer u het gereedschap voor het eerst gebruikt, controleer dan of alle bouten en moeren
goed zijn aangedraaid en draai ze zo nodig alsnog aan.
• Gebruik geen methanol of ethanol bevattende brandstoffen omdat deze de brandstoftank en de
brandstofleidingen intern kan beschadigen.
Waarschuwing
• Laat het gereedschap nooit achter wanneer het ingeschakeld is
• Laat het gereedschap nooit achter wanneer onderdelen heet zijn
Onderhoud
• Wij raden aan om het gereedschap kort na het eerste gebruik een onderhoudsbeurt te laten
geven.
• Zorg bij normaal gebruik regelmatig voor een onderhoudsbeurt.
• Modificeer de onderdelen van dit gereedschap niet. Daarmee vervalt niet alleen de garantie
maar het kan tevens leiden tot letsel aan uzelf of mensen om u heen.
• Onderhoud moet altijd worden uitgevoerd door een bevoegd persoon.
Opbergen
• Maak het gereedschap na gebruik helemaal schoon.
• Zorg ervoor dat u de brandstoftank en de brandstofleidingen niet beschadigd raken als u het
toestel op de grond is geplaatst.
• Laat het gereedschap niet vallen waar schade resulteert in een onveilig gebruik
• Berg het gereedschap buiten bereik van direct zonlicht op.
• Zorg ervoor dat brandstof en olie op een veilige plaats, buiten bereik van hitte, direct zonlicht,
ontstekingsbronnen en kinderen worden opgeborgen.
• Doe het volgende als de machine gedurende langere tijd niet in gebruik is:
• Maak de brandstoftank volledig leeg.
• Bescherm alle metalen motoronderdelen tegen roestvorming door ze in te smeren met olie.
469258_Z1MANPRO1.indd 16 25/04/2016 09:02

NL
17
• Verwijder de bougie, druppel een kleine hoeveelheid olie in de cilinder en trek 2 of 3 maal aan
het startkoord om de olie gelijkmatig te distribueren.
• Breng de bougie weer aan.
• Laat de machine nooit onbeheerd achter wanneer er kinderen bij kunnen.
ZODRA DE MOTOR DRAAIT PRODUCEERT DIT PRODUCT GIFTIGE UITLAATGASSEN. DEZE
GASSEN KUNNEN KLEUR- EN GEURLOOS ZIJN. OM HET RISICO OP ERNSTIG OF DODELIJK
LETSEL TE VERMINDEREN MAG DE MACHINE NOOIT BINNEN OF IN SLECHT GEVENTILEERDE
RUIMTEN WORDEN GEBRUIKT. ZORG VOOR GOEDE VENTILATIE BIJ HET WERKEN IN GREPPELS
OF ANDERE BESLOTEN RUIMTEN.
Grastrimmer veiligheid
WAARSCHUWING: Benzine gassen zijn ontvlambaar, rook niet tijdens het gebruik van de
grastrimmer
• Controleren het gebied op verborgen voorwerpen als bedrading, beton, stenen, hekwerk, kabels
enz. Zorg ervoor dat het te snoeien materiaal vrij is van obstakels alvorens met de klus te
beginnen.
• Draag te allen tijde geschikte veiligheidsuitrusting. Handschoenen, een veiligheidsbril of
gezichtsmasker, een stofmasker, oorbeschermers, een helm en stevige kleding zijn vereist
• Je lichamelijke conditie zelf beoordelen. Het gebruik van een grastrimmer, zelfs een kleiner
model, is lichamelijk veel eisend. Nooit met een klus beginnen tenzij overtuigd van een goede
conditie en sterk genoeg om de klus te voltooien. De grastrimmer nooit gebruiken wanneer
vermoeid, onwel of onder invloed van verdovende middelen als drugs of alcohol
• Controleren of anderen op een veilige afstand van de werkplek staan alvorens met de klus te
beginnen.
• De grastrimmer niet in natte omstandigheden gebruiken. Zorg ervoor dat het te snoeien
materiaal droog is alvorens met de klus te beginnen
• De grastrimmer niet gebruiken wanneer beschermkappen ontbreken of beschadigd zijn
• De grastrimmer alleen rechtovereind gebruiken, met de haspel of het snijmes dicht bij de grond
• Loop langzaam wanneer u de grastrimmer draagt. Pas gemaaid gras of gesnoeide struiken zijn
glad en kunnen hindernissen verbergen
• Uitsluitend authentiek nylon snoeidraad of gespecialiseerde snijmessen gebruiken. Het gebruik
van andere soorten snij middelen is zeer gevaarlijk
• Kom niet, met uw armen of benen, in de buurt van het snijmes tijdens het snoeien. Sta altijd in
een stabiele houding uit de buurt van de plek waar gesnoeid wordt
• Zet de machine onmiddellijk uit wanneer deze vast loopt. Trek de stekker uit het stopcontact
voordat u het probleem op lost
• Wees voorbereid op mogelijke terugslag. Onder sommige omstandigheden, bij onjuist gebruik,
kan de grastrimmer terugslaan in de richting van de gebruiker. Door een juist gebruik en
onderhoud van het apparaat wordt de kans op terugslag aanzienlijk kleiner
• Zet de grastrimmer uit alvorens grindpaden of wegen over te steken
• Schakel de machine niet in niet/slecht-geventileerde ruimtes in. Er bestaat een kans op
vergiftiging door uitlaatgassen
• Schakel de motor uit voordat u de machine neerlegt. Verplaats/transporteer de machine niet
wanneer de motor is ingeschakeld
• Zorg ervoor dat alle bevestigingsmiddelen goed vast zitten. Gebruik de machine niet wanneer
deze onjuist afgesteld is en/of niet volledig samengesteld is. Maak enkel gebruik van geschikte/
gekeurde accessoires
• Houdt een goede balans. Gebruik de machine niet op oneven ondergronden waar de kans
bestaat dat u uitglijdt of uw evenwicht verliest
• Houd alle lichaamsdelen uit de buurt van het maaidraad. Zorg er bij het starten van de machine
voor dat het maaidraad niets raakt
• Houdt de beschermkap, maaidraad en motor te allen tijde vrij van vuilophoping
• Voorzie de machine niet van brandstof wanneer onderdelen van het brandstofsysteem
beschadigd zijn
• Roken en het aansteken van kachels, etc. in de buurt van de machine is verboden
• Plaats ontvlambare materialen/vloeistoffen nooit in de buurt van de motoruitlaat
Onderdelenlijst
1. Beschermkap montagepunt
2. Lage aandrijfschacht
3. Schacht vergrendelknop
4. Klikpin
5. Klemmechanisme
6. Hulphandvat
7. Smoorsamenstelling
8. Ontstekingsschakelaar
9. Uit-stand vergrendelhendel
10. Gashendel
11. Handvat
12. Repeteerstarter
13. Harnas clip
14. Hoge aandrijfschacht
15. Chokehendel
16. Choke positie indicator
17. Luchtkastbehuizing
18. Brandstofpomp
19. Ontstekingskabel
20. Uitlaat
21. Brandstoftank
22. Brandstoftank dop
23. Maaidraad lengteregelaar
24. Beschermkap
25. Snoeikopsamenstelling
26. Spoel
27. Maaidraad
28. Snoeikop vergrendelknop
Accessoires (niet afgebeeld):
• Schouderband
• Inbusbout
• Inbusmoer
• Bougiesleutel
• 2 x inbussleutels
Gebruiksdoel
Grastrimmer met 30 cm32-takt motor, voor het trimmer van gras en licht struikgewas in de tuin.
Voorzien van een trekker schakelaar, dubbele handvaten voor een optimaal gebruikscomfort en
–gemak
469258_Z1MANPRO1.indd 17 25/04/2016 09:02

18
NL
Het uitpakken van uw gereedschap
• Pak uw toestel / gereedschap uit. Inspecteer het en zorg dat u met alle kenmerken en functies
vertrouwd raakt
• Controleer of alle onderdelen aanwezig zijn en in goede staat verkeren. Als er onderdelen
ontbreken of beschadigd zijn, zorg dan dat deze vervangen worden voor u dit toestel /
gereedschap gebruikt
Voor gebruik
WAARSCHUWING: Maak geen aanpassingen en voer geen onderhoud uit wanneer de motor is
ingeschakeld. Zorg ervoor dat de ontstekingsschakelaar (8) in de STOP positie staat
Het samenstellen van de schacht
1. Schuif de beschermkap (24) over de lage aandrijfschacht (2) (Afbeelding A)
2. Vergrendel de beschermkap op het montagepunt (1) met gebruik van de inbegrepen inbusbout,
inbusmoer en inbussleutel (Afbeelding B)
3. Draai de schacht vergrendelknop (3) los
4. Lijn de klikpin (4) met het gat van het klemmechanisme (5) uit (Afbeelding C)
5. Druk de klikpin in en plaats de lage schacht in het klemmechanisme. De klikpin vergrendelt in
het gat van het klemmechanisme (Afbeelding D)
Let op: Zorg ervoor dat de interne as juist is uitgelijnd. Wanneer de interne as onjuist uitgelijnd
wordt bij het aansluiten van de aandrijfschacht, voelt u duidelijke weerstand
6. Vergrendel de schachten samen door de schacht vergrendelknop vast te draaien
Het bevestigen van het hulphandvat
1. Verwijder de twee inbusbouten die de klem van het hulphandvat (6) vasthouden met behulp van
de inbegrepen inbussleutel
2. Plaats het hulphandvat over de hoge aandrijfschacht (14) en pas de positie aan, passend bij
de gebruiker
3. Draai de inbusbouten vast om het handvat in plaats te vergrendelen
Het vullen van de brandstoftank
WAARSCHUWING: Vul de brandstoftank (21) NOOIT met een draaiende motor. Schakel de machine
uit en wacht tot deze volledig afgekoeld is
WAARSCHUWING: Ben uiterst voorzichtig. Brandstof is licht ontvlambaar
WAARSCHUWING: Gebruik geen ethanol en methanol bevattende brandstoffen waar deze de
brandstofleidingen mogelijk beschadigen
Let op: Gebruik enkel 40:1 brandstof/olie mengsels in deze 2-takt motor. Bij het gebruik van andere
verhoudingen slijt de machine vroegtijdig
• Gebruik verse, ongelode benzine. Maak enkel gebruik van 100% synthetische olie, geschikt voor
zwaar belaste 2-takt motors
1. Meng de benzine en brandstof in een geschikte container. Meng benzine en olie nooit direct in
de brandstoftank (15)
2. Plaats de eenheid op de zij, op een stevige ondergrond, zodat de brandstoftank dop (22) omhoog
wijst. Veeg enig vuil rondom de tankopening weg
3. Schroef de dop los en giet het mengsel in de brandstoftank met gebruik van een trechter
Let op: Zorg ervoor dat u het mengsel niet morst. Veeg enig gemorste mengsel schoon
4. Wanneer de brandstoftank gevuld is, draait u de dop onmiddellijk op de tank vast
5. Voordat u de motor start, plaatst u de machine minimaal 3 meter van de plek waar u de tank
gevuld hebt, om de kans op brand te minimaliseren
Gebruik
WAARSCHUWING: Bij het gebruik van de machine is het dragen van de geschikte
beschermende uitrusting, waaronder beschermende handschoenen, een veiligheidsbril en
gehoorbeschermers aanbevolen
Het inlopen van de motor
• Laat de motor tijdens de eerste 5 uur op een gematigde snelheid lopen
• De motor bereikt het maximale uitgaande vermogen aan het eind van de inloopperiode
Beschrijving Uit te voeren werk Voor elk gebruik Na 1 maand/ eerste 20 uur Elke 3 maanden/
50 uur Elke 6 maanden/ 100 uur Elke 12 maanden/ 300 uur
Luchtfilter
Inspectie X
Schoonmaak X
Bougie Schoonmaak
& verstelling X
Verbrandingskamer Schoonmaak
X
(Enkel geautoriseerd
GMC service center)
Brandstof leidingen Inspectie &
schoonmaak X
Bevestigingsmiddelen
en aansluitingen
Vastdraaien en
vervangen wanneer
vereist
X
Onderhoudsschema
469258_Z1MANPRO1.indd 18 25/04/2016 09:02

NL
19
Het starten van de motor
1. Plaats de ontstekingsschakelaar (8) in de ‘I’ positie
2. Lijn de chokehendel (15) met de blauwe lijn op de choke positie indicator (16) uit, om de choke
te sluiten en voor te bereiden op het starten van de motor (Afbeelding E)
Let op: Dit is enkel vereist wanneer de motor koud is
3. Druk de brandstofpomp (18) ongeveer 6 keer in (Afbeelding F), zodat het mengsel in
4. Plaats de machine op de grond en houdt deze met uw voet op het handvat (11) in plaats. Oefen
slecht een kleine druk met uw voet uit
Let op: Wanneer u te veel druk uitoefent raakt de beschermkap (24) mogelijk beschadigd. Slecht een
kleine druk is vereist om de druk van de repeteerstarter (12) op te vangen
5. Trek 2-3 keer aan de repeteerstarter (9) tot de motor start
6. Druk de choke hendel naar beneden in het rode deel van de indicator (warme start)
(Afbeelding G)
Let op: Als de motor uitvalt, start u de motor door de choke hendel in positie te laten en aan de
epeteerstarter te trekken
7. Laat de motor 10 seconden onbelast lopen zodat deze kan opwarmen
Het stoppen van de motor
WAARSCHUWING: Nadat de motor gestopt is, draait het maaidraad (27) voor een korte tijd door
1. Laat de gashendel (10) los en laat de motor voor een aantal seconden stationair draaien
2. Plaats de ontstekingsschakelaar (8) in de uitstand, gemarkeerd met STOP
Gashendel bediening
• Houdt het handvat (11) met uw dominante hand vast en druk de uit-stand schakelaar (9) in zodat
de gashendel bedient kan worden en de snelheid van het snoeidraad (27) verhoogd
Het gebruik van de machine
WAARSCHUWING: Bij het gebruik van de machine is het dragen van de geschikte beschermende
uitrusting, waaronder beschermende handschoenen, een veiligheidsbril en gehoorbeschermers
aanbevolen
• De schouderband dient over de linker schouder van de gebruiker geplaatst te worden, met het
handvat (11) voor controle over de gashendelsamenstelling (7) en de linker hand gepositioneerd
voor het controleren van de snoeikopsamenstelling (25)
Let op: Verwijs naar ‘Het bevestigen van het hulphandvat’ voor instructies betreft het juiste gebruik
van het handvat
• Houd de snoeikopsamenstelling (3) te allen tijde parallel aan de grond
• De machine is geschikt voor het snoeien van gras en licht struikgewas
• Check het snoeigebied en stel de vereiste snoeihoogte vast. Houdt de kopsamenstelling op de
vereiste hoogte voor het verkrijgen van gelijke snoeiresultaten
• Beweeg de trimmer in een vloeiende beweging heen en weer
• Bedien de machine alleen. Zorg ervoor dat het snoeigebied (15 m straal) vrij is van omstanders
• Houdt een zekere houding aan bij het gebruik van de machine
• Gebruik de machine niet in de regen
• Zorg ervoor dat de machine uitgeschakeld is en de schakelaar (8) in de STOP stand staat voordat
u vreemde voorwerpen van de snoeikop verwijdert
• De maaidraadspoel (26) is voorzien van een stootvoeding. Stoot de onderkant van de spoel
vergrendelknop (28) tegen de grond terwijl u een matige snelheid aanhoudt, om maaidraad (27)
vrij te geven
Let op: Wanneer het maaidraad niet juist vrijgegeven wordt, schakelt u de machine uit, wacht u tot
de spoel volledig tot stilstand komt en plaats u de ontstekingsschakelaar (8) in de STOP positie voor
dat u de kop inspecteert
Accessoires
• Verschillende accessoires en verbruiksmiddelen, waaronder stervorming maaidraad, ‘Heavy-
Duty’ nylon maaidraad en harnas zijn verkrijgbaar bij uw GMC handelaar. Reserve onderdelen
zijn verkrijgbaar op toolsparesonline.com
Onderhoud
WAARSCHUWING: Bij het onderhouden van de machine is het dragen van de geschikte
beschermende uitrusting, waaronder werkhandschoenen en een veiligheidsbril aanbevolen.
Onderhoud de machine enkel in een goed geventileerde ruimte
WAARSCHUWING: Houdt de machine uit de buurt van open vlammen, rook niet in de buurt van de
machine en zorg ervoor dat benzinegassen en gemorst benzine ontstekingsbronnen niet kunnen
bereiken
WAARSCHUWING: Verwijderde olie en brandstoffen dienen in geschikte container opgeborgen te
worden en volgens plaatselijke wetten en regelgeving verwijderd te worden
WAARSCHUWING: Schakel de machine uit en wacht tot alle onderdelen volledig afgekoeld zijn
voordat u de machine schoon maakt en/of enig onderhoud uitvoert
Let op: Het onderhoudsschema dient naar gebruik en omstandigheden aangepast te worden.
Wanneer de machine frequenter en in zwaardere omstandigheden gebruikt word, zijn kortere
onderhoudsintervallen vereist
Maaidraad installatie
Het verwijderen van de spoelsamensteling:
1. Zorg ervoor dat de motor uitgeschakeld is en de ontstekingsschakelaar (8) in de STOP stand
staat
2. Houdt de kopsamenstelling (25) vast
3. Draai de vergrendelknop (28) en verwijder de spoelsamenstelling (Afbeelding H)
Het vervangen van het maaidraad
1. Met de snoeikopsamenstelling gedemonteerd, verwijder snoeilijn resten (27) van de spoel
2. Snij 6 m lengte van 2 mm snoeidraad
3. Steek het midden van de snoeilijn in de inkeping in het midden van de spoel (26) (Afbeelding I)
4. Wikkel de lijn rpd de twee spoel delen in de rchting aangeduid op de bovenkant van de spoel
(Afbeelding J)
Het installeren van de spoel
1. Steek de losse uiteinden van het maaidraad door de gaten van de spoelkop (25)
2. Bevestig de spoel op de trimkop samenstelling
3. Bevestig de snoeikopsamenstelling op de lage aandrijfschacht (2) en vergrendel in plaas met de
vergrendelknop (28)
Let op: Zorg ervoor dat de 6-hoekige inkeping op de kopsamenstelling volledig over het 6-hoekige
deel van de lage aandrijfschacht valt
4. Na het wisselen van het maaidraad schakelt u de machine onbelast voor minimaal een minuut
in om er zeker van te zijn dat het maaidraaden de machine juist functioneren
Let op: Maak enkel gebruik van spoelen die aanbevolen zijn door de fabrikant (Zie: ‘Accessoires’)
Bougie onderhoud
1. Voor het verkrijgen van toegang tot de bougie, ontkoppel de ontstekingskabel (19) bovenop de
motor eenheid (Afbeelding K)
2. Verwijder de bougie met gebruik van de bougiesleutel (Afbeelding L)
3. Plaats de neuwe bougie in de machine en draai de laatste kwartslag met de bougiesleutel
469258_Z1MANPRO1.indd 19 25/04/2016 09:02

20
NL
Luchtfilter onderhoud
Let op: Stof in de luchtfilter vermindert de motor efficiëntie, verhoogt het brandstofverbruik en zorgt
voor de ingang van schurende deeltjes in de motor. Maak de filter regelmatig schoon
1. Verwijder de luchtfilter kap (17) door de kruiskopschroef aan de voorzijde van de kap
(Afbeelding M) los te draaien en de zijkanten van de kap in te drukken
2. Tik tegen de filter om licht oppervlaktestof te verwijderen
3. Was de filter met een geschikt oplosmiddel voor het verwijderen van hardnekkiger vuil
4. Laat de filter volledig drogen voordat u deze terug op de machine bevestigd
Brandstoffilter onderhoud
• De brandstoftank (21) is voorzien van een filter, aan het uiteinde van de brandstofleiding.
Verwijder de filter door de opening achter de brandstoftank dop (22) met gebruik van een stuk
draad met een gehaakt uiteinde
• Controleer de filter regelmatig volgens het onderhoudsschema. Stof mag de brandstoftank niet
binnendringen. Een verstopte filter resulteert in het lastig starten van de motor en zorgt mogelijk
voor een abnormale motorprestatie
• Vervang de filter wanneer deze vuil is
• Wanneer de binnenkant van de brandstoftank vuil is, spoelt u deze met benzine uit
Algemene inspectie
• Controleer regelmatig of alle bevestigingsmiddelen nog goed vast zitten
Schoonmaak
• Houd uw machine te allen tijde schoon. Vuil en stof doen de interne onderdelen snel slijten, wat
de levensduur aanzienlijk vermindert. Maak de machine met een zachte borstel of droge doek
schoon. Gebruik wanneer mogelijk zuivere, droge perslucht om door de luchtgaten te blazen
• Maak de behuizing met een vochtige doek en een licht schoonmaakmiddel schoon. Gebruik
geen alcohol, benzine of hardnekkig schoonmaakmiddel
• Gebruik geen bijtende stoffen voor het schoonmaken van plastic onderdelen
Smeren
• Smeer alle bewegende onderdelen regelmatig met een geschikt smeermiddel
Opberging
• Berg de machine op een droge en veilige plek, buiten het bereik van kinderen op
• Transporteer en berg brandstof in geschikte containers op
• Meng enkel voldoende brandstof voor het uit te voeren werk. Wanneer brandstof voor meer
dan 30 dagen opgeborgen is, dient het voor gebruik met een brandstof stabilisator behandelt
te worden
Wanneer brandstof voor een lange tijd opgeborgen is:
• Leeg de brandstoftank (21) volledig
• Bescherm alle motoronderdelen tegen roestvormig door deze in te smeren met olie
• Verwijder de bougie, voorzie de cilinder van een aantal druppels olie en trek 2-3 keer aan de
repeteerstarter om de olie te verspreiden. Plaats de bougie terug
Verwijdering
Bij de verwijdering van elektrische machines neemt u de nationale voorschriften in acht.
• Machines, aangedreven door een benzinemotor, dienen niet met het huishoudelijk afval
weggegooid te worden. Verwijder de eenheid volgens de plaatselijke wetgeving bij uw
plaatselijke recyclecenter
• Benzine, olie en mengsels zijn schadelijk en dienen als schadelijk behandelt te worden. Olie
en brandstoffen dienen niet met het huishoudelijk afval weggegooid te worden. Onjuiste
verwijdering is mogelijk strafbaar. Neem contact op met uw gemeente voor informatie
betreffende de verwijdering van olie en brandstof
469258_Z1MANPRO1.indd 20 25/04/2016 09:02
Table of contents
Languages:
Other GMC Trimmer manuals