4 ENGLISH Grindmaster®Model RC400
General Information
This operating manual includes instructions for using
and maintaining your coffee brewer; keep this manual
readily available.
After unpacking your brewer, check to ensure that your
machine has not been damaged during shipping and
includes all components. Notify your service
representative regarding any questions or concerns
before installing.
During various stages of operation, you may hear
normal operating sounds that are unfamiliar. The
following noises are normal:
Buzzing/Clicking - Heard when the water pump
energizes and/or the three way valve opens and
closes to dispense water or direct water to reservoir.
Popping – A damaged RealCup™ capsule could
result in a popping sound.
Pulsating/Whirring – Under normal operating
conditions, an internal air pump activates at the end
of a brewing cycle and you will hear it while
energized.
Water running or gurgling – On a pour over
installation, you will hear gurgling when reservoir
is empty before the end of a brew cycle. On an auto
fill installation, you will hear this sound as the
brewer automatically refills.
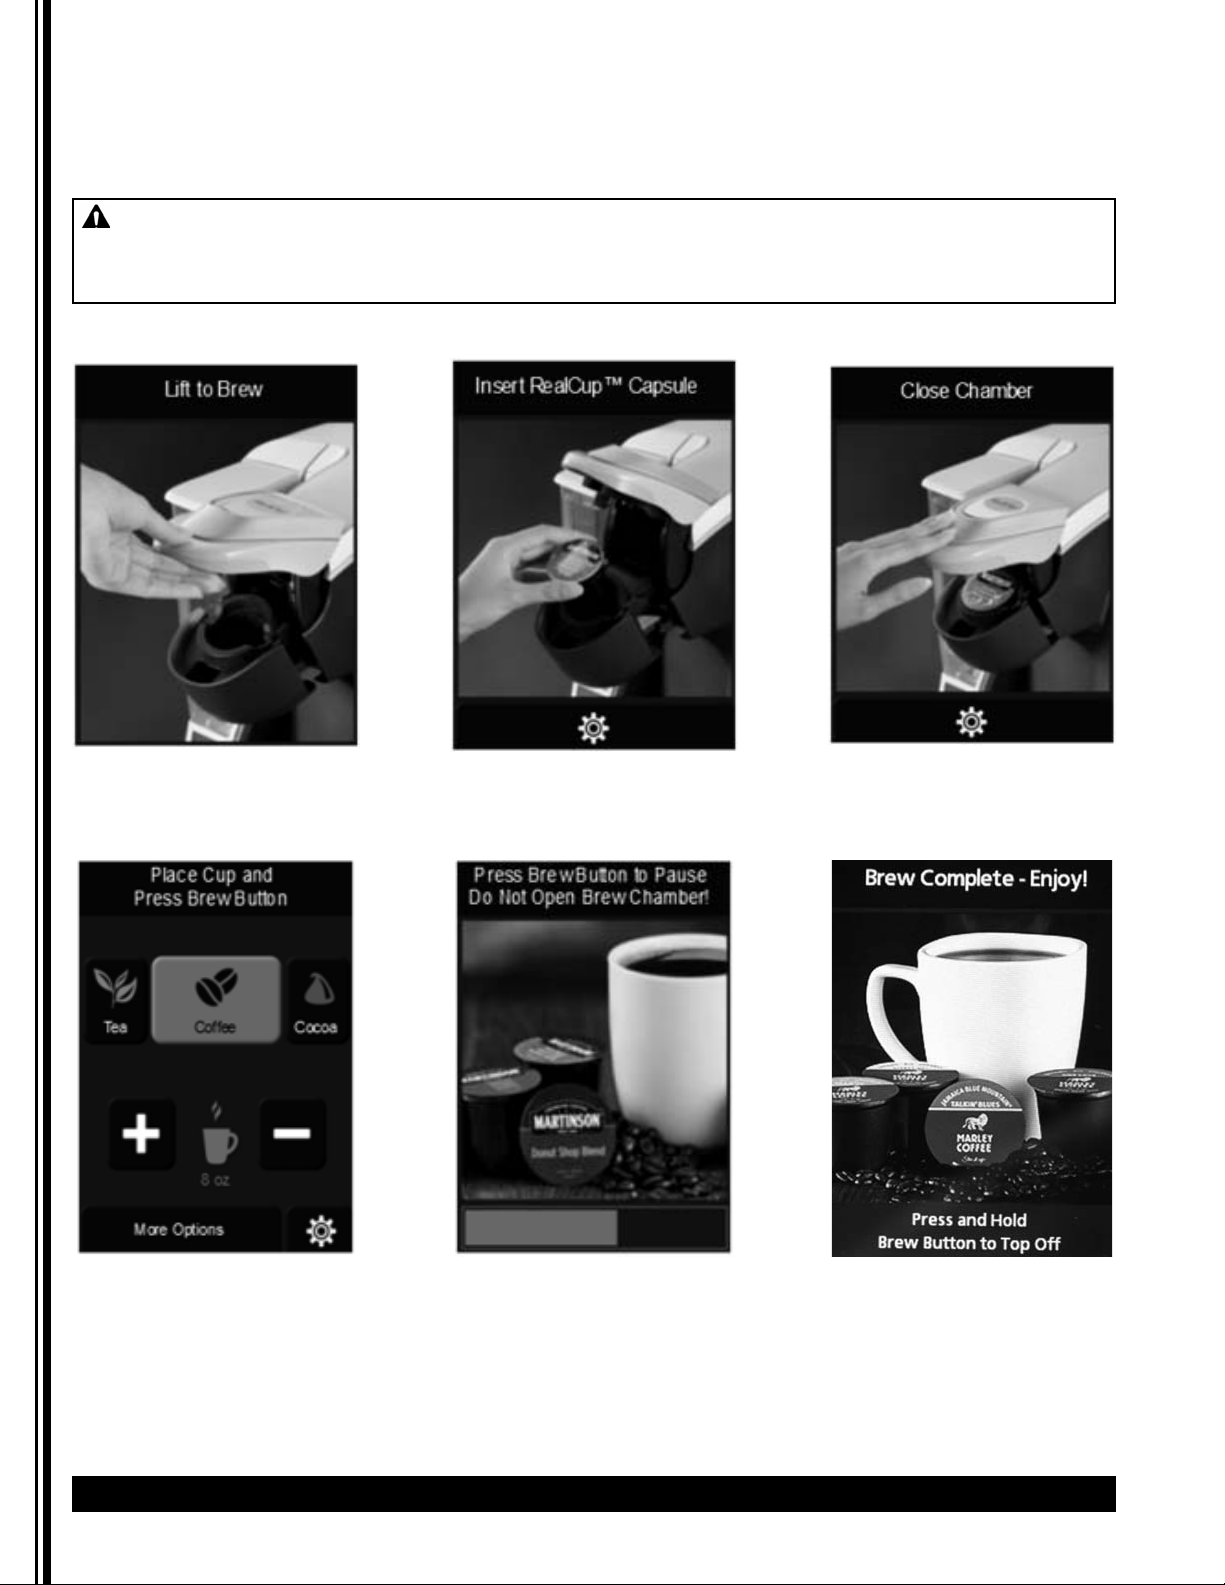
Do not use a damaged RealCup™ capsule or re-insert a
capsule that has been previously inserted & removed.
This may result in coffee grounds and unwanted
material inside the brew chamber and the drinking cup
or mug. Damage to RealCup™ capsule can include but
is not limited to damage around the edge of the foil
seal or denting and deformation of the RealCup™
capsule.
To ensure food safety and proper operation, clean
machine regularly following the daily and weekly
cleaning instructions. Cleaning and water evacuation
instructions are found in the Cleaning and
Maintenance section of this manual.
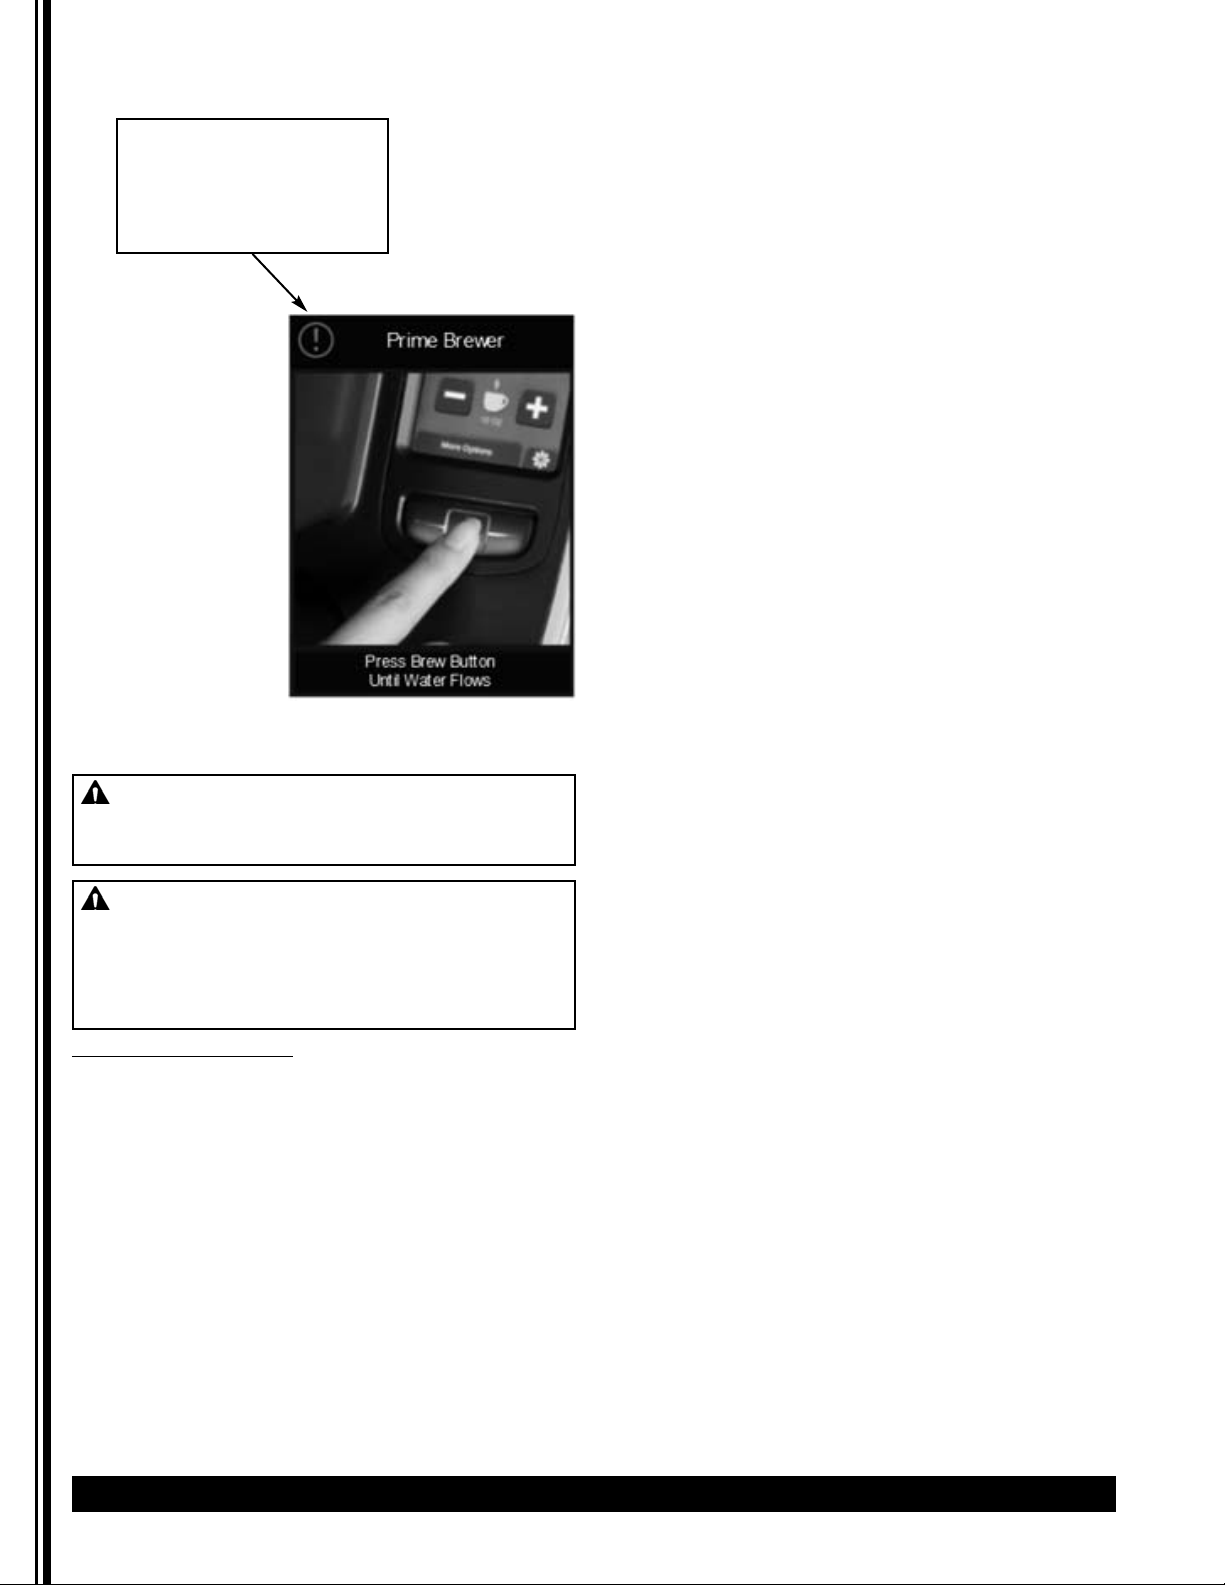
When turning off the machine for an extended period,
be sure to evacuate the water inside the brewer
completely. Otherwise, the water inside the machine
could freeze and lead to damage or cause mold to
appear.
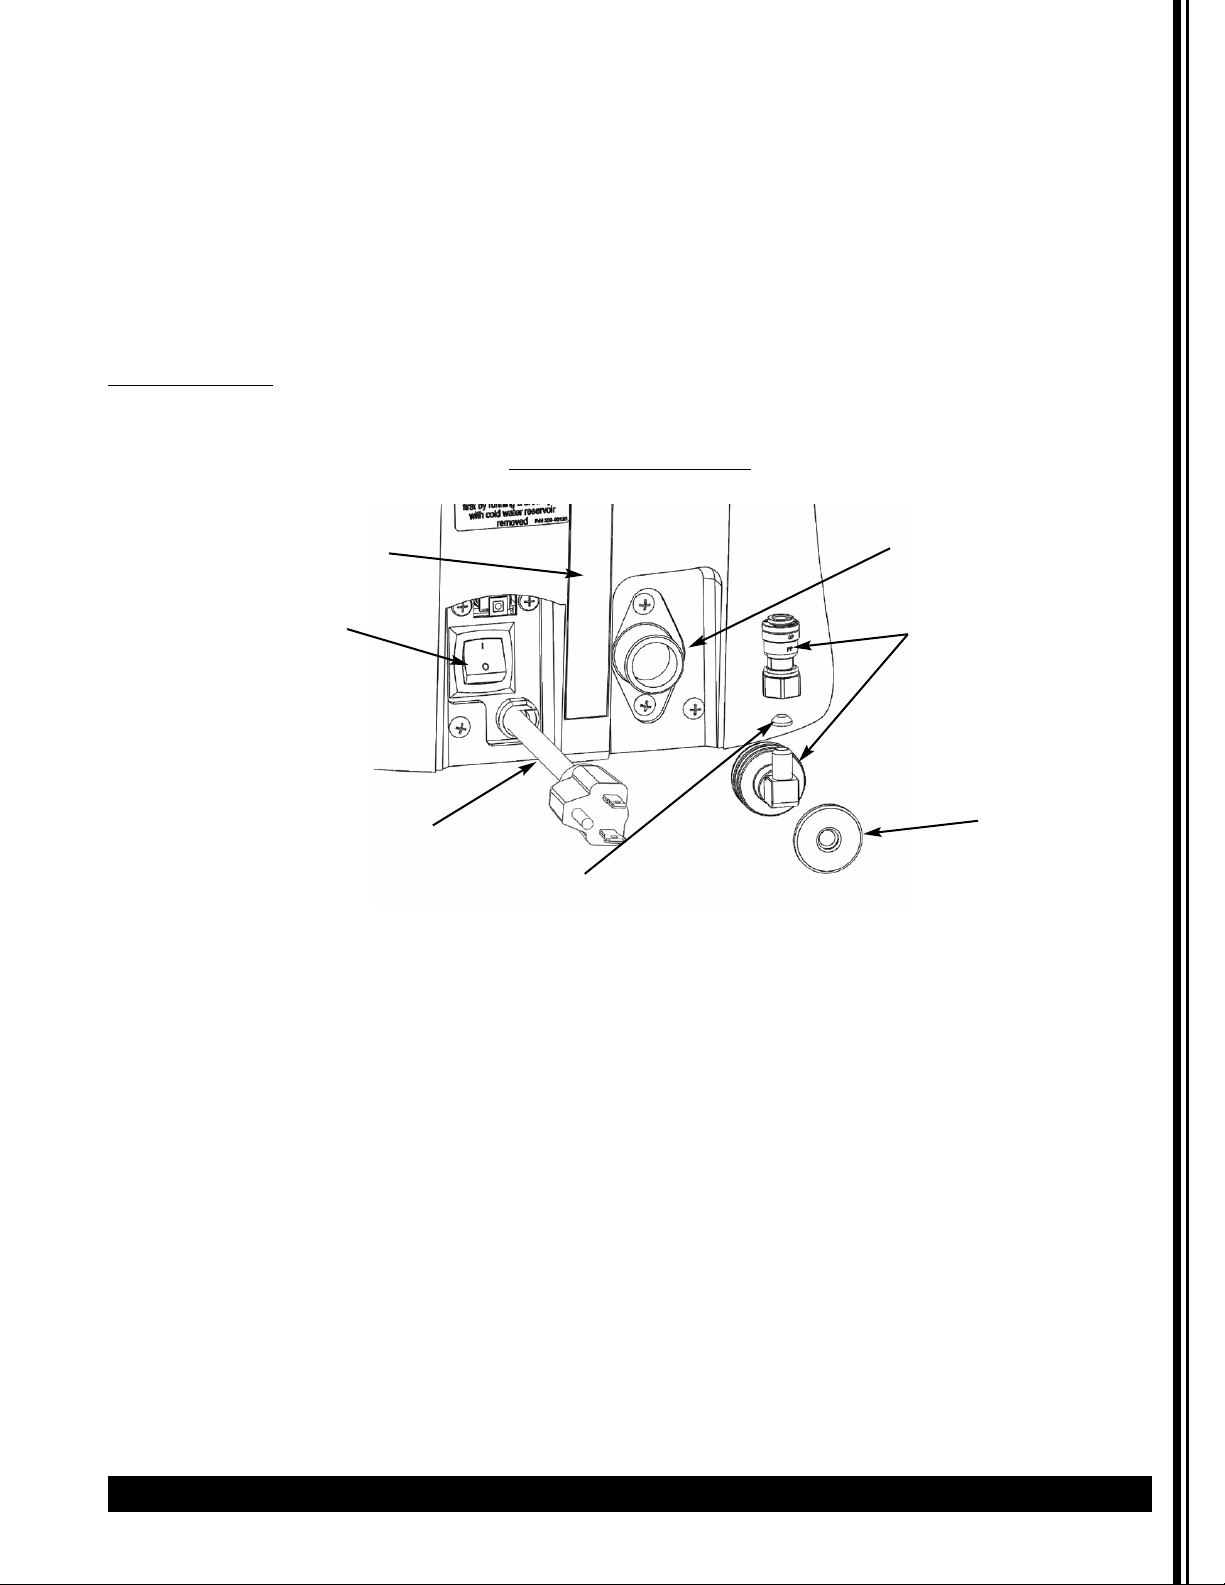
Water pipe connections and fixtures directly connected
to a potable water supply shall be sized, installed, and
maintained in accordance with federal, state, and local
codes. This product requires an approved back flow
prevention device, such as a double check valve, to be
installed between the machine and the water supply.
To prevent foreign material from entering the brewer,
keep brew chamber and reservoir lid closed.
To ensure proper operation of the electronic controls,
do not use reverse osmosis, distilled, or de-ionized
water.
The RC400 brewer hot water temperature is factory set
at 195°F (90.6°C). If your brewer is operated above 4000
feet in elevation, set point adjustment may become
necessary. If the brewer reservoir fogs or experiences
hot water dripping into the reservoir, this indicates the
set point must be lowered. In addition, if the set point
is too high, you could experience less than expected
brew volumes.
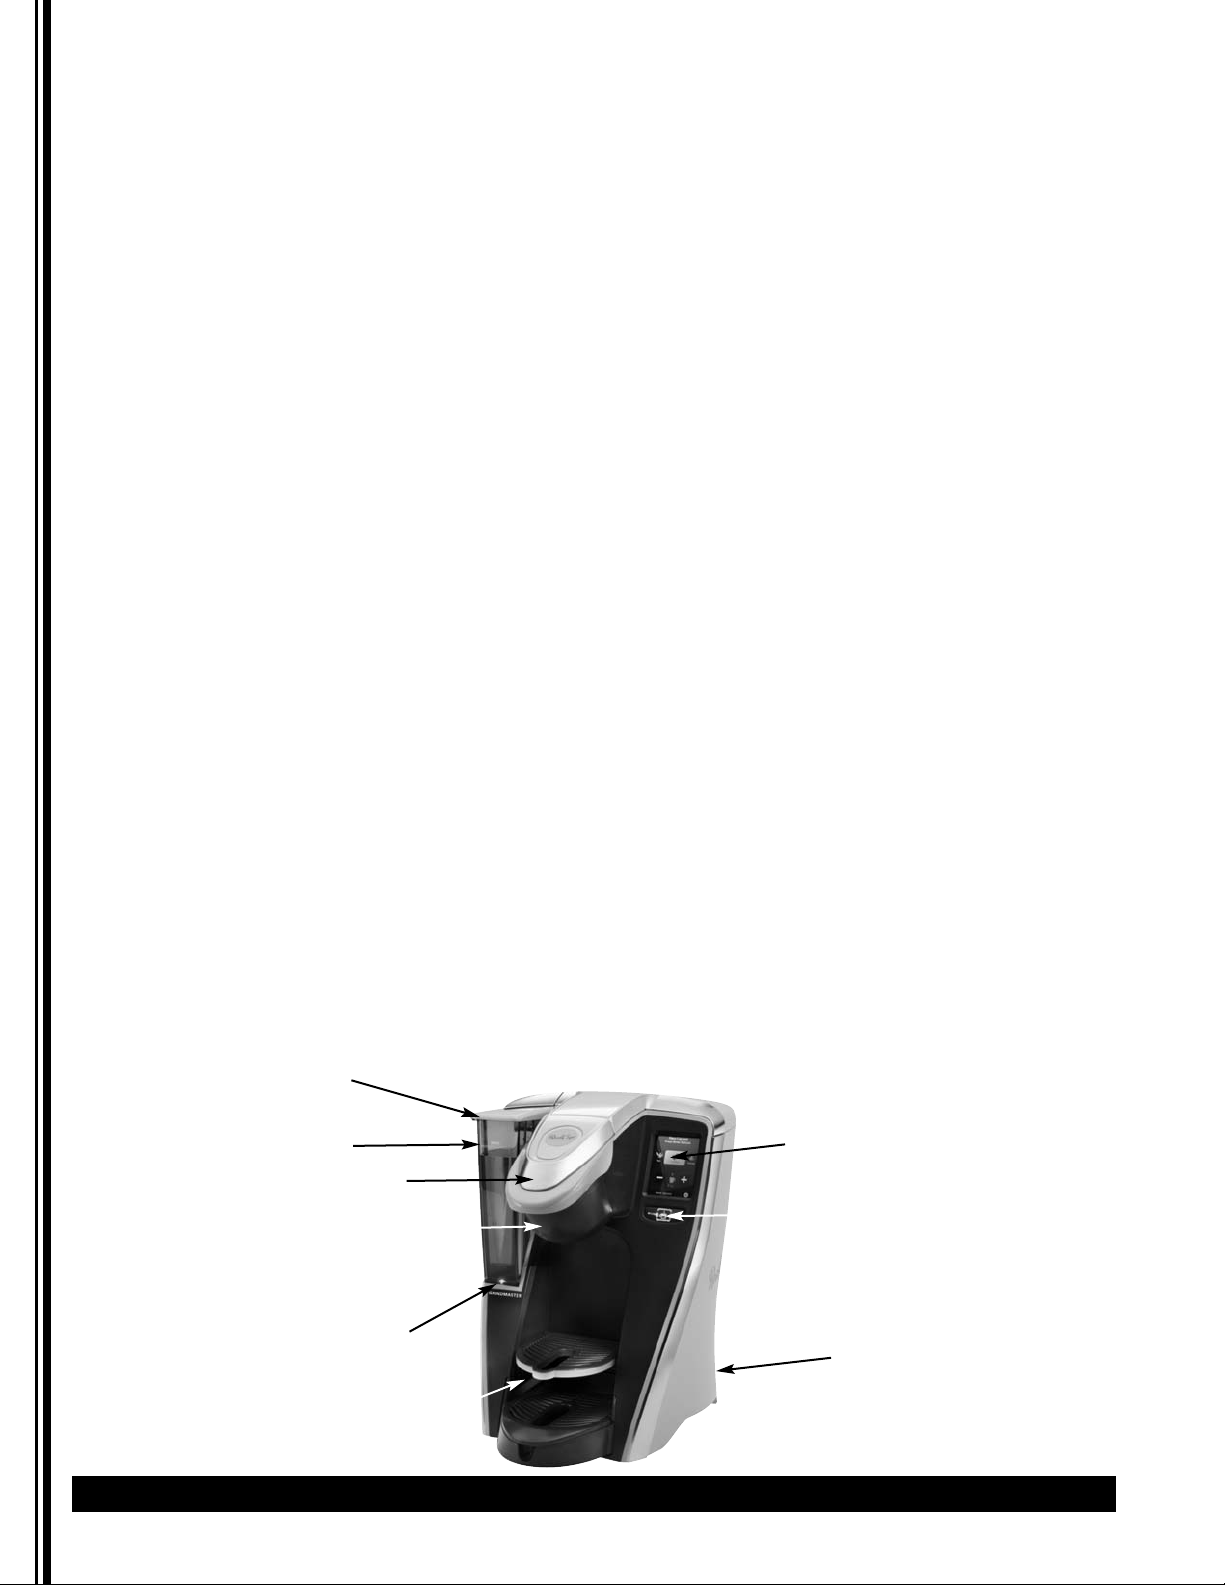
RC400 Features
Reservoir
Reservoir Lid
Brew Chamber Lid
Bezel
Reservoir LED
Pull Down Tray
Screen
Brew Button
Power Switch
(back side of brewer)