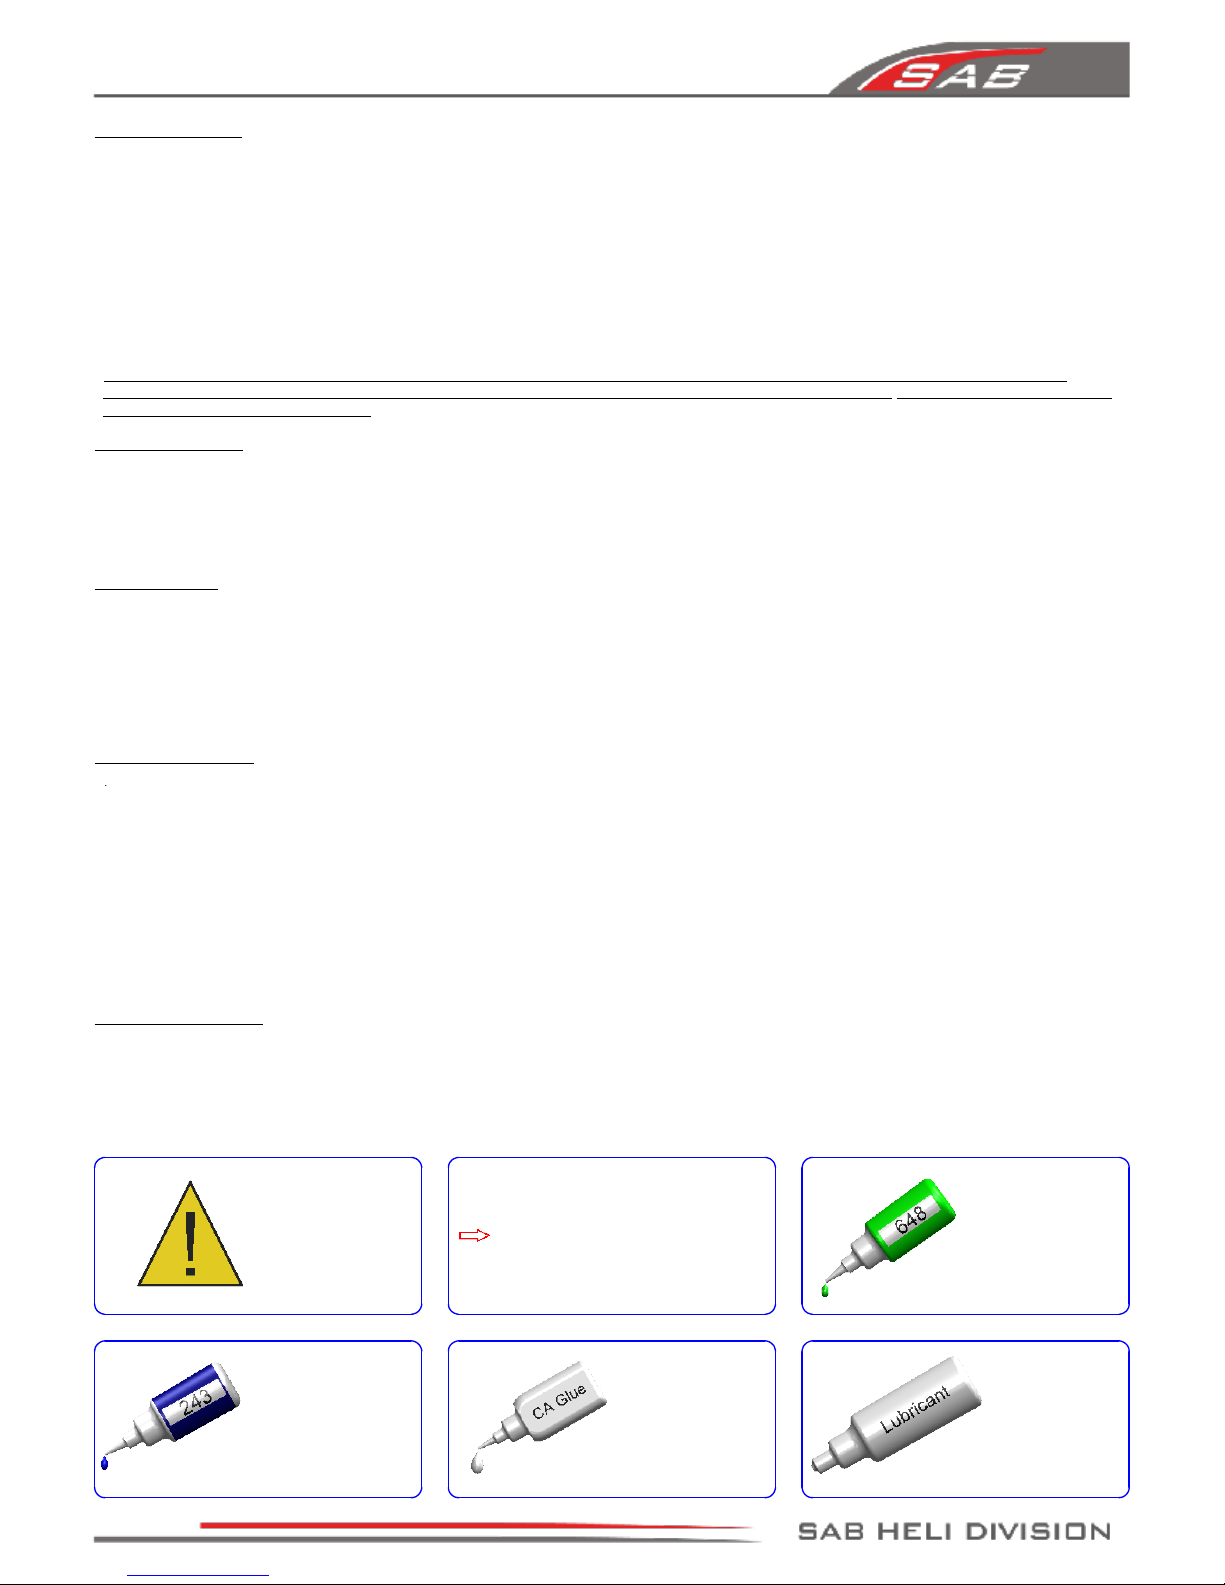
Goblin Goblin 770 Sport User manual

SAB HELI DIVISION

Goblin 770 Sport
Release 1.0 - June 2018
WORLD DISTRIBUTION
www.goblin-helicopter.com
For sales inquiries, please email:
For info inquiries, please email:
Attention: If you are a consumer and have questions or need of assistance,
please contact in a first time the Goblin retailer where you made the purchase
EUROPEAN DISTRIBUTION
www.sabitaly.it
For sales and information, please email:
Attention: If you are a consumer and have questions or need of assistance,
please contact in a first time the Goblin retailer where you made the purchase
USA DISTRIBUTION
www.sabusa.com
For sales and information, please email:
Attention: If you are a consumer and have questions or need of assistance,
please contact in a first time the Goblin retailer where you made the purchase

1427mm
389mm
192mm
Main rotor diameter:
1688mm ( with 750 mm Main blades )
Tail rotor diameter:
302mm ( with 115 Tail blades )
Max blades dimension:
Main blades 770mm with Tail blades 105mm
Main blades 766mm with Tail blades 115mm
Air frame weight:
2850g
Motor size:
Maximum 64mm diameter, maximum height 64mm
Battery compartment:
60x58x350mm
SPECIFICATIONS
It is extremely important that you take a moment to register your helicopter with us. This is the only way to ensure that you are
properly informed about changes to your kit, such as upgrades, retrofits and other important developments. SAB Heli Division
cannot be held responsible for issues arising with your model and will not provide support unless you register your serial number.
The Serial number is also engraved in the Aluminum Main Plate.
Thank you for your purchase, we hope you enjoy your new Goblin helicopter!
SAB Heli Division
VERY IMPORTANT
In the Manual bag you will find a product card your with serial number. Please take a moment to register
your kit online via our web site at:
Please read this user manual carefully, it contains instructions for the correct assembly of the model.
Please refer to the web site www.goblin-helicopter.com for updates and other important information.
http:
//www.goblin-helicopter.com
13 – Installation of the Boom, Canopy
14 – Battery
15 – In flight
16 – Maintenance
17 – Spare Parts
INDEX
1 – Serial Number
2 – Important Notes
3 – Components and Box
4 – Carbon frame Assembly
5 – Trasmission Assembly
6 – Main rotor
7 – Assembling The Modules
8 – Installation of Swashplate Servos
9 – Installation of The Motor
10 – Installation of The ESC
11 – Installation of Flybarless Unit and RX
12 – Tail Assembly
Page 1
Chapter 1, Serial Number

Use CA Glue
Use Proper
Lubricant
Indicates that for
this assembly phase
you need materials
that are in bag xx.
Bag xx
IMPORTANT NOTES
*This radio controlled helicopter is not a toy.
*This radio controlled helicopter can be very dangerous.
*This radio controlled helicopter is a technically complex device which has to be built and handled very carefully.
*This radio controlled helicopter must be built following these instructions. This manual provides the necessary information to correctly
assemble the model. It is necessary to carefully follow all the instructions.
*Inexperienced pilots must be monitored by expert pilots.
*All operators must wear safety glasses and take appropriate safety precautions.
*A radio controlled helicopter must only be used in open spaces without obstacles, and far enough from people to minimize the possibility of
accidents or of injury to property or persons.
*A radio controlled helicopter can behave in an unexpected manner, causing loss of control of the model, making it very dangerous.
*Lack of care with assembly or maintenance can result in an unreliable and dangerous model.
*
Neither SAB Heli Division nor its agents have any control over the assembly, maintenance and use of this product. Therefore, no
responsibility can be traced back to the manufacturer. You hereby agree to release SAB Heli Division from
any responsibility or liability
arising from the use of this product.
SAFETY GUIDELINES
*Fly only in areas dedicated to the use of model helicopters.
*Follow all control procedures for the radio frequency system.
*It is necessary that you know your radio system well. Check all functions of the transmitter before every flight.
*The blades of the model rotate at a very high speed; be aware of the danger they pose and the damage they may cause.
*Never fly in the vicinity of other people.
DAMAGE LIMITS
SAB HELI DIVISION SHALL NOT BE LIABLE FOR SPECIAL, INDIRECT OR CONSEQUENTIAL DAMAGES, LOSS OF PROFITS OR PRODUCTION OR
COMMERCIAL LOSS IN ANY WAY CONNECTED WITH THE PRODUCT, WHETHER SUCH CLAIM IS BASED IN CONTRACT, WARRANTY,
NEGLIGENCE, OR STRICT LIABILITY. Further, in no event shall the liability of SAB Heli Division exceed the individual price of the Product on
which liability is asserted. As SAB Heli Division has no control over use, setup, final assembly, modification or misuse, no liability shall be
assumed nor accepted for any resulting damage or injury. By the act of use, setup or assembly the user accepts all resulting liability. If you as
the Purchaser or user are not prepared to accept the liability associated with the use of this Product, you are advised to return this Product
immediately in new and unused condition to the place of purchase.
LIMITED WARRANTY.
SAB Heli Division reserves the right to change or modify this warranty without notice and disclaims all other warranties, express or implied.
(a)
This warranty is limited to the original Purchaser (“Purchaser”) and is not transferable. REPLACEMENT AS PROVIDED UNDER THIS
WARRANTY IS THE EXCLUSIVE REMEDY OF THE PURCHASER This warranty covers only those Products purchased from an authorized SAB Heli
Division dealer. Third party transactions are not covered by this warranty. Proof of purchase is required for warranty claims.
(b)
Limitations- SAB HELI DIVISION MAKES NO WARRANTY OR REPRESENTATION, EXPRESS OR IMPLIED, ABOUT NONIFRINGEMENT,
MERCHANTABILITY OR FITNESS FOR A PARTICULAR PURPOSE OF THE PRODUCT. THE PURCHASER ACKNOWLEDGES THAT THEY ALONE HAVE
DETERMINED THAT THE PRODUCT WILL SUITABLY MEET THE REQUIREMENTS OF THE PURCHASER’S INTENDED USE.
(c)
Purchaser Remedy- SAB Heli Division’s sole obligation hereunder shall be that SAB Heli Division will, at its option, replace any Product
determined by SAB Heli Division to be defective In the event of a defect, this is the Purchaser’s exclusive remedy. Replacement decisions are
at the sole discretion of SAB Heli Division. This warranty does not cover cosmetic damage or damage due to acts of God, accident, misuse,
abuse, negligence, commercial use, or modification of or to any part of the Product. This warranty does not cover damage due to improper
installation, operation, maintenance or attempted repair by anyone
NOTES FOR ASSEMBLY
Please refer to this manual for assembly instructions for this model. Follow the order of assembly indicated. The instructions are divided into
chapters, which are structured in a way that each step is based on the work done in the previous step. Changing the order of assembly may
result in additional or unnecessary steps.
Use thread lockers and retaining compounds as indicated. In general, each bolt or screw that engages with a metal part requires thread lock.
It is necessary to pay attention to the symbols listed below:
Important
Use Thread Locker
Medium Strength
( SAB HA116-S)
Use retaining
compound
( SAB HA115-S )
Page 2
Chapter 2, Important Notes

ADDITIONAL COMPONENTS REQUIRED
*Electric Motor: 12S/14S – 400/530Kv
Maximum diameter 64mm,
Maximum height 64mm,
Pinion shaft diameter 6/8mm
*Speed controller: minimum 160A to be safe
*Batteries: 12S/14S – 5000mAh
*1 flybarless 3 axis control unit
*Radio power system, if not integrated with the ESC
*3 cyclic servos
*1 tail rotor servo
*6 channel radio control system on 2.4 GHz
(See configuration examples on page 17)
The assembly process is described in the following chapters.
Each chapter provides you with the box, bag and/or foam
tray numbers you will need for that chapter. The information
is printed in a green box in the upper right hand corner of the
page at the beginning of every chapter.
TOOLS, LUBRICANTS, ADHESIVES
*Generic pliers
*Hexagonal driver, size 1.5, 2, 2.5, 3, 4, 5mm
*4mm T-Wrench
*5.5mm Socket wrench (for M3 nuts)
*8mm Hex fork wrench (for M5 nuts)
*Medium threadlocker (eg. Loctite 243)
*Strong retaining compound (eg. Loctite 648)
*Spray lubricant (eg. Try-Flow Oil)
*Synthetic grease (eg. Tri-Flow Synthetic Grease)
*Grease ( eg. Vaseline grease )
*Cyanoacrylate adhesive
*Pitch Gauge (for set-up)
*Soldering equipment (for motor wiring)
Inside the main box:
Box 2: Canopy, Blade Holder.
Box 3: Boom, Carbon rod.
Box 4: Mechanical parts in 4 trays:
Tray 1: Main rotor
Tray 2: Carbon frame and tail rotor
Tray 3: Transmission
Tray 4: Main structure
Box 5: Bags
Box 6: Carbon parts
Box 7: Empty
Inside the main box there are:
Tray 1
Tray 2
Tray 3
Manual
BOX 6
BOX 7
BOX 2
BOX 4
BOX 5
BOX 3
Tray 4
Page 3
Chapter 3, Components and Box

The manufacturing process of the carbon parts
often leaves micro-burrs and sharp edges. We
recommend de-burring the edges to minimize
the risks of electrical wire cuts, etc. Very
important in red line zone.
Page 4
Chapter 4, Carbon Frame

Flat Head Cap
Screw M2.5x5mm
(HC128-S)
ESC Support
(H0153-S)
Flat Head Cap
Screw M2.5x5mm
(HC128-S)
Flat Head Cap
Screw M2.5x5mm
(HC128-S)
Flat Head Cap Screw
M2.5x5mm
(HC128-S)
Frame Spacer
(H0003-S)
Frame Spacer
(H0003-S)
Frame Spacer
(H0003-S)
Flat Head Cap
Screw M2.5x5mm
(HC128-S)
Battery Tray
(H0002-S)
Stop Battery Plate
(H0150-S)
Socket Head Cap
Screw M2.5x8mm
(HC020-S)
BAG 1.1, BAG 1.2, FOAM 2, BOX 6
Battery Tray Assembly
Right Main Frame Assembly
Battery Tray
Assembly
Socket Head Cap
Screw M3x8mm
(HC050-S)
Finishing
Washer M3
(H0007-S)
Main Frame
(H0976-S)
Socket Head Cap
Screw M3x8mm
(HC050-S)
Socket Head Cap
Screw M3x8mm
(HC050-S)
Finishing
Washer M3
(H0007-S)
Note
Use Loctice in all Screw
Finishing
Washer M3
(H0007-S)
Frame Spacer
(H0003-S)
Note
Page 5
Chapter 4, Carbon Frame

BAG 1.2, BAG 1.3, BOX 7
Main Frame
(H0976-S)
Finishing
Washer M3
(H0007-S)
Socket Head Cap
Screw M3x8mm
(HC050-S)
Left Main Frame Assembly
Cable Pass
(HA010-S)
Socket Head Cap
Screw M3x8mm
(HC050-S)
Finishing
Washer M3
(H0007-S)
Socket Head Cap
Screw M3x8mm
(HC050-S)
Right Main Frame
Assembly
Note:
You can use Super Glue to lock
the nuts in correct position.
Metric Hex
Nylon Nut M3
(HC206-S)
Landing Gear ROD
[H0431]
Oring
[HC453]
Landing Gear Plug
[H0432]
PlasticLanding
Gear F3C
(H0449-S)
Plastic Landing Gear Assembly
Finishing
Washer M3
(H0007-S)
Note
Use Loctice in all Screw
Page 6
Chapter 4, Carbon Frame

BAG 1.3
Socket Head Cap
Screws M3x14mm
[HC064]
Socket Head Cap
Screws M3x14mm
[HC064]
Finishing Washer M3
(H0007-S)
Finishing Washer M3
(H0007-S)
Plastic Landing Gear
Assembly
Set Screw M4x4mm
(HC152-S)
Set Screw M4x4mm
(HC152-S)
Main Frame
Assembled
Page 7
Chapter 4, Carbon Frame

Page 8
Chapter 5, Transmission Assembly

Bearing Support Assembly
(H0024-S)
Bearing
12x
24x6mm
(HC426-S)
Flat Head Cap Screw
M2.5x5mm
(HC128-S)
Socket Head Cap
Screw M3x8mm
(HC050-S)
Socket Head Cap
Screw M3x10mm
(HC056-S)
Column
(H0018-S)
Bearing
10x
19x5mm
(HC422-S)
Note:
Socket Head Cap
Screw M3x10mm
(HC056-S)
Main Structure
(H0009-S)
Antenna Guide
(H0050-S)
Button Head Cap
Screw M3x4mm
(HC038-S)
Swash plate
Anti-Rotation Guide
(H0152-S)
Bearing
12x
24x6mm
(HC426-S)
Finishing Washer M3
(H0007-S)
Column
(H0018-S)
Socket Head Cap
Screw M3x10mm
(HC056-S)
Servo Support
(H0010-S)
Bearing
10x
19x5mm
(HC422-S)
BAG 2, FOAM 3, FOAM 4
Page 9
Chapter 5, Transmission Assembly

One Way Bearing
10x
14x12mm
(HC442-S)
60T Pulley Assembly
(H0171-S)
Bearing
10x
15x4mm
(HC420-S)
Socket Head Cap Screw
Shouldered M2.5x19mm
(HC033-S)
Note:
When you tighten the collar (
H0121-S
) on the main
shaft, ensure there is no axial play.
Push down the main shaft while pulling up the
locking collar. Tighten the screw
M4x22
at this time.
One Way Bearing
10x
14x12mm
(HC442-S)
Bearing
10x
15x4mm
(HC420-S)
R
6.25
4.8
Main Shaft
(H0127-S)
Main Structure
Assembly 1
Socket Head Cap Screw
Shouldered M4x24mm
(HC111-S)
Metric Hex
Nylon Nut M4
(HC212-S)
Metric Hex
Nylon Nut M4
(HC212-S)
Socket Head Cap
Screw M4x22mm
(HC104-S)
Socket Head Cap
Screw Shouldered
M3x18mm
(HC079-S)
60T Pulley
(H0171-S)
60T Pulley Assembly
(H0171-S)
Socket Head Cap
Screw M2x10mm
(HC010-S)
Front Tail Pulley Assembly
(H0172-S)
Bush One Way
(H0110-S)
It is very important to
lubricate the pinion and the
main gear with a lubricant
( ex: TRI-FLOW GREASE
or similar).
The perfect play is 0.5mm
add or remove shim for this
Note:
Correct insertion of
the one-way pulley
37T Pulley
(H0172-S)
Metric Hex
Nylon Nut M3
(HC206-S)
19T Drive Pinion
(H0361-S)
Secondary Shaft
(H0157-S)
M4 Locking Collar
(H0121-S)
Washer
10x
16x0.2mm
(HC232-S)
Metric Hex Nylon
Nut M2.5
(HC200-S)
BAG 3, FOAMS 1, 3
Main Gear
(H0320-S)
eg: HUDY One Way
Pulley Oil
eg: Microlube GL261
Front Tail Pulley
Assembly
Page 10
Chapter 5, Transmission Assembly

Belt Tensioner
Arm
Washer
3x
4x0.5mm
(HC176-S)
Belt Tensioner Support
(H0174-S)
Socket Head Cap
Screw M3x12mm
(HC062-S)
Tail Belt Idler Assembly
(H0174-S)
Belt Tensioner Arm
Assembly
Washer
3.2x
6x0.5mm
(HC180-S)
Socket Head Cap Screw
Shoulder M3x40mm
(HC091-S)
Main Structure
Assembly
Tail Belt Idler
Assembly
Button Head Cap
Screw M3x4mm
(HC038-S)
Belt Tensioner Arm Assembly
(H0174-S)
Note:
Position without preload.
Insert the screw in the
hole through the aluminum
support as in the picture.
Flanged Bearing
3x
7x3mm
(HC402-S)
Tail Belt Idler
[H0069]
Flanged Bearing
5x
9x3mm
(HC410-S)
Spring
de 8 / df0.5 / LL8
[HC312]
BAG 4, FOAM 3
Page 11
Chapter 5, Transmission Assembly

Motor Mount
(H0142-S)
Socket Head Cap
Screw M3x10mm
(HC056-S)
Finishing Washer M3
(H0007-S)
Spring
[HC310]
(HC315-S)
Washer
5.3x
15x1mm
(HC188-S)
Metric Hex Nylon
Nut M5
(HC218-S)
34mm
21mm
6mm
7mm
0.2mm
Set Screw
M4x6mm
(HC153-S)
Button Head Cap
Screw M4x8mm
(HC098-S)
20T Pulley
(H0175-20-S)
Install motor pulley after installing H0142.
(See page 17 for optional pulley selection).
Spring
[HC314]
(HC315-S)
Note for 6mm motor shaft
To maximize space for the batteries, it
is advisable to shorten the motor shaft.
Follow the dimensions given in this
drawing. For the cut, you can use an
electric tool like a “Dremel” with a cut-
off disc.
Additionally, ensure the motor shaft
has an appropriate 'flat' for one of the
set screws.
Socket Head Cap
Screw M3x8mm
(HC050-S)
Bearing support (H0143-S)
Install H0142 after mounting the motor.
The motor shaft requires a centered
pulley. H0142 can not be used with an
8mm motor shaft.
Bushing
6x
8x18mm
(H0176-S)
Use with 6mm
motor shaft.
Flanged Bearing
6x
13x5mm
(HC414-S)
Socket Head Cap
Screw M3x10mm
(HC056-S)
Set Screw M5x20mm
(HC158-S)
Motor Support
(H0143-S)
Motor
BAG 5, FOAM 3, FOAM 4
Page 12
Chapter 5, Transmission Assembly

Note: Larger ID
Note: Smaller ID
Approx 76mm
BAG 6, FOAM 1
Center Hub Assembly
Center Hub
(H0135BM-S)
Oring
(HA024-S)
Damper Derlin
(H0426-B-S)
Spindle
(H0079-S)
Radius Arm Assembly ... x2
Uniball Arm Assembly ... x2
Flanged Bearing
2.5x
6x2.5mm
(HC400-S)
Spacer Arm
2.5x
4x6.3mm
[H0253]
Uniball
Radius Arm
[H0205]
Flanged Bearing
3x
7x3mm
(HC402-S)
Radius Arm
(H0132BM-S)
Spacer Arm
3x
5x2.7mm
[H0134]
Main Blade Grip Assembly ...x2
Blade Grip
(H0719BM-S)
Blade Grip Arm
(H0183BM-S)
Bearing
10x
19x5mm
(HC422-S)
Socket Head Cap
Screw M4x10mm
(HC102-S)
Uniball M3
(H0065-S)
Socket Head Cap
Screw M2.5x18mm
(HC032-S)
Uniball Arm
Assembly
Radius Arm
Assembly
Socket Head Cap
Screw M3x16mm
(HC068-S)
Washer
3x
4x0.5mm
(HC176-S)
Linkage Rod
Assembly
Main Blade Grip
Assembly
Thrust Bearing
10x
18x5.5mm
(HC438-S)
Washer
10x
16x1mm
(HC230-S)
Bearing
10x
19x5mm
(HC422-S)
Washer
6x
14 x1.5mm
(HC194-S)
Socket Head Cap
Screw M6x10mm
(HC124-S)
Washer
10x
16x1mm
(HC230-S)
Washer
10x
16x0.2mm
[HC232-S]
Linkage Rod A Assembly ...x2
Plastic Ball Link
(H0402-S)
Plastic Ball Link
(H0402-S)
Linkage Rod
M3x50mm
(H0417-S)
(Initial length for the rods from the swashplate
to the Blade Grip.)
eg: Microlube GL261
eg: Microlube GL261
Note:
The HPS head should be assembled with one, 1mm shim (HC230) and one,
0.2mm shim (HC232) on each side. The blade grips must move freely, but
they should not move just under their own weight. If the blade grips are too
tight, you can remove the 0.2mm shim (HC232) from each side. After
approximately 10/20 flights, please check preload, you can add one or two
0.2mm shim (HC232) if preload has changed.
Chapter 6,Head
Page 13

Socket Head Cap
Screw M3x12mm
(HC062-S)
Carbon Frame
Assembly
Head HPS
Assembly
Central Group
Assembly
Socket Head Cap
Screw M3x8mm
(HC050-S)
Metric Hex
Nylon Nut M4
(HC212-S)
Socket Head Cap
Shoudered M4x24mm
(HC111-S)
Finishing
Washer M3
(H0007-S)
BAG 7, FOAM 1, FOAM 2
Canopy Positioner
(H0008-S)
Socket Head Cap
Screw M3x10mm
(HC056-S)
Uniball
(H0063-S)
Uniball M3
(H0065-S)
Uniball M3
(H0065-S)
Swashplate Assemly
(H0422BM-S)
Socket Head Cap
Screw M3x12mm
(HC062-S)
[HC212-S]
[HC062-S]
[HC062-S]
[HC111-S]
Swashplate
Assemly
(H0422BM-S)
Finishing
Washer M3
(H0007-S)
eg: Microlube GL261
Canopy Positioner
(H0008-S)
Use Loctice in all Screw
Note:
Socket Head Cap
Screw M3x8mm
(HC050-S)
Page 14
Chapter 7, Assembling The Modules

ASSEMBLY OF THE BALL ON THE HORN.
The rods going from the servos to the swash plate must be as
vertical as possible. Not all servos are equal, so to better align
them you can choose to use the supplied spacer H0031.
Figure 3
illustrates this.
INSTALLATION OF SWASHPLATE SERVOS
The linkage ball must be positioned between
17-19 mm
out on the servo arm (F
igure 1
), recommended servo arm SAB
p/n [HA050/HA051]. The 120° placement of the servos inside Goblin means the arms are difficult to access. For this reason it is
advisable to ensure alignment of the servo arms (and sub trim set) before installation of the servos in the model.
Proceed with installation following the instructions below.
Figure 2
shows a completed installation.
Uniball M2
5H6
(H0064-S)
Socket Head Cap Screw M2x8mm
(HC008-S)
or
Socket Head Cap Screw M2x6mm
(HC004-S) without Uniball Spacer
Servo 2
SERVO ASSEMBLY 1, 2, 3
Servo 1
Uniball Spacer
[H0031]
(H0064-S)
Socket Head Cap
Screw M2.5x12mm
(HC026-S)
Socket Head Cap
Screw M3x6mm
(HC044-S)
Socket Head Cap
Screw M2.5x8mm
(HC020-S)
Servo 1
Servo 3
Servo Spacer
(H0075-S)
Servo 2
Servo 3
17-19mm
Servo 1
BAG 8
Page 15
Chapter 8, Installation Of Swashplate Servos

Plastic ball link
(H0066-S)
Plastic ball link
(H0402-S)
Plastic ball link
(H0402-S)
Approx 76mm
Approx
55mm
Approx
66mm
Initial length for the rods from the servos to the swash plate.
Approx. 64 mm
Plastic ball link
(H0066-S)
Initial length for the rods from the swashplate to the blade grips.
Set Screw M2.5x40mm
(HC242-S)
Linkade Rod B
Aseembly
Head HPS Version Preliminary Setup
Adjust the linkage as shown. The linkage Rod A has thead right/left.
Turning, you can change the tracking without disconnecting the plastic ball link.
The wire for the front servo must be positioned here
Linkade Rod A
Aseembly
Linkage Rod B Assembly ... x3
Linkage Rod A Assembly ... x2
Linkage Rod
(H0417-S)
BAG 8
Page 16
Chapter 8, Installation Of Swashplate Servos

Note: For safety reasons we suggest to not exceed 2000rpm.
Some example configurations:
TRANSMISSION SETUP
It is important to choose the right reduction ratio to maximize efficiency based on your required
flight performance.
The Goblin has many possible reduction ratios at your disposal. It is possible to optimize any motor
and battery combination.
It is recommended to use wiring and connectors appropriate for the currents generated in a
helicopter of this class.
If you are using a head speed calculator which requires a main gear and pinion tooth count, use
214
teeth for the main gear (this takes into account the two stage reduction) and the tooth count of your
pulley as the pinion count.
Below is a list of available reduction ratios
:
H0175-18-S - 18T Pinion = ratio 11.9:1 H0175-22-S - 22T Pinion = ratio 9.8:1
H0175-19-S - 19T Pinion = ratio 11.3:1 H0175-23-S - 23T Pinion = ratio 9.3:1
H0175-20-S - 20T Pinion = ratio 10.7:1 H0175-24-S - 24T Pinion = ratio 8.9:1
H0175-21-S - 21T Pinion = ratio 10.2:1 H0175-25-S - 25T Pinion = ratio 8.6:1
Page 17
Chapter 9, Installation Of The Motor

Figure 1 shows the motor correctly
wired. It is advisable to cover the wire
joints between the motor and the ESC
with heat shrink tubing.
2 mm
0.75 mm 0.75 mm
Big Motor Belt
(HC309-S)
MOTOR BELT TENSION
*Assemble the motor and pinion to its mounting plate.
*Fit the motor assembly into position.
*Compress the springs by pushing the motor toward the main shaft.
*At maximum compression, temporarily tighten one of the slide screws.
*With the minimum centre distance it is easy to install the belt. First put the belt on the motor pinion.
*Then put the belt around the big pulley.
*Rotate the motor several times by hand.
*Release the screw that locks the slide.
*The springs keep the belt in tension.
*Help the springs by pulling the motor slightly.
*The belt must be very tight.
*Lock all screws.
Motor Assembly
Note:
Check for vertical alignment of
the motor pulley. To do this, simply
turn the motor several times and
check to you see if the belt is aligned
with the big pulley ( one way bearing
pulley ). If the belt is riding too high,
simply loosen up the motor pulley
and drop it just a little bit, if it is
riding too low, loosen up the motor
pulley and raise it a bit.
Correct
Incorrect
Page 18
Chapter 9, Installation Of The Motor
Table of contents
Other Goblin Toy manuals

Goblin
Goblin Goblin Comet User manual

Goblin
Goblin 500S User manual

Goblin
Goblin MINI COMET User manual

Goblin
Goblin 420 User manual

Goblin
Goblin SG651 User manual

Goblin
Goblin SPEED User manual

Goblin
Goblin 380 KYLE STACY EDITION User manual

Goblin
Goblin FIREBALL User manual

Goblin
Goblin Urukay Competition User manual

Goblin
Goblin urukay User manual
Popular Toy manuals by other brands

Jamara
Jamara Tiger Moth Instruction

Hasbro
Hasbro Star Wars Revenge of the Sith Energy Blaster refill... instruction manual

BNF
BNF Blade mCP instruction manual

GREAT PLANES
GREAT PLANES Super Stearman instruction manual

Lionel
Lionel H16-44 owner's manual

Mattel
Mattel MATCHBOX Build Your Own Adventure SQUID SUB quick start guide