Gocycle 3396 Guide

GOCYCLE FRONT PANNIER
(PRODUCT CODE 3396)
Version 1.0
Assembly and adjustment of the Gocycle Front Pannier
(For G2 and G3 Only)

Assembly Guide: Gocycle Front Pannier
© Karbon Kinetics Limited. All Rights Reserved. i
CONTENTS
Overview…………………………………………………………………………………………………………1
Parts List…………………………………………………………………………………………………………1
Tool List…………………………………………………………………………………………………………..1
1. What’s in your Pannier ....................................................................................2
2. Loading the Front pannier onto the Gocycle......................................................4
3. Adjusting the Latch Mechanism........................................................................6

Assembly Guide: Gocycle Front Pannier
© Karbon Kinetics Limited. All Rights Reserved. 1
OVERVIEW
This document details assembly of the Gocycle Front Pannier.
PARTS LIST
To successfully complete the procedure you will require the following parts.
Note: You may
be able to reuse parts on your Gocycle and as such only need to order parts specific to your
repair:
Part Code
Part Description
Quantity
3396
Gocycle Front Pannier
1
TOOL LIST
To successfully complete this procedure, you will require the following tools.
You can
purchase special KKL tools by their tool number detailed below.
Part Code
Tool Description
2375
4 mm Allen Key
If you have any questions, or require any further assistance, please contact
techsupport@gocycle.com

Assembly Guide: Gocycle Front Pannier
© Karbon Kinetics Limited. All Rights Reserved. 2
1. WHAT’S IN YOUR PANNIER
1.1. The Gocycle Front
Pannier is compatible with
the G2 and G3 Gocycle.
1.2. There is a shoulder
strap in the top pocket
which clips onto the two side
buckles.
1.3. When using the
pannier whilst not attached
to the Gocycle, attach the
shoulder strap as shown for
more comfortable carrying.
Note: Whilst riding with the
Gocycle Front Pannier
attached to the Gocycle, the
shoulder strap should be
detached from the buckles
and stowed securely inside
the Gocycle Front Pannier.

Assembly Guide: Gocycle Front Pannier
© Karbon Kinetics Limited. All Rights Reserved. 3
1.4. For comfort while
carrying the pannier rotate
the mounting bracket as
shown.
1.5. This shows the pannier
hinge rotated for comfort
whilst the shoulder strap is
being used.
1.6. A Low Height Light
Bracket (SKU 4219) is
included with the Gocycle
Front Pannier and is
required to be fitted to G2
Gocycles using integrated
lights.
1.7. Note the correct
orientation of the Low
Height Light bracket to
ensure clearance between
the integrated front light and
the Gocycle Front Pannier.
G2 Gocycle only.

Assembly Guide: Gocycle Front Pannier
© Karbon Kinetics Limited. All Rights Reserved. 4
2. MOUNTING THE GOCYCLE FRONT
2.1. Slide the Gocycle Front
Pannier up towards the
handlebar stem as
shown ensuring that
the mounting bracket
is aligned and oriented
with the stem height
adjustment bolt.
2.2. Locate the latch
(attached to the lanyard
from the left pocket). Install
the latch into the hooks as
shown.
2.3. Push and close the
latch as shown until it is fully
closed as shown.

Assembly Guide: Gocycle Front Pannier
© Karbon Kinetics Limited. All Rights Reserved. 5
2.4. This shows the Gocycle
Front Pannier mounted to
the Gocycle and with the
latch in the closed position.
2.5. Attach the Velcro
safety strap around the
handlebar stem as shown.
Ensure the Velcro safety
strap holds the Gocycle
Front Pannier securely to the
handlebar stem.
Note: Never ride with the
Velcro safety strap not
secured as shown!
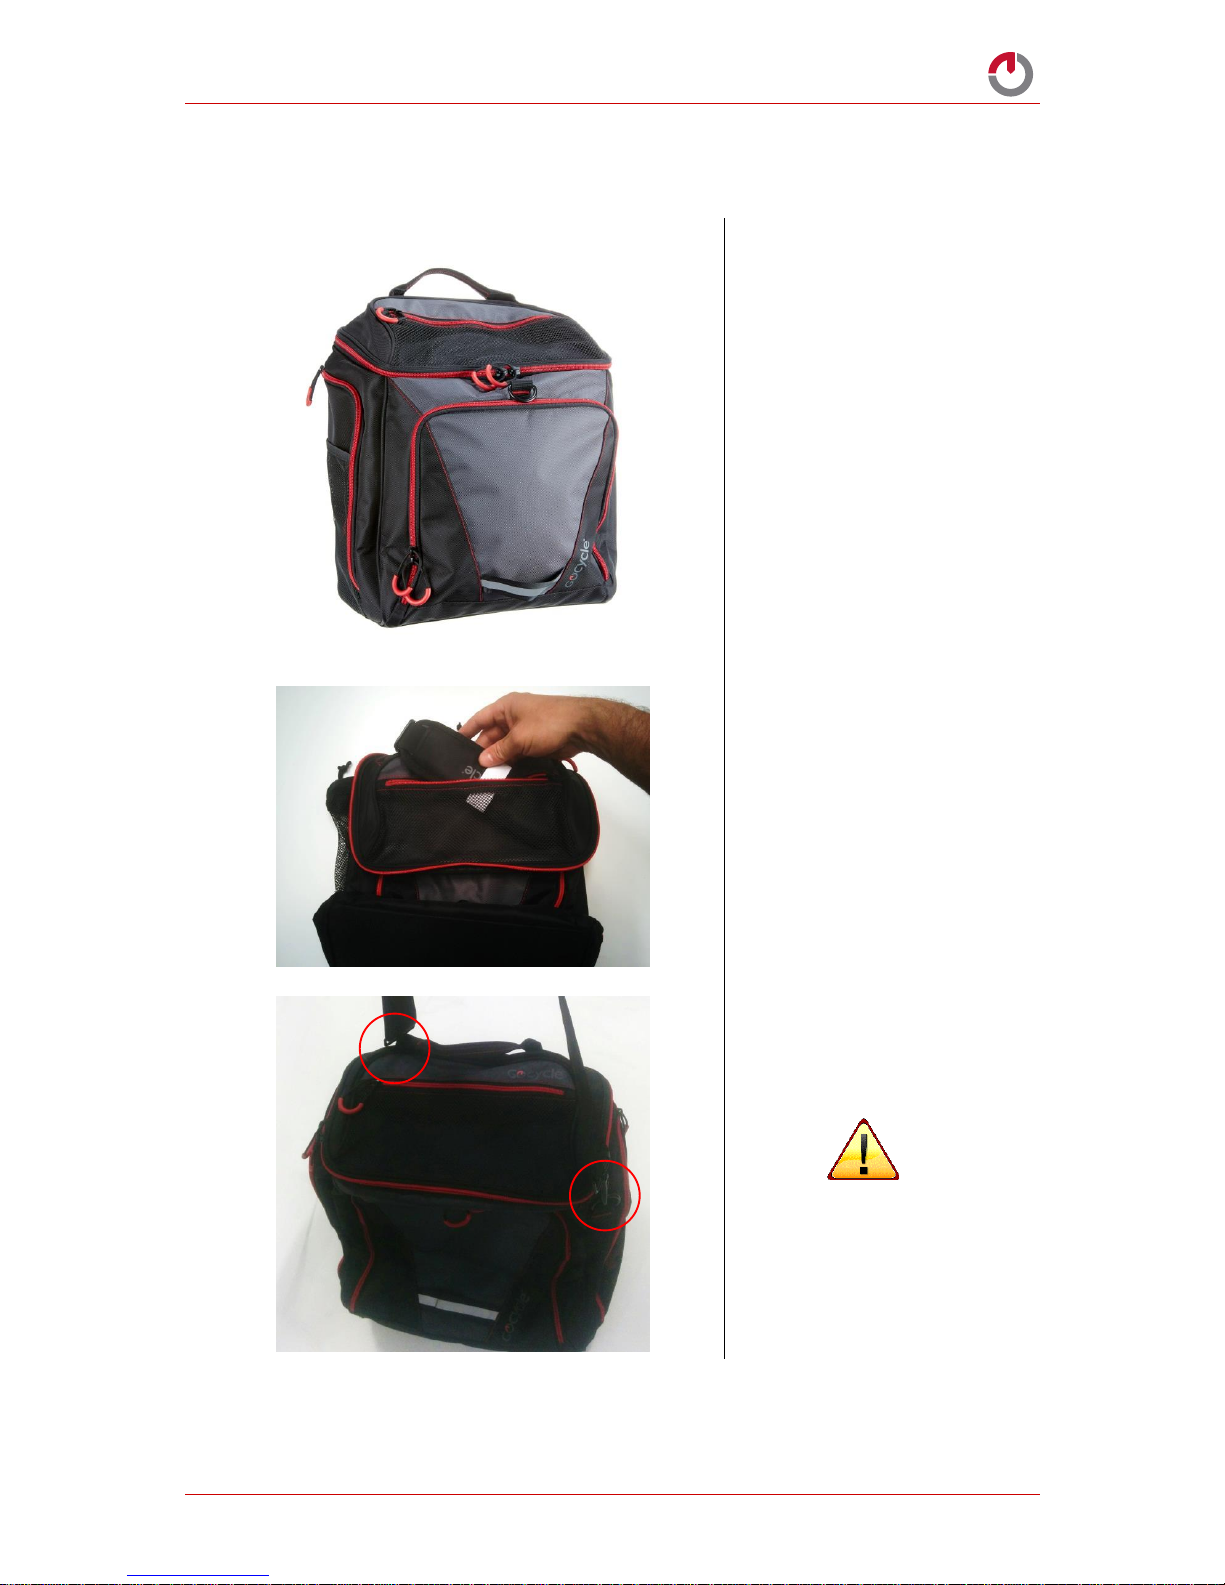
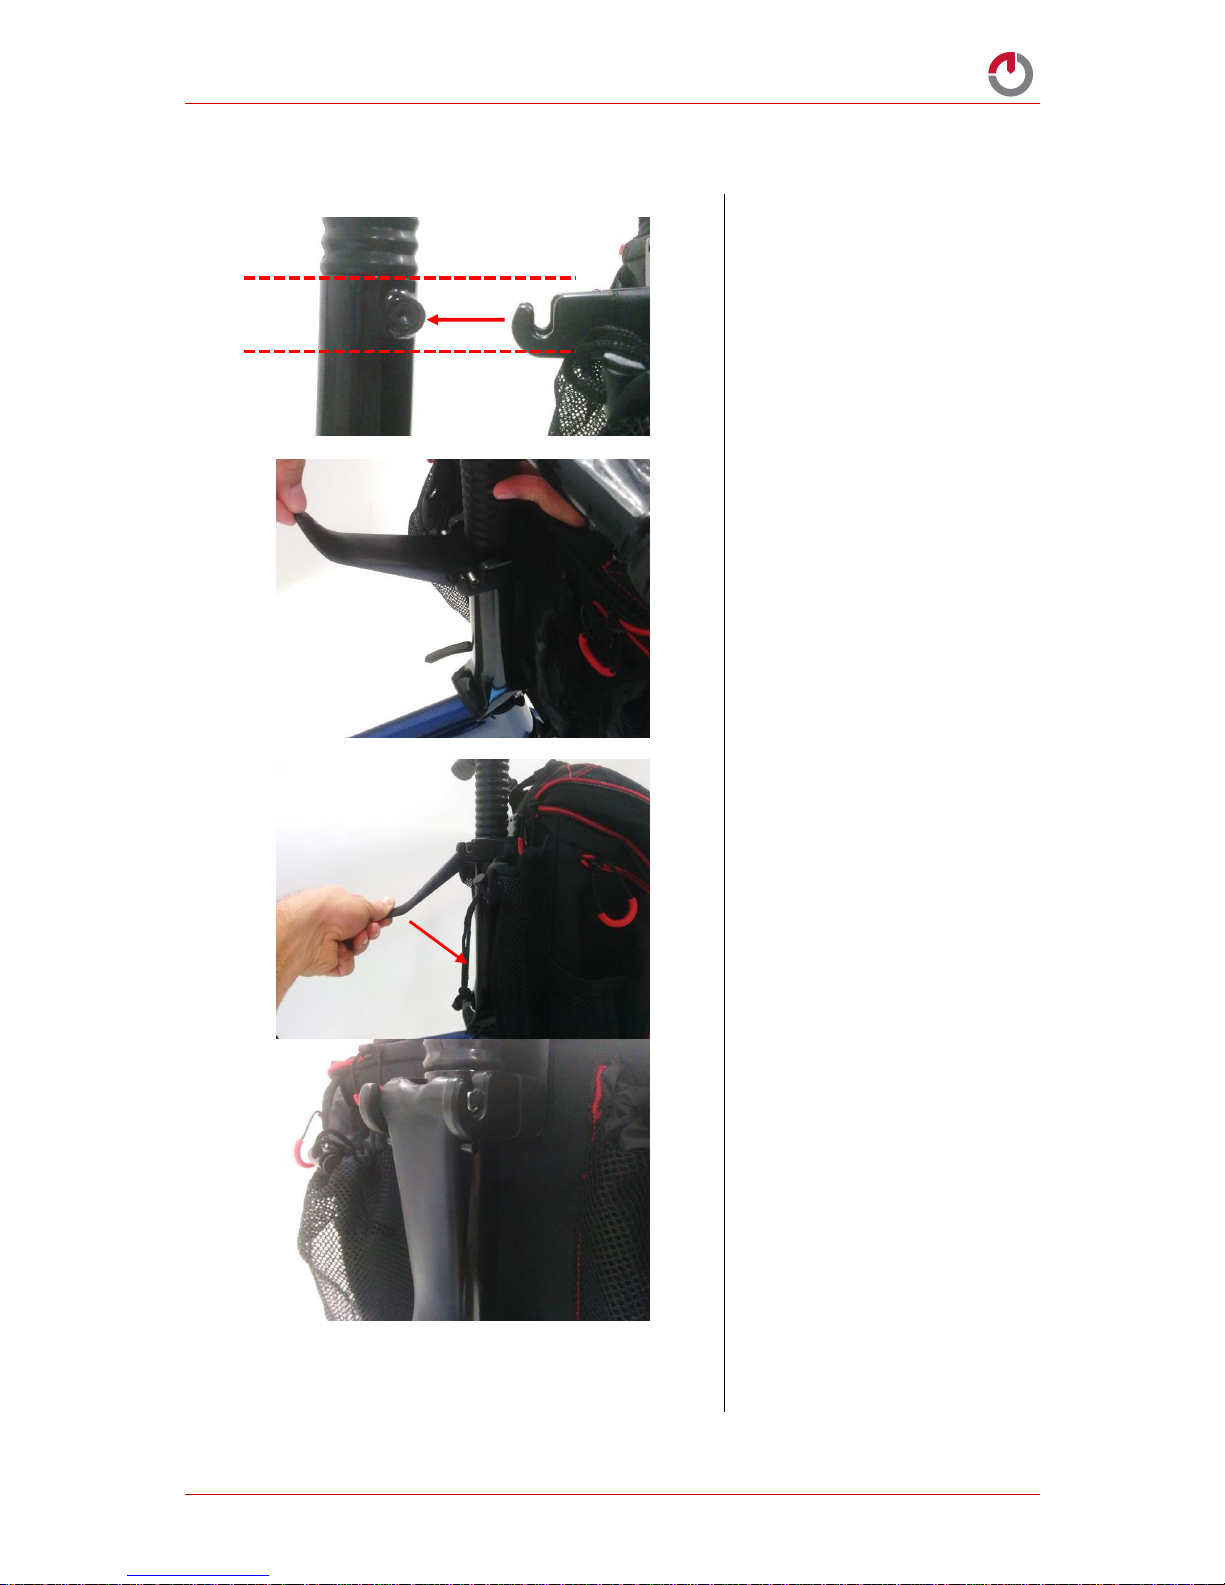
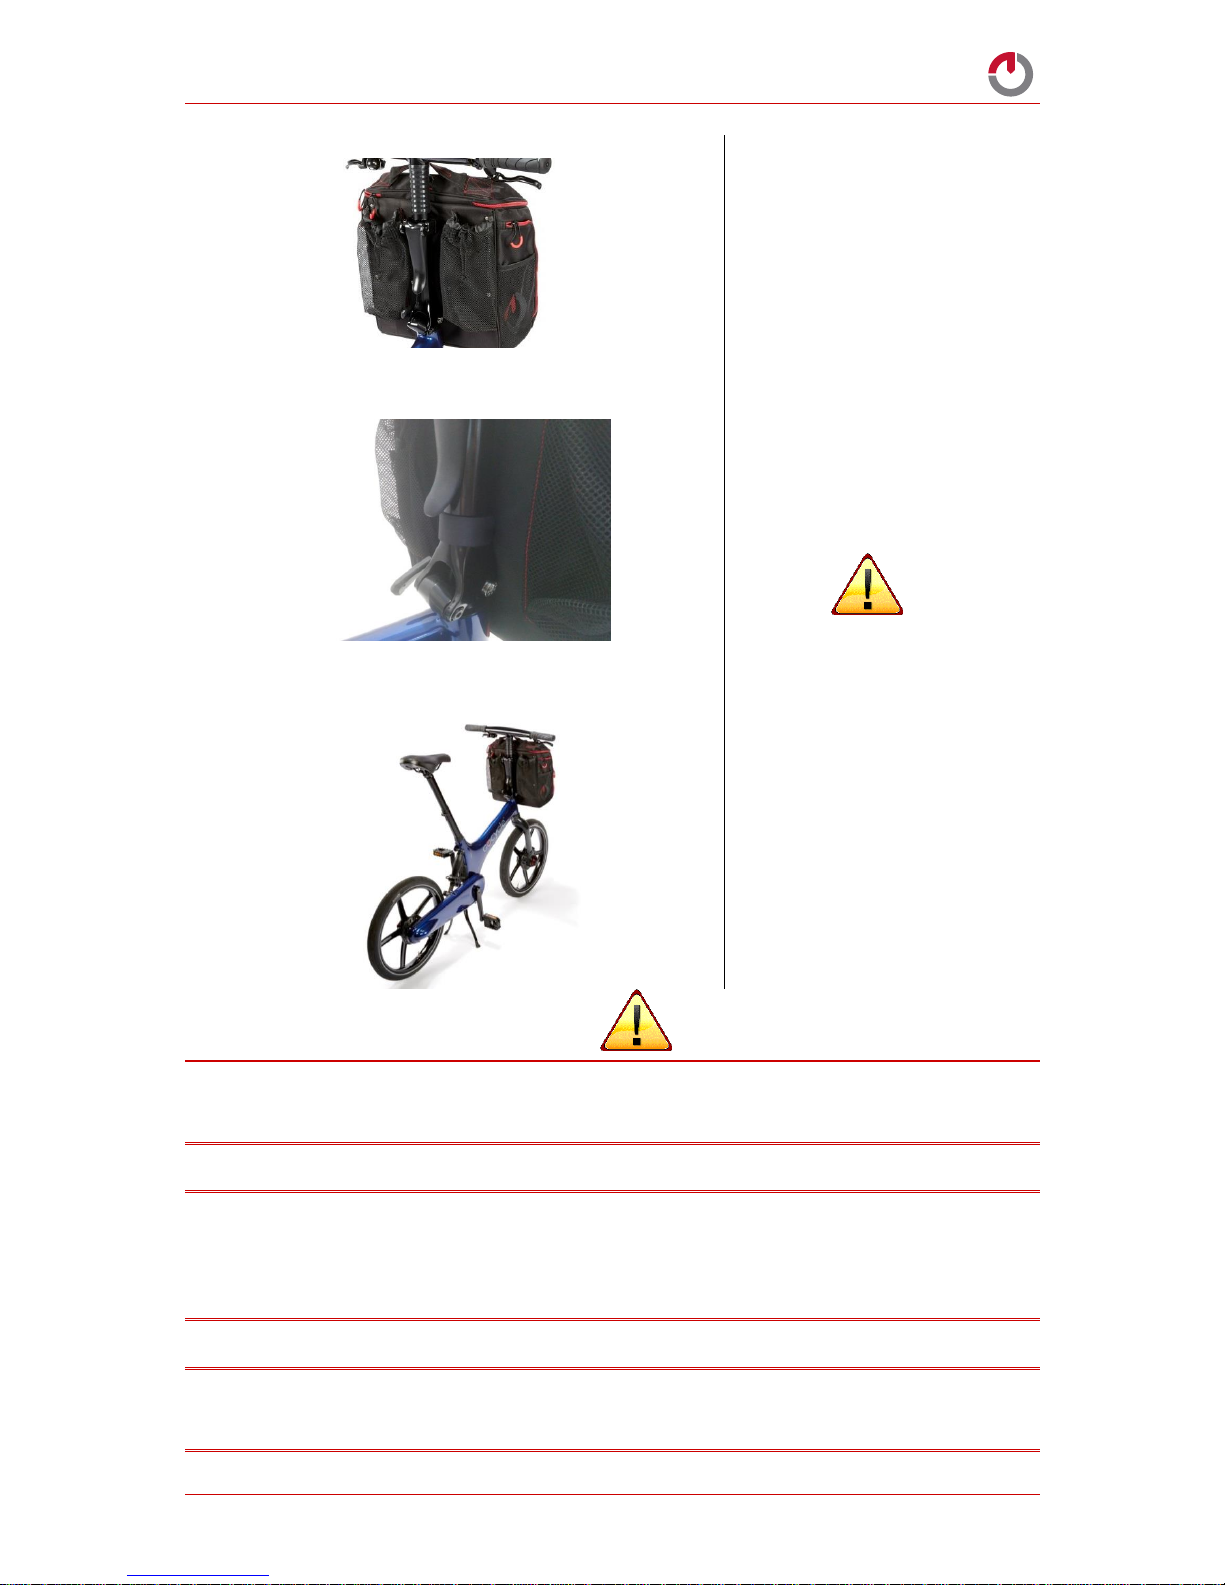
2.6. Gocycle Front Pannier
fitted and Gocycle ready to
ride.
Removal is the reverse steps
of fitting.
IMPORTANT NOTE: Whilst holding the Gocycle handlebars wiggle the Gocycle Front Pannier to
determine if there are any loose joints. If the Gocycle Front Pannier is loose, do not ride the Gocycle.
You will need to adjust the mounting bracket as described in the following section.
IMPORTANT NOTE: The ride handling will be different with the Gocycle Front Pannier attached and
will vary depending on the type and weight of load. Ensure any loads are evenly distributed and
secured within the Gocycle Front Pannier such as with extra padding to take up empty space. It is
not safe to ride with a load that is free to move, shift, roll, or flop around within the Gocycle Front
Pannier.
IMPORTANT NOTE: Do not ride with the shoulder strap attached to the exterior of the Gocycle Front
Pannier. Whilst riding, the shoulder strap should be detached from the buckles and stowed securely
inside the Gocycle Front Pannier.

Assembly Guide: Gocycle Front Pannier
© Karbon Kinetics Limited. All Rights Reserved. 6
3. ADJUSTING THE LATCH MECHANISM
3.1. The latch should begin to
feel tight to close from 45
degrees below horizontal
generally at the point as
shown. If the latch is “too
tight” or “too loose”, it
requires adjustment as
described below.
3.3. Remove the Gocycle
Front Pannier from the
Gocycle handlebar stem and
open the hinged mounting
bracket as shown.
3.4. Fold the hinge so that it
is open and flat as shown
allowing access to the
adjusting bolts.
3.5. Use the 4mm Allen key
(similar to the seat post
height adjustment Allen key)
to tighten or loosen the
mounting bracket.
If the mounting bracket is too
tight, turn each of the 2
adjustment bolts ½ a turn
anticlockwise.
Too loose
Too tight

Assembly Guide: Gocycle Front Pannier
© Karbon Kinetics Limited. All Rights Reserved. 7
IMPORTANT NOTE: The above assembly steps must be carried out in the order described.
Failure to do so may result in damage to the Gocycle.
If you have any further queries or comments, please contact Gocycle Technical Support:
techsupport@gocycle.com
If the mounting bracket is too
loose, turn each of the 2
adjustment bolts ½ a turn
clockwise.
Both bolts must be adjusted
equally to provide even
tension when closing the
latch.
The hook features will shorten
or lengthen depending on how
the adjustment bolts are
turned.
3.6. Close the hinged
mounting bracket as shown
3.7 Check that the Gocycle
Front Pannier can be mounted
to the Gocycle, ensuring that
the latch operates correctly as
shown. The latch should begin
feel tight at 45 degrees below
horizontal and close firmly
against the handlebar stem. If
required, re-adjust the
mounting bracket as
described.
Hook Features
Table of contents
Other Gocycle Bicycle Accessories manuals