3.2 Language Setting of Main Menu
Language setting procedure:
Double-click the screen to call out the main menu.
As shown in figure, click click click. Set the appropriate menu language according
to your requirements.
Volume
Backlight
User Setting
Reset
Upgrade
English 中文
Language/语言
1
2
3
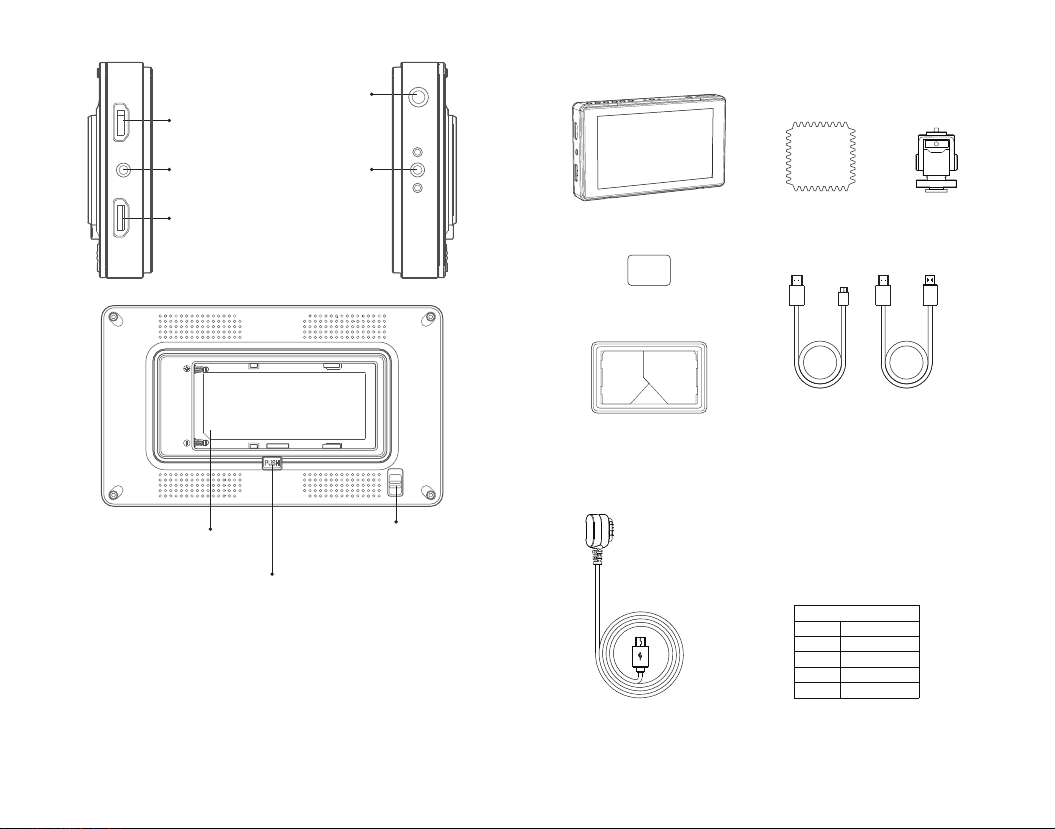
This monitor supports SD card which belongs to NTFS or FAT32 file system.
The monitor can store 25 lut files at most.
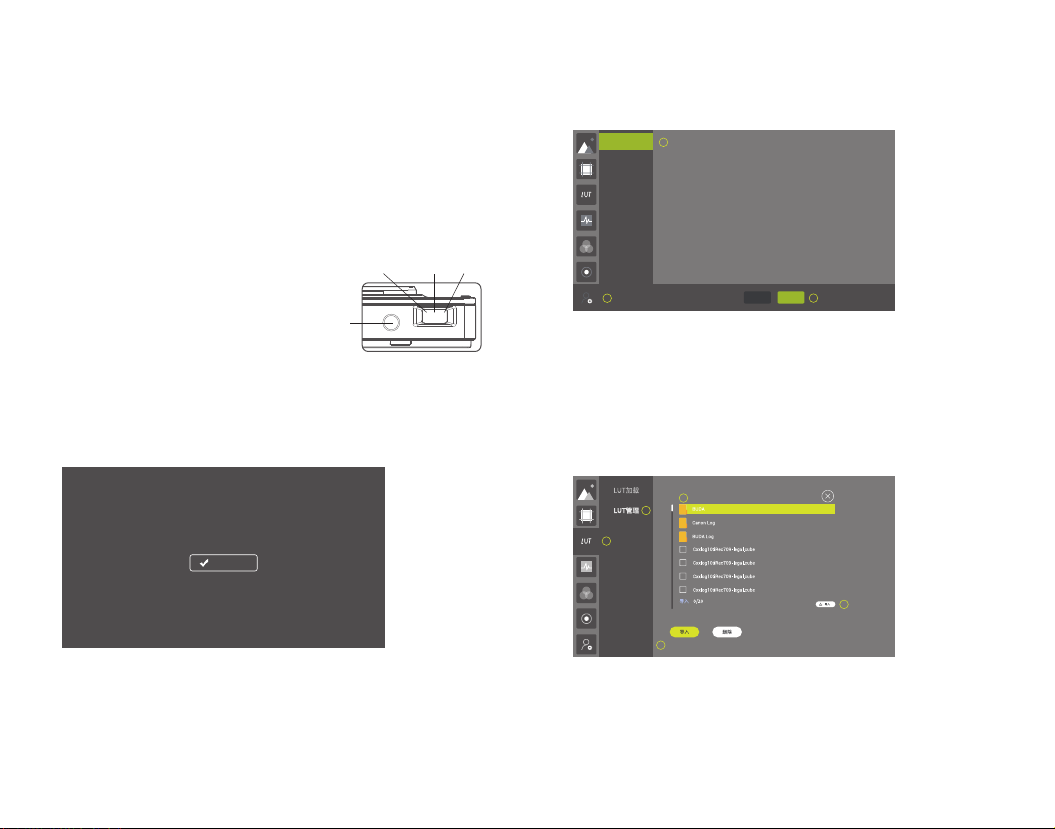
4. Lut Operation
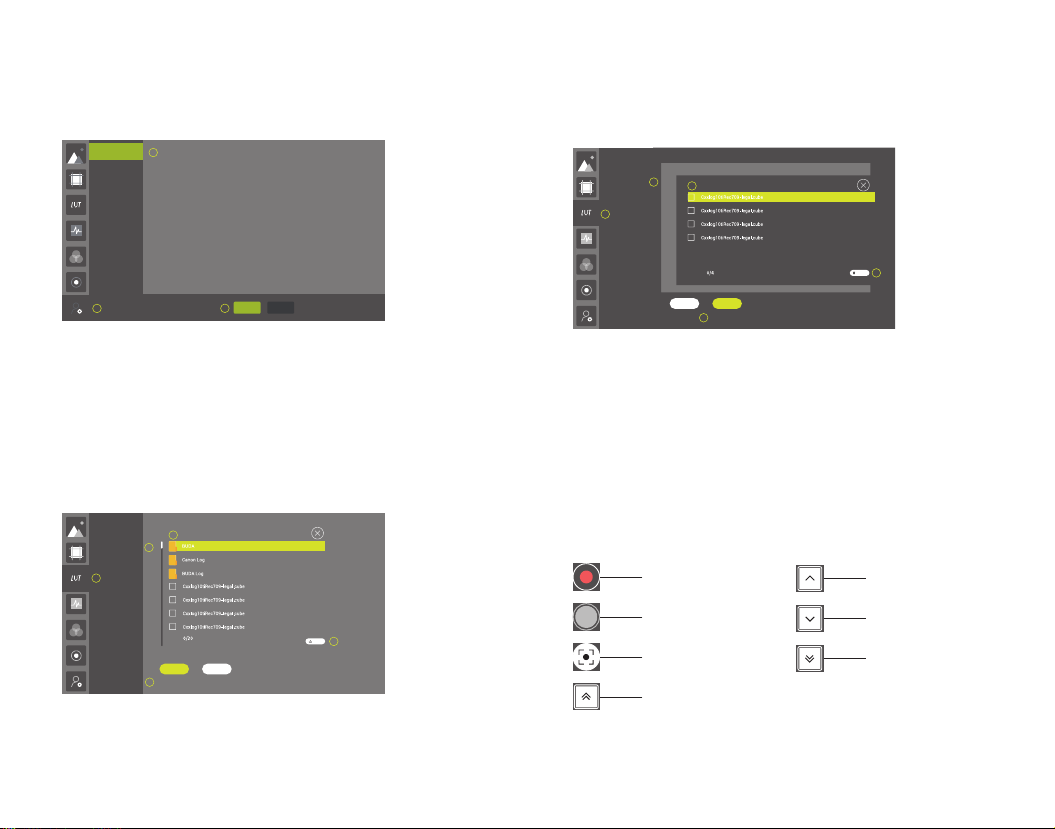
4.1 Lut Import
4.1.1 Touch operation: click Import, the monitor will auto read the folders of SD card and .cube
files and display them. After marking the .cube files to be led in under the same contents, click
the “Import” icon on the bottom right to finish file leading in.
4.1.2 Buttons operation: turn the select dial to choose lut manage-Import. Then, press down
the select dial and the monitor will read the files of SD card and .cube files. Turn the select dial
leftwards or rightwards and press down to mark them. After marking finished, press the back
button and press down the select dial to lead in the marked files.
5. Camera Control
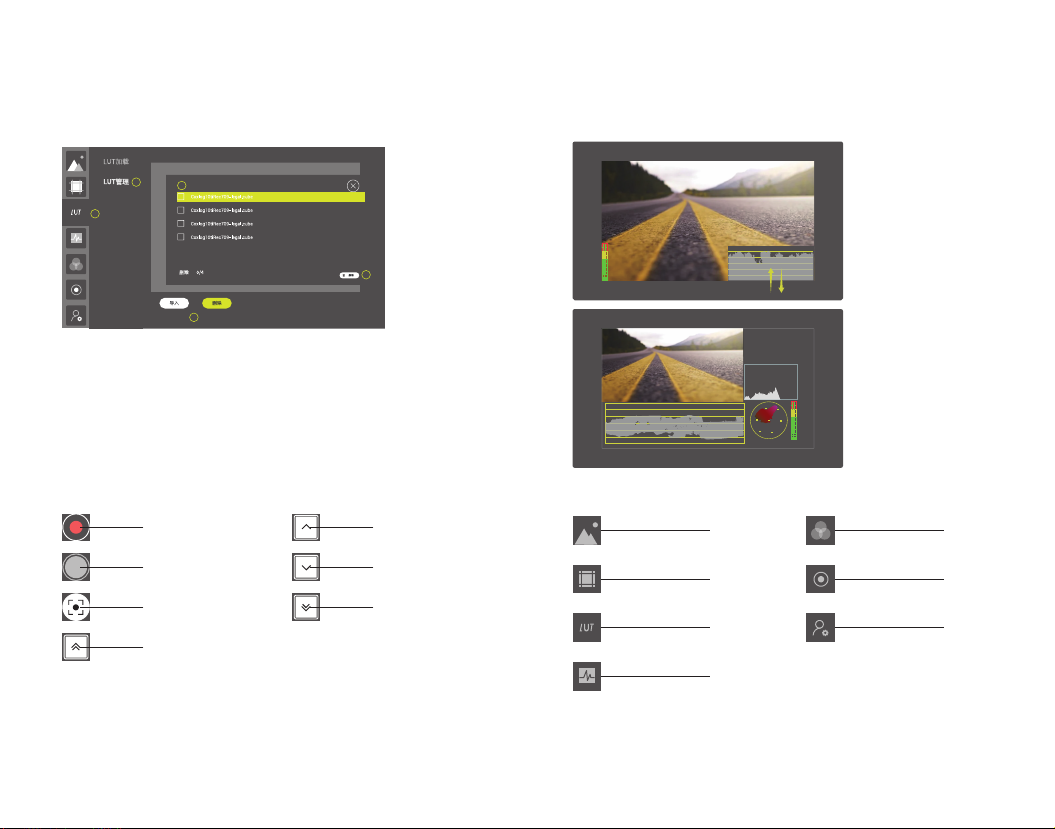
4.2 Lut Delete
4.2.1 Touch operation: click “delete” icon, and the locally stored lut files will be displayed. Mark
the undesired lut files and click the delete icon on the bottom right to delete.
5.1 When the camera control is on and camera mapping is off, slide leftwards from the screen
edge on the right to pop-up the camera control menu. Single-click the hidden menu in the
video area can also pop up or hide the menu as required.
5.2 When camera control and camera mapping is switched on, the touch camera control menu
will not be displayed. Mapping the camera control function button to the shortcut button F: F1:
camera control on/off; F2: recording; F3: shooting; F4: auto focus; F5: focusing +1; F6:
focusing -1.
4.2.2 Button Operation: turn the select dial to choose lut manage-deldete and press down the
dial until the locally stored lut files are displayed. Mark the files according to the requirements
and press down back button and select dial to delete the lut files.
4
5
1
Close the interface
3Delete the Interface
Quantity of Imported Files
Delete
2
LUT Load
LUT Manage
Delete
Import Delete
Note: "Delete 0/4" will be displayed on the Delete interface. In there, "0" means the quantity of marked
files and "4" means the quantity of imported files.
1
3
4
5
2
Close the interface
Files List of SD Card
LUT Load
Import
Import
Import Delete
LUT Manage
Import the Interface
Note: "Import 0/20" will be displayed on the Import interface. In there, "0" means the quantity of marked
files and "20" means remained quantity of imported files.
Note: To achieve camera control, it is recommended to purchase corresponding camera
control cable and gain support of camera. As the control orders are not supported by all
cameras, please refer to the relevant instruction manual of the camera control cable to
see its support functions and camera models in detail.
F2 Recording(click to
record or stop recording)
F3 Shooting(click to take photos)
Focusing+5, quick adjustment +
F4 Auto focus
F5 Focusing+1, fine adjustment +
F6 Focusing-1, fine adjustment -
Focusing-5, quick adjustment -
- 17 - - 18 -