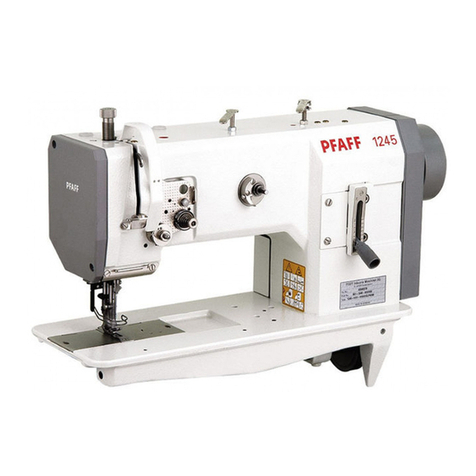
Pfaff 3811-2/45 User manual

3811- 2/45
- 11/43
-11/45
-13/45
Instruction manual
●For machines with a thread trimmer use
the Maintenance Manual -900/71 for the
PFAFF 5480.
●Use the motor manufacturer's technical
literature for the motor.
296-12-17514
Betriebsanleitungengl.06.97

2
Notes on safety
lThe machine must only be commissioned in full knowledge of the instruction manual and operated by
persons with appropriate training.
lBefore putting into service also read the safety rules and instructions of the motor supplier.
lThe machine must be used only for the purpose intended.
Use of the machine without the safety devices is not permitted.
Observe all the relevant safety regulations.
lWhen gauge parts are exchanged (e.g. needle, presser foot, needle plate, feed dog and bobbin) when
threading, when the workplace is left, and during service work, the machine must be
disconnected from the mains by switching off the master switch or disconnecting the mains plug.
lOn mechanically operated clutch motors without start inhibitor it is necessary to wait until the motor
has stopped.
lDaily servicing work must be carried out only by appropriately trained persons.
lRepairs, conversion and special maintenance work must only be carried out by technicians or persons
with appropriate training.
lFor service or repair work on pneumatic systems the machine must be disconnected from the compressed
air supply system.
Exceptions to this are only adjustments and function checks made by appropriately trained technicians.
lWork on the electrical equipment must be carried out only by electricians or appropriately trained persons.
lWork on parts and systems under electric current is not permitted, except as specified in regulations
EN 50110.
lConversions or changes to the machine must be authorized by us made only adherence to all safety
regulations.
lFor repairs, only replacement parts approved by us must be used.
lComissioning of the sewing head is prohibited until such time as the entire sewing unit is found to
comply with EC directives.
Meanings of the symbols:
Danger spot!
Items requiring special attention.
Danger of injury to operative
service staff.
Be sure to observe and adhere to these notes!

3
Inhaltsverzeichnis
Notes on safety................................................................................................................ 2
What the symbols mean.................................................................................................. 2
Fields of application.......................................................................................................... 5
1 Technical data .................................................................................................................. 5
2 Operation elements and optical displays.......................................................................... 6
3 Initial check ...................................................................................................................... 8
4 Installing the machine ...................................................................................................... 8
5 Connecting compressed air and electricity ...................................................................... 8
.1 Compressed air................................................................................................................8
.2 Electricity ......................................................................................................................... 8
6 Switching the machine on................................................................................................ 8
7 Switching the machine off ............................................................................................... 8
8 Check ............................................................................................................................. 10
.1 Oil level in the sewing machine ..................................................................................... 10
.2 Direction of rotation ....................................................................................................... 10
9 Inserting the needle ....................................................................................................... 10
10 For your attention before the initial operation ................................................................ 10
11 Needle thread and hook thread...................................................................................... 12
.1 Threading the needle thread .......................................................................................... 12
.2 Adjusting the needle thread tension .............................................................................. 12
.3 Threading the hook thread ............................................................................................. 12
.4 Adjusting the hook thread tension ................................................................................. 12
12 Top feed pressure and presser foot pressure ................................................................ 14
.1 Adjusting the top feed pressure..................................................................................... 14
.2 Adjusting the presser foot pressure............................................................................... 14
13 Adjusting the stitch length ............................................................................................. 14
14 Preparing for adjustments.............................................................................................. 16
15 Needle position in the needle hole................................................................................. 16
.1 Across the sewing direction........................................................................................... 16
.2 With the sewing direction .............................................................................................. 16
16 Preadjusting the needle height....................................................................................... 18
17 Bottom feed settings ..................................................................................................... 20
.1 Zeroing the main feed dog ............................................................................................. 20
.2 Limiting the shortest stitch length to 2 mm................................................................... 20
.3 Main feed and differential feed synchronicity ................................................................ 22
.4 Lateral motion of main and differential feeds................................................................. 24
.5 Lifting motion of main and differential feeds.................................................................. 26
.6 Setting the feed dog ...................................................................................................... 28
18 Top feed settings ........................................................................................................... 30
.1 Synchronicity of top and bottom feeds .......................................................................... 30
.2 Vibrating presser - lifting motion .................................................................................... 32
.3 Vibrating presser - stroke ............................................................................................... 32
.4 Front connecting rod to the top feed drive..................................................................... 34
19 Basic stitch length.......................................................................................................... 36
.1 Adjust basic stitch length to 3 mm ................................................................................ 36

4
20 Presser foot settings...................................................................................................... 38
.1 Clearance between presser foot and needle plate......................................................... 38
.2 Presser foot stroke with the automatic presser foot lifter ............................................. 38
.3 Aligning the presser foot ................................................................................................ 40
21 Hook settings.................................................................................................................42
.1 Hook - lateral motion ...................................................................................................... 42
.2 Adjusting the hook height .............................................................................................. 44
.3 Adjusting the hook angle................................................................................................ 46
.4 Hook-to-needle clearance in sewing direction................................................................ 46
.5 Hook-to-needle clearance in hook direction (across the sewing direction)..................... 46
.6 Hook motion .................................................................................................................. 48
.7 Needle height and hook-to-needle clearance ................................................................. 50
22 Rear needle guard .......................................................................................................... 52
.1 Adjusting the height of the rear needle guard ................................................................ 52
.2 Clearance between rear needle guard and needle ......................................................... 52
23 The hook-eccentric guard............................................................................................... 52
24 Front needle guard ......................................................................................................... 54
.1 Adjusting the height ....................................................................................................... 54
.2 Lateral adjustment ......................................................................................................... 54
25 Needle thread puller ....................................................................................................... 56
26 Needle thread regulator ................................................................................................. 56
27 Adjustable thread guide ................................................................................................. 56
28 Hook thread regulator .................................................................................................... 58
29 Hook thread controller.................................................................................................... 58
30 Hook thread puller.......................................................................................................... 58
31 Quick adjustment of the differential for altering the gathering intensity ........................ 60
.1 Zeroing the differential quick adjustment ....................................................................... 60
.1.1 Rough adjustment at the Angle transmitter ................................................................... 60
.1.2 Fine adjustment at the poti “0” ..................................................................................... 60
.2 Key allocation for positioning the cam against the actuating lever................................. 62
.2.1 Setting the gathering level of key “1”............................................................................ 62
.2.2 Setting the gathering levels ........................................................................................... 62
32 Edge trimmer ................................................................................................................. 64
.1 Trimming motion............................................................................................................ 64
.2 Zero point ....................................................................................................................... 64
.3 Knife height .................................................................................................................... 64
.4 Aligning the upper knife in sewing direction .................................................................. 66
.5 Aligning the upper knife across the sewing direction..................................................... 66
.6 Aligning the stop eccentric............................................................................................. 66
33 Tape brake ..................................................................................................................... 68
.1 Switching on ..................................................................................................................68
.2 Switching off.................................................................................................................. 68
.3 Adjusting the brake intensity.......................................................................................... 68
.4 Pre-tension..................................................................................................................... 68
34 Care and maintenance ................................................................................................... 70
.1 Sewing machine ............................................................................................................ 70
.2 Maintenance unit ........................................................................................................... 70
.3 Lubrication recommendation.......................................................................................... 71
5
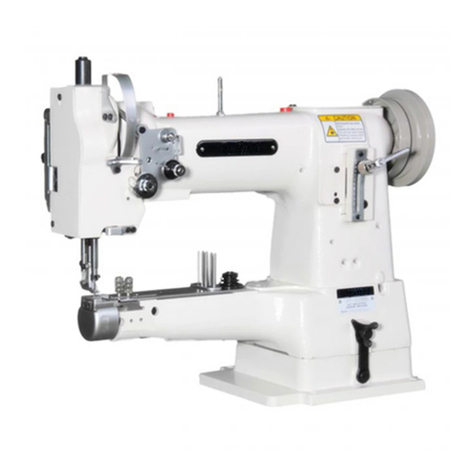
1 Specifications for the PFAFF 3811-../..
Sewing machine head : for -2/45: .................... 5487/5489-814/01 N
for -11/43 und -11/45:.. 5487/5489-814/01
for -13/45: .................. 5487/5489-814/01-731/12
Stich type : 401
Max. s.p.m. : 3200 min-1
Basic stitch length : 3 and 4 mm ( -2/45 2,2 mm)
Differential stitch length : 8 mm ( -2/45 6 mm)
Needle system : Leather: 4463KKD
Fabric: 4463-35
Needle size : 80 - 110 depending on material
Trimming margin : (only -13/45) 6mm
Presser foot clearance : 7mm
Sewing motor : QE 6040, Q 31 PLUS, P 40 SE, Q 40 SE
Input rating : 0,8 kW
Power supply : E 230 Volt, 50/60Hz
Working air pressure : 6 bar
Air consumption : ~0,3 - 0,5 Normlitre per work cycle
Work place related emission level : at s.p.m. n=2600min-1: LpA<79 dB(A). Noise level
measurement in accordance with DIN 45635-48-A-1
Dimensions : LxBxH (1250 x 600 x 1700mm; incl. spool holder)
Weight : Net: 140 kg
Subject to alterations Status 06.94
Fields of application
PFAFF 3811-2/45
-11/43
-11/45
Integrated sewing unit for working fullness into a material ply
PFAFF 3811-13/45
Integrated sewing unit for working fullness into a material ply with simultaneous edge
trimming
This manual suits for next models
3
Table of contents
Other Pfaff Sewing Machine manuals

Pfaff
Pfaff admire 1000 User manual

Pfaff
Pfaff 145 User manual

Pfaff
Pfaff 3334 User manual

Pfaff
Pfaff 918 User manual

Pfaff
Pfaff EXPRESSION 2038 - User manual

Pfaff
Pfaff 2483-980/31 User manual

Pfaff
Pfaff 918 User manual

Pfaff
Pfaff dorina 72 User manual

Pfaff
Pfaff CREATIVE 2124 User manual

Pfaff
Pfaff 1211 User manual

Pfaff
Pfaff STITCH CREATOR User manual

Pfaff
Pfaff smart 100s User manual

Pfaff
Pfaff perfomance 2054 User manual

Pfaff
Pfaff tipmatic tiptronic 1151 User manual

Pfaff
Pfaff hobbylock 795 User manual

Pfaff
Pfaff 1181 User manual

Pfaff
Pfaff hobbylock 4764 User manual

Pfaff
Pfaff Ccreative 2.0 User manual

Pfaff
Pfaff COVERLOCK 3.0 - User manual

Pfaff
Pfaff 1051 User manual