goodnature SX 280 User manual

SERIAL #
1.0
SQUEEZEBOX PRESS
OWNER’S MANUAL
MANUAL
VERSION

02
22
SX-280 SQUEEZEBOX PRESS
OWNER’S MANUAL
Weight Crated:
4800 LBS
Capacity:
23.45 TN. TOTAL FORCE
75 PSI ON PRODUCE
Total Weight:
4130 LBS
Dimensions:
110”L X 67”W X 65.5”H
MACHINE SPECIFICATIONS
Introduction
Component HP Amperage Supply Voltage
SX-280 2 7.0/4.0 220/440
IMPORTANT WARNING: To limit electrical shock, personal injury or material damage due to misuse,
please read these instructions carefully and follow them strictly. The operation manual should be kept
within easy access for all users and read completely by all first time users of the machine.

03
22
SX-280 SQUEEZEBOX PRESS
OWNER’S MANUAL
Table of Contents
SECTION 1
SECTION 1.1
SECTION 2
SECTION 2.1
SECTION 2.2
SECTION 3
SECTION 3.1
SECTION 3.2
SECTION 4
SECTION 4.1
SECTION 4.2
SECTION 5
SECTION 5.1
SECTION 5.2
SECTION 6
SECTION 6.1
SECTION 7
SECTION 7.1
SECTION 8
SECTION 8.1
SECTION 8.2
SECTION 8.3
SECTION 8.4
SECTION 8.5
SECTION 8.6
PAGE 04
PAGE 04
PAGE 05
PAGE 05
PAGE 05
PAGE 06
PAGE 06
PAGE 07
PAGE 08
PAGE 08
PAGE 09
PAGE 10
PAGE 10
PAGE 11
PAGE 12
PAGE 12
PAGE 13
PAGE 13
PAGE 14
PAGE 14
PAGE 15
PAGE 16
PAGE 18
PAGE 19
PAGE 21
Safety Precautions
Safety Precautions
Unpacking
Unpacking
Enclosed Parts List
Installation
Installation
Press Bags
Operation
Press Operation
Press Speed
Cleaning
Machine Cleaning
Bag Cleaning
Maintenance
Routine Maintenance
Troubleshooting
Troubleshooting
Useful Information
Machine Diagrams
Electric Box
Machine Controls & Components
Electric Box Wiring
Replacement Parts List
Improving Yields

04
22
SX-280 SQUEEZEBOX PRESS
OWNER’S MANUAL
Section 1: Safety Precautions
SAFETY GLASSES must be worn at all times during operation, cleaning and servicing of the machine.
Be aware of pinch points.
Never wear loose fitting clothing that can get caught on any moving part.
Long hair must be worn up and tied back or in a hat or hair net.
Never insert any foreign item into the SX-280 Squeezebox press that was not supplied by the manufacturer and
described in this manual.
Never place hand or any other body part into the press, hydraulic cylinders or near any moving part during
operation.
Always disconnect power before cleaning or servicing this machine.
If any components are damaged or are malfunctioning, discontinue use immediately and get the machine
serviced.
1.1 SAFETY PRECAUTIONS
IMPORTANT WARNING: To limit electrical shock, personal injury or material damage due to misuse,
please read these instructions carefully and follow them strictly. This operation manual should be kept
nearby for all users and read completely by all first time users of the machine.

05
22
SX-280 SQUEEZEBOX PRESS
OWNER’S MANUAL
Section 2: Unpacking
2.1 UNPACKING
After Crate is unloaded and delivered, remove the crate, banding and shrink wrap to expose the press for inspection.
This equipment was carefully inspected mechanically and electrically before shipment. It should be physically free of
marks or scratches and in perfect electrical order upon delivery.
Inspect for physical damage, electrical damage or any loose or bare wires.
If any items are damaged due to shipping, contact the freight carrier within 15
days of receiving your shipment.
Unpack and inspect all enclosed parts. Check to make sure no parts are missing. There is an Enclosed Parts List
located later in this section.
If any parts are missing or damaged please contact our customer service department by calling (716)-855-3325.
ITEM
A
B
C
D
E
QTY
2
96
4
1
1
PART NAME
Press Bag Set
Bag Loops
Casters
Caster Bolt Package
Cake Separator
DESCRIPTION
White Cloth Bags
4.5” Rubber Loop
Wheels
Bolts for Casters
Plastic Paddle
2.2 ENCLOSED PARTS LIST

06
22
SX-280 SQUEEZEBOX PRESS
OWNER’S MANUAL
Section 3: Installation
After unpacking and before running, it is important to check that fasteners did not become loose during shipping.
Check all nuts, bolts and screws to make sure everything is tight.
Check for proper voltage before connecting any power to the machine.
The voltage and amperage of the power supply depends on the specifications
provided by the customer. Information can be found on page 2 of this manual.
If you choose not to use the plug supplied with machine, run appropriate supply voltage through a strain relief in
the control box to the terminals labeled L1, L2 and L3, if three phase. Please refer to the electrical diagram in this
manual for the specific location.
3.1 INSTALLATION
IMPORTANT WARNING: All electrical connections should be made by a licensed professional in
accordance with state and local codes.

07
22
SX-280 SQUEEZEBOX PRESS
OWNER’S MANUAL
Section 3: Installation
Each set of bags consists of 6 individual units containing 2 layers each. The units are secured to each other using
hook and loop Velcro. Each bag has grommets on the bottom corners and the end bags have grommets on the top in
place of the Velcro. The grommets on the end bags are spaced to easily slip over the bag pins on the press area. The
grommets on the bottom of the bags are used to secure the bottom of the bags during the dumping process.
Knot the bag loops through the bottom grommets. We recommend having the bag sets preassembled and bag loops
attached, before inserting them into the press.
Place one layer only, into each section of the scissor assembly (you may find it easier to begin at one end and work
your way to the other end).
After all the layers are properly placed, grasp the bag loops and pull them over the bag tab. Each bag corner is
attached with one bag loop which gets attached to two bag tabs as shown below.
3.2 INSTALLATION: PRESS BAGS
IMPORTANT WARNING: All electrical connections should be made by a licensed professional in
accordance with state and local codes.

08
22
SX-280 SQUEEZEBOX PRESS
OWNER’S MANUAL
Section 4: Operation
SAFETY GLASSES must be worn at all times during operation.
Beware of all pinch-points and moving parts.
Pressure factory set at 1800psi for extend and 2200 psi for retract (do not adjust).
4.1 PRESS OPERATION
1
2
3
4
5
6
7
8
9
10
Check to make sure all components are in place as described in the installation section.
Turn the disconnect switch to the “ON” position and pull the “E-Stop” button out to start the motor and pump.
Turn directional switch to the forward or reverse position until it stops (the motor and pump will continue to run). The
press does not need to be turned o when it is at full press stage, as there is a built-in override system which is designed to
maintain constant pressure without damaging the press.
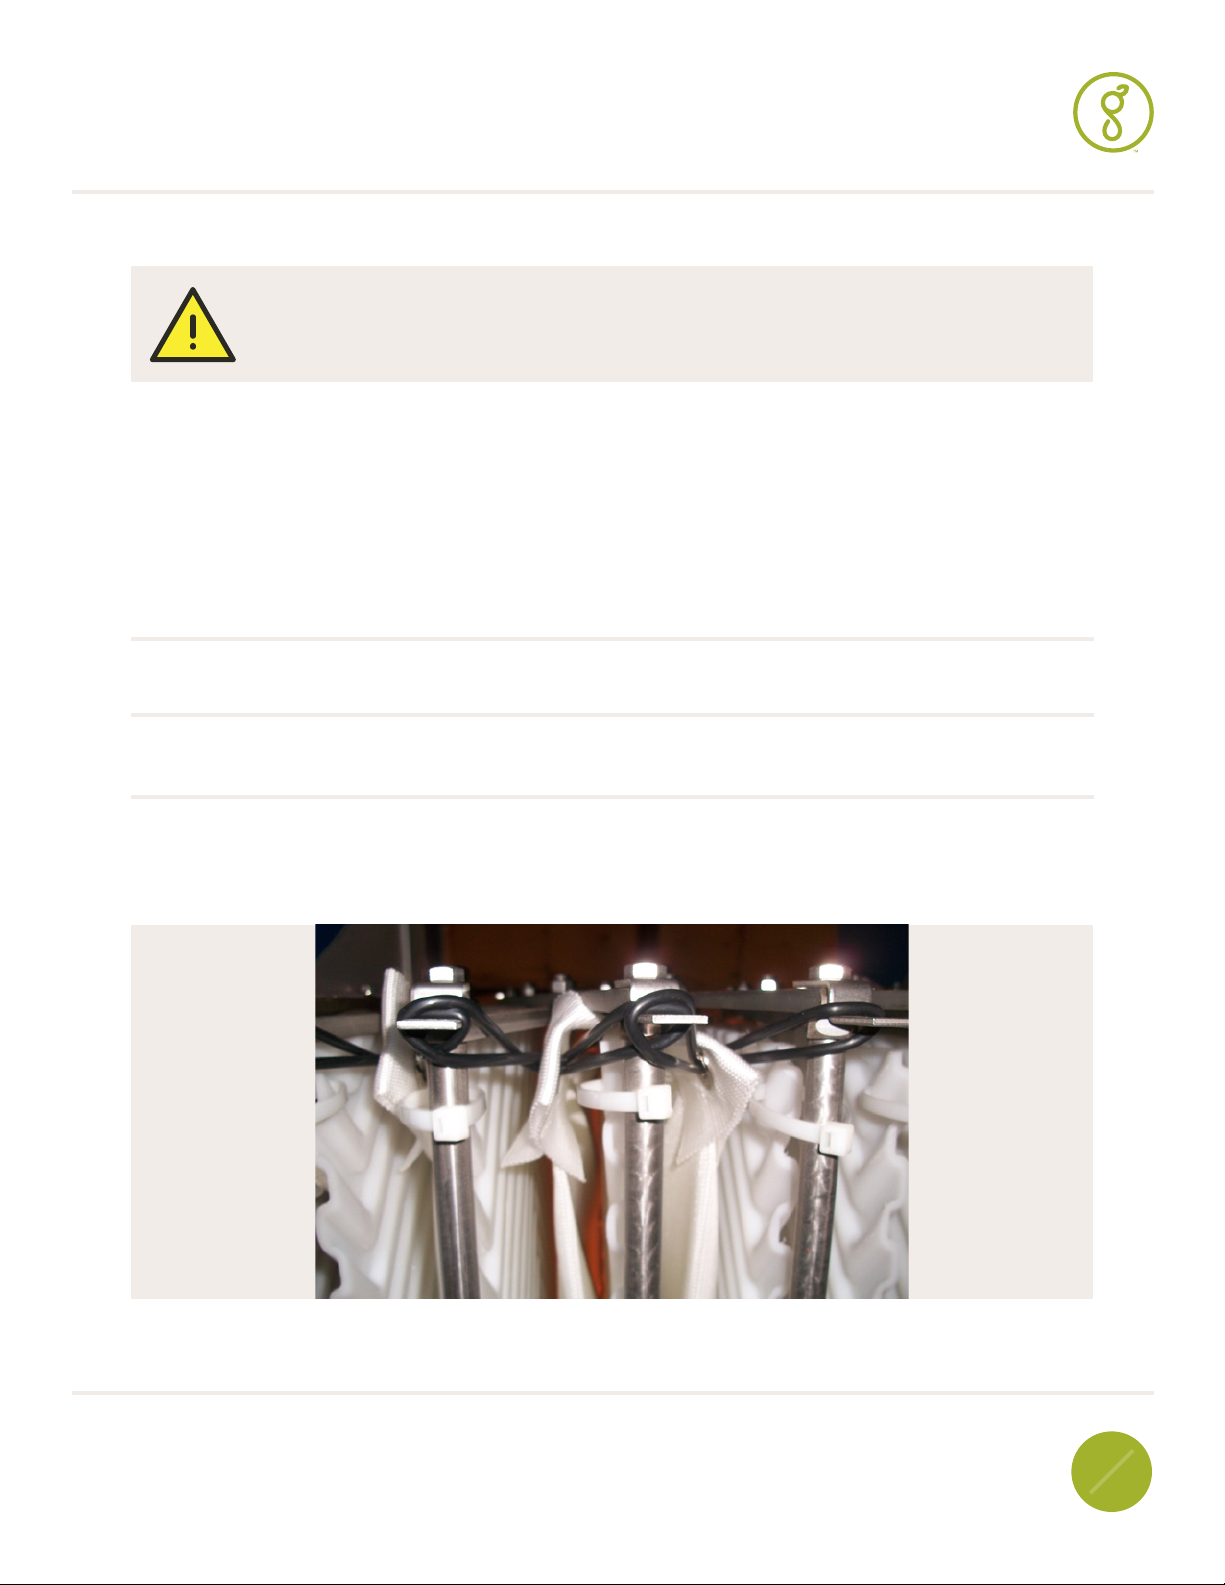
Fill the open side of the press with slurry using a suitable pump. Do not fill one bag at a time, fill them uniformly.
Fill the bags 2’’ to 3” from the top.
Turn the switch to the forward or reverse position to press slurry. After pressing is complete allow the press to hold for
about 2 minutes longer to ensure full extraction.
The open side of the press is now ready to be filled. Repeat steps 3,4, and 5.
Turn the switch in the appropriate direction to begin squeezing the side just filled.
As the side previously pressed opens, gently work the cake separator between the bag and dry cake on both sides of the
cake on all layers.
Be careful not to wear bottoms and sides of the bags by jamming the cake separator into the layers. Re- member to always use
your cake separator to loosen the cakes in the bags before dumping! Caution should be used in order not to cut the seam on the
sides of the bags. Always be sure all edges of the cake separator are smooth, without nicks or sharp edges. Never force the cake
separator. Gently cutting the cakes in half will allow for an easier dump and increase the life of the bags.
When all cakes have been separated from the bag, press the “lift” button to raise and dump the dry cake from the bags.
When the bags are empty, flip the press area back over and repeat. The “lift” button must be released when the press area
reaches its pivot point in order to fall over.

09
22
SX-280 SQUEEZEBOX PRESS
OWNER’S MANUAL
Section 4: Operation
SAFETY GLASSES must be worn at all times during operation.
Beware of all pinch-points and moving parts.
Factory preset is set to full speed. You may find it necessary to adjust the speed to get maximum yield. Soft pom-
ace needs to be pressed at slower speeds. This allows the juice to be extracted without the pomace overflowing
the top of the bag. The speed is adjusted by using the two vernier speed control knobs. To slow down the pressing
cycle, simply turn the appropriate knob clockwise.
4.2 PRESS SPEED
IF PRESS IS TOO SLOW:
This will not have a negative eect on the juice or the machine but will decrease the amount of produce per hour the
machine can handle.
IF PRESS IS TOO FAST:
This generally causes undesired outcomes. 1.) The produce can slide up and out of the press bag. 2.) The pressure inside
the bag can climb too fast, possibly causing the bag to rupture or forcing produce to extrude through the bag. 3.) Juice
will squirt up and out of the press. 4.) Produce will have lower yields because there was not a slow gradual increase in
pressure.
IF PRESS SPEED IS JUST RIGHT:
The press should be set to a speed such that the platen slowly moves in and squeezes the produce while increasing
pressure slowly. Due to the diversity of produce, this machine is capable of processing the variety of characteristics
contained in various fruits and vegetables. Therefore, press speed should be adjusted to the customer’s specific needs.

10
22
SX-280 SQUEEZEBOX PRESS
OWNER’S MANUAL
Section 5: Cleaning
Power O and Disconnect all power before cleaning.
SAFETY GLASSES must be worn at all times during operation.
Beware of all pinch-points and moving parts.
5.1 MACHINE CLEANING
1
2
3
4
5
The first step in cleaning is to disconnect any hand-removable parts and place them in a sink or set them aside for
cleaning and sanitizing, separately.
All remaining produce should be hosed o and removed. Avoid spraying water directly at motors and controls.
After all easily-removable debris has been cleaned o, we recommend using a foaming cleanser to help break down
remaining particles. “Masterklean” can be purchased through customer service, or another product similar to
Masterkleen may be used. For information on the chemical makeup of “Masterklean” please contact Goodnature
Products, customer service (716)-855-3325.
Mix up 3 gallons of cleanser solution, as described in the instructions enclosed with the cleanser, using hot water. Wash
down all surfaces taking care to thoroughly clean all areas that produce has come into contact with.
All removed parts can be washed and sanitized by hand in a sink or soaked if desired.

11
22
SX-280 SQUEEZEBOX PRESS
OWNER’S MANUAL
Section 5: Cleaning
Bags must be cleaned daily. If this cleaning procedure is neglected bags may become clogged resulting in
lower yields and/or damage to the bags.
5.2 BAG CLEANING
1
2
3
4
5
6
7
8
Turn bag inside out.
Rinse bag thoroughly in sink, or hose down. All loose particles should be rinsed out.
Soak bags in a tub filled with a caustic solution (a lightly chlorinated solution). Goodnature can supply cleanser if desired,
please contact customer service at 716-855-3325. Bags should be soaked for a minimum of 30 minutes up to 2 hours.
Place bags in a standard washing machine and add in a chlorine cleanser.
Run the machine with a cold wash, and a hot rinse (Ideally above 100F but below 140F). The temperature of the rinse is
important because this is required to remove residual chlorine.
When cycle is complete, hang bags to dry. Never let bags sit wet in a bucket or sink for an extended period of time.
If bags do not come out white, repeat operation from step 3.
Bags should be replaced after 6 months of daily operation.

12
22
SX-280 SQUEEZEBOX PRESS
OWNER’S MANUAL
Section 6: Maintenance
Power O and Disconnect all power before maintenance.
SAFETY GLASSES must be worn at all times during operation.
6.1 ROUTINE MAINTENANCE
DAILY MAINTENANCE:
WEEKLY MAINTENANCE:
1
2
1
2
3
4
5
6
Keep machine clean and free of any foreign objects.
Apply food-grade grease to the top and bottom of the rail on both sides of the press. This allows the shims to slide
with little resistance.
Check all fasteners for tightness and damage.
Inspect press racks for cracks or sharp edges.
Inspect hydraulic lines for damage of leaks.
Check hydraulic fluid level. With the press retracted or in the open position, remove the breather cap from the
hydraulic reservoir. Use a dipstick to check level of fluid, it should be about 1” below the hole. If it is low, add SAE 10
all purpose hydraulic fluid. If your system was designed for food grade or specialty fluid, use appropriate fluid.
Apply food-grade grease to the 3 grease fittings located on the scissor assembly hinges.
Inspect all nuts and bolts for proper tightness. Critical for proper operation of scissor assembly.
* Oil Filter– Replace oil filter after first 50 hours then every 250 hours thereafter (Part# 13867).

13
22
SX-280 SQUEEZEBOX PRESS
OWNER’S MANUAL
Section 7: Troubleshooting
Power O and Disconnect all power before maintenance.
SAFETY GLASSES must be worn at all times during operation.
7.1 TROUBLESHOOTING
1
2
3
4
5
Press speed too fast or too slow—Adjust the speed according to section 4-2, speed of press.
Platen does not move—Turn flow control knob counter-clockwise and try to run the press back and forth. It is also
possible a fuse may have blown; have a qualified electrician check for electrical fault.
Platen moves erratically or jumps—This indicates oil level is low; check the hydraulic reservoir oil level. Be sure to check
this with the cylinders fully retracted.
Press moves too slow— This can indicate that flow control valve is too restricted or is plugged; Turn flow control knob
counter-clockwise to achieve one inch travel per 13 seconds.
Pomace squirts up when pressing—This could be caused from several factors; bags are too dirty or plugged— clean bags
or it may be time for a new set. Bags are too full—keep the bags 50-75% full. An improper grind—move to larger screen for
chunkier grind. Press speed— usually means it’s too fast. Warm overripe fruit—if possible, cool soft fruit before pressing.
It is often found that using a press-aid will remedy some of these problems.

14
22
SX-280 SQUEEZEBOX PRESS
OWNER’S MANUAL
Section 8: Useful Information
8.1 MACHINE DIAGRAMS
11
3
5
7
6
8
4
1
9
2
10
1
2
3
4
5
6
7
8
9
10
11
Speed Controls / Dump Stops
Press Area 1 (Raise 1)
Press Area 2 (Raise 2)
Li ing Ring
Shims Top & Bo om / Side
(11335/13186)
Hydraulic Cylinder (12171)
Bag Tab (13212)
Caster Plate
Electric Control Panel
Hydraulic Cylinder (19589)
Press Racks (14962)

15
22
SX-280 SQUEEZEBOX PRESS
OWNER’S MANUAL
Section 8: Useful Information
8.2 ELECTRIC BOX
5
2
3
4
1
2
3
4
5
Emergency Stop Bu on: Turns o power to hydraulic pump and solenoid valves. Please note that this does not
disconnect power from the control box. Do no open electric box without disconnecting main power source.
Forward—O —Reverse: Directional switch for the press area. Forward will move the plat- en away from the
operator. O is neutral. Reverse will move the platen towards the operator end.
Raise 1: This is used to lift the press area closest to the operator.
Raise 2: This is used to lift the press area farthest from the operator end.
Disconnect Switch: Main disconnect switch disconnects line voltage to the control box
when o . Control box will not open unless this is o .
1

16
22
SX-280 SQUEEZEBOX PRESS
OWNER’S MANUAL
Section 8: Useful Information
8.3 MACHINE CONTROLS &
Dump valve 13438 (left
coil raise one, right coil)
Hydraulic valve
spool
Solenoid valve
connector
(13148)
Valve coil
(13531)
Coil retaining
nut
Hydraulic return filterPressure relief for
forward/reverse
Drive valve 13439 (reverse left
coil, forward right coil)
Coils for solenoid
valve
COIL REMOVAL:

17
22
SX-280 SQUEEZEBOX PRESS
OWNER’S MANUAL
Section 8: Useful Information
8.3 MACHINE CONTROLS AND COMPONENTS
Raise 2 flow control
(11918)
Forward speed
control (11229)
Reverse speed
control (11229)
Pressure gauge
(13437)
Raise 1 dump
stop control
(13152)
Raise 2 dump
stop control
(13152)
Forward speed
control (11229)
Panel mount
gauge (13437)
Raise 1 flow control
(11918)
Reverse speed
control (11229)

18
22
SX-280 SQUEEZEBOX PRESS
OWNER’S MANUAL
Section 8: Useful Information
8.4 ELECTRIC BOX WIRING DIAGRAM

19
22
SX-280 SQUEEZEBOX PRESS
OWNER’S MANUAL
PART #
11573
13867
11918
11229
18592
13152
13437
13438
13439
13436
14962
11367
12545
12502
11343
12499
14276
14277
18593
12358
12873
12339
PART NAME
Filler Breather
Oil Filter
Flow Control Valve 1/4” Steel
Flow Control Panel Mount 1/4”(Press speed controls)
Manifold Series 2 Valve - w/Relief
On/O Valve-Brass (Dump Stop)
Pressure Gauge-Panel Mount - SS w/bracket
Directional Valve D03-Open Center (Dump Valve)
Directional Valve D03-Tandem Center (Press Valve)
Stacking Relief Valve
Press Racks 28”SQ.
Rack Tie 15”
Bag Loops 4-1/2”
Cross Bar SS
Scissor Bar - Long SS
Scissor Bar - Short SS
Scissor Bar - Long SS (end)
Scissor Bar - Short SS (end)
Cartridge Relief Valve
MOTOR 2 HP, 3 Phase, 230/460 VAc
Hydraulic Oil 10W
Cake Separator
Section 8: Useful Information
8.5 REPLACEMENT PARTS LIST

20
22
SX-280 SQUEEZEBOX PRESS
OWNER’S MANUAL
PART #
13186
11335
12880
11285
19589
14951
14955
12339
11075
11830
14987
13212
13531
15034
15035
15036
15037
15038
13653
13654
18136
14156
PART NAME
Side Shim
Top/Bottom Shim
Hydraulic Gear Pump
Hydraulic Cylinder 2 x 6 (Dump cylinder)
Hydraulic Cylinder 4 x 30 (Press cylinder)
Scissor Plate-Left
Scissor Plate-Right
Cake Separator
Bag Set (#2636) medium weave
Bag Set (#2623) coarse weave
Bag Set (#3188) fine weave
Bag Tab, SS
Coil for 13438,13439
Push/Pull Operator, Red
Contact Block Mounting Adapter
Pushbu on Operator
Pushbu on Cap, Green
Selector Switch Operator, 3 Position
Contact Block - NO
Contact Block - NC
Transformer 150VA
Fuse 2A Class CC
Section 8: Useful Information
8.5 REPLACEMENT PARTS LIST
Table of contents