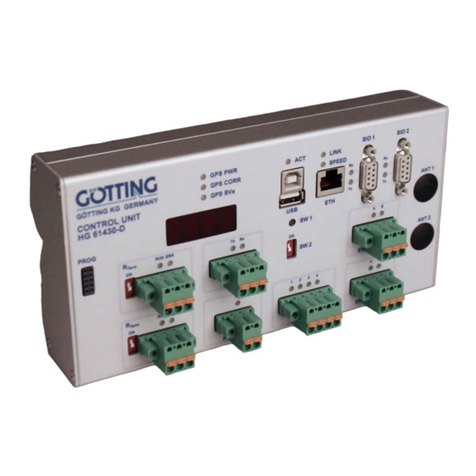
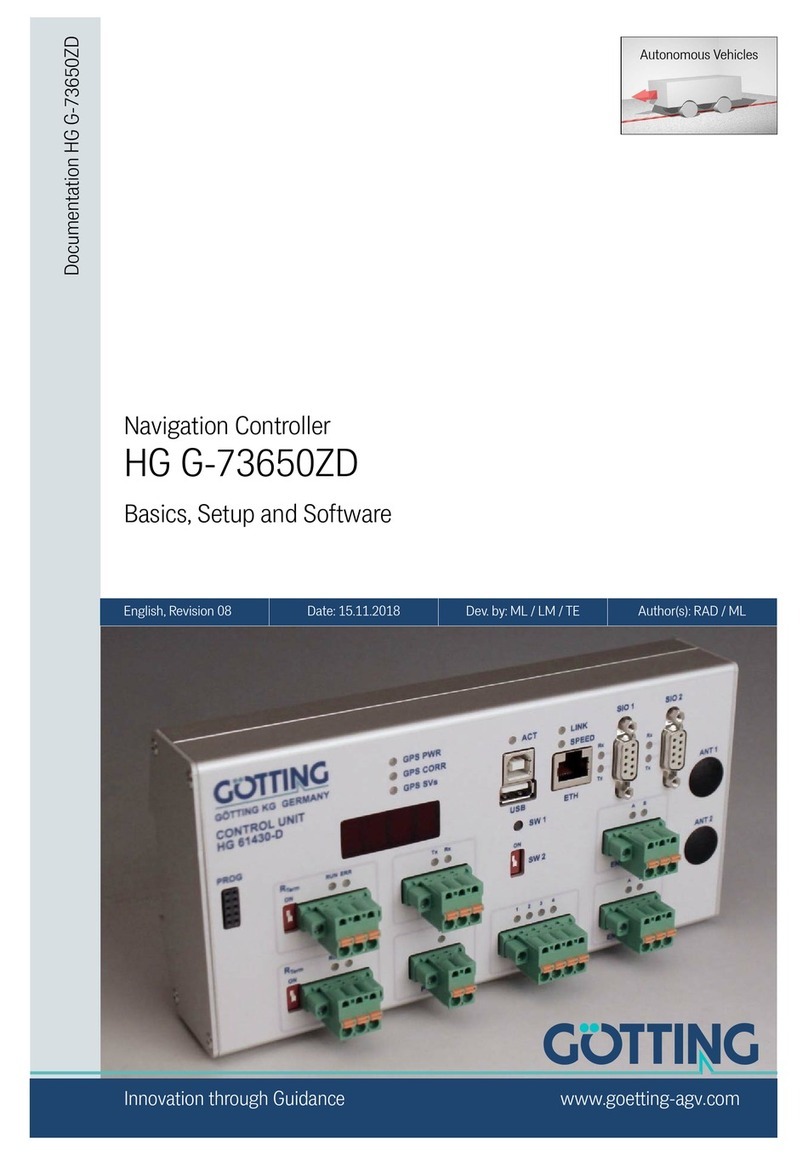
Gotting HG G-73650ZD Manual

Documentation HG G-73650ZD | English, Revision 05 | Date: 09.03.2017 | www.goetting-agv.com
1Table of Contents HG G-73650ZD
Contents
1 Introduction............................................................................................ 6
1.1 Symbols ................................................................................................................................ 6
1.2 Tasks of the Navigation Controller............................................................................... 7
1.3 Intended Use ....................................................................................................................... 7
1.4 Requirements / Options................................................................................................... 8
2 Basic Principles of Track Guidance ..................................................... 9
2.1 Suitable and Unsuitable Vehicle Types....................................................................... 9
2.2 System Composition....................................................................................................... 10
2.3 Position Determination with Sensor Fusion ............................................................ 10
2.3.1 The Odometry ................................................................................................................................ 11
2.3.2 Sensors for Navigation................................................................................................................ 11
2.3.2.1 Transponder Antenna .............................................................................................................. 11
2.3.2.1.1 Single Antenna Evaluation – Calculation of the Position with one Antenna .. 12
2.3.2.1.2 Double Antenna Evaluation ............................................................................................ 14
2.3.2.1.3 The Triple Antenna Evaluation....................................................................................... 15
2.3.2.1.4 Initialising the Transponder Sensor Fusion (Placing Vehicle on the Track) .... 15
2.3.2.1.5 The Transponder List........................................................................................................ 16
2.3.2.2 GPS................................................................................................................................................ 16
2.4 Coordinate Systems ........................................................................................................ 17
2.4.1 The Vehicle Coordinate System ............................................................................................... 17
2.4.2 The Local Coordinate System................................................................................................... 17
2.4.3 Characteristics of the Coordinate Systems .......................................................................... 18
2.5 Reconstruction of the Route (Segments)................................................................. 19
2.5.1 Virtual Tracks ................................................................................................................................. 19
2.5.2 The Segment File.......................................................................................................................... 20
2.5.2.1 Structure of the Segment File............................................................................................... 20
2.5.2.2 The Segment Search................................................................................................................ 21
2.5.2.3 Selection of Segments ............................................................................................................ 22
2.5.2.4 Transmission of Segmente .................................................................................................... 23
2.5.3 Attributes......................................................................................................................................... 24
2.5.3.1 Offset Driving ............................................................................................................................. 24
2.5.3.2 Inverted Steering....................................................................................................................... 25
2.5.3.3 Stop Distance ............................................................................................................................. 26
2.5.3.4 Spot Turn ..................................................................................................................................... 27
2.5.4 Creating / Editing of a Segment File ...................................................................................... 27
2.6 Track Guidance................................................................................................................. 29
2.6.1 Speed Calculation......................................................................................................................... 30
2.6.2 Steering Angle Calculation ........................................................................................................ 30
2.6.3 Guidance of an omnidirectional Vehicle................................................................................ 30
2.6.4 Guidance of a non-omnidirectional Vehicle ......................................................................... 32
2.6.5 Driving Modes................................................................................................................................ 32
2.6.5.1 Idle Mode ..................................................................................................................................... 33
2.6.5.2 Parameter Test Mode .............................................................................................................. 33

Documentation HG G-73650ZD | English, Revision 05 | Date: 09.03.2017 | www.goetting-agv.com
2Table of Contents HG G-73650ZD
2.6.5.3 Automatic Mode ........................................................................................................................ 33
2.6.5.4 Remote Control Mode.............................................................................................................. 33
2.6.5.5 Vector Steering Mode .............................................................................................................. 34
2.7 Communication with the Vehicle Control (e.g. PLC) ............................................ 34
3 Hardware.............................................................................................. 36
3.1 Mounting............................................................................................................................ 37
3.2 Front Panel ........................................................................................................................ 37
3.3 Control Elements on Front Panel ............................................................................... 37
3.4 Display Elements on Front Panel ............................................................................... 38
3.5 Connectors ........................................................................................................................ 38
3.5.1 ETH .................................................................................................................................................... 38
3.5.2 USB.................................................................................................................................................... 39
3.5.3 SIO 1 (GPS Receiver) ................................................................................................................... 39
3.5.4 SIO 2 ................................................................................................................................................. 39
3.5.5 CAN 1................................................................................................................................................ 40
3.5.6 CAN 2................................................................................................................................................ 40
3.5.7 SIO 3 ................................................................................................................................................. 40
3.5.8 POWER............................................................................................................................................. 41
3.5.9 IO........................................................................................................................................................ 41
3.5.10 ENCODER 1 / ENCODER 2......................................................................................................... 41
3.5.11 PROG ................................................................................................................................................ 42
3.5.12 ANT1 / ANT2 .................................................................................................................................. 42
3.6 Extension module Feldbus ........................................................................................... 42
4 Software............................................................................................... 43
4.1 Main menu......................................................................................................................... 44
4.2 Status menu...................................................................................................................... 45
4.2.1 Navigation menu ........................................................................................................................... 45
4.2.1.1 Status ............................................................................................................................................ 45
4.2.1.2 Deviation ...................................................................................................................................... 46
4.2.1.3 Seg. Table .................................................................................................................................... 46
4.2.1.4 Segment....................................................................................................................................... 46
4.2.1.5 PLC ................................................................................................................................................ 47
4.2.2 Transponder menu ....................................................................................................................... 48
4.2.2.1 Antenna ........................................................................................................................................ 48
4.2.2.2 Result ............................................................................................................................................ 49
4.2.2.3 Odometry ..................................................................................................................................... 49
4.2.3 GPS.................................................................................................................................................... 50
4.2.3.1 GPS ................................................................................................................................................ 50
4.2.3.2 ONS ............................................................................................................................................... 51
4.2.3.3 Controller Deviation.................................................................................................................. 51
4.2.3.4 Controller Correction................................................................................................................ 51
4.2.3.5 Status ............................................................................................................................................ 52
4.2.4 GPS Receiver.................................................................................................................................. 53
4.2.4.1 UTC ................................................................................................................................................ 53
4.2.4.2 Status ............................................................................................................................................ 53
4.2.4.3 Position......................................................................................................................................... 53
4.2.4.4 Diff. Data Age ............................................................................................................................. 53
4.2.4.5 Satellites ...................................................................................................................................... 53
4.2.4.6 Accuracy ...................................................................................................................................... 53
4.2.4.7 Base Vector ................................................................................................................................. 54
4.2.4.8 Heading ........................................................................................................................................ 54
4.2.5 Error .................................................................................................................................................. 55

Documentation HG G-73650ZD | English, Revision 05 | Date: 09.03.2017 | www.goetting-agv.com
3Table of Contents HG G-73650ZD
4.2.6 TCP.................................................................................................................................................... 56
4.3 Configuration menu ........................................................................................................ 56
4.3.1 Configuration –> Main ................................................................................................................ 57
4.3.2 Configuration –> Guidance........................................................................................................ 59
4.3.3 Wheels ............................................................................................................................................. 59
4.3.3.1 What type of vehicle is involved? ........................................................................................60
4.3.3.2 The non-omnidirectional vehicle..........................................................................................60
4.3.3.3 The omnidirectional vehicle................................................................................................... 61
4.3.3.4 Which wheels should be used for the odometry? .......................................................... 61
4.3.3.5 How are the positions specified on the vehicle? ............................................................ 61
4.3.3.6 Configuration –> Wheels ........................................................................................................ 62
4.3.4 Configuration –> Antennas........................................................................................................ 64
4.3.5 Configuration –> Accuracy ........................................................................................................ 65
4.3.6 Configuration –> Steer Controller ........................................................................................... 66
4.3.7 Configuration –> Speed Controller ......................................................................................... 68
4.3.8 Configuration –> Sensor Fusion Transponder..................................................................... 69
4.3.9 Configuration –> Sensor Fusion GPS ..................................................................................... 70
4.3.10 Configuration –> Gyro................................................................................................................. 73
4.3.11 Configuration –> Servo............................................................................................................... 74
4.4 Network menu .................................................................................................................. 76
4.5 Config File menu.............................................................................................................. 77
4.5.1 Upload Configuration –> Load parameters from a file on the PC into the navigation
controller ......................................................................................................................................... 77
4.5.2 Download –> Transfer parameters from navigation controller into a file on the PC 78
4.6 Segment File menu ......................................................................................................... 78
4.6.1 Upload Segment File –> Transfer a segment file from the PC into the navigation con-
troller ................................................................................................................................................ 78
4.6.2 Download Segment File –> Transfer segment file from the navigation controller into
a file on the PC .............................................................................................................................. 79
4.7 Segment Table menu ..................................................................................................... 80
4.8 Transponder File menu .................................................................................................. 81
4.8.1 Upload Transponder File –> Transfer a transponder file from the PC into the naviga-
tion controller ................................................................................................................................ 81
4.8.2 Download Segment File –> Transfer transponder file from the navigation controller
into a file on the PC ..................................................................................................................... 82
4.9 Transponder Table menu .............................................................................................. 82
4.10 'Parameter Test' menu................................................................................................... 83
4.10.1 Requirements for switching into the different modes ...................................................... 83
4.10.2 Possibilities in the 'Idle' mode .................................................................................................. 84
4.10.3 Possibilities in the 'Test' mode................................................................................................. 84
4.10.4 Possibilities in the 'Auto' mode................................................................................................ 84
4.10.5 Specification of segments ......................................................................................................... 84
4.10.6 Setting a starting position.......................................................................................................... 85
5 Commissioning .................................................................................... 86
5.1 Interfaces usually connected ....................................................................................... 86
5.2 Test / real operation........................................................................................................86
5.3 Commissioning the communication .......................................................................... 87
5.4 Setting the parameters .................................................................................................. 87
5.4.1 Configuration -> Main ................................................................................................................. 88
5.4.2 Configuration –> Guidance........................................................................................................ 89
5.4.3 Configuration –> Wheels............................................................................................................ 89
5.4.4 Configuration –> Antenna.......................................................................................................... 91
5.4.5 Configuration –> Accuracy ........................................................................................................ 92

Documentation HG G-73650ZD | English, Revision 05 | Date: 09.03.2017 | www.goetting-agv.com
4Table of Contents HG G-73650ZD
5.4.6 Configuration –> Steer Controller ........................................................................................... 92
5.4.7 Configuration –> Speed Controller..........................................................................................92
5.4.8 Configuration –> Sensor Fusion............................................................................................... 93
5.4.9 Configuration –> Gyro ................................................................................................................. 93
5.4.10 Configuration –> GPS .................................................................................................................. 94
5.5 Creating the segments .................................................................................................. 94
5.6 Simulation without vehicle and vehicle controller ............................................... 95
5.7 Simulation without vehicle and with vehicle controller...................................... 96
5.8 Commissioning a vehicle .............................................................................................. 96
5.8.1 Testing and optimizing the parameters ................................................................................. 96
5.8.2 Other optimisations................................................................................................................... 100
5.8.3 Optimising the steering controller........................................................................................ 101
5.8.4 Optimising the speed ramps .................................................................................................. 102
6 CAN Bus Protocol.............................................................................. 103
6.1 How to send Segments to the Control Unit via the CAN Bus ......................... 103
6.2 Transmission Telegrams from Control Unit to PLC, the Wheels and the Gyro ..
105
6.2.1 Path Data Box ............................................................................................................................. 105
6.2.2 Segment Search Box ................................................................................................................ 106
6.2.3 Status Box .................................................................................................................................... 106
6.2.4 Error Box....................................................................................................................................... 107
6.2.5 Wheel Boxes................................................................................................................................ 111
6.2.6 Gyro Box ....................................................................................................................................... 113
6.3 Reception Telegrams from PLC, Wheels, Antennas, Gyro and Sensor Fusion to
the Control Unit ............................................................................................................. 114
6.3.1 Path data (target) Box .............................................................................................................. 114
6.3.2 SPS Control Box ......................................................................................................................... 115
6.3.3 Remote Control Box.................................................................................................................. 116
6.3.4 Wheel Box .................................................................................................................................... 117
6.3.5 Antenna Boxes............................................................................................................................ 117
6.3.6 Gyro Box ....................................................................................................................................... 118
6.3.7 Sensorfusion Boxes................................................................................................................... 119
7 Feldbus Protocol ............................................................................... 122
7.1 Tx Transmission Telegram Control Unit –> PLC.................................................. 122
7.2 Rx Reception Telegram PLC –> Control Unit ....................................................... 126
8 USB Data Logging: Scope of the Data............................................ 130
8.1 Opening logged Data in Excel® ................................................................................ 131
8.2 List of logged Parameters .......................................................................................... 131
9 Trouble Shooting............................................................................... 141
10 Technical Data ................................................................................... 143
11 Appendix ............................................................................................ 144
A Attributes ............................................................................................................................................... 144
B Radius Calculation with 16 Bit Resolution ............................................................................. 145
C Configuration of the Ethernet Interface Parameters via SIO 2 ..................................... 146
D Firmware-Update via the USB Interface ................................................................................. 147
12 List of Figures.................................................................................... 150

Documentation HG G-73650ZD | English, Revision 05 | Date: 09.03.2017 | www.goetting-agv.com
5Table of Contents HG G-73650ZD
13 List of Tables...................................................................................... 153
14 Copyright and Terms of Liability ..................................................... 155
14.1 Copyright ......................................................................................................................... 155
14.2 Exclusion of Liability .................................................................................................... 155
14.3 Trade Marks and Company Names ......................................................................... 155

Documentation HG G-73650ZD | English, Revision 05 | Date: 09.03.2017 | www.goetting-agv.com
6Chapter 1: Introduction HG G-73650ZD
1Introduction
The subject of this manual is the Navigation Controller HG G-73650ZD that enables AGV
(Automated Guided Vehicles) to follow virtual tracks. The following terms are used synony-
mously throughout this document:
– Control Unit (as printed onto the hardware)
– navigation controller
– Vehicle Guidance Controller (VGC)
1.1 Symbols
The following symbols and marks are used in Götting documentations:
Note
Indicates technical information that should be followed when using the device.
ATTENTION!
Indicates dangers that may lead to damages or the destruction of the device.
BEWARE!
Indicates dangers that may lead to injuries or severe damage of property.
WARNING!
Indicates dangers that may lead to injuries, potentially with loss of life, or severe damage of
property.
Tip
Indicates information that makes handling of the device easier.

Documentation HG G-73650ZD | English, Revision 05 | Date: 09.03.2017 | www.goetting-agv.com
7Chapter 1: Introduction HG G-73650ZD
Link
Indicates additional information in the internet, e.g. on our homepage www.goetting-
agv.com. Those links are clickable in the PDF version of this documentation.
Program texts and variables are indicated through the use of a fixed width
font.
Whenever the pressing of letter keys is required for program entries, the required
etter eys are indicated as such (for any programs of Götting KG small and capital
letters are equally valid).
1.2 Tasks of the Navigation Controller
The navigation controller has the following tasks:
1. Determination of the current position via transponders, GPS or external input, see
section 2.3 on page 10
2. Reconstruction of the route to be driven (by means of segment files), see section 2.5
on page 19
3. Track Guidance (controlling the vehicle on a track), see section 2.6 on page 29
As the navigation controller is a very complex technical product the following pages will first
cover the various aspects of the vehicle's track guidance that have to be considered before
we explain the subject areas of commissioning and configuration. The following points will
be explained later in this manual:
Basic information on positioning, track creation and track guidance
Hardware description, including displays and interfaces
Software description, including all menus of the web configuration
Commissioning
Protocol description, structure of the CAN- telegrams, Feldbus (external implementa-
tion on profinet, profibus, etc.)
Listing of data, which can be logged on an USB stick for analysis purposes
Trouble shooting
1.3 Intended Use
WARNING!
The navigation controller is not a safe device! It may only be operated in connection with a
safety system!
Due to its design the navigation controller is designated for a wide scope of applications. It
can only be applied for the track guidance of vehicles if the manufacturer or the plant oper-
ator ensure that sensors for position detection are used that are suitable for the require-
ments of that specific place and thus work fully (GPS e.g. is only suitable for outdoor envi-

Documentation HG G-73650ZD | English, Revision 05 | Date: 09.03.2017 | www.goetting-agv.com
8Chapter 1: Introduction HG G-73650ZD
ronments with the restriction that the GPS signals experience no interferences due to
occlusions). Furthermore it is essential that all parameters, e.g. concerning the vehicle's di-
mensions and functions as well as the position of the axles and wheels have to be entered
with utmost accuracy. Consequently for new projects a comprehensive testing of the set-
tings with a jacked-up vehicle within a closed down section of the plant is always recom-
mended.
ATTENTION!
As vehicles using the steering controller usually drive fully automated during their final / last
implementation step, there is always the risk of damages to the vehicles and the environ-
ment if any incorrect parameters or faulty input signals are entered!
The vehicle manufacturer as well as the plant operator are obliged to operate with the great-
est care and to inform all persons either on the vehicle or in the danger zone surrounding
the machine about the risks involved. Furthermore all persons entrusted with carrying out
work within or close to the area of automated operation have to be informed that the vehicle
is driving autonomously.
1.4 Requirements / Options
– If you want to use the internal sensor fusion, at least one rotary encoder or any other
velocity or distance determining sensor has to be in operation. When rotary encoders
are directly connected to the steering controller please ensure that it is a push/pull
type with an output voltage of 5 to 25 V, two tracks perpendicular to each other and a
resolution of 0.1 to 1 mm / pulse. Using data telegrams on the bus it is also possible
to work with encoders to which this limitation does not apply. For an improved accu-
racy or to achieve redundancy you can also use Gyro HG 84300 (according to
odometry).
– If a transponder positioning system is to be used, its antennas can be connected via
CAN bus. Alternatively or in connection with the transponder system you can use a
GPS system.
– When using the laser scanner HG 43600 two rotary encoders and two steering
encoders have to be connected directly to the navigation controller or deliver their
data via the wheel telegrams on the bus.
– Some steering servos and motor control units can be controlled / addressed directly
by the navigation controller so that a vehicle control system for each individual appli-
cation (e.g. PLC) is not absolutely necessary for each application. However, in terms
of monitoring, redundancy and customized adaptions a vehicle control system is
always recommendable for larger vehicles.
– If emergency stop functions are to be provided, a vehicle control system is manda-
tory as the highest possible safety can only be achieved when both steering control-
ler and vehicle control system are installed.

Documentation HG G-73650ZD | English, Revision 05 | Date: 09.03.2017 | www.goetting-agv.com
9Chapter 2: Basic Principles of Track Guidance HG G-73650ZD
2Basic Principles of Track Guidance
2.1 Suitable and Unsuitable Vehicle Types
The range of particularly suitable vehicle types covers all vehicles that operate predictably
and reproducibly. Several non-steered axles, trailers or vehicles with a center pivot steering
are not suitable.The wheel slippage has to be low and the wheels should be hard to mini-
mize the friction.
Figure 1 Example: Suitable vehicle types (selection)
The sketch below shows simplified versions of all the vehicles as three-wheelers, because
this is the base vehicle model used by the navigation controller. The navigation controller
can also be used for vehicles where the steered wheel is not in the middle (e.g. some fork-
lift truck types).
Figure 2 Sketch: Suitable vehicle types
One fixed axle
particularly
suited
e.g. fork-lift
truck
Symmetrical steering
particularly suited
e.g. some heavy duty
vehicles
Two fixed axles
less accuracy and
partly rubbing, grind-
ing wheels
e.g. large towing
tractors
coordinate
chassis / omni-
directional ve-
hicles
particularly
suited
e.g. special
vehicles

Documentation HG G-73650ZD | English, Revision 05 | Date: 09.03.2017 | www.goetting-agv.com
10 Chapter 2: Basic Principles of Track Guidance HG G-73650ZD
2.2 System Composition
Figure 3 Block diagram system structure
Due to the strict separation of the track controller, sensor fusion and navigation system and
the smart interaction with the vehicle control, the navigation controller offers a high degree
of flexibility and is also suitable for monitoring safety-critical vehicle components.
2.3 Position Determination with Sensor Fusion
The sensor fusion calculates the current position and the vehicle's orientation. The sensor
fusion provides the steering controller with the following data set (also referred to as pose):
–XPosition
–YPosition
–Speed
– Vehicle orientation
If the internal sensor fusion is used, the position of the vehicle is calculated from the odom-
etry, initialized and corrected by the transponder antenna and/or the GPS system. The tran-
sponder antennas will then be connected via CAN bus. Additionally their posi pulse has to
be connected with IO-3 (see manual of the antenna). The optional Gyro is connected via
CAN bus as well and is intended to enhance the odometry.
IO 1-3
A/B
A/B
Navigation Controller
Incremental
Encoder
(optional)
Incremental
Encoder
(optional)
Hardware Control Unit HG 61430
Gyro
HG 84300
(optional)
Transponder-Antenna
HG 98810 / HG 98820 /
HG 98850
(up to 4, optional)
GPS Antennas 1 & 2 (optional)
Track
Guidance
Controller
Vehicle PLC
Internal
Sensor fusion
Transponder
and/or GPS
IO 4
Central
Control
Unit
Narrow-band
RF Modem
(optional)
Narrow-band
RF Modem
(optional)
Steering Servo
Acceleration
(optional)
Break (optional)
Emergency Stop
(optional)
External
Sensor Fusion
e.g. Laser Scanner
(optional)

Documentation HG G-73650ZD | English, Revision 05 | Date: 09.03.2017 | www.goetting-agv.com
11Chapter 2: Basic Principles of Track Guidance HG G-73650ZD
Note
Since odometric calculations tend to be load-dependent the installation of a Gyro is recom-
mended.
If an external sensor fusion (determination of position and angle) shall be applied it can be
connected via the CAN Bus. The relevant protocol is described in chapter 6 on page 103.
This may be e.g. laserscanner HG 43600. As long as they are compliant with the CAN Bus
protocol requirements it is possible to use other position- determination systems as well.
By the use of a short-term stable odometry in combination with an absolute position sensor
the advantages of both systems are united. The absolute position sensor initializes the odo-
metric data and thus provides both the position as well as the vehicle heading at every
point. During operation the cumulative inaccuracies in the odometry will be reset at those
points where an absolute position is available.
In addition to the position and the steering angle the sensor fusion provides the speed as
well as an accuracy estimation. This estimation is based on the accuracy table (see Table 47
on page 121). The table is structured in such a way that the error is small right after e.g. a
transponder has been passed over. With the distance traveled the error tends to grow more
rapidly, as the angle is also steadily worsening. So with every meter travelled the value of
the accuracy assessment is decreased by one position, i.e. it moves one line upwards in the
corresponding Table 47.
When using GPS technology the GPS system determines the position's estimated accuracy
in meters. If GPS and transponder antennas are used simultaneously the accuracy estima-
tion is defined by the system in use. Switching between systems can be automated via ac-
curacy thresholds or set manually via segment specific attributes.
2.3.1 The Odometry
The odometric system uses wheel rotations, the steering angle and/or a Gyro to determine
the change in vehicle position and vehicle heading.
The odometry has the advantage to be highly accurate over short distances and to supply
the vehicle position at any time. The odometry has to be initilized at start-up. However while
traveling longer distances the system immanent errors accumulate. This can cause consid-
erable deviations.
2.3.2 Sensors for Navigation
2.3.2.1 Transponder Antenna
The transponder system outputs the position and the code of the transponder currently lo-
cated underneath the antenna. The position lateral to the direction of travel has an accuracy
between ± 5mm and ±20mm, depending on the antenna type (mostly its size). Also depend-
ing on the antenna type the detection range is between ±125 and up to ± 500mm, the read-
ing distance varies between 50 - 200 mm. Possible antennas are e.g. the Götting types HG
98810, HG 98820 and HG 98850.

Documentation HG G-73650ZD | English, Revision 05 | Date: 09.03.2017 | www.goetting-agv.com
12 Chapter 2: Basic Principles of Track Guidance HG G-73650ZD
The transponder position in direction of travel is only output as the posi pulse when the cen-
ter of the transponder antenna is crossing the transponder. When there is no transponder
underneath the antenna, the antenna delivers no position. There may be at most one
transponder underneath the antenna at any given time. The parameters of the tran-
sponder antenna are set via a RS 232 interface which is described in the antenna manual.
Figure 4 Determination of antenna positions underneath the vehicle
The transponder antennas are 1.5 dimensional. That means that the relative transponder
position in direction to the long side of the antenna is measured. In direction of the short
antenna side only the crossing impulse (posi pulse) is available, which is generated when
the transponder passes the center of the antenna. The navigation controller associates a
certain task with each antenna number:
Antenna 1: Front (if needed)
Antenna 2: Vehicle center, rotated by 90o(if needed)
Antenna 3: Rear
The simplest form is a set-up with a single antenna.
2.3.2.1.1 Single Antenna Evaluation – Calculation of the Position with one Antenna
Figure 5 Single antenna: Placement
ATTENTION!
In order to be able to calculate a position it is normally necessary to detect more than one
transponder!
Vehicle X
Vehicle Y
Front
Antenna 1
Antenna 2
Antenna 3
Ant 3
Position X
Ant 3
Position Y
Ant 1
Position Y
Ant 1
Position X
Ant 2
Position X
Ant 2
Position Y
Vehicle X
Antenna 3
Vehicle Y
Front

Documentation HG G-73650ZD | English, Revision 05 | Date: 09.03.2017 | www.goetting-agv.com
13Chapter 2: Basic Principles of Track Guidance HG G-73650ZD
The transponder antenna is able to determine the transponder position underneath the an-
tenna, however the direction of the antenna with regards to the transponder cannot be de-
termined. (exception: The transponder – a start transponder – can only be approached in
one direction, e.g. at a transfer station). Thus it is necessary to cross two transponders in or-
der to define the position of the vehicle. The odometry additionally measures the track be-
tween these two transponders. The transponder table enables associating absolute posi-
tions with the individually measured points (transponders). With the reading of two
transponders it is then also possible to determine the direction of the vehicle.
A fundamental disadvantage of the single antenna is that the calculated orientation of the
vehicle depends on the distance covered between the transponders. However, the determi-
nation of this distance can only be as precise as the vehicle's odometry. Thus the accuracy
of the calculation not only depends on the antenna and the transponders but also on the
odometry. Subsequently this calculation is not as accurate as the measurement accuracy
guaranteed if two antennas read two transponders simultaneously.
For non-omnidirectional vehicles make sure that the antenna is always mounted as close as
possible to the fixed axle. If this installation proves to be difficult or isn't feasible at all, the
antenna has to be located as close as possible to the fixed axle in the main direction of trav-
el. The further away the antenna is from the fixed axle the less accurate the measurement
will be. (Lever arm, high transversal speed of the transponders in curves and reduced effec-
tive detection range in curves).
Example
Figure 6 Properties of a single antenna set-up
Antenna properties:
The orange area of the antenna represents the range where max. one transponder
may be located. This area lies within a distance of approx. 50 mm around the antenna
casing.
The blue area is the antenna casing (here HG98820 180 mm x 360 mm)
The green area is the reception area of the transponder antenna (here approx. ±50
mm x ±125 mm)
If the thicker red line in the center of the antenna is crossed by a transponder, a posi
pulse will be triggered.
78,84 244,85
500
100
1500
4°
4°
3,19
52,04

Documentation HG G-73650ZD | English, Revision 05 | Date: 09.03.2017 | www.goetting-agv.com
14 Chapter 2: Basic Principles of Track Guidance HG G-73650ZD
The example shows two possible mounting positions of the antenna on the vehicle. The first
position is 100 mm in front of the fixed axle (turquoise), the second one is 1500 mm in front
of the fixed axle (magenta). In both cases the vehicle drives around a curve with a radius of
500 mm. The example clearly shows that the first position is much better than the second
one:
– The antenna's effective reading range for the first position is still 224 mm, for the sec-
ond position the range is reduced to 78 mm.
– The reading accuracy of the first position is considerably higher. In both cases the
vehicle uniformly turns 4o(it turns with the same speed). The transponder readings
are displayed symmetrically to the posipulse. In position 1 the transponder is read in a
distance of 3,19 mm from the desired position (center of the antenna), in position
two with a reading error of 52,04 mm.
– As the transponder moves much faster through the reading area in position two due
to the bigger lever, the error rate, generated by the timing, will increase.
– Major corrective movements may lead to completely missing the transponder in posi-
tion two.
If it is not possible to install the antenna close to the fixed axle, e.g. on a fork-lift, the follow-
ing should be observed:
– It should not be attempted to read transponders in tight turns. It is better to place a
pair of transponders with a distance of at least 0.5 m before and after the curve.
– Where curves are to be driven that are so long that transponders have to be read, the
radius has to be kept to the maximum possible and the speed should be as lowered
as much as possible.
– The transponder antenna has to be mounted as close as possible to the rear axle
(fixed axle or fixed roller).
For omnidirectional vehicles make sure that the antenna is mounted as close as possible to
the center of the vehicle. Again the following applies: The more tilted the vehicle moves the
more restricted the measurement is. If the vehicle only drives in diagonal direction a calcu-
lation cannot be performed at all, since the transponders are no longer crossing the antenna
center and consequently no posi pulses are generated. For each transponder crossing only
one calculation is performed (posi pulse of the transponder).
2.3.2.1.2 Double Antenna Evaluation
Figure 7 Properties of a double antenna set-up
Vehicle X
Vehicle Y
Front
Antenna 1
Antenna 3

Documentation HG G-73650ZD | English, Revision 05 | Date: 09.03.2017 | www.goetting-agv.com
15Chapter 2: Basic Principles of Track Guidance HG G-73650ZD
The double antenna set-up has the advantage that the vehicle orientation can be directly
measured using the second antenna. To do so the transponders have to be laid in such a
manner that both antennas are simultaneously located above a transponder each and that
antenna 1 or 3 will trigger a posi pulse. Then the calculation is independent from the odom-
etry. Furthermore the accuracy, especially of the vehicle orientation, is much more precise
in comparison with the evaluation of a single antenna. The antennas should be mounted as
far apart as possible. This means that small inaccuracies during positioning will only have a
slight impact on the angle error. For each transponder crossing only one calculation is per-
formed (posipulse of antenna 1,3).
2.3.2.1.3 The Triple Antenna Evaluation
Figure 8 Properties of a triple antenna set-up
In contrast to the single and double antenna set-up in this application all degrees of freedom
of the vehicle are measured directly. Calculations can be executed as long as all antennas
are positioned above transponders at the same time. This set-up also allows the determina-
tion of the vehicle's position and orientation when driving diagonally. Antenna 1 and 3 de-
termine the orientation and Y position, antenna 2 determines the vehicle's X position (vehi-
cle coordinate system). If only antenna 1 and 3 are located above transponders, the position
will be calculated when antenna 1 or 3 generate a posi pulse (like when using a double an-
tenna set-up).
2.3.2.1.4 Initialising the Transponder Sensor Fusion (Placing Vehicle on the Track)
There are several options for the initialisation of the transponder sensor fusion:
1. Single antenna set-up:
– The vehicle reads a special start transponder. The start transponder is a normal
transponder which can only be read with a certain orientation due to construc-
tional measures. This may be e.g. at a transfer station. The start transponder is
marked accordingly in the transponder list and the start heading is recorded in
1/100° (s. 2.3.2.1.5 on page 16). A start transponder is only evaluated as
such directly after the system has been switched on, afterwards it is con-
sidered a normal transponder.
– The vehicle crosses several transponders. After the first transponder a position
cannot yet be calculated. After the second transponder the position and head-
ing can be calculated. After the third transponder the position is confirmed and
the accuracy is set to a good value provided the relative position of the third
Transponder corresponds with the positions of the previous ones.
Vehicle X
Vehicle Y Front
Antenna 1
Antenna 2
Antenna 3

Documentation HG G-73650ZD | English, Revision 05 | Date: 09.03.2017 | www.goetting-agv.com
16 Chapter 2: Basic Principles of Track Guidance HG G-73650ZD
2. Double antenna set-up: The start position is determined immediately with an uncer-
tainty of ½ of the antenna width when starting over two transponders.
3. Triple antenna set-up: With this set-up the start position is exactly determined when
initializing while the three antennas are placed above three transponders.
If the vehicle is also controlled by a driver (manual mode) it sometimes happens that the
transponders are not crossed directly anymore. This results in an increasing deterioration of
odometry accuracy. Since the system normally is not switched- off the only remaining pos-
sibility for initialization for a single antenna system then is the second alternative.
2.3.2.1.5 The Transponder List
The transponder list is a CSV file (values separated by a semi colon). It can be created and
edited with Microsoft® Excel® or other spreadsheet applications. The navigation controller
can import and export this list (configuration via web browser, see section 4.8.1 on page 81).
Additionally the list can be displayed in the web browser, see section 4.9 on page 82.
0;1;-2480;-4555;9000;0;0;1
1;2;-2462;-3171;0;0;0;0
2;46;6000;0;0;0;0;0
3;4336;9500;0;0;0;0;0
4;8012;031;6891;9000;127;127;1
These values have the following meaning for the navigation controller:
The first column displays the serial number of the transponder tags. The second column
shows the corresponding transponder codes. The following two columns define the posi-
tion in X resp. Y direction in mm. In the fifth column the heading of the start transpon-
der is shown in 1/100°. Attribute 2 and attribute 3 are currently unused. Attribute 4 indi-
cates a start transponder with a 1.
2.3.2.2 GPS
Currently positioning with GPS has not yet been implemented, but will be available at a later
date.
No. Code X Pos. Y Pos. Attribute 1 Attribute 2 Attribute 3 Attribute 4
0 1 -2480 -4555 9000 0 0 1
1 2 -2462 -3171 0 0 0 0
246 6000 0 0 0 0 0
3 4336 9500 0 0 0 0 0
4 8012 3031 6891 9000 127 127 1
Table 1 Definition of transponder list

Documentation HG G-73650ZD | English, Revision 05 | Date: 09.03.2017 | www.goetting-agv.com
17Chapter 2: Basic Principles of Track Guidance HG G-73650ZD
2.4 Coordinate Systems
Within the Control Unit different coordinate systems are in use. Segments and transponders
refer to the local coordinate system (e.g. the coordinate system of the area). All components
of the vehicle refer to the vehicle coordinate system.
2.4.1 The Vehicle Coordinate System
Figure 9 Vehicle Coordinate System
The zero point (or origin) of the vehicle coordinate system is the point that is guided along
the segments.
– For omnidirectional vehicles the zero point can be chosen freely. Not each origin
makes sense, though, for the steering angles of the wheels to stay inside the possible
values. When the vehicle drives curves in which the heading changes the wheels that
are farthest from the origin need high steering angles.
– For non-omnidirectional vehicles the origin has to be placed on a point that is always
moving in vehicle direction (e.g. the axis that is not steered).
The coordinate system is always positioned in the vehicle so that for 0° steering angle and
forwards movement the vehicle drives in positive X direction. Looking in positive X direction
the Y axis has its positive direction to the left. Also in positive X direction the angle is 0° and
grows anti-clockwise from 0 to 360°. The same is valid for the steering angle.
2.4.2 The Local Coordinate System
For the local coordinate system the same basic definitions are valid as for the vehicle coor-
dinate system:
– The Y direction has its positive direction to the left when looking into positive X direc-
tion. Also in positive X direction the angle is 0° and grows anti-clockwise from 0 to
360°.
– When the GPS system is used either a local base station (origin) or the country coor-
dinate system are used. If no local base station is used the necessary GPS correction
data (wireless) have to be leased from a local provider.
Vehicle Coordinate System
X
Y
Y
X
Local Coordinate System
0
o
0 - 360
o

Documentation HG G-73650ZD | English, Revision 05 | Date: 09.03.2017 | www.goetting-agv.com
18 Chapter 2: Basic Principles of Track Guidance HG G-73650ZD
ATTENTION!
The geometer and GPS coordinate systems always have the North as 0° and the angle turns
clockwise. These coordinate systems have to be transformed into a X/Y coordinate system
(X = N and Y = -E).
If only Transponders are used for guidance the bearing of the coordinate system is arbitrary.
Keep in mind, though, that the origin is best placed close to the center of the area for auto-
matic driving. Otherwise the rounding errors of the calculations grow. The maximum area
that can be defined is ±10 km in X and Y direction.
If the country coordinate system is used an offset should be set so that the origin of the
country coordinate system is placed close to the center of the area for automatic driving.
2.4.3 Characteristics of the Coordinate Systems
The basic GPS always uses an ellipsoid coordinate system since the globe of the earth is
flattened by its rotation. This however results in two disadvantages:
– Lines of longitude and latitude are impossible to measure with yard sticks.
– Plate tectonic means that the land masses are drifting several centimeters each year
inside the global coordinate system.
Thus country specific coordinate systems are used. Those coordinate systems drift together
with the land masses and are almost flat. The GPS receiver performs the necessary trans-
formations automatically. The following example of a cylindrical intersection explains some
of the resulting quirks:
Figure 10 Cylindrical intersection of the earth globe for a flat country coordinate system
For this method a 3° stripe of the surface of the earth is projected onto a cylinder. This es-
sentially results in two errors:
– The North heading is only fully valid in the middle of the stripe.
– Distances are slightly distorted.
When using a local GPS base station a flat coordinate system is projected tangentially in
north heading onto the ellipsoid. The base station then marks the origin. This still results in
projection errors. Continental drift is no longer an issue since the base station drifts with the
land masses.
Artist: Anton (rp) 2005
https://commons.wikimedia.org/wiki/File:Utmzylinderrp.jpg
Creative Commons Attribution-Share Alike 3.0 Unported
https://creativecommons.org/licenses/by-sa/3.0/deed.en
Other manuals for HG G-73650ZD
2
Table of contents
Other Gotting Controllers manuals
Popular Controllers manuals by other brands

Pentair
Pentair SOLARTOUCH 521592 Installation and user guide

janitza
janitza Prophi 6R manual

Hamron
Hamron 002-832 operating instructions

Samson
Samson 3271 Mounting and operating instructions

Full Gauge Controls
Full Gauge Controls MT-530E Super manual

Mitsubishi Electric
Mitsubishi Electric NZ2GN2S-D41P01 user manual