Read Me First
Unpacking, Connections & Initial Setup
R6540
On/Standby
Setup Prog.Scan
Record
Return
Prev Next Rev Fwd
Display
Zoom Pause/Step Slow
PBC Disc Menu Title Mute
Volume
Go To
Clear
Program
Subtitle Audio Repeat
Angle
Quality Edit Skip
Stop
Input Disc/Live
Channel
Open/Close
Enter
Play
Power
R6540 DVD+R/RW RECORDER
DVD+R/RW • DVD-R/RW • CD • MP3 • WMA • PICTURE CD PLAYBACK
Power
PlayOpen/Close
Stop
InputChannel
Video Audio
L R
Record
Record
Line In 1
Antenna/Cable
DVD Recorder
Television
A/V IN
Choose English menus.
Choose Spanish menus.
Choose French menus.
Press <ENTER> to continue.
Please wait...
9 channels found
Channel 021 found
Channel searching done!
To exit press the ENTER key.
Welcome!
Please set the time and date:
8:48 PM
01 / 01 / 00 TUE
Continue...
Please select signal type:
Antenna
Cable
Skip
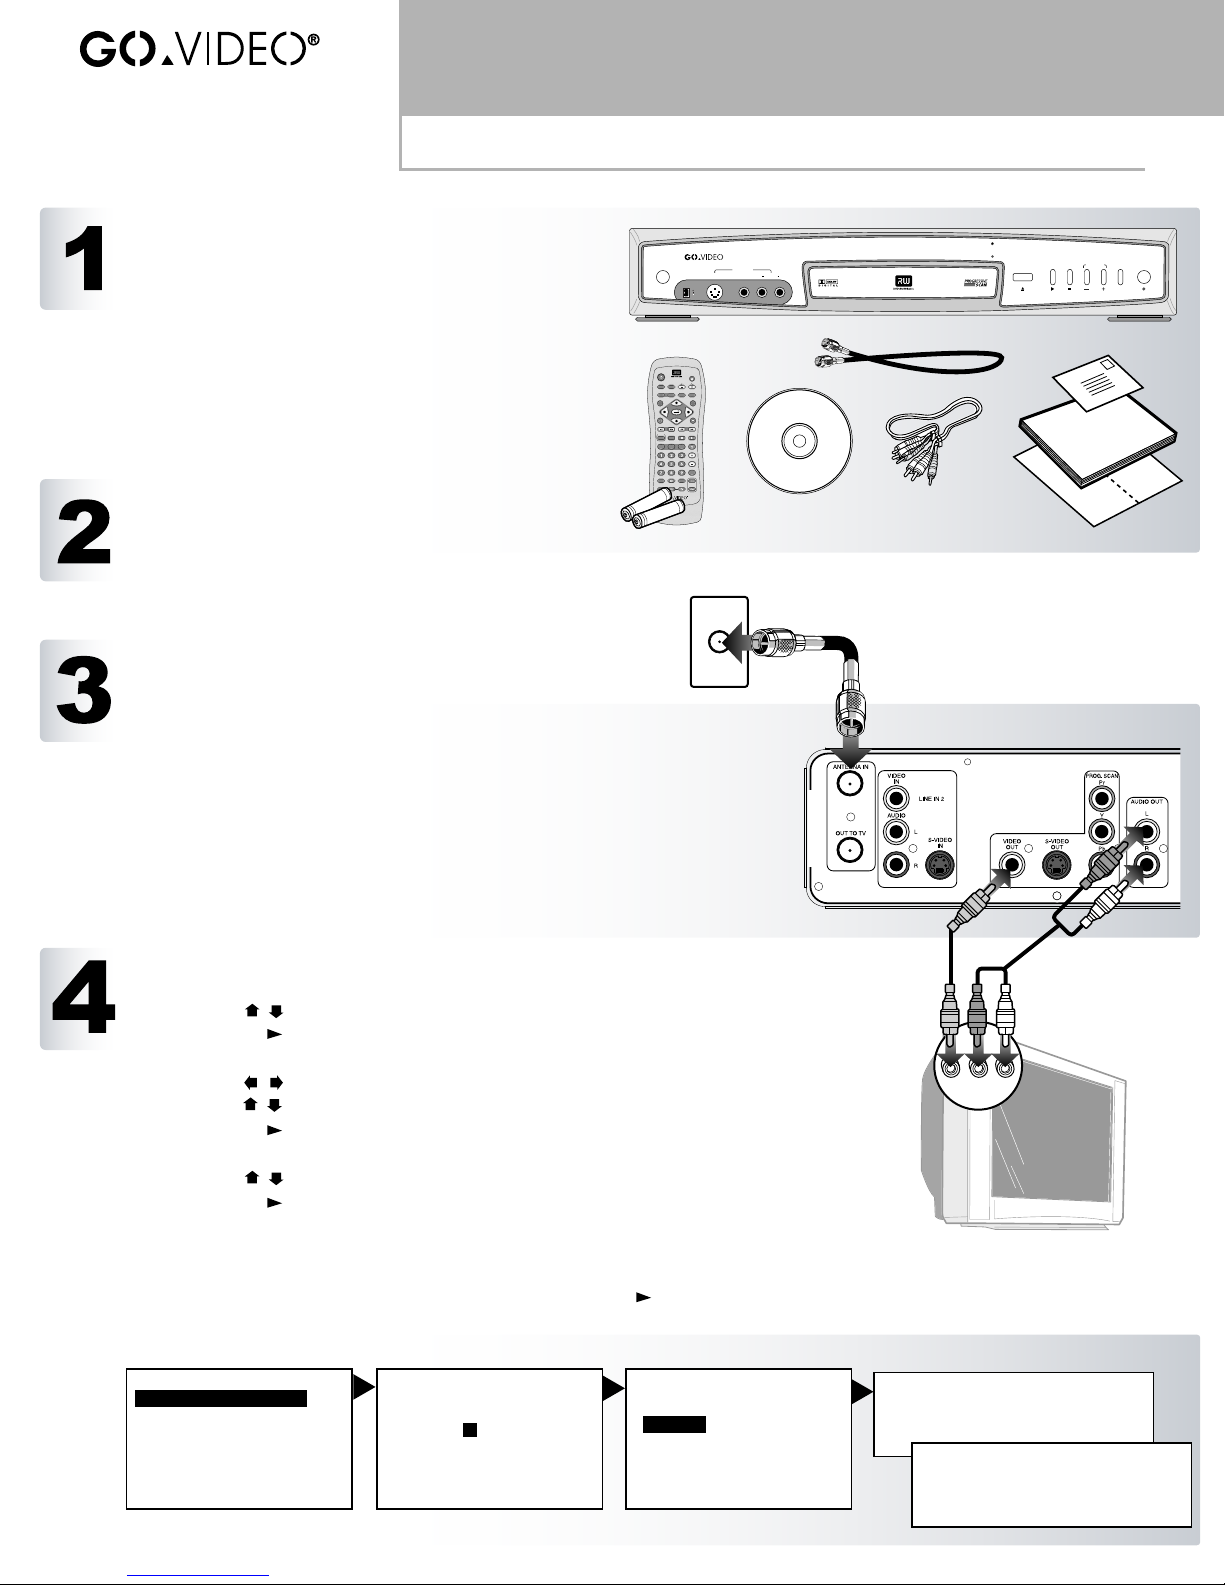
UNPACK YOUR DVD RECORDER
• R6540 DVD recorder (1)
• Remote control (1)
• 1.5V AAA alkaline batteries (2)
• Audio/video cable (1)
• RF (Antenna) cable (1)
• User’s guide (1)
• Quick reference guide (1)
• Warranty registration card (1)
• Blank DVD+RW disc (1)
INSERT REMOTE CONTROL BATTERIES
1Remove battery cover on back of remote control.
2Insert two 1.5V AAA batteries, paying attention to the
correct polarities (+/-).
3Replace cover.
CONNECT DVD RECORDER
1 Connect the RF cable from your antenna or cable TV jack to the
ANTENNA IN jack on the back panel of the DVD Recorder.
2 Connect the supplied audio/video cable from the AUDIO/VIDEO
OUT jacks on the back panel of the DVD Recorder to the line in
jacks on your television and/or stereo receiver.
3 Plug the DVD Recorder into a standard electrical outlet and press
the Power button on the front panel.
4 Turn on your TV and select the Video input.
5 The Language setup menu will appear. Continue with “Initial
Setup” below. For advanced connections, please refer to the User’s
Guide.
COMPLETE INITIAL SETUP
1Set the DVD Recorder’s on-screen menu language.
•Use the / buttons to select English (default), Spanish, or French.
•Press Play /Enter to continue.
2Set the DVD Recorder’s time and date. This is essential for accurate timer recording:
•Use the / buttons to select each item (hours, minutes, month, day, and year).
•Use the / buttons to set each item to the correct time and date.
•Press Play /Enter to continue.
3 Select Antenna or Cable:
• Use the / buttons to select Antenna (default), or Cable.
• Press Play /Enter to continue.
4Run Auto Channel Search
•Auto Channel Search runs automatically after you select Antenna or Cable. This may
take several minutes.
•When all available channels have been found, press Play /Enter to complete Initial
Setup.
1234
S-Video
DV In


