Graco 26A530 User manual

3A5278B
EN
Instructions
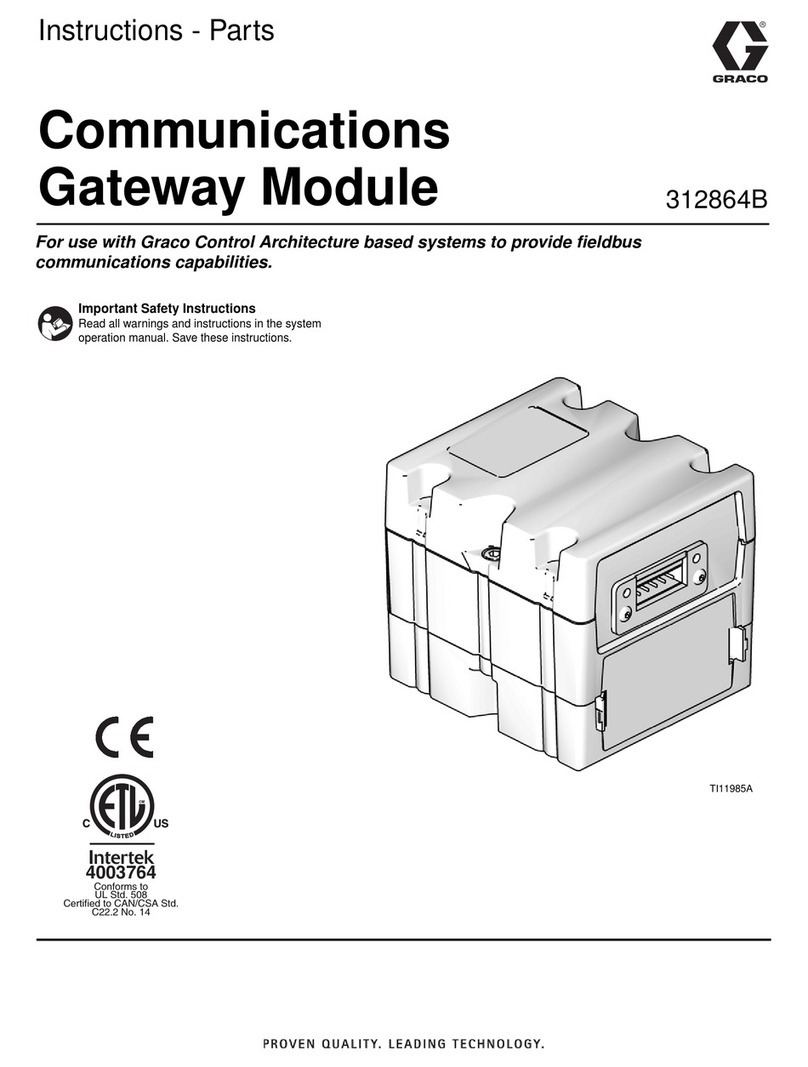
Communications Gateway
Module for XM™Sprayers
For use with XM Plural-Component Sprayers to provide enhanced fieldbus
communications abilities. For professional use only.
Not approved for use in explosive atmospheres or hazardous locations.
See page 2 for part and XM model information.
Important Safety Instructions
Read all warnings and instructions in this
manual and in the XM Plural-Component
Sprayers Operation manual. Save all
instructions.
WLD
CGM with EtherNet/IP connector shown

Related Manuals
23A5278B
Contents
Related Manuals . . . . . . . . . . . . . . . . . . . . . . . . . . . 2
XM Model Options . . . . . . . . . . . . . . . . . . . . . . . . . . 2
CGM Upgrade Kit . . . . . . . . . . . . . . . . . . . . . . . . . . . 2
Overview . . . . . . . . . . . . . . . . . . . . . . . . . . . . . . . . . . 3
System Overview . . . . . . . . . . . . . . . . . . . . . . . . 3
CGM Overview . . . . . . . . . . . . . . . . . . . . . . . . . . 3
Installation . . . . . . . . . . . . . . . . . . . . . . . . . . . . . . . . 4
Install Upgrade Tokens . . . . . . . . . . . . . . . . . . . . 4
Install or Update Data Map . . . . . . . . . . . . . . . . . 5
Setup . . . . . . . . . . . . . . . . . . . . . . . . . . . . . . . . . . . . . 6
Fieldbus Configuration Screens . . . . . . . . . . . . . 6
CGM I/O Data Map . . . . . . . . . . . . . . . . . . . . . . 11
Screens . . . . . . . . . . . . . . . . . . . . . . . . . . . . . . . 12
I/O Signals . . . . . . . . . . . . . . . . . . . . . . . . . . . . . 17
Parts . . . . . . . . . . . . . . . . . . . . . . . . . . . . . . . . . . . . 22
Graco Standard Warranty . . . . . . . . . . . . . . . . . . . 24
Graco Information . . . . . . . . . . . . . . . . . . . . . . . . . 24
Related Manuals
XM Model Options
The Communications Gateway Module can be used with the following XM models. These are not for use in explosive
atmospheres or hazardous locations. See the XM Operation manual (MM 312359) for details of these models.
•XMxAxx
•XMxBxx
•XMxCxx
CGM Upgrade Kit
The following kits contain the hardware and software needed to add a Communications Gateway Module (CGM) to
an XM system.
Manual Description
312864 Communications Gateway Module,
Instructions-Parts
312359 XM Operation
3A1244 Graco Control Architecture™Module
Programming
Part Number Fieldbus
26A530 DeviceNet
26A531 EtherNet/IP
26A532 PROFIBUS
26A533 PROFINET

Overview
3A5278B 3
Overview
System Overview
The XM plural component sprayer supports a
Communications Gateway Module (CGM) that provides
a control link between the XM system and a selected
fieldbus.
CGM Overview
The Communications Gateway Module (CGM) provides
a control link between the XM system and a selected
fieldbus. This provides the means for remote monitoring
and control by external automation systems.
See CGM I/O Data Map, page 11, for a list of internal
data from the XM system that can be viewed or modified
by your fieldbus master.
NOTE: The following system network configuration files
are available at www.graco.com.
• EDS file: DeviceNet or EtherNet/IP fieldbus
networks
• GSD file: PROFIBUS fieldbus networks
• GSDML: PROFINET fieldbus networks

Installation
43A5278B
Installation
The Communications Gateway Module must be
installed in the XM system. The XM system does not
provide a mounting position for this module. It will need
a cable connection to the display module and can be
mounted either close by or at a distance of up to 50 ft
(50 m).
After installing the CGM as desired, connect the CAN
cable adapter (3) to the open connection on the display
module. Connect the CAN cable (2) to the adapter.
Connect the other end of the CAN cable to either of the
two connectors on the CGM. Alternate lengths of the
CAN cable are available and listed in Parts, page 22.
Install Upgrade Tokens
NOTE: The XM system requires updated software to
use the CGM. See Parts, page 22, for details.
To install software upgrades:
1. Use software token (4). See the Graco Control
Architecture™(GCA) Module Programming manual
for instructions.
NOTE: Upgrade all modules in the system to the
software version on the token. Different software
versions may not be compatible.
All data in the module (system settings, USB logs
maintenance counters) may be reset to factory default
settings. Download all settings and user preferences to
a USB before the upgrade, for ease of restoring them
following the upgrade.
The software version history for each system can be
viewed in the technical support section at
www.graco.com.
WARNING
ELECTRIC SHOCK HAZARD
To prevent electric shock:
• Turn off and disconnect power at XM
system main switch before installing
the Communications Gateway Module,
disconnecting any cables, or servicing
equipment.
• All electrical wiring must be done by a
qualified electrician and comply with all
local codes and regulations.

Installation
3A5278B 5
Install or Update Data Map
NOTE: The fieldbus connection is temporarily disabled
during the installation or update of a map token.
1. Ensure the system is inactive.
2. Remove access cover (A).
3. Insert and press map token (5) firmly into slot.
4. Press and hold the map upload push button (B) for
three seconds. The red LED (C) will flash twice,
pause, and repeat once after the data map is
successfully uploaded. This may take up to 10
seconds.
NOTE: The rotary switch (D) has no function for the
CGM.
5. Remove token (5). Store in a safe place.
6. Replace access cover (A).
FIG. 1: Remove Access Cover
ti12319a
A
FIG. 2: Insert Map Token
ti12320a
C
D
5B

Setup
63A5278B
Setup
Fieldbus Configuration Screens
The fieldbus screens are shown only if a CGM is
connected to your system. Find your fieldbus type in the
following table to identify parameters you can view or
edit.
1. Access the fieldbus screens from the setup mode
screens.
2. Turn setup key to enter Setup Mode.
3. Press to go to system setup screens.
4. Press multiple times as needed to go to
fieldbus screens.
NOTE: The fieldbus screen will not display if CAN
cables are not connected. Ensure that all CGM CAN
cables are connected.
PROFIBUS Fieldbus Screens
Screen 1
This screen enables you to set the hardware revision,
system serial number, device address, and installation
date.
Fieldbus Screens Page
PROFIBUS 6
PROFINET 7
DeviceNet 9
EtherNet/IP 10
FIG. 3: PROFIBUS Fieldbus Screen 1
Parameter Range
Hardware
Revision
0-9999
System Serial # 00000000-99999999
Device Address 000-126
Install Date Set as required. Use format shown in
figure above. Validate date and time
before saving.

Setup
3A5278B 7
Screen 2
Enter identification information for the CGM used in your
system.
Screen 3
This screen lists identification information for the
Datamap that has been loaded into the CGM.
PROFINET Fieldbus Screens
Screen 1
This screens enables you to set the hardware revision,
system serial number, IP address, station name, and
installation date.
FIG. 4: PROFIBUS Fieldbus Screen 2
Parameter Range
Location Tag 22 characters available
Function Tag 32 characters available
Description 54 characters available
FIG. 5: PROFIBUS Fieldbus Screen 3
FIG. 6: PROFINET Fieldbus Screen 1
Parameter Range
Hardware
Revision
System Serial #
IP Address Set as required
Install Date Set as required. Use format shown
in figure above. Validate date and
time before saving.
Station Name Required at installation. 32
characters available.

Setup
83A5278B
Screen 2
This screen enables you to change settings for DHCP,
Subnet Mask, Gateway, DNS 1, and DNS 2.
Screen 3
Enter identification information for the CGM used in your
system.
Screen 4
This screen lists identification information for the
Datamap that has been loaded into the CGM.
FIG. 7: PROFINET Fieldbus Screen 2
Parameter Range
DHCP
Yes or No
Subnet Mask Set as required
Gateway Set as required
DNS1 Set as required
DNS2 Set as required
FIG. 8: PROFINET Fieldbus Screen 3
Parameter Range
Location Tag 22 characters available
Function Tag 32 characters available
Description 54 characters available
FIG. 9: PROFINET Fieldbus Screen 4

Setup
3A5278B 9
DeviceNet Fieldbus Screens
Screen 1
This screen enables you to set the hardware revision,
system serial number, device address, and baud rate.
Screen 2
This screen lists identification information for the
Datamap that has been loaded into the CGM.
FIG. 10: DeviceNet Fieldbus Screen 1
Parameter Range
Hardware
Revision
System Serial #
Device Address 00-63
Baud Rate 125, 250, or 500
FIG. 11: DeviceNet Fieldbus Screen 2

Setup
10 3A5278B
EtherNet/IP Fieldbus Screens
Screen 1
This screen enables you to set the hardware revision,
system serial number, and the IP address.
Screen 2
This screen enables you to change settings for DHCP,
Subnet Mask, Gateway, DNS 1, and DNS 2.
Screen 3
This screen lists identification information for the
Datamap that has been loaded into the CGM.
FIG. 12: EtherNet/IP Fieldbus Screen 1
Parameter Range
Hardware
Revision
System Serial #
IP Address Required at installation
FIG. 13: EtherNet/IP Fieldbus Screen 2
Parameter Range
DHCP
Yes or No
Subnet Mask Set as desired
Gateway Set as desired
DNS 1 Set as desired
DNS 2 Set as desired
FIG. 14: EtherNet/IP Fieldbus Screen 3

Setup
3A5278B 11
CGM I/O Data Map
Outputs from PLC; Inputs to Graco XM
Inputs to PLC; Outputs from Graco XM
Signal Data Type BYTE
Pump On Off Control Integer BYTES 0-1
Operation Mode Control Integer BYTES 2-3
Volume Ratio Target Ctrl Integer BYTES 4-5
Reset Alarms Integer BYTES 6-7
Reset Batch Totalizers Integer BYTES 8-9
Reset Potlife Time Integer BYTES 10-11
Set Job Number Integer BYTES 12-13
Spare Output 1 Integer BYTES 14-15
Spare Output 2 Integer BYTES 16-17
Spare Output 3 Integer BYTES 18-19
Signal Data Type BYTE
Pump On Off Integer BYTES 0-1
Operation Mode Integer BYTES 2-3
Target Ratio Integer BYTES 4-5
Actual Ratio Integer BYTES 6-7
Event Code Integer BYTES 8-11
Temperature A Integer BYTES 12-13
Temperature B Integer BYTES 14-15
Pressure A Integer BYTES 16-17
Pressure B Integer BYTES 18-19
Flow Rate A Integer BYTES 20-21
Flow Rate B Integer BYTES 22-23
Batch Total A Integer BYTES 24-25
Batch Total B Integer BYTES 26-27
System in Weight Mode Integer BYTES 28-29
Temperature Units Integer BYTES 30-31
Pressure Units Integer BYTES 32-33
Volume Units Integer BYTES 34-35
Weight Units Integer BYTES 36-37
Potlife Timer Enable Integer BYTES 38-39
Potlife Timer Integer BYTES 40-41
Job Number Integer BYTES 42-43
Voltage System DC Integer BYTES 44-45
Spare Input 1 Integer BYTES 46-47
Spare Input 2 Integer BYTES 48-49
Spare Input 3 Integer BYTES 50-51
Spare Input 4 Integer BYTES 52-53
Spare Input 5 Integer BYTES 54-55
Spare Input 6 Integer BYTES 56-57
Spare Input 7 Integer BYTES 58-59

Setup
12 3A5278B
Screens
See XM Operations manual (MM 312359) for details of system operation. The following shows the XM display and
the gateway signal information available for each screen.
Run (Fluid Control)
Pump On/Enter Mode
Spray Mode
Shown with pump turned on.
FIG. 15: Pump On/Enter Mode
FIG. 16: Spray Mode
3
45
2
1
6
3
45
2
1
6
8

Setup
3A5278B 13
Pump Mode
Shown in Run Pump AB with pumps turned off and turned on.
Shown with pump turned on.
NOTE: Labels 1 and 2 are part of the menu bar and repeat on all screens. If the potlife timer is not visible, refer to the
sprayer manual for instructions on how to enable it.
NOTE: Labels 3 and 4 will repeat on all versions of this run screen.
NOTE: All versions of this screen display the sum of Flow Rate A and Flow Rate B. Some operation modes display A
and B separately. The gateways always provide Flow Rate A and Flow Rate B independently.
FIG. 17: Run Pump AB Off (Left) and On (Right)
FIG. 18: Pump Mode On
Label
Input to PLC
Description Units Comments Output from PLC Description
1 Potlife Timer Minutes Minutes remaining until potlife timer
expires
Can be reset to maximum value
using Reset Potlife Timer
2Systemin
Weight Mode
Integer 0 = Volume mode
1 = Weight mode
Read Only
77
3
45
2
1
6

Setup
14 3A5278B
3 Pump On Off Integer 0 = Pump is off
1 = Pump is on
Highlighted icon indicates pump is
on.
Pump On Off Control
4 Operation
Mode
Integer Icon on display indicates operation
mode.
0 = Spray
1 = Run Pump A (recirc)
2 = Run Pump B (recirc)
3 = Run Pump AB (recirc)
4 = Park
5 = Pump Test
6 = Ratio Test/Batch Dispense
8 = Inactive (system off)
9 = Valve Test
All other values are unused
Operation Mode Control
Acceptable values are 0, 1, 2, 3, 4,
or 8
All other values will be rejected
5 Pressure A
Pressure B
psi, bar,
MPa
Read Only
6 Temperature A
Temperature B
°F or °C Read Only
7 Flow Rate A
Flow Rate B
cc/min Read Only
8 Actual Ratio Ratio is in thousandths
1200 is 1.2:1 ratio
Read Only
Label
Input to PLC
Description Units Comments Output from PLC Description

Setup
3A5278B 15
Run (Information Screens)
Alarm
Totalizers and Job Number
FIG. 19: Alarm Screen
Label
Input to PLC
Description Units Comments Output from PLC Description
1 Event Code Integer See I/O Signals, page 17 for details
of Event Code.
Can be reset using Reset Alarms
2 Voltage Sys-
tem DC
mV Read Only
FIG. 20: Totalizers and Job Number Screen
Label
Input to PLC
Description Units Comments Output from PLC Description
1BatchTotalA
Batch Total B
Liters, gal-
lons (US),
or gallons
(Imperial)
Display shows batch totals of A, B,
and A plus B. The gateway provides
batch totals for A and B.
Can be reset to 0 using Reset Batch
Totalizers
2 Job Number Integer Can be changed using Set Job
Number. Job numbers from 0 to
9999 are valid.
2
1
1
2
1

Setup
16 3A5278B
Setup Screen
Setup Home
NOTE: The target ratio can only be changed when the system is in volume mode.
Date/Time/Units
FIG. 21: Setup Screen
Label
Input to PLC
Description Units Comments Output from PLC Description
1 Target Ratio Integer Ratio in thousandths. That is:
1200 = 1.2:1 ratio
1800 = 1.8:1 ratio
Volume Ratio Target Ctrl
FIG. 22: Date/Time/Units Screen
Label
Input to PLC
Description Units Comments Output from PLC Description
1 Volume Units Integer 0 = liter
1 = gallons (US)
2 = gallons (Imperial)
Read Only
2 Pressure Units Integer 0 = psi
1 = bar
2 = MPa
Read Only
3 Temperature
Units
Integer 0 = °F
1 = °C
Read Only
4 Weight Units Integer 0 = lb
1 = kg
Read Only
1
1
2
3
4

Setup
3A5278B 17
I/O Signals
Automation Input Signals
This section provides details about the CGM Automation Input and Output signals.
Pump On/Off
Operation Mode
Target Ratio
Provides target volume or weight ratio based on value of System in Weight Mode. Ratio is in thousandths. That is:
1200 = 1.2:1 ratio
1800 = 1.8:1 ratio
Actual Ratio
Provides actual volume or weight ratio based on value of System in Weight Mode. Ratio is in thousandths. That is:
1200 = 1.2:1 ratio
1800 = 1.8:1 ratio
Event Code
Contains the 4 character event code as ASCII characters, but only the most recent to occur. Each of the 4 bytes in
the integer represent one of the ASCII characters in the actual error code. The most significant byte is the first
character.
Values Pump On/Off
0Pump is off
1Pump is on
Values Operation Mode
0Spray
1Run Pump A (recirc)
2Run Pump B (recirc)
3Run Pump AB (recirc)
4Park
5Pump test
6Batch dispense
7Reserved
8Inactive (system off)
9Valve test

Setup
18 3A5278B
Temperature A
Temperature B
F° or C° depending on the setting of temperature units in the display.
NOTE: A value of 0°F represents an error.
Pressure A
Pressure B
Units in psi, bar, or MPa depending on setting of pressure units in the display.
An integer value within those units.
Flow Rate A
Flow Rate B
Cubic centimeters (milliliters) per minute
An integer value.
Batch Total A
Batch Total B
Batch material usage in volume or weight depending on current system mode. The particular volume or weight units
depend on the setting of units in the display. The value will be in tenths of gallons, liters, pounds, or kilograms. That
is:
If system mode is volume and volume units is liters, a value of 700 represents 70.0 liters.
System in Weight Mode
Indicates if the system is set to volume or weight mode.
Units
All units settings are set in the Display Module. The following signals are used to communicate this information to the
automation controller.
Pressure Units
Values Pump On/Off
0System is in volume mode
1System is in weight mode
Values Units
0psi
1bar
2MPa

Setup
3A5278B 19
Temperature Units
Volume Units
Weight Units
Potlife Timer Enable
Potlife Timer
The remaining potlife timer in minutes. A potlife time of 1 minute is actually from 1 to 60 seconds.
Job Number
The current job number of the system.
Voltage System DC
DC supply voltage in the system (in mV).
Values Units
0°F
1°C
Values Units Display Flow Rate Settings
0liter cc/min or liter/min
1gallons (US) oz/min or gpm (US)
2gallons (Imperial) oz/min or gpm (Imperial)
Values Units
0lb
1kg
Values Units
0Potlife timer is disabled
1Potlife timer is enabled

Setup
20 3A5278B
Automation Output Signals
Pump On Off Control
Through the gateway, the pump can only be turned on if the operation mode is set to Spray, Run Pump A, Run Pump
B, Run Pump AB, or Park.
All non-zero values will also be treated as a request to turn pump on.
Operation Mode Control
The pump must be off for the operation mode to be changed.
All other values will be rejected.
Volume Ratio Target Ctrl
The target volume ratio can only be set when the system is in volume mode. See System in Weight Mode, page 18.
Ratio in thousandths. That is:
1200 = 1.2:1 ratio
1800 = 1.8:1 ratio
Acceptable range is 1.0:1 to 10.0:1 (1,000 to 10,000). All other values will be rejected.
Reset Alarms
Values Pump On Off
0Pump is off
1Pump is on
Values Operation Mode
0Spray
1Run Pump A (recirc)
2Run Pump B (recirc)
3Run Pump AB (recirc)
4Park
8Inactive (system off)
Values Units
0Reset alarms
1Must set to 0 before setting to 1 to reset
alarms again
This manual suits for next models
3
Table of contents
Other Graco Gateway manuals