manuals.online logo
Brands
  1. Home
  2. •
  3. Brands
  4. •
  5. Graco
  6. •
  7. Water Pump
  8. •
  9. Graco Premier 970199 Operation manual

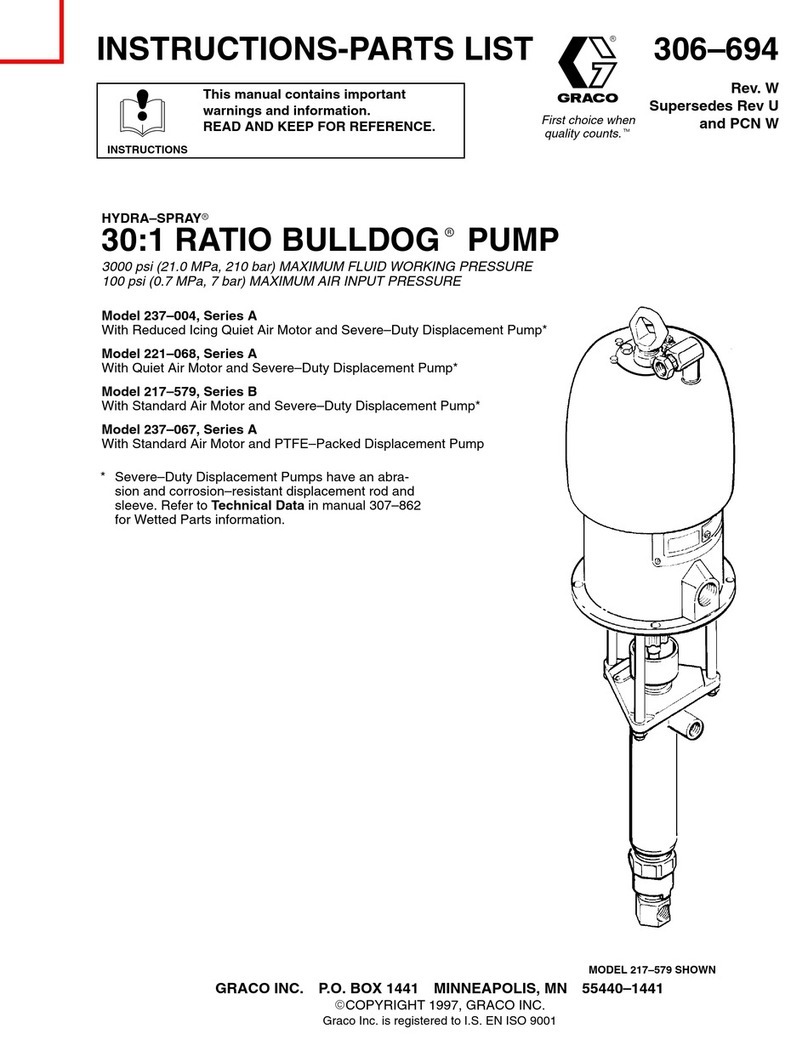
Graco Premier 970199 Operation manual

Instructions – Parts List
GRACO INC.ąP.O. BOX 1441ąMINNEAPOLIS, MNą55440-1441
Copyright 1999, Graco Inc. is registered to I.S. EN ISO 9001
55 GALLON (200 LITER), 34:1 PREMIERt
Module Supply Units
238 bar, 23.8 MPa (3400 psi) Maximum Working Pressure
* Model 970199, Tandem with Pneumatic Crossover
Model 970200, Tandem with Electric Crossover
* Model 970201, Pneumatic Low Level Shutoff
* These models are certified.
310337 Rev.B
Read warnings and instructions.
See page 2 for table of contents and
list of models.
8894A
Model 970199 Tandem Shown
Parts
2310337
Table of Contents
List of Models 2. . . . . . . . . . . . . . . . . . . . . . . . . . . . . . . . . .
Warnings 3. . . . . . . . . . . . . . . . . . . . . . . . . . . . . . . . . . . . . .
System Information 6. . . . . . . . . . . . . . . . . . . . . . . . . . . . .
Component Identification and Function 7. . . . . . . . . . . .
System Setup 8. . . . . . . . . . . . . . . . . . . . . . . . . . . . . . . . . .
Operation 12. . . . . . . . . . . . . . . . . . . . . . . . . . . . . . . . . . . .
Parts 16. . . . . . . . . . . . . . . . . . . . . . . . . . . . . . . . . . . . . . . .
Technical Data 19. . . . . . . . . . . . . . . . . . . . . . . . . . . . . . . .
Graco Warranty 20. . . . . . . . . . . . . . . . . . . . . . . . . . . . . . .
Graco Information 20. . . . . . . . . . . . . . . . . . . . . . . . . . . . .
List of Models
Part No. Pump Model
Displacement
Pump Model Ratio
Maximum Fluid
Working Pressure
Maximum Pump
Air Input Pressure
Parts
Page
* 970199 PremiertDura-Flot2400 34:1 238 bar, 23.8 MPa
(3400 psi)
7 bar, 0.7 MPa
(100 psi)
16
970200 PremiertDura-Flot2400 34:1 238 bar, 23.8 MPa
(3400 psi)
7 bar, 0.7 MPa
(100 psi)
17
* 970201 PremiertDura-Flot2400 34:1 238 bar, 23.8 MPa
(3400 psi)
7 bar, 0.7 MPa
(100 psi)
18
* These models are CE certified.
Related Manuals
Component Manual No.
Ram-Mounted Pumps 310524
Pneumatic Crossover 310293
Low-Level Shutoff 310294
Electrical Crossover 310295
310337 3
Warnings
Warning Symbol
WARNING
This symbol alerts you to the possibility of serious
injury or death if you do not follow the instructions.
Caution Symbol
CAUTION
This symbol alerts you to the possibility of damage to
or destruction of equipment if you do not follow the
instructions.
WARNING
INSTRUCTIONS
EQUIPMENT MISUSE HAZARD
Equipment misuse can cause the equipment to rupture, malfunction, or start unexpectedly and result
in serious injury.
DThis equipment is for professional use only.
DRead all instruction manuals, warnings, tags, and labels before operating the equipment.
DUse the equipment only for its intended purpose. If you are uncertain about usage, call your Graco
distributor.
DDo not alter or modify this equipment. Use only genuine Graco parts and accessories.
DCheck the equipment daily. Repair or replace worn or damaged parts immediately.
DDo not exceed 75 psi (5.1 bar) maximum inbound air pressure to the air–powered ram.
DNever exceed the recommended working pressure or the maximum air inlet pressure stated on
your pump or in the Technical Data on page 19.
DBe sure that all spray/dispensing equipment and accessories are rated to withstand the maximum
working pressure of the pump. Do not exceed the maximum working pressure of any component or
accessory used in the system.
DRoute the hoses away from the traffic areas, sharp edges, moving parts, and hot surfaces. Do not
expose Graco hoses to temperatures above 82°C (180°F) or below -40°C (-40°F).
DDo not use the hoses to pull the equipment.
DUse fluids and solvents that are chemically compatible with the equipment wetted parts. Refer to
the Technical Data sections of all the equipment manuals. Always read the material manufactur-
er’s literature before using fluid or solvent in this pump.
DAlways wear protective eyewear, gloves, clothing, and respirator as recommended by the fluid and
solvent manufacturers.
DWear hearing protection when operating this equipment.
DComply with all applicable local, state and national fire, electrical and other safety regulations.
4310337
WARNING
INJECTION HAZARD
Spray from the spray gun, hose leaks, or ruptured components can inject fluid into your body and
cause extremely serious injury, including the need for amputation. Splashing fluid in the eyes or on the
skin can also cause serious injury.
DFluid injected into the skin might look like just a cut, but it is a serious injury. Get immediate medi-
cal attention.
DDo not point the gun/valve at anyone or at any part of the body.
DDo not put your hand or fingers over the spray tip/nozzle.
DDo not stop or deflect fluid leaks with your hand, body, glove, or rag.
DAlways have the trigger guard on the gun when dispensing.
DCheck the gun diffuser operation weekly. Refer to the gun manual.
DBe sure the gun/valve trigger safety operates before dispensing.
DLock the gun/valve trigger safety when you stop dispensing.
DFollow the Pressure Relief Procedure on page 12 if the nozzle clogs, and before cleaning, check-
ing or servicing the equipment.
DTighten all fluid connections before operating the equipment.
DCheck the hoses, tubes, and couplings daily. Replace worn, damaged, or loose parts immediately.
Do not repair high pressure couplings; you must replace the entire hose.
DFluid hoses must have spring guards on both ends, to help protect them from rupture caused by
kinks or bends near the couplings.
FIRE, EXPLOSION AND ELECTRIC SHOCK HAZARD
Improper grounding, poor air ventilation, open flames, or sparks can cause a hazardous condition and
result in fire, explosion, or electrostatic shock and other serious injury.
DGround the equipment, the object being dispensed, and all other electrically conductive objects in
the dispense area. Proper grounding dissipates static electricity generated in the equipment. Refer
to System Grounding on page 8.
DProvide fresh air ventilation to avoid the buildup of flammable fumes from solvent or material.
DExtinguish all open flames or pilot lights in the dispense area.
DDo not turn on or off any light switch in the dispense area.
DDo not use this equipment with flammable liquids.
DDo not stop or deflect fluid leaks with your hand, body, glove, or rag.
DKeep the dispense area free of debris, including solvent, rags, and gasoline.
DDo not smoke in the dispense area.
DIf there is any static sparking or you feel an electric shock while using the equipment, stop dis-
pensing immediately. Do not use the equipment until you have identified and and corrected the
problem.
310337 5
WARNING
MOVING PARTS HAZARD
Moving parts, such as the ram ram plate/pump inlet can pinch fingers.
DDo not operate the equipment with the guard removed.
DKeep clear of all moving parts when starting or operating the equipment.
DKeep hands and fingers away from the priming piston during operation and whenever the pump
is charged with air.
DKeep clear of the ram plate, pump fluid inlet, and lip of the fluid container when raising or lower-
ing the ram.
DBefore checking or servicing the ram or pump, follow the Pressure Relief Procedure on
page 12.
TOXIC FLUID HAZARD
Hazardous fluid or toxic fumes can cause serious injury or death if splashed in the eyes or on the
skin, inhaled, or swallowed.
DKnow the specific hazards of the fluid you are using.
DStore hazardous fluid in an approved container. Dispose of hazardous fluid according to all
local, state and national guidelines.
DAlways wear protective eyewear, gloves, clothing and respirator as recommended by the fluid
and solvent manufacturer.
DAvoid exposure to heated material fumes.
DProvide adequate ventilation.
6310337
System Information
System Description
Systems 970199 and 970200 include dual 55 gallon
supply units for continuous material supply. System
970199 uses a pneumatic crossover; System 970200
uses an electrical crossover.
System 970201 is a single 55 gallon supply unit with a
low–level shutoff. See Fig. 1.
Each system air–powered ram pushes a ram plate (C)
into a drum of material, while the pump (A) removes
material from the drum and pushes it through a supply
hose to a customer–supplied header. Material flows
through the header to individual dispense drops.
WARNING
A main air bleed valve (E) and pump air bleed
valve (H), are required. These accessories help
reduce the risk of serious injury, including fluid
injection and splashing of fluid in the eyes or on the
skin, and injury from moving parts if you are adjust-
ing or repairing the pump.
The main air bleed valve (E) shuts off and relieves
the air to the pump and ram. The ram will hold
pressure if the ram director valve (U) is in the
horizontal (neutral) position. To relieve air pressure
in the ram, close the main air bleed valve (E) and
move the director valve (U) to DOWN. The ram will
slowly drop.
The pump air bleed valve (H) relieves air trapped
between it and the pump after the air is shut off.
Trapped air can cause the pump to cycle unexpect-
edly. Locate the valve close to the pump.
The fluid drain valve assists in relieving fluid pres-
sure in the displacement pump, hose, and gun.
Triggering the gun to relieve pressure may not be
sufficient.
System Accessories and Modules
Before you install the system, you should be familiar
with the parts discussed in the following paragraphs.
NOTE: Reference numbers and letters in parentheses
in the text refer to the callouts in the figures and the
parts drawing.
DMain air bleed valve (E) is required in your system
to shut off the air supply to the pump and ram
(Refer to the preceding WARNING ). When closed,
the valve bleeds off all air in the ram and pump, and
the ram slowly lowers. Be sure the valve is easily
accessible from the pump, and is located upstream
from the air manifold (F).
DPump air bleed valve (H) is required in your
system to relieve air trapped between it and the air
motor when the valve is closed (Refer to the pre-
ceding WARNING). Be sure the valve is easily
accessible from the pump, and is located down-
stream from the air regulator (G).
DAir regulator (G) controls pump speed and outlet
pressure by adjusting the air pressure to the pump.
Locate the regulator close to the pump, but up-
stream from the pump air bleed valve.
DAir manifold (F) has a swivel air inlet. It mounts to
the ram, and provides ports for connecting lines to
air-powered accessories.
DAir line filter (J) removes harmful dirt and moisture
from the compressed air supply.
DSecond bleed-type air valve (K) isolates the air
line accessories for servicing. Locate upstream
from all other air line accessories.
DPneumatic (Model 970199) or electrical (Model
970200) crossover (L) provides switching between
dual rams to provide a constant supply of material
to the system. The crossover controls the air supply
to each of the ram air motors. A low–level shutoff
(L) (Model 970201) provides automatic shutdown
of a single ram system when only a small amount
of material remains. The shutoff controls the air
supply to the ram air motor.
DRam air regulator (T) controls the air pressure to
the ram.
DRam director valve (U) controls the raising and
lowering of the ram.
DAir release valve (V) opens and closes the flow of
air to assist raising the ram plate (C) out of an
empty drum.
DBleed handle (CC) bleeds air from under the ram
plate (C) to assist in priming the pump and lowering
the ram plate into the drum.
310337 7
Component Identification and Function
Fig. 1
KEY
APump
BRam (two used on 970199 and 970200,
one used on 970201)
CRam Plate
DElectrically Conductive Air Supply Hose
E Main Air Bleed Valve (required, for pump
and ram)
FAir Manifold
GPump Air Regulator
HPump Air Bleed Valve
(required, for pump)
JAir Line Filter
KBleed-Type Air Valve
(for accessories)
LPneumatic Crossover (for 970199), Elec-
trical Crossover (for 970200), Low–level
Shutoff (for 970201)
NElectrically Conductive Fluid Hose
SBall Valve
TRam Air Regulator
URam Director Valve
VAir Release Valve
WAir Line Drain Valve
YGround Wire (required; Refer to
page 8 for setup)
AA Safety Valve
CC Bleed Handle
U
T
N
V
E
JK
D
C
CC
B A
AA
S
W
Y
H
G
F
Supply Unit A Supply Unit B
Model 970199 Tandem Shown
L
8310337
System Setup
System Setup
The following typical system installation is only a guide
for selecting and installing system components and
accessories. Contact your Graco distributor for help in
designing a system to suit your particular needs.
Air-powered ram extruder systems force high viscosity
fluids into the intake valve of the fluid pump. Make
certain all accessories are adequately sized and
pressure-rated to meet your system’s requirements.
Air and Fluid Hoses
Be sure all air hoses (D) and fluid hoses (N) are prop-
erly sized and pressure-rated for your system. Use
only electrically conductive hoses. See Fig. 1.
Selecting System Ram Locations
System rams are to be positioned so that air regulator
controls for pumps and rams are easily accessible.
Make sure there is overhead clearance for rams when
fully raised. Refer to the separate ram manual 306934
(supplied) for additional setup data.
Use holes in ram base as a guide, drill holes for 13
mm (1/2 in.) anchors.
Check that ram base is level in all directions. If neces-
sary, level base using metal shims. Secure base to
floor using 13 mm (1/2 in.) anchors to prevent ram
from tipping.
System Grounding
WARNING
FIRE AND EXPLOSION HAZARD
Before operating the pump, ground the
system as explained below. Also read
the section FIRE, EXPLOSION AND
ELECTRIC SHOCK HAZARD on
page 4.
1. Ram Pumps: check ground wire and clamp. See
Fig. 2. To install, loosen grounding lug locknut (W)
and washer (X). Insert one end of 1.5 mm@(12 ga)
minimum ground wire (Y) into slot in lug (Z) and
tighten locknut securely. Connect other end of wire
to true earth ground.
Fig. 2
W
X
Y
Z
0864
Pump Ground
2. Air and fluid hoses: use only electrically conduc-
tive hoses.
3. Air compressor: follow manufacturer’s recom-
mendations.
4. Dispense gun: ground through connection to
properly grounded fluid hose and pump.
5. Material supply container: follow your local code.
6. Object material is applied to: follow your local
code.
7. Solvent pails used when flushing: follow your
local code. Use only metal pails, which are con-
ductive, placed on grounded surface. Do not place
pail on nonconductive surface, such as paper or
cardboard, which interrupts grounding continuity.
8. To maintain grounding continuity when flush-
ing or relieving pressure, hold metal part of
dispense gun firmly to side of grounded metal pail,
then trigger gun.
310337 9
System Setup
Pneumatic Crossover Setup (Model
970199)
Install the pneumatic crossover as shown in Fig. 3.
Refer also to manual 310293.
NOTE: During system operation, as the ram ap-
proaches the drum bottom, the top of the ram contacts
the limit valve switch. The switch shuts off air to the
ram air motor via a 4–way piloted air valve. As the
valve stops air to one air motor, it starts air to the other
air motor. This allows constant material flow and
changing out of material drums.
NOTE: The position of the limit valve (D) on the ram
determines when the ram air motor is turned on and
off. During operation, this position can be adjusted as
desired. See Fig. 3.
8887A
Fig. 3
KEY
A2–Way Valves (2)
BRegulator
C4–Way Piloted Air Valve
DLimit Valves (2)
EMain Air Inlet
Pneumatic Crossover Setup (Model 970199)
A
B
C
D
E
10 310337
System Setup
Electrical Crossover Setup (Model 970200)
The electrical crossover is setup as shown in Fig. 4.
Also refer to manual 310295.
NOTE: During system operation, as the ram ap-
proaches the drum bottom, the top of the ram contacts
the empty level indicator kit’s limit valve switch. The
switch shuts off air to the ram air motor via a solenoid
valve. As the valve stops air to one air motor, it starts
air to the other air motor. This allows constant material
flow and changing out of material drums.
The position of the empty level indicator kit (B) on the
ram determines when the ram air motor is turned on
and off. During operation, this position can be adjusted
as desired. See Fig. 4.
8891A
KEY
AUnloader Crossover
BEmpty Level Indicator Kit (2)
C3/4 in. npt Muffler
DSolenoid Valve
E3/4 in. Hex Nipple
D
E
Electrical Crossover Setup (Model 970200)
A
BB
C
Fig. 4
310337 11
System Setup
Low–Level Shutoff Setup (Model 970201)
Setup the low–level shutoff as shown in Fig. 5. See
also manual 310294.
During system operation, as the ram approaches the
drum bottom, the top of the ram contacts the limit
valve switch. The switch shuts off the air to the air
motor.
NOTE: The position of the air limit valve (B) on the
ram determines when the ram air motor is turned on
and off. During operation, this position can be adjusted
as desired. See Fig. 5.
8890A
Fig. 5
Low–Level Shutoff Setup (Model 970201)
A
KEY
A3–Way Pilot Valve
BAir Limit Valve
CLimit Valve Bracket
B
C
12 310337
Operation
Pressure Relief Procedure
WARNING
INJECTION HAZARD
The system pressure must be manually
relieved to prevent the system from
starting or spraying accidentally. Fluid
under high pressure can be injected through the
skin and cause serious injury. To reduce the risk of
an injury from injection, splashing fluid, or moving
parts, follow the Pressure Relief Procedure
whenever you:
Dare instructed to relieve the pressure,
Dstop dispensing,
Dcheck or service any of the system equipment,
Dor install or clean the dispense ball valve.
1. Relieve system pressure to which Graco module
supply units are attached.
2. Close dispenser ball valves (S). Unhook ball
valves from system. See Fig. 1.
3. Close pump air bleed valve (H, required in your
system). See Fig. 1 or Fig. 6.
4. Shut off main air bleed valve (E, required in your
system). Set ram director valve (U) to DOWN.
Ram will slowly drop.
5. Hold metal part of dispenser ball valve firmly to
side of grounded metal pail, and open ball valve to
relieve pressure.
6. Close dispenser ball valve.
7. Repeat procedure for each ram (for models
970199 and 970200 only).
Flushing the System
Flush the system before initial use to prevent material
contamination.
CAUTION
Flush the system before performing the initial
material loading procedure. The system was fac-
tory-tested using a light soluble oil, a soybean oil, or
other oil as tagged. Flush the system to avoid con-
taminating the material that has been designated for
initial material loading.
To flush the system, perform the following procedure:
1. Select material to be used.
WARNING
Use fluids and solvents that are chemically compat-
ible with the equipment wetted parts. Refer to the
Technical Data sections of all the equipment
manuals. Always read the material manufacturer’s
literature before using fluid or solvent in this pump.
2. Verify that factory-test oil and material are compat-
ible:
a. If substances are compatible, omit following
step b and proceed to step 4.
b. If substances are incompatible, perform re-
maining steps to flush system.
3. Select drum of solvent that dissolves, cleans, and
eliminates factory-test oil from system. If neces-
sary, check with Graco Distributor or material sup-
plier for recommended solvent.
4. Before flushing, be sure entire system and flushing
drums are properly grounded. Refer to System
Grounding, on page 8.
5. Using compatible solvent, perform Starting and
Adjusting System Rams procedure and Starting
and Adjusting the Pump procedure on page 13.
6. Flush solvent through system for 1 to 2 minutes.
7. Remove drum containing solvent.
310337 13
Operation
Starting and Adjusting System Rams
WARNING
PRESSURIZED EQUIPMENT HAZARD
To reduce the risk of injury or equipment
damage:
DMake sure all material hose connec-
tions are secure.
DCheck that all routing of air lines will
not interfere with any moving compo-
nents within the fixture.
DDo not pressurize the system until
you have verified the system is ready
and it is safe to do so.
1. Use following instructions to start and adjust
system rams.
WARNING
MOVING PARTS HAZARD
Moving parts can pinch or amputate your
fingers. During container changeover or
when servicing the pump or supply unit,
be sure to close the pump air valve (H). Failure to
do this may allow the pump to start if the other
supply unit receives a low level signal.
2. Close all air regulators and air valves on the
supply unit being started. See Fig. 6.
3. Open main air bleed valve (E) and set ram air
regulator (T) to 2.8 bar, 0.26 MPa (40 psi). Move
director valve (U) handle so arrow points to UP,
and let ram rise to full height.
4. Remove drum cover. Smooth material surface with
straightedge.
5. Set full drum of fluid on ram base, slide drum back
against tube stop, and center under ram plate (C).
Use drum clamps (DD) to center, hold, and proper-
ly align drum with ram.
WARNING
MOVING PARTS HAZARD
Moving parts can pinch or amputate your
fingers. When the pump is operating and
when raising or lowering the ram, keep
your fingers and hands away from the pump intake,
ram plate, and lip of the drum.
CAUTION
To help avoid damage to equipment, do not use
drums that have side bungs or large dents with this
ram. Rough bung openings or large dents will dam-
age the wipers or stop the ram plate, resulting in a
runaway pump.
6. Move director valve handle to DOWN position to
lower ram. Lower ram until ram plate is just above
drum, then set valve to neutral position. Reposition
drum as necessary so wipers do not hit drum lip.
Open vent valve (CC) on ram plate.
7. Set director valve to DOWN position and lower
ram until fluid appears at vent valve (CC). Set
director valve to neutral and close vent valve.
Starting and Adjusting the Pump
1. Be sure pump air regulator (G) is closed. Set ram
air regulator (T) to 3.5 bar, 0.35 MPa (50 psi). Set
director valve (U) to DOWN. See Fig. 6.
2. Open the pump air bleed valve (H). Slowly adjust
the pump air regulator. This will start the pump
and fill the material passage.
3. Keep director valve (U) set to DOWN while pump
is operating.
NOTE: Increase air pressure to the ram if the pump
does not prime properly with heavier fluids. If fluid is
forced out around the top wiper, ram pressure is too
high and the air pressure should be decreased.
14 310337
Operation
Changing Drums
WARNING
MOVING PARTS HAZARD
Moving parts can pinch or amputate your
fingers. When the pump is operating and
when raising or lowering the ram, keep
your fingers and hands away from the pump intake,
ram plate, and lip of the drum.
1. Stop pump. Close pump air bleed valve (H). See
Fig. 6.
2. Before raising wiper plate, locate push button on
air release valve (V).
3. Set director valve (U) to UP to raise wiper plate. At
the same time, carefully equalize pressure in drum
by operating air release valve.
4. Raise wiper plate until it is completely out of drum.
5. Remove empty drum.
6. Inspect wiper plate and, if necessary, remove any
remaining material or material build–up.
7. Place full drum on ram base.
8. Lower ram and adjust position of drum relative to
ram plate, as explained under Starting and Ad-
justing Ram on page 13.
Shutdown and Care of the Pump
1. Set director valve (U) to neutral. See Fig. 6.
WARNING
To reduce the risk of serious injury whenever you
are instructed to relieve pressure, always follow the
Pressure Relief Procedure on page 12.
2. Relieve pressure.
3. Follow pump shutdown instructions in your sepa-
rate pump manual.
310337 15
Operation
Fig. 6
DD
UT
V
E
C
CC
H
G
Supply Unit A Supply Unit B
Model 970199 Tandem Shown
16 310337
Parts
Model 970199
Tandem with Pneumatic Crossover, 34:1 Ratio Premier Pump
Includes items 1–7
8894A
Ref No. 3 Fluid Supply Hose
Includes Items 4–7
1
3
2
7 6 5 4
2 REF
1
Ref Part
No. No. Description Qty
Ref Part
No. No. Description Qty
1 918481 PUMP, ram–mounted 200 liter (55 gal.)
See 310524 for parts 2
2 918393 KIT, pneumatic crossover
See 310293 for parts 1
3 C56995 HOSE ASSEMBLY, fluid supply;
Includes items 4–7 2
4 521973 . HOSE 1
5 521975 . UNION, pipe 1
6 C20490 . NIPPLE, hex 1
7 118854 . VALVE, ball 1
310337 17
Parts
Model 970200
Tandem with Electrical Crossover, 45:1 Ratio Premier Pump
Includes items 1–7
1
3
2
Ref No. 2 Electrical Crossover Kit
Ref No. 3 Fluid Supply Hose
Includes Items 4–7
7 6 5 4
8893A
1
2
Ref Part
No. No. Description Qty
Ref Part
No. No. Description Qty
1 918481 PUMP, ram–mounted 200 liter (55 gal.)
See 310524 for parts 2
2 C59520 KIT, electrical crossover
See 310295 for parts 1
3 C56995 HOSE, fluid supply;
Includes items 4–7 2
4 521973 . HOSE ASSEMBLY 1
5 521975 . UNION, pipe 1
6 C20490 . NIPPLE, hex 1
7 118854 . VALVE, ball 1
18 310337
Parts
Model 970201
Supply Unit with Pneumatic Low Level Shut–Off, 45:1 Ratio Premier Pump
Includes items 1–7
1
3
2
Ref No. 3 Fluid Supply Hose
Includes Items 4–7
7 6 5 4
8892A
Ref Part
No. No. Description Qty
Ref Part
No. No. Description Qty
1 918481 PUMP, ram–mounted 200 liter (55 gal.)
See 310524 for parts 1
2 918396 KIT, shut–off, low level, pneumatic
See 310294 for parts 1
3 C56995 HOSE, fluid supply;
Includes items 4–7 1
4 521973 . HOSE ASSEMBLY 1
5 521975 . UNION, pipe 1
6 C20490 . NIPPLE, hex 1
7 118854 . VALVE, ball 1
310337 19
Technical Data
Part No. Pump Model
Displacement Pump
Model Ratio
Maximum Fluid
Working Pressure
Maximum Pump Air
Input Pressure
970199 PremiertDura-Flot2400 34:1 238 bar, 23.8 MPa
(3400 psi)
7 bar, 0.7 MPa
(100 psi)
970200 PremiertDura-Flot2400 34:1 238 bar, 23.8 MPa
(3400 psi)
7 bar, 0.7 MPa
(100 psi)
970201 PremiertDura-Flot2400 34:1 238 bar, 23.8 MPa
(3400 psi)
7 bar, 0.7 MPa
(100 psi)
Sound Pressure Levels (dBa)
(measured at 1 meter from unit)
Input Air Pressures at 15 cycles per minute
Air Motor
0.28 MPa, 2.8 bar
(40 psi)
0.48 MPa, 4.8 bar
(70 psi)
0.63 MPa, 6.3 bar
(90 psi)
0.7 MPa, 7 bar
(100 psi)
Premier 82.5 82.4 83.2 83.0
Sound Power Levels (dBa)
(tested in accordance with ISO 9614–2)
Input Air Pressures at 15 cycles per minute
Air Motor
0.28 MPa, 2.8 bar
(40 psi)
0.48 MPa, 4.8 bar
(70 psi)
0.63 MPa, 6.3 bar
(90 psi)
0.7 MPa, 7 bar
(100 psi)
Premier 90.6 90.6 93.0 95.9
Main air inlets [for 970199 (1) and 970200 (2)] 3/4 in. npsm(f). . . . . . . . . . . . . . . . . . . . . . . . . . .
Main air inlet (for 970201) 1/2 in. npt(f). . . . . . . . . . . . . . . . . . . . . . . . . . . . . . . . . . . . . . . . . . . . . . .
Material outlets [for 970199 (2), 970200 (2), and 970201 (1)] 1–1/2 in. npt(f). . . . . . . . . . . . . . .
Maximum fluid flow (at 60 cpm) 34.6 liters/min (9.2 gpm). . . . . . . . . . . . . . . . . . . . . . . . . . . . . . .
Wetted parts Fluid outlet fittings: zinc or cadmium–plated carbon steel. . . . . . . . . . . . . . . . . . .
20 310337
Graco Standard Warranty
Graco warrants all equipment manufactured by Graco and bearing its name to be free from defects in material and workmanship on the
date of sale to the original purchaser for use. With the exception of any special, extended, or limited warranty published by Graco,
Graco will, for a period of twelve months from the date of sale, repair or replace any part of the equipment determined by Graco to be
defective. This warranty applies only when the equipment is installed, operated and maintained in accordance with Graco’s written
recommendations.
This warranty does not cover, and Graco shall not be liable for general wear and tear, or any malfunction, damage or wear caused by
faulty installation, misapplication, abrasion, corrosion, inadequate or improper maintenance, negligence, accident, tampering, or sub-
stitution of non–Graco component parts. Nor shall Graco be liable for malfunction, damage or wear caused by the incompatibility of
Graco equipment with structures, accessories, equipment or materials not supplied by Graco, or the improper design, manufacture,
installation, operation or maintenance of structures, accessories, equipment or materials not supplied by Graco.
This warranty is conditioned upon the prepaid return of the equipment claimed to be defective to an authorized Graco distributor for
verification of the claimed defect. If the claimed defect is verified, Graco will repair or replace free of charge any defective parts. The
equipment will be returned to the original purchaser transportation prepaid. If inspection of the equipment does not disclose any defect
in material or workmanship, repairs will be made at a reasonable charge, which charges may include the costs of parts, labor, and
transportation.
THIS WARRANTY IS EXCLUSIVE, AND IS IN LIEU OF ANY OTHER WARRANTIES, EXPRESS OR IMPLIED, INCLUDING BUT
NOT LIMITED TO WARRANTY OF MERCHANTABILITY OR WARRANTY OF FITNESS FOR A PARTICULAR PURPOSE.
Graco’s sole obligation and buyer’s sole remedy for any breach of warranty shall be as set forth above. The buyer agrees that no other
remedy (including, but not limited to, incidental or consequential damages for lost profits, lost sales, injury to person or property, or any
other incidental or consequential loss) shall be available. Any action for breach of warranty must be brought within two (2) years of the
date of sale.
Graco makes no warranty, and disclaims all implied warranties of merchantability and fitness for a particular purpose in connection
with accessories, equipment, materials or components sold but not manufactured by Graco. These items sold, but not manufactured
by Graco (such as electric motors, switches, hose, etc.), are subject to the warranty, if any, of their manufacturer. Graco will provide
purchaser with reasonable assistance in making any claim for breach of these warranties.
In no event will Graco be liable for indirect, incidental, special or consequential damages resulting from Graco supplying equipment
hereunder, or the furnishing, performance, or use of any products or other goods sold hereto, whether due to a breach of contract,
breach of warranty, the negligence of Graco, or otherwise.
FOR GRACO CANADA CUSTOMERS
The parties acknowledge that they have required that the present document, as well as all documents, notices and legal proceedings
entered into, given or instituted pursuant hereto or relating directly or indirectly hereto, be drawn up in English. Les parties reconnais-
sent avoir convenu que la rédaction du présente document sera en Anglais, ainsi que tous documents, avis et procédures judiciaires
exécutés, donnés ou intentés à la suite de ou en rapport, directement ou indirectement, avec les procedures concernées.
Graco Information
TO PLACE AN ORDER, contact your Graco distributor, or call one of the following numbers
to identify the distributor closest to you:
1–800–367–4023 Toll Free
612–623–6921
612–378–3505 Fax
All written and visual data contained in this document reflects the latest product information available at the time of publication.
Graco reserves the right to make changes at any time without notice.
Sales Offices: Minneapolis, Detroit
International Offices: Belgium, Korea, Hong Kong, Japan
www.graco.com
PRINTED IN USA 310337 02/1999, Revised 10/2003

This manual suits for next models

2

Other Graco Water Pump manuals

Graco E-Flo Plus Operating instructions

Graco

Graco E-Flo Plus Operating instructions

Graco Monark Operation manual

Graco

Graco Monark Operation manual

Graco 15H882 User manual

Graco

Graco 15H882 User manual

Graco Dyna-Star HP 77X202 User manual

Graco

Graco Dyna-Star HP 77X202 User manual

Graco SaniForce Instruction Manual

Graco

Graco SaniForce Instruction Manual

Graco Check-Mate 800 User manual

Graco

Graco Check-Mate 800 User manual

Graco Dura-Flo 1200 Bulldog 237-516 Operation manual

Graco

Graco Dura-Flo 1200 Bulldog 237-516 Operation manual

Graco 24G546 User manual

Graco

Graco 24G546 User manual

Graco 190ES 261825 Operating instructions

Graco

Graco 190ES 261825 Operating instructions

Graco Husky 2150e Instruction Manual

Graco

Graco Husky 2150e Instruction Manual

Graco Series D Datasheet

Graco

Graco Series D Datasheet

Graco Ratio President Hydra-Spray B 222-293 Operation manual

Graco

Graco Ratio President Hydra-Spray B 222-293 Operation manual

Graco 224342 A Series User manual

Graco

Graco 224342 A Series User manual

Graco Husky 2200 Use and care manual

Graco

Graco Husky 2200 Use and care manual

Graco Hydra-Cat Xtreme XL Parts list manual

Graco

Graco Hydra-Cat Xtreme XL Parts list manual

Graco Dura-Flo 2400 Operation manual

Graco

Graco Dura-Flo 2400 Operation manual

Graco Dyna-Star 239882 User manual

Graco

Graco Dyna-Star 239882 User manual

Graco Metric CHECK-MATE 200 Datasheet

Graco

Graco Metric CHECK-MATE 200 Datasheet

Graco Husky 515 series User manual

Graco

Graco Husky 515 series User manual

Graco SaniForce 24N300 Parts list manual

Graco

Graco SaniForce 24N300 Parts list manual

Graco MP-25 Instruction Manual

Graco

Graco MP-25 Instruction Manual

Graco 253485 Operation manual

Graco

Graco 253485 Operation manual

Graco Husky 2200F Installation manual

Graco

Graco Husky 2200F Installation manual

Graco Dura-Flo 1100 User manual

Graco

Graco Dura-Flo 1100 User manual

Popular Water Pump manuals by other brands

Viking pump 495 Series Technical & service manual

Viking pump

Viking pump 495 Series Technical & service manual

Simer 3963 owner's manual

Simer

Simer 3963 owner's manual

KABI KF700-C1 operating manual

KABI

KABI KF700-C1 operating manual

Arcomed Volumed nVP7000 Chroma Service manual

Arcomed

Arcomed Volumed nVP7000 Chroma Service manual

BRINKMANN PUMPS STA901/200 operating instructions

BRINKMANN PUMPS

BRINKMANN PUMPS STA901/200 operating instructions

Knauer AZURA P 2.1S user manual

Knauer

Knauer AZURA P 2.1S user manual

CET PFP-13hpHND-EM-HP80 Instruction handbook

CET

CET PFP-13hpHND-EM-HP80 Instruction handbook

HOGERT HT4R795 user manual

HOGERT

HOGERT HT4R795 user manual

Craftsman 390.304692 owner's manual

Craftsman

Craftsman 390.304692 owner's manual

Agilent Technologies 1200 series user manual

Agilent Technologies

Agilent Technologies 1200 series user manual

Almatec AHS Series Operating and installation instructions

Almatec

Almatec AHS Series Operating and installation instructions

NVE 866 Challenger  Series owner's manual

NVE

NVE 866 Challenger Series owner's manual

GENTRON Pro2 2000 owner's manual

GENTRON

GENTRON Pro2 2000 owner's manual

Pentair Myers CPM Series Installation and service manual

Pentair

Pentair Myers CPM Series Installation and service manual

Milwaukee 4115 Operator's manual

Milwaukee

Milwaukee 4115 Operator's manual

Tunze Turbelle e-jet 1605 Instructions for use

Tunze

Tunze Turbelle e-jet 1605 Instructions for use

VITO AGRO VIMB15A instruction manual

VITO

VITO AGRO VIMB15A instruction manual

Calpeda MXSU Original operating instructions

Calpeda

Calpeda MXSU Original operating instructions

manuals.online logo
manuals.online logoBrands
  • About & Mission
  • Contact us
  • Privacy Policy
  • Terms and Conditions

Copyright 2025 Manuals.Online. All Rights Reserved.