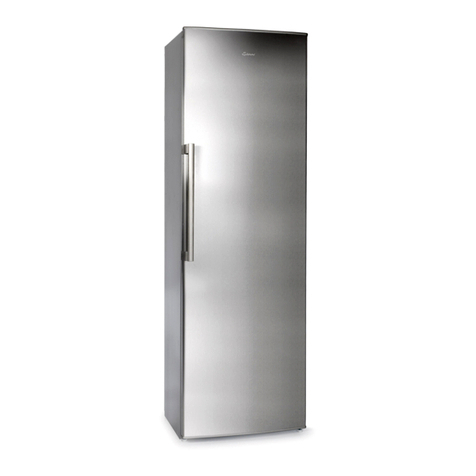
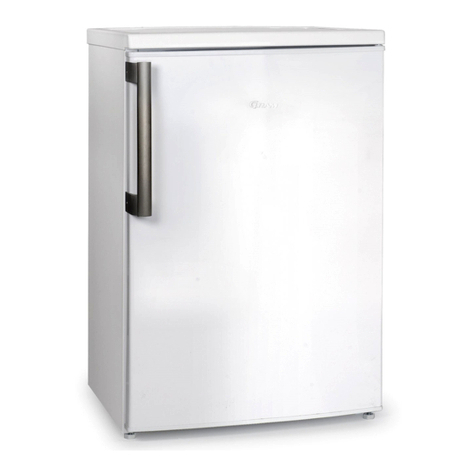
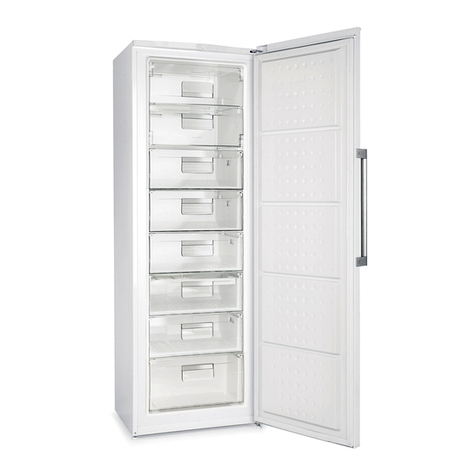
Gram FS 3185-90 User manual

FS 3185-90
EN
User guide
DA
Betjeningsvejledning
SV
Bruksanvisning
NO
Bruksanvisning
FI
Käyttöohjeet


WARNING!
In order to ensure a normal operation of your freezing appliance, which uses a completely environmentally friendly
refrigerant the R600a (Flammable only under certain conditions) you must observe the following rules:
Do not hinder the free circulation of the air around the appliance.
Do not use mechanical devices in order to accelerate the defrosting other than the ones recommended by the
manufacturer.
Do not destroy the refrigerating circuit.
Do not use electric appliances inside the food keeping compartment, other than those that might have been
recommended by the manufacturer.
ADVARSEL!
For at sikre en normal funktion af fryseskabet, der anvender et komplet miljøvenligt kølemiddel, R 600a (Kun
brændbar under særlige forhold), skal du overholde følgende regler:
Undlad at hindre den frie luftcirkulation rundt om apparatet.
Der må ikke anvendes mekanisk udstyr, ud over det af producenten anbefalede, til at fremskynde
afrimningsprocessen.
Undgå at beskadige kølekredsløbet.
Undlad at bruge elektrisk udstyr inde i rummet, hvor der opbevares fødevarer, ud over de steder, som
producenten evt. har anbefalet.
VARNING!
För att säkerställa normal användning av frysskåpet, som utnyttjar helt miljöanpassade kylmedlet R600a (Endast
antändbart under vissa förhållanden) måste du iaktta följande regler:
Hindra inte fri luftcirkulation runt frysskåpet.
Använd inga mekaniska enheter för att påskynda avfrostningen, förutom det som rekommenderas av tillverkaren.
Skada inte kylningskretsen.
Använd inga elektriska enheter inuti matsignalsfacket, utöver det som rekommenderas av tillverkaren.
ADVARSEL!
For å sikre normal drift av fryseskapet, som bruker en fullstendig miljøvennlig kjølevæske – R600a (Kun antennelig
under bestemte forhold), må du overholde følgende regler:
Ikke blokker den frie luftsirkulasjonen rundt apparatet.
Ikke bruk mekanisk utstyr for å akselerere avisingsprosessen annet enn slikt utstyr som produsenten anbefaler.
Pass på så du ikke ødelegger kjølekretsen.
Ikke bruk elektriske apparater inne i de delene av skapet der du lagrer mat, såfremt de ikke er av en slik type som
produsenten anbefaler.
VAROITUS!
Laitteen kylmäaineena on ympäristöystävällinen R600a (syttyvää vain tietyissä olosuhteissa). Jotta laite toimisi
normaalisti, on noudatettava seuraavia ohjeita:
Älä estä ilman vapaata kiertoa laitteen ympäri.
Älä käytä mekaanisia välineitä sulatuksen nopeuttamiseen, paitsi sellaisia, joita valmistaja suosittelee.
Älä vahingoita jäähdytyspiiriä.
Älä käytä ruokalokeroiden sisällä sähkölaitteita, jollei valmistaja niin suosittele.

Sikkerheten først /25
Krav til det elektriske anlegget /26
Transportanvisninger /26
Installasjonsanvisninger /26
Temperaturkontroll og justering /27
Før bruk /27
Fryserkontrollpanel /28
Hurtigfrysfunksjon /28
Lagring av frosne matvarer /28
Frysing av ferske matvarer /28
Lag isbiter /29
Bli kjent med apparatet /29
Avriming /29
Rengjøring og stell /29
Montering av døren /29
Ting du må gjøre og ting du ikke må gjøre /30
Feilsøking /31
Energiforbruk /31
Informasjon vedrørende støy /31
Tekniske data /32
Tärkeitä turvaohjeita/33
Sähkötekniset vaatimukset /34
Kuljetusohjeet /34
Asennusohjeet /34
Lämpötilan ohjaus ja säätö /35
Ennen käyttöönottoa /35
Pakastimen ohjauspaneeli /36
Pikapakastustoiminto /36
Pakastetun ruuan säilyttäminen /36
Tuoreen ruuan pakastaminen /36
Jääpalojen teko /37
Laitteen osat /37
Sulattaminen /37
Puhdistus ja huolto /37
Oven kätisyyden vaihto/37
Tärkeää!/38
Vianetsintä /39
Energiankulutus /39
Tietoja käyttöäänistä /39
Tekniset tiedot /40
EN
Index
Safety first /1
Electrical requirements /2
Transportation instructions /2
Installation instructions /2
Temperature control and adjustment /3
Before operating /3
Freezer control panel /4
Fast freeze function /4
Storing frozen food /4
Freezing fresh food /4
Making ice cubes /5
Getting to know your appliance /5
Defrosting /5
Cleaning and care /5
How to reposition the door /5
Do’s and Don’ts /6
Troubleshooting/7
Energy Consumption /7
Information concerning the noise /7
Technical data /8
Vigtige sikkerhedsanvisninger /9
Krav til el-installationen /10
Transportvejledning /10
Installationsvejledning /10
Temperaturkontrol og –regulering /11
Før ibrugtagning /11
Fryserens betjeningspanel /12
Hurtig-frys knap /12
Opbevaring af frostvarer /12
Frysning af friske fødevarer /12
Fremstilling af isterninger /13
Dus med dit apparat /13
Afrimning /13
Rengøring og vedligeholdelse /13
Sådan vender du døren /13
Husk at og Undlad at /14
Fejlfinding /15
Energiforbrug /15
Information om støj /15
Tekniske data /16
Säkerheten först /17
Krav för elanslutning /18
Transportinstruktioner /18
Installationsinstruktioner /18
Temperaturkontroll och justering /19
Innan du använder frysskåpet /19
Kontrollpanel för frys /20
Snabbfrysningsfunktion /20
Förvaring av fryst mat /20
Infrysning av färsk mat /20
Göra isbitar /21
Lär känna ditt frysskåp /21
Avfrostning /21
Rengöring och vård /21
Omhängning av dörrarna /21
Kom ihåg att göra och inte göra /22
Felsökning /23
Energiförbrukning /23
Information rörande ljud /23
Tekniska data /24
DA
Register
SV
Index
FI
Hakemisto
NO
Indeks

1

2
3
4
5
6
8
7

9

Congratulations on your new GRAM freezer.
Safety first!
Do not connect your appliance to the electricity supply
until all packing and transit protectors have been
removed.
• Leave to stand for at least 4 hours before switching on
to allow the compressor oil to settle if transported
horizontally.
• If you are discarding an old appliance with a lock or a
latch fitted to the door, ensure that it is left in a safe
condition to prevent the entrapment of children.
• This appliance must only be used for its intended
purpose.
• Do not dispose of the appliance on a fire. Your
appliance contains non CFC substances in the
insulation which are flammable. We suggest that you
contact your local authority for information on disposal
and available facilities.
• We do not recommend the use of this appliance in an
unheated, cold room (E.g. garage, conservatory, annex,
shed, out-house etc.).
To obtain the best possible performance and problem-
free operation from your appliance it is very important to
read the user guide carefully. Failure to observe the
user guide may reduce your right to free service during
the guarantee period.
Please keep the user guide in a safe place for easy
reference.
EN
User guide
1
This appliance is not intended for people with reduced physical, sensory or mental
capabilities or lack of experience and knowledge unless they have been supervised or
instructed in use of the appliance by a person responsible for their safety.
Children should be supervised to ensure that they do not play with the appliance.

EN
User guide
Electrical requirements
Before inserting the plug into the socket make
sure that the voltage and the frequency shown
in the rating plate inside the appliance
corresponds to your electricity supply.
We recommend that this appliance is
connected to the mains supply via a suitably
switched and fused socket in a readily
accessible position.
The plug has to be accessible after installation
in order to allow disconnection of the
appliance from the supply after installation.
Warning! This appliance must be earthed.
Repairs to the electrical equipment may only
be made by qualified technicians. If the power
cable is damaged, the manufacturer or GRAM
service must replace it in order to avoid
danger.
ATTENTION!
This appliance operates with R600a which is
an environmental friendly but flammable gas.
During the transportation and fixing of the
product, care must be taken not to damage
the cooling system. If the cooling system is
damaged and there is a gas leakage from the
system, keep the product away from open
flame sources and ventilate the room for a
while.
WARNING - Do not use electrical devices or
other means to accelerate the defrosting
process, others than those recommended by
the manufacturer.
WARNING - Do not damage the refrigerant
circuit.
Transportation instructions
1. The appliance should only be transported
in an upright position. The packaging must be
intact during transportation.
2. If the appliance has been positioned
horizontally during transportation, it must not
be operated for at least 4 hours to allow the
system to settle.
3. Failure to comply with the above
instructions could result in damage to the
appliance for which the manufacturer will not
be held liable.
4. The appliance must be protected against
rain, moisture and other atmospheric
influences.
Important!
• Avoid touching the bottom of the condenser
metal wires at the back of the appliance while
cleaning or carrying the appliance as you may
receive injuries to your fingers and hands.
• Do not attempt to sit or stand on top of your
appliance as it is not designed for such use.
You could be injured or damage the
appliance.
• Make sure that the mains cable is not caught
under the appliance during and after moving it
as this could damage the cable.
• Do not allow children to play with the
appliance or tamper with the controls.
Installation instructions
1. Do not keep your appliance in a room
where the temperature is likely to fall below
+10ºC (50ºF).
2. Do not place the appliance near cookers or
radiators or in direct sunlight, as this will
cause extra strain on the appliance's
functions. If installed next to a heat source,
maintain the following minimum side
clearances:
30 mm from cookers
300 mm from radiators
3. Make sure that sufficient room is provided
around the appliance to ensure free air
circulation (Fig. 2).
• Place the spacer on the back of your freezer
to set the distance between the freezer and
the wall (Fig. 3).
4. The appliance should be positioned on a
level surface. The two front legs can be
adjusted as required.To ensure that your
appliance is standing upright adjust the two
front legs by turning them either clockwise or
anti-clockwise, until firm contact is secured with
the floor. Correct adjustment of the legs
prevents excessive vibration and noise (Fig. 4).
2
EN
User guide
5. Refer to the "Cleaning and Care" section
to prepare your appliance for use.
6. If you want to place two products side by
side, e.g. a refrigerator and a freezer, as a
side by side solution you have to use a
decoration kit which contains a small mat
and a decoration part. The mat is mounted
on the side of o
ne of the products to create a
space between the products. The decoration
part is placed between the products to hide
the gap between the products (Fig. 2). The
decoration kit is not a part of the product but
can be delivered as an accessory.
Temperature control and adjustment
The freezer temperature is influenced by the
thermostat control (The recommended
positions are either 2 or 3) (Fig.5).
In general, this temperature is below -18°C.
Lower temperatures canbe obtained by
adjusting the thermostat control towards the
position MAX.
We recommend checking the temperature
with a thermometer to ensure that the
storage compartments are kept to the
desired temperature. Remember to read off
the thermometer immediately as the
temperature on the thermometer will rise
very rapidly after you remove it from the
freezer.
Please remember that each time the door is
opened cold air escapes and the internal
temperature rises. Therefore never leave the
door open and ensure that it is closed
immediately after the food is put in or
removed.
Before operating
Before you start using the freezer check
that:
1. The legs have been adjusted for perfect
levelling.
2. The interior is dry and that air can
circulate freely at the back of the appliance.
3. The interior is cleaned as recommended
under the "Cleaning and care” section.
4. The plug is inserted into the socket and
the electricity supply is switched on. Avoid
unintentional disconnection by placing sticky
tape on the switch.
And note that:
5. You will hear a noise as the compressor
starts up. The liquid and gases sealed within
the refrigeration system may also make some
noise, whether the compressor is running or
not. This is quite normal.
6. To freeze the fresh food use the
compartment marked with 4 stars.
7. Do not put a too large quantity of food into
the freezer. The food quality is kept if it is
frozen as quickly as possible. Therefore it is
preferable not to exceed the freezing capacity
of the appliance shown in the "Technical data"
section.
The thermostat control has to be adjusted in
order to obtain the lowest temperature inside
the freezer with the button on the fast freeze
function and the orange LED indicator
switched on.
8. After the time necessary to freeze the
fresh food is finished, place the thermostat
control in a medium position (The orange
LED
indicator is not switched on).
9. Do not load the appliance immediately
after it has been switched on. Wait until the
correct storage temperature has been
reached. We recommend that you check the
temperature with an accurate thermometer
(See the "Temperature Control and
Adjustment" section).
Important Note:
In the event of an electrical cut do not open
the door. Frozen food should not be affected if
the electrical cut lasts for less than 15 hours.
If the electrical cut lasts longer than 18 hours,
then the food should be checked.
3

EN
User guide
Freezer control panel
(Fig. 5)
The control panel adjusts the temperature in
the freezer and has the following functions:
1 - Orange LED indicator - Fast freeze on
When you turn the thermostat control (4) to
the MAX position, the orange LED indicator
(1) is switched on and the compressor will run
continuously. Remember to turn the
thermostat control back to its previous
position once the food is frozen.
2 - Green LED indicator -Electricity on
(Voltage)
Is switched on when the appliance is
connected to the socket and remains
switched
on as long as the power is switched on. This
green LED indicator does not provide
information on the temperature inside the
freezer.
3 - Red LED indicator -High Temperature
Alarm
4 - Setting the thermostat control
High temperature alarm
After the appliance is turned on for the first
time the alarm is not active for 12 hours (The
red LED indicator is switched off).
After this period of time the red LED indicator
is switched on in the following situations:
-If the appliance is overloaded with fresh food
-If the door is left open by mistake.
In these situations the red LED indicator will
continue to be switched on until the appliance
reaches the preset temperature.
If the red LED indicator is still switched on
then wait for 24 hours before calling GRAM
service.
Important:
The temperatures obtained inside can vary
according to the conditions of use of the
appliance such as the location, the
surrounding temperature, how often the door
is opened and the quantity of food. The
temperature setting will be modified according
to these conditions.
Fast freeze function
When you turn the thermostat control (4) to
the MAX position, the orange LED indicator
(1) is switched on and the compressor will run
continuously.
Storing frozen food
Your freezer is suitable for the long-term
storage of commercially frozen foods and can
also be used to freeze and store fresh food.
Freezing fresh food
Please observe the following instructions to
obtain the best results.
Do not freeze too large a quantity at any time.
The quality of the food is best preserved when
it is frozen right through to the core as quickly
as possible.
If large amounts of fresh food have to be
frozen, adjust the thermostat control to the
MAX position 24 hours before putting the
fresh food in the fast freeze compartment.
It is strongly recommended to keep the
thermostat control at the MAX position for at
least 24 hours to freeze the maximum amount
of fresh food as stated in the "Tecnical data"
section.
Take special care not to mix frozen and fresh
food.
Remember to turn the thermostat control
back
to its previous position once the food is
frozen.
Small quantities of food up to 1/2 kg (1 lb) can
be frozen without the fast freezer function
4

EN
User guide
Making ice cubes
(Fig. 6)
Fill the ice cube tray 3/4 with water and place
it in the freezer. Loosen frozen trays with a
spoon handle or a similar instrument; never
use sharp-edged objects such as knives or
forks.
Getting to know your appliance
(Fig. 1)
1 - Control panel, display and adjustment
2 - Ice cube tray support and ice cube tray
3 - Compartments for keeping frozen food
4 - Adjustable front legs
Defrosting
Please defrost the freezer compartment at
least twice a year or when the ice layer is too
thick.
• Ice build-up is a normal phenomenon.
• The ice build-up, especially in the upper side
of the compartment is a natural phenomenon
and does not affect the functioning of the
appliance.
• It is recommended to defrost the appliance
when the quantity of frozen food is not too big.
• Before the defrosting set the adjusting
thermostat control
on the maximum position in
order to freeze the food.
• Unplug the appliance
• Take out the frozen food, pack it in several
paper sheets and put it in a cool place.
• Let the door stay open for a quick defrosting
and put inside vessels with warm water (Max.
80°C).
Do not use pointed or sharp-edged objects
such as knives or forks to remove the frost.
Never use hairdryers, electrical heaters or
other similar electrical appliances for
defrosting.
When defrosting has finished, close the
defrosted part and dry the interior thoroughly
(Fig. 7).
To take out the drawers from the freezer
compartment and proceed as in Fig. 8.
Cleaning and care
1. We recommend that you switch off the
appliance at the socket outlet and pull out the
mains plug before cleaning.
2. Never use any sharp instruments or
abrasive substances, soap, household
cleaner, detergent or wax polish for cleaning.
3. Use luke warm water to clean the cabinet
of the appliance and wipe it dry.
4. Use a damp cloth wrung out in a solution
of one teaspoon of sodium bicarbonate to one
pint of water to clean the interior and wipe it
dry.
5. If the appliance is not going to be used for
a long period of time, switch it off, remove all
food, clean it and leave the door ajar.
6. We recommend that you polish the metal
parts of the product (i.e. door exterior, cabinet
sides) with a silicone wax (car polish) to
protect the high quality paint finish.
7. Any dust gathered on the condenser,
located at the back of the appliance, should
be removed once a year with a vacuum
cleaner.
8. Check the door seals regularly to ensure
that they are clean and free from food
particles.
9. Never:
• Clean the appliance with unsuitable material
such as petroleum based products.
• Subject it to high temperatures in any way,
• Scour, rub etc., with abrasive material.
10. Excess deposit of frost
should be removed
regularly. Large accumulation of frost will
impair the performance of the freezer.
11. To remove a drawer, pull it as far as
possible, tilt it upwards and then pull it out
completely.
How to reposition the door
Proceed in numerical order (Fig. 9).
5

EN
User guide
Do’s and Don’ts
Do check the content of the freezer at
regular intervals.
Do clean and defrost your appliance
regularly (See the "Defrosting" section)
Do keep food for as short a time as possible
and adhere to "Best Before" and "Use
By" dates.
Do store frozen food in accordance with the
instructions on the packets.
Do prepare fresh food for freezing in small
portions to ensure rapid freezing.
Do wrap the frozen food immediately after
purchasing and put it in to the freezer as
soon as possible.
Don’t leave the door open for long periods
of time, as this will make the
appliance more costly to run and
cause excessive frost formation.
Don’t use sharp edged objects such as
knives or forks to remove the ice.
Don’t store poisonous or any dangerous
substances in your appliance. It has
been designed for the storage of
edible food only.
Don’t exceed the maximum freezing
capacity when freezing fresh food.
Don’t try to keep frozen food which has
thawed; it should be eaten within 24
hours or cooked and refrozen.
6

Heat
EN
User guide
Troubleshooting
If the appliance does not operate when
switched on then check;
• That the plug is inserted properly in the
socket and that the power supply is on. (To
check the power supply in the socket, plug
in another appliance)
• Whether the fuse has blown, the circuit
breaker has tripped or whether the main
distribution switch has been turned off.
• That the temperature control has been set
correctly.
• That the new plug is wired correctly, if you
have changed the fitted, moulded plug.
If the appliance is still not operating at all after
the above checks, contact GRAM service.
Please ensure that the above checks have
been carried out, as you will be invoiced for
the service visit if no faults have been found.
Energy Consumption
Maximum frozen food storage volume is
achieved without using the 5 upper drawers
(The bottom drawer must stay in the freezer)
in the freezer compartment. The energy
consumption of your appliance is based on
the freezer compartment being fully loaded
without using the 5 upper drawers (The
bottom drawer should be left in the freezer
compartment).
Practical advice concerning the reduction
of the electricity consumption
1. Make sure that the appliance is located in
well-ventilated areas, far from any heat
source
(Cooker, radiator etc.). At the same time, the
appliance must be kept away from sunlight .
2. Make sure that the frozen food is placed in
the appliance as soon as possible, especially
during summertime. It is recommended to use
thermal insulated bags to transport the food
home.
3. Do not keep the door of the appliance open
more th
an necessary and make sure that after
each opening the door is well closed.
Information concerning the noise
and the vibrations which might
appear during the operation of the
appliance
1. The operation noise can increase during
the operation.
- In order to keep the temperatures at the
adjusted level, the compressor of the
appliance starts periodically. The noise
produced by the compressor becomes
stronger when it starts and a click can be
heard when it stops.
- The performance and operation features of
the appliance can change according to the
modifications of the temperature in the
surrounding environment. This must be
considered to be normal.
2. Noises like liquids flowing or as being
sprayed.
- These noises are caused by the flow of the
refrigerant in the circuit of the appliance and
comply with the operation principle of the
appliance.
3. Other vibrations and noises.
- The level of noise and vibrations can be
caused by the type and the condition of the
floor on which the appliance is placed. Make
sure that the floor does not have significant
level distortions and that it can yield to the
weight of the appliance (It is flexible).
- Another source of noise and vibrations is
represented by the objects placed on the
appliance. These objects must be removed
from the appliance.
7

Technical data
Brand GRAM
Model
F
S
3185
-
90
Appliance type UPRIGHT FREEZER
Gross volume (liter) 188
Net volume (liter) 162
Freeze capacity (kg/24 h) 9
Energy class (1) A+
Power consumption (kWh/year) (2) 237
Safety during electricity cut from - 18 °C to - 9 ° C
in hours 15
Noise level dB(A) 40
Environment friendly refrigerating agent R600a
(1) Energy class : A++ .......D (A++ = economical . . . D = less economical)
(2) The real power consumption depends on using conditions and appliance location.
EN
User guide
8
The symbol on the product or on the packaging indicates that this product must not
be treated as household waste. Instead it has to be handed over to the existing place of
collection for the recycling of electrical and electronic equipment. By ensuring the correct
removal of this product, you help preventing the potential negative consequences for the
environment and human health, which could be caused by the inappropriate waste
handling of this product. For more detailed information about the recycling of this product,
please contact your local government offices, your household waste disposal service or
the shop where you purchased the product.

Tillykke med dit nye GRAM fryseskab.
Vigtige sikkerhedsanvisninger!
Undlad at tilslutte apparatet til strømforsyningen før alle
pakke- og transportbeskyttelser er fjernet.
• Lad apparatet stå i mindst 4 timer, før du tænder for
det. Dette sikrer, at kompressorolien kan løbe på plads,
hvis apparatet er blevet transporteret liggende.
• Hvis du kasserer et brugt apparat udstyret med dørlås
eller smæklås, er det vigtigt at være opmærksom på at
efterlade det på en måde, som forhindrer, at børn kan
blive spærret inde i det.
• Dette apparat må kun anvendes til det tilsigtede formål.
• Bortskaf ikke apparatet ved at brænde det. Dit apparat
indeholder CFC-fri stoffer i isoleringen, som er
brandbare. Vi foreslår, at du kontakter kommunen for
information om bortskaffelse.
• Vi fraråder anvendelse af dette apparat i uopvarmede,
kolde rum (som f.eks. garage, vinterhave, anneks, skur,
udhus, osv.).
For at få størst mulig nytte af dit apparat og for at sikre
en problemfri funktion, er det meget vigtigt, at du læser
denne betjeningsvejledning grundigt. Hvis
betjeningsvejledning ikke følges, kan det medføre, at
retten til gratis service i garantiperioden reduceres.
Opbevar denne betjeningsvejledning på et sikkert sted,
hvor den er nem at komme til.
DA
Betjeningsvejledning
9
Dette apparat er ikke beregnet til anvendelse af personer med reducerede fysiske,
følelsesmæssige eller mentale evner eller mangel på erfaring og viden med mindre de er blevet
overvåget eller har fået instruktion i brugen af apparatet af en person, der er ansvarlig for
deres sikkerhed.
Børn skal overvåges for at sikre, at de ikke leger med apparatet.

DA
Betjeningsvejledning
Krav til el
-
installationen
Før stikket sluttes til stikkontakten, skal du
kontrollere, at den spænding og frekvens, der
fremgår af typeskiltet inde i apparatet, svarer
til netspændingen hos dig.
Vi anbefaler, at dette apparat sluttes til en
lettilgængelig stikkontakt, som er beskyttet
med en passende sikring samt forsynet med
en afbryder.
Advarsel! Dette apparat skal jordforbindes.
Reparationer af det elektriske udstyr må kun
udføres af kvalificerede teknikere. Hvis
forbindelseskablet er beskadiget, skal
producenten eller GRAM service udskifte det
for at undgå fare.
BEMÆRK!
Dette apparat bruger R600a, som er en
miljøvenlig, men brændbar gas. Under
transporten og under monteringen af
produktet skal der udvises forsigtighed for at
undgå at beskadige kølesystemet. Hvis
kølesystemet beskadiges, og der bliver en
gaslækage fra systemet, skal produktet
holdes væk fra åben ild, og rummet skal luftes
ud.
ADVARSEL - Der må ikke anvendes
mekaniske genstande eller andre midler, ud
over de af producenten anbefalede, for at
fremskynde afrimningsprocessen.
ADVARSEL - Undgå at beskadige
kølekredsløbet.
Transportvejledning
1. Apparatet bør kun transporteres i lodret
stilling. Emballagen skal være intakt under
transporten.
2. Hvis apparatet har været placeret liggende
under transporten, må det ikke betjenes i
mindst 4 timer for at give systemet tid til at
stabilisere sig.
3. Hvis ovenstående retningslinier ikke
overholdes, kan det medføre beskadigelse af
apparatet, som ikke er dækket af
producentens garantiforpligtelse.
4. Apparatet skal beskyttes mod regn, fugt og
andre atmosfæriske påvirkninger.
Vigtigt!
• Undgå at røre bunden af kondensatorens
metalribber bag på apparatet under rengøring
eller flytning af apparatet, da dette kan
medføre læsion af fingre og hænder.
• Undlad at sidde eller stå oven på apparatet,
da det ikke er beregnet til det. Du kan selv
komme til skade eller komme til at beskadige
apparatet.
• Kontrollér, at netledningen ikke kommer i
klemme under apparatet under og efter
flytning, da dette kan beskadige ledningen.
• Lad ikke børn lege med apparatet eller pille
ved knapperne.
Installationsvejledning
1. Undlad at installere apparatet i rum, hvor
temperaturen kan falde til under +10 ºC.
2. Undlad at placere apparatet tæt ved
komfurer, radiatorer eller i direkte sollys, da
dette vil medføre en øget belastning af
apparatets funktioner. Hvis apparatet
installeres i nærheden af en varmekilde, skal
følgende minimumsafstande overholdes:
30 mm fra komfurer
300 mm fra radiatorer
3. Kontrollér, at der er tilstrækkelig plads
omkring apparatet for at sikre fri luftcirkulation
(Fig. 2).
• Sæt afstandsstykket på bagsiden af
fryseskabet for at justere afstanden mellem
fryseskabet og væggen (Fig. 3).
Apparatet skal placeres på en jævn overflade.
De to forreste ben kan justeres efter behov.
For at sikre at apparatet står lodret, skal de to
forreste benene drejes med eller mod uret,
indtil de er i fast kontakt med gulvet. Ved
korrekt justering af ben reduceres vibrationer
og støj (Fig. 4).
5. Se afsnittet ’Rengøring og vedligeholdelse’
for at forberede apparatet til brug.
10

DA
Betjeningsvejledning
6. Hvis du ønsker at placere f.eks. et
køleskab og et fryseskab ved siden af
hinanden som en ”side-by-
side” løsning, skal
du benytte et monteringssæt, som
indeholder en lille måtte og en
dekorationsliste. Måtten skal monteres på
siden af det ene skab, sådan at der er lidt
luft mellem skabene. Dekorationslisten
monteres mellem de 2 skabe, sådan at den
skjuler mellemrummet mellem skabene (Fig
2). Monteringssættet er ikke en del af
produktet, men kan leveres som tilbehør.
Temperaturkontrol og -regulering
Frysertemperaturen afhænger af
indstillingen på termostatknappen (Den
anbefalede position er 2 eller 3) (Fig.5).
Denne temperatur er generelt under -18°C.
Laveretemperaturer kan opnås ved at justere
termostatknappen mod positionen MAX.
Vi anbefaler, at du kontrollerer temperaturen
med et termometer for at sikre, at
opbevaringsrummene holdes på den
ønskede temperatur. Husk at aflæse
termometret med det samme, da
termometrets temperatur vil stige meget
hurtigt efter du har taget det ud af fryseren.
Husk på, at der kommer kold luft ud, hver
gang døren åbnes, og den indvendige
temperatur stiger. Derfor skal du aldrig
efterlade døren åben. Sørg altid for at lukke
døren straks efter have lagt fødevarer ind i
eller taget dem ud af fryseskabet.
Før ibrugtagning
Før du begynder at bruge fryseren, bør du
kontrollere at:
1. Benene er justeret, så apparatet står
fuldstændig plant.
2. Apparatet er tørt indeni, og at luften kan
cirkulere frit bag det.
3. Apparatet er rengjort sådan som anbefalet
i afsnittet "Rengøring og vedligeholdelse".
4. Stikket er sat i stikkontakten, og at der er
tændt for strømmen. Undgå uforsætlig
afbrydelse ved at sætte tape på kontakten.
Og bemærk at:
5. Der vil kunne høres en lyd, når
kompressoren starter. Kølevæsken og
luftarterne, der findes i kølesystemet, kan
også støje lidt uanset om kompressoren kører
eller ej. Dette er helt normalt.
6. Til at fryse friske fødevarer bruges
afdelingen, som er markeret med 4 stjerner.
7. Fyld ikke for store mængder af fødevarer
ind i apparatet på samme tid. Fødevarernes
kvalitet bevares bedst, hvis de fryses så
hurtigt som muligt. Derfor anbefaler vi ikke at
overskride apparatets indfrysningskapacitet
vist i afsnittet " Tekniske data ". For at opnå
den laveste temperatur i inde i fryseren, skal
termostatknappen indstilles med knappen for
hurtig-frys funktionen og den orange LED
indikator vil lyse.
8. Efter den nødvendige tid til at nedfryse de
friske fødevarer skal du indstille
termostatknappen til en mellem-position (Den
orange LED indikator lyser ikke).
9.Fyld ikke apparatet op umiddelbart efter at
have tændt for det. Vent til den korrekte
opbevaringstemperatur er nået. Vi anbefaler,
at du kontrollerer temperaturen med et
nøjagtigt termometer (Se afsnittet
"Temperaturkontrol og regulering").
Vigtig bemærkning:
Undlad at åbne døren i tilfælde af
strømafbrydelse. Frosne fødevarer skulle ikke
blive berørt, hvis afbrydelsen varer mindre
end 15 timer. Hvis fejlen varer længere, skal
fødevarer kontrolleres.
11

DA
Betjeningsvejledning
Fryserens betjeningspanel
(Fig. 5)
Betjeningspanelet bruges til at indstille
temperaturen i fryseren og har følgende
funktioner:
1 - Orange lampe - Hurtig-frys er tændt
Når du drejer termostatknappen (4) til den
maksimale position, vil den orange LED
indikator (1) lyse, og kompr
essoren vil arbejde
uafbrudt. Husk at dreje termostatknappen
tilbage til den oprindelige position, når
fødevarerne er frosne.
2 - Grøn lampe -tilsluttet strøm (spænding)
Lyser, når apparatet er tilsluttet strømmen og
vil lyse, så længe strømmen er tilsluttet. Den
grønne LED indikator giver ikke oplysninger
om temperaturen inde i fryseren.
3 - Rød lampe -Alarm for høj temperatur
4 - Knap til temperaturindstilling
Alarm for høj temperatur
Når apparatet tændes første gang, vil alarmen
først aktiveres efter 12 timer (Den røde LED
indikator er slukket).
Efter denne periode kan den røde lampe lyse i
følgende tilfælde:
-Hvis apparatet er overfyldt med friske
fødevarer
-Hvis døren er åben.
I disse tilfælde vil den røde LED indikator lyse
indtil apparatet har nået den indstillede
temperatur.
Hvis den røde lampe er tændt, så vent 24
timer, før du tilkalder GRAM service.
Vigtigt:
Den opnåede temperatur kan variere
afhængig af fryserens anvendelsesforhold,
som f.eks. placering, omgivende temperatur,
hvor ofte døren åbnes samt mængden af
fødevarer. Temperaturindstillinger vil blive
tilpasset disse forhold.
Hurtig-frys funktion
Når du drejer termostatknappen (4) til den
maksimale position, vil den orange LED
indikator lyse og kompressoren vil arbejde
uafbrudt.
Opbevaring af frostvarer
Din fryser er egnet til langtidsopbevaring af
fødevarer, som købes frosne. Den kan også
anvendes til nedfrysning og opbevaring af
friske fødevarer.
Frysning af friske fødevarer
Ved at følge nedenstående retningslinier,
opnås de bedste resultater.
Frys ikke for store mængder ad gangen.
Fødevarernes kvalitet bevares bedst, hvis de
indfryses så hurtigt som muligt.
Hvis man ønsker at nedfryse store mængder
af fødevarer,
skal termostatknappen indstilles
til positionen MAX 24 timer før de ferske
fødevarer lægges i hurtig-frys rummet.
Det anbefales på det kraftigste at holde
termostatknappen på positionen MAX
i mindst
24 timer for at nedfryse store mængder af
friske fødevarer der er angivet som
frysekapacitet. Vær især opmærksom på ikke
at blande allerede frosne fødevarer
med friske
fødevarer.
Husk at dreje termostatknappen tilbage til den
oprindelige position, når fødevarerne er
frosne.
Små mængder af fødevarer op til ½ kg kan
fryses uden hurtig-frys funktionen.
12

DA
Betjeningsvejledning
Fremstille isterninger
(Fig. 6)
Fyld isterningbakken 3/4 op med vand og sæt
den i fryseren. Hvis bakken fryser fast, løsnes
den med skaftet på en ske eller lignende; brug
aldrig skarpe redskaber som f.eks. knive eller
gafler.
Dus med dit apparat
(Fig. 1)
1 -
Betjeningspanel, visning og regulering
2 - Indfrysningsbakke og isterningbakke
3 - Fryseskuffer
4 - Justerbare ben
Afrimning
Afrim fryserafdelingen mindst to gange om
året, når islaget er for tykt.
• Isdannelsen er et normalt fænomen.
• Isdannelsen, særligt på den øverste side af
fryserafdelingen, er et normalt fænomen og
påvirker ikke fryserens funktion.
• Vi anbefaler, at fryseren afrimes, når der
ikke er så mange frosne fødevarer i fryseren.
• Inden afrimning justeres termostatknappen
til en maks position, så fødevarerne
opbevares frosne.
• Tag apparatets stik ud af stikkontakten.
• Tag de frosne fødevarer ud, pak
fødevarerne ind i flere lag papir og læg dem
et
koldt sted.
• Hold døren åben for hurtig afrimning og sæt
beholdere med varmt vand (maks. 80 °C) ind i
fryseren.
Der må ikke benyttes spidse eller skarpe
genstande som knive og gafler til at fjerne
islaget.
Brug aldrig hårtørrer, elektriske varmeovne
eller lignende el-apparater til afrimning.
Når afrimningen er færdig, luk den afrimede
del og tør indersiden grundigt
(Fig. 7).
For at tage skufferne ud af fryseren, følg
vejledningen i fig. 8.
Rengøring og vedligeholdelse
1. Vi anbefaler, at du slukker for apparatet på
stikkontakten, og at stikket trækkes ud før
rengøring.
2. Brug aldrig skarpe instrumenter eller
slibematerialer, sæbe,
husholdningsrengøringsmidler, vaskepulver
eller polérvoks til rengøring.
3. Vask kabinettet i lunkent vand og tør det af
med en klud.
4. Anvend en fugtig klud vredet op i en
opløsning af én teskefuld natriumbikarbonat
(tvekulsurt natron) til 1/2 liter vand til
rengøring af indersiderne, og tør efter med en
klud.
5. Hvis apparatet ikke skal benyttes i længere
tid: Sluk for det, fjern alle fødevarer, rengør
det, og lad døren stå på klem.
6. Vi anbefaler, at apparatets metaldele (dvs.
dørenes yderside, kabinettets sider) poleres
med en silikonevoks (bilpolish) for at beskytte
den højkvalitetslakerede overflade.
7. Støv, der samler sig på kompressoren på
bagsiden af apparatet, bør fjernes en gang
om året med en støvsuger.
8. Kontroller tætningslisterne jævnligt for
sikre, at de er rene og fri for fødevarepartikler.
9. Man må aldrig:
• Rengøre apparatet med uegnede materialer,
som f.eks. opløsningsmiddelbaserede
produkter.
• På nogen måde udsætte det for høje
temperaturer,
• Skure, skrubbe osv. med slibende
materialer.
10. Større mængder is bør fjernes
regelmæssigt. Store lag af is vil forringe
fryserens effektivitet.
11. For at flytte en skuffe skal den trækkes så
langt ud som muligt, vip den opad og træk
den så helt ud.
Sådan vender du døren
Fortsæt i numerisk rækkefølge (Fig. 9).
13
Table of contents
Languages:
Other Gram Freezer manuals

Gram
Gram FC 463150 N User manual

Gram
Gram KF 245 User manual

Gram
Gram Compact 410 User manual

Gram
Gram KF 311861 N X User manual

Gram
Gram FS 3215-93 User manual

Gram
Gram FS 3215-60 User manual

Gram
Gram FS3105-90 User manual

Gram
Gram FS 42296-60 N User manual

Gram
Gram FS 441862 N User manual

Gram
Gram FS 5286-90 N User manual

Gram
Gram FS3105-90 User manual

Gram
Gram FC 494186 N/1 User manual

Gram
Gram FS 3286-90 N X User manual

Gram
Gram BAKER SF 550 User manual

Gram
Gram FS3105-90 User manual

Gram
Gram FS 293 User manual

Gram
Gram KS Monolit User manual

Gram
Gram FS 4296-90 N User manual

Gram
Gram FS 32215-63 User manual

Gram
Gram SF 930 User manual