Gram FSI 401754 N User manual

%8,/7,1)5((=(5
User manual
)8/'7,17(*5(5%$57)5<6(6.$%
Betjeningsvejledning
FULLT INTEGRERBART FRYSESKAP
Bruksanvisning
HELINTEGRERAD FRYSSKÅP
Bruksanvisning
TÄYSIN INTEGROITAVA PAKASTIN
Käyttöohje
FSI 401754 N
EN
DA
NO
SE
FI

EN
2

EN
3
Index
BEFORE USING THE APPLIANCE................................. 4
General warnings...................................................................... 4
Safety warnings ........................................................................ 6
Installing and operating your freezer ........................................ 7
Before using your freezer ......................................................... 8
Information on No-Frost technology ......................................... 9
THE PARTS OF THE APPLIANCE AND THE
COMPARTMENTS .......................................................... 10
USAGE INFORMATION.................................................. 11
Display and control panel .........................................................11
Operating your freezer..............................................................11
Super freeze mode ...............................................................11
Economy mode.................................................................... 12
Screen saver mode.............................................................. 12
Door open alarm function .................................................... 13
Temperature settings ............................................................... 13
Freezer Temperature Settings ............................................. 13
Warnings about temperature adjustments............................... 13
Accessories ............................................................................. 15
Making ice cubes ................................................................. 15
ARRANGING FOOD IN THE APPLIANCE..................... 16
CLEANING AND MAINTENANCE.................................. 18
Defrosting ................................................................................ 18
Replacing the LED strip........................................................... 19
SHIPMENT AND REPOSITIONING................................ 20
BEFORE CALLING YOUR GRAM SERVICE................. 21
Tips for saving energy ............................................................. 23

EN
4BEFORE USING THE APPLIANCE
General warnings
WARNING: Keep ventilation openings, in the appliance
enclosure or in the built-in structure, clear of obstruction.
WARNING: Do not use mechanical devices or other
means to accelerate the defrosting process, other than
those recommended by the manufacturer.
WARNING: Do not use electrical appliances inside the
food storage compartments of the appliance, unless
they are of the type recommended by the manufacturer.
WARNING: Do not damage the refrigerant circuit.
WARNING: In order to avoid any hazards resulting from
the instability of the appliance, it must be xed in accor-
dance with the following instructions:
• If your appliance uses R600a as a refrigerant (this
information will be provided on the label of the cooler)
you should take care during transportation and
installation to prevent the cooler elements from being
damaged. R600a is an environmentally friendly and
natural gas, but it is explosive. In the event of a leak
due to damage of the cooler elements, move your
fridge away from open ames or heat sources and
ventilate the room where the appliance is located for
a few minutes.
• While carrying and positioning the appliance, do not
damage the cooler gas circuit.
• Do not store explosive substances such as aerosol
cans with a ammable propellant in this appliance.
• This appliance is intended to be used in household
and domestic applications such as:
- sta kitchen areas in shops, oces and other work-
ing environments which can be equated with ordi-
nary household

EN
5
BEFORE USING THE APPLIANCE
- farm houses and by clients in hotels, motels and oth-
er residential type environments which can be equat-
ed with ordinary household
- bed and breakfast type environments which can be
equated with ordinary household
- catering and similar non-retail applications which can
be equated with ordinary household.
• The appliance is supplied with a plug approved in the
EU, which must not be used in a Danish installation, as
the unit thereby is not earthed acc. Local regulations.
Replacing the to Danish plug must be performed by
a qualied electrician. Alternatively, use an adapter
to transition between Schuko plug and Danish earth
system.
• This appliance can be used by children aged from 8
years and above and persons with reduced physical,
sensory or mental capabilities or lack of experience
and knowledge if they have been given supervision or
instruction concerning use of the appliance in a safe
way and understand the hazards involved. Children
shall not play with the appliance. Cleaning and user
maintenance shall not be made by children without
supervision.
• If the supply cord is damaged, it must be replaced
by the manufacturer, an authorised service agent or
similar qualied persons, in order to avoid a hazard.
• This appliance is not intended for use at altitudes
exceeding 2000 m.

EN
6BEFORE USING THE APPLIANCE
Old and out-of-order fridges or freezers
• If your old fridge or freezer has a lock, break or remove the lock
before discarding it, because children may get trapped inside it
and may cause an accident.
• Old fridges and freezers may contain isolation material and
refrigerant with CFC or HFC. Therefore, take care not to harm
environment when you are discarding your old fridges or freezers.
Please ask your municipal authority about the disposal of the WEEE
reuse, recycle and recovery purposes.
Notes:
• Please read the instruction manual carefully before installing and
using your appliance. We are not responsible for the damage
occurred due to misuse.
• Follow all instructions on your appliance and instruction manual,
and keep this manual in a safe place to resolve the problems that
may occur in the future.
• This appliance is produced to be used in homes and it can only be
used in domestic environments and for the specied purposes.
It is not suitable for commercial or common use. Such use will
cause the guarantee of the appliance to be cancelled and our
company will not be responsible for losses incurred.
• This appliance is produced to be used in houses and it is only
suitable for cooling / storing food. It is not suitable for commercial
or common use and/or for storing substances except for food.
Our company is not responsible for losses to be incurred in the
contrary case.
Safety warnings
• Do not connect your Freezer to the mains electricity supply using
an extension lead.
• Do not plug in damaged, torn or old plugs.
• Do not pull, bend or damage the cord.
• This appliance is designed for use by adults, do not allow children
to play with the appliance or let them hang o the door.
• Never touch the power cord/plug with wet hands as this could
cause a short circuit or electric shock.

EN
7
BEFORE USING THE APPLIANCE
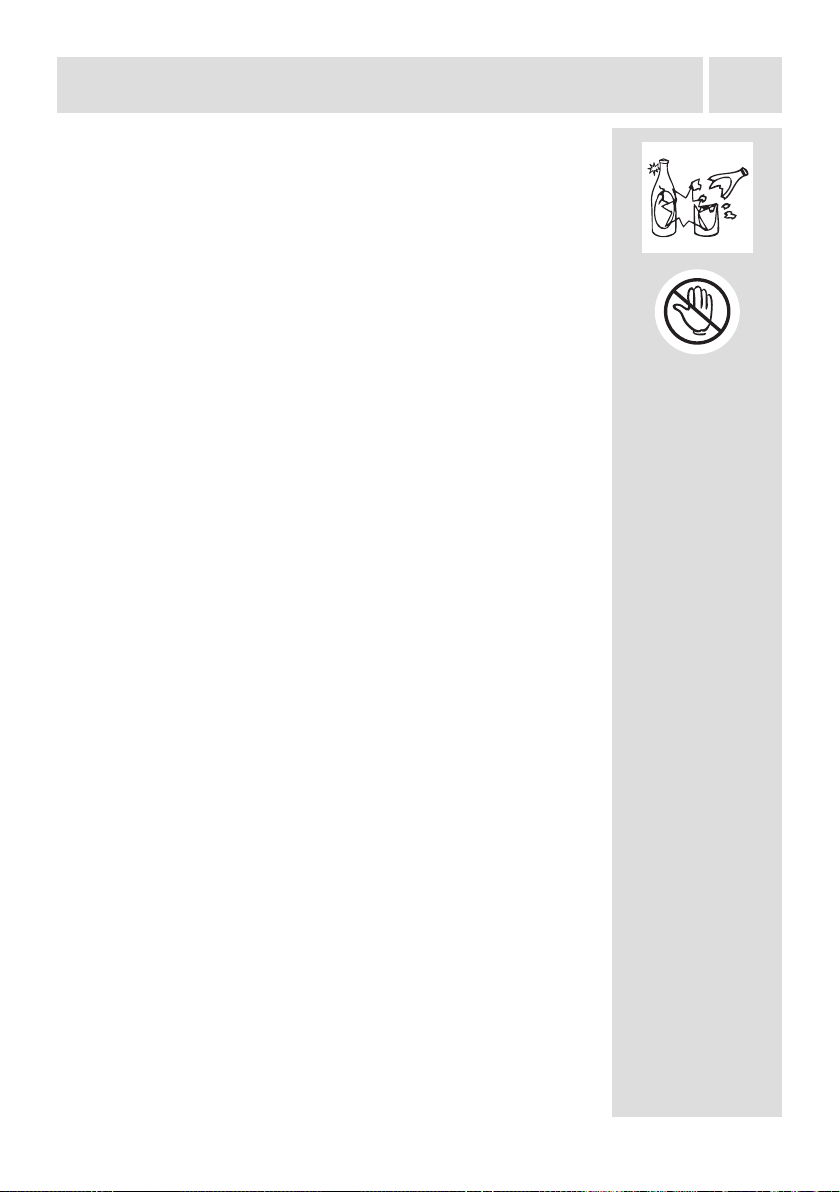
• Do not place glass bottles or beverage cans in the ice-making
compartment as they can burst as the contents freeze.
• Do not place explosive or ammable material in your freezer.
Place drinks with high alcohol content vertically in the frezer
compartment and make sure that their tops are tightly closed.
• When removing ice from the ice-making compartment, do not
touch it. Ice may cause frost burns and/or cuts.
• Do not touch frozen goods with wet hands! Do not eat ice-cream
and ice cubes immediately after you have taken them out of the
freezer!
• Do not touch frozen goods with wet hands. Do not eat ice-cream
or ice cubes immediately after you have taken them out of the
ice-making compartment.
• Do not cover the body or top of freezer with lace. This aects the
performance of your freezer.
• Secure any accessories in the freezer during transportation to
prevent damage to the accessories.
Installing and operating your freezer
Before starting to use your freezer, you should pay attention to the
following points:
• The operating voltage for your freezer is 220-240 V at 50Hz.
• The plug must be accessible after installation.
• Your freezer may have a smell when it is operated for the rst
time. This is normal and the smell will fade away when your
freezer starts to cool.
• Before connecting your freezer, ensure that the information on
the data plate (voltage and connected load) matches that of the
mains electricity supply. If in doubt, consult a qualied electrician.
• Insert the plug into a socket with an ecient ground connection. If
the socket has no ground contact or the plug does not match, we
recommend that you consult a qualied electrician for assistance.
• The appliance must be connected with a properly installed fused
socket. Power supply (AC) and voltage at the operating point
must match with the details on the name plate of the appliance
(name plate is located on the inside left of the appliance).
• We do not accept responsibility for any damages that occur due
to ungrounded usage.
• Place your freezer where it will not be exposed to direct sunlight.
• Your freezer should never be used outdoors or exposed to rain.
• Your appliance should be at least 50 cm away from stoves, gas

EN
8BEFORE USING THE APPLIANCE
ovens and heater cores, and at least 5 cm away from electrical
ovens.
• When your freezer is placed next to a deep freezer, there should
be at least 2 cm between them to prevent humidity forming on
the outer surface.
• Do not place heavy items on the appliance.
• Clean the appliance thoroughly, especially the interior, before
use (see Cleaning and Maintenance).
• The installation procedure into the kitchen unit is given in the
Installation Manual. This product is intended to be used in proper
kitchen units only.
• Before using your freezer, wipe all parts with a solution of warm
water and a teaspoon of sodium bicarbonate, then rinse with
clean water and dry. Place all parts in the freezer after cleaning.
Before using your freezer
• When using your freezer for the rst time, or after transportation,
keep it in an upright position for at least 3 hours before plugging
into the mains. This allows ecient operation and prevents
damage to the compressor.
• Your freezer may have a smell when it is operated for the rst
time. This is normal and the smell will fade away when your
freezer starts to cool.

EN
9
Information on No-Frost technology
No-frost freezers dier from other static freezers in their operating
principle.
In normal freezers, the humidity entering the freezer due to opening
the door and the humidity inherent in the food causes freezing in
the freezer compartment. To defrost the frost and ice in the freezer
compartment, you are periodically required to turn o the freezer,
place the food that needs to be kept frozen in a separately cooled
container and remove the ice gathered in the freezer compartment.
The situation is completely dierent in no-frost freezers. Dry and cold
air is blown into the fridge and freezer compartments homogeneously
and evenly from several points via a blower fan. Cold air dispersed
homogeneously and evenly between the shelves cools all of your
food equally and uniformly, thus preventing humidity and freezing.
Therefore your no-frost freezer allows you ease of use, in addition to
its huge capacity and stylish appearance.
BEFORE USING THE APPLIANCE

EN
10
THE PARTS OF THE APPLIANCE AND THE
COMPARTMENTS
1. Control panel
2. Freezer upper room cover
3. Freezer compartment drawers / freezer room cover *
4. Freezer compartment drawers
5. Ice matic *
6. Ice tray *
7. Freezer LED strip *
8. No Frost air circulation system
This presentation is only for information about the parts of the appliance.
Parts may vary according to the appliance model.
1
2
3
4
5
6
7
8
* In some models

EN
11
USAGE INFORMATION
Display and Control Panel
1 2 3 4 5 6
Using the Control Panel
1. Alarm indicator
2. Freezer set value screen.
3. Super Freeze mode indicator
4. It enables the setting value of freezer to be modied and super freeze mode
to be activated if desired. Freezer may be set to -16, -18, -20, -22, -24°C
super freeze.
5. It enable the economy mode to be activated if desired.
6. Eco mode indicator
Operating Your Freezer
Super Freeze Mode
How Would It Be Used?
Press freezer set button (#4 on control panel diagram) until Super freeze symbol
(#3) will be seen on the screen. Buzzer will sound beep beep. Mode will be set.
During This Mode:
• Economy mode can not be selected.
• Super freeze mode can be cancelled by the same operation of selecting.

EN
12
Economy Mode
How Would It Be Used?
• Push "MODE" button (#5 on control panel diagram) until eco symbol appears.
• If no button is pressed for 1 second. Mode will be set. Eco symbol (#6) will
blink 3 times. When mode is set, buzzer will sound beep beep.
• Freezer temperature segments (#2) will show "E".
• Economy symbol and E will light till mode nishes.
During This Mode:
• Freezer may be adjusted. When economy mode will be cancelled, the
selected setting values will proceed.
• Super freeze mode can be selected. Economy mode is automatically
cancelled and the selected mode is activated.
• To cancel, you will just need to press on mode button.
Screen Saver Mode
Purpose
This mode saves energy by switching o all control panel lighting when the panel
is left inactive.
How to Use
• Screen saver mode will be activated automatically after 30 seconds.
• If you press any key while the lighting of the control panel is o, the current
machine settings will reappear on the display to let you make any change
you wish.
• If you do not cancel the screen saving mode or press any key for 30 seconds,
control panel will remain o.
To deactivate the screen saving mode,
• To cancel the screen saving mode, rst of all, you need to press any key to
activate the keys and then press and hold the Mode button " " (#5) for 3
seconds.
• To reactivate screen saving mode, press and hold the mode button " " (#5)
for 3 seconds.
USAGE INFORMATION

EN
13
Door Open Alarm Function
If freezer door is opened more than 2 minutes, appliance sounds ‘beep beep’.
Temperature Settings
Freezer Temperature Settings
• The initial temperature value for the freezer setting indicator is -18°C.
• Press the set freezer button once (#4 on control panel diagram).
• When you rst push this button, the last set value will blink on the screen.
• Whenever you press this button, a lower temperature will be set (-16°C,
-18°C, -20°C, -22°C, -24°C, super freeze).
• When you push the set freezer button until the super freeze symbol (#3)
appears, and if you do not push any other button within 1 second, super
freeze will ash.
• If you continue to press it, it will restart from -16°C.
• The temperature value selected before super freeze mode or economy mode
is activated and will remain the same when the mode is over or cancelled.
The appliance continues to operate with this temperature value.
Recommended Temperature Values for Freezer
When to adjust Inner
Temperature (oC)
For minimum freezing capacity -16, -17
In normal usage -18, -19, -20, -21
For maximum freezing capacity. -22, -23, -24
Warnings about temperature adjustments
• Do not pass to another adjustment before completing an adjustment
• Temperature adjustments should be made according to the frequency of
door openings, the quantity of food kept inside the freezer and ambient
temperature of the place of your freezer.
• Your freezer should be operated up to 24 hours according to the ambient
temperature without interruption after being plugged in to be completely
cooled.
• Do not open doors of your freezer frequently and do not place much food
inside it in this period.
• A 5 minute delaying function is applied to prevent damage to the compressor

EN
14 USAGE INFORMATION
of your freezer, when you take the plug o and then plug it on again to operate
it or when an energy breakdown occurs. Your freezer will start to operate
normally after 5 minutes.
• Your freezer is designed to operate in the ambient temperature intervals
stated in the standards, according to the climate class stated in the
information label. We do not recommend operating your freezer out of stated
temperatures value limits in terms of cooling eectiveness.
• This appliance is designed for use at an ambient temperature within the 10°C
- 43°C range.
Climate class Abbient temperature (oC)
TBetween 16 and 43 (oC)
ST Between 16 and 38 (oC)
NBetween 16 and 32 (oC)
SN Between 10 and 32 (oC)

EN
15
USAGE INFORMATION
Accessories
Making ice cubes
Ice tray (In some models)
• Fill the ice tray with water and place in the freezer compartment.
• After the water has completely turned into ice, you can twist the tray as shown
below to remove the ice cubes.
Icematic (In some models)
• Take out the ice making tray
• Fill the water to the line.
• Place the ice making tray in its
original position
• When ice cubes are formed,
twist the lever to drop ice cubes
into the icebox.
Note:
• Do not ll the icebox with water to make ice. This may damage it.
• The movement of the ice maker may be dicult while the freezer is running.
In such a case it should be cleaned by removing the glass shelves.
Removing the Ice maker
• Remove the freezer glass
shelves
• Remove the icemaker by
pulling left or right on the shelf.
You can remove the icemaker to increase the available volume in the freezer
compartment.
Visual and text descriptions on the accessories section may
vary according to the model of your appliance.

EN
16 ARRANGING FOOD IN THE APPLIANCE
• Use your freezer to keep frozen food for a long time and to produce ice.
• Do not place food you want to freeze next to frozen food.
• You should freeze your food (meat, minced meat, sh etc) in portions that
allow consuming in a time.
• Do not put fresh and warm food with frozen food side by side as it can thaw
the frozen food.
• While freezing fresh food (i.e. meat, sh and mincemeat) divide them in parts
in order to use in one time.
• For storing the frozen food; the instructions shown on frozen food packages
should always be followed carefully and if no information is provided, food
should not be stored for more than 3 months from the purchased date.
• Maximum load; if you want to load large quantities and use the maximum net
capacity, you can remove the drawers (Except the bottom one). You can store
bulky items directly on the shelves.
• When buying frozen food ensure that these have been frozen at suitable
temperatures and that the packing is intact.
• Frozen food should be transported in appropriate containers to maintain the
quality of the food and should be returned to the freezing surfaces of the unit
in the shortest possible time.
• If a package of frozen food shows the sign of humidity and abnormal swelling
it is probable that it has been previously stored at an unsuitable temperature
and that the contents have deteriorated.
• The storage life of frozen food depends on the room temperature, thermostat
setting, how often the door is opened, the type of food and the length of time
required to transport the product from the shop to your home. Always follow
the instructions printed on the package and never exceed the maximum
storage life indicated.
If you would freeze about 3 kg food in your freezer:
• You can place your food without touching other frozen food and activate “Fast
Freezing” mode. You can put your food next to other frozen food after they
are frozen (after minimum 24 hours).
• Do not re-freeze the frozen goods after being melted. This may cause health
issues like food poisoning.
• Do not place hot food to the freezer before cooling them. This may cause the
spoiling of food frozen before in the freezer.
• When you are buying frozen food, make sure that they frozen in proper
conditions and the package is undamaged.
• Follow the instructions for storing conditions on the package of the frozen
food while storing them. If there is no explanation, food must be consumed
in a short time.
• If the package of frozen food is humid and smells bad, it may be stored under

EN
17
inappropriate conditions and spoiled. Do not buy this kind of food!
• Storing time for frozen food may dier according to the ambient temperature,
frequency of door openings, thermostat adjustments, type of food and the
time between the buying of the food and placing of the food in the freezer.
Always follow instructions on the package and do not exceed storing period.
ARRANGING FOOD IN THE APPLIANCE

EN
18 CLEANING AND MAINTENANCE
• Disconnect the unit from the power supply before cleaning.
• Do not clean the appliance by pouring water.
• Make sure that no water enters the lamp housing and other
electrical components.
• The freezer should be cleaned periodically using a solution of
bicarbonate of soda and lukewarm water.
• Clean the accessories separately with soap and
water Do not clean them in the dishwasher.
• Do not use abrasive products, detergents or soaps. After washing,
rinse with clean water and dry carefully. When you have nished
cleaning, reconnect the plugto the mains supply with dry hands.
• Clean the condenser with a broom at least twice a year. This will
help you to save on energy costs and increase productivity.
THE POWER SUPPLY MUST BE DISCONNECTED.
Defrosting
Your freezer defrosts automatically. Water produced by defrosting
ows to evaporating container passing through water collecting
groove, and vaporizes here by itself.
Evaporating
tray

EN
19
Replacing the LED strip
1 led strip in freezer is used to illumianate your appliance. Please call the service
man.
Note: Numbers and location of led strips may be changed according to the model.
!!! Some versions may be without illumination.
CLEANING AND MAINTENANCE
led strip

EN
20 SHIPMENT AND REPOSITIONING
Transportation and changing of installation position
• The original packages and foamed polystyrene (PS) can be
retained if required.
• During transportation, the appliance should be secured with
a wide string or a strong rope. The instructions written on the
corrugated box must be followed while transporting.
• Before transporting or changing the installation position, all the
moving objects (ie, drawer, Ice trays, …) should be taken out or
xed with bands in order to prevent them from getting damaged.
Carry your freezer in the upright position.
Table of contents
Languages:
Other Gram Freezer manuals

Gram
Gram Blast Chillers and Freezers User manual

Gram
Gram FSI 3225-94 N/1 User manual

Gram
Gram FS3105-90 User manual

Gram
Gram SF 930 User manual

Gram
Gram KF 4366-90 N/1 User manual

Gram
Gram FC 494186 N X User manual

Gram
Gram FS 120-II User manual

Gram
Gram FS 3185-90 User manual

Gram
Gram KFI 300851 User manual

Gram
Gram FS 320-00 User manual

Gram
Gram FS 3125-90 User manual

Gram
Gram KF 245 User manual

Gram
Gram FS 3215-60 User manual

Gram
Gram KS Monolit User manual

Gram
Gram KF 311861 N X User manual

Gram
Gram FC 494186 N/1 User manual

Gram
Gram FS 3286-50 N User manual

Gram
Gram FS 4316-90 N X User manual

Gram
Gram BAKER SF 950 User manual

Gram
Gram FS 3215-93 User manual