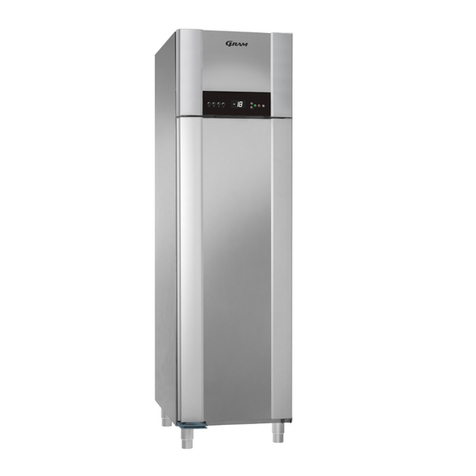
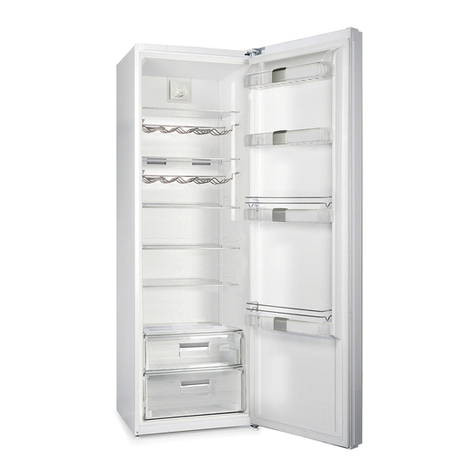
Gram KF 130-11 M56 Series User manual

KF 130-11
M56 Series Manual
Fre
sh
l
ine

CONGRATULATIONS ON YOUR NEW GRAM
Fre
sh
l
ine FRIDGE/FREEZER.
Congratulations on your new fridge/freezer. The fridge/freezer
was developed taking the different storage requirements of food
items into consideration. Some must be stored cold - others require
a little higher temperature. A few must be stored separately so as
not to impart flavour and odour to other items of food. Most items
of food require high air humidity in order to stay fresh.
To ensure that you get as much joy out of your new fridge/freezer
as possible, it is important that you become familiar with the
appliances functions and know how to use the accessories. Please
read this manual carefully before setting up and using your
fridge/freezer.
As these instructions apply to several fridge/freezer models, the
equipment may vary from model to model.
Before using the fridge/freezer
On receipt, check to ensure that the fridge/freezer has not become
damaged during transportation. Transport damage should be
reported to the local supplier before the fridge/freezer is put to use.
It is also highly recommended that your fridge/freezer is left in it’s
final position in the kitchen for a minimum of 2 hours prior to
turning on. This allows the oil to settle in the compressor, which is
caused by movement during transportation.
Before filling the refrigerator with items of food, the fridge/freezer’s
interior should be cleaned with lukewarm water containing a mild
detergent. Use a soft cloth. If the fridge/freezer has been stored in
cold surroundings (colder than +5ºC), it must be allowed to
stabilise for at least 2 hours before being switched on.
Read more about setting up and installation on pages 7 through
to 12.
2

CONTENTS
ImportantInformation 4
Transporting and moving the fridge/freezer 4
If the fridge/freezer is not to be used for some time 5
Warning 5
Disposal 5
ProductDescription 6
Setting Up And Installation 7
Where to place the fridge/freezer 7
Building into a kitchen cabinet 9
Building into a refrigerator cabinet 9
Installation and ventilation diagrams 10
Electricalconnection 11
Changing the door hinge over to the opposite side 12
Using The Fridge/Freezer 13
Operating the fridge/freezer 13
Changing the temperature 13
Brief temperature variations 14
Freezingdown 14
Replacingthebulb 14
Using The Fridge/Freezer’s Accessories 15
Glassshelves 15
Bottleshelves 15
Vegetabledrawer 15
Multi-boxes 15
Freezercompartment 15
DefrostingAndCleaning 16
Defrostingoftherefrigerator 16
Defrosting of the internal freezer compartment 16
Cleaning the fridge/freezer 17
GRAM Customer Care And Servicing 18
Checklist 18
ContactDetails 19
SpareParts 19
Nameplate - Your appliance details and specifications 20
3

IMPORTANT INFORMATION
The fridge/freezer contains the environment-friendly, non-ozone
depleting refrigerant R600a. As R600a is a flammable gas, it is
important to avoid damage to the refrigeration circuit during
transport and installation. If the refrigeration circuit is damaged,
avoid using naked flame in the vicinity of the fridge/freezer and
connecting power to the fridge/freezer. Also make sure that there
is good ventilation in the room. If you are in doubt, please contact
your supplier.
This appliance is not intended for use by persons (including
children) with reduced physical, sensory or mental capabilities, or
lack of experience and knowledge, unless they have been given
supervision or instruction concerning use of the appliance by a
person responsible for their safety.
Children should be supervised to ensure that they do not play with
the appliance.
WARNING: Keep ventilation openings, in the appliance enclosure
or in the built-in structure, clear of obstruction.
WARNING: Do not use mechanical devices or other means to
accelerate the defrosting process, other than those recommended
by the manufacturer.
WARNING: Do not damage the refrigerant circuit.
WARNING: Do not use electrical appliances inside the food storage
compartments of the appliance, unless they are recommended by
the manufacturer.
Transporting and moving the fridge/freezer
The fridge/freezer must always be moved in the vertical position.
The cabinet must not be tilted more than approx 40º. If the fridge/
freezer has been tilted more than 40º, the power supply must not
be connected until the appliance has stood upright for at least 2
hours.
4

If the fridge/freezer is not to be used for some time
Turn off the fridge/freezer by turning the dial on the thermostat
module to “0” then disconnect the power supply to the fridge/
freezer and if possible, pull the plug out of the wall socket.
Empty, defrost and clean the fridge/freezer. Leave the fridge/
freezer door slightly ajar. This will prevent bad smells in the fridge/
freezer.
Warning
Old refrigerators and freezers are often fitted with complicated
latches that can only be opened from the outside. If you have an
old unit like this stored away somewhere, or if you scrap it,
remember to destroy the latch to prevent children from being
exposed to danger by getting locked inside the unit.
Note! Please also observe the environmental rules on disposal.
Disposal
If a fridge/freezer is to be disposed of, this must be done in an
environmentally correct way, in accordance with current rules of
disposal.
Please observe the environmental rules on disposal. There might
be special requirements/conditions to be observed. Information on
disposal can be obtained from:
- Gram A/S
- Your white-goods supplier
- Authorities (your local council, Ministry of the Environment, etc.)
5

6
PRODUCT DESCRIPTION
The fridge/freezer is intended for use in a normal household. It is
designed for temperature class SN-T in accordance with European
standard EN 153. This means that the fridge/freezer will run best
at a room temperature of +10ºC to +43ºC.
Thermostat dial
Freezer Compartment
Storage Shelf
Lamp
Multi Boxes
Glass Shelves
Rubber Sealing Strip
Condenser
Evaporation Tray
Compressor
Compressor Compartment
Vegetable Drawer
Nameplate
Adjustable Feet
Bottle Shelf
Door Handle

7
SETTING UP AND INSTALLATION
Where to place the fridge/freezer
For safety reasons the fridge/freezer must not be installed
outdoors; it must be placed in a dry room. Never place the
appliance close to sources of heat such as cookers or radiators, and
avoid placing it in direct sunlight. The surface on which the
appliance is placed must be level and sturdy. The small wheels
mounted at the rear of the fridge/freezer make it easy to place it in
the required position.
Important Note: The use of other gas appliances inside the
building, such as cook tops, ovens and heaters may create extra
moisture in the air, along with places that experience general high
humidity. This may cause the refrigerator/freezer to build up an
excess of ice on the evaporator plate causing the drip tray at the
back to overflow with water during the defrost process. To help
eliminate excess moisture, a dehumidifier or ventilation unit is
recommended.
The fridge/freezer can be set up free-standing against a wall or
built into a kitchen cabinet.
It is important that the appliance stands completely level and that
there is good air circulation over, under and around it. The
fridge/freezer can be adjusted by turning the two adjusting screws
on the plinth. After adjustment, the feet and the two rear wheels
must be in contact with the surface on which the appliance stands.
It is extremely important that the fridge/freezer’s adjustable feet are
set correctly to avoid movement or future distortion of the cabinet.
It is also advantageous, but not necessary, that
the fridge/freezer is tilted slightly towards the
rear to allow the door to close on it’s own.
Models with table top (KS150/FS120/KF130)
are suitable for building in under a worktop or
in a continuation of a worktop if the kitchen
elements have a standard height of 850mm.
Before fitting, attach the ventilation grill
supplied, to the top of the fridge/freezer. (1)
1
8
If the refrigerator is placed beside another refrigerator or freezer,
there must be at least 20mm clearance between them.
If the appliance is not built in but positioned with it’s door hinge
side against a wall, there should be at least 50mm between the
appliance and the wall in order to allow the door to open easily.
The fridge/freezer must not be placed against the back wall where
the condenser plate can touch it. Allow a minimum of 20mm
between the condenser and the back wall. Use the grey rubber
spacers provided in the parts kit to ensure there is a sufficient gap.
The illustrations on the following pages (9 & 10), show how to
create sufficient air circulation around the cabinet. The dimensions
give the actual size of openings. The circulation area must be at
least 200 cm².

9
Building into a kitchen cabinet
Building into a kitchen cabinet with sufficient ventilation
around the fridge/freezer to dissipate heat from the
compressor. The appliance can stand direct on the floor or on
its plinth. (2)
Building into a refrigerator cabinet
Building into a refrigerator cabinet follows the same principal
as shown in illustration 2. (3)
2
3

Installation And Ventilation Diagrams
The measurements below is a guideline only. The degree of the
door opening shows the minimum requirement to easily access the
storage bins. (4 & 5)
10
20mm
110º110º
20mm+ 20mm+
35-50mm+
110º
20mm+
35-50mm+
70mm+
50mm+
4
5

11
Electrical connection
The appliance is intended for connection to alternating current.
The connection values for voltage (V) and frequency (Hz) are given
on the nameplate inside the cabinet.
Power must be connected via a wall socket with switch. The wall
socket should be easily accessible.
It is recommended, as with any high tech appliance, that a power
surge protection device be used.
All earthing requirements stipulated by the local electricity
authority must be observed. The cabinet plug and wall socket
should then give correct earthing. If in doubt, contact your local
supplier or an authorised electrician.
WARNING - This appliance must be earthed. The flexible cord
(mains lead) fitted to this appliance has three cores for use with a
3-pin 10 amp plug.
IMPORTANT
The cores in this mains lead are coloured in accordance with the
following code:
GREEN AND YELLOW - EARTH
BLUE - NEUTRAL
BROWN - LIVE
These colours might not correspond with the colour markings
identifying the terminals in your plug.
Proceed as follows:
Connect the GREEN AND YELLOW core to the plug terminal
marked “E” or by an earth symbol, or coloured GREEN or GREEN
AND YELLOW. Connect the BLUE core to the plug terminal
marked “N” or coloured BLACK.
Connect the BROWN core to the plug terminal marked “L” or
coloured RED.

12
Changing the door hinge over to the opposite side
Illustrations 6, 7 & 8 below, show how easy it is to change the
doors from right-hinged to left-hinged, or vice versa. (Changing
the door from left to right is done in the same way, but opposite).
*The fridge/freezer must be switched off and emptied completely.
- Take off the table top by removing the two screws at the front of
the cabinet and three at the back (KS150/FS120/KF130 only).
- Tilt the refrigerator back at a 40ºangle, in order to gain access to
the lower hinge.
- Remove the door handle.
- Remove the front adjustable feet.
- Remove the three screws holding the lower bracket in place
using a Philips screwdriver. (6)
- Remove the door and unscrew the three screws from the
bracket on the base of the cabinet. (7)
- Before refitting the brackets on the opposite side of the cabinet,
move the threaded pin on the hinge bracket to the other threaded
hole.
- Remove the threaded pin under the control panel using a Philips
screwdriver and move it to the opposite side. (8)
- Refit the door and screw the bottom hinge into position.
- Replace the adjustable feet.
- Replace the door handle and the table top.
Reversing the internal freezer door
Unscrew the door and the bracket. Turn the door 180º. Re-attach
the door and bracket on the opposite side.
6 87

13
USING THE FRIDGE/FREEZER
Operating the fridge/freezer
Start the fridge/freezer by plugging it into a wall socket.
If the mains lead has been damaged, it must be replaced with a
corresponding type supplied by an electrical service centre and
installed by a qualified electrician.
The thermostat dial is positioned behind the door at the top of the
cabinet.
Turn the thermostat dial past “0” to turn the fridge/freezer on.
The fridge/freezer is switched off when the dial setting is at “0”.
Although Gram refrigeration products are generally very quiet, it is
normal for certain noises to be heard during operation, e.g.
gurgling, cracking, knocking etc… These noises can all be
associated with gas converting to liquid and vice-versa, the
compressor turning on/off and the build up of ice melting away
during the defrost process.
Changing the temperature
The thermostat dial setting can be changed from “1” (warmest) to
“7 “(coldest). (9)
When the appliance is started the thermostat should be in it’s
middle setting “4”. After an hour or two the cabinet will have
cooled down. If a lower temperature is required, turn the
thermostat dial towards “7”. If a higher temperature is required,
turn the dial towards “1”.
Once the chamber has reached it’s set temperature, the thermostat
will detect this and turn the compressor off for a period of time
until it is required to turn back on.
This process assists in the defrosting process of the refrigerator’s
chamber.
9

14
Brief temperature variations
Brief temperature variations are normal and occur when:
- the cabinet is filled with fresh food items
- the door is left open for longer periods
- the refrigerating element defrosts
Items of food in the cabinet will not be affected by these variations
and the temperature will quickly return to normal.
Freezing down
The temperature in the small freezer compartment is closely related
to the setting in the refrigerator (this applies to appliances with 1
compressor).
If quick freezing down is required the cabinet should be set to run
at the lowest temperature, i.e. “7”. As this setting affects both the
refrigerator and freezer, personal experience should be used to
determine how long the quick-freeze (and thus the low refrigerator
temperature) should last. After freezing down, the normal
temperature setting should again be chosen.
Please Note: Pack your frozen foods in airtight and watertight
containers in order to avoid drying out. Portions should be as flat
as possible to allow rapid freezing down.
Replacing the bulb
Turn the thermostat dial to “0” and disconnect the appliance by
unplugging the mains lead from the wall socket. Unscrew the
lamp cover with a screwdriver. (10)
Replace the bulb with a new one (max. 15watt, E14).
Refit the cover, (11) reconnect the power and reset the
temperature by turning the thermostat dial to the temperature it
was previously set at.
10 11

15
USING THE FRIDGE/FREEZER’S ACCESSORIES
Glass shelves
The glass shelves can be arranged to give more, or less space
between the shelves thus allowing flexible cabinet arrangement
(12 and 13).
Extract the shelf by lifting up the left shelf side (14). Start by
removing the top shelf when you want to clean the refrigerator or
rearrange the shelves.
Bottle shelves
The large bottle shelf at the bottom of the door is suitable for large
2 litre bottles. The height of the small bottle shelf is adjustable.
Vegetable drawer
The drawers in the bottom of the cabinet are suitable for storing
fruit and vegetables. The overlying shelf covers the drawer and
maintains humidity thus preventing stored food from drying out.
Multi-boxes
The multi-boxes are ideal for all items of food and can be placed in
the cabinet or the door, whichever is most expedient. The
tight-fitting lids prevent drying out and save much time in tedious
wrapping and unwrapping. The multi-boxes are made of material
that remains unaffected by mineral oils, fats and weak acids.
They withstand temperatures below 0ºC and up to 100ºC. They
can be cleaned in the dishwasher but must not be placed close to a
heating element. Multi-boxes can also be purchased as accessories.
Freezer compartment
The whole of the freezer can be used for freezing down and for
the long-term storage of frozen foods.
12 13
14

16
DEFROSTING AND CLEANING
Defrosting of the refrigerator
Defrosting of the refrigerator is automatically carried out when it
goes through it’s set temperature cycle, refer to “Changing the
temperature” on page 13.
However, a manual defrost should be carried out when a build up
of excess ice is noticed on the evaporator plate (situated internally
at the rear of the cabinet).
Empty the food from the cabinet and store in an area where it can
keep chilled safely for approximately 2 hours.
Turn the refrigerator off by turning the thermostat dial to “0” and
disconnect the plug from the power outlet.
Leave the door open and make sure the evaporator tray and drain
hole are clear so the defrost water can run through freely. (15)
The water will collect in the drip tray, which is located at the rear of
the refrigerator, above the compressor.
Leave the refrigerator to defrost for approx 1 hour.
Turn the refrigerator back on by reconnecting the power plug and
turning the thermostat dial to it’s previous setting.
Once the refrigerator is turned back on, the heat of the compressor
will cause the water in the drip tray to evaporate.
Defrosting of the internal freezer compartment
If more than 4-5mm of frost and ice has formed in the freezer, it is
time for a defrost.
Remove all items from the freezer. To keep them as cold as
possible during defrost, they can be placed in the refrigerator
cabinet. Turn the thermostat to high, “7” or off “0”. Place a bowl
containing hot water (not boiling) in the freezer. When the ice has
melted, clean out the freezer using water and a little washing-up
liquid. Dry the freezer with a soft cloth. Reset the temperature.
Warning
It is dangerous to use electrical apparatus, knives or sharp objects
to speed up the defrosting process.

17
Cleaning the fridge/freezer
Turn the fridge/freezer off by turning the thermostat dial to “0” and
disconnect the power supply to the fridge/freezer.
The fridge/freezer is best cleaned using a weak soap solution and a
soft cloth. Never use cleaning agents that scour. It is also highly
recommended that harsh cleaning agents are not used to clean
the plastic components as certain chemicals can lead to premature
deterioration and cause damage to these parts. Clean the sealing
strip around the door regularly to prolong its life. Use only clean
water for cleaning the sealing strip.
The plastic parts of the cabinet cannot withstand boiling water
(max 85ºC).
It is important to prevent water from getting into the thermostat.
Clean the water drain in the “evaporation tray” in the refrigerator
compartment using the cleaning pin in the parts kit supplied (15).
Remove dust and threads from the compressor compartment at
the back of the refrigerator with a vacuum cleaner
15

18
GRAM CUSTOMER CARE & SERVICING
Checklist
If you discover a problem with your fridge/freezer, please refer to
the following points before contacting your supplier for assistance.
PROBLEM POSSIBLE CAUSES WHAT TO DO
Refrigerator does not
operate.
*No electricity to the power
point.
*Check the plug is connected
correctly to the power point.
*Check another appliance at the
same power outlet.
*Check the house fuse/circuit
breaker.
Compressor is operating
for long periods.
*Hot weather.
*Frequent door openings.
*Large quantity of food
recently added.
*Door not sealing properly.
*Minimise door openings to allow
the temperature to stabilise.
*Refer to
Changing the
Temperature
on page 13.
*Check the cabinet is level and
door seals are clean and
undamaged.
*Check there are no obstructions
that are preventing the door from
closing.
Food freezing in the
refrigerator.
*Temperature setting is set too
low.
*Food is stored too close to, or
touching rear of cabinet.
*Refer to
Changing the
Temperature
on page 13.
*Move food away from the rear of
the cabinet.
Storage compartments are
too warm.
*Temperature setting not
correct.
*Frequent door openings.
*Large quantity of food
recently added.
*Refer to
Changing the
Temperature
on page 13.
*Minimise door openings to allow
the temperature to stabilise.
Compressor not operating. *No electricity to power point.
*Fridge cabinet has reached it’s
set temperature.
*Possibility of fault with the
compressor.
*Check power to refrigerator.
*If compressor is still not operating
after checking the power and .
after it’s usual rest period,
please contact your supplier.
Door not closing properly. *Fridge not level.
*Dented or damaged door
seal.
*Adjust feet. Refer to
Setting Up
And Installation
on page 7.
*Contact your supplier for advice.

19
Contact details
If after referring to the manual and above checklist you still require
assistance, please contact your supplier or visit the importers
website for service centre details on http://www.indepower.co.nz
Please have the appliance information ready to provide to your
supplier. This information is shown on the silver nameplate inside
the cabinet or on the back page of this manual.
Spare parts
When ordering spare parts, please give the model and serial
number of your fridge/freezer.
PROBLEM POSSIBLE CAUSES WHAT TO DO
Water found in the bottom
of the refrigerator.
*Blocked drain hole.
*Food or packaging touching
the rear of the refrigerator
(evaporator plate).
*Clear drain hole with the
cleaning pin supplied.
*Re-position food items away from
the rear of the refrigerator.
Condensation on outside
of the refrigerator.
*This is not unusual during
periods of high humidity.
*Wipe dry.
Condensation inside the
refrigerator.
*Frequent or long door
openings.
*Door not sealing properly.
*Not unusual during periods of
high humidity.
*Minimise door openings.
*Check the door seal is sitting flat
and sealing tightly.
*Wipe dry.
Door is out of alignment. *With time and usage,
movement or distortion may
occur.
*Adjust feet and make sure the
cabinet is level.
*Refer to
Setting Up And
Installation
on page 7.
*Try not to overload the
Refrigerator door bottle holders
with too many heavy items as this
may also cause cabinet distortion
over time.

20
REFRIGERATION WARRANTY
This document sets out terms and conditions of warranty. This is an
important document. Please retain this document with your proof of
purchase documents in a safe place for future reference.
This warranty is valid in New Zealand only.
Terms and conditions:
1. In this warranty
(a) ‘Refrigerator’ means any ‘Gram’ or ‘Elcold’ energy efficient refrigerator or
freezer accompanied by this document which is purchased from a
Dealer authorised by Independent Power (NZ) Limited;
(b) ‘Dealer’ means any dealer expressly authorised to sell refrigerators on
behalf of Independent Power (NZ) Limited.
(c) ‘Warranty Period’ means where you use the Refrigerator for personal,
domestic or household purposes in New Zealand for the period of 24
months following the date of the original purchase of the Refrigerator;
(d) ‘you’ means the purchaser of the Refrigerator not having purchased the
Refrigerator for re-sale, and ‘your’ has the corresponding meaning;
(e) ‘Authorised Service Agent’ means any agent expressly authorised to
undertake repairs by Independent Power (NZ) Limited.
2. Independent Power (NZ) Limited warrants that when dispatched the
Refrigerator is free from defects in materials and workmanship for the
Warranty Period.
3. Should you encounter problems with your Refrigerator during the
Warranty Period please contact the Dealer you purchased your
Refrigerator from with the serial number for the Refrigerator and proof
of purchase documents. Proof of purchase is required before you can
make a claim under this warranty. Before contacting the Dealer for
assistance please refer to the owner’s manual and trouble shooting
checklist.
4. During the Warranty Period Independent Power (NZ) Limited or it’s
Authorised Service Agents will, at no extra charge, subject to these
terms and conditions, repair or replace, any parts which it considers
defective. This warranty does not cover noise or vibration within the
Refrigerator which is considered normal, or bulbs, filters or similar
perishable parts. You agree that any replaced Refrigerator or replaced
parts become the property of Independent Power (NZ) Limited.
5. Where you are within an Independent Power (NZ) Limited service area,
this warranty includes the cost of transporting the Refrigerator to and
from the nearest Authorised Service Agent and travelling costs for
This manual suits for next models
1
Table of contents
Other Gram Refrigerator manuals

Gram
Gram KS 3286-90 User manual

Gram
Gram KS 32315-63/1 User manual

Gram
Gram KF 3295-93 N/1 User manual

Gram
Gram KS 32265-63 User manual

Gram
Gram FB 2185-90 User manual

Gram
Gram FB 3306-90 Series User manual

Gram
Gram KC 311186 User manual

Gram
Gram KC 371185 User manual

Gram
Gram KS 4456-90 F/2 User manual

Gram
Gram LC 151350 User manual

Gram
Gram KS 42476-60/1 User manual

Gram
Gram FB 2107-90 User manual

Gram
Gram KF 482064 FN/1 User manual

Gram
Gram KF310 User manual

Gram
Gram KF 471854 N/1 User manual

Gram
Gram KF 32255-63 User manual

Gram
Gram FB 3095-91/1 User manual

Gram
Gram BAKER M 950 User manual

Gram
Gram KF 3245-90 User manual

Gram
Gram KF 481864 FN User manual