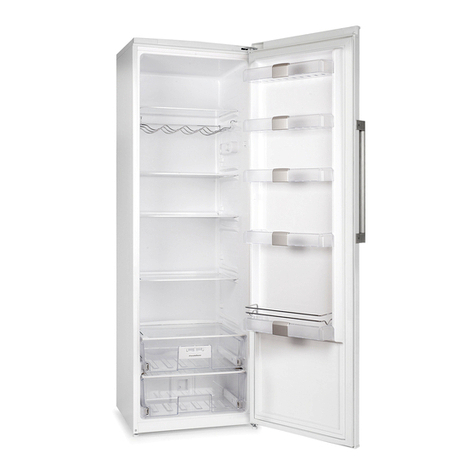
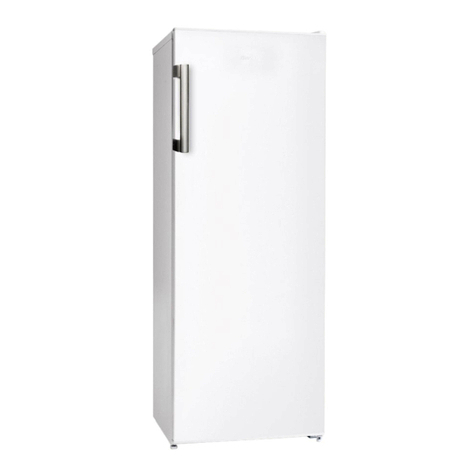
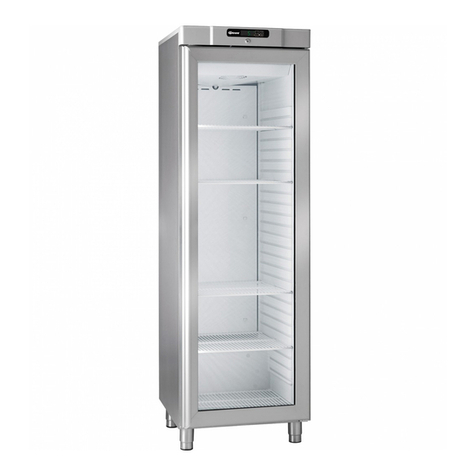
Gram Standard Plus Service manual

765042420 Rev.000 1
Operating- and servicemanual
Gram Standard Plus / Baker Standard 139

765042420 Rev.000 2
Table of contents
Application ..................................................................................................................................................... 3
Safety information .......................................................................................................................................... 4
Location ......................................................................................................................................................... 5
Optimizing the energy consumption .............................................................................................................. 7
General description ....................................................................................................................................... 8
Refrigerant / GWP value ............................................................................................................................... 9
Climate / temperature class ........................................................................................................................... 9
Electrical connection ...................................................................................................................................... 9
General use ................................................................................................................................................. 11
Operating the product .................................................................................................................................. 13
Keyboard lock .............................................................................................................................................. 14
Changing the temperature ........................................................................................................................... 15
Errors and Alarms ........................................................................................................................................ 15
Display of the evaporator sensor reading ................................................................................................... 16
HACCP Alarms ............................................................................................................................................ 17
Setting of HACCP alarm values .................................................................................................................. 17
Display of HACCP alarms ........................................................................................................................... 17
Deletion of HACCP alarms .......................................................................................................................... 18
Cleaning of condenser filter ......................................................................................................................... 19
Defrosting .................................................................................................................................................... 19
Defrost water ............................................................................................................................................... 20
Door closing mechanism ............................................................................................................................. 21
Power failure ................................................................................................................................................ 21
Cleaning ...................................................................................................................................................... 21
Door gaskets ............................................................................................................................................... 22
Long term storage ....................................................................................................................................... 22
Service ......................................................................................................................................................... 23
Disposal ....................................................................................................................................................... 24
EC-Declaration of conformity ...................................................................................................................... 25
RoHS 3 - (EU) 2015/863 ............................................................................................................................. 25
Default factory settings ................................................................................................................................ 26
Access to service parameters ..................................................................................................................... 26
Parameter overview ..................................................................................................................................... 27
Wiring diagram K/M 139 .............................................................................................................................. 37
Wiring diagram F 139 .................................................................................................................................. 38
Piping diagram ............................................................................................................................................. 39
765042420 Rev.000 3
Thank you for choosing a quality product from Gram Commercial.
This manual will advise you how to install, use and maintain your new product.
Before our products leave the factory, they undergo a full function and quality test.
Should you nevertheless experience problems with the product, then contact your local dealer.
Gram Commercial representatives and dealers placed all over the world are ready to help you.
Please refer to your dealer for information about the warranty coverage of your new Gram product.
Any warranty is subject to correct use according to specifications in this user manual, where e.g.
common maintenance and eventual repairs are carried out by authorized technicians with proper
knowledge of the product and only using original spare parts.
Changes in installation and other use of the product than prescribed in this manual, might affect
the operation and durability of the product.
The manual is written according to our current technical knowledge. We constantly work on
updating this information, and we reserve the right to make technical changes.
Application
The product is designed for professional storage of foodstuff at a constant temperature.
The product is not be used for chilling down or freezing in foodstuff.
The product is only to be used for the purpose for which it has been expressly designed. Any other
use could cause that the foodstuff stored in the product are not kept at the correct temperature or
even damage the product.
The product is not suited for storing blood plasma, laboratory samples, pharmaceuticals or similar
substances. The manufacturer will not be held liable or responsible for any damage caused by
improper, incorrect or unreasonable use of the product.

765042420 Rev.000 4
Safet
y
information
Important
Description of symbols used in this manual.
Warning
Lacking observation to these instrucions might result in accidents with
personal injury.
Important If these instructions are not observed, the product might be damaged or
destroyed.
Be aware that Gram Commercial has taken precautions to ensure that the safety of the product is
in order.
Please read carefully the following information regarding safety.
It is important, that everyone who are to use or install the product, to have access to this
manual.
This appliance is not intended for use by persons with reduced physical, sensory or mental
capabilities, or lack of experience and knowledge, unless they have been given supervison
or instruction concerning use of the appliance by a person responsible for their safety.
Children should be supervised to ensure that they do not play with the appliance.
The appliance might contain parts with sharp edges in the compressor compartment, and in
the inside compartment.
The appliance is not to be transported on a sack truck, there is a danger of loosing the
balance, causing danger to persons.
Do not pull the power cord to dicconnect the appliance, or when moving the appliance.

765042420 Rev.000 5
Location
When receiving the product, check the packaging material for damage.
If any damage occurs at the packaging material, it should be considered if the product might have
been damaged too. If the damage is substantial, please contact your dealer.
The transport pallet can be removed by loosening the screws that fasten the pallet to the product.
This task requires at least 2 persons.The heaviest part of the product is at the top. Be
aware of this, when removing the transport pallet.
Fig.1

765042420 Rev.000 6
If the cabinet has been transported in horizontal position it must stand upright at least 2
hours before it is started to allow the oil from the compressor to run back.
Because of the heavy weight of the product, the floor might be damaged or scratched
when moving the product.
Correct set up gives the most effective operation.
The product should be located in a dry and adequately ventilated room.
To ensure efficient operation, it may not be placed in direct sunlight or against heat-
emitting surfaces. The product is designed to operate in an ambient temperature
between +16C and +40°C.
Avoid placement of the product in a chlorine/acid-containing environment (swimming
bath etc.) due to risk of corrosion.
The product and parts of the interior is equipped with a protecting film, which should be
removed before use.
Clean the product with a mild soap solution before use.
The set up place must be level and horizontal.
For versions with legs, use the adjustable legs to make sure that the product stands
level and upright.
For versions with castors, the locking devices of the two front castors must be activated, when the
product is in place. The base must be level, and the product may not be placed on frames or the
like.
Fig. 2

765042420 Rev.000 7
Optimizin
g
the ener
gy
consumption
Correct set up gives the most effective operation.
The product should be located in a dry and adequately ventilated room.
To ensure efficient operation, it may not be placed in direct sunlight or against heat-emitting
surfaces. The product is designed to operate in an ambient temperature between +16C
and +40°C.
Do not keep the door open for too long.
Keep the condenser filter clean – to be cleaned at least every 2 weeks.
Do not set the temperature setpoint too low.
There must always be 20 cm of free space above the product, to ensure that the heat from
the condenser can be led away.
The product should be placed as close as possible up against the wall. For products with a
heating element in the tray on the cabinet backside, however max. 75 mm from the wall.
Fig. 3
Max. 75 mm

765042420 Rev.000 8
General description
Fig. 4
Compressor Condenser with air filter
Front panel
Display
Door
Gasket
Air intake
Air distribution plate
Shelves for storage

765042420 Rev.000 9
Refri
g
erant / GWP value
Refrigerator Regrigerant Charge kg GWP
CO2
equivalent
STANDARD PLUS K 139 G R290 0,146 3 0,4
STANDARD PLUS M 139 G R290 0,146 3 0,4
Freezer
STANDARD PLUS F 139 G R290 0,143 3 0,4
Climate / temperature class
Products are tested according to the following climate and temperature classes. Information about
the product’s climate and temperature class can be found at the name plate (see fig.8)
Electrical connection
Read the text below thoroughly before electrical connection.
The product is intended for connection to alternating current. The connection voltage (V)
and frequency (Hz) are shown on the name plate in the cabinet (see Fig. 8). Only the
supplied cord is to be used.
Never use an extension cord for this appliance!
If a wall socket is placed in a longer distance than the length of the supplied power cord,
contact an electrician to establish a wall socket within the range of the supplied power
cord.
If the product is defective, it must be examined by an authorized technician with proper
knowledge of the product during the guarantee period, if it is a product with built-in
compressor.
If it is a product connected to an external compressor unit, it must be examined by the
company who has connected the product to the unit.
Outside the guarantee period, it is advisable to use the service advised by your dealer. If
this is not the case, assistance is required from an authorized technician with proper
knowledge of the product.
Climate class
3 25°C / 60 % RH
4 30°C / 55 % RH
5 40°C / 40 % RH
Temperature
class
L1 -18°C
M1 +5°C

765042420 Rev.000 10
Fig. 5
Always disconnect the power if interruptions in power supply occur, and when electrical parts are
removed/put on, and before cleaning and maintenance of the product.
Repairing of electrical/technical parts may only be performed by authorized technicians with proper
knowledge of the product.
Do not use the product before all coverings are installed, so that live or rotating machine parts can
not be touched.
The product is not to be used outdoor.
All earthing requirements stipulated by the local electricity authorities must be observed. The plug
and wall socket should then give correct earthing. If necessary, contact an electrician.
Make sure the product is disconnected at the wall socket or at the cabinet inlet
as shown above (Fig. 5), before service is performed on electrical parts. It is
not sufficient to switch off the product by the START/STOP key as there will
still be voltage to some electrical parts of the product.

765042420 Rev.000 11
General use
Do not damage the refrigeration system parts.
During normal operation, some parts of the refrigeration system in the compressor
compartment might reach high temperatures, and could therefore cause burns if
touching these components.
Do not use electrical devices inside the product.
To ensure correct and efficient air flow in the cabinet, the upper and lower areas must be
kept free of items as shown on the next page. (see Fig. 6)
All items to be stored, that are not wrapped or packed, must be covered in order to avoid
unnecessary corrosion of the inner parts of the cabinet.
If any controller parameters are changed from default, this could cause that the product
is not functioning normally, and harmful temperatures could damage items that are kept
inside the product.
If the product is turned off, wait minimum 3 minutes before turning it on again. This is to
protect the compressor from damage
Maximum loading of wire shelf: 40 kg
Do not store explosive substances such as aerosol cans with flammable propellant in
this appliance.

765042420 Rev.000 12
Fig.6
Do not place foodstuff
Below the bottom shelf support

765042420 Rev.000 13
Operatin
g
the product
Display The display contains the elements that are
shown to the left of this text. Not all the
symbols shown are used in this product. The
symbols that are used are described below.
The temperature is shown in the 4
alphanumeric positions. The individual symbols
show what is in operation.
Symbols
If this symbol is lit, not all HACCP alarms have
been displayed.
If this symbol flashes, the controls have stored
at least one new HACCP alarm.
If this symbol is not lit, then all HACCP related
alarms have been shown or the alarm log has
been deleted.
If this symbol is lit, then the compressor is in
operation.
If this symbol flashes, the set point of the
controls is about to be changed or the
compressor is being prevented from starting
due to various safety parameters in the
controls.
If this symbol is lit, the controls are performing
a defrosting process. If this symbol flashes, the
drip time after defrosting is under way or
defrosting could not be commenced due to the
compressor's operation preventing this
defrostin
g
.
If this symbol is lit, then the evaporator fan is in
operation. If this symbol flashes, it means that
the evaporator fan has been deactivated/limited
in starting by various parameters in the
controls.
When this symbol is lit, the frame and drainage
heating elements respectively have been
switched on
(
onl
y
applies to freezers
)
.
When this symbol is lit, the cabinet is in energy-
saving mode.
When this symbol is lit, it is time to clean the
cabinet's condenser
When this symbol is lit, there is a current alarm
or a sensor fault that needs to be addressed.

765042420 Rev.000 14
This symbol indicates that the temperature in
the displa
y
is measured in °C
When this symbol is lit, the cabinet is in
standb
y
mode.
Operating
buttons
On/off button. Used to switch the cabinet on or
off and to exit a menu.
Press the P button to set the desired
temperature in the cabinet /Set point. This
button is also used as a ”select” button.
+/- buttons. Up/down when making settings.
The alarm clock is used in connection with
temperature alarms
The defrosting button is used to initiate manual
defrostin
g
Start-up:
Connect the product to the electrical outlet. If the product starts in Standby, do the
following:
Press the button for approx. 2 sec to switch the product on.
Upon start-up, the display will show the current temperature in the cabinet and relevant
control lights will be lit.
Keyboard lock
If the display is locked, attempts to switch the cabinet off or to enter settings will result in
the display showing Loc. In this state, no settings can be made on the controls.
The keyboard for the controls can be unlocked by simultaneously pressing and
for approx. 1 second. The display will now show UnL, and the display is unlocked.
The keyboard can be locked in the same manner. After being locked, the display will
show Loc, and the display is locked.
P
-+
-

765042420 Rev.000 15
Chan
g
in
g
the temperature
To set the desired set point, do the following:
Briefly press the button . Once this has been done, the current set point of the
product is shown in the display. Furthermore, the symbol will flash as an
indication that the set point is about to be changed. The set point can now be
changed using or .
Each time or is pressed, the temperature is changed by 0.1 degrees up or
down respectively. If or is pressed continuously, then the set point is
changed continuously.
Once the desired set point has been set, the new value is shown in the display.
Pressing the button saves the new set point, and the controller does
return to normal operation.
If there is no confirmation by pressing the button , the controller will return to normal
operation after 15 seconds. Those changes that might have been performed with respect
to the set point will then be saved such that the value set will become the new cabinet set
point.
Errors and Alarms
SENSOR ERRORS
Displa
y
Explanation
Pr1
Room sensor error.
The error display will persist until the fault is remedied.
Service is required for the product.
Pr2
Evaporator sensor error.
The error display will persist until the fault is remedied.
Service is required for the product.
P
+-
+-
+-
P
P

765042420 Rev.000 16
ALARMS
Displa
y
Explanation
dFd Defrosting alarm. This code is shown in the display if the defrosting
has been interrupted at the maximum time allowed for a defrosting.
The product will in all probability continue to function normally. This is
just an indication that the product is being or has been subjected to a
greater load than the defrosting parameter settings are able to
accommodate. This error is acknowled
g
ed b
y
touchin
g
an
y
ke
y
.
˪d Door alarm, if the door remains open or is not properly closed. This
alarm is cancelled when the door is closed a
g
ain properl
y
.
AH
High temperature alarm.
This alarm is saved in the alarm lo
g
.
AL
Low temperature alarm.
This alarm is saved in the alarm lo
g
.
For all alarms, press to acknowledge the alarm. The display will then revert to its normal
content.
Displa
y
of the evaporator sensor readin
g
In order to check the evaporator temperature / the function of the evaporator sensor, it is possible
to read out the evaporator temperature from the controller display. This is done by holding for
approx. 2 Seconds. The dispaly will then show “rCH“. Press until “PB2“ is shown in the
display. In order to display the current reading of probe 2 „PB2“, which is the evaporator sensor, it
is now necessary to press . Now the evaporator temperature is displayed. In order to end the
read out press . If nothing further is touched for 60 seconds, the display will return to standard
operation showing the cabinet temperature.
P

765042420 Rev.000 17
HACCP Alarms
The controls can store up to three HACCP alarms. The information saved for these alarms
is:
The critical value(s)
Duration of the alarm
The controls can display the following alarms:
Display Explanation
AL Low temperature alarm. The read-out provided by the controls for the alarm
shows the lowest temperature that has occurred in the cabinet and how long
the cabinet temperature has been under the set alarm value
(
A1
)
.
High temperature alarm. The read-out provided by the controls for the alarm
shows the highest temperature that has occurred in the cabinet and how long
the cabinet temperature has been above the set alarm value
(
A4
)
.
˪d
Door alarm. The read-out provided by the controls for the alarm shows the
highest temperature that has occurred in the cabinet during this type of alarm
and how long the door has been open.
Settin
g
of HACCP alarm values
This is done by pressing and simultaneously until A1 is shown in the display. Then
press or to switch between the individual parameters (A1, A4 and A7). The PA
parameter, which appears when browsing as described above, is treated in the chapter on
service parameters.
Display Explanation
Low temperature alarm limit. The default setting is -35°C
High temperature alarm limit. The default setting is +25°C
Time delay for A1 and A4. The default is 60 minutes.
Displa
y
of HACCP alarms
If there have been or still are one or more alarms for the cabinet, this will be indicated by
the controls.
When “HACCP” is continuously lit in the control display, not all HACCP alarms have been
read out.
If “HACCP” flashes, the controls have stored at least one new HACCP alarm.
If “HACCP” is not lit, then all HACCP related alarms have been shown or the alarm log has
been deleted.
+-
+-

765042420 Rev.000 18
If one or more alarms are active for the cabinet, then the symbol will be lit. Active
alarms cannot be deleted.
If “HACCP” is either continuously lit or flashing in the display, it is possible to read out the
alarm(s) contained in the log. This is done by pressing the button . This action causes
LS to appear on the control display. Pressing will then cause information on the first
possible alarm type to be displayed. Pressing or will cause the controls to switch
between the different alarms if there are more than one type. When the alarm for which
data is desired to be read out is reached, then do the following.
example:
The controls show AH. Press .
The controls will now show the data that relates to the AH alarm. Each individual step is
shown for approx. 1 second. The sequence is as follows:
Display Explanation
.°C
The critical highest temperature under the AH alarm in °C
dur
Duration of the alarm
H01
Number of hours the temperature alarm has lasted (1 hour)
n20
Number of minutes the temperature alarm has lasted (n is used because
the display cannot write "m" for minutes)
AH
Alarm type (AH for high temperature alarm)
To leave this part of the display and return to the LS display, press once. To exit the
alarm log, press once on or twice on . To delete the alarm log instead, do as
described in the following.
Deletion of HACCP alarms
When all relevant alarms have been checked and none of them are active any longer, then
the log can be deleted in the manner described below.
Pressthe button once, after which the display shows LS. By pressing once more on
the display will show rLS, which is the reset of the alarm log. When this appears in the
display, then press . The display now shows 0. Press the button until the display
shows 149. Pressing the button continuously causes the numerical value to change
more quickly. If you run past 149, the button can be used to correct the value. When
the display shows 149, confirm the deletion by pressing . The controls confirm the
deletion by showing ” ---- ” which will flash for 4 seconds.
P
+-
P
P+
+
-
P

765042420 Rev.000 19
Cleanin
g
of condenser filter
Reminder about cleaning the condenser's air filter:
To ensure the proper operation of the cabinet, it will be periodically indicated that the filter in front
of the condenser has to be cleaned. This is indicated by the warning light being lit.
Resetting of condenser filter alarm:
After the filter has been cleaned, the controls must be reset to remove the filter alarm. Resetting
can only be done by a specific key combination.
Press the button until the control display shows a combination of letters.
Using the button or , press if necessary until the display shows rCH.
When the display shows rCH, then press .
Then press the button or until the display shows 149.
When the display shows 149, press .
This causes the display to show ---- for approx. 4 seconds, which confirms that the counter
has been reset.
Now the warning light is shut off and the controls return to normal operation according to
parameter “C10”.
Defrosting
Normal defrosting takes place automatically 4 times per day. If the product is under an extremely
intense load (frequent openings of the door and frequent replacement of the goods), it may
become necessary to perform manual defrosting.
Starting manual defrosting: Press the button for more than 4 seconds.
The symbol will be lit while defrosting is occurring. After defrosting has been concluded, the
symbol will flash to indicate a drip time. Immediately after the drip time has been completed,
the cabinet's refrigeration system will start up again.
If pressing the button as described above does not result in defrosting being performed, then
the reason is:
that the evaporator is ice-free, which means that defrosting is not necessary.
that the defrosting is delayed, due to the compressor is running. This is indicated by is
flashing.
Shortly after defrosting has been completed, the compressor starts, and the symbol is lit to
indicate that the refrigeration process is working once again.
Do not use sharp or pointed objects to accelerate the defrosting process.
-
+-
P
+-
P

765042420 Rev.000 20
Defrost water
The product generates defrost water during defrosting, which is conducted out into a re-
evaporation tray at the back of the product (see Fig. 7).
A re-evaporation tube from the cooling system on freezers or an electric heating element placed on
the tray for refrigerators (K and M models) will enable the water to be re-evaporated.
Cleaning the re-evaporation tray at the back of the product is recommended as needed and
at a minimum once annually. Remember to shut off the electrical power to the product
before cleaning.
Be careful not to damage the re-evaporation tube on freezers or the re-evaporation heating
element and associated float switch in refrigerators in connection with any cleaning.
Please note that the re-evaporation components placed on the back of the cabinets can be
hot. This applies both for the pressurised tube on the freezer as well as for the heating element on
the refrigerators. Use proper means of protection (gloves) to avoid burns in connection with
cleaning the re-evaporation trays.
Fig. 7
Other manuals for Standard Plus
1
This manual suits for next models
7
Table of contents
Other Gram Refrigerator manuals

Gram
Gram FB 3306-90 Series User manual

Gram
Gram KS 3215-93/1 User manual

Gram
Gram KF 3245-93 User manual

Gram
Gram KF310 User manual

Gram
Gram KS 3265-90 User manual

Gram
Gram FS 1095-90 User manual

Gram
Gram BAKER 610 User manual

Gram
Gram KS 3265-90 User manual

Gram
Gram KF 482064 FN/1 User manual

Gram
Gram KF 471551 User manual