5
GB
Important information
The refrigerator contains the
environment-friendly, non-ozone-
depleting refrigerant R600a. As R600
is a flammable gas, it is important to
avoid damage to the refrigeration
circuit during transport and installation.
If the refrigeration circuit is damaged,
avoid using naked flame in the vicinity
of the refrigerator and connecting
power to the refrigerator. Also make
sure that there is good ventilation in
the room. If you are in doubt, please
contact your supplier.
Transporting and moving
the refrigerator
The refrigerator must always be moved
in the vertical position. The cabinet
must not be tilted more than approx.
40°. If the refrigerator has been tilted
more than 40°, the power supply must
not be connected until the appliance
has stood upright for at least two
hours.
If the refrigerator is not to
be used for some time
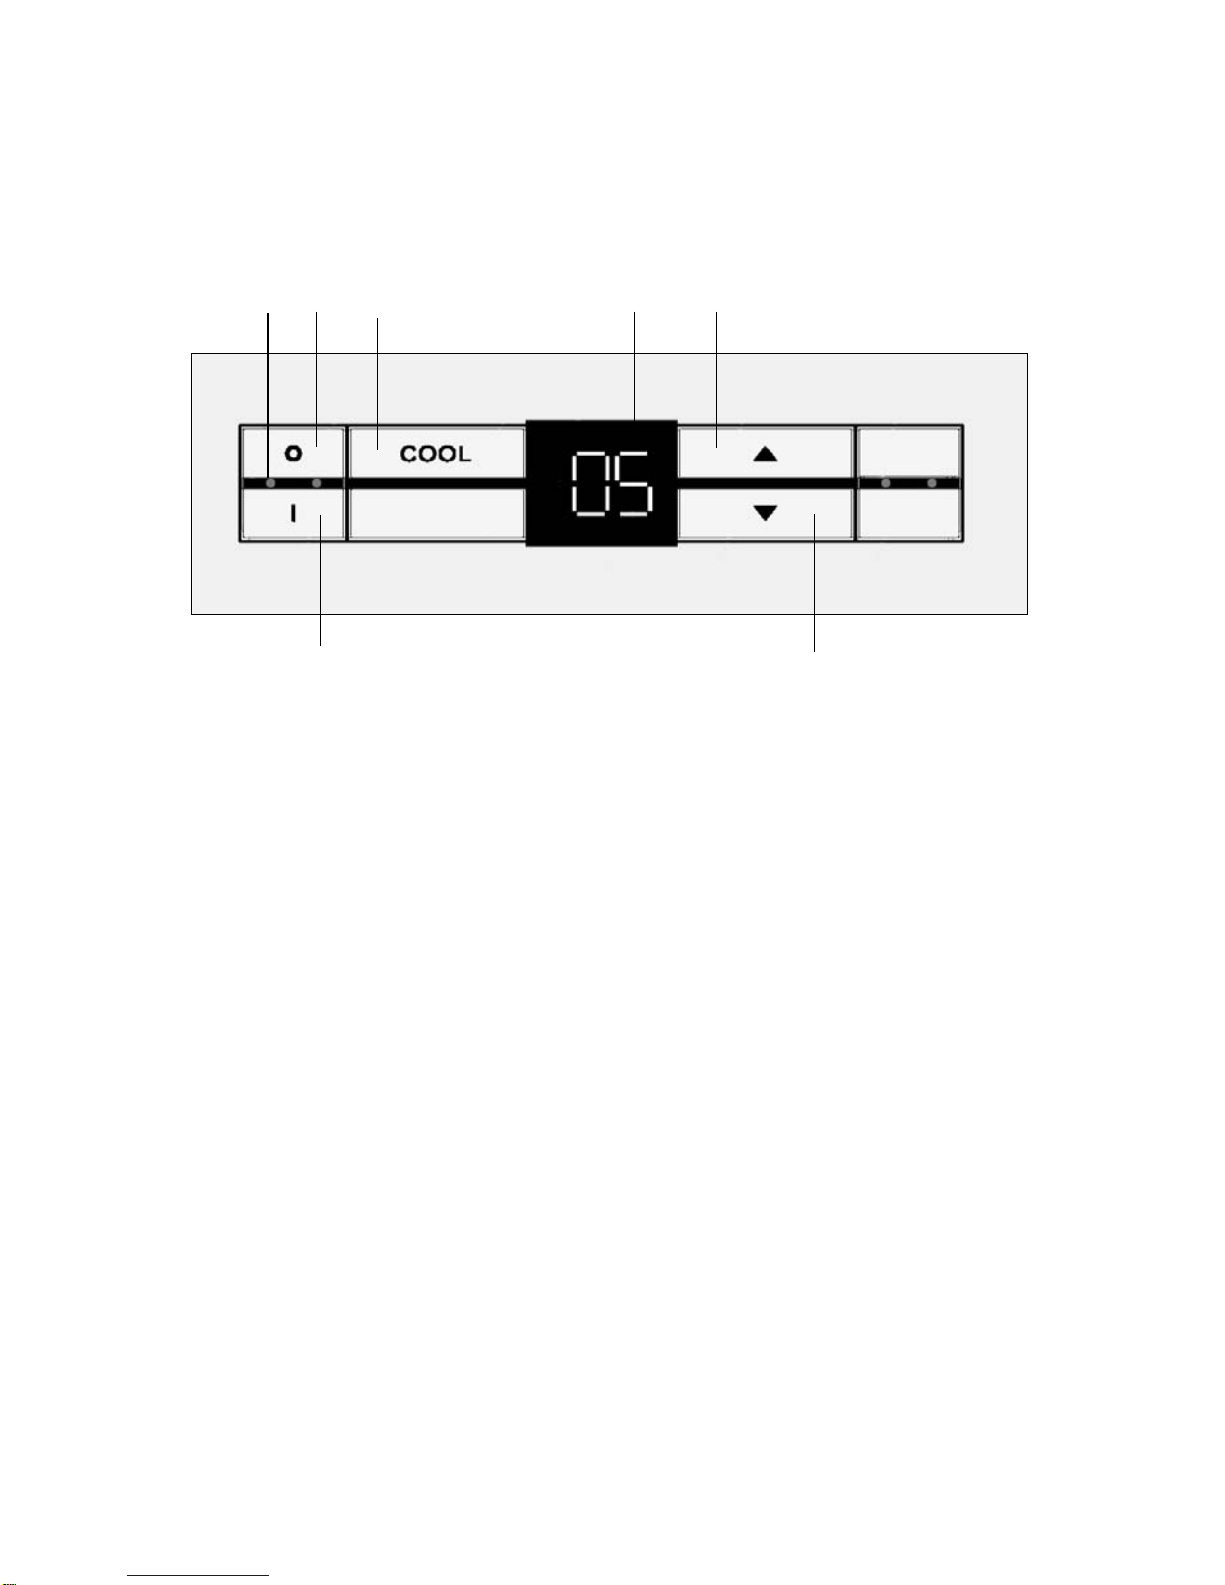
If the refrigerator is to remain unused
for a time, switch it off by pressing
button O (2). Then disconnect
the power supply to the refrigerator and
possibly pull the plug out of the wall
socket.
Empty, defrost and clean the
refrigerator. Leave the refrigerator door
slightly ajar. This will prevent bad
smells in the refrigerator.
Warning
Old refrigerators and freezers are often
fitted with complicated latches that can
only be opened from the outside. If you
have an old unit like this stored away
somewhere, or if you scrap it,
remember to destroy the latch to
prevent children from being exposed to
danger by getting locked inside the
unit.
Note! Please also observe the
environmental rules on disposal.
Disposal
If a refrigerator is to be disposed of,
this must be done in an
environmentally correct way, in
accordance with current rules on
disposal.
Please observe the environmental
rules on disposal. There might be
special requirements/conditions to be
observed.
Information on disposal can be
obtained from:
- Gram Domestic A/S
- Your white-goods supplier
- Authorities (the local council, Ministry
of the Environment, etc.)