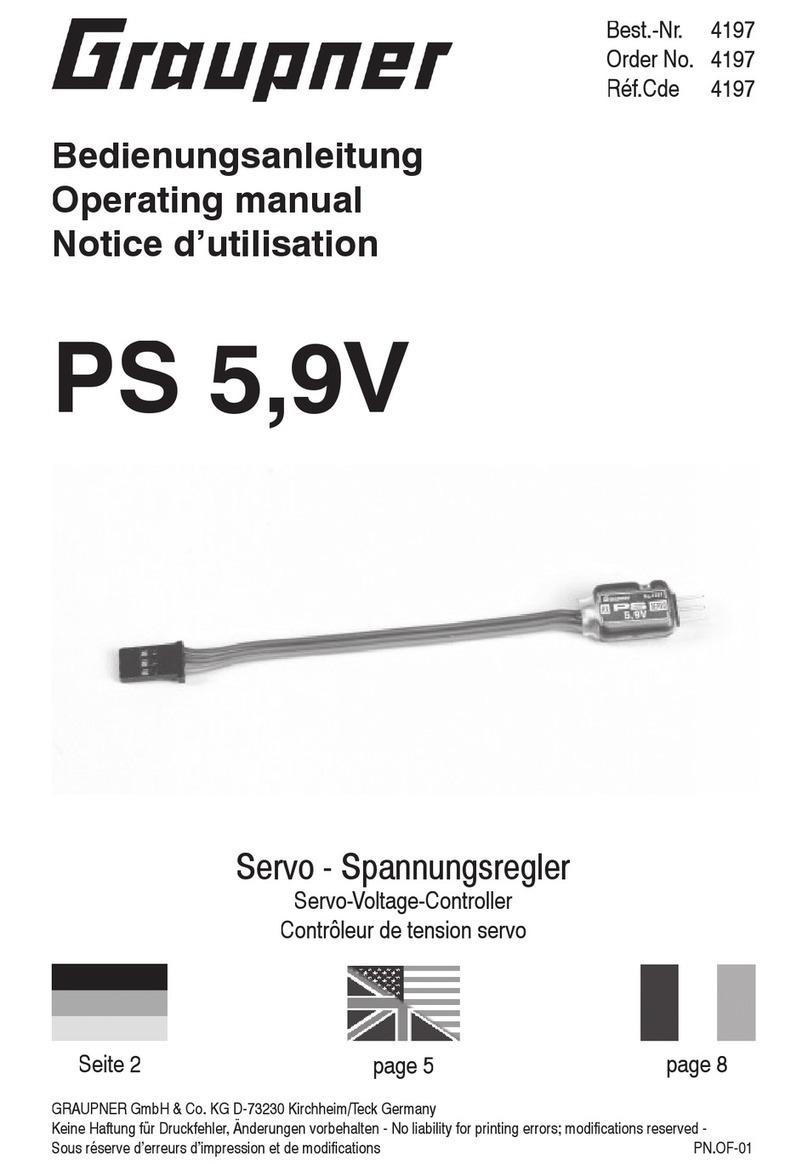
GRAUPNER SPEED PROFI 40R User manual

Best.-Nr. 7196
Bedienungsanleitung
SPEED PROFI 40RSPEED PROFI 40R
SPEED PROFI 40R
Sehr geehrter Kunde,
vielen Dank, dass Sie sich für diesen Fahrtenregler
entschieden haben. Mit diesem Regler haben Sie
ein technisch modernes und sehr leistungsfähiges
Produkt entschieden.
Bitte lesen Sie die Anleitung vor Gebrauch Ihres
neuen Reglers sorgfältig durch. Nur so nutzen Sie
das gesamte Potential des Reglers und vermeiden
Fehler bei der Bedienung.
Funktionen:
•Auto Set-up
•Hohe Taktfrequenz
•Vorwärts, Bremse, Rückwärts mit A.B.S.(Antiblock-
ierbremssystem)
•Verzögerungszeit für Rückwärtsfahrt
•Übertemperaturschutz
Sicherheitshinweise:
•Kein Spielzeug, nicht für Kinder unter 14 Jahren.
•Ausschließlich für den Einsatz in batteriebetrieben,
funkferngesteuerten Modellen zulässig.
•Nur max. 10 Akkuzellen verwenden. Benutzen Sie
niemals mehr als 10 Zellen.
•Fahren Sie den Antriebsakku nicht völlig leer, da
ansonsten die Stromversorgung für den
Empfänger nicht mehr gewährleistet ist und es zu
Störungen der Empfangsanlage kommen kann.
•Es dürfen keinerlei Veränderungen am Regler
durchgeführt werden.
•Es dürfen nur gut entstörte Elektromotoren an
den Regler angeschlossen werden.
•Benutzen Sie Ihren Regler nie im oder unter Wass-
er. Es darf kein Schmutz, Wasser oder andere
Fremdmaterialien in den Regler gelangen.
Installieren Sie den Regler so, dass er nicht mit
Fett, Wasser oder Öl in Berührung kommen kann.
•Nur die angegebene Betriebsspannung ver-
wenden!
•Motoren mit Schiffs- oder Luftschrauben sind ge-
fährliche Gegenstände, die einen sorgsamen Um-
gang zum gefahrlosen Betrieb erfordern. Halten
Sie sich daher niemals neben oder im Gefähr-
dungsbereich des Antriebes auf, wenn der
Antriebsakku angesteckt ist. Technische Defekte
elektrischer oder mechanischer Art können zum
unverhofften Anlaufen des Motors und herum
fliegenden Teilen führen, die erhebliche
Verletzungen verursachen können.
•Stecken Sie immer den Akku ab, wenn der Akku
geladen wird oder der Regler nicht in Benutzung
ist.
•Schalten Sie den Regler erst an, wenn er am
Empfänger eingesteckt und der Sender
eingeschaltet ist.
•Berühren Sie nicht die Kühlkörper, solange diese
heiß sind/werden
•Vermeiden Sie Verpolungen und Kurzschlüsse
zwischen den Anschlußkabeln, der Regler ist
dagegen nicht geschützt und wird sofort zerstört.
•Solange ein Motor an den Regler angeschlossen
ist, dürfen Sie niemals den Motor mit einem sepa-
raten Akku laufen lassen.
•Führen Sie immer zuerst einen Reichweitetest am
Boden durch, bevor Ihr Modell zum Einsatz kommt.
•Haftungsausschluss: Die Einhaltung der
Betriebsanleitung sowie die Bedingungen und
Methoden bei Installation, Betrieb, Verwendung
und Wartung des Reglers können von der Fa.
GRAUPNER nicht überwacht werden. Daher über-
nimmt die Fa. GRAUPNER keinerlei Haftung für
Verluste, Schäden oder Kosten, die sich aus
fehlerhafter Verwendung und Betrieb ergeben
oder in irgendeiner Weise damit zusammenhän-
gen. Die Garantieleistung übersteigt in keinem
Falle den Wert des Produktes, da wir keine
Kontrolle darüber haben, dass der Regler korrekt
installiert und Sachgemäß verwendet wurde.
Montage des Speed Profi 40R:
Es ist sehr wichtig den bestmöglichen Platz für den
Regler zu bestimmen. Dabei ist auf maximale Kühl-
luftzufuhr für die Kühlkörper der Transistoren zu
achten.
Montieren Sie den Regler mit Doppelklebeband an
der vorgesehenen Stelle.
Temperatursicherheitsabschaltung:
Wird die Endstufe des Reglers zu warm, so schaltet
eine Temperatursicherheitsabschaltung die Motor-
funktion solange ab, bis diese wieder ausreichend
abgekühlt ist.
Einbau des Ein-/Ausschalters:
Der Ein-/Ausschalter wird einfach mit doppelseitigem
Klebeband an eine geeignete Stelle geklebt.
Einbau des Empfängers:
Um Empfangsstörungen zu vermeiden, montieren
Sie bitte den Empfänger möglichst weit weg von
Motor, Stromleitungen, Akkus und Servo.

4. Bringen Sie nun den Gashebel auf
die Position Vollbremse/Voll-rück-
wärts. Die rote und die grüne LED
leuchtet auf und zeigt an, die
Vollbremse/Vollrück-wärts-Einstel-
lung erreicht wurde.
5. Bringen Sie nun den Gashebel
wieder in Neutralposition.
Technische Daten:
Betriebsspannung: 7,2 ... 12V (6-10 Zellen)
Frequenz: 1kHz
Impulsstrom: 200A
Dauerstrom: 40A
BEC: 5V/1,5A
Motoremfehlung: ab 12 Windungen
Temperaturabschaltung: ja
Abmessungen ca.( mm): 42 x 38 x 16
Gewicht: 65g
Installation des Reglers:
Stellen Sie die Wege der Fernsteuerung auf 100%,
die Trimmung auf neutral und schließen Sie den Re-
gler richtig an den Empfänger an.
Gehen Sie sicher, dass der Reglerschalter auf „OFF“
steht, bevor Sie den Akku and den Regler anstecken.
Schalten Sie zuerst den Sender an, und dann den
Regler.
Programmierung des Reglers:
1. Stellen Sie den Servo-Reverse-Schalter des Send-
ers auf „Normal“ Position
2. Gashebel in Neutralposition brin-
gen. Warten Sie (ca. 1 sek.) bis die
grüne LED zu leuchten beginnt.
Die Neutralposition ist nun abges-
peichert.
3. Bringen Sie nun den Gashebel in
die Position Vollgas. Die rote LED
leuchtet auf und zeigt an, wenn
die Vollgaseinstellung erreicht
wurde. GRAUPNER GmbH & Co. KG
D-73230 KIRCHHEIM/TECK GERMANY
Kein Haftung für Druckfehler. Änderungen vorbehalten! PN.KC-01
Empfänger Motor
Batterie
Ein/Aus
Schalter
sw = Akku -
blau=Motor -
weiß = Motor +
rot = Akku +
40R

Order-No. 7196
Operating instructions
SPEED PROFI 40RSPEED PROFI 40R
SPEED PROFI 40R
Dear customer,
Many thanks for deciding to purchase this speed
control. This is a very high-performance product
incorporating the latest technology.
Please read through the instructions very carefully
before you use your new speed control. This
should ensure that you are able to exploit the
unit’s full potential, and avoid errors in its use.
Functions
•Auto Set-up
•High pulse frequency
•Forward, reverse with A.B.S. (Anti-Block braking
system)
•Delay time for reversing
•Overheating protection
Safety notes:
•No toy. Not suitable for children under 14 years.
•Read through the operating instructions carefully
before you use the unit.
•Exclusively for use in battery-operated radio-con-
trolled modells. No other usage is permissible.
•The permissible range is 4-10 cells. Never use
more than 10 cells.
•Be sure that the drive accu is not getting absolutely
empty when you drive. Otherwise the power supply
of the receiver is no longer ensured witch may
cause interferences in the receiver unit.
•Do not carry out any modifications of any kind to
the speed controller.
•All electric motors connected to the speed con-
troller must be of suitable rating and adequately
suppressed.
•Never operate your speed controller in or around
water. Dirt, water or other foreign matter must not
be allowed to get into the unit.
•Do not exceed the stated number of cells in the
battery.
•Motors fitted with propellers (boat or aircraft) are
hazardous objects which must be handled with
great care to avoid injury and damage. Never stand
in or close to the primary danger area of the motor
when the drive battery is connected to it. Any
electrical or mechanical defect may cause the motor
to burst into life unexpectedly, and parts may then
fly about which could cause serious injury.
•Disconnect the battery while charging or whenever
the speed controller is not to be used.
•Don’t switch on the speed controller until it is
plugged into the receiver, and the transmitter has
been switched on.
•Don’t touch the heat-sinks if they are hot, or are
heating up.
•Avoid short-circuits and reversed polarity connec-
tions between the cables, this will ruin your speed
controller immediately.
•Never run motor on external battery when hooked
up on speed controller.
•Always carry out a range check on the ground
before operating your model for the first time.
•Liability exclusion: We at GRAUPNER have no
control over the way you install, use and maintain
this speed controller, nor can we check that you
abide by the operating instructions. For this reason
GRAUPNER accepts no liability whatever for injury,
damage to property or financial loss which result
from the incorrect or improper use of this charger,
or are connected with it in any way.
Because we have no control over the installation
of this product, in no case shall our liability exceed
the original cost of the product.
Installing the Speed Profi 40R:
It is very important to determine the best possible
location for the speed control. Make sure that there
is the maximum flow of cooling air to the transistor
heat-sinks. Mount the speed control in the appropri-
ate position using double-sided foam tape.
Safety overheating cut-off:
If the speed control’s output stage threatens to over-
heat, a safety temperature cut-off switches off the
motor function until it has cooled down to a safe
level.
Installing the On/Off switch:
The On/Off switch can simply be fixed to any suit-
able point using double-sided foam tape.
Installing the receiver:
To avoid interference, please install the receiver as
far as possible from the motor, high-current cables,
batteries and the servo. The aerial should be run out
of the vehicle by the most direct route possible.
If the aerial is too long, it is best to simply cut off the
excess length.

Throttle stick
GRAUPNER GmbH & Co. KG
D-73230 KIRCHHEIM/TECK GERMANY
Liability for printing errors excluded.
We reserve the right to introduce modifications. PN.KC-01
Preparing the speed control for use:
Set the throttle servo travel to 100% at the transmitter,
set the trim to neutral, and connect the speed control
to the receiver. Ensure that the speed control switch is
set to “OFF” before you connect the battery to it.
Switch on the transmitter, and only then the speed
control.
Throttle stick
Full
Throttle
Programming the speed control:
1. Set the throttle reverse switch to
the “normal” position.
2. Move the throttle stick to “neutral”,
wait (about 1 sec.) until the green
LED is lighting. Thus the neutral
position has been saved.
3. Move the throttle lever to the full-
throttle position. The red LED lights
up to indicate the full-throttle
position.
4. Now move the throttle stick to the
full brake / full reverse position. The
red and green LEDs light up to in-
dicate that it the full brake / full
reverse position.
5. Now return the throttle stick to the
neutral position.
Specification
Operating voltage: 7,2 ... 12 V (6-10 cells)
Functions: forward / neutral / brake /
reverse
Frequency: 1 kHz
Peak current: 200 A
Continuous current: 40 A
BEC: 5 V/1,5 A
Recommended motor: min. 12 turns
Temperature cut-off: yes
Dimensions approx.: 42 x 38 x 16 mm
Weight: 65 g
Throttle stick
Throttle stick
Full
reverse
Receiver Motor
Battery
On/Off
Switch
black=batt.-
blue
=
motor -
white = motor +
red = battery +
40R

Ref. No.7196
Instructions d’utilisation
SPEED PROFI 40RSPEED PROFI 40R
SPEED PROFI 40R
Cher Client,
Nous vous remercions pour votre acquisition de ce
régulateur. Avec cet appareil, vous disposez d’un régulateur
de vitesse très performant et d’une technique moderne.
Veuillez lire attentivement ces instructions avant d’utiliser
votre nouveau régulateur afin de pouvoir disposer de la
totalité de son potentiel et d’éviter des erreurs de manipu-
lation.
Fonctions :
•Auto Set-up
•Haute cadence de fréquence
•Marche avant, Marche arrière avec ABS (Antiblockier-
bremssystem)
•Temps de retardement pour le passage en marche ar-
rière
•Protection en sur-température
Conseils de sécurité:
•Cet appareil n’est pas un jouet et ne convient pas
aux enfants en-dessous de 14 ans.
•Le régulateur est exclusivement conçu pour l’équipement
des modèles radiocommandés à propulsion électrique,
toute autre utilisation est inadmissible!
•Utilisez uniquement des batteries de 4 à 10 éléments,
ne l’alimentez jamais avec plus 10 éléments.
•Ne roulez pas jusqu´à ce que l´accu de propulsion soit
vide, sinon l´alimentation en courant du récepteur n´est
plus assurée, ce qui peut conduire à des perturbations
de l´ensemble de réception.
•Aucune modification ne devra être effectuée sur le
régulateur.
•Seuls des moteurs adaptés et bien antiparasités dev-
ront être connectés au régulateur.
•Veuillez lire attentivement ces instructions avant
l’utilisation.
•Aucune salissure ni d’eau ou autres corps étrangers ne
doivent pénétrer dans le régulateur. Installez le régula-
teur de façon à ce qu’il ne soit pas en contact avec de
la graisse, de l’eau ou de l’huile.
•Utilisez uniquement la tension d’alimentation indiquée!
•Les moteurs entraînant une hélice aérienne ou marine
sont dangereux et nécessitent la prise de précautions
vis-à-vis de l’entourage. Ne vous tenez jamais à côté
ou dans la zone dangereuse d’une propulsion, lorsque
la batterie d’alimentation est connectée. Une défectu-
osité d’ordre électrique ou mécanique peut provoquer
le démarrage involontaire du moteur et la projection de
pièces qui peuvent vous blesser sérieusement.
•Déconnecter toujours la batterie du régulateur pour la
recharge et après chaque utilisation.
•Mettez en contact le régulateur que lorsqu’il est con-
necté sur le récepteur et seulement après avoir mis en
contact l’interrupteur de l’émetteur.
•Vérifiez toujours les polarités correctes de la batterie;
une inversion détruira le régulateur.
•Ne touchez pas le radiateur de refroidissement tant
qu’il est encore chaud.
•Evitez les court-circuits entre les fils de raccordement.
•Effectuez toujours un essai de portée au sol avant de
faire évoluer votre modèle.
•Eviter les inversions de polarité et les court-circuits de
tous genres. Le régulateur n’est pas protégé contre
celà.
•Tant que le moteur est connecté au régulateur, ne faites
jamais tourner le moteur avec une batterie séparée
sous peine de détruire le régulateur et de perdre le
bénéfice de la garantie.
•Exclusion de responsabilité: Le respect des instruc-
tions d’utilisation ainsi que les conditions et les méth-
odes d’installation, l’utilisation et l’entretien du régula-
teur ne peuvent pas être contrôlés par la firme Graup-
ner GmbH & Co. KG. Par conséquent, nous déclinons
toute responsabilité concernant la perte, les dommag-
es et les frais résultants d’une utilisation incorrecte
ainsi que notre participation aux dédommagements d’une
façon quelconque.
Comme nous n’avons aucune possibilité de contrôle
sur l’installation et l’utilisation de l’appareil, notre re-
sponsabilité n’excèdera en aucun la valeur du produit.
Montage du Speed Profi 40R :
Il est très important de déterminer le meilleur emplacement
possible pour installer le régulateur en veillant à assurer
une circulation d’air optimale sur le radiateur de refroidis-
sement des transistors.
Fixez alors le régulateur à l’emplacement choisi avec de la
bande adhésive double-face.
Coupure de sécurité en température :
Lorsque l’étage final du régulateur s’échauffe de trop, une
coupure de sécurité en température arrête le moteur tant
que l’étage n’est pas suffisamment refroidi.
Montage de l’interrupteur su régulateur :
L’interrupteur sera simplement collé à un endroit adapté
avec de la bande adhésive double-face.
Installation du récepteur :
Pour éviter des perturbations au récepteur, il conviendra
de l’installer le plus éloigné possible du moteur, des con-
ducteurs de courant, de la batterie et des servos.
Manche de
commande des gaz
Stop / neutre
Manche de
commande des gaz
Plein gaz vers
l’avant
Manche de
commande des gaz
Plain gaz
vers l’arrière
Manche de
commande des gaz
Stop / neutre
GRAUPNER GmbH & Co. KG
D-73230 KIRCHHEIM/TECK ALLEMAGNE
Nous ne sommes pas responsables d’éventuelles erreurs d’impression!
Sous réserve de modifications! PN.KC-01
Installation du régulateur :
Réglez la course de la voie sur laquelle sera connecté
le régulateur sur 100% dans l’émetteur, placez le
réglage de trim au neutre et connectez le régulateur
sur le récepteur.
Assurez-vous que l’interrupteur du régulateur soit placé
sur ‘’OFF’’ (Coupé) avant de connecter la batterie de
propulsion.
Programmation du régulateur :
1. Placez le commutateur d’inversion de
course de l’émetteur sur la position
‘’Normal’’.
2. Placez le manche des gaz sur la posi-
tion neutre. Attendez (~ 1 s) que le LED
verte s´allume. La position neutre est
alors mémorisée.
3. Placez maintenant le manche des gaz
sur la position plein gaz ; le LED rouge
s’allume et indique ainsi que cette
position.
4. Placez ensuite le manche des gaz sur
la position plein freinage/pleine marche
arrière ; les LED rouge et vert
s’allument et indiquent que cette posi-
tion a été mémorisée.
5. Ramenez alors le manche des gaz
sur la position neutre.
Caractéristiques techniques :
Tension d’alimentation 7,2 ...12 V (6–10 éléments)
Fonctions Marche avant/neutre/
frein/marche arrière
Fréquence 1kHz
Courant d’impulsion 200A
Courant permanent 40A
BEC 5V/1,5 A
Moteur conseillé à partir de 12 enroulements
Coupure en température
oui
Dimensions, env. (mm) 42 x 38 x 16
Poids, env. 65g
Recepteur Moteur
Batterie
Interrupteur
noir
=
Batt.
-
bleu=Moteur
-
blanc = Moteur +
rouge = Batterie +
40R
This manual suits for next models
1
Table of contents
Languages:
Other GRAUPNER Controllers manuals

GRAUPNER
GRAUPNER NAVY V15R User manual

GRAUPNER
GRAUPNER MX-10 HOTT Owner's manual

GRAUPNER
GRAUPNER GM Genius Pro Series User manual

GRAUPNER
GRAUPNER Compact Control 45 User manual

GRAUPNER
GRAUPNER BRUSHLESS CONTROL Series User manual

GRAUPNER
GRAUPNER PICO 8 User manual

GRAUPNER
GRAUPNER Navy V40R User manual

GRAUPNER
GRAUPNER mc-24 PROFI-ROM User manual

GRAUPNER
GRAUPNER MXS-8 Owner's manual

GRAUPNER
GRAUPNER PS 5,9V User manual