Green Creative ATOM Track User manual

Ref.#: INS012-TRACK-261119
WARNING – Read all product labels and instructions before installing the fixture.
WARNING – To prevent wiring damage or abrasion, do not expose wiring to edges of sheet metal or other sharp objects.
WARNING – Do not make or alter any open holes in an enclosure of wiring or electrical components during kit installation.
WARNING – The recessed luminaire is intended for mounting only in a covered ceiling where only the LED side of the luminaire will be exposed to dry or damp environments.
WARNING – INSTALLATION SHOULD ONLY BE PERFORMED AFTER POWER TO THE FIXTURE HAS BEEN DISCONNECTED.
CAUTION – TO REDUCE THE RISK OF FIRE AND ELECTRIC SHOCK, USE WITH THE APPROPRIATE TRACK SYSTEM.
CAUTION – FOR USE WITH CEILING-MOUNTED TRACKS ONLY.
• Do not install any part of this system (TRACK) less than 7 feet (2.2m) above the floor.
• Test the compatibility of the track system and track lamp adapter before installing the track lamp.
TRACK HEAD INSTALLATION GUIDE – WARNING
ADAPTER AND TRACK TYPE RECOGNITION
H TYPE ADAPTER H TRACK TYPE
J TYPE ADAPTER J TRACK TYPE
L TYPE ADAPTER L TRACK TYPE
For use with ATOM track series.
11/16”11/16” 1/2”1/2”3/4”
1-3/8”
1-3/8”
1-3/8”
1-3/8”
1-3/16”
www.greencreative.com - [email protected] - Tel / Fax: (866) 774-5433 - / GREENCREATIVELED / GClightingLED / GREEN-CREATIVE An ILLUMUS Brand

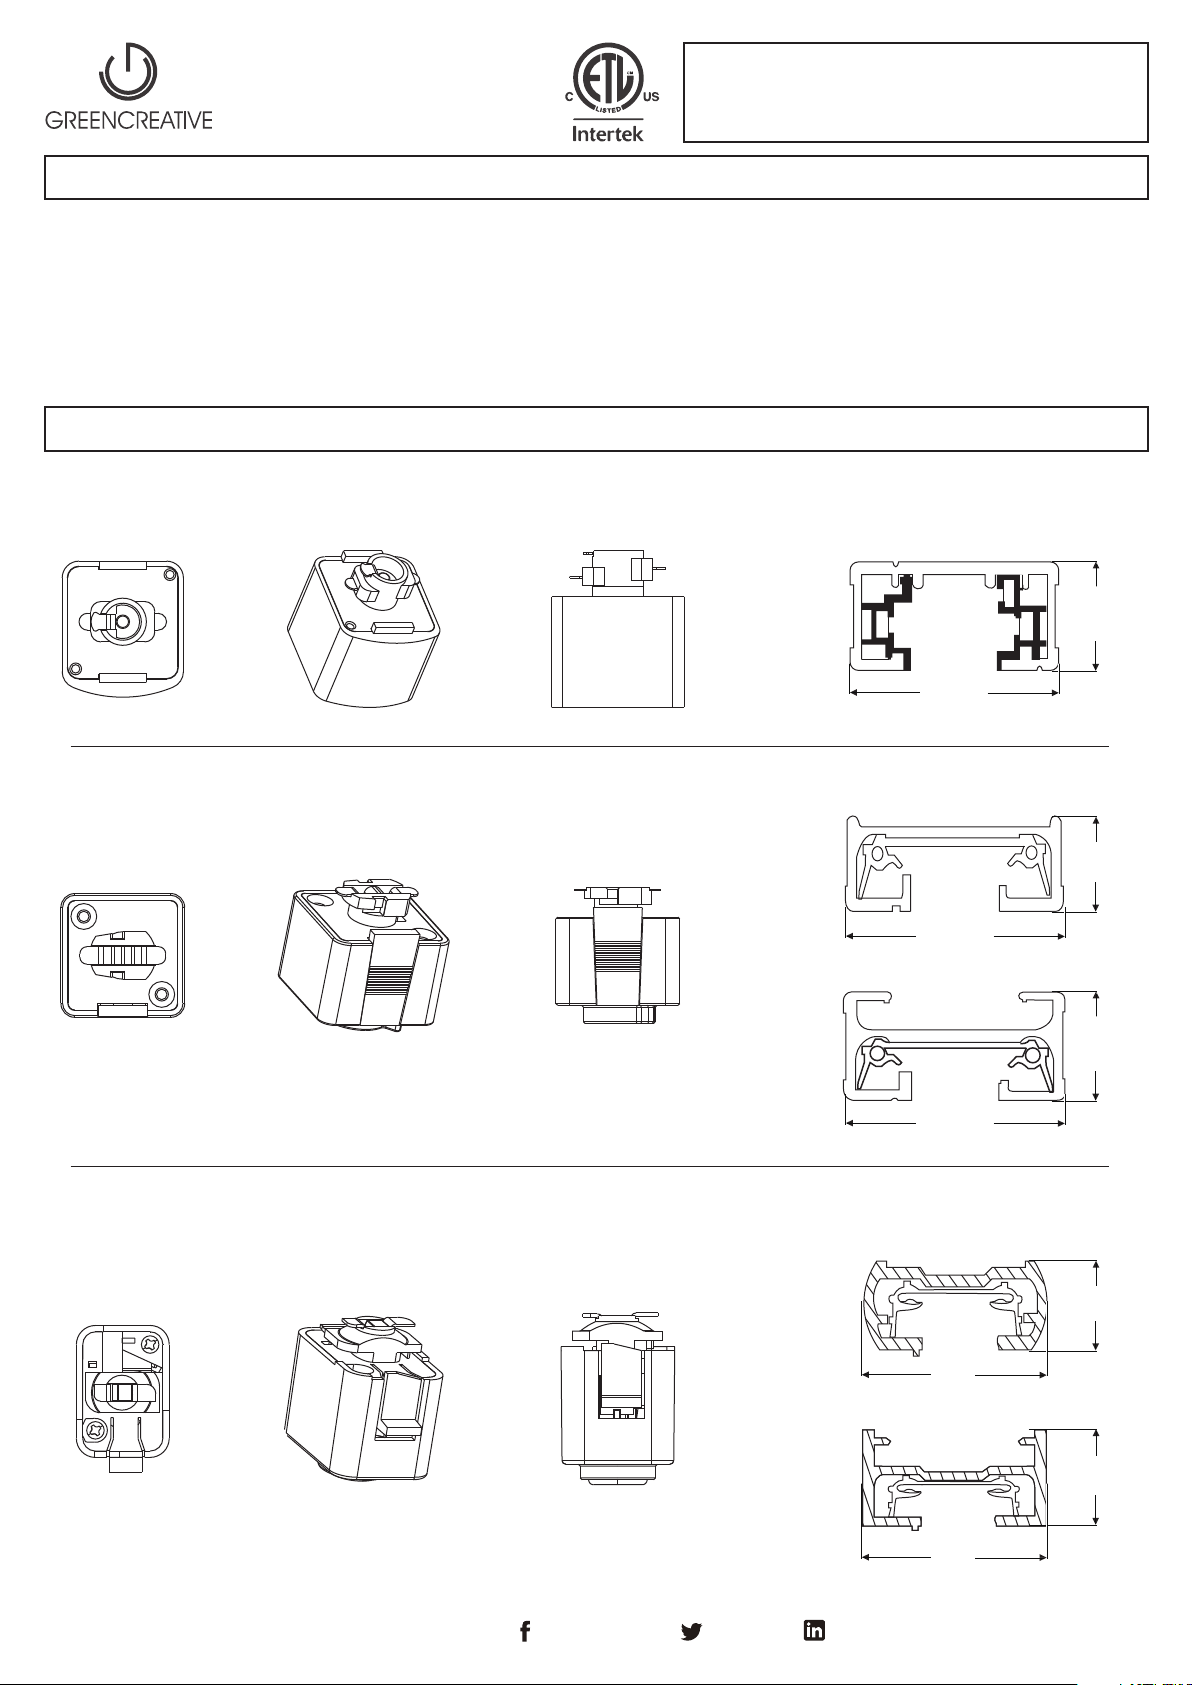
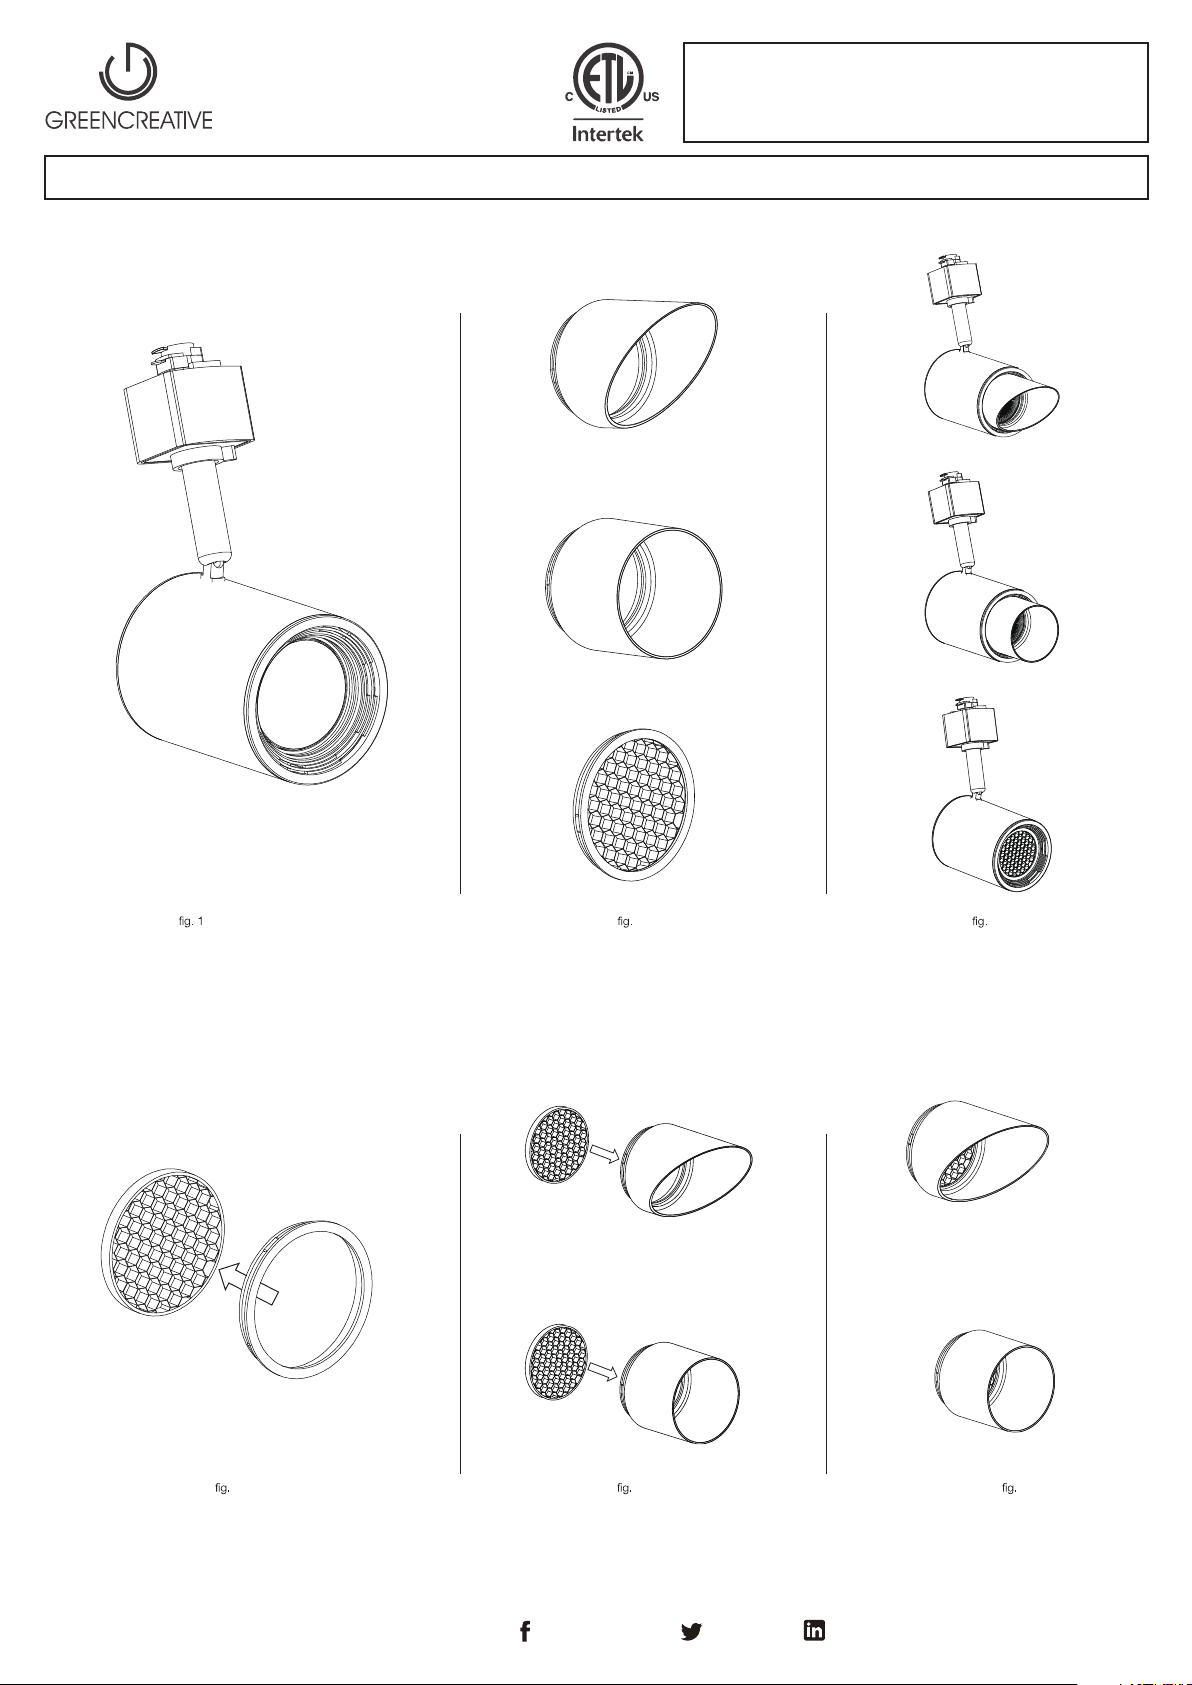
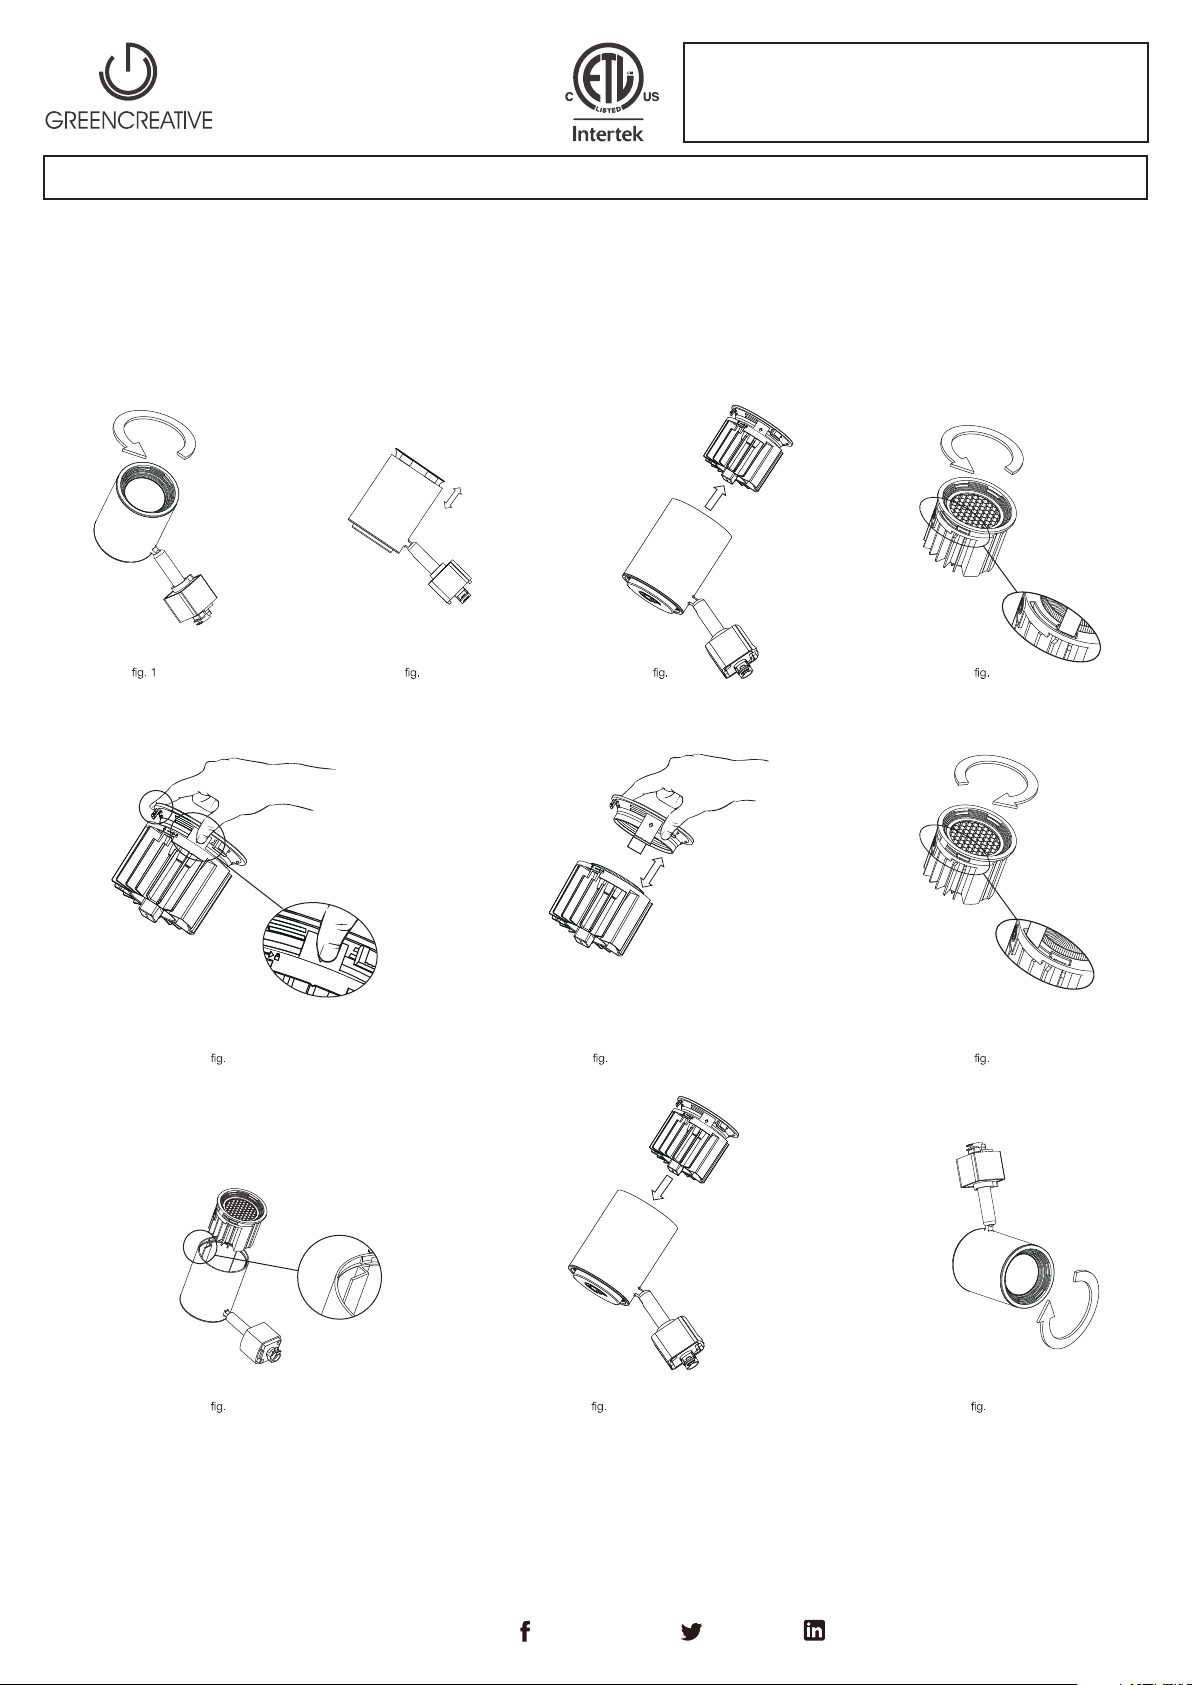
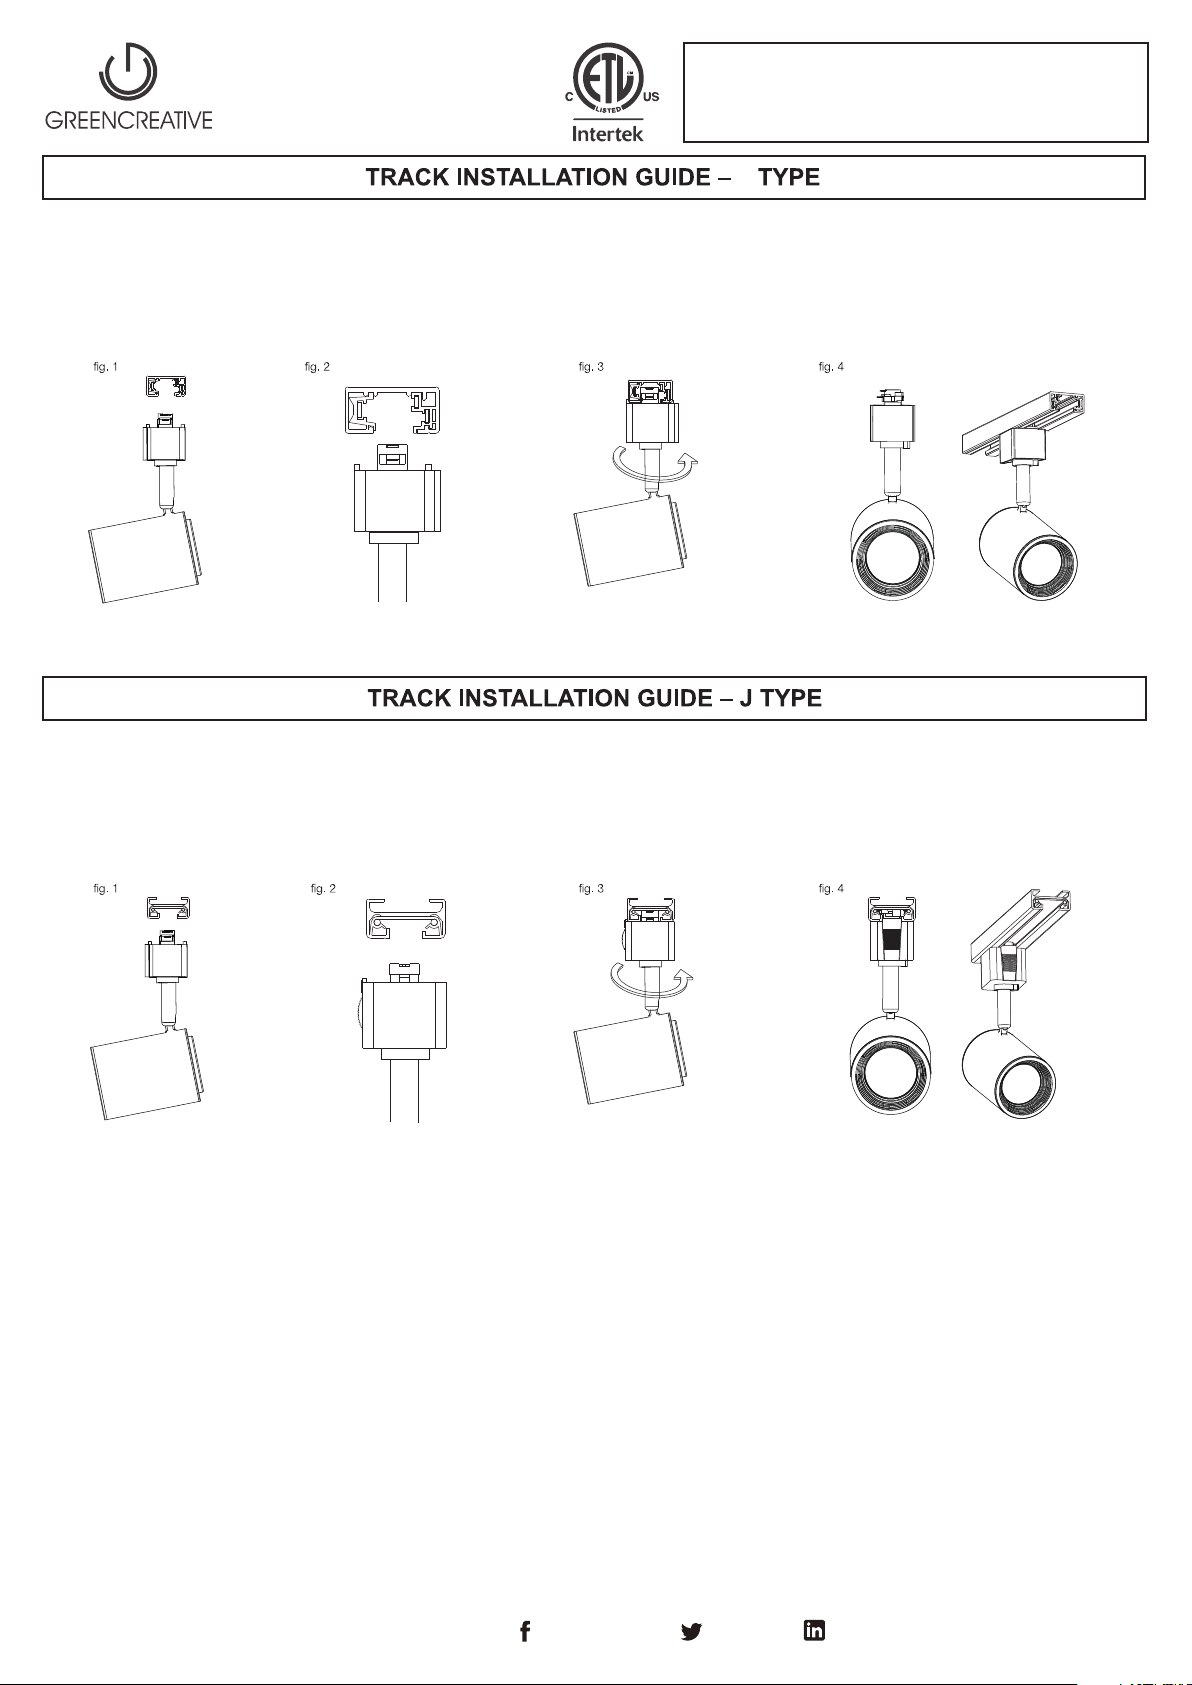
1. Make sure the fixture’s adapter is an H type and compatible with the H track system. (fig. 1)
Note: the H type adapter is only compatible with singie-circuit track types.
2. Insert the head of adapter into the slot of the track rail making sure the locking tabs are parallel with the track’s polarity line. Note: the grounding contact direction. (fig. 2)
3. While holding the adapter aligned with the track, push the fixture upward. Then while pulling down on the adapter sleeve twist the body of the fixture 90 degrees until the
locking tabs on both sides of the adaptor snap into the track groove. (fig. 3)
Note: the ground pin needs to be touching the grounding pin. (fig. 4)
The adapter only rotates in one direction. Do not forcefully rotate the adapter in the wrong direction as it may damage it.
Removing the lamp
1. While holding the fixture in place, pull the adapter sleeve held down and gently twist the fixture 90 degrees until it can easily be removed from the track groove.
1. Make sure the fixture’s adapter is a J type and compatible with the J track system. (fig. 1)
Note: the J type adapter is compatible with single or two-circuit track types. Simply lift the contact to its up position for two-circuit application.
2. Insert the head of adapter into the slot of the track rail making sure the locking tab is parallel to the track’s polarity line. Note: the grounding contact direction. (fig. 2)
3. While holding down the lock tab with your thumb, push the fixture upward, then twist the body of the fixture 90 degrees until the locking tab on the adapter snaps into the track
groove. (fig. 3)
Note: the ground pin needs to be touching the grounding pin. (fig. 4)
The adapter only rotates in one direction. Do not forcefully rotate the adapter in the wrong direction as it may damage it.
Removing the lamp
1. While holding the fixture in place, pull the lock tab down and gently twist the fixture 90 degrees until it can easily be removed from the track groove.
H
For use with ATOM track series.
www.greencreative.com - [email protected] - Tel / Fax: (866) 774-5433 - / GREENCREATIVELED / GClightingLED / GREEN-CREATIVE An ILLUMUS Brand

1. Make sure the lamp adapter is a L type and compatible with the L track system. (fig. 1)
Note: the L type adapter is compatoble with single or two-circuit track types. Simply lift the contact to its up position for two-circuit application.
2. Insert the head of adapter into the slot of the track rail making sure the locking tab is parallel to the track’s polarity line. (fig. 2)
3. While holding the adapter up to the track, push the fixture upward, then twist the body of the fixture 90 degrees until the locking tab on the adapter snaps into the track groove.
(fig. 3)
Note: the ground pin needs to be touching the grounding pin. (fig. 4)
The adapter only rotates in one direction, therefore do not forcefully rotate the adapter in the wrong direction as it may damage it.
Removing the lamp
1. While holding the fixture in place, gently twist the fixture 90 degrees until it can easily be removed from the track groove.
L
TRACK INSTALLATION GUIDE --- JBOX CANOPY MOUNT
1. Make sure the POWER IS TURNED OFF at the source to the J-box in which you are installing the product.
2. Attach the mounting bracket to the J-box using two of the provided screws. (fig. 1)
3. Attach the safety clip to one of the holes in the mounting bracket. (fig. 2)
4. Wire the wires from the back of the fixture to power source inside the J-box (black to hot, white to neutral, green to ground). Carefully tuck all the wires and connectors inside
the J-box. (fig. 3)
5. Attach the canopy to the mounting bracket using the canopy screws (provided), screw in until the fixture is secured. (fig. 4)
6. Restore power at the source and installation is complete.
For use with ATOM track series.
www.greencreative.com - [email protected] - Tel / Fax: (866) 774-5433 - / GREENCREATIVELED / GClightingLED / GREEN-CREATIVE An ILLUMUS Brand

1. Make sure the lamp adapter is a L type and compatible with the L track system. (fig. 1)
Note: the L type adapter is compatoble with single or two-circuit track types. Simply lift the contact to its up position for two-circuit application.
2. Insert the head of adapter into the slot of the track rail making sure the locking tab is parallel to the track’s polarity line. (fig. 2)
3. While holding the adapter up to the track, push the fixture upward, then twist the body of the fixture 90 degrees until the locking tab on the adapter snaps into the track groove.
(fig. 3)
Note: the ground pin needs to be touching the grounding pin. (fig. 4)
The adapter only rotates in one direction, therefore do not forcefully rotate the adapter in the wrong direction as it may damage it.
Removing the lamp
1. While holding the fixture in place, gently twist the fixture 90 degrees until it can easily be removed from the track groove.
54
32
6
1. Locate the accessory locking channel in the fixture holder ring (fig. 1). Locate the retainer clips on the edge of the accessory (fig. 2). Simply insert the edge of the accessory
into the locking channel of the holder until it clicks and is securely fasten.
2. To install the honeycomb with the snoot or wall wash accessory, gently push the mesh ring out from the honeycomb plastic ring. (fig. 4)
3. Insert the mesh ring, from the bottom of the snoot or the wall wash (fig. 5) until it’s firmly in place in the holder connecting part of the accessory. (fig. 6)
4. Then proceed to normal accessory installation as described above.
ACCESSORY INSTALLATION
For use with ATOM track series.
www.greencreative.com - [email protected] - Tel / Fax: (866) 774-5433 - / GREENCREATIVELED / GClightingLED / GREEN-CREATIVE An ILLUMUS Brand

2
5
8
6 7
3 4
honey comb
FIELD UPGRADABLE LIGHT MODULE
1. Rotate the holder counter-clock wise (fig.1) until it's loose and slightly arises from the fixture. (fig. 2)
2. Pull on the holder to unplug the module and extract the module from the fixture. (fig. 3)
3. Rotate the holder so the feet are in the larger part of the module sliding opening. (fig. 4)
4. Pinch the 2 holder’s feet and detach it from the Fixture. (fig. 5 & 6)
5. Attach the holder to the new module with pinching the feet of the holder and inserting them into the larger part of the sliding opening holes. Then rotate the holder clockwise to
secure it. (fig. 7)
6. Look for the keyed connection in the fixture and on the module. And insert the module according to those keyed connection (A to A). (fig. 8 & 9)
7. Push the module until the holder is tight with the edge of the fixture. Verify the module is not loose and fits tight with the fixture. If not rotate clockwise until it's secured. (fig. 10)
9 10
A
A
A
A
A
A
For use with ATOM track series.
www.greencreative.com - [email protected] - Tel / Fax: (866) 774-5433 - / GREENCREATIVELED / GClightingLED / GREEN-CREATIVE An ILLUMUS Brand
Table of contents
Other Green Creative Lighting Equipment manuals