T
i
g
h
t
e
n
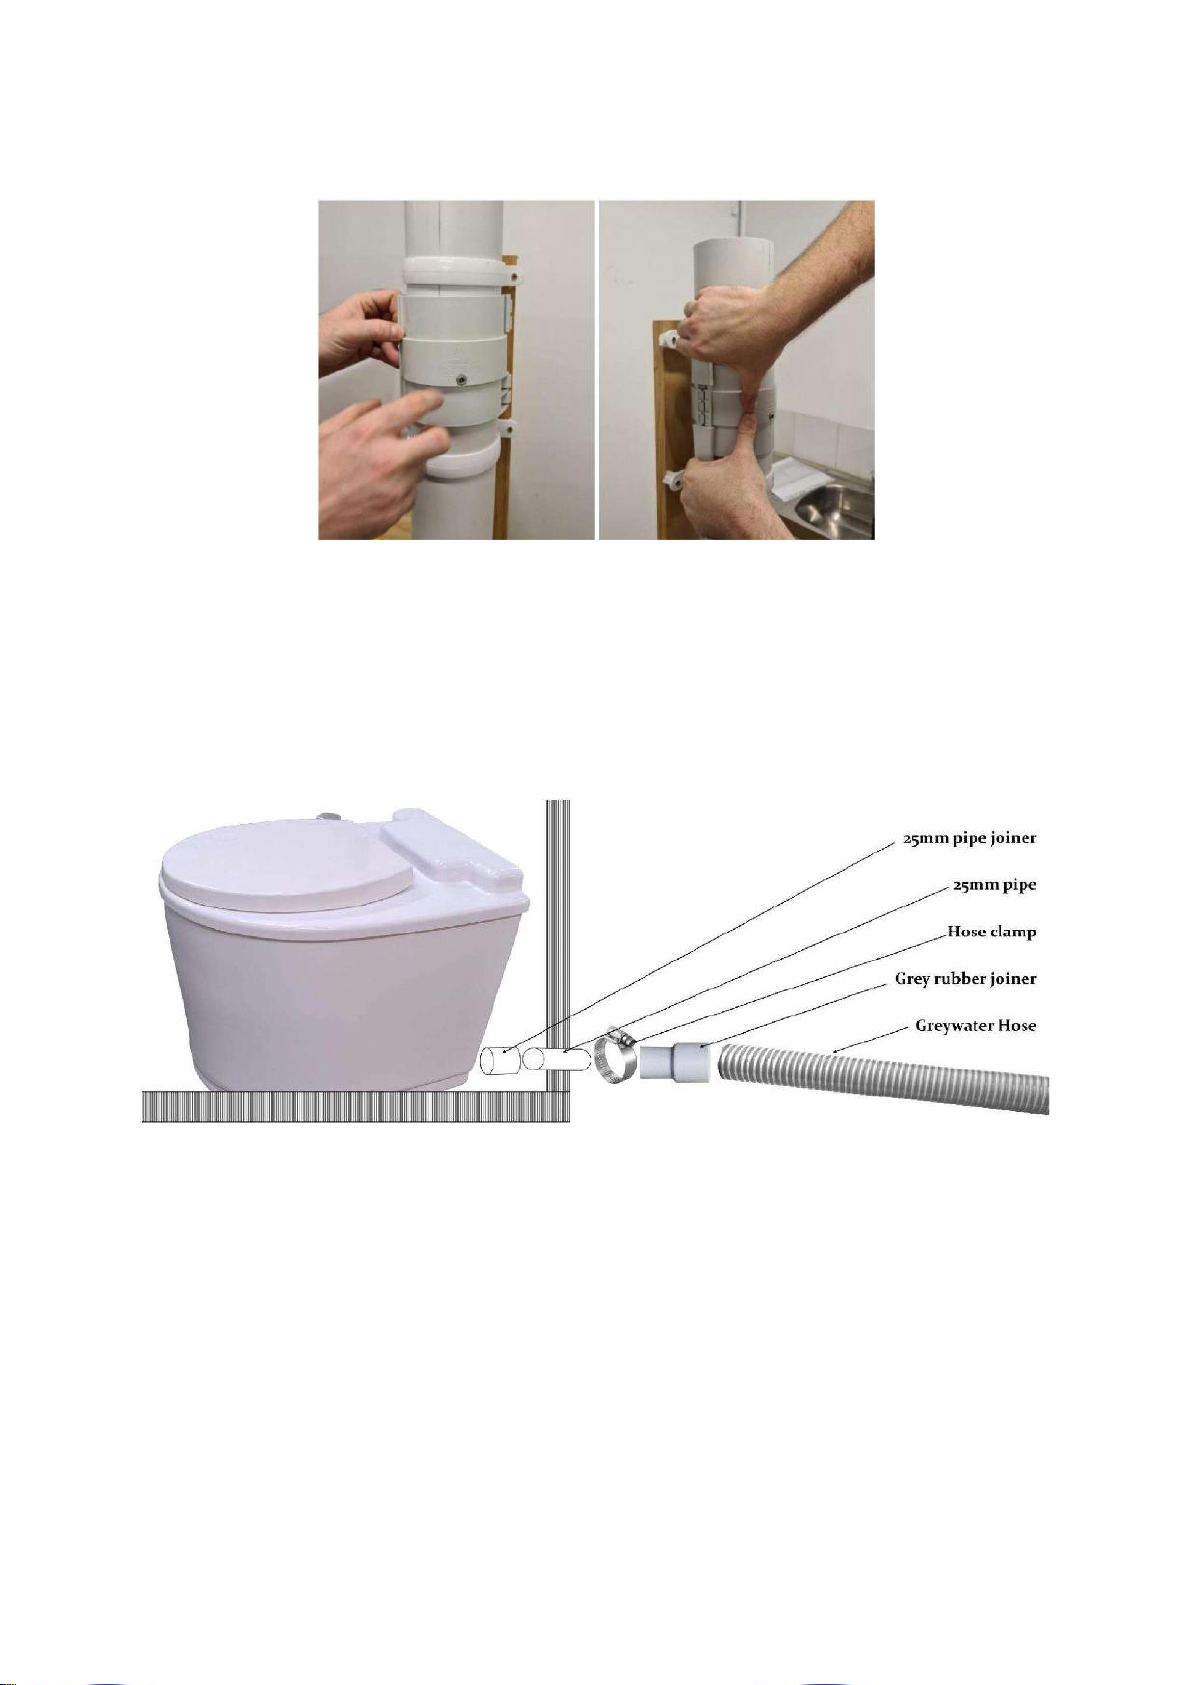
the rubber joiner with the hose clamp onto the 25mm pipe.
C
onn
e
c
t
the grey ribbed hose
t
o
the rubber joiner and connect the other end of the hose to the absorption trench.
E
n
s
ur
ethere
is
a
n
even
n
a
t
ur
a
l
fall on
the
drain hose
w
i
t
hou
t
any air
t
r
a
p
s
!
B
E
F
O
R
E
U
S
E
B
e
f
or
e
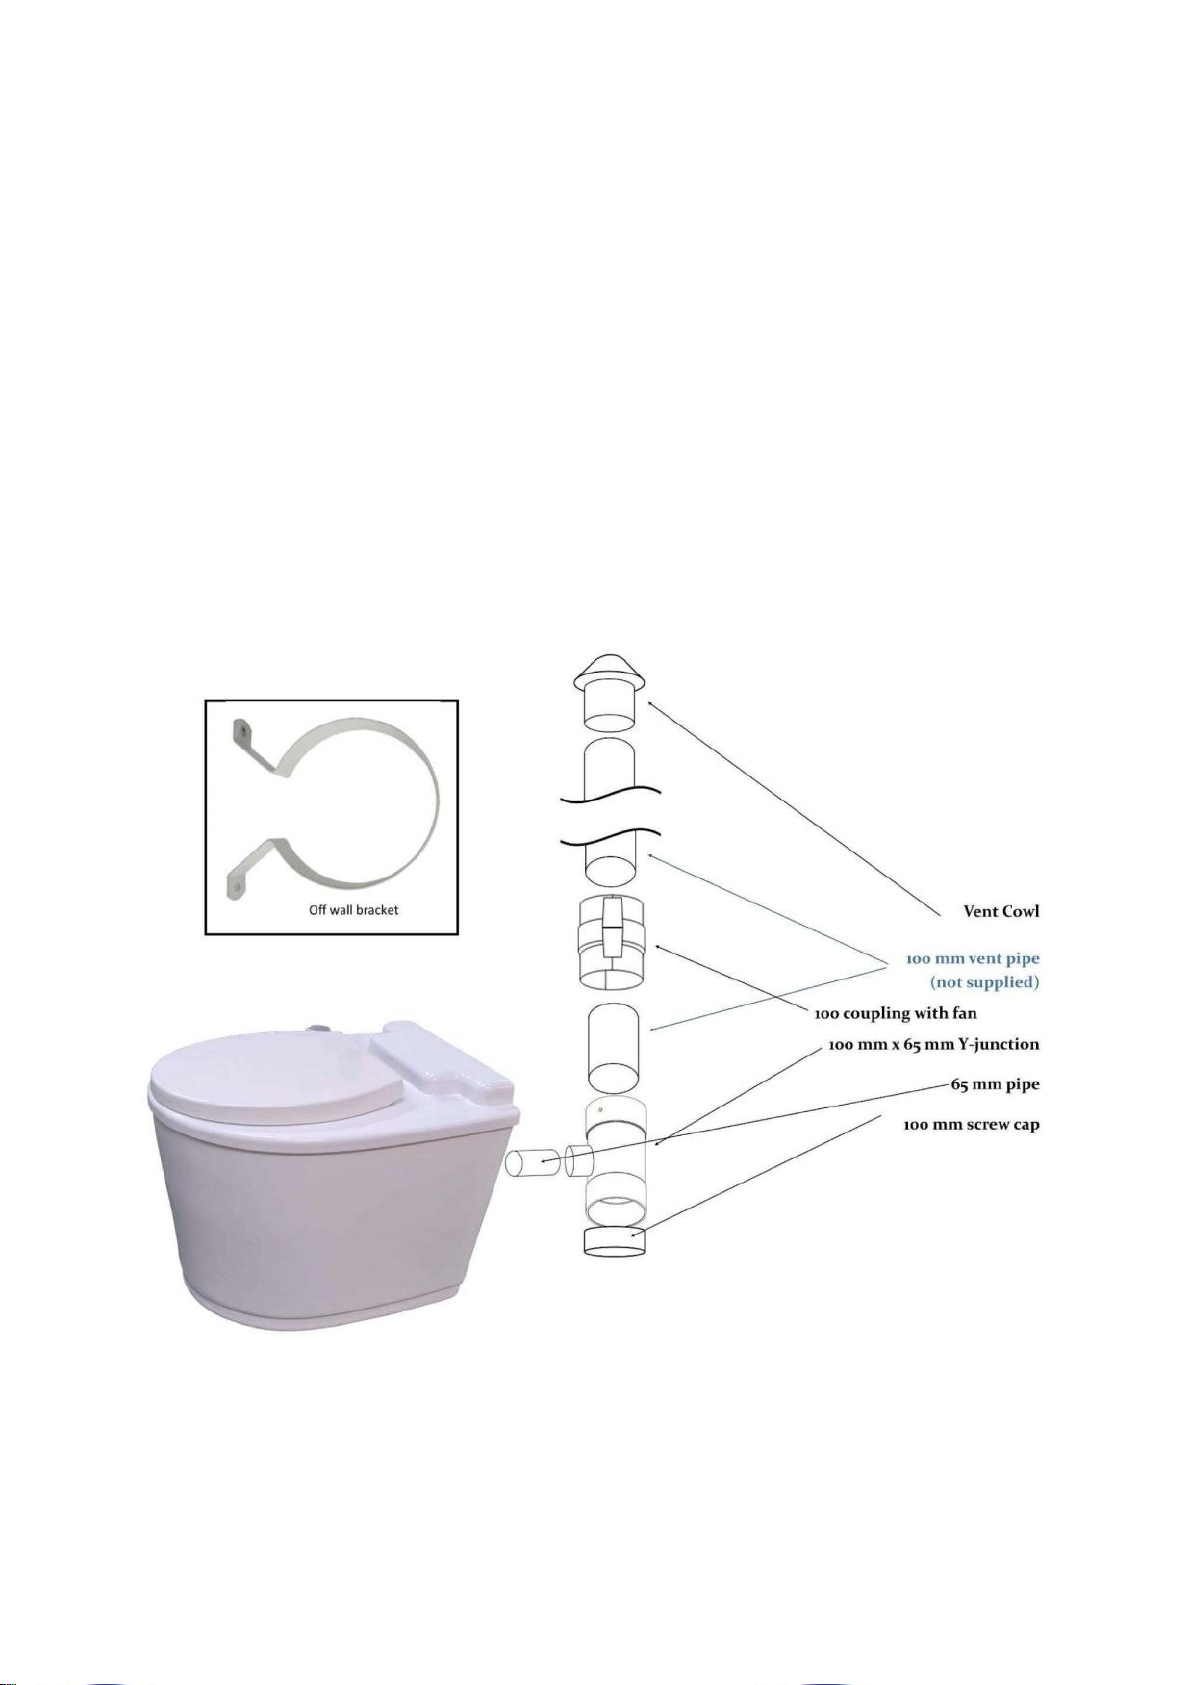
putting the system into use, line the composting chamber with our
J
u
t
e
liner and then
fill
t
h
e
composting chamber with a 2.5 - 5 cm layer of hemp.
Also,
after every emptying,
remember
to
li
n
e
with a new jute liner and add a new layer of hemp before
u
s
e
.
2.
USE OF THE KIWI
POD
T
h
e
Kiwi
Pod System can be used almost like any normal water toilet.
T
o
il
e
t
paper can be
t
hro
w
n
into the toilet, as it composts
together
with the waste. However, any items containing plastic,
e
.
g
.
sanitary towels should be placed into a
separate
bin.
A
handful of covering material (Hemp, 1
c
up
)
should be added after each bowel
movement.
Our compost starter can also be used according
t
o
instructions on the
bo
tt
l
e
.
R
e
m
e
m
b
e
r
that there isa balance
between
covering the deposit enough
visually,
and covering
i
t
excessively, resulting in the chamber
filling
up
quickly
and needing changing more
o
f
t
e
n
.
3.
S
E
R
V
IC E
a)
Check
the fan 1) monthly to ensure it is working or 2) ifyou notice unusual
odour
.
b)
T
h
e
average length of time until a container is¾ full
(recommended
exchange level) is
a
round
4–6 weeks at 2 people fulltime
u
s
e
.
c)
T
h
e
fallow containers need to be secured to prevent tampering by young children.
This
can
b
e
achieved by keeping the containers in a locked area or by securing a lockable strap
a
round
the composting container that cannot be undone by young
c
h
il
dr
e
n
.
d)
I
t
is not vital that the fallow container is kept in the sun, however composting is
a
cc
e
l
e
r
a
t
e
d
by warmth.
T
h
e
r
e
f
or
e
choosing a warm spot is helpful, as long as provision c) above is
ob
s
e
r
v
e
d
.
To
exchange or empty the
Kiwi
Pod, protective clothing, face mask, glasses and gloves must be w
orn
at all
t
i
m
e
s.
1)
T
a
k
e
the top off the
s
y
s
t
e
m.
2) Put the lid onto the container either while still inside the unit or outside.
If
whilst
i
n
s
i
d
e
,
ensure you put the lid on avoiding the carrier straps (in their holding brackets) and the
4
bungee
l
oop
s.
3)
A
tt
a
c
h
the 4 bungee loops onto the bungee
bu
tt
on
s.
4) Put the drip tray next to the
Kiwi
P
od
.
5)
L
i
f
t
the container out onto the drip
t
r
a
y
.
6)
A
tt
a
c
h
the drip tray to the composting container with the 2 bungee loops and buttons.
Y
ou
now can carry the container outside, eliminating any spillage through use of the drip
t
r
a
y
.