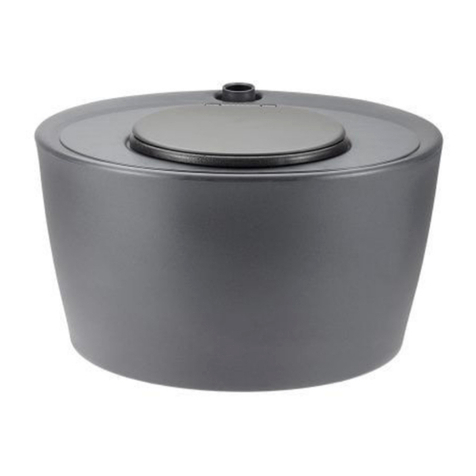
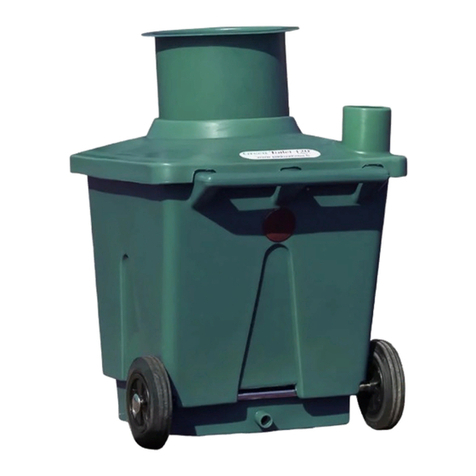
GREEN LOO SCANDI-POD User manual

GREEN LOO
DRY COMPOSTING TOILET
Owners –Installation –Operation
Manual
for the
SCANDI-POD

2
NB.: For installation:
The Scandi –Pod requires 75mm Stormwater pipe (not supplied for
transport reasons) as its vent pipe. This pipe is sometimes not a
standard stock item in your local plumbing supply shop and may
need to be ordered in especially.
Original Scandi-Pod Instruction leaflet supplied.
Please note that the original instruction the Finnish manufacturer has supplied are enclosed
with the Scandi-Pod.
There are some dissimilarities with the Green Loo instructions, i.e. the use of a moisture trap,
supply of electric fan, the lining of the base for the composting containers etc.
Green Loo instructions should take precedence over the Finnish ones –however if in doubt,
contact us for clarifications.

3
INSTALLATION PLANNING
It's all in the planning!
For proper operation of the toilet you should consider a number of issues.
The design of the site and building needs to allow for:
• An elevated starting point for liquid to flow by gravity from the toilet down into a liquid absorption trench
which is to be dug outside the toilet. The whole toilet needs to sit on level ground, IF ANYTHING SLOPING
SLIGHTLY BACKWARDS.
• Space for the toilet and a firm, dry and sheltered base for it to sit.
• Adequate access to service and maintain the toilet, i.e. remove the full container and replace it with an empty
one.
• Good ventilation to provide oxygen and evaporate liquids
• Electrical supply (240VAC or 12VDC) to the fan location
The Scandi-Pod is supplied as a kit containing most of the components required and can be installed using basic
building tools and materials available at plumbing suppliers or hardware shops
Installation of the Scandi Pod involves:
1. Preparing a flat, level and firm base for the composting container to sit
2. Installing the ventilation pipe-work, including fan and vent cowl
3. Connecting the ventilation pipe work, electrical connection and excess liquids pipe
4. Preparing the excess liquids dispersal trench
5. Final checks before use
Space Required
There is no ideal set of measurements which will suit all applications but you do need to provide enough space
to locate and install the toilet, enough space to fit and maintain the air vent piping and fan and enough space to
access and exchange the containers, so allow space to remove and store the bins.
•Don't plan to install a light directly over the pedestal/waste chute as this will attract flying insects.
•Don’t use your toilet fan. It’s suction works against the suction of the fan of the Scandi –Pod.
Most Scandi-Pods are installed indoors and are usually screwed or glued to the floor.
Vent System
The Scandi-Pod airflow requirement is provided by 75mm pipe and incorporates a continuous running fan
(supplied). Consider how the fan will be powered (240VAC or 12VDC) and ensure the fan housing is
accessible for maintenance. Ensure correct airflow of the fan away from the toilet.

4
Remember that warm air from the composting chamber (the composting process generates its own warmth)
naturally rises, and that sharp bends restrict airflow –designing the vent piping correctly will improve natural
operation.
Warm air holding moisture entering a cold vent can result in condensation. Consider insulating the outlet vent
piping and install the supplied moisture (condensate) trap as per page 4 and 5.
Excess Liquid
A lot of the liquid waste is used up in the composting process, as well as being evaporated through the vent
system. An absorption trench is required to deal with any excess liquid.
The length of the trench is 1 m for the Scandi-Pod servicing 2 people, or 2m for the Scandi-Pod with 2 extra
chambers, servicing 4 people. The trench is to be 400mm wide, 400mm deep.
However, dimensions must not be less than required by Regulation 50 of the Health (Treatment of Sewage and
Disposal of Effluent and Liquid Waste) Regulations 1974 or AS/NZS 1547. See diagram for an installation
below.
1. INSTALLATION
The first thing to do is to decide where in the toilet room you want to place the Scandi Pod. Ensure you have an
outside facing wall at the back of the Scandi-Pod for ventilation and excess liquids drain purposes.
Once you have found the right spot in the toilet room, either glue the Scandi Pod to the floor using silicone or
similar –or drill 4 small holes through the edge of the bottom of the Scandi Pod base and into the floor –affix
with suitable screws or fixings. Ensure you don’t drill on the inside of the base, where liquids are collected and
funneled away.
Drill the right size hole at floor level through an outside facing wall of the toilet to allow the excess liquids
drain hose to traverse. Attach the hose to the Scandi Pod, using the supplied hose clamp and feed through wall.
Seal hole with silicone. Connect the hose to the absorption trench. Ensure there is a natural fall on the drain
hose!

5
Drill a suitable hole in the wall to allow the vent pipe to traverse through the wall. Suggested installation
drawing below. After the vent system has been installed, seal wall hole with silicone.
Vent Pipe Installation
The ventilation pipe should rise perpendicularly with as few curves and elbows as possible, the vent cowl
placed on top. Don’t use pipe cement – the push fittings should be tight enough for this purpose, and this allows
you to dismantle and service the vent system as required.
The below is an example as to a standard vent installation –there are many permutations possible and if in
doubt, contact us for discussion and guidance:
1. Cut off a short piece of vent pipe and cut off a 45 degree piece, about half the pipe diameter. The length
of this pipe is to allow the fan to be affixed without interfering with the turning mechanism for the
bulking material spreader. The 45 degree cut off is to be the at the bottom of this pipe, facing inwards,
to make exchange of composting containers easier.
2. Attach the fan (supplied), and cut off a short piece of the vent pipe and insert into the fan. Plug the fan
into the power supply (supplied) or 12V system and ensure the airflow is away from the composting
container, upwards towards the exhaust end.
3. Attach the 45 degree bend (supplied), pointing backwards. Cut a hole in the wall, allowing the vent pipe
assembly to traverse the wall. Cut a short piece of pipe to traverse the wall.
4. Moisture trap: Attach the Y joiner (supplied) as per the picture. Cut off a short piece of vent pipe and
insert into the Y –joiner at the bottom. Finish with attaching the cap (supplied). This is your moisture

6
trap, which should be emptied every few weeks by undoing the cap, letting the water drain out and re-
attaching the cap.
5. Attach a length of vent pipe to the house wall using pipe fasteners. Add additional vent pipes, joiners
and pipe fasteners (from your local plumbing store) as required. Cap with the (supplied) vent cowl. The
vent cowl should be 60 cm above the roof line. Congratulations, you are done!
There is also a 75mm joiner supplied, so the vent pipe can traverse the wall perpendicularly, allowing the
Scandi-Pod to be installed as close to the wall as possible. In this case the 45 degree angle and fan should
be situated as close to the outside wall as practicable. However please note that the fan is not waterproof
and a suitable position or covering needs to be selected.
2. BEFORE USE
Before putting the system into use, line the bin with the Geotech bin liner and fill the composting chamber with
a 2 - 3 cm layer of peat. Also, after every emptying, remember to repeat this before use. Instead of the bin liners
you can also use 2 - 3 cm of pine bark chips. When emptying the container, rinse the inside and ensure the
drainage holes aren’t blocked.
3. USE OF THE SCANDI POD
The Scandi Pod System can be used almost like any normal water toilet. Toilet paper can be thrown into the
toilet, as it composts together with the waste. However, any items containing plastic, e.g. sanitary towels should
be placed into a separate bin. A handful of covering material (peat, 1 cup) should be added after each bowel
movement.

7
The knob at the back of the unit can be used to turn the bin, should there be an accumulation of compost in a
particular place (coning).
Remember that there is a balance between covering the deposit enough visually, and covering it excessively,
resulting in the chamber filling up and needing changing more often.
Our compost starter/accelerator may also be added.
4. SERVICE
a) Check the fan 1) monthly to ensure it is working or 2) if you notice unusual odour.
b) The average length of time until a container is ¾ full (recommended exchange level) is around 4 –8
weeks at 2 people full time use.
c) The fallow containers need to be secured to prevent tampering by young children. This can be achieved
by keeping the containers in a locked area or by securing and locking a strap around the composting
container that can not be undone by young children.
d) It is not vital that the fallow container is kept in the sun, however composting is accelerated by warmth.
Therefore choosing a warm spot is helpful, as long as provision a) above is observed.
To exchange or empty the Scandi Pod, protective clothing, face mask, glasses and gloves must be worn at all
times. Lift the container out. Cover with lid. Lift the second container in place. You can use a rubbish bin when
carrying the container out to avoid any spillage. Childproof fallow containers as per point 4c above. The waste
will finish composting in this container (3 months on average).
When emptying a container, carry to the prepared disposal site. Gently lay the container on its side and start
emptying the container with a spade or shovel. Always observe safe work methods. Clean the container by
hosing if required.
5. USE OF COMPOST
a. Bury the contents of the container into a prepared area. Burial depth is a minimum of 300mm
in soil that is not intended for human food cultivation for six (6) months, and
b. Burial should be a minimum of 30 metres from any water source and 6 metres from any sub-
soil or open drainage system, or
c. Disposed of as directed by the Local Government.
6. CLIMATIC CONDITIONS
Composting will occur satisfactorily between 5 and 50 degrees Celsius.
GOING AWAY
If you are leaving the premises for a couple of weeks, it is OK to hibernate the system.
Cover the compost with a generous amount of peat and turn the fan off.
When re-activating the system turn the fan on and possibly add some compost starter.
If going away for a prolonged period of time, turn the fan off, take the active bin outside to compost,
and cover.
Start the system up as per usual on your return.

8
Dear Friend,
Thank you very much for choosing our Scandi-Pod Bio Sanitation System.
We hope that you enjoy many years of fruitful, waterless and trouble-free use.
Please don’t hesitate to contact us with any questions, suggestions, we are here to help.
Feedback is always welcome and is an invaluable part of providing an excellent product
and service!
Finally, thank you for being an integral part of the environmental solution. The Earth
will thank you too!
The Team at Green Loo NZ
Joy Reimink
22 Teviotview Place
Amberley, 7410
0273080983
Table of contents
Other GREEN LOO Toilet manuals
Popular Toilet manuals by other brands

Grohe
Grohe Sensia ARENA Assembly Intructions

Separett
Separett Tiny 1271-01 installation manual

Sanela
Sanela SLP 23RS Instructions for use

Raritan
Raritan Cricket Installation & maintenance instructions

enware
enware IFO SIGN WC P-Trap Installation and maintenance instructions

Toto
Toto CW822 Series installation guide

Jacob Delafon
Jacob Delafon OSCAR PACK E28068-00 installation manual

Kohler
Kohler OVE Series installation instructions

Lotus
Lotus ATS-907 user manual

EcoLet
EcoLet 25a instruction manual

DURAVIT
DURAVIT ME by Starck 280931 93 Series Mounting instructions

Kohler
Kohler ARCHER K-4440T installation instructions