manuals.online logo
Brands
  1. Home
  2. •
  3. Brands
  4. •
  5. GREEN SERIES FITNESS
  6. •
  7. Treadmill
  8. •
  9. GREEN SERIES FITNESS CIR-TM7000E-G Manual

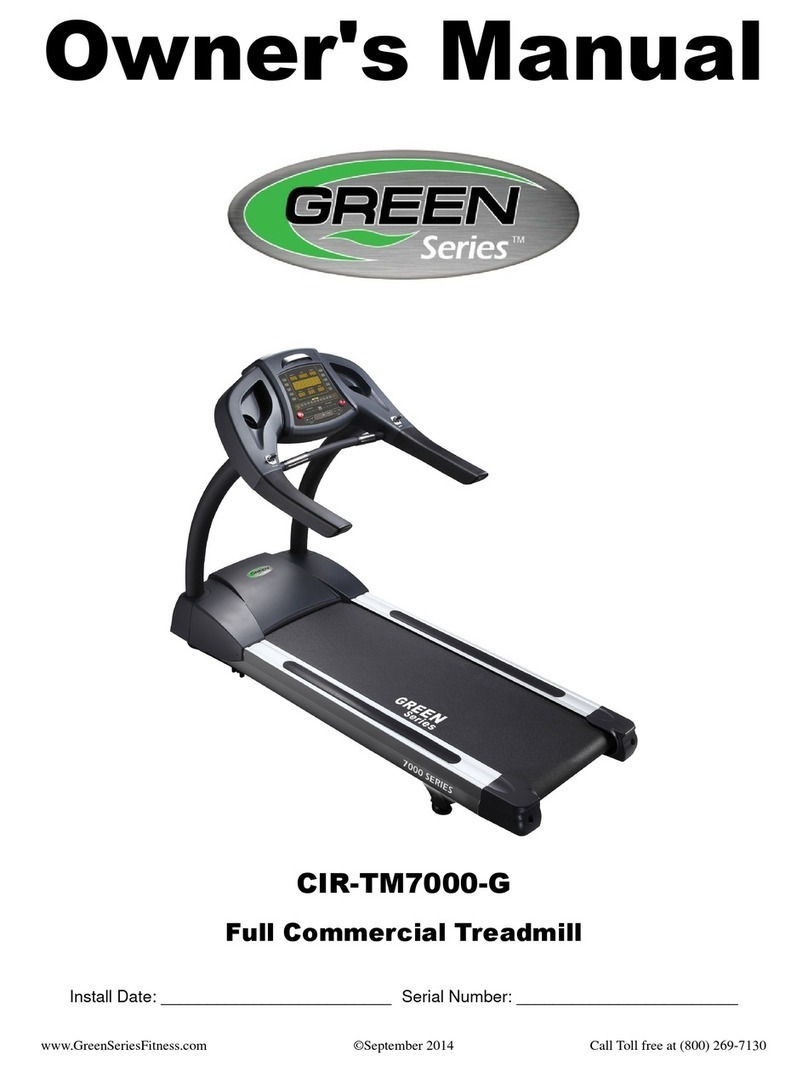
GREEN SERIES FITNESS CIR-TM7000E-G Manual

www.GreenSeriesFitness.com ©December 2014 Call Toll free at (800) 269-7130
1
CIR-TM7000E-G & CIR-TM7000-G
Suspension Upgrade Procedure
www.GreenSeriesFitness.com ©December 2014 Call Toll free at (800) 269-7130
2
1. Front hood area disassembly
1.1. Start treadmill and elevate to 6%. Once there, treadmill front frame should be at 9”off ground.
1.2. Go to front of treadmill and shut off breaker. Unplug power cord from wall.
www.GreenSeriesFitness.com ©December 2014 Call Toll free at (800) 269-7130
3
1.3. Remove the Sure-Connect from the treadmill and unplug the power cord from the treadmill.
1.4. Remove the screws from the right and left console mast covers. Slide up the console mast covers and
rubber grommets upward on the console mast support tubes. Secure by pulling half the rubber
grommets through the console mast covers. Remove the remaining screws securing the motor hood
and place the motor hood aside.
www.GreenSeriesFitness.com ©December 2014 Call Toll free at (800) 269-7130
4
2. Side Rail Disassembly & Suspension Change
2.1. Get a 25lb or 30lb hex dumbbell or equality just behind front elevation frame pivot point. (Due to the
side rails that need to be taken out the rear of the treadmill, rear feet will be place on these mounts
later. This is an ideal length that will be needed to take the side off the back end)
2.2. Pick up rear of treadmill and roll forward enough to place both rear feet on top of dumbbells RT & LT.
www.GreenSeriesFitness.com ©December 2014 Call Toll free at (800) 269-7130
5
2.3. Take RT & LT rear roller covers off. Two (2) screws per side, Phillip head #2 screw driver. First screw
is under side and second one on top. Takes screws and put in rear covers when taken off.
Note: Magnetic end screw drivers work the best
www.GreenSeriesFitness.com ©December 2014 Call Toll free at (800) 269-7130
6
2.4. Mark with white or silver permanent marker the placement of RT & LT rear roller cover mounts before
disassembly. Mark top and sides.
2.5. Take two (2) screws and flat washers out per side. #2 Phillip screw driver. Store in rear roller covers.
www.GreenSeriesFitness.com ©December 2014 Call Toll free at (800) 269-7130
7
2.6. Loosen four (4) allen bolts per side under side rails ½ to 1 turn only. Old versions 4mm allen head.
(new versions 5mm allen head) Note: Do not use old worn down Allen wrenches. This will strip
the bolt heads and NOT COVERED under warranty.
2.7. Slide both the LT & RT side rails back of machine, then take off and put aside but not on side of
treadmill. This space will be needed for suspension upgrade.
www.GreenSeriesFitness.com ©December 2014 Call Toll free at (800) 269-7130
8
2.8. See picture below for the rows to be explained in the following procedures.
2.9. In Middle Rear Row #3, take 5mm T handle Allen wrench through deck to suspension screw in frame.
Take out both LT & RT sides. Note: Only on Middle Rear Row #3
Front Row #1
Middle Front Row #2
Middle Rear Row #3
Rear Row #4
www.GreenSeriesFitness.com ©December 2014 Call Toll free at (800) 269-7130
9
2.10. Go to front row #1 suspension. Take out #3 Philips screw and re-tighten 5mm allen bolt
suspension to frame. Estimate is 30 lbs of torque. Best way is to put #2 Phillips screw driver between
deck and frame to keep suspension grommet from going sideways. Note: Make sure the suspension
stays straight and not sideways hitting side of frame.
2.11. Now install an additional 8mm –1.25 locking nut at bottom of suspension frame. While holding
#5mm Allen wrench, secure 8mm nut with 13mm socket at estimated 30 –50 lbs of torque.
www.GreenSeriesFitness.com ©December 2014 Call Toll free at (800) 269-7130
10
2.12. After completing step 2.11, reattach the 8mm x 40mm Philips head bolt back into front row #1
suspension with clip. Tighten to estimated 20 lbs of torque. Note: Make sure to use blue Loctite on
end of bolts.
2.13. Go to rear of treadmill and take off both LT & RT rear deck Philips head 8mm x 30mm bolts. Pry
up the deck without damage at least 1”and secure with item like plastic or rubber handle wrench.
CAUTION: INJURY TO FINGERS AT THIS POINT WHEN NOT BEING CAREFULL.
www.GreenSeriesFitness.com ©December 2014 Call Toll free at (800) 269-7130
11
2.14. On Rear Middle Row #3 install rubber suspension. Go from under frame to suspension. Hand
screw down into frame threads.Note: Keep fingers from going on top of rubber suspension just
in case running deck slips from pry contact and comes down on suspension.
2.15. Tighten down with adjustable pliers. Please be cautious of over tightening which will cause the
top metal plate to disconnect from the rubber suspension. Just a snug fit is good.
www.GreenSeriesFitness.com ©December 2014 Call Toll free at (800) 269-7130
12
2.16. Once Step 2.15 is complete take out all pry items and let running deck rest on suspension.
Reinstall Rear Row #4 LT & RT Philips head 8mm x 30mm bolts. Estimate is 30 lbs of torque.
Note: Make sure to use blue Loctite on end of bolts.
2.17. Continue back to Middle Front Row #2 and re-tighten 5mm allen bolt suspension to frame.
Estimate is 30 lbs of torque. Best way is to put #2 Phillips screw driver between deck and frame to
keep suspension grommet from going sideways. Note: Make sure the suspension stays straight
and not sideways hitting side of frame.
www.GreenSeriesFitness.com ©December 2014 Call Toll free at (800) 269-7130
13
2.18. Once Step 2.17 is complete, finish installation rest of 8mm nuts to Middle Front Row #2 and
Middle Rear Row #3. Secure 8mm nuts with 13mm socket at estimated 30 –50 lbs of torque.
www.GreenSeriesFitness.com ©December 2014 Call Toll free at (800) 269-7130
14
2.19. Slide both RT & LT side rails back on treadmill. Note: Do not tighten Allen bolts down at this
time.
2.20. Re-install both RT & LT rear roller cover mounts. Easiest to put screw driver through rear top
hole securing screw with washer to lower mount and reattaching loosely to frame. Then install the
second screw with washer with finger holding side of screw to line up hole to screw end. Thus not
losing washer during the installation of screw and reattaching loosely to frame.
www.GreenSeriesFitness.com ©December 2014 Call Toll free at (800) 269-7130
15
2.21. Line up rear roller cover mounts to previous markings and tighten down screws to estimated 10-
20 lbs of torque.
2.22. Re-install both RT & LT roller covers. Loosely install top screw then put in lower screw. Once
both are loosely installed tighten both down to estimated 10-20 lbs of torque.
www.GreenSeriesFitness.com ©December 2014 Call Toll free at (800) 269-7130
16
2.23. Now slide Right side rails back to rear roller cover and first tighten 4mm old style (or
5mm new style) Allen bolts rear area. Second secure the other three (3) Allen bolts from rear roller to
front roller area. Repeat for Left side. Torque down to 20 lbs of pressure. Note: Do not use old worn
down Allen wrenches. This will strip the bolt heads and NOT COVERED under warranty.
www.GreenSeriesFitness.com ©December 2014 Call Toll free at (800) 269-7130
17
3. Final Assembly
3.1. Connect the AC power cord to the treadmill. Do not attach the Sure Connect bracket at this time.
3.2. Power up the treadmill and bring the speed up to 2- 4 MPH. check the running belt and drive belt does
not slip. If good then test running treadmill at 8 mph for over 2mins while checking the alignment.
CAUTION; DO NOT WALK AWAY OR DO ANYTHING ELSE. WATCH RUNNING BELT.
* If needed adjust according to normal running belt tracking procedures.
www.GreenSeriesFitness.com ©December 2014 Call Toll free at (800) 269-7130
18
3.3. Treadmill is now ready for motor hood cover to be installed.
3.4. Ensure that the mounting clips on each side of the treadmill are centered on the attach points. If screws
do not securely stay in clip, depress with pliers down a bit to give the screws metal to attach to.
www.GreenSeriesFitness.com ©December 2014 Call Toll free at (800) 269-7130
19
3.5. Using the screws removed at the beginning of the procedure; install the two (2) machine screws first at rear
of motor hood to frame.
3.6. After installing the machine screws at the front of the motor hood, install the two (2) self-tapping sheet metal
screws on each side of the motor hood.
www.GreenSeriesFitness.com ©December 2014 Call Toll free at (800) 269-7130
20
3.7. After the screws of the motor hood have been secured, attach the Sure Connect to the power cord
receptacle. Now you are ready for normal treadmill operation.

Other manuals for CIR-TM7000E-G

1

This manual suits for next models

1

Other GREEN SERIES FITNESS Treadmill manuals

GREEN SERIES FITNESS CIR-TM6000DC-G User manual

GREEN SERIES FITNESS

GREEN SERIES FITNESS CIR-TM6000DC-G User manual

GREEN SERIES FITNESS CIR-TM7000E-G1 User manual

GREEN SERIES FITNESS

GREEN SERIES FITNESS CIR-TM7000E-G1 User manual

GREEN SERIES FITNESS CIR-TM8000E-G User manual

GREEN SERIES FITNESS

GREEN SERIES FITNESS CIR-TM8000E-G User manual

GREEN SERIES FITNESS 6000 Upright Instruction Manual

GREEN SERIES FITNESS

GREEN SERIES FITNESS 6000 Upright Instruction Manual

GREEN SERIES FITNESS CIR-TM7000E-G Reference guide

GREEN SERIES FITNESS

GREEN SERIES FITNESS CIR-TM7000E-G Reference guide

GREEN SERIES FITNESS CIR-TM7000-G User manual

GREEN SERIES FITNESS

GREEN SERIES FITNESS CIR-TM7000-G User manual

GREEN SERIES FITNESS CIR-TM6000AC-G User manual

GREEN SERIES FITNESS

GREEN SERIES FITNESS CIR-TM6000AC-G User manual

GREEN SERIES FITNESS CIR-TM6000AC-G User manual

GREEN SERIES FITNESS

GREEN SERIES FITNESS CIR-TM6000AC-G User manual

GREEN SERIES FITNESS CIR-TM8000-G User manual

GREEN SERIES FITNESS

GREEN SERIES FITNESS CIR-TM8000-G User manual

GREEN SERIES FITNESS CIR-TM7000-G1 User manual

GREEN SERIES FITNESS

GREEN SERIES FITNESS CIR-TM7000-G1 User manual

GREEN SERIES FITNESS CIR-TM6000AC-G1 User manual

GREEN SERIES FITNESS

GREEN SERIES FITNESS CIR-TM6000AC-G1 User manual

Popular Treadmill manuals by other brands

SportsArt Fitness TR20F Repair manual

SportsArt Fitness

SportsArt Fitness TR20F Repair manual

HOMCOM A90-201V70 Assembly instruction

HOMCOM

HOMCOM A90-201V70 Assembly instruction

LIFESTYLER 831.297140 user manual

LIFESTYLER

LIFESTYLER 831.297140 user manual

Smooth Fitness Smooth 9.25HR user manual

Smooth Fitness

Smooth Fitness Smooth 9.25HR user manual

Keys Fitness PRO 750 owner's manual

Keys Fitness

Keys Fitness PRO 750 owner's manual

Xterra TR200 owner's manual

Xterra

Xterra TR200 owner's manual

Life Span Control user manual

Life Span

Life Span Control user manual

Pro-Form PFT 55 owner's manual

Pro-Form

Pro-Form PFT 55 owner's manual

Pro-Form 360 P Treadmill user manual

Pro-Form

Pro-Form 360 P Treadmill user manual

Star Trac E-TRx Work instructions

Star Trac

Star Trac E-TRx Work instructions

Life Fitness Arctic Silver 97TWEZ parts manual

Life Fitness

Life Fitness Arctic Silver 97TWEZ parts manual

Life Fitness 90TW-XXXX-03 parts manual

Life Fitness

Life Fitness 90TW-XXXX-03 parts manual

Pro-Form 795 Treadmill manual

Pro-Form

Pro-Form 795 Treadmill manual

Pro-Form Cross Walk CSI user manual

Pro-Form

Pro-Form Cross Walk CSI user manual

Star Trac 4500 owner's manual

Star Trac

Star Trac 4500 owner's manual

Pro-Form 540S HEARTRATE CONTROL user manual

Pro-Form

Pro-Form 540S HEARTRATE CONTROL user manual

Pro-Form 3.9 Xm Treadmill Manuel de l'utilisateur

Pro-Form

Pro-Form 3.9 Xm Treadmill Manuel de l'utilisateur

Life Fitness Lifecycle upright 9500HR Operation manual

Life Fitness

Life Fitness Lifecycle upright 9500HR Operation manual

manuals.online logo
manuals.online logoBrands
  • About & Mission
  • Contact us
  • Privacy Policy
  • Terms and Conditions

Copyright 2025 Manuals.Online. All Rights Reserved.