Grex G4.2 PRO Installation instructions

SICUREZZA E ISTRUZIONI D’USO
SAFETY AND INSTRUCTIONS FOR USE
SICHERHEIT UND GEBRAUCHSANLEITUNG
SÉCURITÉ ET INSTRUCTIONS D’UTILISATION
SEGURIDAD E INSTRUCCIONES

3
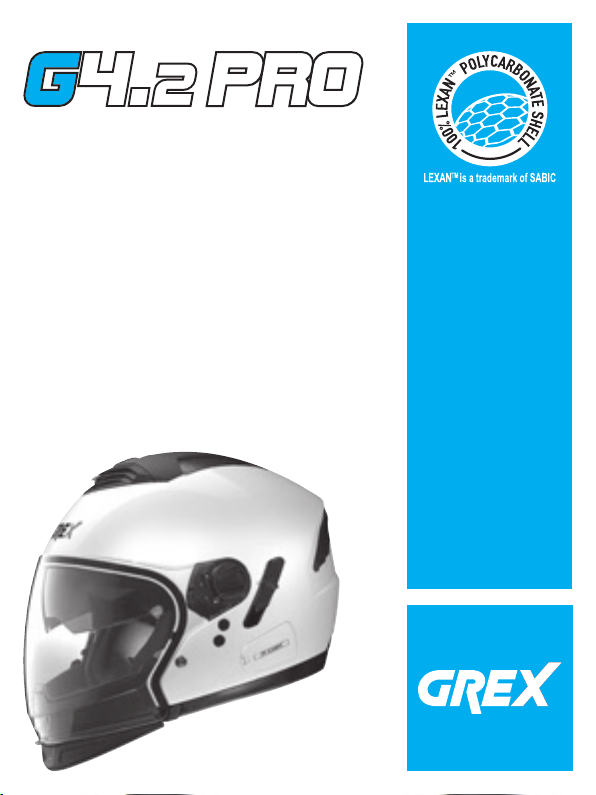
CONGRATULAZIONI... per l’acquisto del tuo nuovo casco.
Il design, l’ergonomia, il comfort, l’aerodinamicità, i comandi semplici e funzionali; il tutto è
stato progettato e realizzato per ottenere un prodotto moderno e dalle massime prestazio-
ni, in grado di soddisfare le più elevate esigenze in termini di sicurezza e comfort.
SICUREZZA E NORME D’USO
IMPORTANTE
-Leggi questo libretto e tutti gli altri documenti inclusi prima di utilizzare il tuo
casco perché contengono importanti informazioni che ti aiuteranno ad utilizzare
al meglio il casco, in tutta sicurezza e semplicità.
-Non attenersi a queste istruzioni potrebbe ridurre la protezione data dal casco e
quindi mettere a repentaglio la tua incolumità.
UTILIZZO DEL CASCO
- Il casco è progettato in modo specico per l’uso motociclistico e ciclomotoristico;
non deve pertanto essere utilizzato per altri usi (o impieghi o nalità) perché in tal
caso non garantisce la medesima protezione.
- In caso d’incidente, il casco è un elemento di protezione che permette di limitare lesio-
ni e danni alla testa. Nonostante ciò, non è in grado da solo di eliminare i rischi di ferite
gravi e/o mortali, le quali dipendono dalle diverse dinamiche speciche dell’impatto;
quindi guida con prudenza.
- Indossa sempre il tuo casco ben allacciato alla guida di motocicli, in modo da sfruttar-
ne tutta la protezione disponibile.
- Non indossare mai sciarpe sotto il sistema di allacciatura o copricapo di qualsiasi tipo
sotto il casco.
- Il casco può attutire i rumori del trafco. Comunque, in tutti i casi, assicurati di perce-
pire bene i suoni necessari quali clacson e sirene di emergenza.
- Tienilo sempre lontano da fonti di calore, come ad esempio la marmitta di scarico,
l’alloggiamento del bauletto o l’abitacolo di un mezzo di trasporto.
- Non modicare e/o manomettere il casco (anche solo in parte) per nessun motivo.
Monta solo accessori e/o ricambi originali adatti al tuo specico modello di casco.
- Danni al casco, che possono essere causati da cadute accidentali, non sempre sono
ben visibili; ogni casco che abbia subito un urto violento deve essere sostituito.
- In caso di dubbi sull’integrità e sicurezza del casco, astieniti dall’utilizzarlo e rivolgiti ad
un rivenditore autorizzato, per farlo ispezionare.
SCELTA DEL CASCO
Taglia
- Per individuare la taglia corretta, indossa caschi di diverse misure, e scegli quello che
si adatta meglio alla conformazione della tua testa, che risulta perfettamente stabile
una volta indossato e adeguatamente allacciato e che ti garantisce contemporanea-
mente un buon comfort.
- Un casco troppo grande può scendere sino a coprire gli occhi, oppure ruotare lateral-
mente durante la guida.
- Tienilo in testa per alcuni minuti e verica che non ci siano zone di pressione, che alla
lunga possono provocare indolenzimento o mal di testa.
Scalzamento
- Con il casco indossato e il cinturino ben allacciato, prova a slarti il casco come indi-
cato in gura (Fig A). Infatti, in caso d’incidente, le forze in gioco e le diverse direzioni
in cui queste forze agiscono possono determinare rotazioni del casco o addirittura lo
scalzamento del casco dalla testa se questo non è perfettamente allacciato.

3
- Il casco non deve ruotare, muoversi liberamente sulla testa o slarsi. In caso contrario
regola la lunghezza del cinturino o cambia taglia del casco. Ripeti di nuovo il test.
Sistema di ritenzione
- Il sistema di ritenzione (cinturino) è regolato di serie con una lunghezza standard;
prima di utilizzarlo verica la corretta pre-regolazione.
- Assicurati sempre che il cinturino sia bene allacciato e stretto in modo da tenere il
casco fermo sulla testa. In qualsiasi caso, prima di partire, assicurati che il cinturino
sia ben stretto sotto il mento, il più indietro possibile verso la gola, ma senza che
sia scomodo.
- La giusta tensione del cinturino ti deve permettere una respirazione e una deglutizione
normale, ma senza riuscire a far passare un dito fra cinturino e gola.
- Attenzione:
il bottone eventualmente presente sul cinturino ha esclusivamente la funzione
di impedire lo sventolio della parte terminale dello stesso, dopo che si è provveduto ad
allacciarlo correttamente.
VISIERA
-
Se la visiera è danneggiata e presenta graf marcati che riducono la visibilità, è probabile
che il trattamento protettivo sia stato compromesso, e pertanto la visiera deve essere
sostituita.
-
La visiera è utilizzabile esclusivamente per il modello di casco per cui è stata progettata.
- Non applicare adesivi e vernici.
MANUTENZIONE E PULIZIA
- Danni al casco, che possono essere causati da cadute accidentali, non sempre sono
ben visibili; ogni casco che abbia subito un urto violento deve essere sostituito.
- Attenzione: il casco e la visiera possono essere seriamente danneggiati da alcune
sostanze comuni senza che il danno sia visibile. Per le operazioni di pulizia del casco
e della visiera, utilizza solo acqua tiepida e sapone neutro; asciuga a temperatura
ambiente, al riparo dal sole e/o da fonti di calore.
- Attenzione: non utilizzare mai benzina, diluente, benzolo, solventi o altre sostanze
chimiche perchè possono:
• danneggiare irrimediabilmente il casco;
• modicare le proprietà ottiche, ridurre le proprietà meccaniche ed indebolire il tratta-
mento protettivo della visiera.
Fig. A
ITALIANO

4 5
ISTRUZIONI D’USO
Il casco G4.2 PRO è dotato di mentoniera protettiva amovibile e può essere
utilizzato in differenti congurazioni (Fig. 1): con visiera e mentoniera, con la
sola visiera, con la sola mentoniera, senza visiera e senza mentoniera. L’utilizzo
del casco nella congurazione completa, con mentoniera agganciata e visie-
ra chiusa, offre ovviamente il più elevato livello di protezione rispetto alle altre
congurazioni.
Le coperture delle feritoie di innesto della mentoniera (che devono essere mon-
tate nel caso il casco venga utilizzato senza mentoniera) sono disponibili diret-
tamente nella scatola. Le placchette laterali (che consigliamo di montare nel
caso il casco venga utilizzato senza visiera) sono, a seconda delle versioni del
prodotto, disponibili direttamente sul prodotto stesso, nella scatola o comun-
que come accessorio/ricambio.
VISIERA
1 Smontaggio Visiera
1.1. Alzare e rimuovere la cover di blocco sinistra dal rispettivo nottolo laterale (Fig. 2).
1.2. Ruotare il nottolo di 90° verso la parte anteriore del casco (Fig. 3).
1.3. Rimuovere il nottolo dal casco tirandolo verso l’esterno in modo che la baionetta
interna “A” dello stesso esca dalla rispettiva sede del meccanismo visiera (Fig. 4).
1.4. Rimuovere la visiera dal casco afferrandone l’estremità laterale e deformandola
verso l’esterno in modo che il foro “B” della visiera stessa si sganci dal meccani-
smo e che il perno interno ”C” esca dalla rispettiva sede del meccanismo (Fig. 5).
1.5. Ripetere le precedenti operazioni sul lato destro del casco.
Se si vuole utilizzare il casco senza visiera procedere con le istruzioni seguenti a
partire dal punto 2.2.
2. Montaggio Visiera
2.1. Posizionare la parte sinistra della visiera sul relativo meccanismo visiera avendo
cura di inserirne il perno interno “C” e il foro “B” rispettivamente nella parte infe-
riore e nel rilievo circolare del meccanismo stesso (Fig. 5).
2.2. Posizionare il nottolo laterale sinistro sul rispettivo meccanismo e inserire la baio-
netta interna “A” dello stesso nella corrispondente sede del meccanismo stesso
(Fig. 4).
N.B. le cover di blocco e i nottoli laterali destri e sinistri sono diversi tra di loro e
siglati sul retro rispettivamente con “R” (Right = destra) e “L” (Left = sinistra).
2.3. Ruotare il nottolo di 90° verso la parte posteriore del casco. Per compiere l’ope-
razione premere il nottolo verso l’interno del casco (Fig. 3).
2.4. Fissare il nottolo posizionando la cover di blocco e premendola contro lo stesso
(Fig. 2). Vericare poi che la cover sia saldamente agganciata al nottolo.
2.5. Ripetere le precedenti operazioni sul lato destro del casco.
ATTENZIONE
- Vericare sempre che i nottoli e le cover di blocco siano montati correttamente e
risultino ben ancorati ai meccanismi laterali.
- Vericare che i meccanismi funzionino correttamente. Aprire e chiudere la visiera
vericando che questa venga trattenuta dai meccanismi nelle rispettive posizio-
ni. Se necessario ripetere le operazioni sopra descritte.
- Non utilizzare il casco senza aver montato correttamente la visiera, i nottoli late-
rali e le cover di blocco.

4 5
- Se i meccanismi laterali presentano dei malfunzionamenti o danneggiamenti, ri-
volgersi ad un rivenditore autorizzato Grex.
MENTONIERA PROTETTIVA AMOVIBILE
3. Sgancio della mentoniera protettiva amovibile
3.1. Aprire completamente la visiera.
3.2. Spingere verso l’alto la leva di sgancio destra della mentoniera e contemporane-
amente slare la mentoniera dal casco, tirandola verso esterno (Fig. 6). Eseguire
la stessa operazione sul lato sinistro del casco.
ATTENZIONE
Ogni volta che si desidera sganciare la mentoniera per utilizzare il casco nella con-
gurazione jet, inserire le coperture delle feritoie d’innesto della mentoniera (cover
mentoniera) destra e sinistra nelle rispettive feritoie presenti sui telaietti laterali destro
e sinistro e premerle verso l’interno del casco no a sentire il click di aggancio (Fig. 7).
N.B. le cover mentoniera destra e sinistra sono diverse tra di loro e siglate sul retro
rispettivamente con “R” (Right = destra) e “L” (Left = sinistra).
4. Aggancio della mentoniera protettiva amovibile
Prima di agganciare la mentoniera al casco è necessario rimuovere le cover mento-
niera, agendo come di seguito indicato:
4.1. Aprire completamente la visiera.
4.2. Spingere verso l’alto la leva di sgancio destra e contemporaneamente slare la
cover mentoniera tirandola verso l’esterno (Fig. 6). Eseguire la stessa operazione
anche sul lato sinistro del casco.
4.3. Inserire l’estremità destra della mentoniera nella feritoia presente sul telaietto
laterale destro del casco e premerla verso l’interno del casco no a sentire il click
di aggancio (Fig. 7). Eseguire la stessa operazione sul lato sinistro del casco.
4.4. Accertarsi che la mentoniera sia correttamente agganciata in entrambe le estre-
mità tirando leggermente la mentoniera stessa verso l’esterno del casco.
ATTENZIONE
- Non rimuovere in nessun modo e per nessun motivo l’imbottitura semirigida in-
terna della mentoniera protettiva.
- Quando il casco viene utilizzato senza mentoniera protettiva amovibile montare
sempre cover mentoniera fornite di serie.
- In caso di dubbi circa il funzionamento del meccanismo manuale di sgancio della
mentoniera rivolgersi ad un rivenditore Grex.
•
(Disponibile di serie o come accessorio/ricambio).
5. Montaggio Visierino Interno PINLOCK®
5.1. Smontare la visiera (vedi istruzioni precedenti).
5.2. Assicurarsi che la supercie interna della visiera sia pulita e vericare che le leve
esterne di regolazione dei perni siano disposte verso l’interno (Fig. 10).
5.3. Appoggiare il visierino interno PINLOCK®alla visiera.
ATTENZIONE: il prolo in silicone del visierino interno PINLOCK®deve essere a
contatto con la supercie interna della visiera.
5.4. Inserire un lato del visierino interno PINLOCK®in uno dei due perni della visiera
e tenerlo in posizione (Fig. 8).

6 7
5.5. Allargare la visiera e incastrare all’altro perno il secondo lato del visierino interno
PINLOCK®(Fig. 9).
5.6. Rilasciare la visiera.
5.7. Rimuovere la pellicola di protezione dal visierino interno PINLOCK®e controllare
che tutto il prolo in silicone del visierino sia aderente alla visiera.
5.8. Montare la visiera sul casco (vedi istruzioni precedenti).
Verica e regolazione del tiraggio del visierino interno PINLOCK®
Vericare il corretto montaggio del visierino interno PINLOCK®aprendo e chiudendo
la visiera e controllando che non ci sia movimento relativo tra di loro.
Qualora il visierino interno PINLOCK®non fosse ben ssato alla visiera, agire con-
temporaneamente su entrambe le leve esterne di regolazione facendole ruotare ver-
so l’alto, in modo graduale e senza eccedere, per aumentare il tiraggio (Fig. 10). Il
massimo tiraggio si ottiene quando le leve esterne di regolazione dei perni si trovano
disposte verso l’esterno.
ATTENZIONE
- L’eventuale presenza di polvere tra le due visiere può causare dei graf su en-
trambe le superci.
- Visiere e visierini interni PINLOCK®danneggiati da graf possono ridurre la visi-
bilità e devono essere sostituiti.
- Controllare periodicamente il corretto tiraggio del visierino interno PINLOCK®per
evitare che questo si muova e possa causare dei graf su entrambe le superci.
- Qualora durante l’uso si vericassero fenomeni di appannamento della visiera
del casco e/o formazione di condensa in zone comprese tra visiera e visierino,
vericare il corretto montaggio e tiraggio del visierino interno PINLOCK®.
- Un tiraggio eccessivo e prematuro del visierino interno PINLOCK®può determi-
nare un’eccessiva aderenza di quest’ultimo contro la supercie della visiera e/o
deformazioni permanenti dello stesso con conseguente impossibilità di eseguire
correttamente successive regolazioni.
- Situazioni d’intensa sudorazione/respirazione, utilizzo in particolari condizioni
climatiche (basse temperature e/o umidità elevata e/o sbalzi di temperatura
e/o pioggia copiosa) e/o utilizzo intenso e prolungato possono determinare
la riduzione dell’efcacia del visierino interno PINLOCK®causando appan-
namento o formazione di condensa sullo stesso. In queste situazioni, dopo
l’utilizzo, per ripristinare l’efcacia del sistema, rimuovere il visierino interno
PINLOCK®dalla visiera del casco e farlo asciugare con aria secca e tiepida.
La stessa prassi deve essere eseguita per il casco, che deve essere lasciato
asciugare per eliminare eventuale umidità creatasi all’interno per le situazioni
sopra descritte.
6. Smontaggio Visierino Interno PINLOCK®
6.1. Smontare la visiera equipaggiata con il visierino interno PINLOCK®(vedi istruzio-
ni precedenti).
6.2. Allargare la visiera e sganciare il visierino interno PINLOCK®dai perni (Fig. 9).
6.3. Rilasciare la visiera.
Manutenzione e pulizia
- Smontare il visierino interno PINLOCK®dalla visiera. Usando un panno umido e
morbido, pulire delicatamente con sapone neutro liquido. Rimuovere ogni traccia
di sapone sotto acqua corrente.
- Lasciare asciugare il visierino senza stronare aiutandosi con aria secca e tiepida.

6 7
- Per mantenere inalterate nel tempo le caratteristiche del visierino, lasciare asciu-
gare il casco dopo l’utilizzo in luogo aerato e asciutto con la visiera aperta. Tene-
re lontano da fonti di calore e conservare in luogo oscuro.
- Non usare solventi o prodotti chimici.
PLACCHETTE LATERALI
(Disponibili di serie o come accessorio/ricambio).
Quando il casco G4.2 PRO viene congurato in una versione priva di visiera consiglia-
mo di montare in sua sostituzione le placchette laterali.
7. Montaggio Placchette Laterali
Per montare le placchette laterali rimuovere prima le cover di blocco, i nottoli laterali
e, se montata, la visiera (vedi istruzioni precedenti).
7.1. Spingere verso l’alto il gancio deformabile “D” del meccanismo visiera sinistro
no a farlo fuoriuscire dalla sede della calotta e rimuovere poi il meccanismo
stesso dal casco avendo cura di non perdere le molle di azionamento presenti
sul suo retro (Fig. 11).
7.2. Inserire i denti della placchetta laterale sinistra nelle sedi laterali presenti sulla
calotta e premerla poi verso l’interno del casco in corrispondenza del gancio
deformabile “E” (Fig. 12).
N.B. le placchette laterali destra e sinistra sono diverse tra di loro e siglate sul
retro rispettivamente con “R” (Right = destra) e “L” (Left = sinistra).
7.3. Ripetere le precedenti operazioni sul lato destro del casco.
8. Smontaggio Placchette Laterali
8.1. Spingere verso l’alto il gancio deformabile “E” della placchetta laterale sinistra
no a farlo fuoriuscire dalla sede della calotta; rimuovere poi la placchetta dal
casco (Fig. 12).
8.2. Inserire i denti del meccanismo visiera sinistro nelle sedi laterali presenti sulla
calotta e premerlo poi verso l’interno del casco in corrispondenza del gancio
deformabile “D” (Fig. 11).
N.B. i meccanismi visiera destro e sinistro sono diversi tra di loro e siglati sul retro
rispettivamente con “R” (Right = destra) e “L” (Left = sinistra).
8.3. Ripetere le precedenti operazioni sul lato destro del casco.
8.4. Se si desidera montare la visiera vedere le istruzioni di montaggio precedenti.
8.5. Montare poi i nottoli laterali e le cover di blocco su entrambi i lati del casco come
da istruzioni di montaggio sopra fornite.
ATTENZIONE
- Quando si vuole utilizzare il casco in una congurazione priva di visiera montare
sempre i nottoli laterali e le cover di blocco che vengono forniti di serie. In alter-
nativa consigliamo di montare le placchette laterali.
- Non utilizzare il casco senza aver montato correttamente le placchette o i nottoli
laterali e le relative cover di blocco.
- Se i meccanismi laterali o i nottoli o le cover di blocco presentano dei malfunzio-
namenti o danneggiamenti, rivolgersi ad un rivenditore autorizzato Grex.

8 9
VISION PROTECTION SYSTEM (VPS)
L’esclusivo VISION PROTECTION SYSTEM (VPS) interno è uno schermo parasole
stampato in LEXAN™(*) e trattato scratch-resistant/fog-resistant, semplice e comodo
da utilizzare: basta abbassarlo per renderlo attivo o sollevarlo per escluderlo dal cam-
po visivo. È utile in tutte le situazioni, nei lunghi tratti extraurbani o per brevi percorsi
cittadini.
L’innovativo sistema di aggancio, inoltre, permette di smontare e montare lo scher-
mo parasole senza l’ausilio di attrezzi per le ordinarie operazioni di manutenzione e
pulizia.
Funzionamento del VPS
Il meccanismo del VPS permette, con un semplice movimento, di rendere attivo lo
schermo parasole abbassandolo sino ad impegnare parzialmente il campo visivo
della visiera, determinando la desiderata riduzione della trasmittanza della luce. In
ogni momento, sempre con un semplice movimento ed in modo indipendente dalla
visiera, il VPS può essere poi disattivato ed essere quindi rapidamente risollevato
sino a ripristinare le normali condizioni di visibilità e protezione offerte dalla visiera
omologata del casco.
Per disattivare il VPS spingere il cursore laterale verso il basso no a ne corsa (Fig.
13 A). Per attivare il VPS spingere il cursore laterale verso l’alto no a ne corsa (Fig.
13 B).
Precauzioni d’uso
Gli attuali standard omologativi (ECE22-05) stabiliscono che i livelli minimi di tra-
smittanza luminosa delle visiere debbano essere superiori all’80% durante la guida
notturna e comunque non inferiori al 50% durante quella diurna. Ciò rende molto
frequente, per non dire quasi obbligatorio, il ricorso all’uso di occhiali da sole - che
determinano una trasmittanza risultante molto inferiore al 50% - durante la guida
diurna in condizioni meteorologiche e ambientali con luce particolari, per esempio
con forte luminosità causata da un’elevata intensità e/o incidenza dei raggi solari,
allo scopo di ridurre l’affaticamento degli occhi nelle lunghe percorrenze o ridurre il
rischio di abbagliamento diretto rispetto all’uso delle sole visiere omologate. Tuttavia
l’utilizzo di occhiali da sole rende particolarmente difcoltose le eventuali manovre di
emergenza derivanti dalla necessità di ripristinare rapidamente la massima visibilità
offerta dalla visiera del casco, come ad esempio accade quando si entra in un tun-
nel o, in generale, si vericano delle repentine variazioni della luminosità ambientale.
Grazie al suo meccanismo di funzionamento, nel caso del VPS, tali manovre risultano
invece essere semplicate.
ATTENZIONE
- Il VPS deve essere attivato/disattivato utilizzando esclusivamente l’apposito cur-
sore; non disattivare il VPS manipolandolo direttamente.
- Il VPS può essere attivato solo di giorno e nelle condizioni ambientali sopra de-
scritte.
- Il VPS deve essere disattivato di notte e/o in condizioni di scarsa visibilità.
- Vericare sempre che il posizionamento del VPS sia adeguato alle varie condizio-
ni meteorologico ambientali e/o alle raccomandazioni d’utilizzo sopra esposte.
- Raccomandiamo di utilizzare il VPS solo ed esclusivamente in abbinamento alla
visiera di serie omologata, avente cioè valore di trasmittanza superiore all’80%.
- Il VPS non sostituisce la protezione che offre la visiera.
(*) LEXAN is a trademark of SABIC.

8 9
- Vericare che il VPS sia pulito e correttamente funzionante in modo che attivando
il VPS non si provochino graf e/o usure anomale dello stesso.
- Per le operazioni di manutenzione e pulizia del VPS e della visiera vedere l’appo-
sita sezione del manuale d’uso del casco.
- Il trattamento scratch-resistant/fog-resistant del VPS permette di ridurre note-
volmente il problema dell’appannamento. Il perdurare di condizioni meteorologi-
che e/o ambientali particolarmente critiche possono tuttavia indurre l’insorgere
dell’appannamento e/o determinare la formazione di condensa sul VPS con con-
seguente riduzione della visibilità e/o della nitidezza delle immagini: in tal caso il
VPS deve essere disattivato.
- In caso di pioggia, il contatto diretto delle gocce d’acqua contro il VPS scra-
tch-resistant/fog-resistant determina una rapida diminuzione della nitidezza delle
immagini con conseguente scarsa visibilità: in tal caso il VPS deve essere disat-
tivato.
- Il particolare trattamento fog-resistant del VPS è in generale sensibile alle con-
dizioni di temperatura elevata o alle fonti di calore. In questo caso possono ve-
ricarsi contaminazioni causate dal contatto con altri materiali, riscontrabili con
la formazione di aloni o macchie. Si raccomanda, in queste situazioni (ad es.
nel bauletto in giornate molto calde), di assicurarsi che la visiera non rimanga a
contatto con altri materiali.
9. Smontaggio VPS
Per rimuovere lo schermo parasole dal casco aprire completamente la visiera del
casco e abbassare il VPS spingendo il cursore verso l’alto del casco no a ne corsa
(Fig. 13 B).
9.1. Afferrare la parte centrale dello schermo parasole, premerla leggermente verso
l’interno del casco e contemporaneamente tirare lo schermo parasole verso il
basso no ad estrarre il suo dente d’aggancio superiore dalla calotta (Fig. 14).
9.2. Afferrare la parte laterale sinistra dello schermo parasole, premerla leggermente
verso l’interno e tirarla poi verso la parte anteriore del casco (Fig. 15). Ripetere la
stessa operazione sul lato destro del casco.
10. Montaggio VPS
Per montare lo schermo parasole aprire completamente la visiera e spingere il curso-
re verso l‘alto del casco no a ne corsa (Fig. 13 B).
10.1. Inserire l’estremità sinistra dello schermo parasole nella guida laterale sinistra
sino all’aggancio del dente nella sede della calotta (Fig. 15). Ripetere poi la
stessa operazione sul lato destro del casco.
10.2. Premere leggermente lo schermo parasole verso l’interno del casco in prossimi-
tà del suo dente d’aggancio superiore e contemporaneamente spingerlo nella
sede ricavata tra calotta esterna ed interna (Fig. 14).
ATTENZIONE
- Vericare il corretto funzionamento del VPS spostando il cursore laterale sinistro
verso il basso (Fig. 13 A) e verso l’alto del casco (Fig. 13 B) no a ne corsa. Se
necessario ripetere le operazioni sopra descritte.
- Se i meccanismi di apertura e chiusura del VPS presentano malfunzionamenti o
danneggiamenti, rivolgersi ad un rivenditore autorizzato Grex.
- Non utilizzare il casco senza aver montato correttamente il VPS.
- Il VPS non sostituisce la protezione che offre la visiera, pertanto esso deve esse-
re sempre utilizzato solo quando la visiera del casco è abbassata.

10 11
IMBOTTITURA DI CONFORTO INTERNA AMOVIBILE
11. Smontaggio Imbottitura Interna di Conforto
Per smontare l’imbottitura di conforto alzare il VPS, aprire completamente la visiera e
rimuovere la mentoniera dal casco (vedi istruzioni precedenti).
11.1. Aprire il sottogola (vedi istruzioni relative); tirare la parte anteriore del guanciale
sinistro verso l’interno del casco per sganciarne il bottone di ssaggio dal tela-
ietto sinistro (Fig. 16). Ripetere la stessa operazione sul lato destro del casco.
11.2. Sganciare l’occhiello sinistro del paranuca dal telaietto sinistro (Fig. 17). Ripete-
re la stessa operazione sul lato destro del casco.
11.3. Sganciare la linguetta posteriore sinistra della cufa dal supporto ssato sulla
calotta interna in polistirolo deformando leggermente il bordo della calotta e
tirando leggermente l’imbottitura di conforto verso l’interno (Fig. 18). Successi-
vamente ripetere l’operazione anche con la linguetta centrale e con la linguetta
destra.
11.4. Slare le linguette laterali sinistra e destra dell’imbottitura di conforto dalle in-
tercapedini presenti tra i guanciali interni in polistirolo e i telai laterali interni alla
calotta esterna (Fig. 19).
11.5. Afferrare la zona frontale sinistra della cufa e tirarla verso l’alto per slare la
rispettiva linguetta della cufa dal supporto ssato alla calotta interna in poli-
stirolo (Fig. 20). Successivamente ripetere l’operazione anche con la linguetta
frontale centrale e con quella destra.
11.6. Slare la bandella sinistra del sottogola dall’asola del guanciale (Fig. 21). Ripe-
tere la stessa operazione sul lato destro del casco.
11.7. Togliere completamente la cufa dal casco.
12. Montaggio Imbottitura Interna di Conforto
12.1. Inlare la bandella sinistra del sottogola nell’asola del guanciale (Fig. 21). Ripe-
tere la stessa operazione sul lato destro del casco.
12.2. Inlare la linguetta frontale sinistra della cufa nella corrispondente sede pre-
sente sul supporto ssato alla calotta interna in polistirolo e spingerla verso il
basso sino ad agganciarla completamente. Ripetere poi l’operazione anche con
la linguetta centrale e con quella destra (Fig. 20).
12.3. Inlare le linguette laterali destra e sinistra della cufa spingendole nelle inter-
capedini presenti tra i guanciali interni in polistirolo e i telai laterali interni alla
calotta esterna (Fig. 19).
12.4. Inlare le linguette posteriori destra, centrale e sinistra della cufa nelle cor-
rispondenti sedi del supporto ssato sulla calotta interna in polistirolo defor-
mando leggermente il bordo della calotta (Fig. 18). Spingere le linguette sino ad
agganciarle completamente al supporto.
12.5. Agganciare l’occhiello sinistro del paranuca al telaietto sinistro (Fig. 17) veri-
cando che resti libero il foro centrale del telaio stesso. Premere l’imbottitura
del guanciale in corrispondenza del bottone di ssaggio posto sul suo retro
facendolo agganciare nella sede d’aggancio del telaio ssato alla calotta (Fig.
16) e tirare la bandella sinistra del sottogola verso l’interno del casco. Ripetere
le stesse operazioni sul lato destro del casco.
N.B. vericare il corretto montaggio della zona frontale della cufa alzando ed
abbassando il VPS il cui movimento deve risultare libero. In caso contrario ripe-
tere le operazioni 11.5 e 12.2.

10 11
ATTENZIONE
- Estrarre l’imbottitura interna di conforto solo quando è necessario pulirla o la-
varla.
- Non usare mai il casco senza aver rimontato completamente e correttamente la
sua imbottitura interna di conforto.
- Lavare delicatamente a mano ed utilizzare solo sapone neutro e acqua a 30° C
max.
- Risciacquare in acqua fredda ed asciugare a temperatura ambiente al riparo dal
sole.
- L’imbottitura interna di conforto non deve mai essere lavata in lavatrice.
- Il polistirolo interno è un materiale facilmente deformabile ed ha lo scopo di
assorbire gli urti mediante sua alterazione o parziale distruzione.
- Non modicare o alterare in alcun modo le componenti interne in polistirolo.
- Pulire le componenti interne in polistirolo utilizzando esclusivamente un panno
umido, quindi lasciare asciugare a temperatura ambiente al riparo dal sole.
- Per eseguire le operazioni sopra esposte non utilizzare mai attrezzi e utensili.
WIND PROTECTOR
(Disponibile di serie o come accessorio/ricambio).
Questo accessorio permette di migliorare le prestazioni del casco in particolari condi-
zioni d’utilizzo. Il paravento (Wind Protector) riduce spiacevoli inltrazioni d’aria sotto
il mento.
Vedi Fig. 22 per il montaggio e lo smontaggio.
SISTEMA DI VENTILAZIONE
L’esclusivo sistema di ventilazione, completo ed estremamente efcace, sfrutta tre
differenti gestioni dei ussi d’aria, attraverso una presa d’aria frontale, due prese d’a-
ria superiori e due estrattori d’aria posteriori che permettono un ottimale ricircolo
dell’aria all’interno del casco.
A Sistema completamente chiuso (Presa aria frontale chiusa e prese aria superiori
chiuse) (Fig. 23A)
B Sistema completamente aperto (Presa aria frontale aperta e prese aria superiori
aperte) (Fig. 23B)

12 13
CONGRATULATIONS... for the purchase of your new helmet.
This helmet has been designed and created to be a modern, high performing product,
able to satisfy the most demanding requests as for safety and comfort. This is made pos-
sible by the helmet design, its ergonomic, comfort and aerodynamic properties as well as
its practical and easy-to-use controls.
SAFETY AND NORMS OF USE
IMPORTANT
- Before using the helmet read this booklet and all enclosed documents carefully,
in that they contain very important indications on how to use the helmet easily
and safely.
- Failure to observe these instructions may reduce the protection provided by the
helmet and consequently put your safety at risk.
USING THE HELMET
- The helmet has been specically designed for motorcycle and motorbike use therefo-
re it must not be used for other purposes (or uses or scopes). Equal protection is not
guaranteed for any use different from the intended one.
- In case of accident, the helmet represents a protective element, which reduces injuries
and head damage. This notwithstanding, it cannot alone prevent serious and/or fatal
injuries due to the specic accident dynamics, therefore drive carefully.
- When driving any motorcycle, always wear the helmet properly fastened in order to
fully exploit its protection.
- Never wear scarves under the fastening system nor caps of any sort under the helmet.
- The helmet can mufe trafc noises. However make sure that you can hear essential
sounds such as horns and emergency vehicle sirens.
- Always keep the helmet away from heat sources like the exhaust mufer, the bag seat
or the interior of a vehicle.
- Do not modify nor damage the helmet or part of it for whatsoever reason. Use only ori-
ginal accessories and/or spare parts suitable for your specic helmet model.
- Damage resulting from accidental fall may not be visible; helmets, which received vio-
lent impacts, are to be replaced.
- In case of doubt about the helmet integrity and safety, avoid using it and contact an
authorized dealer to let it check.
CHOOSING THE HELMET
Size
- In order to determine the correct helmet size, try on helmets of different sizes and
choose the one which suits best the shape of your head and which you feel rm once
worn and fastened, thus ensuring a great comfort.
- Should the helmet be too big, it may slide down covering the eyes or turn slowly to
the side while riding.
- Keep it on for a few minutes and make sure there are no points of extreme pressure
that may cause pain or headache.
Taking off the helmet
- With the helmet on and the strap securely fastened, try to take the helmet off as shown
in Fig. A. In case of accident the different forces at stake and their various directions
may result in helmet rotations or they may even cause the helmet to slip off if it is not
securely fastened.

12 13
- The helmet should not rotate nor move on the head and should not slide off. Should
the contrary happen, adjust strap length or change helmet size. Repeat test.
Retention System
- The retention system (strap) is factory-adjusted at a standard length. Before use,
check that it is correctly pre-adjusted.
- Make sure the strap is properly fastened and tightened so as to keep the helmet
rmly in place. Anyway, before riding, make sure that the strap is well fastened
under the chin, as close as possible to the throat, but without being uncomfortable.
- The correct strap tension should allow normal breathing and swallowing, but without
leaving the space of a nger between strap and throat.
- Attention: the button which may be present on the strap only prevents its end from
apping once the strap has been fastened properly.
VISOR
- If the visor is damaged or deeply scratched causing reduced visibility, this means that
the protective treatment is probably damaged so the visor is to be replaced.
- The visor can be used only for the intended helmet model.
- Do not paint nor apply stickers.
MAINTENANCE AND CLEANING
- Damage resulting from accidental fall may not be visible; helmets, which received
violent impacts, are to be replaced.
- Attention: Helmet and visor may be seriously damaged by some common substances
without the damage being however visible. Use only lukewarm water and mild soap to
clean helmet and visor, and then let them dry at room temperature away from sunrays
and/or heat sources.
- Attention: Never use petrol, thinner, benzene, solvents nor other chemicals which
may:
• Irreparably damage the helmet;
• Modify optical properties, reduce mechanical ones and weaken the visor protective
treatment.
Fig. A
ENGLISH

14 15
INSTRUCTIONS FOR USE
The G4.2 PRO helmet is equipped with a removable protective chin guard and
can be used with different congurations (Fig. 1): with visor and chin guard,
with visor only, with chin guard only, without visor and chin guard. Using the
helmet in its full conguration - with chin guard fastened and visor pulled down
- denitely guarantees a higher level of protection if compared with the other
possible congurations.
The chin guard locking slot covers - which have to be assembled if the helmet is
used without chin guard - are included in the box. The side plates - which should
be assembled if the helmet is used without visor - are available on the product
itself, in the box or as accessory / spare parts - depending on the version of the
product.
VISOR
1. Visor Disassembly
1.1. Lift and release the left safety cover from its lateral latch (Fig. 2).
1.2. Turn the latch 90° towards the front of the helmet (Fig. 3).
1.3. Remove the latch from the helmet by pulling it outwards so that the latch inner
bayonet “A” comes out of its housing in the visor mechanism (Fig. 4).
1.4. Remove the visor by holding its side end and bending it outwards so that the
hole “B” of the visor comes unhooked from the mechanism and the inner pin “C”
comes out of its housing in the mechanism (Fig. 5).
1.5. Follow the same steps on the right side of the helmet.
When using the helmet without visor, follow the instructions below starting from
step 2.2.
2. Visor Assembly
2.1. Place the left part of the visor on the visor mechanism, paying particular attention
to insert the inner pin “C” and the hole “B” respectively in the lower part and in
the special circular projection of the mechanism (Fig. 5).
2.2. Place the left side latch on the corresponding mechanism and insert the inner
bayonet “A” in its housing in the side mechanism (Fig. 4).
NOTE: The left and right safety covers and lateral latches are different from each
other and are marked on their back as R (Right) and L (Left).
2.3. Turn the latch 90° towards the back of the helmet. Carry out this operation by
pushing the latch towards the inside of the helmet (Fig 3).
2.4. Fix the latch by positioning the safety cover and then pressing it against the latch
(Fig. 2). Make sure the cover is rmly attached to the latch.
2.5. Follow the same steps on the right side of the helmet.
WARNING
- Always ensure that the latches and the safety covers have been correctly assem-
bled and that they grip well to the side mechanisms.
- Make sure that the mechanisms are working properly. Open and close the visor,
making sure that the mechanisms hold it in the different positions. If necessary,
repeat the above-mentioned steps.
- Do not use the helmet if the visor, the lateral latches and the safety covers have
not been assembled properly.
- Should any of the side mechanisms fail or be damaged, please contact a Grex
authorized dealer.

14 15
REMOVABLE PROTECTIVE CHIN GUARD
3. Removable Protective Chin Guard Release
3.1. Open the visor completely.
3.2. Pull the right chin guard release lever upwards and at the same time remove
the chin guard from the helmet by pulling it outwards (Fig. 6). Perform the same
operation on the left side of the helmet.
WARNING
Every time you wish to release the chin guard to use your helmet in the jet congura-
tion, insert the right and left chin guard locking slot covers (chin guard covers) in the
slots on the right and left side frames and push them towards the inside of the helmet
until you hear a fastening click (Fig. 7).
NOTE: The left and right chin guard covers are different from each other and are
marked on their back as R (Right) and L (Left).
4. Removable Protective Chin Guard Fastening
Before fastening the chin guard to the helmet, remove the chin guard covers by per-
forming the following operations:
4.1. Open the visor completely.
4.2. Pull the right release lever upwards and at the same time remove the chin guard
cover by pulling it outwards (Fig. 6). Perform the same operation on the left side
of the helmet.
4.3. Insert the right end of the chin guard into the right side frame slot of the helmet
and press it towards the inside of the helmet until you hear a fastening click (Fig.
7). Perform the same operation on the left side of the helmet.
4.4. Make sure the chin guard is correctly fastened at both ends by gently pulling it
towards the outside of the helmet.
WARNING
- Never remove the semi-rigid inner padding of the chin guard.
- When the helmet is used without the removable protective chin guard, always
assemble the chin guard covers supplied.
- If in doubt on how the manual chin guard release device works, please contact a
Grex dealer.
•
(Available as standard or accessory/spare part).
5. Inner Visor PINLOCK®Assembly
5.1 Disassemble the visor (see instructions above).
5.2 Make sure that the inner surface of the visor is clean and check that the pin ad-
justment external levers are turned inwards (Fig. 10).
5.3 Place the PINLOCK®inner visor on the visor.
WARNING: The silicone-sealed prole of the PINLOCK®inner visor must be in
contact with the inner surface of the visor.
5.3 Insert one side of the PINLOCK®inner visor on one of the visor pins and hold it
in position (Fig. 8).
5.4 Widen the visor and fasten the other side of the PINLOCK®inner visor to the
second pin (Fig. 9).
5.5 Release the visor.

16 17
5.6 Remove the protective lm from the PINLOCK®inner visor and check that the
entire silicone-sealed prole of the inner visor adheres to the visor.
5.7 Fit the visor on the helmet (see instructions above).
Checking and Adjusting the PINLOCK®Inner Visor Stretch
Check the correct PINLOCK®inner visor assembly by opening and closing the visor
and making sure that they do not move.
If the PINLOCK®inner visor is not tightly xed to the visor, move both external adjust-
ment levers upwards to increase the stretch (Fig. 10). This operation must be carried
out gradually. The maximum stretch is achieved when the pin adjustment external
levers are turned outwards.
WARNING
- The presence of dust between the two visors may produce scratches on both
surfaces.
- Scratched PINLOCK®visors and inner visors may cause reduced visibility and
must therefore be replaced.
- Regularly check the correct stretch of the PINLOCK®inner visor to prevent the it
from moving and scratching both surfaces.
- If the helmet visor fogs up and/or condensation forms between the visors, check
that the PINLOCK®inner visor is both correctly assembled and stretched.
- An excessive and early stretch of the PINLOCK®inner visor may result in exces-
sive adherence against the visor surface and/or permanent deformations with
subsequent inability to correctly perform any following adjustments.
- Intense sweating /breathing, the use under particular weather conditions (low
temperatures, and/or high humidity and/or sudden changes in temperature and/
or heavy rain) and/or intense and prolonged use may affect the performance of
the PINLOCK®inner visor and cause fogging or formation of condensation. In
such cases, after using the helmet and to restore the system efciency, remove
the PINLOCK®inner visor from the helmet visor and let it dry with dry and warm
air. The same procedure must be applied to the helmet, in order to dry out humid-
ity in case it has formed up as a consequence of the conditions described above.
6. Inner Visor PINLOCK®Disassembly
6.1. Remove the visor equipped with the Pinlock®inner visor (see instructions above).
6.2. Widen the visor and release the Pinlock®inner visor from the pins (Fig. 9).
6.3. Release the visor.
Maintenance and Cleaning
- Remove the PINLOCK®inner visor from the visor. Using a damp and soft cloth,
gently clean it with neutral liquid soap. Remove the soap under running water.
- Dry the inner visor with dry and warm air without wiping it.
- To keep the features of the inner visor in good conditions over time, let the helmet
dry in a ventilated and dry place with the visor open after use. Keep it away from
heat sources and store it in a place away from direct light.
- Do not use solvents or chemical products.
SIDE PLATES
(Available as standard or accessory/spare part).
When the G4.2 PRO helmet is congured without visor, assembling the side plates in
its place is recommended.

16 17
7. Side Plates Assembly
To assemble the side plates, rst remove the safety cover, the lateral latches and - if
assembled - the visor (see instructions above).
7.1. Push the left visor mechanism deformable fastening “D” upwards until it is out of
its shell seat and then remove the mechanism from the helmet, paying particular
attention not to lose the visor mechanism springs on its back (Fig. 11).
7.2. Insert the teeth of the left side plate in their side seats on the shell, then push the
plate towards the inside of the helmet near the deformable fastening “E” (Fig. 12).
NOTE: The left and right side plates are different from each other and are marked
on their back as R (Right) and L (Left).
7.3. Follow the same steps on the right side of the helmet.
8. Side Plates Disassembly
8.1. Push the left side plate deformable fastening “E” upwards until it is out of its shell
seat, then remove the plate from the helmet (Fig. 12).
8.2. Insert the teeth of the left visor mechanism in their side seats on the shell,
then push towards the inside of the helmet near the deformable fastening “D”
(Fig. 11).
NOTE: The left and right visor mechanisms are different from each other and are
marked on their back as R (Right) and L (Left).
8.3. Follow the same steps on the right side of the helmet.
8.4. If you wish to assemble the visor, see the assembly instructions above.
8.5. Then assemble the lateral latches and the safety covers on both sides of the
helmet as indicated in the assembly instructions above.
WARNING
- When using the helmet in a conguration without visor, always assemble the
lateral latches and the safety covers supplied. Alternatively, it is recommended
to assemble the side plates.
- Do not use the helmet if the visor, the side plates or the lateral latches and their
safety covers have not been assembled properly.
- Should any of the side mechanisms, latches or any of the safety covers fail or be
damaged, please contact a Grex authorized dealer.
VISION PROTECTION SYSTEM (VPS)
The exclusive inner VISION PROTECTION SYSTEM (VPS) is a LEXAN™(*) polycar-
bonate moulded sunscreen with scratch-resistant/fog-resistant treatment. Very sim-
ple and practical to use. Just lower to activate it or lift to remove it from the eld of
vision. It is useful in all sorts of situations, both on long journeys out of town and
shorter town trips.
Moreover, the innovative fastening system allows you to assemble and disassemble
the sunscreen without the need for any tools for ordinary maintenance and cleaning
operations.
VPS Operation
The VPS mechanism allows to activate the sunscreen by simply lowering it until it
partially covers the visor eld of vision. In this way, the desired light transmittance
reduction is achieved. At any time, without operating the visor, the VPS can be deac-
tivated with a simple movement and easily lifted up to restore the normal conditions
(*) LEXAN is a trademark of SABIC.

18 19
of visibility and protection guaranteed by the approved helmet visor.
To deactivate the VPS, push the side slider completely downwards (Fig. 13 A).
To activate the VPS, push the side slider completely upwards (Fig. 13 B).
Precautions for Use
The current approval standards (ECE22-05) state that the visor minimum light
transmittance levels must be greater than 80% when riding at night and not less
than 50% when riding during the day. For this reason, when riding during the day
under particularly bright weather conditions, e.g. very strong sunlight caused by
high intensity and/or incidence of the sunbeams, the use of sunglasses - which
have a transmittance much lower than 50% - turns out to be advisable, if not
absolutely necessary, to reduce eye fatigue on long trips. Sunglasses also reduce
the risk of direct dazzling as opposed to the use of mere approved helmet visor.
However, the use of sunglasses makes it difcult to perform emergency manoeu-
vres when the maximum visibility range of the visor must be quickly restored. Just
think, for example, of what happens when you enter a tunnel or when unexpected
changes in environmental brightness occur. Thanks to its operating mechanism,
the VPS makes these operations much easier.
WARNING
- Use the special slider to activate/deactivate the VPS; do not deactivate the
VPS by handling it directly.
- The VPS can only be used during the day and under the environmental condi-
tions described before.
- At night and/or in conditions of poor visibility, the VPS must be deactivated.
- Always check that the VPS is properly positioned according to different weath-
er/environmental conditions and/or the above-mentioned recommendations
for use.
- We recommend using the VPS only and solely together with the approved
standard visor, which has a transmittance value greater than 80%.
- The VPS does not replace the protection guaranteed by the visor.
- Always make sure that the VPS is clean and that it is operating properly in or-
der to avoid scratches and/or anomalous wear on it every time it is activated.
- As for VPS and visor maintenance and cleaning operations, please refer to the
appropriate section in the helmet user’s manual.
- The VPS scratch resistant/fog-resistant treatment highly reduces fogging.
Protracted periods of adverse weather and/or environmental conditions might
cause fogging and/or formation of condensation on the VPS, which entails a
reduction of visibility and/or sharpness of vision: in this case, deactivate the
VPS.
- In case of rain, the direct contact of raindrops with the scratch resistant/
fog-resistant treated VPS quickly reduces sharpness of vision, thus causing
scarce visibility: in this case, deactivate the VPS.
- The special VPS fog-resistant treatment is usually sensitive to high temper-
atures or heat sources. In this case, contaminations caused by contact with
other materials might occur. These contaminations will cause marks and
stains to develop. In these cases (e.g. when the helmet is kept in the top case
on hot days), it is recommended to make sure the visor is not touching other
materials.

18 19
9. VPS Disassembly
To remove the sunscreen from the helmet, open the visor completely and lower the
VPS by pushing the slider completely upwards (Fig. 13 B).
9.1. Hold the central part of the sunscreen, press it slightly towards the inner part of
the helmet and simultaneously pull the sunscreen downwards until its upper grip
pawl has been removed from the shell (Fig. 14).
9.2. Hold the left side part of the sunscreen, push it slightly towards the inside and
then pull it towards the front of the helmet (Fig. 15). Repeat the same operation
on the right side of the helmet.
10. VPS Assembly
To remove the sunscreen, open the visor completely and push the slider completely
upwards (Fig. 13 B).
10.1. Insert the sunscreen left end into the left side guide until the grip pawl is hooked
into the shell housing (Fig. 15). Repeat the same operation on the right side of
the helmet.
10.2. Press the sunscreen slightly towards the inside of the helmet near its upper grip
pawl while pushing it in the seat between the outer and inner shells (Fig. 14).
WARNING
- Push the left side slider completely downwards (Fig. 13 A) and upwards (Fig.
13 B) to make sure that the VPS works properly. If necessary, repeat the
above-mentioned steps.
- If the VPS opening/closing mechanisms are damaged or not working properly,
please contact a Grex authorized dealer.
- Do not use the helmet if the VPS has not been assembled properly.
- Since the VPS does not assure you the same protection as the one provided by
the visor, it has to be used only when the helmet visor is lowered.
REMOVABLE INNER COMFORT PADDING
11. Inner Comfort Padding Disassembly
To remove the inner comfort padding, lift the VPS, open the visor completely
and remove the chin guard from the helmet (see instructions above).
11.1. Open the chin strap (see specic instructions) and pull the front of the left cheek
pad towards the inside of the helmet to undo the snap fastener from the left
frame (Fig. 16). Repeat the same operation on the right side of the helmet.
11.2. Release the roll neck left eyelet from the left frame (Fig. 17). Repeat the same
operation on the right side of the helmet.
11.3. Release the liner left rear ap from the support xed to the inner polystyrene
shell by slightly deforming the shell edge and slightly pulling the comfort pad-
ding towards the inside (Fig. 18). Then repeat the same steps to remove the
central ap as well as the right ap.
11.4. Remove the left and right side aps of the comfort padding from the cavities
between the inner polystyrene cheek pads and the outer shell inner side frames
(Fig. 19).
11.5. Hold the left front part of the liner and pull it upwards in order to remove the
corresponding liner ap from the support xed to the polystyrene inner shell
(Fig. 20). Then repeat the same steps for the central front and right ap.
11.6. Remove the chin strap left band from the cheek pad slot (Fig. 21). Repeat the
same operation on the right side of the helmet.

20 21
11.7. Completely remove the liner from the helmet.
11.5. Hold the left front part of the liner and pull it upwards in order to remove the
corresponding liner ap from the support xed to the polystyrene inner shell
(Fig. 20). Then repeat the same steps for the central front and right ap.
11.6. Remove the chin strap left band from the cheek pad slot (Fig. 21). Repeat the
same operation on the right side of the helmet.
11.7. Completely remove the liner from the helmet.
12. Inner Comfort Padding Assembly
12.1. Insert the chin strap left band in the cheek pad slot (Fig. 21). Repeat the same
operation on the right side of the helmet.
12.2. Insert the left front ap of the liner into its seat on the support xed to the pol-
ystyrene inner shell and push it downwards until it is completely locked. Follow
the same steps for the central and right ap (Fig. 20).
12.3. Insert the right and left side aps of the liner, pushing them into the cavities
between the inner polystyrene cheek pads and the outer shell inner side frames
(Fig. 19).
12.4. Insert the rear right, central and left aps of the liner into the corresponding
seats on the support xed to the polystyrene inner shell by slightly deforming
the shell edge (Fig. 18). Push the aps until they are fully hooked onto the sup-
port.
12.5. Hook the roll neck left eyelet to the left frame (Fig. 17), making sure that the
frame central air intake is free. Push the cheek pad padding in line with the snap
fastener on its back by fastening it to the attachment seat of the frame xed to
the shell (Fig. 16). Then pull the chin strap left band towards the inside of the
helmet. Follow the same steps on the right side of the helmet.
NOTE: Check the correct assembly of the liner front area by lifting and lowering
the VPS. These movements should be smooth. If this is not the case, repeat
steps 11.5 and 12.2.
WARNING
- Remove the inner comfort padding only when cleaning or washing is required.
- Never use the helmet before completely and correctly reassembling its inner
comfort padding.
- Delicately hand-wash in lukewarm water (max. 30° C) and neutral soap.
- Rinse with cold water and allow drying at room temperature, away from direct
sunlight.
- Never machine-wash the inner comfort padding.
- The inner polystyrene is an easily deformable material. It is apt to change or get
partially destroyed to help absorb shocks.
- Do not modify or alter the helmet’s internal polystyrene components in any way.
- Clean the inner components with a damp cloth only and allow it to dry at room
temperature away from direct sunlight.
- Never use tools or equipment of any sort to carry out the steps described
above.
WIND PROTECTOR
(Available as standard or accessory/spare part).
This accessory allows improved helmet performance under certain conditions of use.
The Wind Protector reduces unpleasant inltrations of air under the chin.
See Fig. 22 for assembly and disassembly.
Table of contents
Languages:
Other Grex Motorcycle Accessories manuals
Popular Motorcycle Accessories manuals by other brands

KTM Power Parts
KTM Power Parts 69109945000 Information

130R
130R ARIDA user manual

hepco & becker
hepco & becker 630548 00 01 Mounting instructions

Lincoln Electric
Lincoln Electric K3190-1 Operator's manual

Dr. Jekill & Mr. Hyde
Dr. Jekill & Mr. Hyde smartbox 2 manual

Motion Research
Motion Research SportVue MC1 manual