manuals.online logo
Brands
  1. Home
  2. •
  3. Brands
  4. •
  5. Grifco
  6. •
  7. Controllers
  8. •
  9. Grifco E138G User manual

Grifco E138G User manual

grifco.com.au
grifco.co.nz
WIRELESS WALL CONTROL – MODEL E138G
WARNING
For use with eDrive 2.0 with radio-on-board.
To prevent possible SERIOUS INJURY or DEATH from a moving door:
•Use Wireless Entry Device within sight of the door and out of reach of children
•ALWAYS keep remote controls out of reach of children. NEVER permit children to operate, or play with remote
controls.
•Acvate door ONLY when it can be seen clearly, is properly installed, and there are no obstrucns to the door travel.
•ALWAYS keep the door in sight un completely closed. NEVER permit anyone to cross the path of a moving door
•NEVER allow small children near baeries. If baery is swallowed, immediately nofy your doctor.
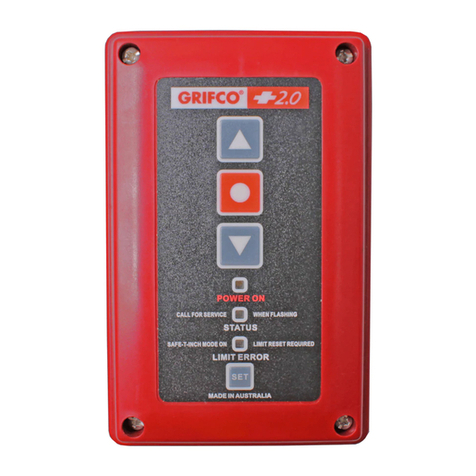
GRIFCO FRONT PANEL
PROGRAMMING
1. UP - Moves the door upwards
2. DOWN - Moves the door downwards
3. STOP- Stops the door
4. SET - 
5. POWER ON - Shows when the unit is
mains powered
6. STATUS - Shows the status of the unit
7. LIMIT ERROR – When lit indicates
limits are not set
TOP
Buon
LOWER
Buon
To program the E138G Wireless Entry Device ensure the radio lock
is removed then perform the following steps:
1. Press and hold the SET buon on the GRIFCO front panel,
then
2. While holding the SET buon, press the STOP buon 5 mes
(the greenstatus light will light then connue ashing,
indicang learn mode)
3. Let go of the SET buon
4. Press the E138G TOP buon
5. Then press the E138G LOWER 
6. The orange LIMIT ERROR light will ash each me to
acknowledge the buon has been pressed.
7. Press STOP buon on the GRIFCO front panel (the green light
will connue to ash).
8. Press the E138G LOWER buon again
9. The green light will go out indicang exit learn mode.
10. Install the RADIO LOCK key on the eDrive2 board to prevent
any further wireless entry devices being learned.
E138G
Wireless Wall
Control
OPERATION
The E138G TOP bun can be used to TOGGLE the acon ofthe door between close / stop/ openif anobstrucon detecon device is installed,
or stop/ openonly if no obstrucon detecon device is installed.
The E138G LOWER bun can be used to CLOSE the door. If no obstrucon detecon device is installed, the LOWER key must remain pressed to complete the door close sequence.
+
Chamberlain Australia Pty Limited / Chamberlain NewZealand (Chamberlain), the manufacturer of Merlin®automac garage door openers, warrants to the original consumer purchaser of this product that it is free from
defect in materials and/or workmanship for a period of 1 year from the date of purchase. Chamberlain is commied to manufacturing and supplying high quality goods. As part of this commitment, we seek to provide
reliableserviceand support for our goods and are pleased to provide you, the original purchaser, with this Chamberlain Limited Warranty. The benets given to you under this Chamberlain Limited Warranty are in
addion to any rights and remedies that you may have under Australian or New Zealand consumer protecon laws. Our goods come with guarantees that cannot be excluded under the Australian Consumer Law, or
New Zealand Consumer Guarantees Act 1993. You are entled to a replacement or refund for a major failure and for compensaon for any other reasonably foreseeable loss or damage. You are also entled to have for
compensaon for any other reasonably foreseeable loss or damage. You are also entled to have the goods repaired or replaced if the goods fail to be of acceptable quality and the failure does not amount to a major
failure.


CR2032
Use a screwdriver
blade to pry open the
case as shown
Insert replacement
batteries positive side
up. Replace the
batteries with only
CR2032 coin cell
batteries.
Replace cover.
+
+
Remove the old
battery. Dispose of
old batteries
properly.
THE REMOTE CONTROL BATTERY
ONE YEAR LIMITED WARRANTY
REPLACEMENT PARTS
114A4666C




of the body, it can cause severe or fatal injuries in 2 hours or less.

keep away from children.





be dangerous.

INSTALLATION



• Replace the front cover plate.


+
©2021 The Chamberlain Group, Inc

Other Grifco Controllers manuals

Grifco D-DRIVE DDC-22 User manual

Grifco

Grifco D-DRIVE DDC-22 User manual

Grifco C10A User manual

Grifco

Grifco C10A User manual

Grifco DDEB-1R User manual

Grifco

Grifco DDEB-1R User manual

Popular Controllers manuals by other brands

Siemens GBB 1 Series Mounting instructions

Siemens

Siemens GBB 1 Series Mounting instructions

Dive Gear Express DGX Gears D6 Second Stage Service Manual

Dive Gear Express

Dive Gear Express DGX Gears D6 Second Stage Service Manual

Tinycontrol LANKONT-001 manual

Tinycontrol

Tinycontrol LANKONT-001 manual

DS18 BTRC-R owner's manual

DS18

DS18 BTRC-R owner's manual

Unitronics Vision V130-33-R34 installation guide

Unitronics

Unitronics Vision V130-33-R34 installation guide

LOVATO ELECTRIC ATL10 manual

LOVATO ELECTRIC

LOVATO ELECTRIC ATL10 manual

Koheron CTL200-0 user guide

Koheron

Koheron CTL200-0 user guide

NEC N8103-91 user guide

NEC

NEC N8103-91 user guide

Cleveland Steam Oven Network installation guide

Cleveland

Cleveland Steam Oven Network installation guide

Exi HALO installation manual

Exi

Exi HALO installation manual

Jung FAJ 6 UP operating instructions

Jung

Jung FAJ 6 UP operating instructions

Havaco HRX quick start guide

Havaco

Havaco HRX quick start guide

Effigy Labs Control Pedal Quick Start Guide and Limited Warranty

Effigy Labs

Effigy Labs Control Pedal Quick Start Guide and Limited Warranty

Siemens GXD 31.1 Series Mounting instructions

Siemens

Siemens GXD 31.1 Series Mounting instructions

Aerotech A3200 Series Hardware manual

Aerotech

Aerotech A3200 Series Hardware manual

opticis IPVDS-700-ED user manual

opticis

opticis IPVDS-700-ED user manual

Sharp JW10 Driver guide

Sharp

Sharp JW10 Driver guide

Siemens OpenAir GND12x.1 Series Installation instructions manual

Siemens

Siemens OpenAir GND12x.1 Series Installation instructions manual

manuals.online logo
manuals.online logoBrands
  • About & Mission
  • Contact us
  • Privacy Policy
  • Terms and Conditions

Copyright 2025 Manuals.Online. All Rights Reserved.