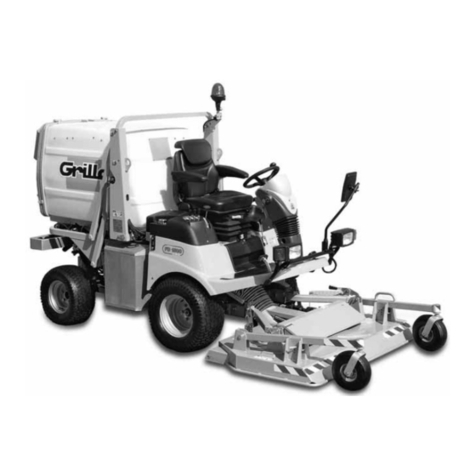
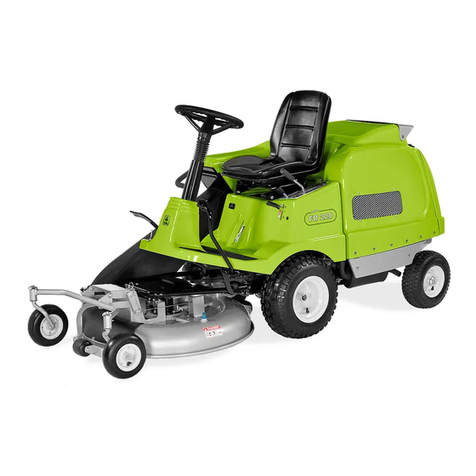
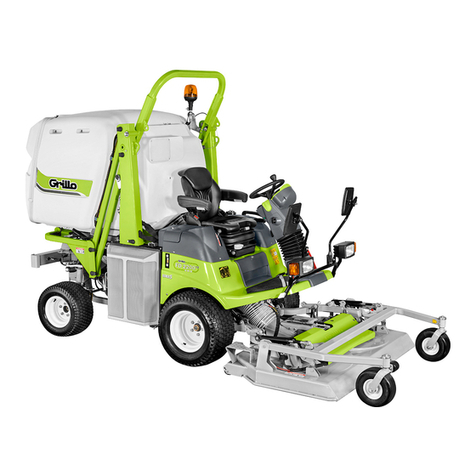
Grillo FD 220 R User guide

EDIZIONE 2008

INDEX / INDICE / CONTENU / INHALT / INDICE
GB
Safety regulations ............................................................................................................................................ p. 2
FD 220 R Hydrostatic Mower ........................................................................................................................... p. 7
Identification and after-sales and service ........................................................................................................ p. 8
Technical specifications ................................................................................................................................... p. 9
Putting the machine into service ...................................................................................................................... p. 9
Instructions for use ........................................................................................................................................... p. 10
Maintenance and lubrication............................................................................................................................. p. 11
Troubleshooting guide ...................................................................................................................................... p. 12
Noise level – vibration level .............................................................................................................................. p. 14
Description of the controls - pictures ............................................................................................................... p. 47
Scheduled service ............................................................................................................................................ p. 52
I
Norme antinfortunistiche................................................................................................................................... p. 2
Rasaerba idrostatico FD220 R ........................................................................................................................ p. 15
Identificazione e assistenza ............................................................................................................................. p. 16
Caratteristiche tecniche ................................................................................................................................... p. 17
Messa in opera della macchina ....................................................................................................................... p. 17
Istruzioni d’uso.................................................................................................................................................. p. 17
Manutenzione e lubrificazione .......................................................................................................................... p. 19
Guida all’identificazione degli inconvenienti ..................................................................................................... p. 20
Rumorosità – vibrazioni .................................................................................................................................... p. 22
Descrizione dei comandi - figure ..................................................................................................................... p. 47
Manutenzione programmata ............................................................................................................................ p. 53
F
Règles de sécurité générale ............................................................................................................................. p. 2
Tondeuse hydrostatique FD220 R ................................................................................................................... p. 23
Identification et assistance ............................................................................................................................... p. 24
Caractéristiques techniques ............................................................................................................................. p. 25
Mise en service de la machine ......................................................................................................................... p. 25
Mode d’emploi .................................................................................................................................................. p. 25
Maintenance et graissage ................................................................................................................................ p. 27
Procédure pour l’identification des inconvénients ............................................................................................ p. 28
Bruit – vibrations .............................................................................................................................................. p. 30
Description des commandes - figures ............................................................................................................ p. 47
Entretien programmé ....................................................................................................................................... p. 54
D
Sicherheitsvorschriften ..................................................................................................................................... p. 2
Hydrostatischer Rasenmäher FD220 R ........................................................................................................... p. 31
Identifikation der Maschine und Kundendienst ................................................................................................ p. 32
Technische Daten – Produktbeschreibung ...................................................................................................... p. 33
Inbetriebnahme der Maschine ......................................................................................................................... p. 33
Betriebsanleitung ............................................................................................................................................. p. 33
Wartung und Schmieren .................................................................................................................................. p. 35
Liste der häufigsten Störungen und deren Behebung ..................................................................................... p. 36
Geräuschemission - Vibrationen ...................................................................................................................... p. 38
Beschreibung der Steuerung - Bilder ............................................................................................................... p. 47
Programmierte Wartung ................................................................................................................................... p. 55
E
Normas de seguridad ....................................................................................................................................... p. 2
Cortacésped hidrostático FD 220 R ................................................................................................................. p. 39
Identificación y asistencia ................................................................................................................................ p. 40
Caracteristícas técnicas.................................................................................................................................... p. 41
Puesta en marcha de la máquina ..................................................................................................................... p. 41
Instrucciones para el uso.................................................................................................................................. p. 41
Mantenimento y lubricación .............................................................................................................................. p. 43
Guía para identificar los inconvenientes .......................................................................................................... p. 44
Niveles del ruido - vibración ............................................................................................................................. p. 46
Descripción mandos - fotos ............................................................................................................................. p. 47
Mantenimiento programado ............................................................................................................................. p. 56
2

3

4

5
WARNING! SHARP PARTS. Keep hands and feet away. Do not operate the mower over gravel
or foreign bodies which may be sucked up and ejected by the blades, generating a danger.
Keep people away. remove the key and read the instruction manual before attempting to carry
out any maintenance or repairs to the machine.
ATTENZIONE! ORGANO TAGLIENTE. Tenere lontano mani e piedi. Non lavorare col rasaerba
sopra alla ghiaia o corpi estranei che possono essere aspirati e centrifugati dalle lame risultando
molto pericolosi, tenere lontano le persone. Togliere la chiave e leggere le istruzioni prima di
effettuare qualsiasi operazione di manutenzione e riparazione.
ATTENTION! ORGANE TRANCHANT. Eloigner les mains et les pieds. Ne pas utiliser la tondeuse
sur le gravier ou sur des corps qui peuvent être aspirés et centrifugés par les lames et devenir
très dangereux. Les personnes doivent se trouver à une certaine distance. Enlever la clé et
lire les instructions avant toute opération de maintenance et de réparation.
ACHTUNG! SCHARFE KLINGEN. Hände und Füsse fernhalten. Beim Mähen nicht über Schotter,
Steine oder andere Fremdkörper fahren, da diese durch die Drehbewegung der Messer
angesaugt und weggeschleudert werden können (Verletzungsgefahr). Nicht in der Nähe von
anderen Personen mähen. Vor jedem Wartungs- bzw. Reparatureingriff den Startschlüssel
abnehmen und die Gebrauchsanleitung durchlesen.
¡PELIGRO! ÓRGANO CORTANTE. Mantener lejos los pies y las manos. No limpiar la herramienta
con el motor en marcha, ¡Peligro! Expulsión de objetos: mantener alejadas las personas.
Atención: quitar la llave y leer las instrucciones antes de efectuar cualquier operación de
mantenimiento o reparación.
DANGER! Machine rollover:
Do not use this machine on slopes greater then 12,5°(22%).
PERICOLO! Ribaltamento della macchina:
Non usare questa macchina su pendii superiori ai 12,5°(22%).
DANGER! Renversement de la machine:
Ne pas utiliser cette machine sur des pentes supérieures à 12,5°(22%).
GEFAHR! Umstürzen der Maschine:
Die Maschine nicht an Hängen mit einer Neigung über 12,5°(22%) einsetzen.
¡PELIGRO! Volcado de la máquina:
No utilizar esta máquina en pendientes superiores a 12,5°(22%).
MAX 12,5°(22%)


7
FD 220 R HYDROSTATIC MOWER
Dear Customer,
Thank you for purchasing our Grillo FD 220. We are confident that this machine will fully satisfy all your
requirements.
To use and maintain the mower at its best, we urge you to read and observe carefully the instructions given in this
handbook; this will ensure the best possible results and will also safeguard your investment. Please keep this
handbook in a safe place. It should accompany the machine throughout its working life.
CAUTION! Read carefully before starting the engine. The following warnings are
important for operator safety!
WARNINGS
Caution is the main safeguard in preventing accidents!
We urge you to read the following warnings for use of the mower before starting any work at all.
Improper use of the mower and its equipment can be dangerous; to minimise risks, always observe the necessary
precautions set out below:
1) Read the whole of this manual before turning on and using the mower for the first time.
2) Pay particular attention to the warnings and safety labels provided around the mower.
3) The mower blade is very dangerous when rotating; never place hands or feet underneath the mower deck.
4) Before allowing others to use the machine, make sure they are aware of the safety precautions and how it is
used.
5) Before starting the machine, make sure there is no-one nearby, especially small children.
6) Before reversing the machine, make sure there are no people or obstacles in the way.
7) Do not allow passengers to ride on the machine.
8) Do not operate the machine when tired or after drinking alcohol.
9) Check the condition of the ground before mowing. Make sure there are no stones, sticks or other objects which
could be run over and become very dangerous if flung outwards.
10) Before starting work, change into suitable working clothes, gloves, boots and goggles.
11) Before getting off the mower, stop the engine, disengage the PTO, remove the ignition key and lower the deck
to its lowest position.
12) Always drive at low speed along uneven paths.
13) Reduce speed when travelling downhill.
14) Do not allow underage children to use the mower; use by anyone under 16 is prohibited.
15) Do not reverse at high speed.
16) Sharp turns at high speed are dangerous.
17) Always operate the drive pedal smoothly; sudden accelerations are dangerous.
18) To prevent toxic gas emissions, do not run the engine in enclosed places.
19) Fill the tank with fuel before starting the engine. Only refuel outdoors, always stop the engine, keep
away from sparks or naked lights, and do not smoke!
Do not remove the cap from the fuel tank when the engine is hot.
Always replace the fuel tank and container caps securely.
20) Do not allow any fuel spillage and after filling the tank wipe away any spilled fuel before starting the engine.
21) Do not use the mower near to ditches or embankments which may collapse under the weight of the machine,
especially when the surface is loose or wet.
22) Always turn slowly when driving downhill.
23) Do not tamper with or disable the safety devices.
24) Do not use the mower on gravel, which may be very dangerous if drawn in and flung out by the blades.
25) If you have children, hide the ignition keys when the machine is not in use.
26) Never attempt any adjustments or cleaning with the engine running.
27) Never allow anyone to check the machine while you are seated at the controls with the engine running.
28) Never place heavy loads on the seat; the ignition safety device could become disengaged.
29) The user is always responsible for any damage caused to third parties.
30) Any improper use whatsoever will invalidate the warrantyandexoneratethemanufacturerfromallresponsibility.
31) Misshapen or damaged blades must always be replaced, never just repaired.
32) Always use original Grillo spares and accessories.

8
33) Only work in sunlight or under effective artificial lighting.
34) Do not stop when working up or down slopes.
35) If the fuel tank has to be emptied, only do so outdoors.
36) WARNING: to avoid the risk of fire, keep the engine bay, exhaust pipe, discharge manifolds, battery, tank area
and fuel pipes free of grass, leaves, dirt, etc..
37) Do not store the machine inside any building where the engine fumes can reach naked flames, sparks, or bare
electrical wires.
38) Replace worn or damaged exhaust pipes.
39) Only store fuel in containers specifically built for the purpose.
40) Take great care when working close to a road.
41) Do not change the engine settings, especially the engine rpm.
42) If you hit an obstacle, stop the engine, disconnect the plugs (petrol-engine version), remove the ignition key
and inspect the mower; if the machine vibrates, have it repaired.
43) Allow the engine to cool before putting the machine away in a closed environment.
IDENTIFICATION AND AFTER-SALES AND SERVICE
IDENTIFICATION
The Grillo FD 220 R has an ID plate showing the serial number, located
underneath the seat.
AFTER-SALES SERVICE
This handbook provides the instructions for using the mower. For correct servicing, contact your local dealer.
SPARE PARTS
Original spare parts should always be used, as they are the only guarantee of safety and interchangeability.
When ordering, always state the machine’s serial number and the code number of the spare part required. For
engine parts, follow the instructions provided in the specific manual.
WARRANTY
The warranty is subject to the terms and conditions stated on the card.
As regards the engine and battery, the individual manufacturers’ conditions apply.
RECOMMENDED SPARE PARTS TO BE KEPT TO HAND
1 (one) set of mower blades
1 (one) set of belts
1 (one) engine air filter
1 (one) engine oil filter
1 (one) throttle cable
1 (one) choke cable
2 (two) system fuses
HOW TO ORDER SPARE PARTS
Always state the machine’s serial number and the code number of the spare part required. Contact your local Grillo
service centre. For further information, our address is:
GRILLO S.p.A.
Via Cervese 1701 - 47023 CESENA (FC) Italy
Tel. 0039.0547.633.111 / Fax 0039.0547.632.011
FD 220 R
223 kg.
10/3200
tipo
serie
massa c.a.
anno
KW/giri minuto
S.p.A.
CESENA - ITALY
03573
303001
0000

9
TECHNICAL SPECIFICATIONS
ENGINE: Briggs & Stratton 13.5 HP single-cylinder, synchro-balanced (AVS) - Vanguard OHV 16 HP double-cylinder.
IGNITION: electric with 12 V battery.
GEARBOX: hydrostatic transmission with differential.
SPEED: 0 -9 km/h with pedal control.
CUTTING DECK: frontal, 1 blade of 800 mm, total width 860 mm.
STEERING SYSTEM: steering-wheel with pedal-controlled forward and reverse travel.
CUTTING HEIGHT: 7 settings, from 30 to 90 mm.
DRIVING SEAT: adjustable with knob, spring-mounted.
TYRES: front: 16 x 7.50-8; rear: 13 x 5.00 - 6.
FUEL TANK: 7 lt - FUEL LOW WARNING: 1 lt.
PARKING BRAKE: disc type.
INTERNAL STEERING DIAMETER: Ø mm 350.
LENGTH: 2345 mm - WIDTH: 860 mm - HEIGHT: 1140 mm.
HOURLY MOWING CAPACITY: 4000 m2/h.
WEIGHT: 223 kg.
GASS CATCHER: 200 litres.
ACCESSORIES: mulching kit, side discharging kit, toothed wheels.
PUTTING THE MACHINE INTO SERVICE
1) Check that the machine is complete and has not been damaged in transit.
2) Check the engine oil level.
3) Check the tyre pressure:
Front wheels 16 x 7.50 - 8 (1.2 BAR)
Rear wheels 13 x 50 - 6 (1.2 BAR)
4)
Check the battery voltage periodically, ensuring that it does not drop below 12 Volts. If this occurs, charge the battery.
IMPORTANT!!! When fitting the battery, ensure that the poles are correctly connected. Never start the engine
if the battery is not connected.
5) Caution! The expansion tank of the hydrostatic transmission must be empty, the level is 12 mm below the bottom
of the expansion tank fig. 22. No procedures are required.
BATTERY - WARNING!
The gases released by the battery are explosive, keep it away from sparks or naked lights. Check the terminals
periodically and keep them greased with Vaseline.
RUNNING-IN . WARNING!!
Change the engine oil after the first 5 hours’ operation.
Check that there are no oil leaks or loose screws, especially the blade fixing screws.
Adjust the tension of the PTO belt (9, fig. 2).
INSTRUCTIONS FOR USE
Before starting the engine, always check that:
– the hydrostatic transmission cooling fins are clean;
– the engine cooling breather vents are unobstructed;
– the engine oil is at the correct level (fig. 4);
– the speed selection pedal is not depressed (fig. 1 n. 1);
– the PTO lever is in the neutral position (fig.1 n. 2);
– the air filter is clean (fig. 3), to inspect the engine lift the grass catcher;
– the cutting deck is clean.
Fill the fuel tank, using a funnel fitted with a very fine mesh filter (fig. 6).
Adjust the seat with the aid of the knob (C) fig. 7.
STARTING THE ENGINE
Push the throttle to half-way (fig. 1 n. 4).
If the engine is cold, activate the choke (fig. 1 n. 3 or fig. 1/A n. 3). Turn the ignition key on the dashboard (fig. 1 n.
5); once the engine has started release it, deactivate the choke and wait a few minutes for the engine to warm up.

10
STARTING WORK
Rev up the engine and engage the PTO lever (fig. 1 n. 2). Adjust the cutting height using the lever n°6 fig. 1.
IMPORTANT:
1) Reduce the travel speed to avoid overloading the deck when at work and cut with the blades at top speed so
the grass is chopped up quickly.
2) Always keep the blades sharp.
In case of wear, sharpen or replace them as required.
Operate the speed selection pedal (fig. 5 n. 1) gently and start work (push the pedal to position (A) to travel forward,
or (B) to reverse. Lever fig. 1 n°7 is the parking brake; (P) is the engaged position.
GUIDELINES FOR EFFECTIVE USE
1. Check the condition of the ground before mowing. Make sure there are no stones, sticks or other objects.
2. When mowing, keep the engine at full revs and adjust the speed to suit the height of the grass. Take care when
you come to thick clumps of tall grass; slow down if necessary.
3. Sharpen the mower blades frequently; the cut will be better and the engine will be under less strain.
4. Engage the blades a few metres before you come to the grass for cutting.
5. Always keep the engine at full revs when mowing; if the engine slows down, decelerate for a moment to allow
the engine to recover rpm.
6. For best lawn appearance, alternate one longitudinal and one transverse cut, both at the same height.
7. If the duct tends to become clogged with grass, reduce the travel speed since it may be too high for the lawn’s
condition. If the problem persists, probable causes are blunt blades, dented fin profiles, slack belt or clogged
grass catcher grille.
8. If the grass is very long it is best to cut it in two passes, the first with the blades at the highest level, perhaps
working on reduced width, and the second at the final height required.
9.
Take great care when cutting close to bushes and low kerbs which might damage the edge of the deck and the blade.
10. When you finish work, engage the parking brake and always turn off the petrol tap (fig. 6/A).
MOWING POSITION
To adjust the cutting height use the lever n°6 fig. 1.
On rough or uneven ground, it is best to work with the deck in the highest position, to avoid knocks on the blade.
SLOPING GROUND
If possible always travel up and down rather than across slopes. When turning, take care that the wheels on the
uphill side do not meet any obstacles (stones, logs, roots, etc.) which might make you lose control of the machine.
If the drive wheels tend to slip, screw in the deck float knob (D) fig. 7 to increase the load on the drive wheels and
improve traction. In these situations never use the cutting deck lifting pedal (fig. 1 n°8), because it changes the
machine stability conditions. Always make an evaluation of the working conditions and take care on damp ground
or wet grass since the machine might slip.
When going downhill, start off slowly and try not to drive over dry or cut grass
because the wheels lose grip.
Never use this machine on gradients of more than 12,5°(22%).
GRASS CATCHER:
The grass catcher is fitted with a buzzer that sounds when it is full. Stop mowing immediately and empty the catcher.
The catcher is emptied from the driving seat by operating the lever in fig. 18; the hatch opens automatically.
The grille inside the catcher must be kept clean for good pick-up and to prevent clogging (fig.19).
To inspect the catcher, press the closing lever (fig. 20).
TRIGGERING OF SAFETY DEVICES
Remember that the engine stops whenever:
– the operator gets up from the seat.
In addition, the engine will not start if:
– the blades are engaged;
– you are not sitting in the driving seat;
– the travel pedal is not in the stop position;
– if you start off with the parking brake engaged, the engine stops.
CAUTION!
To avoid obstacles or climb onto pavements or up kerbs, use the pedal (fig. 1 n°8). It stops the engine for safety
reasons, whether the PTO is engaged.
It is not advised to use the pedal for extended moving.

11
MAINTENANCE AND LUBRICATION
CAUTION!
Remove the key and disconnect the plug before starting any cleaning, maintenance or repair procedure
Always wear suitable working clothes and safety gloves.
LUBRICATION
Never dispose of used oil, petrol or any other type of pollutant in the environment!
Proper maintenance and correct lubrication help to keep the mower working perfectly.
ENGINE
For the lubrication intervals, follow the instructions provided in the engine handbook; in all cases the oil must be
changed after the first 5 working hours, and then every 50 hours or every season, together with the oil filter, fig.
8 (oil drain plug).
For the 13,5 HP engine use SAE 30 oil, 1.4 litres without filter, 1.7 litres with filter (fig. 4). For the Vanguard 16 HP
engine use SAE 30 oil, 1.6 litres.
Replace the engine oil filter (fig. 8/A).
The first precaution is to ensure that the engine is correctly serviced with the air filter, cooling fins and cylinder head
clean and the oil at the correct level.
Check the air filter every 4 hours, or even more often in very dusty environments (fig. 3 - fig. 3/A).
Check the engine cooling intake grille.
HYDROSTATIC AXLE
With the engine cold, check the expansion tank (fig. 22); it must be empty.
Clean the hydraulic motor cooling fans often, every 4 working hours in summer when conditions are very dusty.
Change the engine oil after the first 50 hours’ operation, and then every 200 hours, use 1.85 lt of 10W30 oil and
to replace proceed as follows:
1) Remove the two caps fig. 23
2) Using a screwdriver, remove the cap fig. 24
3) Screw the two caps fig. 23 back into place (tightening torque 13~17 Nm).
4) Fill with oil and replace the cap fig. 24.
5) Check that the expansion tank is empty; the level is 12 mm below the bottom of the expansion tank fig. 22.
REAR WHEEL AXLE
Grease the rear wheel pivot pins in fig. 10 every 20 hours.
Lubricate the steering joints.
SHARPENING THE BLADES
A blunt blade pulls at the grass, giving it an unsightly appearance. The cutting edge of the blade must therefore
always be kept sharp; worn blades must be replaced.
To do this it is best to remove the mower deck fig. 11, Proceed as follows:
1) Remove the guard above the deck by unscrewing the two knobs fig. 2 n°13.
2) Release the spring fig. 12 “E”.
3) Release the fork fig. 12 “F”.
4) Remove the belt fig. 12.
5) Release the fork fig. 13
6) Release the belt stretcher spring and the register fig. 13/A.
7)
Release the pin 11 fig. 2, pull the deck forward and place it to the side. Take care not to bend adjuster cables 11.
As the blades wear they lose their cutting efficiency and tend to become unbalanced, causing the mower to vibrate.
If the unbalance persists even after sharpening, check the balance by inserting a screwdriver in the hole in the
centre of the blade and grind until the blade remains horizontal and therefore “balanced”.
To remove a blade, take hold of it firmly, wearing safety gloves, and undo the central screw.
CAUTION!
Always replace damaged or bent blades; never attempt to repair them! ALWAYS USE ORIGINAL BLADES!
ADJUSTING THE CUTTING DECK
A level deck is essential for a uniform cut over the whole lawn.
With the mower on a flat surface, check that the tyre pressure is correct, check the float spring tension, and if

12
necessary turn the adjuster screw (fig. 7 “D”).
If a satisfactory parallel setup cannot be achieved, adjust the register n°10 fig. 2.
To adjust the mowing height, set the lever n°6 fig. 1 on the lowest setting “40”, fit two 30 mm shims at the sides
under the edge of the deck and set the wire fig. 2 n.12 taut.
DRIVE BELTS - HYDROSTATIC AXLE
These belts are self-adjusting and do not require any adjustment, Simply check the spring tension, to replace the
belts, release the tension springs (“G”, fig. 14).
PTO BELT
Caution! This belt is special, use only original belts.
To replace, proceed as already explained for replacement of the hydrostatic transmission belt (upper spring “G”,
fig. 14):
1) Remove the guard above the deck by unscrewing the two knobs fig. 2 n°13.
2) Release the spring fig. 12 “E”.
3) Release the fork fig. 12 “F”.
4) Remove the guard “1” fig. 14 and remove the belt fig. 12.
To adjust the tension, use the register of the wire fig. 13/A which stretches the spring. When the PTO lever fig. 1
n°2 is engaged the spring must be stretched (its length must increase by 30 mm).
Adjust the blade brake on the cutting deck pulley (fig. 12). When the blades are engaged, the shoe must be in line
and 4 mm away from the belt; adjust the hook “F” fig. 12.
TROUBLESHOOTING GUIDE:
PROBLEM
With the key in the ON position, the instrument panel remains off - PETROL ENGINE
– Battery not supplying any power – Check the connecting leads
– Charge the battery
– Change the fuse
The instrument panel comes on, but with the key in the ON position, the starter motor does not turn
– Battery not supplying enough power – Charge the battery
– Start-up not enabled – Travel pedal in STOP position
– Disengage the blades
– Sit in the driving seat
Engine difficult to start or runs unevenly
– Carburettor problems – Clean or replace the air filter
– Adjust the carburettor (refer to the motor handbook)
– Sediment or dirt in the fuel – Empty the tank and use fresh petrol
– Check the fuel filter and replace if necessary
The starter motor turns but the engine will not start
– No petrol flow – Check that the choke is on (if the engine is cold)
– Check level in tank
– Check the fuel filter and replace if necessary
– Check that the fuel cap bleeder hole
is not blocked
– Ignition system fault – Check that the spark plug cap is on properly
– Check that the electrodes are clean and the
gap is correct
CAUSE REMEDY

13
Engine revs fall during mowing
– Travel speed too high for – Decrease speed
mowing height – Raise the deck a few settings
When the blades are engaged, the engine cuts out
– Engagement not enabled – Check the blade engagement microswitch
– Operator sitting in the driving seat;
– The lifting pedal can be used.
Uneven cutting and poor pick-up
– Cutter deck not parallel with the ground – Check tyre pressures
– Adjust the deck until parallel
– Blades not cutting properly – Check that blades are fitted correctly
– Sharpen or replace blades
– Adjust the tension of the PTO belt
– Travel speed too high for – If possible cut grass with lawn dry
mowing height and lawn condition – Reduce travel speed
Vibration while working
– Blades not balanced – Balance the blades or replace if
damaged
– Loose screws – Check and tighten the blade, engine and
chassis fixing screws
COLLISION WITH A STONE OR OTHER OBSTACLE
– Stop the machine.
– Switch off the engine, lift up the lawnmower and check that the blade fixing screws have not been sheared if
so, replace them (fig. 21). Check that the blade is not bent out of shape and replace it if necessary.
IMPORTANT
To move the machine with the engine off, operate the lever fig. 9.
MECHANICAL PARKING BRAKE
It is important to keep the cable properly adjusted (item H, fig. 15) when disengaged, the lever must be free and
in the zero position. To engage the brake, move the lever n°7 fig. 1 to the “P” position.
THE MACHINE “CREEPS” WHEN PARKED
Adjust the flow of oil in the hydraulic motor using the register (fig. 16). This must be done with the motor cold.
ELECTRICS
The electrical system is protected by fuses which cut out the entire system if tripped. The fuses are located inside
the bodywork close to the seat (fig. 17).
Replace the blown fuse with another of the same rating.
Never replace a fuse with one of different rating.
If the problems persist after the above procedures have been carried out, contact your Authorised Service Centre.
Never attempt to carry out complex repairs if you do not have the necessary equipment and technical skills.
FINISHING WORK
When you finish mowing disengage the blades, to stop, take your foot off the pedal (fig.1 n.1). Set the throttle lever
on idling speed and turn off the engine by turning the key (fig. 1 n. 5) to STOP. Engage the parking brake and always
turn off the petrol tap (fig. 6/A).
CAUSE REMEDY
PROBLEM

14
CLEANING
Wash the deck. Never use a high-pressure water cleaner to wash out the engine compartment; use compressed
air or a vacuum cleaner.
LENGTHY PERIODS IN STORE
The machine should be stored in a dry place protected from the weather; cover it with a sheet of canvas if possible.
If it is to be out of use for more than 1 month, disconnect the red battery lead and follow the instructions in the engine
handbook also lubricate all the joints.
Check the battery voltage periodically, ensuring that it does not drop below 12 Volts. If this occurs, charge the
battery.
Use the preservative additive for unleaded petrol.
If the machine is to be out of use for more than 30 days, drain the fuel from the engine to prevent sticky deposits
from forming in the fuel intake system or in vital parts of the carburettor.
To protect the engine, we advise you to use the Briggs & Stratton fuel additive, available from all Briggs & Stratton
authorised service centres. Add the additive to the fuel in the tank or in the fuel container. Run the engine a little
to circulate the additive through the carburettor. The engine and carburettor can be stored for up to 24 months.
N.B.: If no additive are used or the engine is running on petrol which contains alcohol, drain the fuel tank and run
the engine until there is no fuel left.
TRANSPORT
If the machine is transported on a truck or trailer, lower the deck, engage the parking brake and ensure that the
mower is secured to the conveyance by means of ropes, cables or chains.
ACCESSOIRES:
SIDE DISCHARGE KIT
If you do not want to collect the grass, the cutting deck is planned to lodge the side discharge baffle (fig. 25 rif. A).
Unhook the doorstop and put the baffle; please remember to check that it is well locked.
MULCHING KIT
This is for cutting and mulching grass 10/12 cm high. This operation is best done with dry grass as the turbulence
inside the deck mulches it better.
It is advisable not to stop the machine after cutting but to continue for a few minutes over the already cut lawn to
discharge the grass from inside the deck.
You need to fit the closing plug and to replace the blade (fig. 26).
NOISE LEVEL
Engine speed rpm
3000
LWA 99,5 - LpA 80,7 dBA
VIBRATION LEVELS
3000
awz 0,22/awx 0,48/awy 0,30
Vibrations
m/s2
Engine speed rpm

15
RASAERBA IDROSTATICO FD 220 R
Gentile Cliente,
nel ringraziarla per la fiducia e la preferenza accordata al nostro Grillo FD 220 R confidiamo che l’uso di questa
sua nuova macchina risponda pienamente alle sue esigenze.
Per l’impiego ottimale e per la sua manutenzione nel tempo, la preghiamo di leggere attentamente e seguire
scrupolosamente le indicazioni di questo libretto; ciò le consentirà di ottenere i massimi risultati e salvaguardare
la sua spesa. La preghiamo di conservare questo libretto, che dovrà sempre accompagnare la macchina.
ATTENZIONE! Leggere attentamente prima di avviare il motore. Le seguenti avver-
tenze sono importanti per l’incolumità dell’operatore!
AVVERTENZE
La prudenza è l’arma principale nella prevenzione degli incidenti!
La preghiamo vivamente di leggere con attenzione le seguenti avvertenze nell’uso del rasaerba, prima ancora di
iniziare il lavoro.
L’uso improprio del rasaerba ed il suo equipaggiamento possono risultare pericolosi; per ridurre queste possibilità
osservare le precauzioni necessarie di seguito riportate:
1) Leggere interamente questo manuale prima di accendere e mettere in movimento il rasaerba.
2) Dare particolare attenzione alle ammonizioni e alle etichette di sicurezza attorno al rasaerba.
3) La rotazione della lama del rasaerba è molto pericolosa, non mettere mai le mani o i piedi sotto al piatto
rasaerba.
4) Prima di fare lavorare con la macchina altre persone bisogna metterle al corrente delle norme di sicurezza
e di come si usa.
5) Prima di accendere la macchina verificare che non ci siano persone intorno; specialmente bambini.
6) Prima di partire con la macchina in marcia indietro controllare che non ci siano persone od ostacoli.
7) Non permettere passeggeri sulla macchina.
8) Non usare la macchina quando si è affaticati e non bere alcolici.
9) Controllare il terreno prima di procedere alla rasatura, che non vi siano sassi, bastoni o corpi estranei, che
potrebbero essere scagliati lontano, e quindi molto pericolosi.
10) Prima di iniziare il lavoro, indossare indumenti appropriati da lavoro, guanti, scarponi, occhiali.
11) Prima di scendere dal rasaerba, spegnere il motore, disinserire la PTO, rimuovere la chiave d’avviamento e
abbassare il piatto tosaerba nella posizione più bassa.
12) Sui viali sconnessi viaggiare a bassa velocità.
13) Sulle pendenze, in discesa moderare la velocità.
14) Non fare lavorare ragazzi troppo giovani; vietato l’uso ai minori di 16 anni.
15) Non fare retromarcia col motore accelerato.
16) È pericoloso azionare il volante bruscamente, col motore a massimo regime.
17) Non azionare il pedale avanzamento bruscamente.
18) Per evitare il pericolo di esalazioni velenose, non adoperare il motore acceso in un locale chiuso.
19) Prima di avviare il motore riempire il serbatoio di carburante. Fare rifornimento di combustibile solo
all’aperto, spegnere sempre il motore, stare lontano da scintille o fiamme, non fumare!
Non rimuovere il tappo serbatoio carburante quando il motore è caldo.
Riposizionare in modo sicuro il tappo del serbatoio e dei contenitori di carburante.
20) Evitare fuoriuscite di combustibile e dopo aver riempito il serbatoio pulire ogni fuoriuscita sulla macchina prima
di avviare il motore.
21) Non operare col rasaerba vicino a fossati o banchine che si possono rompere sotto il peso della macchina,
specialmente quando la superficie è staccata o bagnata.
22) In discesa curvare sempre lentamente.
23) Non manomettere o disattivare i dispositivi di sicurezza.
24) Non lavorare col rasaerba sopra alla ghiaia che viene aspirata e centrifugata dalla lama, risultando molto
pericolosa.
25) Se avete dei bambini, quando non usate la macchina, nascondete le chiavi di avviamento.
26) Non fare nessun tipo di regolazione o pulizia col motore in moto.
27) Non fare controllare la macchina da nessuno mentre siete seduti alla guida col motore in moto.
28) Non appoggiare pesi sul sedile, si potrebbe disattivare il dispositivo di sicurezza dell’avviamento.
29) L’utilizzatore è sempre responsabile dei danni arrecati a terzi.
30)
Ogni utilizzo improprio comporta il decadimento della garanzia ed il declino di ogni responsabilità del costruttore.

16
31) I coltelli deformati o danneggiati devono essere sempre sostituiti, mai riparati.
32) Usare sempre ricambi ed accessori originali Grillo.
33) Lavorare solo con la luce del sole o con buona luce artificiale.
34) Non fermarsi quando si lavora in salita o in discesa.
35) Se dovete svuotare il serbatoio carburante eseguite l’operazione all’aperto.
36) ATTENZIONE: per ridurre il pericolo di incendio mantenere il vano motore, la marmitta, i collettori di scarico,
la batteria, la zona serbatoio e conduttura carburante liberi da erba, foglie, polvere, ecc..
37) Non immagazzinare la macchina dentro un edificio dove i vapori del carburante possono arrivare a fiamme,
scintille o fili elettrici scoperti.
38) Sostituire le marmitte usurate o danneggiate.
39) Immagazzinare il carburante in contenitori specificatamente costruiti per questo scopo.
40) Fare attenzione quando si lavora vicino ad una strada.
41) Non cambiare le regolazioni del motore in modo particolare il numero di giri max..
42) Se si urta un corpo estraneo disinnestare la lama, fermare il motore scollegare le candele (versione a benzina),
togliere la chiave d’avviamento e ispezionare il tosaerba, se la macchina vibra farla riparare.
43) Far raffreddare il motore prima di mettere la macchina in locali chiusi.
IDENTIFICAZIONE E ASSISTENZA
IDENTIFICAZIONE
Il Grillo FD 220 R è fornito di una targhetta con il numero della
macchina, posizionata sotto al sedile.
SERVIZIO ASSISTENZA
Questo manuale fornisce le indicazioni per l’uso del rasaerba. Per una corretta manutenzione interpellare il
Rivenditore di Zona.
RICAMBI
Si raccomanda di impiegare esclusivamente ricambi originali, gli unici che offrono caratteristiche di sicurezza e
intercambiabilità.
Ogni richiesta deve essere corredata del numero di matricola della macchina e il numero di codice del pezzo da
sostituire. Per i ricambi del motore, attenersi a quanto indicato nel libretto specifico.
GARANZIA
La garanzia è fornita nei modi e nei limiti indicati nell’apposita cartolina.
Per quanto riguarda il motore e la batteria, valgono le condizioni previste dai rispettivi Produttori.
RICAMBI CHE SI CONSIGLIANO DI TENERE DI SCORTA
N. 1 lama rasaerba
N. 1 serie cinghie
N. 1 filtro aria motore
N. 1 filtro olio motore
N. 1 filo acceleratore
N. 2 fusibili impianto
COME ORDINARE I RICAMBI
Indicare sempre il numero di matricola della macchina e il codice del pezzo da sostituire. Rivolgersi ai nostri centri
Grillo presenti in ogni provincia. Per maggiori informazioni il nostro indirizzo è:
GRILLO S.p.A.
Via Cervese 1701 - 47023 CESENA (FC)
Tel. 0547.633.111 / Fax 0547.632.011
FD 220 R
223 kg.
10/3200
tipo
serie
massa c.a.
anno
KW/giri minuto
S.p.A.
CESENA - ITALY
03573
303001
0000

17
CARATTERISTICHE TECNICHE
MOTORIZZAZIONE: Briggs & Stratton 13,5 HP monocilindrico, sincrobilanciato (AVS), Vanguard 16 HP-OHV
bicilindrico.
AVVIAMENTO: elettrico con batteria 12 V.
CAMBIO: trasmissione idrostatica con differenziale.
VELOCITÀ: 0 - 9 Km/h con comando a pedale.
PIATTO DI TAGLIO: frontale 1 coltello mm 800, larghezza totale mm 860.
SISTEMA DI GUIDA: a volante con avanzamento e retromarcia a pedale.
ALTEZZA DI TAGLIO: 7 posizioni, da 30 a 90 mm.
SEDILE: regolabile mediante pomello, ammortizzato.
PNEUMATICI: anteriori: 16 x 7.50-8; posteriori: 13 x 5.00 - 6.
SERBATOIO: lt. 7 - RISERVA: lt. 1.
FRENO DI STAZIONAMENTO: a disco.
DIAMETRO INTERNO DI STERZATA: Ø mm 350.
LUNGHEZZA: mm 2345 - LARGHEZZA: mm 860 - ALTEZZA: mm 1140.
CAPACITÀ ORARIA: 4000 m2/h.
PESO: kg 223. CESTO: 200 litri
ACCESSORI: kit mulching, kit scarico laterale, ruote artiglio.
MESSA IN OPERA DELLA MACCHINA
1) Controllare l’integrità della macchina e accertare che non abbia subito danni durante il trasporto.
2) Verificare il livello olio motore.
3) Verificare la pressione dei pneumatici:
Ruote anteriori 16 x 7.50 - 8 (1,2 BAR)
Ruote posteriori 13 x 50 - 6 (1,2 BAR)
4)
Controllare il voltaggio della batteria, non deve risultare inferiore al valore di 12 Volt, eventualmente provvedere alla ricarica.
IMPORTANTE!!! Durante il montaggio evitare di invertire le polarità della batteria. Non avviare il motore se la
batteria non è collegata.
5) Attenzione! Nella trasmissione idrostatica la vaschetta di espansione deve essere vuota, il livello è a 12 mm sotto
al piano inferiore della vaschetta di espansione, fig. 22. Non occorre fare alcuna operazione.
BATTERIA - ATTENZIONE!
I gas sprigionati dalla batteria sono esplosivi, tenetela lontano da fiamme o scintille. Controllare periodicamente
i morsetti e mantenerli lubrificati con grasso di vaselina.
RODAGGIO - ATTENZIONE!!
Sostituire l’olio motore dopo le prime 5 ore di funzionamento.
Controllare che non vi siano perdite d’olio o viti lente, in particolare quelle di fissaggio della lama.
Registrare la tensione della cinghia presa di forza (n. 9, fig. 2).
ISTRUZIONI D’USO
Prima di avviare il motore controllare sempre:
– che le alette di raffreddamento della trasmissione idrostatica siano ben pulite;
– che le griglie di aspirazione per il raffreddamento del motore siano pulite;
– che l’olio del motore sia a livello (fig. 4);
– non premere il pedale preselezione velocità (fig. 1 n. 1);
– che la leva presa di forza sia in posizione folle (fig.1 n. 2);
– che il filtro aria sia ben pulito (fig. 3), per ispezionare il motore alzare il cesto della macchina;
– che il piatto tosaerba sia ben pulito.
Riempire il serbatoio di carburante servendosi di un imbuto munito di un filtro molto fine (fig. 6).
Regolare la posizione del sedile agendo sul pomello (C) fig. 7.
AVVIAMENTO DEL MOTORE
Spingere fino a metà corsa il manettino acceleratore (fig. 1 n. 4).
Se il motore è freddo azionare lo starter (fig. 1 n. 3 oppure fig. 1/A n. 3). Ruotare la chiave di avviamento posta sul cruscotto
(fig. 1 n. 5); una volta avviato il motore rilasciarla, disinserire lo starter, aspettare qualche minuto per riscaldare il motore.

18
INIZIO DEL LAVORO
Accelerare opportunamente il motore, innestare la leva PTO (fig. 1 n. 2). Regolare l'altezza di taglio tramite la leva
n°6 fig. 1.
IMPORTANTE:
1) Ridurre la velocità di avanzamento, in modo da non caricare eccessivamente il piatto durante il lavoro e tagliare
con la lama alla massima velocità.
2) Tagliare sempre con lame affilate.
In caso di usura affilarle o sostituirle secondo le necessità.
Azionare dolcemente il pedale preselezione velocità (fig. 5 n. 1) ed iniziare il lavoro (spingendo il pedale nella
posizione (A) la macchina avanza, nel punto (B) retrocede.
La leva fig. 1 n°7 è il freno di stazionamento, nella posizione (P) è inserito.
REGOLE UTILI PER IL BUON USO
1. Controllare il terreno prima di procedere alla rasatura che non vi siano sassi, bastoni o corpi estranei.
2. Durante la rasatura tenere il motore a massimo regime, regolare la velocità in base all’altezza dell’erba.
Prestare attenzione quando si incontrano cumuli di erba alta e fitta, se necessario rallentare.
3. Affilare frequentemente le lame del tosaerba; il taglio sarà migliore e il motore forzerà di meno.
4. Innestare le lame qualche metro prima di entrare nell’erba da tagliare.
5. Rasare sempre con motore a massimo regime; se il motore cala di giri rallentare un attimo, in modo da far
riprendere al motore il giusto regime di giri.
6. Un taglio longitudinale alternato ad uno trasversale, eseguito ad una altezza costante, contribuisce a migliorare
l'aspetto del prato.
7. Se il convogliatore tende ad intasarsi d'erba, è bene ridurre la velocità di avanzamento in quanto può essere
eccessiva in funzione della condizione del prato; se il problema rimane, cause probabili sono i coltelli male
affilati, il profilo delle alette deformato, la cinghia lenta o la rete del cesto intasata.
8. Se l'erba è molto alta è opportuno eseguire il taglio in due passate; la prima con le lame ad altezza massima
ed eventualmente a scia ridotta, e la seconda all'altezza desiderata.
9. Fare molta attenzione ai tagli in corrispondenza di cespugli e in prossimità di cordoli bassi che potrebbero
danneggiare il bordo del piatto di taglio e la lama.
10. Terminato il lavoro, inserire il freno di stazionamento e chiudere sempre il rubinetto della benzina (fig. 6/A).
POSIZIONI DI TAGLIO
Per regolare l’altezza di taglio si agisce sulla leva n°6 fig. 1.
In presenza di terreno accidentato, cunette o dossi, è conveniente operare con il piatto nella posizione di taglio più
alta onde evitare urti da parte della lama.
TERRENI IN PENDENZA
I terreni ripidi devono essere percorsi possibilmente nel senso salita/discesa, facendo molta attenzione nei cambi
di direzione, che le ruote a monte non incontrino ostacoli (sassi, rami, radici, ecc.) che potrebbero causare la perdita
di controllo della macchina. Se le ruote motrici tendono a slittare, avvitare il pomello (D) fig. 7 che regola il
galleggiamento del piatto in modo da caricare più peso sulle ruote motrici e quindi avere più trazione. In tali
situazioni non utilizzare mai il pedale sollevamento piatto (fig. 1 n°8), in quanto provoca un cambiamento delle
condizioni di stabilità. Valutare le varie situazioni e prestare attenzione in presenza di terreno umido e erba bagnata
poiché la macchina potrebbe scivolare. In discesa partire a bassa velocità ed evitare di calpestare erba secca o
tagliata poiché le ruote perdono aderenza. Non usare questa macchina su pendii superiori a 12,5°(22%).
CESTO RACCOGLIERBA
Il cesto raccoglierba è dotato di sensore sonoro che segnala il cesto pieno e pertanto occorre interrompere
immediatamente il taglio e procedere allo svuotamento dello stesso.
Questa operazione si esegue dal posto guida agendo sulla leva fig. 18, il portellone si apre automaticamente.
La griglia all'interno del cesto va mantenuta pulita per favorire una buona raccolta ed evitare intasamenti fig. 19.
Se si vuole ispezionare il cesto premere la levetta di chiusura fig. 20.
INTERVENTI DEI DISPOSITIVI DI SICUREZZA
Ricordare sempre che il motore si ferma ogni volta che:
– l’operatore si alza dal sedile.

19
Inoltre il motore non si avvia se:
– le lame sono innestate;
– se non si è seduti al posto di guida;
– se il pedale avanzamento non è in posizione di stop;
– se si parte con il freno di stazionamento inserito il motore si spegne.
ATTENZIONE!
Per superare ostacoli, salire su marciapiedi o su cordoli usare il pedale (fig. 1 n°8). L’uso di tale pedale spegne il motore
per motivi di sicurezza, nel caso che la PTO sia innestata.
Se ne sconsiglia l'uso per i trasferimenti prolungati.
MANUTENZIONE E LUBRIFICAZIONE
ATTENZIONE!
Togliere la chiave e scollegare la candela prima di iniziare qualsiasi intervento di pulizia, manutenzione o
riparazione. Indossare indumenti adeguati e guanti da lavoro.
LUBRIFICAZIONE
Non disperdere mai nell’ambiente oli esausti, benzina e ogni altro prodotto inquinante!
Un’efficiente manutenzione e una corretta lubrificazione contribuiscono a mantenere la macchina in perfetta efficienza.
MOTORE
Per gli intervalli di lubrificazione seguire le norme contenute nel libretto del motore; comunque è indispensabile
sostituire l’olio dopo le prime 5 ore di lavoro, successivamente ogni 50 ore o ogni stagione unitamente al
filtro olio, fig. 8 (tappo scarico olio).
Per il motore 13,5 HP utilizzare olio SAE 30, lt. 1,4 senza filtro, lt. 1,7 con filtro (fig. 4). Per il motore Vanguard 16
HP utilizzare olio SAE 30, lt. 1,6.
Sostituire il filtro olio (fig. 8/A).
La prima precauzione è che il motore sia correttamente manutenzionato con filtro aria, alette raffreddamento,
testata pulita e l’olio motore a livello.
Controllare il filtro aria ogni 4 ore o anche più frequentemente se l’ambiente è molto polveroso (fig. 3 - fig. 3/A).
Controllare la griglia a rete di aspirazione del raffreddamento del motore.
ASSALE IDROSTATICO
Controllare con il motore freddo
la vaschetta di espansione, deve essere vuota, fig. 22
.
Pulire frequentemente le alette di raffreddamento del motore idraulico, in estate, in presenza di molta polvere, ogni
4 ore di lavoro.
Sostituire l'olio dopo le prime 50 ore di lavoro, successivamente ogni 200 ore utilizzare olio 10W30 quantità 1,85
lt, per la sostituzione procedere come segue:
1) Togliere i due tappi fig. 23.
2) Rimuovere, utilizzando un cacciavite, il tappo fig. 24.
3) Avvitare i due tappi fig. 23 (coppia di serraggio 13~17 Nm).
4) Inserire l'olio, rimontare il tappo fig. 24.
5) Verificare che la vaschetta di espansione sia vuota, il livello è a 12 mm. sotto al piano inferiore della vaschetta
di espansione fig. 22.
ASSE RUOTE POSTERIORE
Lubrificare con grasso ogni 20 ore i perni snodo ruota posteriori fig. 10. Lubrificare le articolazioni dello sterzo.
AFFILATURA DELLE LAME
Una lama non affilata strappa l’erba conferendole un brutto aspetto, è necessario che l’affilatura sia sempre
eseguita sui taglienti della lama, se risulta usurata sostituirla.
Per questa operazione è consigliabile sganciare il piatto della macchina fig. 11, procedere come segue:
1) Togliere la protezione sopra al piatto svitando i due pomelli fig. 2 n°13.
2) Sganciare la molla fig. 12 "E".
3) Sganciare la forcella fig. 12 "F".
4) Togliere la cinghia fig. 12.
5) Sganciare la forcella fig. 13.
6) Sganciare la molla tendicinghia e il registro fig. 13/A.
7) Sganciare il perno 11 fig. 2, tirare il piatto in avanti, posizionarlo lateralmente, fare attenzione a non piegare i
cavi di regolazione fig. 11.
Other manuals for FD 220 R
2
Table of contents
Languages:
Other Grillo Lawn Mower manuals

Grillo
Grillo FD 2200 4WD User manual

Grillo
Grillo GF3 Guide

Grillo
Grillo FD 2200 TS User manual

Grillo
Grillo CLIMBER 10 User manual

Grillo
Grillo CL62 User manual

Grillo
Grillo CLIMBER 7.22 User manual

Grillo
Grillo FD13.09 User manual

Grillo
Grillo FD450 User manual

Grillo
Grillo FD 1500 2WD User guide

Grillo
Grillo CLIMBER 8.22 User manual

Grillo
Grillo MD 22 User manual

Grillo
Grillo FD450 User manual

Grillo
Grillo fm2200 User manual

Grillo
Grillo Climber 710 User manual

Grillo
Grillo GF1 User manual

Grillo
Grillo CL 75 User manual

Grillo
Grillo MD13 User manual

Grillo
Grillo Climber 9.22 User manual

Grillo
Grillo FD 220 R User manual

Grillo
Grillo CLIMBER CL9.16 User guide