Grizzly H7604 User manual

COPYRIGHT © JUNE, 2005 BY GRIZZLY INDUSTRIAL, INC.
WARNING: NO PORTION OF THIS MANUAL MAY BE REPRODUCED IN ANY SHAPE
OR FORM WITHOUT THE WRITTEN APPROVAL OF GRIZZLY INDUSTRIAL, INC.
#EW7266 PRINTED IN CHINA
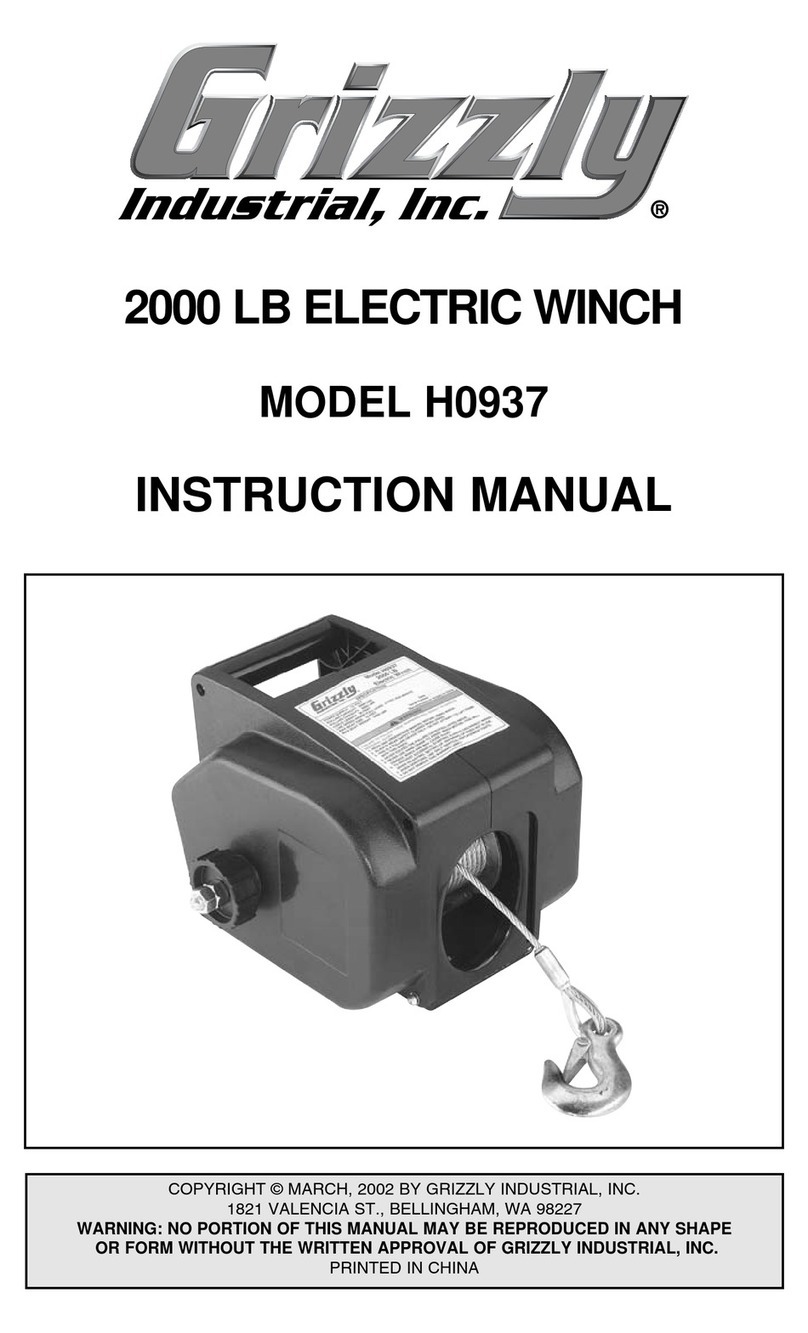
2000 LB. ELECTRIC WINCH
MODEL H7604
INSTRUCTION MANUAL


Table of Contents
INTRODUCTION .....................................................................................2
Foreword ...........................................................................................2
Machine Data ....................................................................................2
Contact Info .......................................................................................2
SECTION 1: SAFETY .............................................................................3
Safety Instructions for Machinery .....................................................3
Additional Safety Instructions for Electric Winches ..........................5
SECTION 2: SET UP ..............................................................................6
Inventory ...........................................................................................6
Wiring ................................................................................................7
Mounting Receiver Hitch ...................................................................8
Mounting Winch ................................................................................9
SECTION 3: Operations ......................................................................10
Pulling Capacity ..............................................................................10
Hand Crank .....................................................................................10
Receiver Hitch .................................................................................10
Winch ..............................................................................................11
Maintenance ...................................................................................11

H7604 2000 Lb. Electric Winch
-2-
INTRODUCTION
If you have any comments regarding this
manual, please write to us at the following
address:
Grizzly Industrial, Inc.
C/O Technical Documentation
P.O. Box 2069
Bellingham, WA 98227-2069
Most importantly, we stand behind our
tools. If you have any service questions or
parts requests, please call or write us at
the location listed below.
Grizzly Industrial, Inc.
1203 Lycoming Mall Circle
Muncy, PA 17756
Phone: (570) 546-9663
Fax: (800) 438-5901
E-Mail: [email protected]
Web Site: http://www.grizzly.com
We are proud to offer the Grizzly Model
H7604 2000 Lb. Electric Winch. This
model is part of a growing Grizzly family
of fine power tools. When used according
to the guidelines set forth in this manual,
you can expect years of trouble-free,
enjoyable operation and proof of Grizzly’s
commitment to customer satisfaction.
The Model H7604 features convenient,
portable power for pulling boats, stuck
vehicles, and other heavy items. This
2000 lb. pulling capacity winch is pow-
ered by your 12V automotive battery. The
winch also has a built in carrying handle, a
quick attach mounting plate, and a heavy-
duty bumper mount receiver hitch.
It is our pleasure to provide this manual
with the Model H7604. It was written
to encourage safety considerations and
guide you through general operating pro-
cedures and maintenance.
The specifications, details, and photo-
graphs in this manual represent the Model
H7604 as supplied when the manual was
prepared. However, owing to Grizzly’s pol-
icy of continuous improvement, changes
may be made at any time with no obliga-
tion on the part of Grizzly.
Read the manual before operation.
Become familiar with this machine, its
safety instructions, and its operation
before beginning any work. Serious
personal injury may result if safety or
operational information is not under-
stood or followed.
Foreword Contact Info
Machine Data
Pulling Capacity ............................ 2000 lb.
Line Speed Under Load ......... 6" per Minute
Cable Size .................................... 3⁄16" x 30'
Crank Handle .................2 Position, Manual
Power Source ...........................12V Battery

H7604 2000 Lb. Electric Winch -3-
SECTION 1: SAFETY
Indicates a potentially hazardous situation which, if
not avoided, MAY result in minor or moderate injury.
It may also be used to alert against unsafe practices.
Indicates a potentially hazardous situation which, if
not avoided, COULD result in death or serious injury.
This symbol is used to alert the user to useful infor-
mation about proper operation of the equipment.
Safety Instructions for Machinery
For Your Own Safety Read Instruction Manual
Before Operating This Equipment
The purpose of safety symbols is to attract your attention to possible hazard-
ous conditions. This manual uses a series of symbols and signal words which
are intended to convey the level of importance of the safety messages. The
progression of symbols is described below. Remember that safety messages by
themselves do not eliminate danger and are not a substitute for proper accident
prevention measures.
1. READ THROUGH THE ENTIRE
MANUAL BEFORE STARTING
MACHINERY. Machinery presents
serious injury hazards to untrained
users.
2. ALWAYS USE ANSI APPROVED
SAFETY GLASSES WHEN
OPERATING MACHINERY. Everyday
eyeglasses only have impact resistant
lenses, they are NOT safety glasses.
3. ALWAYS WEAR AN ANSI
APPROVED RESPIRATOR WHEN
OPERATING MACHINERY THAT
PRODUCES DUST. Wood dust is a
carcinogen and can cause cancer and
severe respiratory illnesses.
NOTICE
4. ALWAYS USE HEARING
PROTECTION WHEN OPERATING
MACHINERY. Machinery noise can
cause permanent hearing damage.
5. WEAR PROPER APPAREL. DO NOT
wear loose clothing, gloves, neckties,
rings, or jewelry which may get caught
in moving parts. Wear protective hair
covering to contain long hair and
wear non-slip footwear.
6. NEVER OPERATE MACHINERY
WHEN TIRED, OR UNDER THE
INFLUENCE OF DRUGS OR
ALCOHOL. Be mentally alert at all
times when running machinery.
Indicates an imminently hazardous situation which, if
not avoided, WILL result in death or serious injury.

H7604 2000 Lb. Electric Winch
-4-
7. ONLY ALLOW TRAINED AND
PROPERLY SUPERVISED PER-
SONNEL TO OPERATE MACHIN-
ERY. Make sure operation instruc-
tions are safe and understood.
8. MAKE SURE GUARDS ARE IN
PLACE AND WORK CORRECTLY
BEFORE USING MACHINERY.
9. KEEP CHILDREN AND VISITORS
AWAY. Keep all children and visitors
a safe distance from the work area.
10. MAKE WORKSHOP CHILD PROOF.
Use padlocks, master switches, and
remove start switch keys.
11. NEVER LEAVE WHEN MACHINE
IS RUNNING. Turn power OFF
and allow all moving parts to come
to a complete stop before leaving
machine unattended.
12. DO NOT USE IN DANGEROUS
ENVIRONMENTS. DO NOT use
machinery in damp, wet locations,
or where any flammable or noxious
fumes may exist.
12. KEEP WORK AREA CLEAN AND
WELL LIT. Clutter and dark shad-
ows may cause accidents.
13. USE A GROUNDED EXTENSION
CORD RATED FOR THE MACHINE
AMPERAGE. Undersized cords
overheat and lose power. Replace
extension cords if they become dam-
aged. DO NOT use extension cords
for 220V machinery.
14. ALWAYS DISCONNECT FROM
POWER SOURCE BEFORE
SERVICING MACHINERY. Make
sure switch is in OFF position before
reconnecting.
15. MAINTAIN MACHINERY WITH
CARE. Keep blades sharp and clean
for best and safest performance.
Follow instructions for lubricating
and changing accessories.
16. REMOVE ADJUSTING KEYS AND
WRENCHES. Make a habit of check-
ing for keys and adjusting wrenches
before turning machinery ON.
17. CHECK FOR DAMAGED PARTS
BEFORE USING MACHINERY.
Check for binding and alignment of
parts, broken parts, part mounting,
loose bolts, and any other conditions
that may affect machine operation.
Repair or replace damaged parts.
18. USE SUGGESTED ACCESSORIES.
Refer to the instruction manual for
recommended accessories. The use
of improper accessories may cause
risk of injury.
19. DO NOT FORCE MACHINERY. Work
at the speed for which the machine
or accessory was designed.
20. SECURE WORKPIECE. Use clamps
or a vise to hold the workpiece when
practical. A secured workpiece pro-
tects your hands and frees both
hands to operate the machine.
21. DO NOT OVERREACH. Keep prop-
er footing and balance at all times.
22. MANY MACHINES WILL EJECT
THE WORKPIECE TOWARD THE
OPERATOR. Know and avoid con-
ditions that cause the workpiece to
"kickback."
23. ALWAYS LOCK MOBILE BASES
(IF USED) BEFORE OPERATING
MACHINERY.
24. BE AWARE THAT CERTAIN
WOODS MAY CAUSE AN
ALLERGIC REACTION IN PEOPLE
AND ANIMALS, ESPECIALLY
WHEN EXPOSED TO FINE DUST.
Make sure you know what type of
wood dust you will be exposed to
and always wear an approved respi-
rator.

H7604 2000 Lb. Electric Winch -5-
Additional Safety Instructions for
Electric Winches
No list of safety guidelines can be
complete. Every environment is dif-
ferent. Always consider safety first,
as it applies to your individual work-
ing conditions. Use this and other
machinery with caution and respect.
Failure to do so could result in seri-
ous personal injury, damage to equip-
ment or poor work results.
1. READ THIS MANUAL: This manual
contains proper operating instruc-
tions for this machine.
2. EYE PROTECTION: Always wear
ANSI approved eye protection when
operating winch.
3. LOOSE CLOTHING: DO NOT wear
loose clothing while operating this
machine. Keep hair, jewelry and
hands away from operating winch.
4. CABLE DAMAGE: DO NOT use
winch if the cable is damaged or
frayed. DO NOT replace the cable
with one of lesser strength.
5. CABLE BREAKAGE: Do not stand
in line with or alongside the cable
while the winch is operating. If the
cable breaks it can cause serious
personal injury.
6. WINCH LIMITS: DO NOT attempt
to exceed the pulling limits of the
winch.
7. SAFETY SPOTTER: Use a spotter
to help ensure safety when using the
winch. Be sure the spotter is out of
the way of the vehicle and the cable
before operating the winch.
8. HAND CRANK: Never use the hand
crank to assist the winch while run-
ning. This will damage the winch and
could cause personal injury.
9. AUTOMOTIVE BATTERY: Be sure
the battery is in good condition.
Always connect the positive (+/RED)
cable to the positive (+/RED) battery
post first, then connect the nega-
tive (-/BLACK) cable to the vehicle
frame.
There is danger associated with the
use of the Model H7604. Accidents are
frequently caused by lack of familiar-
ity or failure to pay attention. Use this
machine with respect and caution
to lessen the possibility of operator
injury. If normal safety precautions
are overlooked or ignored, serious
personal injury may occur.

H7604 2000 Lb. Electric Winch
-6-
Inventory
Figure 1. Winch inventory.
C
B
D
A
E
F
After all the parts have been removed
from the box, you should have the follow-
ing items:
Box 1: (Figure 1) Qty
A. Winch ................................................1
B. 10' Power Cable ................................1
C. Bumper Mount Receiver Hitch ..........1
D. Mounting Plate ..................................1
E. 10' Remote Control Cable .................1
F. Manual Crank Handle .......................1
In the event that any non proprietary parts
are missing (e.g. a nut or a washer), we
would be glad to replace them, or for the
sake of expediency, replacements can be
obtained at your local hardware store.
SECTION 2: SET UP
Your winch left our warehouse carefully
packed. If you discover the winch is dam-
aged after you have signed for delivery,
please immediately call Customer Service
at (570) 546-9663 for advice.
Save the container and packing materials
for possible inspection by the carrier or its
agent. Otherwise, filing a freight claim can
be difficult.
When you are completely satisfied with
the condition of the shipment, you should
inventory the equipment.

H7604 2000 Lb. Electric Winch -7-
To temporarily wire the winch to a 12V
battery:
1. Plug the power cable into the cor-
responding plug socket on the winch.
Route the power cable from the winch
to your battery, being careful to avoid
getting it tangled with the other wires or
causing a tripping hazard.
2. Connect the red alligator clip to the
positive (+/RED) terminal of your bat-
tery. Use only a 12V battery source that
is in good working condition. Connect
the black alligator clip to the frame of
your vehicle to establish a ground con-
nection.
3. Plug the remote control switch into the
second plug socket on the side of the
winch. This remote switch allows the
winch to be operated from a safe dis-
tance.
4. Set the remote control aside in a safe
place until the winch is ready to oper-
ate.
To permanently wire the winch to a 12V
battery:
The included power cable can be used for
a permanent wiring set-up; however, the
alligator clips must be replaced with suit-
able connectors (not included) to allow the
red wire to hook up to a positive 12V power
source and the black wire to connect to the
vehicle frame. Route the wires through the
vehicle in a way that will prevent damage
to the wires during operation and mainte-
nance of the vehicle.
Important Wiring Reminders
1. Always wear ANSI approved safe-
ty glasses when operating the
winch or working near the 12V
battery.
2. Always connect the positive (+/
RED) cable to the positive (+/
RED) battery post and the nega-
tive (-/BLACK) cable to the vehi-
cle frame.
3. Always connect the red alligator
clip to the battery FIRST, followed
by the black alligator clip to the
vehicle frame.
4. Never run the battery dead while
using the winch.
5. Never use a battery that is leaking
acid or is badly corroded.
Failure to comply with these and
other warnings could result in seri-
ous personal injury.
If holes are drilled into metal to route
the power cable, be sure to use rubber
grommets to protect the cable from
being cut on the sharp metal.
NOTICE
Wiring

H7604 2000 Lb. Electric Winch
-8-
This receiver hitch is rated for 2000
lbs. of pulling force. Be sure the
bumper is capable of withstanding
this amount of force. Reinforcement
or modification may be required
depending on the mounting loca-
tion. Failure to comply with this
notice could result in damage to
your vehicle and/or property.
NOTICE
Mounting
Receiver Hitch
The receiver hitch is designed to be mount-
ed to a standard truck step bumper. The
vehicle and bumper must have a minimum
towing capacity of 2000 lbs. The receiver
accepts a standard 2" draw bar.
To install the receiver hitch:
1. Temporarily clamp the receiver hitch to
the truck bumper with C-clamps.
2. Use the holes in the receiver hitch as a
guide for drilling four 1⁄2" mounting holes
into the bumper.
Note: Avoid drilling into any wiring that
may be routed through the inside of the
bumper.
DO NOT weld or drill additional holes
in the hitch. This will weaken the
hitch and may cause it to break.
3. Mount the receiver hitch permanently
with four 1⁄2" carriage bolts, flat washers,
lock washers, and hex nuts.
Note: Only use Grade 5 carriage bolts,
flat washers, lock washers, and hex
nuts. Use a thread locking compound
such as Loctite® on the bolts.
Figure 2. Receiver hitch installation.
4. Insert a draw bar with an attached hitch
ball (not included) into the receiver and
secure it with a hitch pin in order to
attach a trailer or temporarily mount the
winch.

H7604 2000 Lb. Electric Winch -9-
The Model H7604 is designed to be
mounted temporarily to a hitch ball on a
vehicle; however, you may also attach the
winch mounting plate permanently to a
trailer or vehicle.
To mount the winch temporarily:
1. Slide the heads of the mounting plate
studs into the keyhole slots on the back
of the winch.
2. Attach the mounting plate assembly
to a trailer hitch or vehicle by inserting
the trailer hitch ball through the shaped
hole in the mounting plate as shown in
Figure 3.
Mounting Winch To mount the winch permanently:
1. Select a mounting location on your
bumper, boat trailer, truck bed, or some
other suitable location.
2. Place the winch in the desired mounting
location and mark the location of the
mounting holes with a scribe or some
other marking tool.
3. Drill out the holes for mounting the
winch.
4. Mount the winch to the vehicle using
Grade 5 hex bolts of at least 3⁄8" diam-
eter with lock washers, flat washers and
hex nuts.
Figure 3. Winch temporary mount.
This winch creates 2000 lbs. of pull-
ing force. Be sure the mounting loca-
tion is capable of withstanding this
amount of force. Reinforcement or
modification may be required depend-
ing on the mounting location. Failure
to comply with this notice could result
in damage to your vehicle and/or
property.
NOTICE

H7604 2000 Lb. Electric Winch
-10-
This winch has a pulling capacity of 2,000
lbs. Applying this capability to a practical
sense, you can:
• Move a load from a “dead” stop of up to
2,000 lbs. on level ground.
• Move up to a 4,800 lb boat in water.
• Maintain movement of a wheeled vehi-
cle of up to 6,000 lbs.
Pulling capacity is reduced as the incline
increases. For example, maintaining vehi-
cle movement capacity is reduced from
6,000 lbs. on flat ground to 1,100 lbs. on
a 45° incline. Please refer to Figure 4 for
estimated pulling capacity (maintaining
vehicle movement) on various inclines.
Figure 4. Pulling capacity chart.
Pulling Capacity
Receiver Hitch
SECTION 3: Operations
To use the receiver hitch:
1. Turn the tow vehicle OFF and engage
the parking brake.
2. Slide a draw bar with a hitch ball into the
receiver and secure it with a hitch pin.
3. Connect the trailer to the hitch ball and
attach the safety chains to the receiver
hitch.
To use the hand crank:
1. Turn the clutch knob clockwise until it is
hand tight. Do not force or overtighten.
Hand Crank
2. Remove the outer hex nut and place the
end of the hand crank over the flattened
end of the threaded shaft (see Figure
5).
3. Replace the outer hex nut and tighten it
against the hand crank.
4. Rotate the hand crank clockwise to
tighten the cable. Turn until the cable
has been completely retracted.
Figure 5. Hand crank.

H7604 2000 Lb. Electric Winch -11-
5. Retighten the clutch knob and tighten
the inner hex nut.
6. Attach the power cord to the 12V bat-
tery.
7. Stand clear of the cable. Use the remote
control to turn the winch ON and begin
retracting the cable.
Maintenance
Occasionally examine the cable for
any fray or other damage. Damage
to the cable can significantly
reduce the pulling capacity and will
increase the likelihood of breaking
under load. This could cause seri-
ous personal injury.
1. Occasionally lubricate the cable with a
light machine oil.
2. Grease the gears every 6 months.
Separate the left and right housing to
expose the gears. Use a good quality
waterproof grease.
Never use the hand crank to assist
the operating winch. This will dam-
age the winch and may cause seri-
ous personal injury. Never wrap the cable around an
object and attach the hook to the
cable. This can damage the object
and fray or kink the cable. Should
the cable or pulling object break,
serious personal injury could occur.
Winch
To operate the electric winch:
1. Place the vehicle in low gear (manual
transmission) or Park (automatic trans-
mission). Put your emergency brake
ON and block the wheels with suitable
chocks.
2. Attach the power and control cables to
the winch.
3. Unlock the cable by turning the clutch
knob counterclockwise, then pull out
the amount of cable you need. Always
leave at least three turns of cable on
the winch to prevent it from slipping off
under initial tension.
4. Hook onto the pulling object using a
pulling point, tow strap, or chain as
shown in Figure 6.
Figure 6. Cable attachment.

H7604 2000 Lb. Electric Winch
-12-
Grizzly Industrial, Inc. warrants every product it sells for a period of 1 year to the original
purchaser from the date of purchase. This warranty does not apply to defects due directly
or indirectly to misuse, abuse, negligence, accidents, repairs or alterations or lack of
maintenance. This is Grizzly’s sole written warranty and any and all warranties that may
be implied by law, including any merchantability or fitness, for any particular purpose, are
hereby limited to the duration of this written warranty. We do not warrant or represent that
the merchandise complies with the provisions of any law or acts unless the manufacturer so
warrants. In no event shall Grizzly’s liability under this warranty exceed the purchase price
paid for the product and any legal actions brought against Grizzly shall be tried in the State
of Washington, County of Whatcom.
We shall in no event be liable for death, injuries to persons or property or for incidental,
contingent, special, or consequential damages arising from the use of our products.
To take advantage of this warranty, contact us by mail or phone and give us all the details.
We will then issue you a “Return Authorization Number,” which must be clearly posted on
the outside as well as the inside of the carton. We will not accept any item back without this
number. Proof of purchase must accompany the merchandise.
The manufacturers reserve the right to change specifications at any time because they
constantly strive to achieve better quality equipment. We make every effort to ensure that
our products meet high quality and durability standards and we hope you never need to
use this warranty.
Please feel free to write or call us if you have any questions about the machine or the
manual.
Grizzly Industrial, Inc.
1203 Lycoming Mall Circle
Muncy, PA 17756
Phone: (570) 546-9663
Fax: (800) 438-5901
E-Mail:
Web Site: http://www.grizzly.com
Thank you again for your business and continued support. We hope to serve you again
soon!
WARRANTY AND RETURNS

Name _________________________________________________________________
Street _________________________________________________________________
City _______________________ State _________________________ Zip _________
Phone # ____________________ Email ________________________ Invoice # _____
Model # ____________________ Order # _______________________ Serial # ______
WARRANTY CARD
The following information is given on a voluntary basis. It will be used for marketing purposes to
help us develop better products and services. All information is strictly confidential.
1. How did you learn about us?
____Advertisement ____Friend ____Catalog
____Card Deck ____Website Other:________________________
2. Which of the following magazines do you subscribe to?
3. What is your annual household income?
____$20,000-$29,000 ____$30,000-$39,000 ____$40,000-$49,000
____$50,000-$59,000 ____$60,000-$69,000 ____$70,000+
4. What is your age group?
____20-29 ____30-39 ____40-49
____50-59 ____60-69 ____70+
5. How long have you been a woodworker/metalworker?
____0-2 Years ____2-8 Years ____8-20 Years ____20+ Years
6. How many of your machines or tools are Grizzly?
____0-2 ____3-5 ____6-9 ____10+
7. Do you think your machine represents a good value? ____Yes ____No
8. Would you recommend Grizzly Industrial to a friend? ____Yes ____No
9. Would you allow us to use your name as a reference for our customers in your area?
Note: We never use names more than 3 times. ____Yes ____No
10. Comments: _________________________________________________________
______________________________________________________________________
______________________________________________________________________
______________________________________________________________________
____ Cabinet Maker
____ Family Handyman
____ Hand Loader
____ Handy
____ Home Shop Machinist
____ Journal of Light Cont.
____ Live Steam
____ Model Airplane News
____ Modeltec
____ Old House Journal
____ Popular Mechanics
____ Popular Science
____ Popular Woodworking
____ Practical Homeowner
____ Precision Shooter
____ Projects in Metal
____ RC Modeler
____ Rifle
____ Shop Notes
____ Shotgun News
____ Today’s Homeowner
____ Wood
____ Wooden Boat
____ Woodshop News
____ Woodsmith
____ Woodwork
____ Woodworker West
____ Woodworker’s Journal
____ Other:

FOLD ALONG DOTTED LINE
GRIZZLY INDUSTRIAL, INC.
P.O. BOX 2069
BELLINGHAM, WA 98227-2069
TAPE ALONG EDGES--PLEASE DO NOT STAPLE
Name________________________________
Street________________________________
City______________State______Zip_______
Send a Grizzly Catalog to a friend:
Place
Stamp
Here
Table of contents
Other Grizzly Winch manuals
Popular Winch manuals by other brands

rough country
rough country PRO9500 manual

Harken
Harken Performa Winch 70.3 STP Installation and maintenance manual

Kerbl
Kerbl 37113 operating instructions

Comeup
Comeup CWG-30375 instruction manual

TRAC
TRAC Small Craft T10121-C Installation and operating instructions

Ronstan
Ronstan ANDERSEN Classic 10 product manual