GROTHE CALIMA 800 User manual

Installation and operating instructions
Mobile wireless doorbell CALIMA 800
• Bluetooth® loudspeaker function
• Individual ringing melodies in MP3 format
• LED light ring / LED flashing light
• Operation with rechargeable battery or power supply unit

2
Table of contents
General information
• Product information ......................................................................................................................................... 3
• Safety and legal information ......................................................................................................................... 4
CALIMA 800 – the highlights briefly explained ..................................................................................... 5
Product overview ............................................................................................................................................. 6
First use / commissioning / Connect rechargeable battery .............................................................. 7
Replacement of the rechargeable battery ....................................................................................................... 9
Table adapter ...................................................................................................................................................... 10
Setting of the wireless doorbell
• Switch Bluetooth®function on and off / Couple audio source via Bluetooth®..................................... 11
• Melody selection / microSD card . . . . . . . . . . . . . . . . . . . . . . . . . . . . . . . . . . . . . . . . . . . . . . . . . . . . . . . . . . . . . . . . . . . . . . . . . . . . . . . . . . . . . . . . . . . . . . . . . . . . . . . . . . . . . . . . 13
• Colour selection LED light ring .................................................................................................................... 16
• LED setting ...................................................................................................................................................... 17
• Ringtone volume ............................................................................................................................................ 19
Mute / slumber function ...............................................................................................................................20
Coupling
• Couple wireless doorbell and wireless bell button .................................................................................. 22
• Delete coupling between wireless doorbell and wireless bell button ................................................. 24
Alarm function (optional with MISTRAL SE03) .......................................................................................... 25
Possible combinations / networking ..................................................................................................... 26
Radio range ...................................................................................................................................................... 27
Technical data ................................................................................................................................................ 27
Troubleshooting and help ........................................................................................................................... 28
Quick start guide
• Bluetooth®....................................................................................................................................................... 30
• Melody selection / microSD card . . . . . . . . . . . . . . . . . . . . . . . . . . . . . . . . . . . . . . . . . . . . . . . . . . . . . . . . . . . . . . . . . . . . . . . . . . . . . . . . . . . . . . . . . . . . . . . . . . . . . . . . . . . . . . . . 31
• Colour selection LED light ring .................................................................................................................... 32
• LED setting....................................................................................................................................................... 32
• Volume.............................................................................................................................................................. 33
• Slumber function . . . . . . . . . . . . . . . . . . . . . . . . . . . . . . . . . . . . . . . . . . . . . . . . . . . . . . . . . . . . . . . . . . . . . . . . . . . . . . . . . . . . . . . . . . . . . . . . . . . . . . . . . . . . . . . . . . . . . . . . . . . . . . . . . . . . . . . . . . . . 33
• Mute ................................................................................................................................................................. 34
• Coupling .......................................................................................................................................................... 34
• Delete coupling .............................................................................................................................................. 35
• Alarm function ................................................................................................................................................ 35

3
Product information
Dear client,
Thank you very much for choosing our product. With this device you have acquired a quality product
which we have developed and produced for you with the greatest possible care and to the highest
standards.
Package contents
Please check the package contents against the enclosed packing list.
You also need
• a coin or similar to open the battery compartment
• Optional microSD card for using the external melody memory, available as accessory,
16 GB μSD16 (article number 43509
Informationen about the product
Please read the installation and operating instructions carefully before commissioning and keep
them for future reference on. Attach these instructions to the product in case you pass it on.
The latest installation and operating instructions are also available on our website on the respective
article detail page as PDF for download. You can also find out more here:
Cleaning
Please clean using only a slightly damp cloth, not a microfibre cloth, as this could scratch the surface.
Intended use
The device described here is solely intended as a radio-controlled bell and signalling system for private
use. The function can be impaired by different influences (flat batteries, radio interference, etc.).
Never use this wireless doorbell in safety-related areas!
If failure of the device could cause a hazard for people, or other consequential damage is possible, you
MUST prevent this through suitable additional safety measures!
Safety instructions
Do not expose the wireless doorbell to dripping or splashing liquid! Do not place any vessels filled with
liquid on it! Do not cover it with objects or blankets, curtains, etc. and protect it from direct sunlight
and naked flames!
A short circuit of the charging contacts on the desk adapter must be prevented at all costs.
https://www.grothe.de/service/
erklaervideos/
https://www.grothe.de/Haeufig-
gestellte-Fragen/

4
Declaration of conformity
Grothe GmbH herewith declares in sole responsibility and legally binding that this product is in
conformity with the essential health and safety requirements and the other relevant provisions of
Directive 2014/53/EU; depending on the device type tested according to the relevant standards
EN3000220-2, EN 301489-1, EN 62368-1:2016, EN 55022, EN 50581.
RED Directive 2014/53/EU
EMC Directive 2014/30/EU
RoHS Directive 2011/65/EU
WEEE Directive 2012/19/EU
EC Declaration of Conformity for all EC countries: visit www.funkgong.de
Transmission frequency 868.35 MHz
Disposal and recycling
Electrical equipment with this labelling must be collected separately and
recycled in an environmentally compatible way.
Electric scrap and batteries (if used) may NOT be disposed of in household or
commercial waste! Dispose of unusable or discontinued electrical equipment
solely via the return and collection systems or via the manufacturer or importer.
Guarantee and liability
GROTHE GmbH doorbells are produced using modern technology and are subjected to one hundred
percent quality control. If a defect nonetheless occurs in your device, GROTHE GmbH provides a
guarantee with the following scope.
1. Our guarantee includes subsequent improvement or replacement delivery of a device, if it verifiably
has functional or material defects.
2. The guarantee does not cover natural wear and tear or transport damage. It also does not cover
damaged caused by disregard of the installation instructions or improper installation. The guarantee
automatically expires if the device was opened after the fault diagnosis.
3. The guarantee period is 24 months from purchase of the device by the consumer. Compliance with
the claim period must be verified by proof of date of purchase by means of the enclosed invoice,
delivery note or similar document.
In case of a defect, please send the device with enclosed description of the defect to the address of the
seller with the above-named documents.
Safety and legal information

5
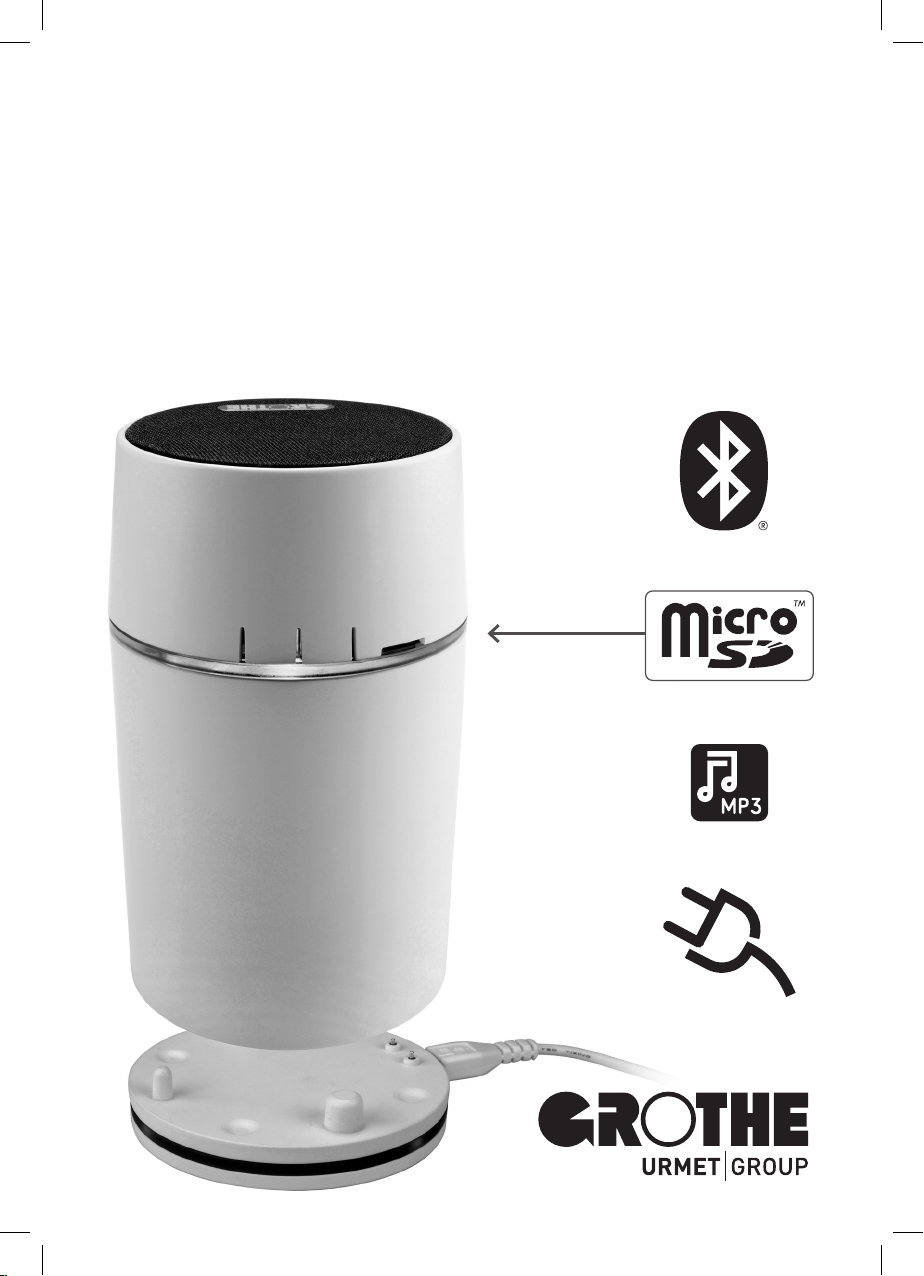
The flexible teamplayer – CALIMA 800 …
… is a mobile wireless doorbell with a large range and stable radio connection, which you can use
anywhere in the house and in protected outdoor areas (outdoors in dry weather from moisture
protected).
… is set and operated quickly and easily via the two-button control.
… reports the status of the setting via the voice output.
… is a powerful Bluetooth®loudspeaker that automatically pauses when a call is signalled or when
an incoming call is received. The stream is controlled via a smartphone or similar.
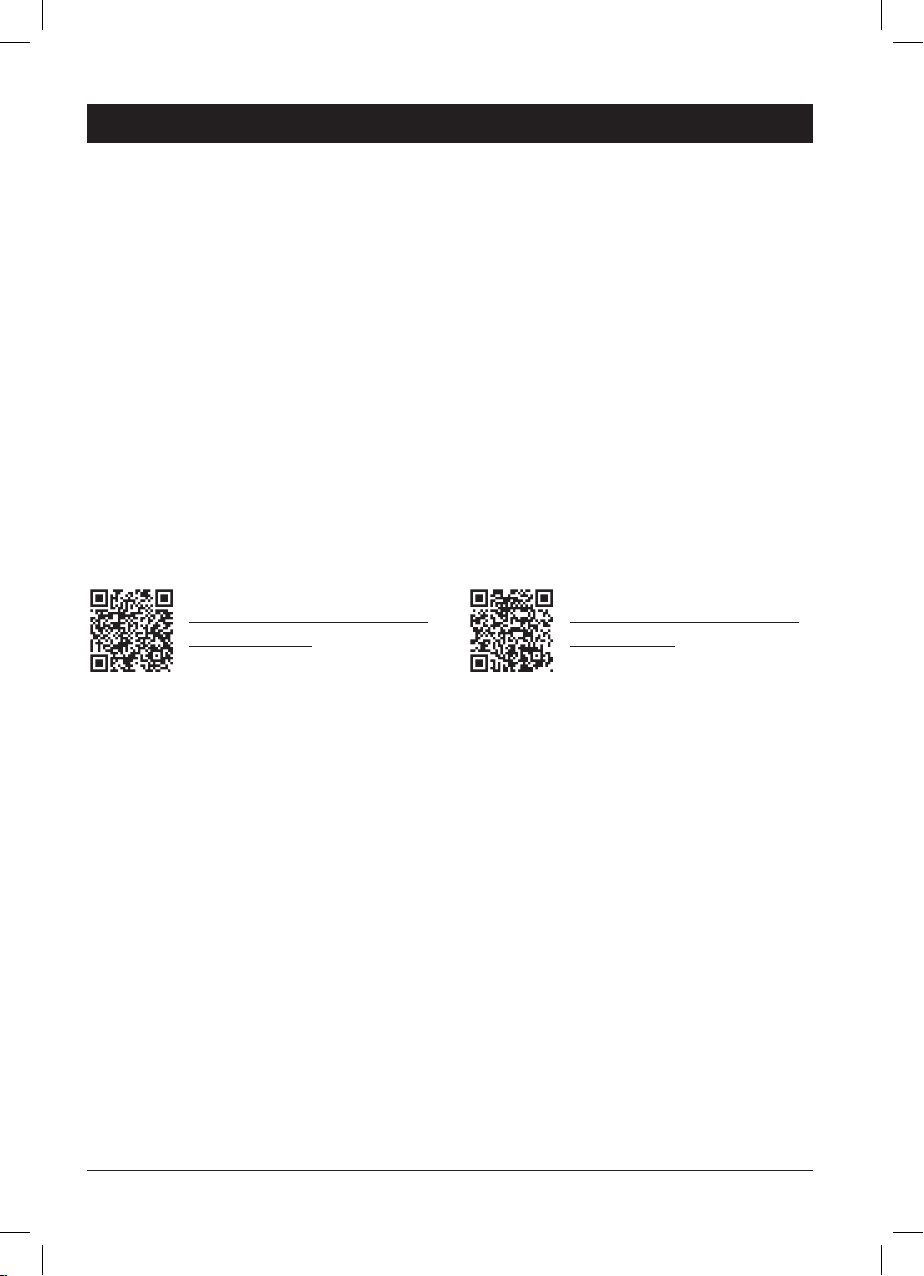
… is equipped with a microSD card slot. Save your desired call melodies in MP3 format on a
microSD card (optional accessory μSD16, article number 43509)
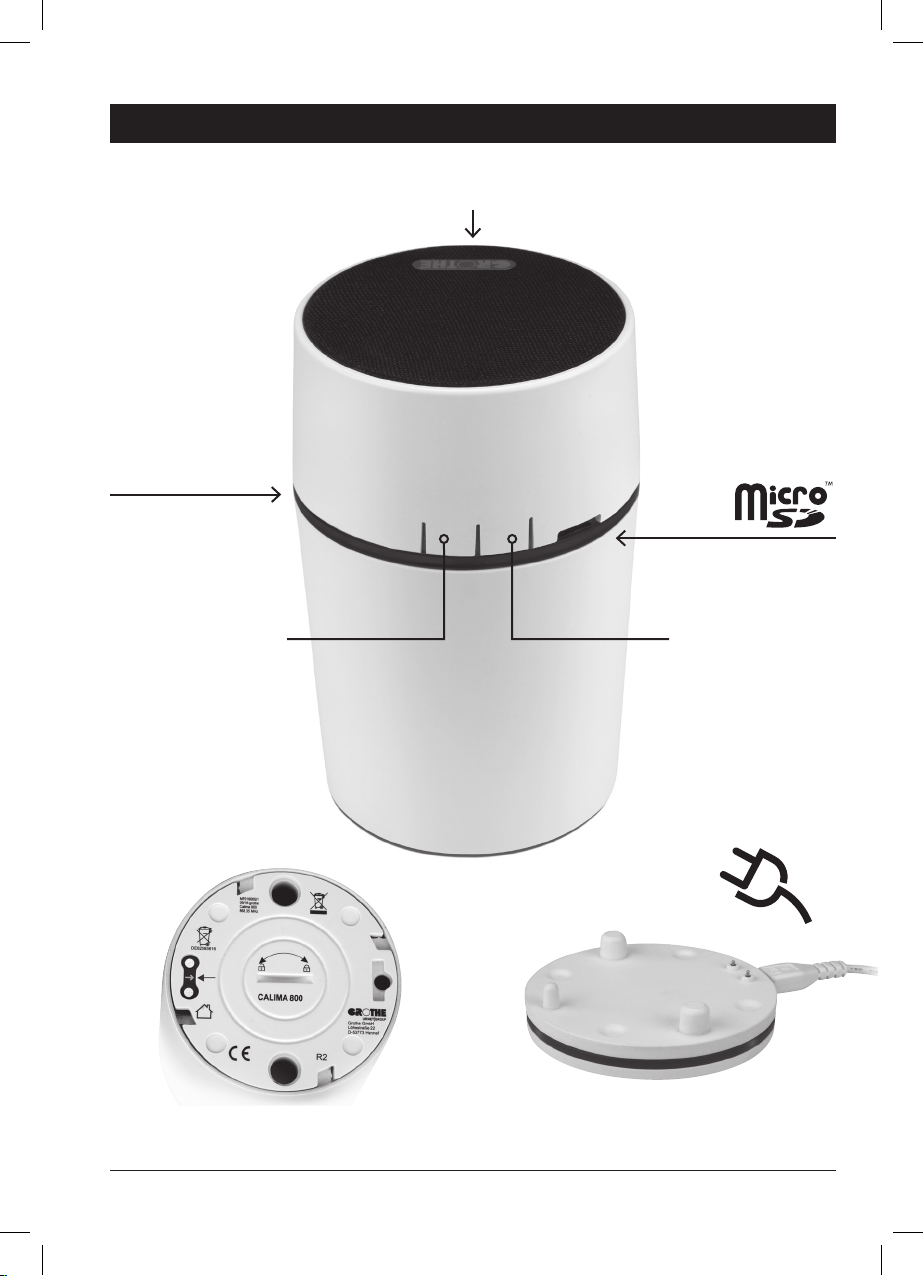
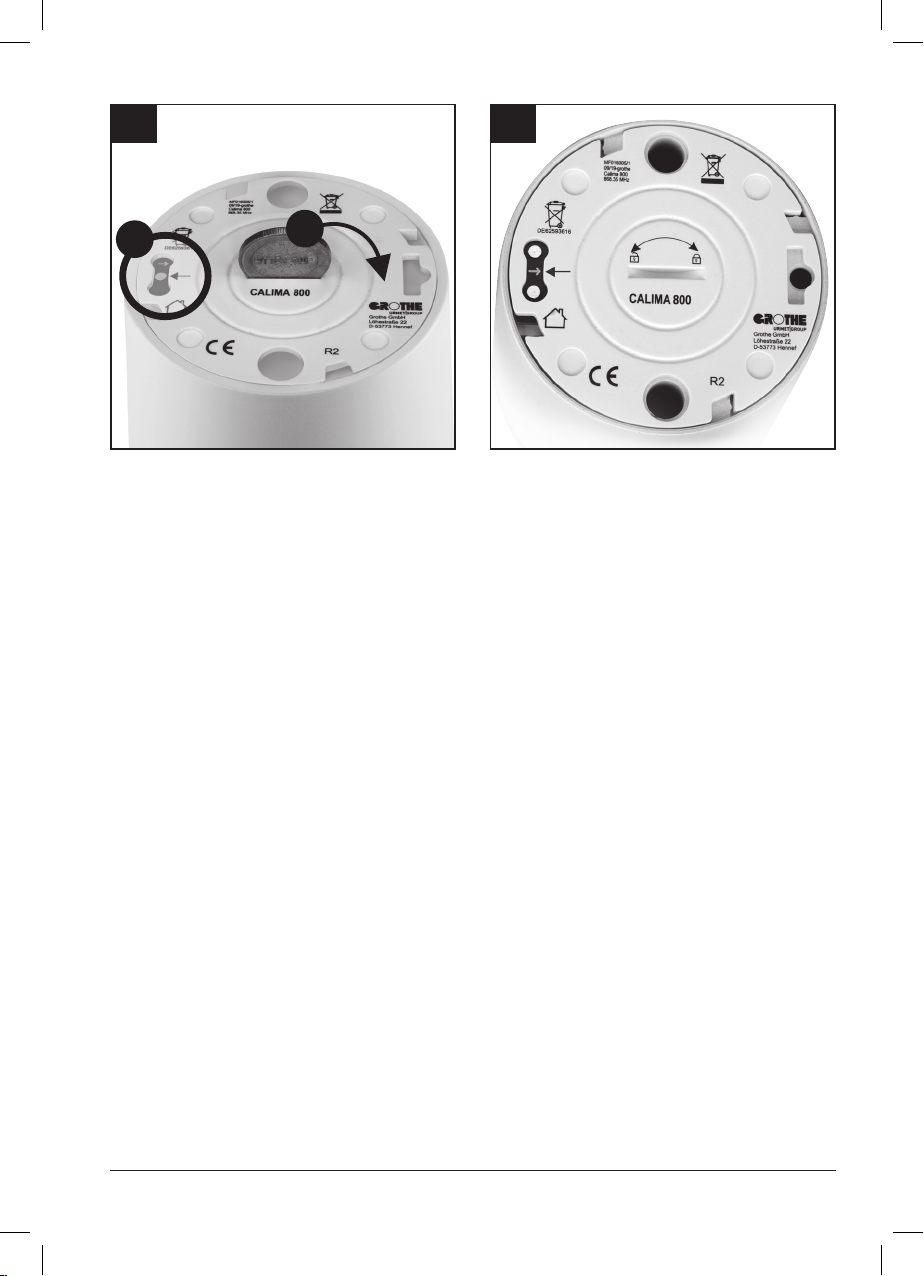
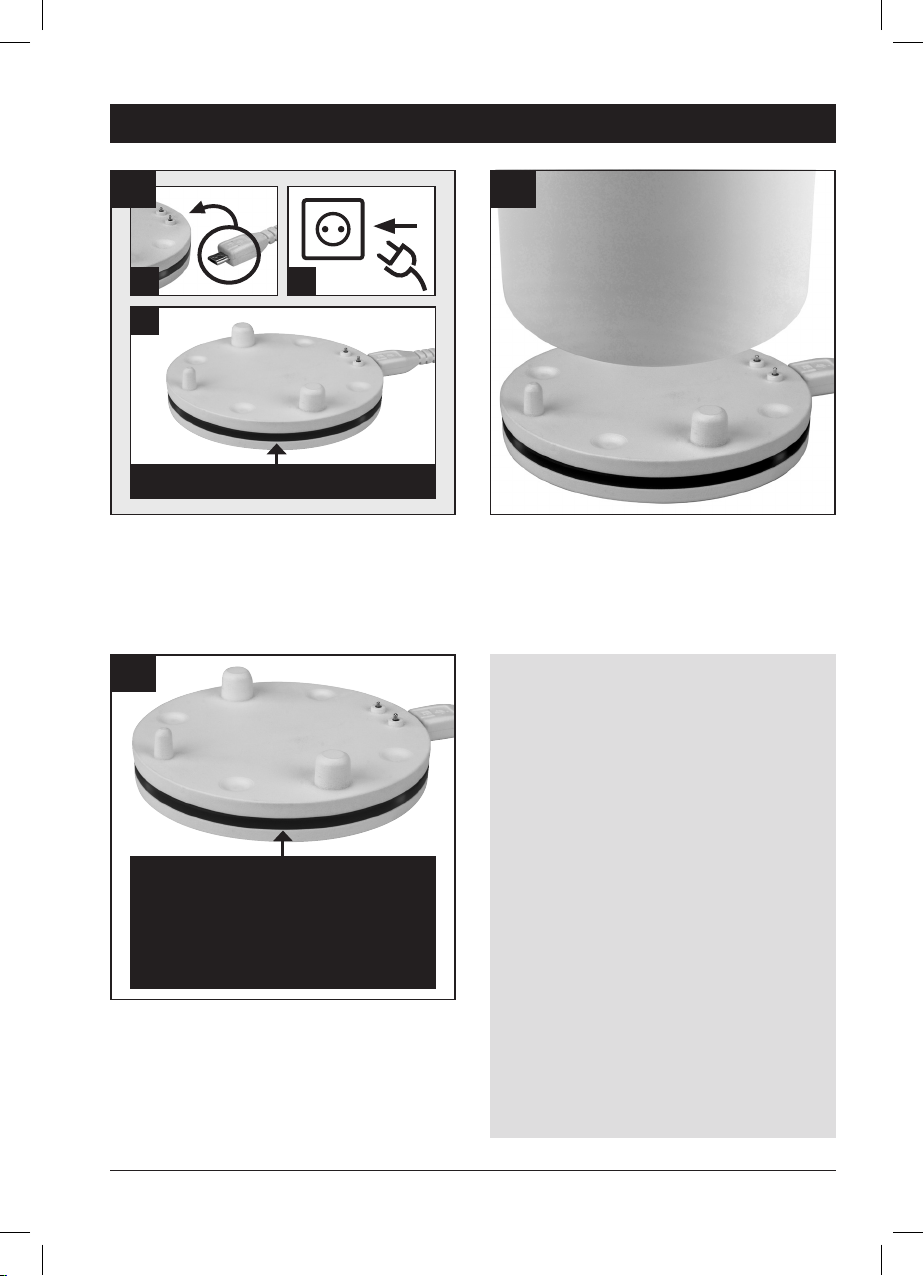
… is equipped with a powerful rechargeable lithium-ion battery, which is charged via the table
adapter.
… can be used in battery mode or can permanently be supplied with voltage with the matching table
adapter with mains adapter (Additional table adapters TA55 available, article number 43599).
… each coupled wireless bell-button (wireless motion detector) can be assigned an individual call
melody from the internal or external melody memory (microSD card).
… can be muted indefinitely or set to sleep mode for 1 / 3 / 9 hours and then does not signal visually
or acoustically. Until then the LED light ring flashes green as a reminder.
… saves all settings permanently - even without power supply.
… has a coloured LED light ring with LED flash light function for optical signalling. Colour and type
can be adapted to your specific needs.
… is individually adjustable. You can add to every MISTRAL wireless bell-button, wireless motion
detector etc. to every (general transmitters) a different ringing melody, a special optical
signalling (white flashing / coloured light or flashing / switched off). One exception: the volume is
always the same for everyone.
… is quickly ready for use, as it is initially only coupled with the wireless bell-button (general
transmitter) *. Later, the call melody, volume and optical call signalling are set.
… is coupled with the wireless bell-button MISTRAL SE03 in the set ex works.
… is part of an expandable system, which can be equipped with different wireless bell-buttons,
wireless doorbells, wireless motion detectors etc. (general transmitters) of the series CALIMA,
MISTRAL or ECHO.
… can be coupled with up to 22 wireless bell-buttons, wireless motion detectors, etc. (general
transmitters). Each one transmits an individual code, so interference is impossible.
… can also be used as a quickly deployable, flexible and above all mobile in-house help call system.
For the alarm function you need a wireless bell-button MISTRAL SE03 as alarm transmitter.
CALIMA 800 – the highlights briefly explained
* The chapters “coupling” and quick start quide describe the coupling process.

6
Product overview
Loudspeaker
Menu button
LED light ring
microSD card slot
Select button
Table adapter with
power supply unitRechargeable battery compartment cover
Product overview

7
1
1
2
2
3
3
4
4
First-time use / starting up
To do this, simply push the plug of the battery
into the socket of the wireless doorbell until it
audibly clicks into place. Please note the
polarity (same colours to each other).
Good to know: The anti-twist protection ensures that you can only push the plug into the socket in
the correct position.
The LED light ring lights up red during the
configuration process
LIGHTS UP RED
First-time use / starting up / connect rechargeable battery »
KLICK
Open the battery compartment by using a coin to
unscrew the cover anti-clockwise.
Before first-time use, the battery needs to be
connected to the CALIMA 800.

8
6
6
5
5
2.
2.
1.
1.
Cover in closed state.
The closed cover prevents the battery from
slipping.
1. Put the cover on. The small black arrow on
the cover must point to the contact, which,
viewed clockwise, is visible below respectively
to the left of the small white arrow between the
contacts.
2. Close the battery compartment by sing a coin
to screw the cover clockwise.
First-time use / initial operation / Connect the battery / Close the battery compartment

9
1
1
2
2
3
3
1. UNLOCK PLUG
2. PULL OUT
BATTERY
INSERT BATTERY,
WIRES FIRST
Open the battery compartment by using a coin to
unscrew the cover counterclockwise to replace
the rechargeable battery.
1. Press the small lever on the plug to unlock it.
This will release the connection.
2. Pull the battery upwards out of the housing.
Connect the new rechargeable battery as you
did for the initial use.
Then insert the rechargeable battery, wires first,
into the slot in the bottom of the housing. Then
close the housing as explained.
Good to know:
The CALIMA 800 is equipped with a long-life
rechargeable lithium-ion battery.
The rechargeable battery is not
permanently installed and can be easily
replaced without tools. We thus support a
long product life of a high-quality product.
Depending on usage habits, it may at some
point be necessary to replace the battery.
If, after very frequent charging and
discharging processes, you notice that the
battery performance has decreased
considerably or the battery is defective,
you can obtain a suitable replacement
rechargeable battery from us.
Replacement of the rechargeable battery

10
3
3
2
2
3.
3.
2.
2.
1.
1.
1
1
LIGHTS UP GREEN
LED LIGHT RING LIGHTS UP ...
... IN GREEN = STANDBY
... IN RED = BATTERY IS CHARGED
... NOT = CHECK POWER SUPPLY
The LED light ring indicates the following
conditions: Green – Standby, CALIMA 800 is
supplied with voltage, the battery is fully
charged. Red – battery is charged. Does not
light up – mains adapter is not plugged in,
please check the connections.
Note:
Charge the battery for at least 12 hours
prior to initial use.
Settings such as coupling, melody selection,
etc. can also be made before the 12 hours
have elapsed, even while charging on the
table adapter (TA55).
If possible, please supply the CALIMA 800 as
standard via the TA55 table adapter to
ensure that the battery is always sufficiently
charged.
Of course, CALIMA 800 can also be used as
a mobile wireless doorbell and Bluetooth
®
loudspeaker over a long period of time
without the need for a table adapter.
Audio output via Bluetooth
®
streaming is
guaranteed for several hours.
Place the CALIMA 800 on the table adapter so
that the spring contacts touch the contact points
of the CALIMA 800. The guide domes of the table
adapter help to find the correct position.
Table adapter
1.) Connect the USB cable to the table adapter.
2.) Plug the power adapter into a socket.
3.) As soon as the LED light ring lights up green,
the table adapter is ready for use.
Table adapter

11
1 x
1
1
2
2
3
3
1 x
4
4
Bluetooth®function
CALIMA 800 can be connected to other audio sources via Bluetooth® and thus be used as a Bluetooth®
loudspeaker. When a visitor rings, the sound output of the Bluetooth®source is immediately muted
and automatically resumes when the ringing melody ends. So you will certainly not miss a visitor.
BLUETOOTH
®
MENU
Press the Menu button on the wireless doorbell
in its normal state once.
You will hear „Bluetooth
®
menu“.
LIGHTS UP BLUE
The LED light ring lights up blue.
PRESSING SELECT BUTTON:
ALTERNATING BLUETOOTH®
SWITCHED ON OR SWITCHED OFF
Pressing the select button turns on the
Bluetooth
®
function. The next time you press the
select button, Bluetooth
®
is switched off.
Bluetooth
®
function »

12
5
5
SETTING FINISHED
As confirmation you will hear „setting finished“.
Note: The wireless doorbell automatically
returns to the normal state, if no button has
been pressed for 7 seconds
Good to know: We recommend to switch off
Bluetooth®
function, if you do not want to
use the loudspeaker.
This extends the battery life (if you use the
CALIMA 800 without table adapter).
If the Bluetooth®function is switched off,
operation is guaranteed for several months.
A harmful deep discharge of the battery is
prevented by the CALIMA 800 battery
monitoring system.
Couple audio sources via Bluetooth®
Note: When the battery is low, the Bluetooth
®
function is automatically switched off. If the battery
charge drops further, all functions of the CALIMA 800 are then deactivated. You must fully recharge
CALIMA 800 using the TA55 desk adapter to be able to use its functions again.
In the Bluetooth®menu on your smartphone or other Bluetooth®enabled audio source, you will see
„CALIMA 800“, when the Bluetooth®function of the CALIMA 800 is switched on. Connect your
Bluetooth®audio source with the CALIMA 800.
Start a program with audio output on a coupled device within range of Calima 800. Adjust the volume of
the audio output on the coupled device.
Bluetooth
®
function • Couple audio sources via Bluetooth
®

13
2 x
3
3
2
2
1 x
4
4
MELODY SELECTION
1
1
Melody selection – melody memory / microSD card
Then, press the Menu button on the wireless
doorbell in its normal state twice.
Press the wireless bell button for which you
want to set the melody.
You will hear “melody selection”.
Melody selection – melody memory / microSD-card »
Insert the microSD card* into the microSD card
slot with the contacts upwards after you have
copied the melodies in MP3 format into the main
directory of the microSD card*.
*microSD-card 16GB available at Grothe (µSD16 article number 43509)

14
For selecting a call melody in the internal
melody memory press the Select button
repeatedly until the desired melody is played.
x-times
6
6
5
5
LIGHTS UP GREEN
To select a call melody in the external melody
memory (microSD card), press the Select button
for approximately three seconds in order to
switch to external memory.
The LED light ring lights up green when the
internal melody memory is activated.
3 seconds
7
7
You will hear “External melody memory”.
8
8
EXTERNAL
MELODY MEMORY
Melody selection – melody memory / microSD card »

15
Note: The wireless doorbell automatically
returns to the normal state, if no button has
been pressed for 7 seconds.
Repeat the procedures to set the melody for
further coupled wireless bell-buttons.
Note: You can switch between the external
and internal melody memory at any time by
pressing the Select button again for about
three seconds.
The LED light ring lights up according to the
selection
• green for active internal memory
• yellow for active microSD card.
The LED light ring lights up yellow when the
external melody memory is activated.
9
9
LIGHTS UP YELLOW
You will hear “Setting finished” as confirmation.
11
11
SETTING FINISHED
For a selection in external melody memory press
the Select button repeatedly until the the desired
melody is played.
From now on, you hear the last played melody
when the wireless bell button is pressed.
x-times
10
10
Melody selection – melody memory / microSD-card

16
Colour selection LED light ring »
Colour selection LED light ring
1
1
1 x
Then, press the Menu button on the wireless
doorbell in its normal state three times.
3 x
2
2
You will hear “Colour selection”. The LED light
ring lights up in the colour currently set.
Press the wireless bell button, for which you
want to set the colour of the LED light ring.
3
3
LIGHTS UP IN THE COLOUR
CURRENTLY SET
COLOUR SELECTION
3
3
Now press the Select button repeatedly until the
LED light ring lights up in the desired colour.
Your selection is saved automatically if no
button is pressed for 7 seconds.
x-times
4
4

17
Colour selection LED light ring • LED Setting »
Note: The wireless doorbell automatically
returns to the normal state if no button has
been pressed for 7 seconds.
7 seconds after the last button was pressed you
will hear “Setting finished”.
From now on, the LED ring lights up in the set
colour when the wireless bell button is pressed.
LIGHTS UP (WHEN THE WIRELESS
BELL BUTTON IS PRESSED) IN THE
SET COULOUR
SETTING FINISHED
5
5
LED Setting
1
1
You will hear “LED setting”.
2
2
LED SETTING
Press the Menu button in the normal state vour
times.
4 x

18
LED setting
Goot do know:
You have various options for the LED light
ring / LED flash light to choose from, which
you can define individually for each wireless
bell button (in general transmitter).
• Colour (red, green, blue etc.)
• Type (RGB-LED lights up or blinks,
white light flashes)
• Optical sigalling switched off
If you use several wireless bell buttons, you
can distinguish which door was rung.
Now press the Select button repeatedly until the
desired LED setting is displayed.
x-mal
3
3
Selection options always start from the current
setting in the following order:
• White flashing
• Coloured lightning
• Coloured blinking
• Switched off
4
4
FLASHES / LIGHTS UP/
BLINKS / SWITCHED OFF
As confirmation you will hear “Setting finished”.
5
5
SETTING FINISHED
Note: The wireless doorbell automatically
returns to the normal state if no button has
been pressed for 7 seconds.

19
Ringing tone volume
Call melody volume »
Note: The volume of the wireless doorbell can
always only be set for all wireless bell buttons
used.
1
1
The LED light ring blinks green as confirmation.
2
2
BLINKS GREEN
You will hear “Volume”.
3
3
VOLUME
Press the Select button until the call melody is
played with the desired volume.
Your selection ist saved automatically, if no
button is pressed for 7 seconds.
x-mal
4
4
Press the Menu button in the normal state five
times.
5 x

20
Call melody volume • Mute / slumber function »
Note: The wireless doorbell automatically
returns to the normal state if no button has
been pressed for 7 seconds.
7 seconds after the last button was pressed you
will hear “Setting finished”. From now on, the
wireless doorbell signals with the last selected
volume.
5
5
SETTING FINISHED
If you do not want to be disturbed, you can
mute the wireless doorbell so that neither a
melody is played, nor does the LED ring flash.
The wireless doorbell signals neither visually
nor acoustically. To do this, two options are
available for you to choose from:
• The function can either be activated for a
previously defined period (slumber function)
• or for an unlimited time (mute).
Both functions, i.e. mute and slumber mode,
are indicated visually. The LED ring blinks
green until the wireless doorbell is back in
active mode, and therefore serves as a
reminder to end muting.
Mute / slumber function
Press the Select button in the normal state once.
1 x
1
1
If mute is active, the LED light ring blinks green
at regular intervals.
2
2
BLINKS GREEN
Table of contents
Other GROTHE Accessories manuals