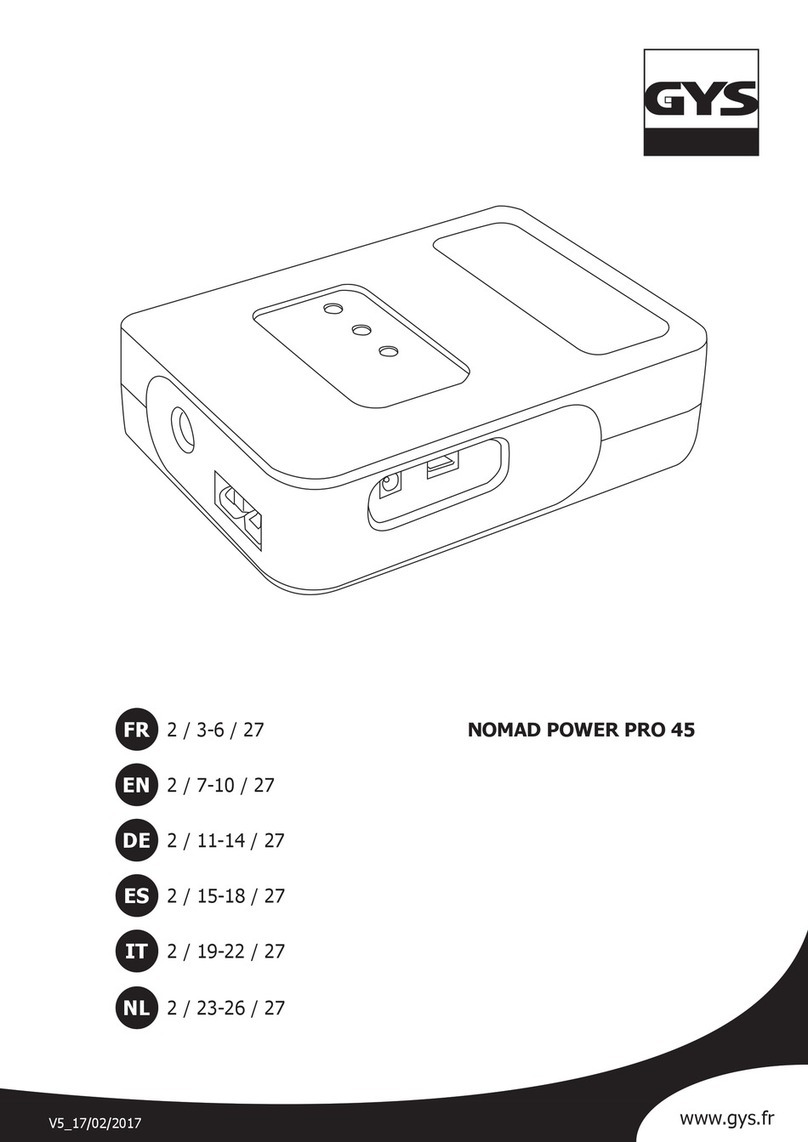
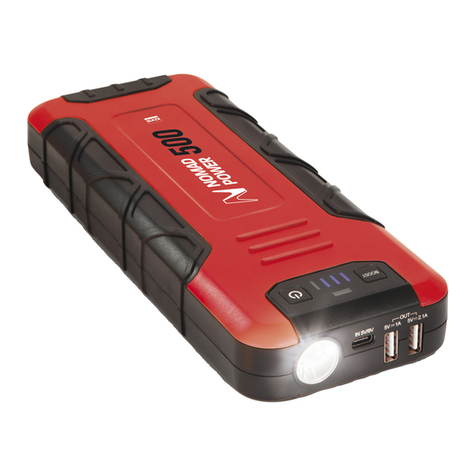
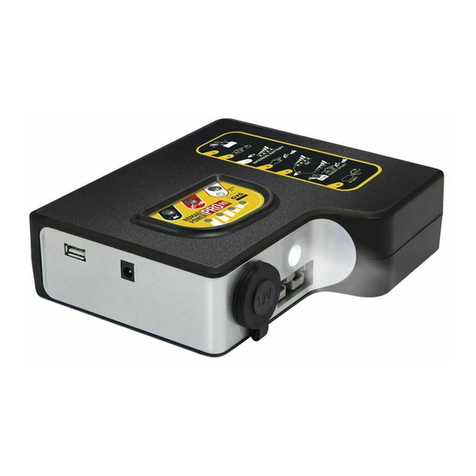
GYS NOMAD POWER 10 Maintenance and service guide

V3.2_11/03/2016
FR
EN
DE
ES
RU
2 / 3-5 / 24-25
2 / 6-8 / 24-25
2 / 9-11 / 24-25
2 / 12-14 / 24-25
2 / 15-17 / 24-25
NOMAD POWER 10
www.gys.fr
IT 2 / 18-20 / 24-25
NL 2 / 21-23 / 24-25

2
NOMAD POWER 10
1
2
3
4
5
6
7
8
910
11
13
12
x1
x1 x1
x1
x1
x1
FR EN DE ES RU IT NL
1Témoins de charge Charging indi-
cators Kontrollleuchte Indicadores lumi-
nosos de carga Индикатор зарядки Spie di carica
Lampjes die het
oplaadniveau
aangeven
2Bouton ON/OFF ON/OFF button EIN-AUS-Schalter Botón ON/OFF Кнопка ON/OFF (ВКЛ/
ВЫКЛ) Tasto ON/OFF ON/OFF knop
3Prise PC
19V / 3.5A
Computer socket
19V / 3.5A
Laptop-Anschluss
(19V/3,5A)
Conector PC
19V / 3.5A
Разъем для
компьютера
19В / 3.5A
Presa PC
19V / 3.5A
Stopcontact PC
19V / 3.5A
4Prise
5V / 1A
Socket
5V / 1A
Mini USB-An-
schluss (5V/1A)
Conector
5V / 1A
Разъем
5В / 1A
Presa
5V / 1A
Stopcontact
5V / 1A
5Prise alimentation
12V / 1A
Power supply
socket
12V / 1A
Ladegerätean-
schluss
Conector red
eléctrica
12V / 1A
Вилка питания
12В / 1A
Presa elettrica
12V / 1A
Stopcontact
12V / 1A
6Port USB
5V / 2A
USB port
5V / 2A USB-Port (5V/2A) Puerto USB
5V / 2A
Разъем USB
5В / 2A
Porta USB
5V / 2A
USB aansluiting
5V / 2A
7Leds LEDs LED Leds Светодиоды Led Ledlampjes
8
Connecteur pour
câble de démarrage
intelligent
Jumper cable
connection
Anschluss für
Starthilfekabel
Conector para
cable de arranque
inteligente
"Интеллектуальный
коннектор
для кабеля запуска"
Connettore per
cavo
d«starter intelli-
gente
Aansluiting voor
smart
startkabels
9Pinces de
démarrage Jumper cables Starthilfekabel Pinzas de
arranque
Зажимы
запуска
Morsetti di
avviamento
Laad
klemmen
10
Câble USB USB cable USB-Kabel Cable USB Кабель USB Cavo USB USB kabel
11
Alimentation
secteur Power supply Ladegerät Alimentación de
red eléctrica Сетевой шнур Alimentazione Netspanning
12
Prise allume cigare Cigarette lighter
plug
Ladekabel für
Zigarettenanzü-
nder
Conector del
encendedor
Разъем для
прикуривателя
Presa accendi-
sigari
Plug sigarette-
naansteker
13
Kit d’embouts +
câble auxiliaire
Connections kits
+ auxiliary cable
Laptopkabel mit
Adapterkit
Kit de boquillas +
cable auxiliar
Набор насадок +
вспомогательный
кабель
Kit di ghiere +
cavo ausiliare
Kit stekkertjes +
extra kabel

3
NOMAD POWER 10 FR
Ce manuel d’utilisation comprend des indications sur le fonctionnement de votre appareil et les précautions à suivre pour
votre sécurité. Merci de le lire attentivement avant première utilisation et de le conserver soigneusement pour toute
relecture future.
SÉCURITÉ
- À n’utiliser en aucun cas pour charger des piles ou des batteries non-rechargeables.
- Si le câble d’alimentation est endommagé, il doit être remplacé.
- Ne pas couvrir l’appareil pendant l’utilisation.
- Ne pas stocker ou utiliser l’appareil dans un local où la température est > à 70°C.
- Ne pas modier ni démonter l’appareil.
- Mettre à l’abri de la pluie et de l’humidité.
- Produit faisant l’objet d’une collecte sélective. Ne pas jeter dans une poubelle domestique.
- Cet appareil n’est pas prévu pour être utilisé par des personnes (y compris des enfants) dont les capacités physiques
ou mentales sont réduites, ou des personnes dénuées d’expérience ou de connaissance, sauf si elles ont pu bénécier,
par l’intermédiaire d’une personne responsable de leur sécurité, d’une surveillance ou d’instructions préalables concer-
nant l’utilisation de l’appareil. Les enfants ne doivent pas jouer avec l’appareil. Le nettoyage et l’entretien par l’usager
ne doivent pas être effectués par des enfants sans surveillance.
- L’appareil doit être placé de façon telle que la che de prise de courant soit accessible.
FONCTIONNEMENT
Témoins lumineux
Appuyer sur le bouton ON/OFF pour vérier le niveau de batterie interne du NOMAD
POWER.
Témoins 1 clignotant 1 xe 2 xes 3 xes 4 xes
Capacité de la
batterie interne
de l’appareil 0% 25% 50% 75% 100%
Les voyants clignotent, un par un, lorsque vous rechargez votre appareil. Le nombre de témoins allumés indique la capa-
cité de la batterie interne du NOMAD POWER. Tous les voyants sont xes lorsque la charge est suspendue ou terminée.
!RECHARGER LA BATTERIE DU NOMAD POWER avant la première utilisation et après chaque utilisation.
CHARGE DE LA BATTERIE INTERNE
1 - Brancher l’adaptateur réseau au réseau électrique domestique.
2 - Brancher au port d’entrée du NOMAD POWER l’autre extrémité de l’adaptateur
pour démarrer la charge.
OU
1 - Brancher l’adaptateur voiture sur la prise allume cigare du véhicule.
2 - Brancher au port d’entrée du NOMAD POWER l’autre extrémité de l’adaptateur
pour démarrer la charge.
OU
non fourni 1 - Brancher le câble USB à un chargeur comportant une sortie USB (non fourni).
2 - Brancher le cable au port d’entrée du NOMAD POWER pour démarrer la
charge.

4
NOMAD POWER 10 FR
DÉMARRAGE DU VÉHICULE
Fonction de démarrage d’urgence pour les véhicules essence ou diesel équipés d’une batterie 12V.
Pour démarrer un véhicule, veuillez procéder comme suit :
!Si la tension de la batterie du véhicule est > 12.5 V, le NOMAD POWER ne fonctionnera pas.
1Brancher le câble de démarrage intelligent au connecteur du NOMAD POWER.
2
SMART
BOOSTER CABLE
Error
Start
Si les voyants «Start» et «Error» clignotent alternativement en vert et rouge, l’appareil
est prêt. Si seul, le voyant rouge est allumé, la tension de batterie interne du NOMAD
POWER est trop faible. Dans ce cas, recharger votre appareil.
3S’assurer que le NOMAD POWER est chargé en vériant le nombre de témoin lumineux
sur l’appareil (minimum 3 témoins allumés (voir page 3)).
41- Brancher la pince rouge au (+) de votre batterie.
2- Brancher la pince noire au (-) de votre batterie.
5Start
30"
Si le voyant «Start» devient vert, et le voyant «Error» s’éteint, tout est ok.
Le voyant vert reste allumé pendant 30 secondes, l’utilisateur a donc 30 secondes pour
aller démarrer son véhicule.
(Si aucune action n’est effectuée durant ce temps, le câble de démarrage intelligent se
désactive automatiquement et les voyants «Start» et «Error» se remettent à clignoter
alternativement. Débrancher et rebranchez votre câble de démarrage au connecteur de
l’appareil (voir étape 1).
Error Si seul, le voyant «Error» est allumé, le démarrage du véhicule est impossible (voir page
5 pour plus d’informations).
7Démarrer le véhicule : le voyant «Error» clignote rouge et une alarme se déclenche.
8Retirer immédiatement les 2 pinces des bornes de la batterie du véhicule, et débran-
cher, aussi, le câble de démarage intelligent de son connecteur.
CHARGE DE TÉLÉPHONES PORTABLES
1 - Brancher votre câble au port USB 5V 2A du NOMAD POWER.
2 - Sélectionner l’adaptateur approprié pour votre téléphone portable ou
tablette et brancher-le. Le NOMAD POWER lance la charge automatiquement.

5
NOMAD POWER 10 FR
ALIMENTATION ÉLECTRIQUE
1 - Brancher le câble auxiliaire au port PC 19V 3,5A du NOMAD POWER.
2 - Sélectionner l’embout approprié pour votre ordinateur portable et
connecter-le sur le câble auxiliaire.
3 - Brancher le câble auxiliaire avec l’embout sur la prise alimentation de
votre ordinateur.
FONCTION LAMPE DE POCHE
Appuyer 3 secondes sur le bouton ON/OFF pour allumer les LEDs.
Appuyer brièvement sur le bouton pour changer de modes d’éclairages (4
modes disponibles : normal, lumière stroboscope, SOS et Off).
PROTECTIONS
Cet appareil est protégé contre la surcharge, la décharger profonde, les courts-circuits et les inversions de polarité.
ANOMALIES, CAUSES, REMÈDES
ANOMALIES CAUSES REMÈDES
1Pas de réponse
lors de l’appui sur le bouton ON/OFF Le NOMAD POWER est déchargé. Recharger l’appareil (voir page3).
2Voyant «Error» allumé sur le câble
de démarrage intelligent. Tension de batterie interne < 11.0V. Recharger l’appareil
3Voyant «Error» clignote rouge
+ signal sonore.
Inversion de polarité Vérier que les pinces sont bien connectées et débrancher/rebrancher le câble
de démarrage intelligent.
Court-circuit Vérier que les pinces sont bien connectées et débrancher/rebrancher le câble
de démarrage intelligent.
Les pinces sont restées branchées sur la batterie. Retirer les 2 pinces des bornes de la batterie du véhicule an de protéger
l’appareil.
4L’appareil est un peu chaud lorsqu’il
est branché à un pc portable. -Enlever la batterie du pc portable ou débrancher le NOMAD POWER du pc
portable pendant 5 minutes et rebrancher-le.
CONDITIONS DE GARANTIE
La garantie couvre tous défauts ou vices de fabrication pendant 1 an, à compter de la date d’achat (pièces et main
d’oeuvre).
La garantie ne couvre pas :
• Toutes autres avaries dues au transport.
• L’usure normale des pièces (Ex. : câbles, pinces, etc.).
• Les incidents dus à un mauvais usage (erreur d’alimentation, chute, démontage).
• Les pannes liées à l’environnement (pollution, rouille, poussière).
En cas de panne, retourner l’appareil à votre distributeur, en y joignant :
- un justicatif d’achat daté (ticket de sortie de caisse, facture….)
- une note explicative de la panne.
6
NOMAD POWER 10 EN
This manual contains safety and operating instructions. Read it carefully before using the device for the rst time and
keep it in a safe place for future reference.
SAFETY
- Do not use to charge non rechargeable batteries.
- If damaged, the power supply cable will need to be replaced.
- Do not cover the device whilst using it.
- Do not store or use the device in a room where the temperature is above 70°C.
- Do not modify of dissassemble the product.
- Protect against rain and moisture.
- This product should be disposed of at an appropriate recycling facility. Do not dispose of in domestic waste.
This device is not intended for use by persons (including children) with reduced physical or mental capabilities, or lack
of experience and knowledge, unless they have been given by a person responsible for their safety, supervision or ins-
tructions concerning the use of the device. Children must no play with the product. Cleaning and maintenance should
not be performed by unsupervised children.
- The device must be positioned so that the socket is always accessible.
OPERATION
Indicators Press the ON/OFF button to check internal battery level of the NOMAD POWER.
Lights 1 ashing 1 steady 2 steady 3 steady 4 steady
Internal battery
capacity for the
device 0% 25% 50% 75% 100%
Indicators ash in turn, whilst charging the device. The number of indicators ON indicates the capacity of the NOMAD
POWER internal battery. All lights are steady if the battery is on hold or the charge is complete.
! RECHARGE THE NOMAD POWER before rst use and after each use.
INTERNAL BATTERY CHARGING
1 - Connect mains adaptor to domestic mains.
2 - Connect the other end to the NOMAD POWER to start the charge.
OR
1 - Connect car adaptor to the car cigarette lighter socket.
2 - Connect the other end to the NOMAD POWER to start the charge.
OR
not supplied
1 - Plug the USB cable to a charger with a USB output (not supplied)
2 - Plug the other end to the NOMAD POWER to start the charge.

7
NOMAD POWER 10 EN
STARTING THE VEHICLE
Emergency start function for petrol or diesel vehicles with a 12V battery.
To start a vehicle, please process as follows:
!If the voltage of the vehicle battery is > 12.5V, the NOMAD POWER will not function properly.
1Connect the jumper cable to the NOMAD POWER connector.
2
SMART
BOOSTER CABLE
Error
Start
If the lights «Start» and «Error» ash alternately in green and red, the product is ready.
If the red light only is ON, the internal battery voltage of the NOMAD POWER is too low.
In this event, charge your device.
3Make sure the NOMAD POWER is charged by checking the number of indicators on the
device (minimum of 3 indicators ON (see page 6)).
41- Connect the red clamp to the (+) of the battery.
2- Connect the black clamp to the (-) of the battery.
5Start
30"
If the «Start» light is green and the «Error» light turns off, everything is ok.
The green light stays ON for 30 seconds so the user has 30 seconds to go and start his
vehicle.
(If no action is done during this time, the jumper cable turns itself off and the «Start»
and «Error» indicators will ash again alternately. Unplug and plug back your jumper
cable to the connector device (see step 1).
Error If only the «Error» indicator is turned ON, starting the vehicle is not possible (see page
8 for more information).
7Starting the vehicle: The «Error» indicator ashes red and an alarm beep goes off.
8Remove immediately the 2 clamps of the vehicle battery and unplug also the jumper
cable from of the connector.
CHARGING MOBILE PHONES
1 - Connect the cable to the NOMAD POWER USB port 5V 2A .
2 - Select the appropriate adaptor for your mobile phone or tablet and plug it
in. The NOMAD POWER starts the charge automatically.

8
NOMAD POWER 10 EN
POWER SUPPLY
1 - Plug the auxiliary cable to PC port 19V 3.5A of the NOMAD POWER.
2 - Select the appropriate connection for your laptop and connect it on the
auxiliary cable.
3 - Plug the auxiliary cable with the right connection on the power supply
socket of your laptop.
FLASHLIGHT FUNCTION
Press the ON/OFF button for 3 seconds to turn on the LEDs.
Briey press the button to switch lighting modes (4 available modes: nor-
mal, ash, SOS and OFF).
PROTECTIONS
This device is protected against short-circuits, overloads, deeply discharge and polarity inversions.
TROUBLESHOOTING, CAUSES, REMEDIES
TROUBLESHOOTING CAUSES REMEDIES
1No response while pressing the ON/
OFF button The NOMAD POWER is discharged. Charge the product (see page 6).
2«Error» light ON on the jumper
cable. Internal battery voltage < 11.0V. Charge the product.
3«Error» light ashes red + alarm
beep.
Polarity reversal Check that the clamps are well connected and unplug/plug back the jumper
cable.
Short-circuit Check that the clamps are well connected and unplug/plug back the jumper
cable.
Clamps have been left connected to the battery. Remove the 2 clamps from the car battery in order to protect the device.
4The device is warm whilst connected
to a laptop. -Remove laptop’s battery or unplug the NOMAD POWER from the laptop for 5
minutes and plug it back again.

9
NOMAD POWER 10 DE
Diese Betriebsanleitung enthält Sicherheits- und Betriebshinweise. Bitte lesen Sie diese Anleitung aufmerksam durch,
bevor Sie das Gerät zum ersten Mal benutzen und bewahren Sie sie sorgfältig auf.
SICHERHEITSHINWEISE
• Versuchen Sie nie zu kleine Batterien oder nicht auadbare Batterien zu laden.
• Ist das Ladegerät beschädigt, kontaktieren Sie bitte Ihren Fachhändler.
• Das Gerät bitte bei Benutzung nicht abdecken.
• Bitte das Gerät in einem Raum, wo die Temperatur > als 70°C ist, nicht benutzen oder lagern.
• Das Gerät nicht ändern oder demontieren.
• Schützen Sie das Gerät vor Regen und Feuchtigkeit.
• Für die Entsorgung Ihres Geräts gelten besondere Bestimmungen (Sondermüll). Es darf nicht mit dem Hausmüll ent-
sorgt werden.
• Dieses Gerät ist kein Spielzeug! Schützen Sie es vor unbefugtem Gebrauch. Kinder dürfen nicht mit diesem Gerät spie-
len. Benden sich Kinder oder Personen mit eingeschränkten körperlichen oder geistigen Fähigkeiten sowie Personen
ohne explizite Erfahrung im Umgang mit dem Produkt in der Nähe des Gerätes, sorgen Sie bitte für ausreichend Schutz
und Kontrolle bei Benutzung des Gerätes.
• Achten Sie während der Ladung auf einen frei zugänglichen Netzanschluss
BETRIEB
Kontrolllampe Ein Druck auf EIN/AUS zeigt den Ladestand des internen Akkus.
Kontrollleuchte 1 Blinken 1 Kontrollleuchte 2 Kontrollleuch-
ten 3 Kontrollleuch-
ten 4 Kontrollleuch-
ten
interne Akku-
kapazität des
Gerätes
0% 25% 50% 75% 100%
Die Kontrolllampen blinken einzeln bei Gerätladung. Je mehr Leuchten brennen, desto voller ist der Akku.Wenn alle
Leuchten an sind, ist der Ladevorgang beendet.
!Laden Sie das Nomad Power vor dem Ersteinsatz und dann nach jedem Einsatz auf.
LADEN DER BATTERIE
1 - Das Ladegerät mit dem Spannungsnetz verbinden.
2- Das Ladegerät mit dem Ladegeräteanschluss am NOMAD POWER verbinden. Der
Ladevorgang startet.
Oder
1 - Das Ladekabel mit dem Zigarettenanzünderanschluss im Fahrzeug verbinden.
2 - Den anderen Anschluss des Ladekabels mit dem Ladegeräteanschluss am NOMAD
POWER verbinden. Der Ladevorgang startet.
Oder
nicht im Lieferumfang
1 - Das USB-Kabel mit einem USB-Port verbinden (nicht im Lieferumfang).
2 - Den anderen Anschluss des Ladekabels mit dem Ladegeräteanschluss am
NOMAD POWER verbinden. Der Ladevorgang startet.

10
NOMAD POWER 10 DE
FAHRZEUGSTART
Starthilfefunktion für Benzin- oder Dieselfahrzeuge mit einer 12V Batterie. Zum Start des Fahrzeugs gehen Sie bitte
wie folgt vor:
!Wenn die Spannung der Fahrzeugbatterie über 12,5 V liegt, funktioniert das NOMAD POWER nicht.
1Das Starthilfekabel am passenden Anschluss am NOMAD POWER anschließen.
2
SMART
BOOSTER CABLE
Error
Start
Blinken die «Start» und «Error» LEDs abwechselnd grün und rot, ist das Gerät betriebs-
bereit. Falls nur die rote LED blinkt, ist die interne Akkuspannung des NOMAD POWER
zu niedrig, sollen Sie bitte das Gerät auaden.
3Das NOMAD POWER ist aufgeladen, wenn 3 Kontrollleuchten blinken (siehe S.9)
41- die rote Klemme an (+) der Batterie anschließen
2- die schwarze Klemme an eine blanke Stelle der Karosserie, in ausreichendem Abstand
zu Brennstofeitungen und Batterie, anklemmen.
5Start
30"
Leuchtet die Start-Kontrollleuchte grün und die «Error»-Kontrolleuchtempe ist aus, ist
das Gerät betriebsbereit. Die grüne Kontrollleuchte brennt 30 Sekunden lang, in dieser
Zeit kann das Fahrzeug gestartet werden (Findet in diesem Zeitraum kein Startver-
such statt, deaktiviert sich das Starthilfekabel automatisch und die Start-und «Error»-
Kontrollleuchte blinken wieder abwechselnd. Aktivieren Sie das Starthilfekabel wieder
durch Abziehen und Wiederanschließen am Booster (siehe Abschnitt 1)).
Error Leuchtet nur «Error»-Kontrollleuchte, ist das Starten eines Fahrzeugz unmöglich (siehe
bitte S. 11 für weitere Informationen).
7Fahrzeug-Start: Die «Error»-Kontrollleuchtet blinkt rot und einer Warnton erklingt.
8Die beiden Klemmen sofort von den Anschlüssen im Fahrzeug abziehen und das Star-
thilfekabel aus dem Anschluss am Booster ausziehen.
AUFLADEN VON MOBILTELEFONEN
1- Verbinden Sie das USB-Kabel mit dem USB-Port 5V 2A des NOMAD
POWER.
2- Wählen Sie den geeigneten Adapter für Ihr Handy oder Tablet und
schließen Sie das Gerät an. Das NOMAD POWER startet automatisch den
Ladevorgang.

11
NOMAD POWER 10 DE
LAPTOPANSCHLUSS
1- Schließen Sie das Laptopkabel am PC Port 19V 3,5A des NOMAD
POWER an.
2- Wählen Sie den geeigneten Adapter für Ihr Laptop und schließen Sie ihn an
das Laptopkabel an.
3- Verbinden Sie das Kabel mit dem Anschluss an ihrem Laptop.
TASCHENLAMPEFUNKTION
Drücken Sie drei Sekunden lang den EIN/AUS Schalter zum Einschalten
der LEDs.
Ein kurzer Druck auf den Schalter wechselt den Modus (4 mögliche Modi:
normal, Stroboskoplampe, SOS, AUS).
SCHUTZFUNKTIONEN
Das Gerät ist gegen Kurzschlüsse, Überlastung, Tiefentladung und Verpolung abgesichert.
BETRIEBSSTÖRUNG, URSACHEN, ABHILFEN
Betriebsstörung Ursachen Abhilfen
1Keine Meldung beim Druck auf den
EIN/AUS Schalter NOMAD POWER entladen Das Gerät auaden (siehe S.9)
2Die «Error»-Kontrollleuchte auf dem
Starthilfekabel blinkt interne Batteriespannung < 11,0V Das Gerät auaden
3Die «Error»-Kontrollleuchte blinkt
rot und einer Warnton ertönt.
Verpolung Prüfen Sie bitte, ob die Klemmen richtig verbunden sind und ziehen Sie das
Starthilfekabel ab und schließen es wieder an.
Kurzschluss Prüfen Sie bitte, ob die Klemmen richtig verbunden sind und ziehen Sie das
Starthilfekabel ab und schließen es wieder an.
Die Klemmen sind mit der Akku verbunden. Die 2 Klemmen sofort von den Batteriepolen sowie das Starthilfekabel abziehen,
um das Gerät zu schützen.
4Das Gerät wird warm, wenn ein
Laptop angeschlossen wird. -Den Laptopakku entfernen oder das NOMAD POWER für 5 Minuten ausschalten
und wieder einschalten.
HERSTELLERGARANTIE
Die Garantieleistung des Herstellers erfolgt ausschließlich bei Fabrikations- oder Materialfehlern, die binnen 12 Monate
nach Kauf angezeigt werden (Nachweis Kaufbeleg). Die Garantieleistung erfolgt nicht bei Defekten, die durch unsach-
gemäßen Gebrauch, Sturz oder harte Stöße sowie durch nicht autorisierte Reparaturen oder durch Transportschäden,
die infolge des Einsendens zur Reparatur, hervorgerufen worden sind. Keine Garantie wird für Verschließteile (z. B.
Kabel, Klemmen, etc) sowie bei Gebrauchsspuren übernommen. Das betreffende Gerät bitte immer mit Kaufbeleg
und kurzer Fehlerbeschreibung ausschließlich über den Fachhandel einschicken. Die Reparatur erfolgt erst nach Erhalt
einer schriftlichen Akzeptanz (Unterschrift) des zuvor vorgelegten Kostenvoranschlags durch den Besteller. Im Fall einer
Garantieleistung trägt GYS ausschließlich die Kosten für den Rückversand an den Fachhändler.

12
NOMAD POWER 10 ES
Este manual de uso incluye indicaciones sobre el funcionamiento de su aparato y las precauciones a seguir para su
seguridad. Lea atentamente este documento antes del primer uso y consérvelo para una futura lectura.
SEGURIDAD
- En ningún caso se debe usar este aparato para cargar pilas o baterías no recargables.
- Si el cable de alimentación está dañado, reemplácelo.
- No cubra el aparato durante su uso.
- No almacene ni utilice en aparato en un local donde la temperatura sea superior a 70ºC.
- No modique ni desmonte el aparato.
- Ponga el aparato en un lugar protegido de la lluvia y de la humedad.
- Este producto es objeto de una recogida selectiva. No lo deposite en un contenedor doméstico.
- Este aparato no está diseñado para ser utilizado por personas cuyas capacidades físicas, sensoriales o mentales estén
reducidas, o personas sin experiencia alguna o conocimiento sobre su uso, excepto si lo hacen bajo la vigilancia de
una persona responsable que no cumpla lo anterior, o si han seguido las instrucciones previas del aparato. Los niños
no deben jugar con el aparato. Los niños sin vigilancia no deben limpiar ni efectuar mantenimiento alguno del aparato.
- El aparato debe colocarse de forma que la toma de corriente sea accesible.
FUNCIONAMIENTO
Indicadores
luminosos
Presione el botón ON/OFF para comprobar el nivel de batería interna del NOMAD POWER.
Indicadores lumi-
nosos 1 parpadeando 1 jo 2 jos 3 jos 4 jos
Capacidad de la
batería interna
del aparato 0% 25% 50% 75% 100%
Los indicadores parpadean, uno a uno, cuando recarga el aparato. El número de indicadores encendidos indica la capa-
cidad de la batería interna del NOMAD POWER. Todos los indicadores están jos cuando la carga se interrumpe o se
termina.
!Recargar la batería del Nomad Power antes del primer uso y tras cada uso.
CARGA DE LA BATERÍA INTERNA
1 - Conectar el adaptador de red eléctrica a la red.
2 - Conecte al puerto de entrada del NOMAD POWER la otra extremidad del adapta-
dor para iniciar la carga.
O
1 - Conecte el adaptador de vehículo sobre la toma del encendedor de este.
2 - Conecte al puerto de entrada del NOMAD POWER la otra extremidad del adapta-
dor para iniciar la carga.
O
No incluido 1 - Conecte el cable USB a un cargador que tenga salida USB (no incluido).
2 - Conecte el cable al puerto de entrada del NOMAD POWER para iniciar la
carga.

13
NOMAD POWER 10 ES
ARRANQUE DEL VEHÍCULO
Función de arranque de urgencia para vehículos de gasolina o diésel equipados con una batería de 12V.
Para arrancar un vehículo, proceda así:
!Si la tensión de la batería del vehículo es superior a 12.5V, el NOMAD POWER no funcionará.
1Conecte el cable de arranque inteligente al conector del NOMAD POWER.
2
SMART
BOOSTER CABLE
Error
Start
Si los indicadores START Y ERROR parpadean de forma alterna en verde y rojo, el apa-
rato está listo. Si solo se enciende el rojo, la tensión de la batería interna del NOMAD
POWER es demasiado débil. En este caso, recargue su aparato.
3Asegúrese de que el NOMAD POWER está cargado comprobando el número de indica-
dores sobre el aparato (mínimo 3 indicadores encendidos (ver página 12).
41- Conecte la pinza roja al polo positivo de su batería.
2- Conecte la pinza negra al polo negativo de su batería.
5Start
30"
Si el indicador START se enciende verde y el indicador ERROR se apaga, todo está
correcto.
El indicador verde queda encendido durante 30 segundos, el usuario tiene 30 segundos
para arrancar su vehículo.
(Si no se efectúa ninguna acción durante este tiempo, el cable de arranque inteligente
se desactiva automáticamente y los indicadores START y ERROR parpadean de nuevo
alternándose. Desconecte y vuelva a conectar el cable de arranque al conector del apa-
rato (ver etapa 1).
Error Si solo se enciende el indicador ERROR, el arranque del vehículo es imposible (ver
página 14 para más información).
7Arranque el vehículo: el indicador ERROR parpadea en rojo y se activa una alarma.
8Retire inmediatamente las dos pinzas de los bornes de la batería del vehículo y desco-
necte también el cable de arranque inteligente de su conector.

14
NOMAD POWER 10 ES
CARGA DE TELÉFONOS MÓVILES
1 - Conecte su cable al puerto USB 5V 2A del NOMAD POWER.
2 - Seleccione el adaptador apropiado para su teléfono móvil o tableta y coné-
ctelo. El NOMAD POWER inicia la carga automáticamente.
ALIMENTACIÓN ELÉCTRICA
1 - Conecte el cable auxiliar al puerto PC 19V 3,5A del NOMAD POWER.
2 - Seleccione la boquilla apropiada para su ordenador portátil y conéctela al
cable auxiliar.
3 - Conecte el cable auxiliar con la boquilla sobre la toma eléctrica de su PC.
FUNCIÓN LINTERNA
Presione durante 3 segundos el botón ON/OFF para encender los LEDs.
APresione brevemente el botón para cambiar de modo de iluminación (4
modos disponibles: normal, luz estroboscópica, SOS y Off)
PROTECCIONES
Este aparato está protegido contra las sobrecargas, la descarga profunda, los corto-circuitos y las inversiones de pola-
ridad.
ANOMALÍAS, CAUSAS Y SOLUCIONES
ANOMALÍAS CAUSAS SOLUCIONES
1No hay respuesta cuando se pres-
iona el botón ON/OFF El NOMAD POWER está descargado. Recargar el aparato (ver página 12).
2El indicador «Error» está encendido
en el cable de arrancador inteli-
gente. Tensión de la batería interna < 11.0V. Recargar el aparato
3Indicador «Error» parpadea en rojo
+ señal sonora.
Inversión de polaridad. Compruebe que las pinzas estén bien conectadas y desconecte/conecte el cable
de arranque inteligente.
Cortocircuito Compruebe que las pinzas estén bien conectadas y desconecte/conecte el cable
de arranque inteligente.
Las pinzas se han dejado conectadas a la batería. Retire las 2 pinzas de los bornes de la batería del vehículo para proteger el
aparato.
4El aparato está un poco caliente
cuando se conecta a un pc portátil. -Quite la batería del PC portátil o desconecte el NOMAD POWER del pc portátil
durante 5 minutos, luego vuelva a conectarlo.

15
NOMAD POWER 10 RU
Данная инструкция описывает функционирование вашего устройства и меры предосторожности в целях
обеспечения вашей безопасности. Пожалуйста, прочтите ее перед первым использованием и сохраните, чтобы
при надобности перечитать.
БЕЗОПАСНОСТЬ
- Ни в коем случае не используйте это устройство для зарядки батареек или незаряжаемых батарей.
- Если шнур питания поврежден, он должен быть заменен.
- Не накрывайте аппарат во время использования.
- Не хранить и не использовать устройство в помещении, где температура превышает 70°C.
- Устройство не вскрывать и не модифицировать.
- Берегите от дождя и влаги.
- Это устройство подлежит утилизации. Не выбрасывайте его в домашний мусоропровод.
- Это устройство не должно быть использовано лицами (включая детей), чьи физические или психические
способности ограничены, или же лицами, не имеющими достаточно опыта или знаний, кроме случаев, когда они
это делают под надзором специалистов, отвечающих за их безопасность, или были проинструктированы ими
ранее относительно использования этого устройства. Дети не должны играть с устройством. Чистка и уход не
должны производится детьми без надлежащего присмотра.
- Устройство должно быть расположено так, чтобы вилка была доступна.
ПРИНЦИП РАБОТЫ
Световые
индикаторы
Нажмите на кнопку ON/OFF для проверки степени заряда внутренней батареи
устройства NOMAD POWER.
Световые
индикаторы 1 мигающий 1 немигающий 2 немигающих 3 немигающих 4 немигающих
Емкость внутренней
батареи устройства 0% 25% 50% 75% 100%
Во время зарядки устройства световые индикаторы мигают один за другим. Количество светящихся индикаторов
указывает на емкость внутренней батареи устройства NOMAD POWER. Когда зарядка приостановлена или
завершена, все индикаторы горят, не мигая.
! Зарядите аккумулятор Nomad Power перед первым применением и после каждого использования.
ЗАРЯД ВНУТРЕННЕЙ БАТАРЕИ
1 - Подключите сетевой переходник к домашней сети.
2 - Подключите другой конец переходника к входному разъему устройства
NOMAD POWER, чтобы начать зарядку.
ИЛИ
1 - Подключите автомобильный переходник к прикуривателю машины.
2 - Подключите другой конец переходника к входному разъему устройства
NOMAD POWER, чтобы начать зарядку.
ИЛИ

16
NOMAD POWER 10 RU
не поставляется 1 - Подключите кабель USB к зарядному устройству с выходом USB (не поставляется
в комплекте).
2 - Подключите кабель к входному разъему устройства NOMAD POWER,
чтобы начать зарядку.
ЗАПУСК АВТОМОБИЛЯ
Функция запуска в срочном порядке автомобилей с бензиновым или дизельным двигателем с АКБ 12В.
Для запуска двигателя действуйте следующим образом:
! Если напряжение АКБ автомобиля > 12.5В, то NOMAD POWER не будет работать.
1Подключите интеллектуальный кабель запуска к коннектору устройства NOMAD
POWER.
2
SMART
BOOSTER CABLE
Error
Start
Если индикаторы «Start» и «Error» попеременно мигают зеленым и красным,
то устройство готово. Если горит только красный индикатор, то напряжение
внутренней батареи устройства NOMAD POWER слишком низкое. В этом случае
зарядите ваше устройство.
3Убедитесь в том, что устройство NOMAD POWER заряжено, проверив количество
на нем световых индикаторов (минимум 3 горящих индикатора (см. стр. 15)).
41 - Подсоедините красный зажим к (+) АКБ.
2 - Подсоедините черный зажим к (-) АКБ.
5Start
30"
Если индикатор «Start» загорается зеленым и индикатор «Error» гаснет, то все ok.
Зеленый индикатор горит в течение 30 секунд. Значит у пользователя 30 секунд
на запуск двигателя.
(Если за это время не произведено никаких действий, то интеллектуальный
кабель запуска автоматически отключается и индикаторы «Start» и «Error» снова
начинают поочередно мигать.) Отсоедините и снова подсоедините кабель запуска
к коннектору устройства (см. этап 1).
Error Если горит только индикатор «Error», запуск двигателя невозможен (см. стр. 17
для более подробной информации).
7Заведите автомобиль: индикатор «Error» мигает красным светом и включается
звуковой сигнал.
8Немедленно отсоедините оба зажима от клемм АКБ автомобиля, а также
интеллектуальный кабель запуска от коннектора.
ЗАРЯДКА МОБИЛЬНЫХ ТЕЛЕФОНОВ

17
NOMAD POWER 10 RU
1 - Подсоедините кабель к разъему USB 5В 2A устройства NOMAD
POWER.
2 - Выберите подходящий для вашего телефона или планшета
переходник и подключите его. NOMAD POWER автоматически начинает
зарядку.
ЭЛЕКТРОПИТАНИЕ
1 - Подсоедините вспомогательный кабель к разъему компьютера 19В
3,5A устройства NOMAD POWER.
2 - Выберите подходящий для вашего компьютера переходник и
подключите его к вспомогательному кабелю.
3 - Подключите вспомогательный кабель с насадкой к гнезду питания
компьютера.
ФУНКЦИЯ ФОНАРИКА
Нажмите в течение 3 секунд на кнопку ON/OFF чтобы зажечь
светодиоды.
Коротким нажатием на кнопку меняются режимы подсветки (4
возможных режима: стандартный, стробоскопическое освещение, SOS и
Off).
ЗАЩИТЫ
Это устройство защищено против перегрузок, сильной разрядки, коротких замыканий и инверсии полярности.
НЕИСПРАВНОСТИ, ИХ ПРИЧИНЫ И УСТРАНЕНИЕ
НЕИСПРАВНОСТИ ПРИЧИНЫ УСТРАНЕНИЕ
1Нет реакции при нажатии на
кнопку ON/OFF. NOMAD POWER разряжен. Зарядите устройство (см. стр. 15).
2Индикатор «Error» горит на
интеллектуальном кабеле запуска. Напряжение внутренней батареи < 11.0В. Зарядите устройство
3Индикатор «Error» мигает
красным
+ звуковой сигнал
Инверсия полярности Проверьте, что зажимы правильно подсоединены и отсоедините/снова
подсоедините интеллектуальный кабель запуска.
Короткое замыкание Проверьте, что зажимы правильно подсоединены и отсоедините/снова
подсоедините интеллектуальный кабель запуска.
Зажимы не отсоединили от АКБ. Отсоедините оба зажима от клемм АКБ автомобиля, чтобы защитить
устройство.
4Устройство слегка нагревается,
когда оно подключено к ноутбуку. -Отсоедините батарею от ноутбука или отключите NOMAD POWER от него на
5 минут, затем подключите снова.

18
NOMAD POWER 10 IT
Questo manuale descrive il funzionamente del carica-batterie e le precauzioni da seguire per vostra sicurezza. Leggere
attentamente prima dell’uso e conservare con cura per poterlo consultarlo in futuro.
SICUREZZA
- Non utilizzare in nessuna circostanza per caricare pile o batterie non ricaricabili.
- Se il cavo di alimentazione è danneggiato, esso deve essere imperativamente sostituito.
- Non coprire il dispositivo durante l’uso.
- Non immagazzinare e non usare il dispositivo il ambienti dove la temperatura è > a 70°C.
- Non modicare e non smontare il dispositivo.
- Proteggere dalla pioggia e dell’umidità.
- Prodotto soggetto a raccolta differenziata. Non smaltire con i riuti domestici.
- Questo dispositvo non è stato creato per essere usato da persone (bambini compresi) le quali capacità siche o mentali
sono ridotte, né da persone senza sperienza o conoscenze del soggetto, tranne se esse sono sorvegliate da una persona
responsabile per la loro sicurezza, che li guidi e istruisca sull’uso del dispositivo. I bambini non devono giocare con il
dispositivo. La pulizia e manutenzione non devono essere effettuate da bambini non sorvegliati.
- Il dispositivo deve essere posizionato in modo tale che la presa sia sempre accessibile.
FUNZIONAMENTO
Spie luminose Premere il tasto ON/OFF per vericare il livello della batteria del NOMAD POWER.
Spie 1 spia
lampeggiante 1 ssa 2 sse 3 sse 4 sse
Capacità della
batteria interna
del dispositivo 0% 25% 50% 75% 100%
Le spie lampeggiano una ad una quando il dispositivo è messo in carica. Il numero di spie luminose indica la capacità
della batteria interna del NOMAD POWER. Tutte le spie sono sse quando la carica è sospesa o terminata.
!RICARICARE LA BATTERIA DEL NOMAD POWER prima di effettuare il primo uso, e ricaricarlo ogni volta dopo
averlo utilizzato.
CARICA DELLA BATTERIA INTERNA
1 - Collegare la spina alla presa elettrica.
2 - Collegare l’altra estremità del cavo alla porta d’entrata del NOMAD POWER per
dare inizio alla carica.
OPPURE
1 - Collegare l’adattatore macchina sulla presa accendisigari del veicolo.
2 - Collegare l’altra estremità del cavo alla porta d’entrata del NOMAD POWER per
dare inizio alla carica.
OPPURE
non fornito 1 - Collegare la presa USB a un caricatore avendo un’uscita USB (non fornito).
2 - Collegare il cavo alla porta d’entrata del NOMAD POWER per cominciare la
carica.

19
NOMAD POWER 10 IT
AVVIAMENTO DEL VEICOLO
Funzione di avviamento per veicoli benzina o diesel con batteria 12V.
Per avviare un veicolo, procedere come segue:
!Se la tensione della batteria del veicolo è >12.5V, il NOMAD POWER non funzionerà.
1Collegare il cavo di avviamento intelligente al connettore del NOMAD POWER.
2
SMART
BOOSTER CABLE
Error
Start
Se le spie «Start» e «Error» lampeggiano alternativamente verde e rosso, il dispositivo
è pronto all’uso. Se la spia rossa è accesa da sola, la tensione della batteria interna del
NOMAD POWER è troppo debole. In questo caso, ricaricare il dispositivo.
3Assicurarsi che il NOMAD POWER sia carico vericando il numero di spie luminose sul
dispositivo (minimo 3 spie accese (vedere p. 18)).
41- Collegare il morsetto rosso al (+) della batteria.
2- Colelgare il morsetto nero al (-) della batteria.
5Start
30"
Se la spia «Start» diventa verde, e la spia «Error» si spegne, tutto è ok.
La spia verde rimane accesa durante 30 secondi, l’usuario ha 30 secondi per avviare il
veicolo.
(Se nessuna azione viene effettuata durante questo lasso di tempo, il cavo di avviamen-
to intelligente si disattiva automaticamente e le spie «Start» e «Error» ricominciano a
lampeggiare alternativemente. Scollegare e ricollegare il cavo di avviamento al connet-
tore del dispositivo (vedere tappa 1).
Error Se la spia «Error» è accesa da sola, l’avviamento del veicolo è impossibile (vedere p. 20
per più informazioni).
7Avviare il veicolo: la spia «Error» lampeggia e un’allarme scatta.
8Ritirare immediatamente i 2 morsetti dai terminali della batteria del veicolo, e scollegare
anche il cavo di avviamento intelligente dal suo connettore.

20
NOMAD POWER 10 IT
CARICA DI TELEFONI CELLULARI
1 - Collegare il cavo alla porta USB 5V 2A del NOMAD POWER.
2 - Selezionare l’adattatore appropriato per vostro telefono o tablet e colle-
garlo. Il NOMAD POWER comincia la carica automaticamente.
ALIMENTAZIONE ELETTRICA
1 - Colelgare il cavo ausiliare alla porta PC 19V 3,5A del NOMAD POWER.
2 - Selezionare l’adattatore appropriato per il computer e collegarlo sul cavo
ausiliare.
3 - Collegare il cavo ausiliare al puntale sulla presa di alimentazione del com-
puter.
FUNZIONE TORCIA
Premere durante 3 secondi il tasto ON/OFF per accendere i LED.
Premere brevemente sul tasto per cambiare i modi di illuminazione (4
modi disponibili: normale, luce stroboscopica, SOS e Off).
PROTEZIONI
Questo dispositivo protetto da sovvracarica, scarica profonda, corto-circuito e inversioni di polarità.
ANOMALIE, CAUSE, RIMEDI
ANOMALIE CAUSE RIMEDI
1Nessuna risposta
quando si preme il tasto ON/OFF Il NOMAD POWER è scaritp. Ricaricare il dispositivo (vedere p.18).
2Spia «Error» accesa sul cavo di
avviamento intelligente. Tensione della batteria interna < 11.0V. Ricaricare il dispositivo
3Spia «Error» lampeggia rossa
+ segnale sonoro.
Inversione di polarità Vericare che i morsetti siano collegati e scollegare poi ricollegare il cavo di
avviamento intelligente.
Corto-circuito Vericare che i morsetti siano collegati e scollegare poi ricollegare il cavo di
avviamento intelligente.
I morsetti sono rimasti collegati sulla batteria. Ritirare i 2 morsetti dai terminali della batteria del veicolo per prottegere il
dispositivo.
4Il dispositivo è un leggermente
caldo quando collegato ad un com-
puterportatile. -Togliere la batteria del compur oppure scollegare il NOMAD POWER dal compu-
ter durante 5 minuti, poi ricollegarlo.
Other manuals for NOMAD POWER 10
1
This manual suits for next models
1
Table of contents
Languages:
Other GYS Extender manuals

GYS
GYS NOMAD POWER 300 User manual

GYS
GYS GYSCAP 680 E User manual

GYS
GYS NOMAD POWER PRO 45 User manual

GYS
GYS STARTPACK PRO 12.24 User manual

GYS
GYS GYSPACK PRO User manual

GYS
GYS NOMAD POWER 15 User manual

GYS
GYS GYSCAP 500 E User manual

GYS
GYS NOMAD POWER 500 User manual

GYS
GYS NOMAD POWER VAC 350 User manual

GYS
GYS 028838 User manual