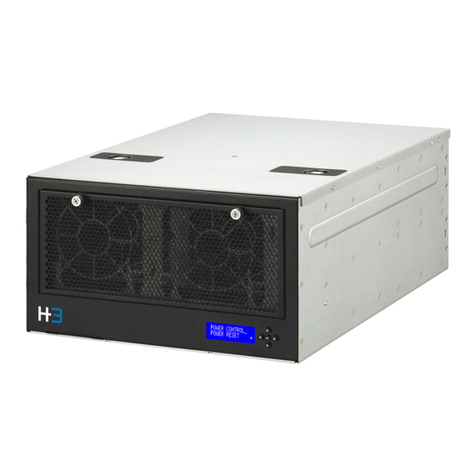
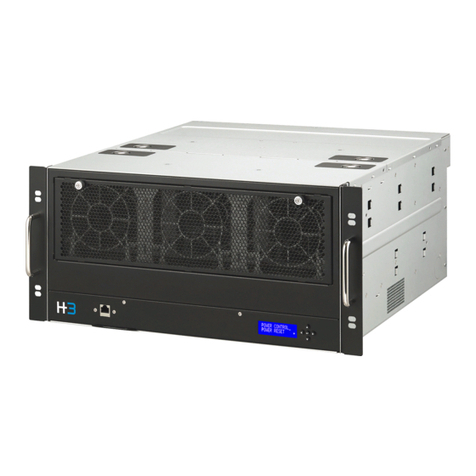
H3 Falcon 5208 User manual

Version 1.0
October 1st, 2021
Falcon 5208
Installation Guide

© 2021 H3 Platform Inc. or its subsidiaries. All rights reserved.H3 Platform and other trademarks are trademarks of H3 Platform
Inc. or its subsidiaries. Other trademarks may be trademarks of their respective owners.
Dear Users
Thank you for choosing our product-Falcon 5208.
The excellent quality and performance make our products
superior in the like product. For you to have the good
understanding to Falcon 5208, please read the user manual and
operate according to the suggested steps for each feature.
If you have any questions when using our machine, please
feel free to contact us. We are more than happy to serve you
constantly.
Technical Support: support@h3platform.com
FAQ: https://www.h3platform.com/
H3 Platform Inc. mainly researches and develops PCIe switch-
based technology and solutions.
---- H3 Platform Inc.

© 2021 H3 Platform Inc. or its subsidiaries. All rights reserved.H3 Platform and other trademarks are trademarks of H3 Platform
Inc. or its subsidiaries. Other trademarks may be trademarks of their respective owners.
Notes, Cautions, and Warning
Note
A NOTE indicates important information that helps you make better use of your
product.
Caution
A CAUTION indicates either potential damage to hardware or loss of data and
tells you how to avoid the problem.
Warning
A WARNING indicates a potential for property damage, personal injury, or death.

Contents
Chassis Overview ......................................................................................................................................... 1
Front panel.......................................................................................................................................................... 1
Back panel........................................................................................................................................................... 2
PCIe Port Number........................................................................................................................................ 3
SSD Installation ............................................................................................................................................ 4
Pull out the SSD drawer................................................................................................................................. 4
Remove the stabilization plate ................................................................................................................... 4
Install SSDs ......................................................................................................................................................... 5
Put the stabilization plat back..................................................................................................................... 5
Insert the drawer back to the chassis....................................................................................................... 6
Cabling Guide ............................................................................................................................................... 7
One PCIe x16 host............................................................................................................................................ 8
Two PCIe x8 hosts ............................................................................................................................................ 8
Four PCIe x4 hosts ........................................................................................................................................... 9
Booting Process ......................................................................................................................................... 10
Connect the management port to your network..............................................................................10
Connect Falcon 5208 to your host machine(s) ...................................................................................10
Connect the A/C power to Falcon 5208 ................................................................................................11
Check LCD for system readiness ..............................................................................................................11

1
Chassis Overview
Front panel
1.
Front Grill
Holds the filter.
2.
Hand screw
The two hand screws hold the front grill.
3.
LCD monitor
Display chassis info/ operation options.
4.
Buttons
Select displayed info, select operations.
Please see Falcon 5208 User Manual for detailed technical specifications.

2
Back panel
1.
PSU
Support up to two 1200W PSU; Platinum
2.
Host port 1
Quad SFF-8644 connectors; PCIe 4.0 x16, support bifurcation (2x8 or 4x4)
3.
Host port 2
Quad SFF-8644 connectors; PCIe 4.0 x16, support bifurcation (2x8 or 4x4)
4.
Mgmt. port
Standard ethernet; RJ45 connector
5.
SSD drawer
Eight PCIe x8 device slot; removable; independent power control
Please see Falcon 5208 User Manual for detailed technical specifications.

3
PCIe Port Number
Please refer to the image below to find the physical PCIe slots that is corresponding to the
port numbers displayed on the GUI.
E.g.
The device installed on the slot 1:1 will be shown on GUI as“1:1 – [device name]”.
1:H1 is the host port 1, 1:H2 is the host port 2. Please do not install any device on the empty slot
next to the host port 2.

4
SSD Installation
Pull out the SSD drawer
Remove the stabilization plate
1. Loosen the hand screws.
2. Pull the handle all the way down.
3. Pull out the drawer.
1. Unscrew the plate
2. Lift the plate up.
There are screws on both sides of the
plate, unscrew all of them.

5
Install SSDs
Put the stabilization plat back
1. Plug the SSD to the PCIe slot.
2. Screw the bracket.
The PCIe slots are designed for single width device.
Oversized device may not fit.
Please screw the bracket. The PCIe gold finger
of the SSD could be damaged due to chassis.
vibration.
1. Place the stabilization plate back.
2. Put the screws back on both sides.
There are three positions available to put the plates on (as indicated in the right image).
Pick the position that you are comfortable with.
There are screw holes on both sides of the plate, screw all of them.

6
Insert the drawer back to the chassis
1. Push the drawer into the socket.
2. Lift the handle.
3. Tighten the hand screws.
Push the drawer until it touches the end, then lift the handle, the drawer will be further pushed
into the position.
Do not force the drawer into position without lifting the handle. The electronic components on
the power connectors can be damaged.

7
Cabling Guide
There are two host ports on the Falcon 5208 chassis, the cabling guide is demonstrated with
host port 1, applicable to both host ports. The connectors are numbered in the same order.
0
1
2
3
The machine that is connected to the host port 1 will be recognized as 1:H1.
The machine that is connected to the host port 2 will be recognized as 1:H2.
Each host port can be bifurcated into two x8 or four x4 ports.
Users can connect 8 host machines at most to a Falcon 5208 chassis.
Failure to follow the cabling guide may cause system error and false information on Falcon 5208
GUI.

8
One PCIe x16 host
Host
-
Chassis
0
-
0
1
-
1
2
-
2
3
-
3
Two PCIe x8 hosts
Host 1
-
Chassis
0
-
0
1
-
1
Host 2
-
Chassis
0
-
2
1
-
3
Connect the corresponding ports as shown in image
1.
Image 1. Cabling for one PCIe x16 host
The host will be recognized as 1:H1.
Connect the corresponding ports as shown in image
2.
This configuration requires port bifurcation setting to 2x8 to function properly.
After booting up Falcon 5208, go to GUI → port configuration page
Set the host port to 2x8 mode before power on the host machines.
Image 2. Cabling for two PCIe x8 hosts
The host 1 will be recognized as 1:H1.0
The host 2 will be recognized as 1:H1.1

9
Four PCIe x4 hosts
Host 1
-
Chassis
0
-
0
Host 2
-
Chassis
0
-
1
Host 3
-
Chassis
0
-
2
Host 4
-
Chassis
0
-
3
Connect the corresponding ports as shown in image
3.
This configuration requires port bifurcation setting to 4x4 to function properly.
After booting up Falcon 5208, go to GUI → port configuration page
Set the host port to 4x4 mode before power on the host machines.
The host 1 will be recognized as 1:H1.0
The host 2 will be recognized as 1:H1.1
The host 3 will be recognized as 1:H1.2
The host 4 will be recognized as 1:H1.3
Image 3. Cabling for four PCIe x4 hosts

10
Booting Process
Connect the management port to your network
Connect Falcon 5208 to your host machine(s)
Please complete Falcon 5208 boot up before powering on any connected host machine.
Improper operation may cause system errors.
It is recommended to install all devices before booting up Falcon 5208.
You can connect Falcon 5208 to your network switch or to your management device directly.
Make sure Falcon 5208 and your management device are under the same network domain.
(Continue to next page)

11
Connect the A/C power to Falcon 5208
Check LCD for system readiness
For cabling details, please see the Cabling Guide section.
A host bus adapter card (HBA) is required to be installed on your host machine(s).
The actual position of HBA may look different on your host machine(s).
Falcon 5208 will start booting up upon power cords are plugged. No further action is required
for this step.
You may have 1 or 2 PSUs depending on your purchase. Connect ALL PSUs to the A/C power.
When the system is ready, the LCD will display the model name and the IP address.
E.g., “Falcon 5208”
10.0.24.52
Now you are ready to power on your host machine(s)

12
Warranty
H3 Platform offers free 2-year limited warranty service on our products. If the standard warranty period is not enough, H3 Platform offers
optional purchase extended warranty service coverage that will provide warranty for 1, 2, or 3 additional years.
Limited Warranty
H3 Platform warrants its products against defects in material and workmanship. Under normal use and service, every hardware portion of the
products will be free from physical defects in material and workmanship during the warranty period, or the product will be re paired or
replaced as determined solely by H3 Platform. H3 Platform provides a limited warranty for its products only to the person or entity that
originally purchased the product from H3 Platform or its authorized distributor or retailer. H3 Platform's products are PCI switches, and H3
Platform makes no warranty of the devices installed, or warranty on compatibility of all PCIe devices. H3 Platform will not b e liable in any
way for the loss of data stored on H3 Platform products and any damage caused by this.
Extra warranty period might be provided by H3 Platform's worldwide dealers/distributors. Please contact dealers/ distributors to pu rchase
the extended warranty.
If a product does not operate as warranted above during the applicable warranty period, H3 Platform shall, at its option and expense (except
for shipping cost), repair the defective product or part, deliver to the customer an equivalent product or part to replace th e defective item.
All products that are replaced will become the property of H3 Platform. Replacement products may be new or reconditioned.
Warranty does not apply, if:
1. The warranty period is expired,
2. The warranty label is broken or removed,
3. The serial number label is missing or unrecognizable,
4. The product has been modified or repaired by any unauthorized service center or personnel.
5. The defect was subject to abuse, improper use not conforming to product manual instructions, or environment conditions more s evere
than those specified in the manual and specification.
6. The defect was subject to Force Majeure, such as acts of God, flood, lighting, earthquake, war, vandalism, theft, brownouts or sags
(damage due to low voltage disturbances)
7. Consumables, such as batteries
8. Routine cleaning, or normal cosmetic and mechanical wear
9. Damage caused by misuse, abuse, or neglect
10. Damage caused by parts that were not manufactured or sold by H3 Platform
11. Damage caused by installing devices not on the compatible list
12. Damage caused when warranted parts were repaired or replaced by an organization other than H3 Platform or by a service provider
not authorized by H3 Platform.
If the customer's product is not covered under warranty, H3 Platform may offer Repair Services under the customer's payment.

13
Software Limited Warranty
Except as provided in the applicable software end-user license or program license agreement, including any software products or the
operating system preinstalled by H3 Platform are provided “as is” and with all faults, and H3 Platform hereby disclaims all o ther warranties
and conditions, either express, implied, or statutory, including, but not limited to, warranties of title and non- infringement, any implied
warranties, duties or conditions of merchantability, of fitness for a particular purpose, and of lack of viruses. Some state s/jurisdictions do not
allow exclusion of implied warranties or limitations on the duration of implied warranties, so the above disclaimer may not a pply to you in
its entirety. To the maximum extent permitted by applicable law, in no event shall H3 Platform or its suppliers be liable for any special,
incidental, indirect, or consequential damages whatsoever (including, but not limited to, damages for loss of profits or conf idential or other
information, for business interruption, for personal injury, for loss of privacy arising out of or in any way related to the use of or inability to
use the software product, even if H3 Platform or any supplier has been advised of the possibility of such damages and even if the remedy
fails of its essential purpose. H3 Platform is not responsible for any interoperability or compatibility issues. Some states/jurisdictions do not
allow the exclusion or limitation of incidental or consequential damages, so the above limitation or exclusion may not apply to you.
H3 Platform warrants all pre-installed H3 Platform software will execute its programming instructions when all files are properly installed. H3
Platform does not warrant that the software will be uninterrupted or error free. In the event H3 Platform software fails to e xecute its
programming instructions during the warranty period, the customer's remedy will be either (1) replacement of the H3 Platform software or
(2) a refund upon return of the product and all copies of software as well as installation instructions.
Compatibility
We have tested and verified the compatibility of third-party products and peripherals on the H3 Platform Compatibility List. Please note that
the tests conducted in H3 Platform labs may not have covered every aspect and that changes to firmware o r hardware may affect device
compatibility and stability. H3 Platform does not guarantee the compatibility with third -party products and peripherals on the List and
reserves the right to update the List at any time without prior notice.
Repair Service
Warranty and out of warranty service should be obtained by contacting the system integrator/dealer/retailer/e -retailer or distributor where
the customer purchased the product. When requesting for service, the proof of purchase and the product serial number mus t be provided.
The return of the defective product should be strictly through the original route of purchase, and the customers shall pack t he product
appropriately to prevent the returned product from suffering in the transportation.
There are no user serviceable parts inside the product. Do not allow any unauthorized service center or personnel to repair or modify the
product. If the original channel is no longer in business or unavailable, the customer may contact H3 Platform Technical Supp ort for
international RMA services. In this case, the customer will be charged for handling fee, $50 (USD), and all fees incurred, includi ng two ways
freight, duties, taxes and brokerage fee.
It is customer's sole responsibility to back up his/ her data. Before allowing any service from H3 Platform or its service provider, including
remote login check and repairing service, the customer must back up the data and remove any of the customer's confidential, p roprietary or

14
personal information. Neither H3 Platform nor its service provider will be liable for any damage, loss and exposure of confidential or private
information or data contained in any product, hardware, software or media.
Notice of Warranty Claims
All warranty claims must be made during the applicable warranty period. Any claim made after that time will not be eligible for warranty
service but may be serviced under a separate H3 Platform support contract covering the product.
DISCLAIMER OF WARRANTY
H3 Platform does not warrant uninterrupted or error-free operation of an H3 Platform product. If the customer transfers an H3 Platform
product to another user, warranty service is NOT available to that user for the remainder of the warranty period. Consumables , such as
batteries and PCIe power cables have no warranty. The above warranties will not apply to products from which serial numbers have been
removed or to defects resulting from misuse (including operation of a H3 Platform product without covers and incorrect input voltage),
unauthorized modification, operation or storage outside the environmental specifications for the product, in-transit damage, improper
maintenance, or defects resulting from use of third-party software, accessories, media, supplies, consumables, or such items not designed
for use with the product. The H3 Platform Software Product Limited Warranty does not apply to software used with products not covered by
any of the H3 Platform limited warranties offered as part of your purchase of an H3 Platform product.
TO THE EXTENT ALLOWED BY LOCAL LAW, THE ABOVE WARRANTIES ARE EXCLUSIVE AND NO OTHER WARRANTY OR CONDITION,
WHETHER WRITTEN OR ORAL, IS EXPRESSED OR IMPLIED AND H3 PLATFORM SPECIFICALLY DISCLAIMS ANY IMPLIED WARRANTIES OR
CONDITIONS OF MERCHANTABILITY, SATISFACTORY QUALITY, AND FITNESS FOR A PARTICULAR PURPOSE.
Some Countries, states or provinces do not allow limitations on the duration of an implied warranty, so the above limitation or
exclusion might not apply to you. The warranty gives you specific legal rights and you might also have other rights that vary from
country to country, state to state or province to province.
Limitation of liability and Remedies.
In no event will H3 Platform or its affiliates, subcontractors, or suppliers be liable for any of the following:
1. Damages for loss of data, or software restoration;
2. Damages relating to Customer's procurement of substitute products or services (i.e., "cost of cover");
3. Incidental, special, or consequential damages (including lost profits, loss of use, Customer downtime, cost of data recovery/re-
creation), even if H3 Platform is informed of their possibility;
4. Third-party claims against Customer for losses or damages.
5. H3 Platform PCIe Switches are not specifically designed, manufactured or intended for sale as parts, compo nents or assemblies for the
planning, construction, maintenance, or direct operation of a nuclear facility. Customer is solely liable if Products or Supp ort
purchased by Customer are used for these applications.
TO THE EXTENT ALLOWED BY LOCAL LAW, THE REMEDIES IN THIS WARRANTY STATEMENT ARE CUSTOMER'S SOLE AND EXCLUSIVE
REMEDIES. EXCEPT AS INDICATED ABOVE, IN NO EVENT WILL H3 PLATFORM OR ITS SUPPLIERS BE LIABLE FOR LOSS OF DATA OR FOR

15
DIRECT, SPECIAL, INCIDENTAL, CONSEQUENTIAL (INCLUDING LOST PROFIT OR DATA), OR OTHER DAMAGE, WHETHER BASED IN
CONTRACT, TORT, OR OTHERWISE.
Some countries, states or provinces do not allow the exclusion or limitation of incidental or consequential damages, so the above
limitation or exclusion may not apply to you.
THE WARRANTY TERMS CONTAINED HERE, EXCEPT TO THE EXTENT LAWFULLY PERMITTED, DO NOT EXCLUDE, RESTRICT OR MODIFY
AND ARE IN ADDITION TO THE MANDATORY STATUTORY RIGHTS APPLICABLE TO THE SALE OF THIS PRODUCT TO YOU.
Table of contents
Other H3 Computer Hardware manuals