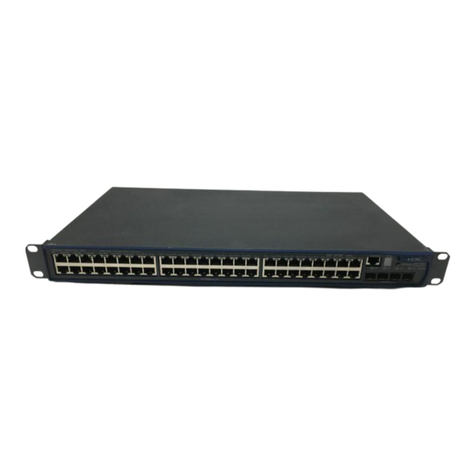
H3C S5120-SI Series Installation manual

H3C S5120-SI Series Ethernet Switches
Command Reference
Hangzhou H3C Technologies Co., Ltd.
http://www.h3c.com
Manual Version: 6W105-20110810
Product Version: Release 1101

Copyright © 2009-2011, Hangzhou H3C Technologies Co., Ltd. and its licensors
All Rights Reserved
No part of this manual may be reproduced or transmitted in any form or by any means without prior
written consent of Hangzhou H3C Technologies Co., Ltd.
Trademarks
H3C, , Aolynk, , H3Care,
, TOP G, , IRF, NetPilot, Neocean, NeoVTL,
SecPro, SecPoint, SecEngine, SecPath, Comware, Secware, Storware, NQA, VVG, V2G, VnG, PSPT,
XGbus, N-Bus, TiGem, InnoVision and HUASAN are trademarks of Hangzhou H3C Technologies Co.,
Ltd.
All other trademarks that may be mentioned in this manual are the property of their respective owners.
Notice
The information in this document is subject to change without notice. Every effort has been made in the
preparation of this document to ensure accuracy of the contents, but all statements, information, and
recommendations in this document do not constitute the warranty of any kind, express or implied.

2-1
Preface
The H3C S5120-SI Series Ethernet Switches Command Reference, Release 1101 describes the
commands available in the H3C S5120-SI series software release 1101.
This preface includes:
1) About This Document
zAudience
zOrganization
zConventions
2) Documentation Guide
zRelated Documentation
zObtaining Documentation
zTechnical Support
zDocumentation Feedback

2-1
1 About This Document
Audience
This documentation is intended for:
zNetwork planners
zField technical support and servicing engineers
zNetwork administrators working with the S5120-SI series
Organization
The H3C S5120-SI Series Ethernet Switches Command Reference, Release 1101 comprises these
chapters:
Chapter Content
01-CLI CLI Configuration Commands
02-Login zCommands for Logging into an Ethernet Switch
zCommands for Controlling Login Users
03-Ethernet Port Ethernet Port Configuration Commands
04-Loopback Interface
and Null Interface Loopback Interface and Null Interface Configuration Commands
05-Ethernet Link
Aggregation Ethernet Link Aggregation Configuration Commands
06-Port Isolation Port Isolation Configuration Commands
07-Port Mirroring Port Mirroring Configuration Commands
08-LLDP LLDP Configuration Commands
09-VLAN
zVLAN Configuration Commands
zPort-Based VLAN Configuration Commands
zVoice VLAN Configuration Commands
10-MSTP MSTP Configuration Commands
11-IP Addressing IP Addressing Configuration Commands
12-IP Performance
Optimization IP Performance Optimization Configuration Commands
13-ARP zARP Configuration Commands
zARP Active Acknowledgement Configuration Commands
14-DHCP
zDHCP Relay Agent Configuration Commands
zDHCP Client Configuration Commands
zDHCP Snooping Configuration Commands
zBOOTP Client Configuration Commands

2-2
Chapter Content
15-FTP and TFTP
zFTP Server Configuration Commands
zFTP Client Configuration Commands
zTFTP Client Configuration Commands
16-IP Routing Basics
Configuration Routing-table Display and Reset Commands
17-Static Routing Static Routing Configuration Commands
18-Mulitcast zIGMP Snooping Configuration Commands
zMulticast VLAN Configuration Commands
19-QoS
zClass Configuration Commands
zTraffic Behavior Configuration Commands
zQoS Policy Configuration and Application Commands
zPriority Mapping Configuration Commands
zLine Rate Configuration Commands
zCongestion Management Configuration Commands
20-802.1X 802.1X Configuration Commands
21-AAA zAAA Configuration Commands
zRADIUS Configuration Commands
22-PKI PKI Configuration Commands
23-SSL SSL Configuration Commands
24-SSH2.0 SSH2.0 Configuration Commands
25-Public Key Public Key Configuration Commands
26-HABP HABP Configuration Commands
27-ACL ACL Configuration Commands
28-Device Management Device Management Commands
29-NTP NTP Configuration Commands
30-SNMP SNMP Configuration Commands
31-RMON RMON Configuration Commands
32-File System
Management
zFile System Management Commands
zConfiguration File Management Commands
33-System Maintaining
and Debugging
zSystem Maintaining Commands
zSystem Debugging Commands
34-Basic System
Configuration Basic Configuration Commands
35-Information Center Information Center Configuration Commands
36-MAC Address Table MAC Address Table Configuration Commands
37-Cluster Management
zNDP Configuration Commands
zNTDP Configuration Commands
zCluster Configuration Commands
38-HTTP zHTTP Configuration Commands
zHTTPS Configuration Commands
39-Stack Management zStack Management Configuration Commands
40-PoE PoE Configuration Commands
2-3
Chapter Content
41-IP Source Guard IP Source Guard Configuration Commands
42-Appendix Command Index
Conventions
This section describes the conventions used in this documentation set.
Command conventions
Convention Description
Boldface Bold text represents commands and keywords that you enter literally as shown.
italic Italic text represents arguments that you replace with actual values.
[ ] Square brackets enclose syntax choices (keywords or arguments) that are
optional.
{ x | y | ... }
Braces enclose a set of required syntax choices separated by vertical bars,
from which you select one.
[ x | y | ... ]
Square brackets enclose a set of optional syntax choices separated by vertical
bars, from which you select one or none.
{ x | y | ... } *
Asterisk marked braces enclose a set of required syntax choices separated by
vertical bars, from which you select at least one.
[ x | y | ... ] *
Asterisk marked square brackets enclose optional syntax choices separated by
vertical bars, from which you may select multiple choices or none.
&<1-n> The argument or keyword and argument combination before the ampersand (&)
sign can be entered 1 to n times.
# A line that starts with a pound (#) sign is comments.
GUI conventions
Convention Description
Boldface Window names, button names, field names, and menu items are in Boldface.
For example, the New User window appears; click OK.
> Multi-level menus are separated by angle brackets. For example, File > Create
> Folder.
Symbols
Convention Description
Means reader be extremely careful. Improper operation may cause bodily
injury.
Means reader be careful. Improper operation may cause data loss or damage to
equipment.
Means an action or information that needs special attention to ensure
successful configuration or good performance.
Means a complementary description.

2-4
Convention Description
Means techniques helpful for you to make configuration with ease.

2-1
2 Documentation Guide
Related Documentation
The H3C S5120-SI documentation set also includes:
Category Documents Purposes
Product
description and
specifications Marketing brochures Describe product specifications and benefits.
Compliance and safety
manual Provides regulatory information and the safety instructions that
must be followed during installation.
Installation guide
zProvides a complete guide to hardware installation and
hardware specifications.
zProvides a complete guide to software and hardware
troubleshooting.
Hardware
specifications
and installation
H3C Pluggable SFP
[SFP+][XFP]
Transceiver Modules
Installation Guide
Guides you through installing SFP/SFP+/XFP transceiver
modules.
Power
configuration RPS ordering guide Provides the RPS and switch compatibility matrix and RPS cable
specifications.
Configuration guide Describes software features and configuration procedures.
Software
configuration Command reference Provides a quick reference to all available commands.
Login password
recovery manual Tells how to find the lost password or recover the password
when the login password is lost.
Operations and
maintenance Release notes
Provide information about the product release, including the
version history, hardware and software compatibility matrix,
version upgrade information, technical support information, and
software upgrading.
Obtaining Documentation
You can access the most up-to-date H3C product documentation on the World Wide Web at this URL:
http://www.h3c.com.
Click the links on the top navigation bar to obtain different categories of product documentation:
z[Technical Support & Documents > Technical Documents] – Provides hardware installation,
software upgrading, and software feature configuration and maintenance documentation.
z[Products & Solutions] – Provides information about products and technologies, as well as
solutions.

i
Table of Contents
1 CLI Commands ··········································································································································1-1
CLI Commands·······································································································································1-1
display history-command·················································································································1-1
quit···················································································································································1-1
return ···············································································································································1-2
screen-length disable ······················································································································1-3
system-view·····································································································································1-3

1-1
1 CLI Commands
CLI Commands
display history-command
Syntax
display history-command
View
Any view
Default Level
1: Monitor level
Parameters
None
Description
Use the display history-command command to display commands saved in the history buffer.
The system will save validated history commands performed last in current user view to the history
buffer, which can save up to ten commands by default. You can use the history-command max-size
command to set the size of the history buffer. Refer to the history-command max-size command in
Login Commands in the Command Reference- Part 1- Login for related configuration.
Examples
# Display validated history commands in current user view (the display information varies with
configuration).
<Sysname> display history-command
display history-command
system-view
vlan 2
quit
quit
Syntax
quit
View
Any view

1-2
Default Level
0: Visit level (in user view)
2: System level (in other views)
Parameters
None
Description
Use the quit command to exit to a lower-level view. If the current view is user view, the quit command
terminates the current connection and quits the system.
Examples
# Switch from GigabitEthernet1/0/1 interface view to system view, and then to user view.
[Sysname-GigabitEthernet1/0/1] quit
[Sysname] quit
<Sysname>
return
Syntax
return
View
Any view except user view
Default Level
2: System level
Parameters
None
Description
Use the return command to return to user view from current view (non user view).
You can also use the hot key Ctrl+Z to return to user view from the current view (non user view), which
equals execution of the return command.
Related commands: quit.
Examples
# Return to user view from GigabitEthernet1/0/1 view.
[Sysname-GigabitEthernet1/0/1] return
<Sysname>

1-3
screen-length disable
Syntax
screen-length disable
undo screen-length disable
View
User view
Default Level
1: Monitor level
Parameters
None
Description
Use the screen-length disable command to disable the multiple-screen output function of the current
user.
Use the undo screen-length disable command to enable the multiple-screen output function of the
current user.
By default, a login user uses the settings of the screen-length command. The default settings of the
screen-length command are: multiple-screen output is enabled and 24 lines are displayed on the next
screen. (For the details of the screen-length command, refer to Login Commands in the Command
Reference- Part 1- Login.)
Note that this command is applicable to the current user only and when a user re-logs in, the settings
restore to the system default.
Examples
# Disable multiple-screen output of the current user.
<Sysname> screen-length disable
system-view
Syntax
system-view
View
User view
Default Level
2: System level
Parameters
None

1-4
Description
Use the system-view command to enter system view from the current user view.
Related commands: quit, return.
Examples
# Enter system view from the current user view.
<Sysname> system-view
System View: return to User View with Ctrl+Z.
[Sysname]

i
Table of Contents
1 Commands for Logging into an Ethernet Switch···················································································1-1
Commands for Logging into an Ethernet Switch ····················································································1-1
activation-key···································································································································1-1
authentication-mode························································································································1-2
auto-execute command···················································································································1-3
databits············································································································································1-4
display telnet client configuration ····································································································1-5
display user-interface ······················································································································1-5
display users····································································································································1-7
display web users····························································································································1-8
escape-key······································································································································1-9
flow-control····································································································································1-10
free user-interface ·························································································································1-11
history-command max-size ···········································································································1-11
idle-timeout····································································································································1-12
ip http enable·································································································································1-13
lock ················································································································································1-13
parity··············································································································································1-14
protocol inbound····························································································································1-15
screen-length·································································································································1-16
send···············································································································································1-16
set authentication password··········································································································1-17
shell ···············································································································································1-18
speed·············································································································································1-19
stopbits ··········································································································································1-20
sysname ········································································································································1-21
telnet··············································································································································1-21
telnet client source·························································································································1-22
telnet server enable·······················································································································1-23
terminal type··································································································································1-23
user-interface·································································································································1-24
user privilege level·························································································································1-25
2 Commands for Controlling Login Users·································································································2-1
Commands for Controlling Login Users··································································································2-1
acl····················································································································································2-1
free web-users·································································································································2-2
ip http acl·········································································································································2-2

1-1
1 Commands for Logging into an Ethernet Switch
Commands for Logging into an Ethernet Switch
activation-key
Syntax
activation-key character
undo activation-key
View
AUX interface view
Default Level
3: Manage level
Parameters
character: Shortcut key for starting terminal sessions, a character or itsASCII decimal equivalent in the
range 0 to 127; or a string of 1 to 3 characters.
Description
Use the activation-key command to define a shortcut key for starting a terminal session.
Use the undo activation-key command to restore the default shortcut key.
You can use a single character (or its correspondingASCII code value in the range 0 to 127) or a string
of 1 to 3 characters to define a shortcut key. In the latter case, the system takes only the first character
to define the shortcut key. For example, if you input an ASCII code value 97, the system will set the
shortcut key to <a>; if you input the string b@c, the system will set the shortcut key to <b>.
You may use the display current-configuration command to verify the shortcut key you have defined.
By default, pressing Enter key will start a terminal session.
Examples
# Set the shortcut key for starting terminal sessions to <s>.
<Sysname> system-view
System View: return to User View with Ctrl+Z.
[Sysname] user-interface aux 0
[Sysname-ui-aux0] activation-key s
To verify the configuration, do the following:
# Exit the terminal session on the aux port, and enter <s> at the prompt of “Please press ENTER”. You
will see the terminal session being started.
[Sysname-ui-aux0] return
<Sysname> quit

1-2
**************************************************************************
* Copyright (c) 2004-2009 Hangzhou H3C Tech. Co., Ltd. All rights reserved.*
* Without the owner's prior written consent, *
* no decompiling or reverse-engineering shall be allowed. *
**************************************************************************
User interface aux0 is available.
Please press ENTER.
<Sysname>
%Apr 28 04:33:11:611 2005 Sysname SHELL/5/LOGIN: Console login from aux0
authentication-mode
Syntax
authentication-mode {none | password | scheme }
View
User interface view
Default Level
3: Manage level
Parameters
none: Does not authenticate users.
password: Authenticates users using the local password.
scheme: Authenticates users locally or remotely using usernames and passwords.
Description
Use the authentication-mode command to specify the authentication mode.
zIf you specify the password keyword to authenticate users using the local password, remember to
set the local password using the set authentication password { cipher | simple } password
command.
zIf you specify the scheme keyword to authenticate users locally or remotely using usernames and
passwords, the actual authentication mode depends on other related configuration. Refer to the
AAA-RADIUS module of this manual for more.
After you specify to perform local password authentication, when a user logs in through the Console
port, a user can log into the switch even if the password is not configured on the switch. But for a VTY
user interface, a password is needed for a user to log into the switch through it under the same
condition.
By default, users logging in through the Console port are not authenticated.

1-3
For VTY user interface, if you want to set the login authentication mode to none or password, you must
first verify that the SSH protocol is not supported by the user interface. Otherwise, your configuration
will fail. Refer to protocol inbound.
Examples
# Configure to authenticate users using the local password.
<Sysname> system-view
System View: return to User View with Ctrl+Z.
[Sysname] user-interface aux 0
[Sysname-ui-aux0] authentication-mode password
auto-execute command
Syntax
auto-execute command text
undo auto-execute command
View
User interface view
Default Level
3: Manage level
Parameters
text: Command to be executed automatically.
Description
Use the auto-execute command command to set the command that is executed automatically after a
user logs in.
Use the undo auto-execute command command to disable the specified command from being
automatically executed.
Use these two commands in the VTY user interface only.
Normally, the telnet command is specified to be executed automatically to enable the user to Telnet to a
specific network device automatically.
By default, no command is automatically executed.

1-4
zThe auto-execute command command may cause you unable to perform common configuration
in the user interface, so use it with caution.
zBefore executing the auto-execute command command and save your configuration, make sure
you can log into the switch in other modes and cancel the configuration.
Examples
# Configure the telnet 10.110.100.1 command to be executed automatically after users log into VTY 0.
<Sysname> system-view
System View: return to User View with Ctrl+Z.
[Sysname] user-interface vty 0
[Sysname-ui-vty0] auto-execute command telnet 10.110.100.1
% This action will lead to configuration failure through ui-vty0. Are you sure?[Y/N]y
After the above configuration, when a user logs onto the device through VTY0, the device automatically
executes the configured command and logs off the current user.
databits
Syntax
databits { 5 | 6| 7 |8 }
undo databits
View
AUX interface view
Default Level
2: System level
Parameters
5: Five data bits.
6: Six data bits.
7: Seven data bits.
8: Eight data bits.
Description
Use the databits command to set the databits for the user interface.
Use the undo databits command to revert to the default data bits.
The default data bits is 8.

1-5
H3C S5120-SI Switch Series only supports data bits 7 and 8. To establish the connection again, you
need to modify the configuration of the termination emulation utility running on your PC accordingly.
Examples
# Set the data bits to 7.
<Sysname> system-view
System View: return to User View with Ctrl+Z.
[Sysname] user-interface aux 0
[Sysname-ui-aux0] databits 7
display telnet client configuration
Syntax
display telnet client configuration
View
Any view
Default Level
1: Monitor level
Parameter
None
Description
Use the display telnet client configuration command to display the source IP address or source
interface configured for the current device.
Example
# Display the source IP address or source interface configured for the current device.
<Sysname> display telnet client configuration
The source IP address is 1.1.1.1.
display user-interface
Syntax
display user-interface [ type number | number ] [ summary ]
View
Any view
Other manuals for S5120-SI Series
10
Table of contents
Other H3C Network Router manuals

H3C
H3C SR8800 IM-FW-II User manual

H3C
H3C S5500-HI Switch Series User manual

H3C
H3C S3100-52P User manual

H3C
H3C MSR 20-20 User manual

H3C
H3C MSR 5600 Installation manual

H3C
H3C MSR 20 Series User manual

H3C
H3C S5120-EI Series User manual

H3C
H3C S7502 User manual

H3C
H3C S1526 User manual

H3C
H3C S1016 User manual

H3C
H3C MSR600 Series User manual

H3C
H3C MSR 5600 User manual

H3C
H3C MSR830 Series User manual

H3C
H3C AR 18-3XE Series User manual

H3C
H3C CR19000-20 User manual

H3C
H3C SR8800-X Operating and maintenance manual

H3C
H3C H3C S5600 Series User manual

H3C
H3C MSR 5600 User manual

H3C
H3C S3100-52P User manual

H3C
H3C s5800 series User manual