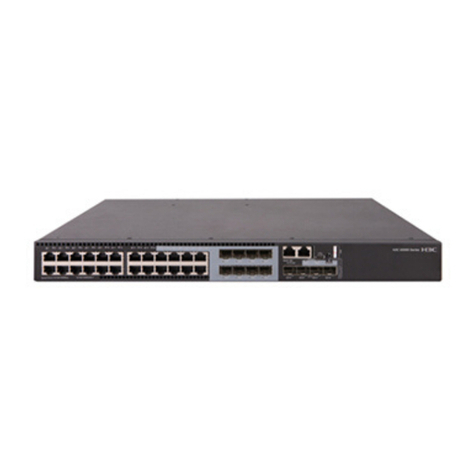
H3C S6300 Series Installation manual

H3C S6300 Switch Series
MCE Command Reference
Hangzhou H3C Technologies Co., Ltd.
http://www.h3c.com
Software version: Release 2418P01
Document version: 6W100-20150717

Copyright © 2015 Hangzhou H3C Technologies Co., Ltd. and its licensors
All rights reserved
No part of this manual may be reproduced or transmitted in any form or by any means without prior
written consent of Hangzhou H3C Technologies Co., Ltd.
Trademarks
H3C, , H3CS, H3CIE, H3CNE, Aolynk, , H3Care, , IRF, NetPilot, Netflow,
SecEngine, SecPath, SecCenter, SecBlade, Comware, ITCMM and HUASAN are trademarks of
Hangzhou H3C Technologies Co., Ltd.
All other trademarks that may be mentioned in this manual are the property of their respective owners
Notice
The information in this document is subject to change without notice. Every effort has been made in the
preparation of this document to ensure accuracy of the contents, but all statements, information, and
recommendations in this document do not constitute the warranty of any kind, express or implied.

Preface
This command reference describes the MCE configuration commands for the H3C S6300 switch series.
This preface includes the following topics about the documentation:
•Audience.
•Conventions.
•About the H3C S6300 documentation set.
•Obtaining documentation.
•Technical support.
•Documentation feedback.
Audience
This documentation is intended for:
•Network planners.
•Field technical support and servicing engineers.
•Network administrators working with the S6300 switch series.
Conventions
This section describes the conventions used in the documentation.
Command conventions
Convention Descri
p
tion
Boldface Bold text represents commands and keywords that you enter literally as shown.
Italic Italic text represents arguments that you replace with actual values.
[ ] Square brackets enclose syntax choices (keywords or arguments) that are optional.
{ x | y | ... }
Braces enclose a set of required syntax choices separated by vertical bars, from which
you select one.
[ x | y | ... ]
Square brackets enclose a set of optional syntax choices separated by vertical bars, from
which you select one or none.
{ x | y | ... } *
Asterisk marked braces enclose a set of required syntax choices separated by vertical
bars, from which you select at least one.
[ x | y | ... ] *
Asterisk marked square brackets enclose optional syntax choices separated by vertical
bars, from which you select one choice, multiple choices, or none.
&<1-n> The argument or keyword and argument combination before the ampersand (&) sign can
be entered 1 to n times.
# A line that starts with a pound (#) sign is comments.

GUI conventions
Convention Descri
p
tion
Boldface Window names, button names, field names, and menu items are in Boldface. For
example, the New User window appears; click OK.
> Multi-level menus are separated by angle brackets. For example, File > Create > Folder.
Symbols
Convention Descri
p
tion
WARNING An alert that calls attention to important information that if not understood or followed can
result in personal injury.
CAUTION An alert that calls attention to important information that if not understood or followed can
result in data loss, data corruption, or damage to hardware or software.
IMPORTANT An alert that calls attention to essential information.
NOTE An alert that contains additional or supplementary information.
TIP An alert that provides helpful information.
Network topology icons
Represents a generic network device, such as a router, switch, or firewall.
Represents a routing-capable device, such as a router or Layer 3 switch.
Represents a generic switch, such as a Layer 2 or Layer 3 switch, or a router that supports
Layer 2 forwarding and other Layer 2 features.
Represents an access controller, a unified wired-WLAN module, or the access controller
engine on a unified wired-WLAN switch.
Represents an access point.
Represents a mesh access point.
Represents omnidirectional signals.
Represents directional signals.
Represents a security product, such as a firewall, UTM, multiservice security gateway, or
load-balancing device.
Represents a security card, such as a firewall, load-balancing, NetStream, SSL VPN, IPS,
or ACG card.
Port numbering in examples
The port numbers in this document are for illustration only and might be unavailable on your device.

About the H3C S6300 documentation set
The H3C S6300 documentation set includes the following categories of documents:
Cate
g
or
y
Documents
Pur
p
oses
Hardware
specifications and
installation
Compliance and safety manual
CE DOC
Provides regulatory information and the safety
instructions that must be followed during
installation.
Installation quick start Provides basic installation instructions.
Installation guide Provides a complete guide to hardware installation
and hardware specifications.
Fan assemblies installation
manual
Describes the appearance, specifications, and
installation and removal of hot-swappable fan
assemblies.
Power modules user manual
Describes the appearance, specifications, and
installation and removal of hot-swappable power
modules.
Pluggable transceiver modules
installation guide
Guides you through installing SFP/SFP+/QSFP+
transceiver modules.
Pluggable modules manual
Describes the hot-swappable modules available for
the H3C switches, their external views, and
specifications.
Software
configuration
Configuration guides Describe software features and configuration
procedures.
Command references Provide a quick reference to all available
commands.
Operations and
maintenance
MIB Companion Describes the MIBs for the software release.
Release notes
Provide information about the product release,
including the version history, hardware and
software compatibility matrix, version upgrade
information, technical support information, and
software upgrading.
Obtaining documentation
Access the most up-to-date H3C product documentation on the World Wide Web
at http://www.h3c.com.
Click the following links to obtain different categories of product documentation:
[Technical Documents]—Provides hardware installation, software upgrading, and software feature
configuration and maintenance documentation.
[Products & Solutions]—Provides information about products and technologies, as well as solutions.
[Software Download]—Provides the documentation released with the software version.
Technical support
servic[email protected]
http://www.h3c.com
Documentation feedback
You can e-mail your comments about product documentation to info@h3c.com.
We appreciate your comments.

i
Contents
MCE commands··························································································································································· 1
address-family ipv4 (VPN instance view) ··············································································································1
description (VPN instance view) ·····························································································································1
display ip vpn-instance ············································································································································2
domain-id ··································································································································································3
ext-community-type ···················································································································································4
ip binding vpn-instance············································································································································4
ip vpn-instance (system view) ··································································································································5
route-distinguisher (VPN instance view) ·················································································································6
route-tag ····································································································································································7
routing-table limit ······················································································································································8
vpn-id ·········································································································································································9
vpn-instance-capability simple······························································································································ 10
vpn-target (VPN instance view/IPv4 VPN view/IPv6 VPN view)····································································· 10
IPv6 MCE commands·················································································································································13
address-family ipv6 (VPN instance view) ··········································································································· 13
domain-id ······························································································································································· 13
vpn-instance-capability simple······························································································································ 14
Index ···········································································································································································16

1
MCE commands
address-family ipv4 (VPN instance view)
Use address-family ipv4 in VPN instance view to enter IPv4 VPN view.
Use undo address-family ipv4 to remove all configurations from IPv4 VPN view.
Syntax
address-family ipv4
undo address-family ipv4
Views
VPN instance view
Predefined user roles
network-admin
Usage guidelines
In IPv4 VPN view, you can configure IPv4 VPN parameters.
Examples
# Enter IPv4 VPN view.
<Sysname> system-view
[Sysname] ip vpn-instance vpn1
[Sysname-vpn-instance-vpn1] address-family ipv4
[Sysname-vpn-ipv4-vpn1]
Related commands
address-family ipv6 (VPN instance view)
description (VPN instance view)
Use description to configure a description for a VPN instance.
Use undo description to delete the description.
Syntax
description text
undo description
Default
No description is configured for a VPN instance.
Views
VPN instance view

2
Predefined user roles
network-admin
Parameters
text: Specifies a description for the VPN instance, a case-sensitive string of 1 to 79 characters.
Examples
# Configure a description of This is vpn1 for VPN instance vpn1.
<Sysname> system-view
[Sysname] ip vpn-instance vpn1
[Sysname-vpn-instance-vpn1] description This is vpn1
display ip vpn-instance
Use display ip vpn-instance to display information about VPN instances.
Syntax
display ip vpn-instance [ instance-name vpn-instance-name ]
Views
Any view
Predefined user roles
network-admin
network-operator
Parameters
instance-name vpn-instance-name: Displays information about the specified VPN instance. The
vpn-instance-name is a case-sensitive string of 1 to 31 characters. If you do not specify a VPN instance,
this command displays brief information about all VPN instances.
Examples
# Display brief information about all VPN instances.
<Sysname> display ip vpn-instance
Total VPN-Instances configured : 1
VPN-Instance Name RD Create time
abc 1:1 2011/05/18 10:48:17
Table 1 Command output
Field Descri
p
tion
VPN-Instance Name Name of the VPN instance.
RD RD of the VPN instance.
Create Time Time when the VPN instance was created.
# Display detailed information about VPN instance vpn1.
<Sysname> display ip vpn-instance instance-name vpn1
VPN-Instance Name and Index : vpn1, 2
Route Distinguisher : 100:1
VPN ID : 1:1

3
Description : vpn1
Interfaces : Vlan-interface2
Address-family IPv4:
Export VPN Targets :
2:2
Import VPN Targets :
3:3
Maximum Routes Limit : 1000
Address-family IPv6:
Export VPN Targets :
2:2
Import VPN Targets :
3:3
Maximum Routes Limit : 1000
domain-id
Use domain-id to configure an OSPF domain ID.
Use undo domain-id to restore the default.
Syntax
domain-id domain-id [ secondary ]
undo domain-id [ domain-id ]
Default
The OSPF domain ID is 0.
Views
OSPF view
Predefined user roles
network-admin
Parameters
domain-id: Specifies an OSPF domain ID, in one of these formats:
•Integer, in the range of 0 to 4294967295. For example, 1.
•Dotted decimal notation. For example, 0.0.0.1.
•Dotted decimal notation:16-bit user-defined number in the range of 0 to 65535. For example,
0.0.0.1:512.
secondary: Specifies a secondary domain ID. If you do not specify this keyword, the command specifies
a primary domain ID.
Usage guidelines
When you redistribute OSPF routes into BGP, BGP adds the primary domain ID to the redistributed BGP
VPNv4 routes as a BGP extended community attribute. Then, BGP advertises the routes to the peer PE.
When the peer PE receives the routes, it compares the OSPF domain ID in the routes with the locally
configured primary and secondary domain IDs. If the primary or secondary domain ID is the same as the
received domain ID, and the received routes are intra-area routes, OSPF advertises these routes in

4
Network Summary LSAs (Type 3). Otherwise, OSPF advertises these routes in AS External LSAs (Type 5)
or NSSA External LSAs (Type 7).
If you do not specify any parameters, the undo domain-id command deletes all domain IDs.
Examples
# Configure the OSPF domain ID as 234.
<Sysname> system-view
[Sysname] ospf 100
[Sysname-ospf-100] domain-id 234
ext-community-type
Use ext-community-type to configure the type code of an OSPF extended community attribute.
Use undo ext-community-type to restore the default.
Syntax
ext-community-type { domain-id type-code1 | router-id type-code2 | route-type type-code3 }
undo ext-community-type { domain-id | router-id | route-type }
Default
The type codes for domain ID, router ID, and route type are hex numbers 0005, 0107, and 0306,
respectively.
Views
OSPF view
Predefined user roles
network-admin
Parameters
domain-id type-code1: Specifies the type code for domain ID. Valid values are hex numbers 0005,
0105, 0205, and 8005.
router-id type-code2: Specifies the type code for router ID. Valid values are hex numbers 0107 and
8001.
router-type type-code3: Specifies the type code for route type. Valid values are hex numbers 0306 and
8000.
Examples
# Configure the type codes of domain ID, router ID, and route type as hex numbers 8005, 8001, and
8000, respectively, for OSPF process 100.
<Sysname> system-view
[Sysname] ospf 100
[Sysname-ospf-100] ext-community-type domain-id 8005
[Sysname-ospf-100] ext-community-type router-id 8001
[Sysname-ospf-100] ext-community-type route-type 8000
ip binding vpn-instance
Use ip binding vpn-instance to associate an interface with a VPN instance.

5
Use undo ip binding vpn-instance to remove the association.
Syntax
ip binding vpn-instance vpn-instance-name
undo ip binding vpn-instance vpn-instance-name
Default
An interface is associated with no VPN instance and belongs to the public network.
Views
Interface view
Predefined user roles
network-admin
Parameters
vpn-instance-name: Specifies a VPN instance by its name, a case-sensitive string of 1 to 31 characters.
Usage guidelines
Use the command on an MCE to associate the VPN instance with the interface connected to the site and
the interface connected to the PE.
This command or its undo form clears the IP address and routing protocol configuration on the interface.
After executing this command or its undo form, use the display this command to view the current
configuration and reconfigure the IP address and routing protocol on the interface.
The specified VPN instance must have been created by using the ip vpn-instance command in system
view.
To associate a new VPN instance with an interface, you must remove the previous association by using
the undo ip binding vpn-instance command and then use the ip binding vpn-instance command to
associate the new VPN instance with the interface.
Examples
# Associate interface VLAN-interface 1 with VPN instance vpn1.
<Sysname> system-view
[Sysname] interface vlan-interface 1
[Sysname-Vlan-interface1] ip binding vpn-instance vpn1
Related commands
ip vpn-instance (system view)
Use ip vpn-instance to create a VPN instance and enter VPN instance view.
Use undo ip vpn-instance to delete a VPN instance.
Syntax
ip vpn-instance vpn-instance-name
undo ip vpn-instance vpn-instance-name
Default
No VPN instance is created.

6
Views
System view
Predefined user roles
network-admin
Parameters
vpn-instance-name: Specifies the name of the VPN instance, a case-sensitive string of 1 to 31 characters.
Examples
# Create a VPN instance named vpn1.
<Sysname> system-view
[Sysname] ip vpn-instance vpn1
[Sysname-vpn-instance-vpn1]
Related commands
route-distinguisher
route-distinguisher (VPN instance view)
Use route-distinguisher to configure an RD for a VPN instance.
Use undo route-distinguisher to remove the RD of a VPN instance.
Syntax
route-distinguisher route-distinguisher
undo route-distinguisher
Default
No RD is specified for a VPN instance.
Views
VPN instance view
Predefined user roles
network-admin
Parameters
route-distinguisher: Specifies an RD for the VPN instance, a string of 3 to 21 characters in one of these
formats:
•16 - b i t A S n u m b e r :32-bit user-defined number. For example, 101:3.
•32-bit IP address:16-bit user-defined number. For example, 192.168.122.15:1.
•32-bit AS number:16-bit user-defined number, where the minimum value of the AS number is 65536.
For example, 65536:1.
Usage guidelines
RDs enable VPNs to use the same address space. An RD and an IPv4 prefix comprise a unique VPN IPv4
prefix. You can use RDs to identify different BGP VPN instances on an MCE.
To change the RD of a VPN instance, you must delete the RD with the undo route-distinguisher command,
and then use the route-distinguisher command to configure a new RD.

7
Examples
# Configure RD 22:1 for VPN instance vpn1.
<Sysname> system-view
[Sysname] ip vpn-instance vpn1
[Sysname-vpn-instance-vpn1] route-distinguisher 22:1
route-tag
Use route-tag to configure an external route tag for redistributed VPN routes.
Use undo route-tag to restore the default.
Syntax
route-tag tag-value
undo route-tag
Default
If BGP runs within an MPLS backbone, and the BGP AS number is not greater than 65535, the first two
octets of the external route tag are 0xD000, and the last two octets are the local BGP AS number. For
example, if the local BGP AS number is 100, the external route tag value is 3489661028 (100 + the
decimal value of 0xD0000000). If the AS number is greater than 65535, the external route tag is 0.
Views
OSPF view
Predefined user roles
network-admin
Parameters
tag-value: Specifies an external route tag for redistributed VPN routes, in the range of 0 to 4294967295.
Usage guidelines
In a dual-homed CE scenario where OSPF runs between the CE and the connected PEs (PE-A and PE-B,
for example), you can use external route tags to avoid routing loops.
When PE-A redistributes BGP routes received from the peer PE into OSPF, and advertises these routes in
the Type 5 or 7 LSAs to the CE, PE-A adds the locally configured external route tag to Type 5 or 7 LSAs.
When PE-B receives the Type 5 or 7 LSAs advertised by the CE, it compares the external route tag in the
LSAs with the locally configured tag. If they are the same, PE-B ignores the LSA in route calculation to
avoid routing loops.
The commands used to configure the external route tag (in the descending order of tag priority) are as
follows:
•import-route
•route-tag
•default tag
H3C recommends configuring the same external route tag for MCEs in the same area.
An external route tag is not transferred in any BGP extended community attribute. It takes effect only on
the MCEs that receive BGP routes and generate OSPF Type 5 or 7 LSAs.
You can configure the same external route tag for different OSPF processes.

8
Examples
# In OSPF process 100, set the external route tag for redistributed VPN routes to 100.
<Sysname> system-view
[Sysname] ospf 100
[Sysname-ospf-100] route-tag 100
Related commands
•default (Layer 3—IP Routing Command Reference)
•import-route (Layer 3—IP Routing Command Reference)
routing-table limit
Use routing-table limit to limit the maximum number of active routes in a VPN instance.
Use undo routing-table limit to restore the default.
Syntax
routing-table limit number { warn-threshold | simply-alert }
undo routing-table limit
Default
The maximum number of active routes in a VPN instance is not limited.
Views
VPN instance view, IPv4 VPN view, IPv6 VPN view
Predefined user roles
network-admin
Parameters
number: Specifies the maximum number of active routes, in the range of 1 to 1024.
warn-threshold: Specifies a warning threshold in the range of 1 to 100 in percentage. When the
percentage of the number of existing active routes to the maximum number of active routes exceeds the
specified threshold, the system gives an alarm message but still allows new active routes. If active routes
in the VPN instance reach the maximum, no more active routes are added.
simply-alert: Specifies that when active routes exceed the maximum number, the system still accepts
active routes but generates a system log message.
Usage guidelines
A limit configured in VPN instance view applies to both the IPv4 VPN and the IPv6 VPN.
A limit configured in IPv4 VPN view or IPv6 VPN view applies to only the IPv4 VPN or the IPv6 VPN.
IPv4/IPv6 VPN prefers the limit configured in IPv4/IPv6 VPN view over the limit configured in VPN
instance view.
Examples
# Specify that VPN instance vpn1 supports up to 1000 active routes, and when active routes exceed the
upper limit, can receive new active routes but generates a system log message.
<Sysname> system-view
[Sysname] ip vpn-instance vpn1

9
[Sysname-vpn-instance-vpn1] route-distinguisher 100:1
[Sysname-vpn-instance-vpn1] routing-table limit 1000 simply-alert
# Specify that the IPv4 VPN vpn2 supports up to 1000 active routes, and when active routes exceed the
upper limit, can receive new active routes but generates a system log message.
<Sysname> system-view
[Sysname] ip vpn-instance vpn2
[Sysname-vpn-instance-vpn2] route-distinguisher 100:2
[Sysname-vpn-instance-vpn2] address-family ipv4
[Sysname-vpn-ipv4-vpn2] routing-table limit 1000 simply-alert
# Specify that the IPv6 VPN vpn3 supports up to 1000 active routes, and when active routes exceed the
upper limit, can receive new active routes but generates a system log message.
<Sysname> system-view
[Sysname] ip vpn-instance vpn3
[Sysname-vpn-instance-vpn3] route-distinguisher 100:3
[Sysname-vpn-instance-vpn3] address-family ipv6
[Sysname-vpn-ipv4-vpn3] routing-table limit 1000 simply-alert
vpn-id
Use vpn-id to configure a VPN ID for a VPN instance.
Use undo vpn-id to remove the VPN ID of a VPN instance.
Syntax
vpn-id
undo vpn-id
Default
No VPN ID is configured for a VPN instance.
Views
VPN instance view
Predefined user roles
network-admin
Parameters
vpn-id: Specifies a VPN ID for the VPN instance, in the form of OUI:Index. Both OUI and Index are hex
numbers. The OUI is in the range of 0 to FFFFFF, and the index is in the range of 0 to FFFFFFFF.
Usage guidelines
The VPN ID uniquely identifies the VPN instance. Different VPN instances must have different VPN IDs.
The VPN ID cannot be 0:0.
Examples
# Configure VPN ID 20:1 for VPN instance vpn1.
<Sysname> system-view
[Sysname] ip vpn-instance vpn1
[Sysname-vpn-instance-vpn1] vpn-id 20:1

10
Related commands
display ip vpn-instance
vpn-instance-capability simple
Use vpn-instance-capability simple to disable routing loop detection for an OSPF VRF process.
Use undo vpn-instance-capability to restore the default.
Syntax
vpn-instance-capability simple
undo vpn-instance-capability
Default
Routing loop detection is enabled for an OSPF VRF process.
Views
OSPF view
Predefined user roles
network-admin
Usage guidelines
On an MCE network, you must disable routing loop detection for an OSPF VRF process on the MCE.
Otherwise, the MCE does not receive OSPF routes from the PE.
This command is applicable only to an OSPF VRF process.
Examples
# Disable routing loop detection for OSPF VRF process 100.
<Sysname> system-view
[Sysname] ospf 100 vpn-instance vpna
[Sysname-ospf-100] vpn-instance-capability simple
vpn-target (VPN instance view/IPv4 VPN view/IPv6 VPN view)
Use vpn-target to configure route targets for a VPN instance.
Use undo vpn-target to remove the specified or all route targets of a VPN instance.
Syntax
vpn-target vpn-target&<1-8> [ both | export-extcommunity | import-extcommunity ]
undo vpn-target { all | vpn-target&<1-8> [ both | export-extcommunity | import-extcommunity ] }
Default
No route targets are configured for a VPN instance.
Views
VPN instance view, IPv4 VPN view, IPv6 VPN view
Predefined user roles
network-admin

11
Parameters
vpn-target&<1-8>: Specifies a space-separated list of up to eight route targets.
A route target is a string of 3 to 21 characters in one of these formats:
•16 - b i t A S n u m b e r :32-bit user-defined number. For example, 101:3.
•32-bit IP address:16-bit user-defined number. For example, 192.168.122.15:1.
•32-bit AS number:16-bit user-defined number, where the AS number must not be less than 65536.
For example, 65536:1.
both: Uses the specified route targets as both import targets and export targets. The both keyword is also
used when you do not specify any of the following keywords: both, export-extcommunity, and
import-extcommunity.
export-extcommunity: Uses the specified route targets as export targets.
import-extcommunity: Uses the specified route targets as import targets.
all: Removes all route targets.
Usage guidelines
MPLS L3VPN uses route targets to control the advertisement of VPN routing information. A PE adds the
configured export targets into the route target attribute of routes advertised to a peer. The peer uses the
local import targets to match the route targets of received routes. If a match is found, the peer adds the
routes to the routing table of the VPN instance.
Route targets configured in VPN instance view are applicable to both the IPv4 VPN and the IPv6 VPN.
Route targets configured in IPv4 VPN view or IPv6 VPN view are applicable to only the IPv4 VPN or IPv6
VPN.
Route targets configured in IPv4 VPN view or IPv6 VPN view take precedence over those configured in
VPN instance view. If you configure route targets in both IPv4 VPN view (or IPv6 VPN view) and VPN
instance view, the IPv4 VPN or IPv6 VPN uses the route targets configured in IPv4 VPN view or IPv6 VPN
view.
Examples
# Configure route targets for VPN instance vpn1.
<Sysname> system-view
[Sysname] ip vpn-instance vpn1
[Sysname-vpn-instance-vpn1] vpn-target 3:3 export-extcommunity
[Sysname-vpn-instance-vpn1] vpn-target 4:4 import-extcommunity
[Sysname-vpn-instance-vpn1] vpn-target 5:5 both
# Configure route targets for the IPv4 VPN vpn2.
<Sysname> system-view
[Sysname] ip vpn-instance vpn2
[Sysname-vpn-instance-vpn2] address-family ipv4
[Sysname-vpn-ipv4-vpn2] vpn-target 3:3 export-extcommunity
[Sysname-vpn-ipv4-vpn2] vpn-target 4:4 import-extcommunity
[Sysname-vpn-ipv4-vpn2] vpn-target 5:5 both
# Configure route targets for the IPv6 VPN vpn3.
<Sysname> system-view
[Sysname] ip vpn-instance vpn3
[Sysname-vpn-instance-vpn3] address-family ipv6

12
[Sysname-vpn-ipv6-vpn3] vpn-target 3:3 export-extcommunity
[Sysname-vpn-ipv6-vpn3] vpn-target 4:4 import-extcommunity
[Sysname-vpn-ipv6-vpn3] vpn-target 5:5 both

13
IPv6 MCE commands
For information about the commands available for both MCE and IPv6 MCE, see "MCE commands."
address-family ipv6 (VPN instance view)
Use address-family ipv6 to enter IPv6 VPN view.
Use undo address-family ipv6 to remove all configurations from IPv6 VPN view.
Syntax
address-family ipv6
undo address-family ipv6
Views
VPN instance view
Predefined user roles
network-admin
Usage guidelines
In IPv6 VPN view, you can configure IPv6 VPN parameters.
Examples
# Enter IPv6 VPN view.
<Sysname> system-view
[Sysname] ip vpn-instance vpn1
[Sysname-vpn-instance-vpn1] address-family ipv6
[Sysname-vpn-ipv6-vpn1]
Related commands
address-family ipv4 (VPN instance view)
domain-id
Use domain-id to configure an OSPFv3 domain ID.
Use undo domain-id to restore the default.
Syntax
domain-id { domain-id [ secondary ] | null }
undo domain-id [ domain-id | null ]
Default
The OSPFv3 domain ID is 0.
Views
OSPFv3 view
Other manuals for S6300 Series
7
Table of contents
Other H3C Switch manuals

H3C
H3C S3100-8TP-SI User manual

H3C
H3C Mini Series User manual

H3C
H3C S3100V2-52TP User manual

H3C
H3C S6860 Series User manual

H3C
H3C S12501X-AF User manual

H3C
H3C S3610 Series User manual

H3C
H3C S3100-52P Installation instructions

H3C
H3C S12500 Series Quick start guide

H3C
H3C S9500 Series User manual

H3C
H3C S3100 Series Installation instructions

H3C
H3C S9500 Series User manual

H3C
H3C S5500-28 C-EI-DC User manual

H3C
H3C S5110V2 Series User manual

H3C
H3C S7500 Series User manual

H3C
H3C S12500X-2L User manual

H3C
H3C S5510 Series User manual

H3C
H3C S10500X Series User manual

H3C
H3C S5560S-EI Series User manual

H3C
H3C S5130S-EI series User manual

H3C
H3C S6805 Series Owner's manual