manuals.online logo
Brands
  1. Home
  2. •
  3. Brands
  4. •
  5. Theben
  6. •
  7. Switch
  8. •
  9. Theben eltimo 020 s User manual

Theben eltimo 020 s User manual

310300 03
Automatic witch for
Power Outlets
eltimo 020 s
eltimo 020 s DCF
1For setting the real time
2For setting day of the week
3Cursor for indication of day of week
(1 = Mo, 2 = Tu ...)
4Hours display
5Display for automatic summer /
wintertime switching
6RC display flashes while the switch is
trying to receive the DCF signal
(with DCF device)
7Display minutes
8For switching condition display
ON / OFF
and permanently ON OFF
9Hours setting
10 Minutes setting
11 RESET (complete deletion)
12 Random program
13 Channel selection ON / OFF
14 Programming/ interrogation
11
22
33
RESRES
d
dhhm
m
ProgProg
4
4
55
6677
8
8
1111
1212
1313
1414
1 2 3 4 5 6 7 1010
99
RC
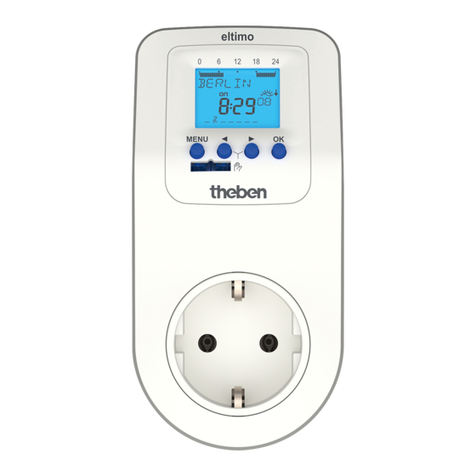
The eltimo 020 s is an automatic switch featuring weekly programs and random
switching.
The eltimo 020 s DCF version is capable of receiving the DCF77 time signal to gua-
rantee that the correct time is always displayed even when switching between sum-
mer and winter time.
2. Appropriate Use
1.Description 020 s / 020 s DCF
6. Programming 020 s / 020 s DCF
3. Initial tartup 020 s DCF
Initial startup with auto summer-/wintertime adjustment 020 s
dhm
A. etting week programm
Result: Switching times can be individually set for every week.
10. Press button d. The current weekday is automatically set.
11. Set the actual time by pressing button hand m.
12. Release button .
B. etting day program
Result: All programmable switching times will
be executed at the same time
every day.
See above without 10.
Pr og
d
After the DCF signal has been received, the switch is immediately ready for use.
1. Plug the switch (eltimo 020 s DCF) into the power outlet.
2. The RC icon flashes while the DCF signal is being received. After a few minutes,
the RC icon stops flashing and the time will be set automatically.
f the switch is still unable to obtain a DCF signal after a few minutes, the time must
be set manually (see chap. 5).
To provide for interference-free signal reception, the switch should always be
installed at a distance of approx. 1 m from other electrical devices (e.g. PC)!
A. Week program
Prerequisite: The initial start-up must have been performed as described in
sections 5.1 A and 5.2 A.
Result: Same switching time on different days of the week.
Programming switch-on time
1. Press button Prog.
2. Press button dfor day selection.
3. Store with Prog.
dentical switching time on several days of the week (e.g. Monday to Friday 1-5).
Repeat the programming steps 2. and 3. until the cursors are positioned above 1-5.
4. Set the switch-on time by pressing button h and m.
5. Store by pressing Prog.
Programming switch-off time
6. Select icon with button i.
7. Repeat setting 2. - 5.
B. Day program operation
Prerequisite:
The initial start-up must have been performed as described in sections 5.1 A
and 5.2 A.
See above but without 2. and 3.
1. Press button RE .
2. Select adjustment rule e.g. dat 1
with button i.
3. Store by pressing Prog button.
4. Set the year by pressing button d.
5. Store by pressing Prog button.
6. Set the date of the day by pressing button d.
7. Use button mto set the date of the month.
8. Store by pressing Prog button.
9. Hold down button for the next
setting operation.
etting beginning of beginning of Valid for
are summer time winter time region
dat bis last sunday last sunday EU
12/95 in march in september
dat 1 last sunday last sunday
from 1/96 in march in september EU
dat 2 last sunday 4 th. sunday
in march in october GB (earlier)
dat 3 first sunday last sunday
in april in october North
no no no
adjustment adjustment
4. Initial startup without auto summer-/wintertime adjustment 020 s
RES
A. etting week program
1. Press button RE .
2. Select adjustment rule no with button i.
3. Store by pressing Prog button.
4. Hold down button .
5. Set the day by pressing button d(1 = Mo, 2 = Tu, ...)
6. Set the actual time by pressing button hand m.
7. Please release button .
B. etting day program
See above without 5.
5. etting/changing the current time 020 s / 020 s DCF
hdm
1. Hold down button .
2. Change the current time by pressing button hund m.
Set the day by pressing button d.
(applies to 020 s DCF only)
3. Release both buttons.
f a DCF signal is received later on, e.g. at
night, the set time is automatically corrected.
eltimoneu GB - 310 300 03_eltimoneu GB - 310 300 20.01.14 13:43 Seite 1
m
1. Hold down button m.
2. Select status using button i.
con indicates permament ON.
con indicates permemant OFF.
Reset permanent switching
1. Hold down button m.
2. Press button iuntil the dot next to the switching status appears.
dhm
The selectable holiday program permits the interruption of a stored program. The
switching status is permanent OFF.
1. Hold down the button h through out the setting operation.
2. Use button dto set the number of days after which
the holiday program is supported to start.
3. Use button mto set the duration of the holiday program.
Interrupting the holiday program
1. Hold down the button h, the display must be reset to 00 00 with the
buttons h and m.
hm
Pr og
Deletion of some switching times
1. Use Prog to search switching time to be deleted.
Only the displayed switching time will be deleted.
2. Press button h and m simultaneously.
General deletion of all switching times
1. Press button d, hand m simultaneously.
Danger resulting from the unattended operation of connected devices
Make sure that the unattended operation of devices connected to the auto
matic switch does not constitute a security risk (safe mounting, overheating,
inaccessible to children)!
Danger of life due to electrical shock
Never use the switch outside, in the bathroom or in other environments with
a high degree of humidity.
nterference with and changes to the product will result in cancellation of
the guarantee.
Fire hazard due to overload
Make sure that the consumer connected does not exceed the maximum per
missible breaking capacity. f in doubt, please contact an electrician or our
customer support service.
EMC
The time switches comply with the european directives 73/ 23 EEC and 89/ 336 EEC. f the time
switch is used together with other devices in an installation, take care that the complete installa-
tion does not cause radio interference.
12. Activating random program 020 s / 020 s DCF
13. Holiday program 020 s / 020 s DCF
14. afety instructions 020 s / 020 s DCF
9. Individual deletions 020 s / 020 s DCF
11. Permanent ON/OFF switching 020 s / 020 s DCF
15. Technical data 020 s / 020 s DCF
Type of program: day or week
Operating voltage: 230 V ± 10 %, 50 Hz
Switching capacity: 16 (2) 230 V~
Time base: Quarz (020 s), DCF (020 s DCF)
Memory locations: 36 (020 s), 33 (020 s DCF)
Min. switching interval: 1 minute
Switching accuracy: ≤ ±1 sec. / day at 20 °C
Power reserve: NiMH battery, approx. 500 h at 20 °C
Perm. ambient temperature: –10 °C to +40 °C
Class of protection: in compliance with EN 60730-1
System of protection: P 20 in compliance with EN 60529
Type: 1 BSTU in compliance with EN 60730-1
and EN 60730-2-7
8. Changing program 020 s / 020 s DCF
hm
Pr og
Pr og
1. Press button Prog several times.
All stored switching times are
subsequently displayed.
Return to automatic mode
2. Press button .
7. Querying the program 020 s / 020 s DCF
A. Weekprogram
No change of the weekdays
1. Check the switching times by pressing the
button Prog.
2. Change the switching times by pressing
button h and m.
3. Store by pressing Prog.
Changing the weekdays
1. Check the switching times by pressing the button Prog.
2. Press button d repeatedly until all but one cursors have stopped flashing.
3. Place cursor above desired weekday.
4. Store by pressing Prog.
e.g.: Lamp shall be switched on at the same time every day from Mo - Fri:
Cursor must be fixed above 1 - 5.
5. f necessary repeat the programming 4. and 5.
6. Store by pressing Prog button.
B. Dayprogram
1. Check the switching times by pressing button Prog.
2. Change the switching time by pressing button h and m.
3. Store by pressing Prog button.
The random program causes the time switch on and off at random between a pro-
grammed switching pair (ON and OFF switching time).
Activating random program
1. Hold down button for approx. 3 sec until
the dice icon in the display starts flashing.
Deactivating random programm
2. Press button and release it immediately. The icon in the display should disappear.
1. Press button i.
Result:
Alternating ON and OFF.
con indicates ON.
con indicates OFF.
10. witching preselection ON/OFF 020 s / 020 s DCF
Theben AG
Hohenbergstr. 32
72401 Haigerloch
DEUTSCHLAND
Tel. +49 7474 692-0
Fax +49 74 74 692-150
ervice
Fon +49 7474 692-369
Fax +49 7474 692-207
[email protected]
Addresses, telephone numbers etc. at
www.theben.de
eltimoneu GB - 310 300 03_eltimoneu GB - 310 300 20.01.14 13:43 Seite 2

This manual suits for next models

1

Other Theben Switch manuals

Theben Timeguard AC1988 Manual

Theben

Theben Timeguard AC1988 Manual

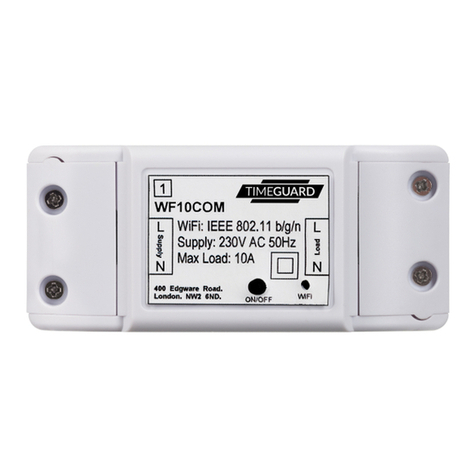
Theben TIMEGUARD WF10COM Manual

Theben

Theben TIMEGUARD WF10COM Manual

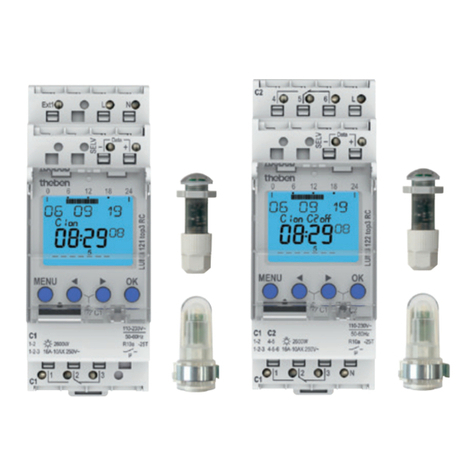
Theben LUNA 121 top3 RC User manual

Theben

Theben LUNA 121 top3 RC User manual

Theben TR 030 top3 UP User manual

Theben

Theben TR 030 top3 UP User manual

Theben LUNA 111 top3 AL User manual

Theben

Theben LUNA 111 top3 AL User manual

Theben LUNA 111 top2 User manual

Theben

Theben LUNA 111 top2 User manual

Theben TRA 69 H User manual

Theben

Theben TRA 69 H User manual

Theben termina tr 611 top2 Parts list manual

Theben

Theben termina tr 611 top2 Parts list manual

Theben TIMEGUARD IS3N-20 Manual

Theben

Theben TIMEGUARD IS3N-20 Manual

Theben TR 610 top2 User manual

Theben

Theben TR 610 top2 User manual

Theben TR 610 top2 User manual

Theben

Theben TR 610 top2 User manual

Theben SEL 173 DCF User manual

Theben

Theben SEL 173 DCF User manual

Theben eltimo 020 top3 User manual

Theben

Theben eltimo 020 top3 User manual

Theben TR 644 top2 User manual

Theben

Theben TR 644 top2 User manual

Theben TIMEGUARD Weathersafe IS3N-20 Manual

Theben

Theben TIMEGUARD Weathersafe IS3N-20 Manual

Theben LUNA Series User manual

Theben

Theben LUNA Series User manual

Theben SELEKTA 170 top2 User manual

Theben

Theben SELEKTA 170 top2 User manual

Theben Luna 129 User manual

Theben

Theben Luna 129 User manual

Theben SELEKTA 170 top2 User manual

Theben

Theben SELEKTA 170 top2 User manual

Theben SELEKTA 171 Top3 RC User manual

Theben

Theben SELEKTA 171 Top3 RC User manual

Popular Switch manuals by other brands

Dynex DX-U27H41 Guide d'installation rapide
Dynex

Dynex DX-U27H41 Guide d'installation rapide

Endress+Hauser Liquiphant FTL64 operating instructions

Endress+Hauser

Endress+Hauser Liquiphant FTL64 operating instructions

Hama 74011488 Operating	 instruction

Hama

Hama 74011488 Operating instruction

Ace Plus IC-612-I user manual

Ace Plus

Ace Plus IC-612-I user manual

Transition Networks SM24DPa Read me first

Transition Networks

Transition Networks SM24DPa Read me first

Analog way QuickVu QVU150-3G quick start guide

Analog way

Analog way QuickVu QVU150-3G quick start guide

FS S5500-48T8SP Configuration guide

FS

FS S5500-48T8SP Configuration guide

Argus AS-21HA manual

Argus

Argus AS-21HA manual

Finisar DWP 50 Product brief

Finisar

Finisar DWP 50 Product brief

D-Link GO-SW-16G quick start guide

D-Link

D-Link GO-SW-16G quick start guide

Bluestream Custom Pro Matrix user manual

Bluestream

Bluestream Custom Pro Matrix user manual

D-Link KVM-222 Quick installation guide

D-Link

D-Link KVM-222 Quick installation guide

Avenview SW-HDM-4X1 instruction manual

Avenview

Avenview SW-HDM-4X1 instruction manual

Ubiquiti UnFi US-8-60W quick start guide

Ubiquiti

Ubiquiti UnFi US-8-60W quick start guide

INTERTECHNO ITL-1001 operating instructions

INTERTECHNO

INTERTECHNO ITL-1001 operating instructions

Circutor REC 3 Series instruction manual

Circutor

Circutor REC 3 Series instruction manual

CTC Union SB202 Series product manual

CTC Union

CTC Union SB202 Series product manual

D-Link DES-7206 Quick installation guide

D-Link

D-Link DES-7206 Quick installation guide

manuals.online logo
manuals.online logoBrands
  • About & Mission
  • Contact us
  • Privacy Policy
  • Terms and Conditions

Copyright 2025 Manuals.Online. All Rights Reserved.