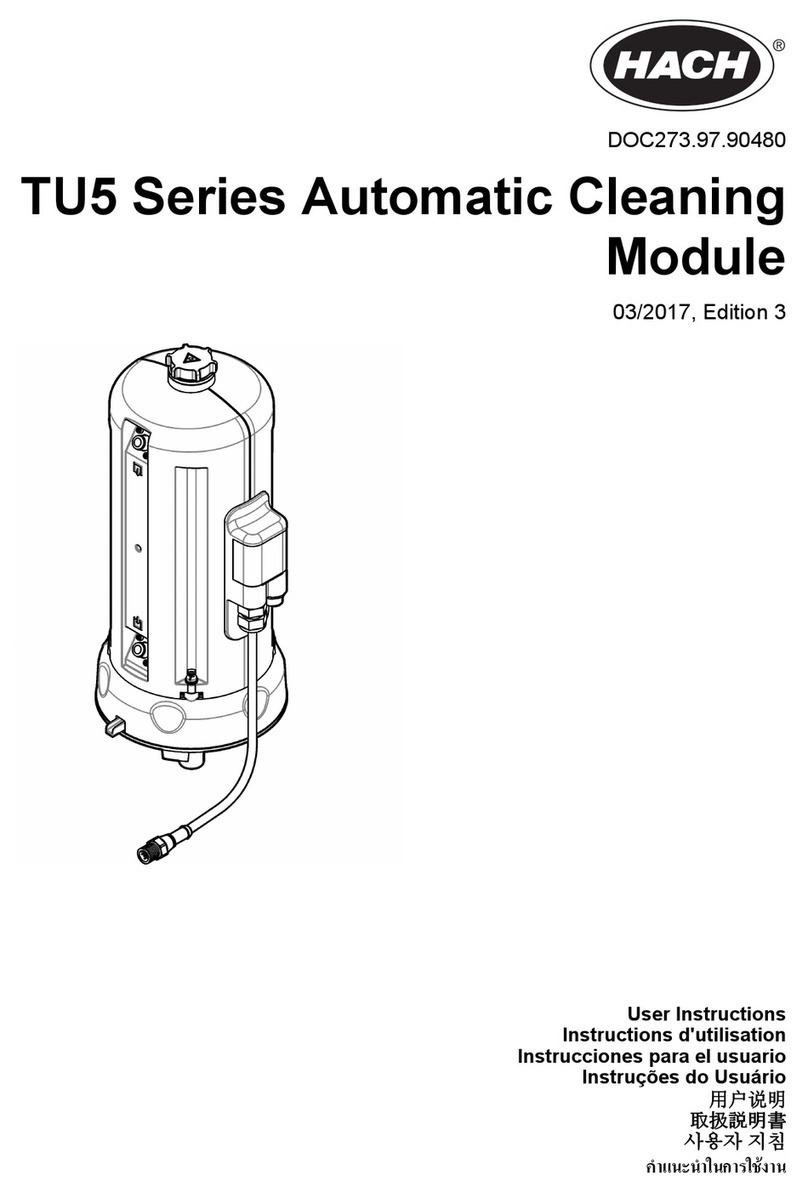
Hach TU5400 User manual

DOC273.98.90480
TU5 Series
Automatic Cleaning Module
06/2021, Edition 5
User Instructions
Bedienungsanleitung
Istruzioni per l'uso
Instructions d'utilisation
Instrucciones para el usuario
Instruções do utilizador
Návod pro uživatele
Gebruiksaanwijzingen
Brugervejledninger
Instrukcja obsługi
Bruksanvisning
Käyttöohje
Инструкции за потребителя
Felhasználói útmutató
Instrucţiuni de utilizare
Naudotojo instrukcijos
Руководство пользователя
Kullanma talimatları
Návod na použitie
Navodila za uporabo
Korisničke upute
Οδηγίες χρήσης
Kasutusjuhend
Korisnička uputstva

Table of Contents
English..............................................................................................................................3
Deutsch.......................................................................................................................... 20
Italiano............................................................................................................................ 37
Français......................................................................................................................... 54
Español.......................................................................................................................... 71
Português...................................................................................................................... 88
Čeština......................................................................................................................... 105
Nederlands................................................................................................................. 122
Dansk............................................................................................................................139
Polski............................................................................................................................ 156
Svenska....................................................................................................................... 173
Suomi............................................................................................................................190
български................................................................................................................... 207
Magyar......................................................................................................................... 225
Română....................................................................................................................... 242
lietuvių kalba...............................................................................................................259
Русский........................................................................................................................276
Türkçe...........................................................................................................................294
Slovenský jazyk......................................................................................................... 311
Slovenski..................................................................................................................... 328
Hrvatski........................................................................................................................ 345
Ελληνικά...................................................................................................................... 362
eesti keel..................................................................................................................... 379
Српски......................................................................................................................... 396
2

Table of Contents
1 Specifications on page 3
2 General information on page 3
3 Installation on page 6
4 Startup on page 12
5 Operation on page 13
6 Maintenance on page 14
7 Replacement parts and accessories
on page 19
Section 1 Specifications
Specifications are subject to change without notice.
Specification Details
IP rating Electronic compartment IP55; process head/Automatic Cleaning Module
attached to the instrument and all of the other functional units IP651
Power requirements 12 VDC (+2 V, –4 V), 7 VA
Protection class III
Pollution degree 2
Overvoltage category II
Environmental conditions Indoor use
Operating temperature 0 to 50 °C (32 to 122 °F)
Storage temperature –40 to 60 °C (–40 to 140 °F)
Humidity 5 to 95% relative humidity, non-condensing
Altitude 2000 m (6562 ft) maximum
Certifications CE, UKCA
Warranty 1 year (EU: 2 years)
Section 2 General information
In no event will the manufacturer be liable for direct, indirect, special, incidental or consequential
damages resulting from any defect or omission in this manual. The manufacturer reserves the right to
make changes in this manual and the products it describes at any time, without notice or obligation.
Revised editions are found on the manufacturer’s website.
2.1 Safety information
The manufacturer is not responsible for any damages due to misapplication or misuse of this product
including, without limitation, direct, incidental and consequential damages, and disclaims such
damages to the full extent permitted under applicable law. The user is soley responsible to identify
critical application risks and install appropriate mechanisms to protect processes during a possible
equipment malfunction.
Please read this entire manual before unpacking, setting up or operating this equipment. Pay
attention to all danger and caution statements. Failure to do so could result in serious injury to the
operator or damage to the equipment.
Make sure that the protection provided by this equipment is not impaired. Do not use or install this
equipment in any manner other than that specified in this manual.
1Water drops, puddles or runlets that will not damage the instrument may be in the inner of the
enclosure.
English 3

2.1.1 Use of hazard information
D A N G E R
Indicates a potentially or imminently hazardous situation which, if not avoided, will result in death or
serious injury.
WARNING
Indicates a potentially or imminently hazardous situation which, if not avoided, could result in death
or serious injury.
CAUTION
Indicates a potentially hazardous situation that may result in minor or moderate injury.
N O T I C E
Indicates a situation which, if not avoided, may cause damage to the instrument. Information that
requires special emphasis.
2.1.2 Precautionary labels
Read all labels and tags attached to the instrument. Personal injury or damage to the instrument
could occur if not observed. A symbol on the instrument is referenced in the manual with a
precautionary statement.
Electrical equipment marked with this symbol may not be disposed of in European
domestic or public disposal systems. Return old or end-of-life equipment to the
manufacturer for disposal at no charge to the user.
This symbol, if noted on the instrument, references the instruction manual for operation
and/or safety information.
This symbol indicates that a risk of electrical shock and/or electrocution exists.
This symbol indicates the need for protective eye wear.
This symbol indicates a laser device is used in the equipment.
This symbol identifies a risk of chemical harm and indicates that only individuals qualified
and trained to work with chemicals should handle chemicals or perform maintenance on
chemical delivery systems associated with the equipment.
This symbol indicates radio waves.
This symbol indicates the presence of a strong magnetic field.
4 English

2.2 Product overview
WARNING
Pacemaker precautions. The instrument has an internal magnet. Keep the instrument a
minimum of 5 cm (2 in.) from the user. A magnetic field can:
• Stop the stimulating pulses from the pacemaker that control the rhythm of the heart.
• Cause the pacemaker to supply the pulses irregularly.
• Cause the pacemaker to ignore the rhythm of the heart and supply pulses at a set
interval.
The automatic cleaning module is an accessory for the TU5300 sc and the TU5400 sc turbidimeters.
Refer to Figure 1. The automatic cleaning module cleans the vial at a selected time interval or
turbidity reading limit. As an alternative, start the cleaning manually or with a Modbus connection.
Figure 1 Product overview
1 Sample outlet 5 Process vial
2 Service lid26 Vial replacement tool
3 Connector for the flow sensor or other
accessories
7 Sample inlet
4 Automatic cleaning module cable
2.3 Product components
Make sure that all components have been received. Refer to Figure 2. If any items are missing or
damaged, contact the manufacturer or a sales representative immediately.
2For service use only
English 5

Figure 2 Product components
1 Automatic cleaning module (with silicone vial
wiper installed)
2 Fiber vial wiper3
Section 3 Installation
WARNING
Pacemaker precautions. The instrument has an internal magnet. Keep the instrument a
minimum of 5 cm (2 in.) from the user. A magnetic field can:
• Stop the stimulating pulses from the pacemaker that control the rhythm of the heart.
• Cause the pacemaker to supply the pulses irregularly.
• Cause the pacemaker to ignore the rhythm of the heart and supply pulses at a set
interval.
CAUTION
Multiple hazards. Only qualified personnel must conduct the tasks described in this
section of the document.
3.1 Installation overview
Figure 3 shows the installation overview with all of the clearances necessary.
Install the turbidimeter and do a leakage test on the system. Refer to the turbidimeter documentation.
Then, install the Automatic Cleaning Module.
3Use the fiber vial wiper for more stringent cleaning requirements.
6 English

Figure 3 Installation overview
1 Service bracket 5 Sample inlet
2 Automatic cleaning module 6 Sample outlet
3 Flow regulator 7 TU5300 sc or TU5400 sc
4 Flow sensor (optional)
3.2 Install the service bracket
Refer to the TU5300 sc/TU5400 sc documentation to install the service bracket. The service bracket
is supplied with the turbidimeter.
3.3 Install the automatic cleaning module
WARNING
Explosion hazard. Make sure that the drain tube is free of all obstructions. If the drain
tube has a blockage or is pinched or bent, high pressure can build up in the instrument.
English 7

WARNING
Personal injury hazard. The sample line contains water under high water pressure that
can burn skin if hot. Qualified personnel must remove the water pressure and wear
personal protective equipment during this procedure.
N O T I C E
Do not let water get in the vial compartment or instrument damage will occur. Before the automatic
cleaning module is installed on the instrument, make sure that there are no water leaks. Make sure
that all tubing is fully seated. Make sure that the vial nut is tight.
N O T I C E
Hold the automatic cleaning module vertically when it is installed on the instrument or the vial can
break. If the vial breaks, water will get in the vial compartment and instrument damage will occur.
Set the controller power to off. If the turbidimeter is not plumbed, do illustrated steps 1A to 7A. If the
turbidimeter is plumbed, do illustrated steps 1B to 10B. Do a leakage test after plumbing of the
cleaning module. Make sure that there are no water leaks, then install the cleaning module on the
turbidimeter.
For more stringent cleaning requirements, replace the silicone vial wiper with the supplied fiber vial
wiper. Refer to Replace the wiper on page 18.
Tubing is supplied by the user. Refer to Replacement parts and accessories on page 19.
8 English

English 9

10 English

English 11

Section 4 Startup
4.1 Set the power to on
CAUTION
Personal injury hazard. Do not look into the vial compartment when the instrument is
connected to power.
After the Automatic Cleaning Module is installed, set the controller power to on.
12 English

Section 5 Operation
WARNING
Chemical exposure hazard. Obey laboratory safety procedures and wear all of the
personal protective equipment appropriate to the chemicals that are handled. Refer to
the current safety data sheets (MSDS/SDS) for safety protocols.
5.1 Set the automatic cleaning options
After the automatic cleaning module is installed, set the cleaning options.
1. Push menu.
2. Select SENSOR SETUP>[select analyzer]>CONFIGURE>CLEANING MODULE.
3. Select ON.
The menu options for the automatic cleaning module are shown on the display.
4. Select SENSOR SETUP>[select analyzer]>CONFIGURE>CLEANING.
5. Select an option.
Option Description
CLEAN.
INTERVAL
Sets the cleaning interval. Options: 2, 6 or 12 hours (default) or 1 or
7 days. The frequency of the cleaning interval selected depends on the
sample composition.
Note: To manually start a cleaning cycle, select SENSOR SETUP>[select
analyzer]>START WIPE.
WIPER
REMINDER
When set to on, the reminder for wiper replacement shows on the display
when it is time to replace the wiper (default: OFF).
CLEAN. LEVEL When set to on, a cleaning cycle is done when the reading is more than
the THRESHOLD setting (default: OFF).
When set to off, a cleaning cycle is done at the time frequency of the
cleaning interval.
THRESHOLD Sets the threshold for a cleaning cycle. Options: 0 to 1000 NTU (or FNU).
Note: This menu option only shows when the CLEAN. LEVEL setting is set to on.
Use caution when the threshold is set. High turbidity levels may be the
result of critical process issues where immediate attention is necessary.
OUTPUT DELAY Sets the time for the hold condition of the output after the cleaning cycle.
Options: 0 to 120 seconds (default: 30 seconds).
SOFT VERSION Shows the software version of the cleaning module
English 13

5.2 Show maintenance information of the cleaning module
1. Push menu.
2. Select SENSOR SETUP>[select analyzer]>DIAG/TEST>COUNTERS.
3. Select an option.
Option Description
WIPER REPLACE Shows the remaining number of wiper cycles before a wiper replacement is
necessary.
VIAL TIME Shows the date of the last vial installation or replacement.
Section 6 Maintenance
WARNING
Burn hazard. Obey safe handling protocols during contact with hot liquids.
CAUTION
Multiple hazards. Only qualified personnel must conduct the tasks described in this
section of the document.
CAUTION
Personal injury hazard. Never remove covers from the instrument. This is a laser-based
instrument and the user risks injury if exposed to the laser.
CAUTION
Personal injury hazard. Glass components can break. Handle with care to prevent cuts.
N O T I C E
Do not disassemble the instrument for maintenance. If the internal components must be cleaned or
repaired, contact the manufacturer.
N O T I C E
Stop the sample flow to the instrument and let the instrument become cool before maintenance is
done.
To set the output behavior during maintenance, push menu and select SENSOR
SETUP>TU5x00 sc>DIAG/TEST>MAINTENANCE>OUTPUT MODE.
14 English

6.1 Maintenance schedule
Table 1 shows the recommended schedule of maintenance tasks. Facility requirements and
operating conditions may increase the frequency of some tasks.
Table 1 Maintenance schedule
Task 1 year As necessary
Replace the vial on page 15 X4
Replace the wiper on page 18 X
Replace the tubing on page 18 X
6.2 Clean spills
CAUTION
Chemical exposure hazard. Dispose of chemicals and wastes in accordance with local,
regional and national regulations.
1. Obey all facility safety protocols for spill control.
2. Discard the waste according to applicable regulations.
6.3 Clean the instrument
Clean the exterior of the instrument with a moist cloth, and then wipe the instrument dry.
6.4 Replace the vial
N O T I C E
Keep water out of the vial compartment or instrument damage will occur. Before the automatic
cleaning module is installed on the instrument, make sure that there are no water leaks. Make sure
that all tubing is fully seated. Make sure that the green O-ring is in place to seal the vial. Make sure
that the vial nut is tight.
N O T I C E
Hold the automatic cleaning module vertically when it is installed on the instrument or the
vial can break. If the vial breaks, water will get in the vial compartment and instrument
damage will occur.
N O T I C E
Do not to touch or scratch the glass of the process vial. Contamination or scratches on the glass
can cause measurement errors.
N O T I C E
Based on the environmental conditions, is necessary to wait a minimum of 15 minutes to
let the system become stable.
Note: Make sure that no particles fall into the vial compartment.
4Sample conditions can increase the frequency of vial replacement.
English 15

1. Push menu.
2. Select SENSOR SETUP>[select analyzer]>DIAG/TEST>MAINTENANCE>VIAL
REPLACEMENT.
3. Complete the steps that show on the controller display. The date the vial was replaced is
automatically saved after the last screen shows.
Refer to the illustrated steps that follow to replace the vial. To protect the new vial from
contamination, use the vial replacement tool to install the vial.
At illustrated step 3, put the automatic cleaning module on its side on a flat surface if a service
bracket is not installed near the instrument.
16 English

English 17

6.5 Replace the wiper
To make sure that the vial is cleaned fully, replace the wiper periodically.
1. Push menu.
2. Select SENSOR SETUP>[select analyzer]>DIAG/TEST>MAINTENANCE>WIPER REPLACE.
3. Stop the sample flow.
4. Remove the cleaning module.
5. Remove the vial. Refer to steps 1 to 5 of Replace the vial on page 15.
6. Complete the steps that show on the controller display. Install the vial wiper (silicone or fiber) that
is applicable to the sample type. Refer to the illustrated steps that follow.
The date that the wiper was replaced is automatically saved after the last screen shows.
7. Install the vial. Refer to steps 8 to 12 of Replace the vial on page 15.
6.6 Replace the tubing
N O T I C E
Keep water out of the vial compartment or instrument damage will occur. Before the automatic
cleaning module is installed on the instrument, make sure that there are no water leaks. Make sure
that all tubing is fully seated. Make sure that the vial nut is tight.
Replace the tubing when the tubing has a blockage or has damage.
1. Set the flow shut-off valve to off. Install the automatic cleaning module on the service bracket.
Refer to steps 1 to 3 of Replace the vial on page 15.
2. Replace the tubing.
18 English

3. Set the flow shut-off valve to on. Make sure that there are no water leaks. Refer to steps 5B and
6B of Install the automatic cleaning module on page 7.
4. Install the automatic cleaning module on the turbidimeter. Refer to step 8B of Install the automatic
cleaning module on page 7.
Section 7 Replacement parts and accessories
WARNING
Personal injury hazard. Use of non-approved parts may cause personal injury, damage
to the instrument or equipment malfunction. The replacement parts in this section are
approved by the manufacturer.
Note: Product and Article numbers may vary for some selling regions. Contact the appropriate distributor or refer to
the company website for contact information.
Replacement parts
Description Item no.
Seal, process vial LZY918
Fiber vial wiper, automatic cleaning module LZQ176
Silicone vial wiper, automatic cleaning module LZY915
Vial with seal, process LZY834
Vial replacement tool LZY906
Accessories
Description Quantity Item no.
Micro fiber cloth, vial cleaning 1 LZY945
Service bracket 1 LZY873
Tubing, inlet and outlet of TU5x00 sc, ¼ in. OD 4 m LZY911
English 19

Inhaltsverzeichnis
1 Technische Daten auf Seite 20
2 Allgemeine Informationen auf Seite 20
3 Installation auf Seite 23
4 Inbetriebnahme auf Seite 29
5 Betrieb auf Seite 30
6 Wartung auf Seite 31
7 Ersatzteile und Zubehör auf Seite 36
Kapitel 1 Technische Daten
Änderungen vorbehalten.
Technische Daten Details
Schutzart IP Elektrofach: IP55; Prozesskopf/automatisches Reinigungsmodul am
Gerät und an allen anderen funktionalen Einheiten angebracht: IP651
Stromversorgung 12 VDC (+2 V, –4 V), 7 VA
Schutzklasse III
Verschmutzungsgrad 2
Überspannungskategorie II
Umgebungsbedingungen Innenraum
Betriebstemperatur 0 bis 50 °C
Lagerungstemperatur -40 bis 60 °C
Relative Luftfeuchtigkeit 5 bis 95 % relative Luftfeuchtigkeit, nicht kondensierend
Höhe Maximal 2000 m (6562 ft)
Zertifizierungen CE, UKCA
Garantie 1 Jahr (EU: 2 Jahre)
Kapitel 2 Allgemeine Informationen
Der Hersteller ist nicht verantwortlich für direkte, indirekte, versehentliche oder Folgeschäden, die
aus Fehlern oder Unterlassungen in diesem Handbuch entstanden. Der Hersteller behält sich
jederzeit und ohne vorherige Ankündigung oder Verpflichtung das Recht auf Verbesserungen an
diesem Handbuch und den hierin beschriebenen Produkten vor. Überarbeitete Ausgaben der
Bedienungsanleitung sind auf der Hersteller-Webseite erhältlich.
2.1 Sicherheitshinweise
Der Hersteller ist nicht für Schäden verantwortlich, die durch Fehlanwendung oder Missbrauch
dieses Produkts entstehen, einschließlich, aber ohne Beschränkung auf direkte, zufällige oder
Folgeschäden, und lehnt jegliche Haftung im gesetzlich zulässigen Umfang ab. Der Benutzer ist
selbst dafür verantwortlich, schwerwiegende Anwendungsrisiken zu erkennen und erforderliche
Maßnahmen durchzuführen, um die Prozesse im Fall von möglichen Gerätefehlern zu schützen.
Bitte lesen Sie dieses Handbuch komplett durch, bevor Sie dieses Gerät auspacken, aufstellen oder
bedienen. Beachten Sie alle Gefahren- und Warnhinweise. Nichtbeachtung kann zu schweren
Verletzungen des Bedienpersonals oder Schäden am Gerät führen.
Stellen Sie sicher, dass die durch dieses Messgerät gebotene Sicherheit nicht beeinträchtigt wird.
Verwenden bzw. installieren Sie das Messgerät nur wie in diesem Handbuch beschrieben.
1Im Inneren des Gehäuses können sich Wassertropfen, Wasserlachen oder Rinnsale bilden, die
das Gerät jedoch nicht beschädigen.
20 Deutsch
This manual suits for next models
2
Table of contents
Languages:
Other Hach Control Unit manuals

Hach
Hach 4-20 mA User manual

Hach
Hach IO9004 User manual

Hach
Hach RTC User manual

Hach
Hach LANGE LZV813 User manual

Hach
Hach TU5 Series User manual

Hach
Hach SC4500 User manual

Hach
Hach 8398 Series User manual

Hach
Hach sc200 User manual

Hach
Hach SIGMATAX 2 User manual

Hach
Hach Lange 4-20 mA Module User manual
Popular Control Unit manuals by other brands

FA goods
FA goods FA-TH16YRAB20SL user manual

Emerson
Emerson PENBERTHY FHS Installation, operation and maintenance instructions

Wecon
Wecon LX3V-4TC user manual

Advantech
Advantech MIO-6254 Startup manual

Lefroy Brooks
Lefroy Brooks M1-4010 Installation, operating, & maintenance instructions

SonicWALL
SonicWALL NSA 250M series installation guide