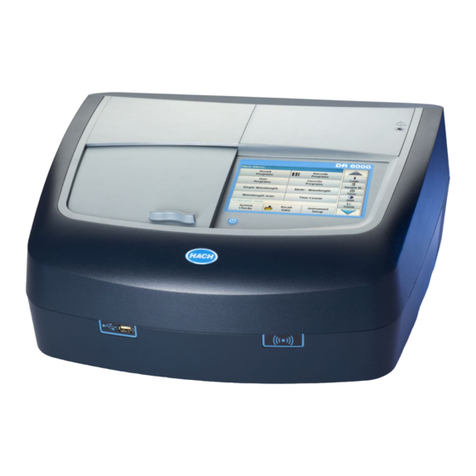
Hach TL2360 Quick manual

DOC022.98.80536
TL2360
03/2021, Edition 5
Basic User Manual
Basis-Bedienungsanleitung
Manuale di base per l'utente
Manuel d'utilisation de base
Manual básico del usuario
Manual básico do utilizador
Základní návod k použití
Basisgebruikershandleiding
Grundlæggende brugerhåndbog
Podstawowa instrukcja obsługi
Grundläggande bruksanvisning
Peruskäyttöohje
Основно ръководство за потребителя
Alapvető felhasználói útmutató
Manual de utilizare de bază
Bendroji naudotojo instrukcija
Базовое руководство пользователя
Temel Kullanım Kılavuzu
Základný návod na použitie
Osnovni uporabniški priročnik
Osnovni korisnički priručnik
Βασικό εγχειρίδιο χρήσης
Kokkuvõtlik kasutusjuhend

Table of Contents
English..............................................................................................................................3
Deutsch.......................................................................................................................... 24
Italiano............................................................................................................................ 48
Français......................................................................................................................... 71
Español.......................................................................................................................... 95
Português.................................................................................................................... 119
Čeština......................................................................................................................... 144
Nederlands................................................................................................................. 166
Dansk............................................................................................................................190
Polski............................................................................................................................ 212
Svenska....................................................................................................................... 237
Suomi............................................................................................................................259
български................................................................................................................... 281
Magyar......................................................................................................................... 306
Română....................................................................................................................... 330
lietuvių kalba...............................................................................................................354
Русский........................................................................................................................378
Türkçe...........................................................................................................................404
Slovenský jazyk......................................................................................................... 427
Slovenski..................................................................................................................... 451
Hrvatski........................................................................................................................ 474
Ελληνικά...................................................................................................................... 496
eesti keel..................................................................................................................... 522
2

Table of Contents
1 Specifications on page 3
2 General information on page 4
3 Installation on page 8
4 User interface and navigation on page 9
5 Startup on page 10
6 Operation on page 11
7 Maintenance on page 20
8 Troubleshooting on page 21
Section 1 Specifications
Specifications are subject to change without notice.
Specification Details
Measurement method Nephelometric
Regulatory Meets ISO 7027, DIN EN 27027 and DIN 38404
ASTM D7315 - Standard Test Method for Determination of Turbidity
Above 1 Turbidity Unit (TU) in Static Mode
ASTM D6855 - Standard Test Method for Determination of Turbidity
Below 5 NTU in Static Mode
Dimensions (W x D x H) 39.5 x 30.5 x 15.3 cm (15.6 x 12.0 x 6.02 in.)
Weight 2.9 kg (6.4 lb)
Enclosure IP30; indoor use only
Protection Class External power supply: Protection Class I; instrument: Protection Class II
Pollution degree 2
Installation category External power supply: Category II; instrument: Category I
Power requirements Instrument: 12 VDC, 3.4 A; power supply: 100–240 VAC, 50/60 Hz
Operating temperature 0 to 40 °C (32 to 104 °F)
Storage temperature –20 to 60 °C (–4 to 140 °F)
Humidity 5 to 95% relative humidity, non-condensing
Display 17.8 mm (7 in.) color touch screen
Light source Light-emitting diode (LED) at 860 ± 30 nm
Measurement units FNU, NTU, EBC, Abs (absorbance), %T (% transmittance) and mg/L
(degree)
Range FNU (Ratio on): 0–1000
FNU (Ratio off): 0–40
NTU (Ratio on): 0–10,000 auto decimal
NTU (Ratio off): 0–40
EBC (Ratio on): 0–2450 auto decimal
EBC (Ratio off): 0–9.8
Absorbance (auto range): 0–2.00
Transmittance (%): 1.0–100
Degree: 0–100 mg/L
English 3

Specification Details
Accuracy1, 2, 3FNU4: ±2% of reading plus 0.01 FNU from 0–1000 FNU
NTU4: ±2% of reading plus 0.01 NTU from 0–1000 NTU, ±5% of reading
from 1000–4000 NTU, ±10% of reading from 4000–10,000 NTU
Absorbance: ±0.005 Abs from 0–1 Abs at 860 nm
Transmittance: 0.12% T from 10–100% T at 860 nm
Resolution Turbidity: 0.001 FNU/NTU/EBC
Absorbance: 0.001 Abs
Transmittance: 0.1% T
Repeatability ±1% of reading or 0.01 FNU/NTU, whichever is greater (under reference
conditions)
Response time Signal averaging off: 6.8 seconds
Signal averaging on: 14 seconds (when 10 measurements are used to
calculate the average)
Stabilization time Immediately
Reading modes Single, continuous, Rapidly Settling Turbidity™, signal averaging on or
off, ratio on or off
Communication USB
Interface 2 USB-A ports for USB flash drive, Seiko DPU-S445 printer, keyboard
and barcode scanner
Datalog Maximum 2000 total logs, includes reading log, verification log and
calibration log
Air purge Dry nitrogen or instrument grade air (ANSI MC 11.1, 1975)
0.1 scfm at 69 kPa (10 psig); 138 kPa (20 psig) maximum
Hose barb connection for 1/8-inch tubing
Sample cells Round cells 95 x 25 mm (3.74 x 1 in.) borosilicate glass with rubber-lined
screw caps
Note: Smaller sample cells (less than 25 mm) can be used when a cell adapter is used.
Sample requirements 25 mm sample cell: 20 mL minimum
0 to 70 °C (32 to 158 °F)
Certification CE, KC, RCM
Warranty 1 year (EU: 2 years)
Section 2 General information
In no event will the manufacturer be liable for direct, indirect, special, incidental or consequential
damages resulting from any defect or omission in this manual. The manufacturer reserves the right to
make changes in this manual and the products it describes at any time, without notice or obligation.
Revised editions are found on the manufacturer’s website.
1Turbidity specifications identified using recently prepared formazin standard and matched 25-
mm sample cells.
2Reference conditions: 23 ± 2 °C, 50 (± 10)% RH noncondensing, 100–240 VAC, 50/60 Hz
3Intermittent electromagnetic radiation of 3 volts/meter or greater may cause slight accuracy
shifts.
4FNU is equivalent to NTU in the Ratio off mode.
4 English

2.1 Additional information
Additional information is available on the manufacturer's website.
2.2 Safety information
The manufacturer is not responsible for any damages due to misapplication or misuse of this product
including, without limitation, direct, incidental and consequential damages, and disclaims such
damages to the full extent permitted under applicable law. The user is soley responsible to identify
critical application risks and install appropriate mechanisms to protect processes during a possible
equipment malfunction.
Please read this entire manual before unpacking, setting up or operating this equipment. Pay
attention to all danger and caution statements. Failure to do so could result in serious injury to the
operator or damage to the equipment.
Make sure that the protection provided by this equipment is not impaired. Do not use or install this
equipment in any manner other than that specified in this manual.
2.2.1 Use of hazard information
D A N G E R
Indicates a potentially or imminently hazardous situation which, if not avoided, will result in death or
serious injury.
WARNING
Indicates a potentially or imminently hazardous situation which, if not avoided, could result in death
or serious injury.
CAUTION
Indicates a potentially hazardous situation that may result in minor or moderate injury.
N O T I C E
Indicates a situation which, if not avoided, may cause damage to the instrument. Information that
requires special emphasis.
2.2.2 Precautionary labels
Read all labels and tags attached to the instrument. Personal injury or damage to the instrument
could occur if not observed. A symbol on the instrument is referenced in the manual with a
precautionary statement.
This symbol, if noted on the instrument, references the instruction manual for operation
and/or safety information.
This symbol indicates the presence of a light source that may have the potential to cause
minor eye injury. Obey all messages that follow this symbol to avoid potential eye injury.
Electrical equipment marked with this symbol may not be disposed of in European
domestic or public disposal systems. Return old or end-of-life equipment to the
manufacturer for disposal at no charge to the user.
2.2.3 Certification
EN 55011/CISPR 11 Notification Warning
This is a Class A product. In a domestic environment this product may cause radio interference in
which case the user may be required to take adequate measures.
English 5

Canadian Radio Interference-Causing Equipment Regulation, ICES-003, Class A:
Supporting test records reside with the manufacturer.
This Class A digital apparatus meets all requirements of the Canadian Interference-Causing
Equipment Regulations.
Cet appareil numérique de classe A répond à toutes les exigences de la réglementation canadienne
sur les équipements provoquant des interférences.
FCC Part 15, Class "A" Limits
Supporting test records reside with the manufacturer. The device complies with Part 15 of the FCC
Rules. Operation is subject to the following conditions:
1. The equipment may not cause harmful interference.
2. The equipment must accept any interference received, including interference that may cause
undesired operation.
Changes or modifications to this equipment not expressly approved by the party responsible for
compliance could void the user's authority to operate the equipment. This equipment has been tested
and found to comply with the limits for a Class A digital device, pursuant to Part 15 of the FCC rules.
These limits are designed to provide reasonable protection against harmful interference when the
equipment is operated in a commercial environment. This equipment generates, uses and can
radiate radio frequency energy and, if not installed and used in accordance with the instruction
manual, may cause harmful interference to radio communications. Operation of this equipment in a
residential area is likely to cause harmful interference, in which case the user will be required to
correct the interference at their expense. The following techniques can be used to reduce
interference problems:
1. Disconnect the equipment from its power source to verify that it is or is not the source of the
interference.
2. If the equipment is connected to the same outlet as the device experiencing interference, connect
the equipment to a different outlet.
3. Move the equipment away from the device receiving the interference.
4. Reposition the receiving antenna for the device receiving the interference.
5. Try combinations of the above.
2.2.4 Korean certification
업무용을 위한 EMC 등급 A 장치에 대한
사용자 지침
사용자안내문
A 급 기기 ( 업무용 방송통신기자재 )
이 기기는 업무용 (A 급 ) 전자파적합기기로서 판매자 또는 사용자는 이 점을 주의하시기 바라며 , 가정
외의 지역에서 사용하는 것을 목적으로 합니다.
2.3 Product overview
CAUTION
Fire hazard. This product is not designed for use with flammable liquids.
The TL2360 laboratory turbidimeter measures the scattered light from water samples to determine
the turbidity value of the samples. In the ratio-on mode, the instrument uses multiple detectors at
different angles to correct for interferences and to increase the measurement range. In the ratio-off
mode, the instrument uses one detector at a 90-degree angle from the light source. The user can
calibrate the instrument and verify the calibration at regular intervals.
6 English
The user interface uses a touch screen display. A Seiko DPU-S445 printer, USB flash drive or
keyboard can connect to the USB ports. Refer to Figure 1. The real-time clock with battery puts a
time-date stamp on all of the data that is transmitted or recorded (i.e., reading log, calibration log and
verification log).
Figure 1 Product overview
1 Sample compartment lid 6 Power connection
2 Touch screen display 7 USB port
3 Sample cell holder 8 Power button
4 Lamp cover 9 USB port
5 Air purge
2.4 Product components
Make sure that all components have been received. Refer to Figure 2. If any items are missing or
damaged, contact the manufacturer or a sales representative immediately.
English 7

Figure 2 Instrument components
1 Silicone oil 6 StablCal Calibration kit
2 Oiling cloth 7 Power supply
3 TL2360 turbidimeter 8 Power cord
4 1-inch sample cells (30 mL) with caps (6x) 9 Dust cover
5 Gelex secondary turbidity standardization kit
Section 3 Installation
CAUTION
Multiple hazards. Only qualified personnel must conduct the tasks described in this
section of the document.
This instrument is rated for an altitude of 3100 m (10,710 ft) maximum. Use of this instrument at an
altitude higher than 3100 m can slightly increase the potential for the electrical insulation to break
down, which can result in an electric shock hazard. The manufacturer recommends that users with
concerns contact technical support.
3.1 Installation guidelines
Install the instrument:
• On a level surface
• In a clean, dry, well ventilated, temperature controlled location
• In a location with minimum vibrations that has no direct exposure to sunlight
• In a location where there is sufficient clearance around it to make connections and to do
maintenance tasks
• In a location where the power button and power cord are visible and easily accessible
3.2 Connect to external devices (optional)
Use the USB ports to connect the instrument to a Seiko DPU-S445 printer, barcode handset
scanner, USB flash drive or keyboard. Refer to Figure 1 on page 7. The maximum length of a
8 English

connected USB cable is 3 m (9.8 ft). As an alternative to the touchscreen, use a keyboard to enter
text into text boxes on the display (e.g., passwords and sample IDs).
Section 4 User interface and navigation
The instrument display is a touch screen. Only use a clean, dry finger tip to navigate the functions of
the touch screen. Do not use writing tips of pens or pencils or other sharp objects to make selections
on the screen or damage to the screen will occur.
Refer to Figure 3 for an overview of the home screen.
Figure 3 Display overview
1 Sample ID and measurement number57 UP/DOWN navigation arrows
2 User comments 8 Sidebar menu (refer to Table 1)
3 Instructions 9 Time and date
4 Turbidity value, unit and reading mode 10 Options button
5 Warning or error message 11 Read button
6 Calibration status icon and calibration curve 12 Home/Instrument information button
Table 1 Sidebar menu icons
Icon Description
Login
Logs in or logs out an operator. To log in, select an operator ID and then push
Login. To log out, push Logout.
Note: When an operator is logged in, the Login icon changes to the icon selected for the operator ID (e.g., fish,
butterfly or soccer ball) and the text "Login" changes to the operator ID.
Sample ID
Selects the sample ID.
5The measurement number increases by one each time a measurement is completed.
English 9

Table 1 Sidebar menu icons (continued)
Icon Description
Calibration
Starts a calibration.
Verification
Starts a verification.
Data Log
Shows the reading log, calibration log and verification log. Refer to Show the
recorded data on page 19.
Setup
Configures the instrument settings. Refer to Configure the instrument settings
on page 11.
Diagnostics
Shows the firmware information, instrument backup, instrument updates, signaling
information and factory service data.
Timer
Sets a timer.
Section 5 Startup
CAUTION
Infrared Light Hazard. The infrared light produced by this instrument can cause eye injury. The
infrared light source in this instrument only receives power when the sample cell cover is closed.
Refer to the illustrated steps that follow to supply power to the instrument and start the instrument.
The self-check will start.
10 English

Section 6 Operation
6.1 Configure the instrument settings
1. Push , then push Setup.
2. Select an option.
Option Description
Location Sets the location name of the instrument. The location is sent with
measurements to the USB drive. The location is not saved to the data log.
Date & Time Sets the date format, the time format and the date and time. Enter the
current date and time. Date Format—Sets the date format. Options: dd-mm-
yyyy (default), yyyy-mm-dd, dd-mm-yyyy or mm-dd-yyyy. Time Format—
Sets the time format. Options: 12 or 24 hours (default).
Security Enables or disables password protection for the settings and tasks in the
security list. Security Password—Sets or changes the security
(administrator) password (10 characters maximum). Passwords are case
sensitive. Security List—Sets the security level for each setting and task in
the security list.
•Off—All operators can change the setting or do the task.
•One key—Only operators with a one-key or two-key security level can
change the setting or do the task. Refer to Add operator IDs on page 12.
•Two keys—Only operators with a two-key security level can change the
setting or do the task.
Note: The Security setting is not set to on until Close is pushed.
Sound Settings Enables or disables the sound settings for individual events. To enable or
disable all of the sound settings, select All and then push Setup.
Peripherals Shows the connection status of attached devices such as a Seiko DPU-
S445 printer, USB memory (flash drive) or keyboard.
Power
Management Sets when the instrument is automatically set to sleep mode or off after a
period of no activity. Sleep Timer—Sets when the instrument is set to sleep
mode. Options: OFF, 30 minutes, 1 (default), 2 or 12 hours.
English 11

6.1.1 Configure the measurement settings
Select the reading mode, measurement units, data log settings and more.
1. At the main reading screen, push Options>Reading Setup.
2. Select an option.
Option Description
Reading
Mode Sets the reading mode to single, continuous or RST mode. Single (default)—The
measurement stops when the reading is stable. Continuous—The measurement
continues until the user pushes Done. RST—The Rapidly Settling Turbidity (RST)
mode calculates and continuously updates the turbidity reading of the sample to a
confidence of 95%, based on the accumulated trend of the real time measured
values. The RST mode is best used on samples that settle rapidly and
continuously change in value. The reading is based on a correctly prepared
sample that is homogeneous at the beginning of the reading. It is best applied to
samples that are greater than 20 NTU. The sample must be mixed thoroughly by
inversion immediately before inserting it into the instrument. Signal Avg—The
turbidity reading that shows on the display is an average of the values measured
during the time interval selected. Options: For single measurement mode, 5 to
15 seconds. For continuous measurement mode, 5 to 90 seconds.
Unit Selects the measurement units that show on the display and that are recorded to
the data log. Options: NTU (default), FNU, EBC, Abs or %T.
Ratio Sets the ratio mode to on (default) or off. When set to off, an indicator shows on
the reading window.
Note: The ratio off mode is only valid for turbidity measurements that are less than 40 NTU.
Bubble
Reject Sets the bubble reject to on (default) or off. When set to on, high turbidity readings
caused by bubbles in the sample are not shown or saved to the data log.
Data Log
Setup Sets the data log settings. Auto Store—Measurement data is automatically
recorded in the reading log. Default: On. If Auto Store is off, push Options>Store to
manually save a reading in the data log. Send Data Format—Sets the output
format of measurement data that is sent to external devices (CSV, XML or BMP).
Default: XML. Print Format—Sets the output format of measurement data that is
sent to a printer (Quick Print or Detailed Print (GLP)). Comments—Lets users add
comments to log entries. Auto Send—Measurement data is automatically sent to
all of the devices (e.g., printer and USB flash drive) that are connected to the
instrument after each measurement. Options: Off, new file or continue file: off—do
not auto send data, new file—send data and save it in a new file, continue file—
send data and save all data in one file.
6.1.2 Add operator IDs
Add a unique operator ID for each person who will measure samples (30 maximum). Select an icon,
operator password and security level for each operator ID.
1. Push Login.
2. Push Options>New.
3. Enter a new operator ID (20 characters maximum), then push OK.
4. Push the LEFT and RIGHT arrows to select the icon for the operator ID (e.g., fish, butterfly or
soccer ball).
5. Push Operator Password, then enter a password for the operator ID.
Note: Passwords are case sensitive.
6. Push Security Level, then select the security level for the operator ID.
•Off—The operator cannot change the settings or do the tasks in the Security settings that have
a security level of one key or two keys.
12 English

•One key—The operator can change all the settings and do all the tasks in the Security settings
that have a security level of off or one key.
•Two keys—The operator can change all the settings and do all the tasks in the Security
settings.
Note: Before a security level can be selected, the Security setting must be set to on. Refer to Configure the
instrument settings on page 11.
7. Push OK>Close.
8. To edit an operator ID, select the operator ID and then push Options>Edit.
9. To delete an operator ID, select the operator ID and then push Options>Delete>OK.
6.1.3 Add sample IDs
Add a unique sample ID for each sample (1000 maximum). The sample ID identifies the sample
location or other sample specific information.
As an alternative, import sample IDs from a spreadsheet file to the instrument. Refer to the expanded
user manual on the manufacturer's website to import sample IDs.
1. Push Sample ID.
2. Push Options>New.
3. Enter a new sample ID (20 characters maximum).
4. Push OK.
5. Select an option.
Option Description
Add Date/Time Adds the date and time that the sample was collected to the sample ID
(optional). The date and time entered for each sample ID show on the Sample
ID menu.
Add Number Adds a measurement number to the sample ID (optional). Select the first
number used for the measurement number (0 to 999).
The measurement number shows in parenthesis after the sample ID on the
home screen. Refer to User interface and navigation on page 9.
Add Color Adds a colored circle to the sample ID icon (optional). The sample ID icon
shows before the sample ID on the home screen. Refer to User interface and
navigation on page 9.
6. Push OK>Close.
7. To edit a sample ID, select the sample ID and then push Options>Edit>OK.
8. To delete a sample ID, select the sample ID and then push Options>Delete>OK.
Note: To delete all sample ID's, select the sample ID and then push Options>Delete All Sample IDs>OK.
6.2 Calibrate the turbidimeter with StablCal Standards
Calibrate the turbidimeter before it is used for the first time using the StablCal sealed vial standards
provided.
Calibrate the turbidimeter at least every 3 months or as specified by the regulating authority when
data is used for ISO 7027 reporting.
Note: Unknown results may occur if standards other than the recommended calibration points are used. The
recommended calibration points (< 0.1, 20, 200, 1000, 4000 and 7500 NTU) provide the best calibration accuracy.
Use of standards other than StablCal, or user-prepared formazin, may result in less accurate calibrations. The
manufacturer cannot guarantee the performance of the instrument if calibrated with co-polymer
styrenedivinylbenzene beads or other suspensions.
6.2.1 Calibration notes
• Make sure that the instrument is in the same ambient conditions as where it is used.
English 13

• Make sure that the standards are at the same ambient temperature as the instrument before use.
• Use only the provided silicone oil. This silicone oil has the same refractive index as the vial glass
and masks minor glass differences and scratches.
• Store the oiling cloth in a plastic storage bag to keep the cloth clean.
• If power is lost during calibration, the new calibration data is lost and the last calibration data is
used.
• In Calibration mode, automatic range and signal averaging on are selected. When calibration is
completed, all operational modes go back to the last settings.
• All nephelometric (turbidity units of measure) calibrations are done at the same time.
• Ratio-on and Ratio-off calibration data is measured and recorded at the same time.
• The FNU values of StablCal standards and formazin standards are calculated using the
conversion factors of 1 FNU = 1 NTU.
6.2.2 Configure the calibration settings
Change the calibration settings as necessary before the instrument is calibrated. The instrument
must be calibrated when the calibration curve is changed.
1. Push Calibration.
2. Push Options>Calibration Setup.
3. Select the calibration curve range and type of calibration standard.
Option Description
StablCal RapidCal
(0–40 NTU) Calibration with 20-NTU StablCal standard (default).
Note: The dark current in the instrument is used as the zero point of the
calibration curve. The calibration curve is linear from 0-40 NTU, thus low
turbidity measurements are very accurate.
StablCal (0–10000
NTU) Full-range calibration (<0.1 NTU, 20 NTU, 200 NTU, 1000 NTU,
4000 NTU, 7500 NTU) with StablCal.
Formazin RapidCal
(0–40 NTU) Calibration with 20-NTU formazin standard.
Note: The dark current in the instrument is used as the zero point of the
calibration curve. The calibration curve is linear from 0-40 NTU, thus low
turbidity measurements are very accurate.
Formazin (0–10000
NTU) Full-range calibration (20 NTU, 200 NTU, 1000 NTU, 4000 NTU,
7500 NTU and dilution water) with formazin.
Degrees (0–100 mg/L) Full-range calibration (20 mg/L, 100 mg/L and dilution water) with
kaolin.
SDVB (0–10000 NTU) Full-range calibration (20 NTU, 200 NTU, 1000 NTU, 4000 NTU,
7500 NTU and dilution water) with spherical styrene divinylbenzene.
EU Pharm (0–30 NTU) Full-range calibration (<0.1 NTU, 3 NTU, 6 NTU, 18 NTU, 30 NTU).
Custom Calibration The user can enter a custom calibration for turbidity. The user selects
the number of calibration standards and the value of each calibration
standard. Use a custom calibration when smaller sample cells are
used with a sample cell adapter.
4. Select the remaining calibration options.
Option Description
Verify after Cal. Sets the instrument to start a verification immediately after the instrument
is calibrated. When set to on, the verification standard is measured
immediately after a calibration is done. The value of the verification
standard shows on the display as the last standard during calibration.
14 English

Option Description
Calibration
Reminder Sets the time interval between calibrations. When a calibration is due, the
display will show a reminder and a question mark on the calibration icon at
the top of the display. Options: Off (default), 1 day, 7 days, 30 days or
90 days. When a calibration is done, the calibration time is set to zero.
Reset to Factory
Calibration Sets the calibration settings to the factory defaults.
6.2.3 Prepare the StablCal standards
When received and at intervals:
1. Clean the exterior surface of the StablCal vials with laboratory glass cleaning detergent.
2. Rinse the vials with distilled or deionized water.
3. Dry the vials with a lint-free cloth.
Note: Never shake or invert the < 0.1 NTU standard. If the standard has been mixed or shaken, do not move the
vial for 15 minutes or more before using.
Note: Do not remove the caps from the sealed vials.
Make sure that the StablCal standards are at ambient instrument temperature before use (and no
greater than 40 °C (104 °F)).
Invert the standards (except < 0.1 NTU) before use. Refer to the user instructions that are supplied
with the StablCal standards.
6.2.4 StablCal calibration procedure
1. Push Login and
select the applicable
Operator ID. If login
is not necessary, go
to step 3.
2. Push Login and
enter the password.
Push OK.
3. Push
Calibration. The
standard values for
the selected
calibration curve
(and verification
standard, if Verify
after Cal is on) show
on the display. To
select a different
calibration curve,
refer to Configure
the calibration
settings on page 14.
4. Get the StablCal
standard that shows
on the display. Clean
the vial with a soft,
lint-free cloth to
remove water spots
and fingerprints.
English 15

5. Apply a small
drop of silicone oil
from the top to the
bottom of the vial.
6. Use the oiling
cloth to apply the oil
equally to the
surface of the vial.
Remove most of the
oil. Make sure that
the vial is almost dry.
7. Carefully and
slowly invert the vial
to fully mix the
standard (do not
invert the <0.1 NTU
vial). Be careful not
to add air bubbles.
8. Put the vial in the
sample cell holder
with the triangle on
the vial aligned with
the reference mark
on the sample cell
holder. Push the lid
closed until a click is
heard.
9. Push Read. Wait
1 minute for the
instrument to
complete the
measurement.
10. Open the lid and
remove the vial from
the sample cell
holder.
11. Do steps 4–10
for the other
StablCal vials (from
lowest to highest
NTU standard).
When complete, the
measured values are
shown.
12. If Verify after
Cal is set to on, the
value of the
verification standard
shows. Push Read
to measure the
verification standard.
13. Push Store to
save the new
calibration data.
6.2.5 Verification procedure
Use the verification procedure to measure the same Gelex or StablCal vial at regular intervals to
determine if the reading stays within the acceptance range. Use the Verification Setup menu to set a
reminder for the verification.
16 English

1. Push Login and
select the applicable
Operator ID. If login
is not necessary, go
to step 3.
2. Push Login and
enter the password.
Push OK.
3. Push Verification.
The verification
standard value is
shown. Push
Options>Verification
Setup to change the
value of the
verification standard.
4. Clean the Gelex
vials with a soft, lint-
free cloth to remove
water spots and
fingerprints.
5. Apply a small
drop of silicone oil
from the top to the
bottom of the vial.
6. Use the oiling
cloth to apply the oil
equally to the
surface of the vial.
Remove most of the
oil. Make sure that
the vial is almost dry.
7. Put the vial in the
sample cell holder
with the triangle on
the vial aligned with
the reference mark
on the sample cell
holder. Push the lid
closed until a click is
heard.
8. Push Read. The
value and pass or
fail status shows.
The data is
automatically stored
in the instrument.
6.3 Turbidity measurement
For accurate turbidity readings use clean sample cells and remove air bubbles.
6.3.1 Measurement notes
Proper measurement techniques are important in minimizing the effects of instrument variation, stray
light and air bubbles. For accurate and repeatable measurements:
Instrument
• Make sure that the instrument is on a level, stationary surface that is free of vibration during the
measurement.
• Instrument stabilization is immediate. No warm-up time is necessary.
• Always close the sample compartment lid during measurement, calibration and verification.
• Remove the sample cell from the instrument and turn off the instrument if the instrument is stored
for an extended time period (more than a month).
• Keep the sample compartment lid closed to keep dust and dirt out.
Sample cells
• Always cap the sample cell to prevent spillage of the sample into the instrument.
English 17

• Always use clean sample cells in good condition. Dirty, scratched or damaged cells can result in
readings that are not accurate.
• Make sure that cold samples do not “fog” the sample cell.
• Store sample cells filled with distilled or deionized water and cap tightly.
• For the best accuracy, use a single sample cell for every measurement or a flow cell.
Note: As an alternative, matched sample cells may be used for measurements but do not provide as good of
accuracy or precision as a single indexed sample cell or flow cell. When using matched sample cells, align the
orientation mark on the sample cell with the reference mark on the sample cell holder.
Measurement
• Measure samples immediately to prevent temperature changes and settling. Before a
measurement is taken, always make sure that the sample is homogeneous throughout.
• Avoid sample dilution when possible.
• Avoid instrument operation in direct sunlight.
6.3.2 Turbidity measurement procedure
To include an operator ID and sample ID with the measurement data, refer to Add sample IDs
on page 13 and Add operator IDs on page 12.
1. Push Login and
select the applicable
Operator ID. If login
is not necessary, go
to step 3.
2. Push Login and
enter the password.
Push OK.
3. Push Sample ID.
Select the applicable
sample ID, then
push Select. The
selected sample ID
shows on the
display.
4. Rinse a clean,
empty sample cell
two times with the
solution to be
measured and drain
to waste. Fill to the
line (about 30 mL)
with sample and
immediately put the
cap on the sample
cell.
18 English

5. Clean the sample
cells with a soft, lint-
free cloth to remove
water spots and
fingerprints.
6. Apply a small
bead of silicone oil
from the top to the
bottom of the sample
cells.
7. Use the oiling
cloth provided to
apply the oil equally
to the surface of the
sample cells.
Remove the excess
oil. Make sure that
the sample cells are
almost dry.
8. Gently and slowly
invert the sample
cell to fully mix the
sample. Be careful
not to add air
bubbles.
9. Put the sample
cell in the sample
cell holder with the
triangle on the
sample cell aligned
with the reference
mark on the sample
cell holder. Push the
lid closed until a click
is heard.
10. Push Read (or
Done if in
continuous mode).
Wait for the
instrument to read
the sample.
Note: If auto store is
off, push Options >
Store to save the data.
6.4 Data management
6.4.1 Show the recorded data
All the recorded data is kept in the data log. There are three types of data logs:
•Reading log—Shows the recorded measurements.
•Calibration log—Shows the calibration history.
•Verification log—Shows the verification history.
1. Push Data Log and select the applicable data log.
2. To show the details of a log entry, select the log entry and then push View Details.
Note: To add a comment to the log entry, push the comments icon.
3. To show only some of the data, push Filter, then select On. The Filter Settings window opens.
4. Select an option.
Option Description
Time Interval Selects only the data that was stored during a specific time interval.
English 19

Option Description
Operator ID Selects only the data that was stored with a specific operator ID.
Sample ID Selects only the data from the Reading Log that was stored with a specific
sample ID.
6.4.2 Send data to a connected device
The instrument can send data to a USB memory device or Seiko DPU-S445 printer. For best results,
use only USB 2.0 memory devices. The instrument makes a logger folder on the device and saves
the data as a .bmp, .csv or .xml file.
1. Connect a USB memory device or cable to a USB port on the instrument.
2. Connect the other end of the cable to the printer, if applicable.
3. Go to Setup>Peripherals. The connection status shows Connected. If the status shows Not
Connected, make sure to use the recommended devices.
4. Push Data Log and select the applicable log.
5. To send only some of the data, use the filter settings or select a single data point. Refer to Show
the recorded data on page 19.
6. Push Options>Send Data Log. Select single data point, filtered data or all data. Push OK.
The instrument sends the selected data to the connected devices.
6.4.3 Delete data from the data log
The instrument automatically deletes the oldest data record when the data log is full. The user can
also delete data manually. Make sure to save the data to an external device, then delete the data in
the data log.
1. Push Data Log and select the applicable log.
2. To delete only some of the data, use the filter settings. Refer to Show the recorded data
on page 19.
3. To delete the data, push Options>Delete Data. Select single data point, filtered data or all data.
Push OK.
The instrument deletes the selected data from the data log.
Section 7 Maintenance
CAUTION
Multiple hazards. Only qualified personnel must conduct the tasks described in this
section of the document.
7.1 Clean spills
CAUTION
Chemical exposure hazard. Dispose of chemicals and wastes in accordance with local,
regional and national regulations.
1. Obey all facility safety protocols for spill control.
2. Discard the waste according to applicable regulations.
7.2 Clean the instrument
Clean the exterior of the instrument with a moist cloth, and then wipe the instrument dry.
20 English
Other manuals for TL2360
1
Table of contents
Languages:
Other Hach Measuring Instrument manuals

Hach
Hach QuikChem 8500 2 Series Instruction Manual

Hach
Hach TL2300 Quick manual

Hach
Hach FH950 User manual

Hach
Hach DR/2010 User manual

Hach
Hach TL2300 User manual

Hach
Hach LBOD101 User manual

Hach
Hach sensION+ EC71 User manual

Hach
Hach sensION+ pH3 User manual

Hach
Hach 1735 TRO User manual

Hach
Hach 5500sc Operating instructions

Hach
Hach POLYMETRON 8810 ISE Quick manual

Hach
Hach sension ph31 User manual

Hach
Hach A1000 Quick manual

Hach
Hach K1100 Quick manual

Hach
Hach Sigma 950 User manual

Hach
Hach HQ1110 Quick manual

Hach
Hach 5500sc Operating instructions

Hach
Hach TitraLab User manual

Hach
Hach POCKET COLORIMETER II User manual

Hach
Hach POCKET COLORIMETER II Manual