Contents
2 LCD television Owner’s Manual
Contents
Warning 3
Important Safety Instructions 4
Panel Control and Rear Terminals
Control 6
Panel Control .......................................................6
Rear Terminals Control........................................6
Remote Control 7
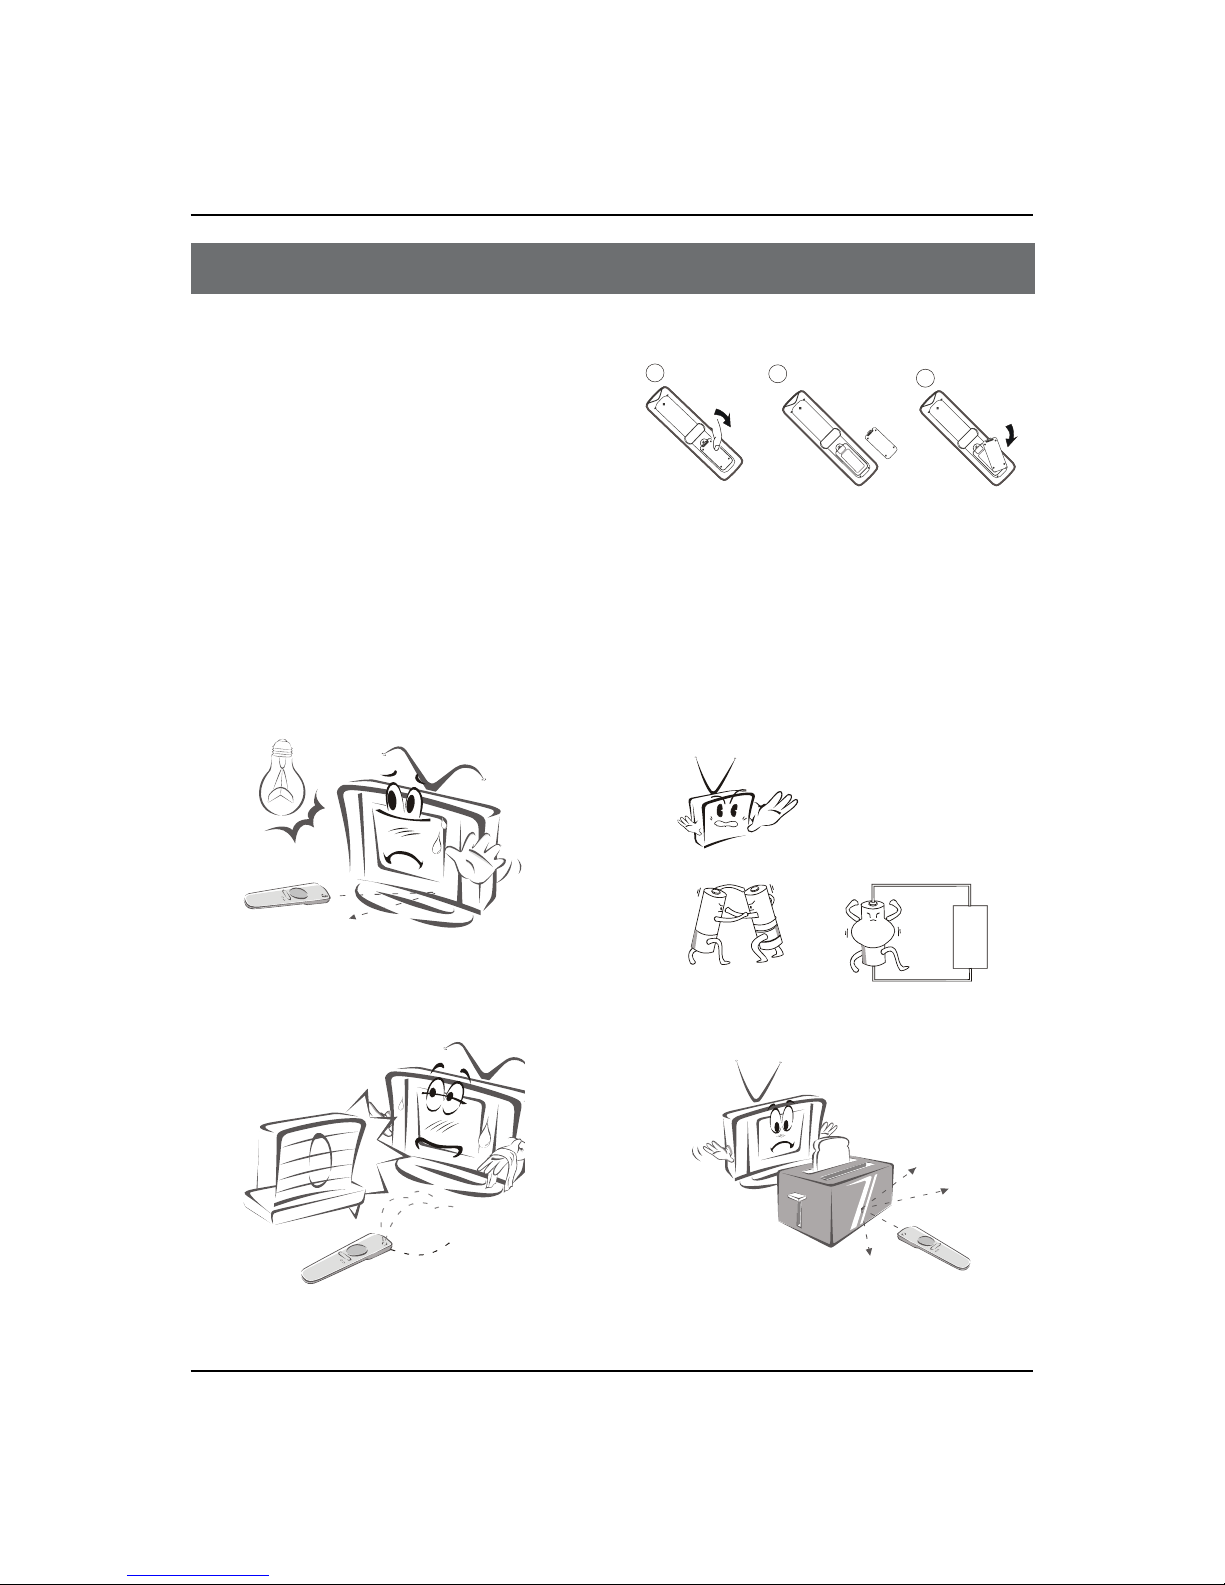
Battery loading.................................................... 7
Precautions ..........................................................7
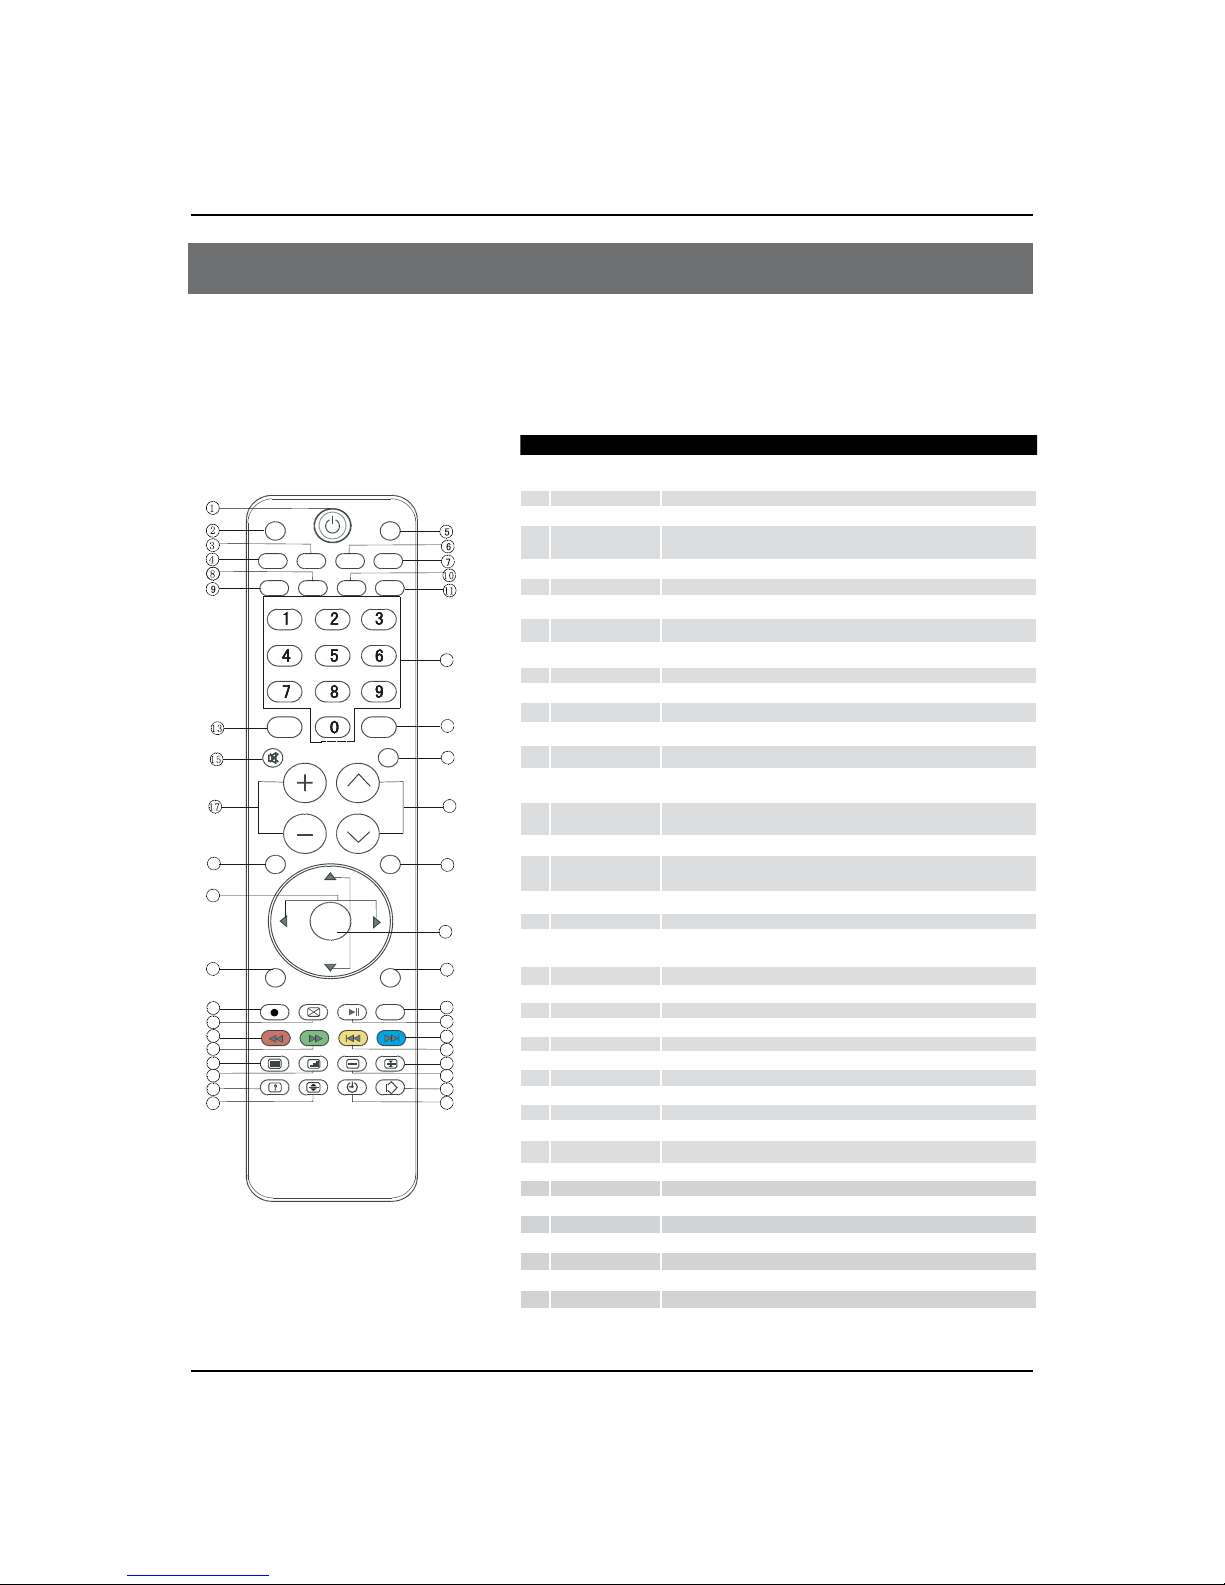
Remote Control Function 8
Function introduction ......................................... 8
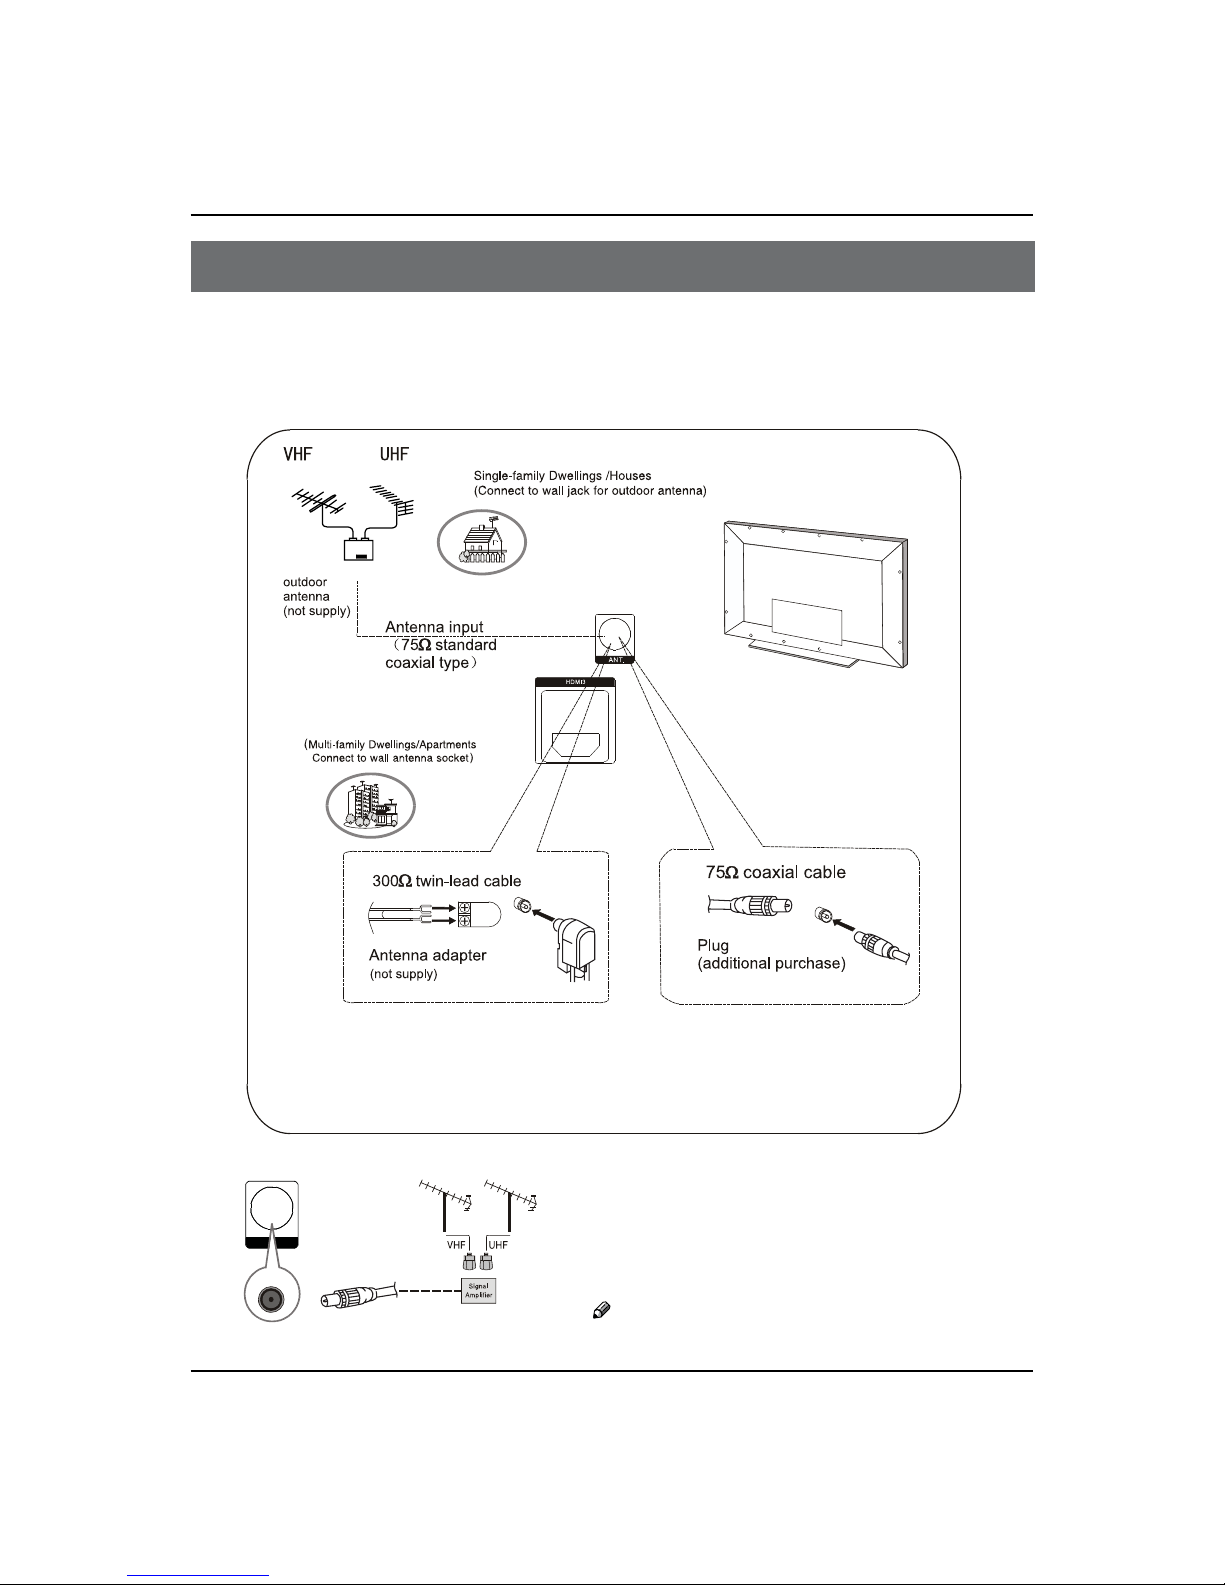
External Equipment Connections 9
Antenna Connection ........................................... 9
Choose Your Connection...................................10
VCR Connection.................................................................. 10
DVD Setup ............................................................................ 10
HDMI or DVI Setup............................................................. 10
PC Setup ................................................................................ 11
Monitor Out Setup............................................................. 11
Power source......................................................12
Basic Receiving and Playing
Operations 12
Switching ON/OFF the TV set ...........................12
Switching ON/OFF the TV set ........................................ 12
Choose the Menu Language.......................................... 12
Choose the Input source ................................................. 12
Searching Channel ............................................13
Channel Edit......................................................................... 13
Automatic search ............................................................... 14
Exchange............................................................................... 14
Watching TV Program .......................................14
How to select the desired program............................. 14
How to select the desired sound.................................. 14
Mute Setting ........................................................................ 15
Quick program view.......................................................... 15
Picture Control Functions .................................15
How to select the picture mode ................................... 15
How to customize your own picture status.............. 15
Sound Control Functions ..................................16
How to choose Digital tone mode............................... 16
How to customize your own sound status................ 17
Timer Functions .................................................18
Setting of Current Time .................................................... 18
Setting of ON/OFF Time................................................... 18
Setting of On Channel...................................................... 18
Setting of Remind Time and Remind Channel ........ 18
Function Menu...................................................19
Function Menu Set ............................................................ 19
Adjust Menu.......................................................20
Lock Setup..........................................................20
How to use the password function.............................. 21
USB Mode...........................................................22
Maintenance 24
Troubleshooting 24
Specification 25
Format 26