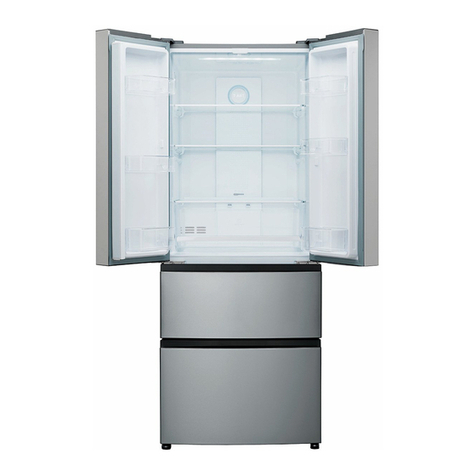
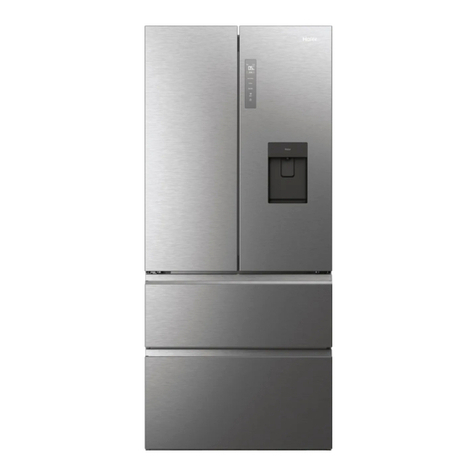
Haier HRF-636I 6 Series User manual

GB
User Manual
Refrigerator-Freezer
HRF-636I*6
HRF-636I*7
*= Colour code:
S,T,CR,BB,W,N,GW,
G,B,GR,X,F or M

GB
2

GB Thank You
3
Legend
Warning – Important Safety information
General information and tips
Environmental information
Disposal
Help protect the environment and human health. Put
the packaging in applicable containers to recycle it.
Help to recycle waste of electrical and electronic ap-
pliances. Do not dispose appliances marked with this
symbol with the household waste. Return the product
to your local recycling facility or contact your municipal
oce.
Thank you for purchasing a Haier Product.
Please read these instructions carefully before using this appliance. The instructions con-
tain important information which will help you get the best out of the appliance and ensure
safe and proper installation, use and maintenance.
Keep this manual in a convenient place so you can always refer to it for the safe and proper
use of the appliance.
If you sell the appliance, give it away, or leave it behind when you move house, make sure
you also pass this manual so that the new owner can become familiar with the appliance
and safety warnings.
WARNING!
Risk of injury or suocation!
Refrigerants, foaming agent and gases must be disposed of professionally. Ensure that
the tubing of the refrigerant circuit is not damaged before being properly disposed of.
Disconnect the appliance from the mains supply. Cut o the mains cable and dispose of
it. Remove the trays and drawers as well as the door catch and seals, to prevent children
and pets to get closed in the appliance.

Content GB
4
1- Safety information............................................................................................................................5
2- Intended use ...................................................................................................................................... 9
3- Product description .......................................................................................................................10
4- Control panel....................................................................................................................................11
5- Use......................................................................................................................................................12
6- Energy saving tips...........................................................................................................................22
7- Equipment ........................................................................................................................................23
8- Care and cleaning ...........................................................................................................................25
9- Troubleshooting..............................................................................................................................28
10- Installation......................................................................................................................................32
11- Technical data ...............................................................................................................................37
12- Customer service.........................................................................................................................38

GB 1- Safety information
5
Before switching on the appliance for the rst time read the fol-
lowing safety hints:
WARNING!
Before rst use
▶Make sure there is no transport damage.
▶Remove all packaging and keep out of children´s reach.
▶Wait at least two hours before installing the appliance in order to
ensure the refrigerant circuit is fully ecient.
▶Handle the appliance always with at least two persons because it
is heavy.
Installation
▶The appliance should be placed in a well-ventilated place. Ensure
a space of at least 2.5 cm above and 5 cm around the appliance.
▶Never place the appliance in a damp area or location where it
might be splashed with water. Clean and dry water splashes and
stains with a soft clean cloth.
▶Do not install the appliance in direct sunlight or near heat
sources(e.g. stoves, heaters).
▶Install and level the appliance in an area suitable for its size and use.
▶Keep ventilation openings in the appliance or in the in-built struc-
ture clear of obstruction.
▶Make sure that the electrical information on the rating plate agrees
with the power supply. If it does not, contact an electrician.
▶The appliance is operated by a 220-240 VAC/50 Hz power sup-
ply. Abnormal voltage uctuation may cause the appliance to fail
to start, or damage to the temperature control or compressor, or
there may be an abnormal noise when operating. In such case, an
automatic regulator shall be mounted.
▶Use a separate earthed socket for the power supply which is easy
accessible. The appliance must be earthed.
▶Only for UK: The appliance’s power cable is tted with 3-cord
(grounding) plug that ts a standard 3-cord (grounded) socket.
Never cut o or dismount the third pin (grounding). After the ap-
pliance is installed, the plug should be accessible.
▶Do not use multi-plug adapters and extension cables.
▶Ensure that the power cable is not trapped by the appliance. Do
not step on the power cable.

1- Safety information GB
6
WARNING!
Installation
▶Do not damage the refrigerant circuit.
▶A shut-o valve must be installed between the hose and the do-
mestic water connection in order to be able to interrupt the water
supply if necessary.
▶The shut-o valve must be easy accessible after installation.
▶Install a pressure reducer when the water pressure in the hose
exceeds 0.6 MPa.
▶Make sure only the delivered hose set are used. Old hose-sets
should not be reused.
▶Only connect to drinking water supply.
▶Make sure the hose joints and connections are rm and there is
no leakage.
Daily use
▶This appliance can be used by children aged from 8 years and
above and persons with reduced physical, sensory or mental ca-
pabilities or lack of experience and knowledge if they have been
given supervision or instruction concerning use of the appliance
in a safe way and understand the hazards involved.
▶Keep away children under 3 years of age from the appliance un-
less they are constantly supervised.
▶Children shall not play with the appliance.
▶If coal gas or other inammable gas is leaking in the vicinity of the
appliance, turn o the valve of the leaking gas, open the doors
and windows and do not unplug a plug in the power cable of the
appliance or any other appliance.
▶Notice that the appliance is set for operation at a specic am-
bient range between 10 and 43 °C. The appliance may not work
properly if it is left for a long period at a temperature above or be-
low the indicated range.
▶Do not place unstable articles (heavy objects, containers lled
with water) on top of the appliance, to ovoid personal injury
caused by falling or electric shock caused by contact with water.

GB 1- Safety information
7
WARNING!
Daily use
▶Do not pull on the door shelves. The door may be pulled slant, the
bottle rack, may be pulled away, or the appliance may topple.
▶Open and close the doors only with the handles. The gap be-
tween the doors and between the doors and the cabinet is very
narrow. Do not extend your hands in these areas to avoid pinch-
ing your ngers. Open or close the doors only when there are no
children standing within the range of door movement.
▶Do not store or use inammable, explosive or corrosive materials
in the appliance or in the vicinity.
▶Do not store medicines, bacteria or chemical agents in the ap-
pliance. This appliance is a household appliance. It is not recom-
mended to store materials that require strict temperatures.
▶Never store liquids in bottles or cans (besides high percentage
spirits) especially carbonated beverages in the freezer, as these
will burst during freezing.
▶Checkthe conditionoffoodif awarmingin thefreezer hastakenplace.
▶Do not set unnecessarily low temperature in the refrigerator
compartment. Minus temperatures may occur at high settings.
Attention: Bottles can burst.
▶Do not touch frozen goods with wet hands (wear gloves). Espe-
cially do not eat ice lollies immediately after removal from the
freezer compartment. There is the risk to freeze or the formation
of frost blisters. FIRST aid: keep immediately under running cold
water. Do not pull away!
▶Do not touch the inside surface of the freezer storage compart-
ment when in operation, especially with wet hands, as your hands
may freeze onto the surface.
▶Unplug the appliance in the event of a power interruption or be-
fore cleaning. Allow at least 5 minutes before restarting the appli-
ance, as frequent starting may damage the compressor.
▶Do not use electrical devices inside the food storage compart-
ments of the appliance, unless they are of the type recommend-
ed by the manufacturer.

1- Safety information GB
8
WARNING!
Maintenance / cleaning
▶Make sure children are supervised if they carry out cleaning and
maintenance.
▶Disconnect the appliance from the electrical supply before un-
dertaking any routine maintenance. Allow at least 5 minutes be-
fore restarting the appliance, as frequent starting may damage
the compressor.
▶Hold the plug, not the cable, when unplugging the appliance.
▶Do not scrape o frost and ice with sharp objects. Do not use
sprays, electric heaters like heater, hair dryer, steam cleaners or
other sources of heat in order to avoid damage to the plastic parts.
▶Do not use mechanical devices or other means to accelerate the de-
frosting process, other than those recommended by themanufacturer.
▶If the supply cord is damaged, it must be replaced by the manu-
facturer, its service agent or similarly qualied persons in order to
avoid a hazard.
▶Do not try to repair, disassemble or modify the appliance by your-
self. In case of repair please contact our customer service.
▶Eliminate the dust on the back of the unit at least once in the year
to avoid hazard by re, as well as increased energy consumption.
▶Do not spray or ush the appliance during cleaning.
▶Do not use water spray or steam to clean the appliance.
▶Do not clean the cold glass shelves with hot water. Sudden tem-
perature change may cause the glass to break.
WARNING!
The appliance contains the ammable refrigerant ISOBUTANE
(R600a). Make sure the refrigerant circuit is not damaged during
transportation or installation. Leaking refrigerant may cause eye
injuries or ignite. If a damage has occurred, keep away open re
sources, thoroughly ventilate the room, do not plug or unplug the
power cords of the appliance or any other appliance. Inform the
customer service.
In case of eyes get into contact with the refrigerant, rinse immedi-
ately it under running water and call immediately the eye specialist.
Refrigerant gas information

GB 2- Intended use
9
2.1 Intended use
This appliance is intended for cooling and freezing food. It has been designed exclusively
for use in household and similar applications such as sta kitchen areas in shops, oces
and other working environments; farm houses and by clients in hotels, motels and other
residential type environments as well as in bed-and-breackfast and catering business. It is
not intended for commercial or industrial use.
Changes or modications to the device are not allowed. Unintended use may cause haz-
ards and loss of warranty claims.
2.2 Accessories
Check the accessories and literature in accordance with this list (Fig. 2.2):
Energy label User manual
Warranty card
Egg tray
2.2
Water pipe 6.35 mm adapter6.35 mm adapter
with valve
Screw
Clip

3- Product description GB
10
3
7
5
6
8
9
16
15
14
13
12
11
10
17
1
2
A B
4
Pictures of appliance (Fig. 3)
3
1 Ceiling lamp
2 Ice maker with ice box
3 Air duct
4 Water and ice dispenser
5 Storage shelves
6 Sensor
7 Door rack/bottle holder
8 Drawers
9 Adjustable feet
A: Freezer compartment
10 Air duct
11 Ceiling lamp
12 Water lter compartment
13 Egg tray
14 Door rack/bottle holder
15 Shelves
16 OK Sticker
17 Drawers
B: Fridge compartment
Notice
Due to technical changes and dierent models, some of the illustrations in this manual
may dier from your model.

GB 4- Control panel
11
3 Sec. Super-Cool
3 Sec. Super-Frz.
3 Sec. Lock
3 Sec. Filter Reset
Vacation
Fuzzy
Crushed
Cubed
Water
Ice on/off
A
a
B
b1
C
c
D
E
F
G
H
d ef1 g
h
b2 f2
4
Control panel (Fig. 4)
Keys:
A Vacation function on/o
B Freezer temperature adjustment
C Filter Reset
D Ice Maker function on/o
E Fuzzy function on/o
F Fridge temperature adjustment
G Panel lock selector
H Dispenser function selection
Indicators:
a Vacation mode
b1 Temperature of freezer
b2 Super-Freeze” mode
c Filter change status
d Ice Maker status
e “Fuzzy” mode
f1 Temperature of fridge
f2 “Super-Cool” mode
g Panel lock
h Dispenser status

5- Use GB
12
5.4 Lock/unlock panel
▶Touch key “G” (3 Sec. Lock) for 3 seconds to block
the temperature and function setting keys against
activation.
▶The indicator “g” lights up (Fig. 5.4) and the illumina-
tion of the panel is switched o. The icon ashes if a
key is touched while the panel lock is activated.
▶To unlock the panel, touch the key again for 3 sec-
onds.
5.3 Switching the appliance on /o
The appliance is in operation as soon as it is connected to the power supply. The tem-
peratures displayed will show the actual temperatures in the compartment. The panel lock
might be active.
Empty the appliance before switching it o. To switch o the appliance, pull the power cord
out o the power socket.
5.5 Standby-mode
The display screen turns o automatically 30 seconds after a key was touched. The dis-
play is locked automatically. It lights up automatically when any key is touched or one of
the doors is opened.
5.2 Sensor keys
The keys on the control panel are sensor keys, which already respond when lightly touched
with the nger.
3 Sec. lock
5.4
5.1 Before rst use
▶Remove all packaging materials, keep them out of children’s reach and dispose them
in an environmentally friendly manner.
▶Clean the inside and outside of the appliance, as well as the interior and accessories
with water and a mild detergent and dry it well with soft cloth.
▶Clean the After the appliance has been levelled and cleaned, wait for at least 2 hours
before connecting it to the power supply. See Section INSTALLATION.
▶Precool the compartments at high settings before loading with food. The function
Super Cool and Super Freeze helps to cool down the compartments quickly.
▶The refrigerator temperature and freezer temperature are automatically set to 4 °C
and -18 °C respectively. These are the recommended settings. If desired, you can
change these temperatures manually. Please see MANUAL ADJUSTING MODE.
Notice: Panel lock
The control panel is automatically blocked against activation if no key is touched for 30
seconds. For any settings the control panel must be unlocked.
Notice: Presettings
▶The appliance is preset to the recommended temperature of 4 °C (refrigerator) and
-18 °C (freezer). Under normal ambient condition you need not to set a temperature.
▶When the appliance is switched on after disconnection from the main power supply, it
may take up to 12 hours for the correct temperatures to be reached.

GB 5- Use
13
5.6 Door opening alarm
When a door is left open for more than 1 minute, the door opening alarm sounds. The
alarm can be silenced by closing the door. If the door is left open for more than 7 minutes,
the light inside the compartment automatically switches o.
5.7.1 Fuzzy mode
If you do not have any special requirements, we rec-
ommend that you use Fuzzy mode: In the Fuzzy mode,
the appliance automatically adjusts the temperature
setting according to the ambient temperature and
temperature change in the appliance.
1. Unlock the panel by touching key “G” if it is locked
(Fig. 5.4).
2. Touch key “E” (Fuzzy) (Fig. 5.7.1-1).
3. Indicator “e” lights up and the function is activated
(Fig. 5.7.1-2).
By repeating the above steps or selecting an other
function this function can be switched o again.
Fuzzy
Fuzzy
5.7.1-2 5.7.1-1
5.7.2.1 Adjust the temperature of the fridge
1. Unlock the panel by touching key “G” if it is locked (Fig.
5.4).
2. Touch key “F” (Fridge) to select the fridge compart-
ment. The temperature in the fridge compartment
(f1) starts ashing (Fig. 5.7.2-1).
3. Touch key “F” (Fridge) repeatedly until the de-
sired temperature is ashing (Fig. 5.7.2-2).
A signal will sound at each key touch.
The temperature increases in sequences of 1 °C
from a minimum of 1 °C to a maximum of 9 °C. The
optimum temperature in the fridge is 4 °C. Colder
temperatures mean unnecessary energy con-
sumption.
4. Touch any key except „F“ (Fridge) to conrm, or the
setting conrms automatically after 5 seconds. The
displayed temperature stops ashing.
3 Sec. Super-Cool
3 Sec. Super-Cool
5.7.2-2 5.7.2-1
Notice: Fuzzy mode
In Fuzzy mode, the temperature of the fridge and freezer cannot be adjusted manually.
5.7 Select the working mode
You need to select one of the following two ways to set the appliance:
5.7.2 Manual adjusting mode
If you want to manually adjust the temperature of the appliance in order to store a particu-
lar food, you can set the temperature via a temperature adjusting key:

5- Use GB
14
5.7.2.2 Adjust the temperature of the freezer
1. Unlock the panel by touching key “G” if it is locked (Fig.
5.4).
2. Touch key “B” (Freezer) to select the freezer com-
partment. The temperature in the freezer compart-
ment (b1) starts ashing (Fig. 5.7.2-3).
3. Touch key “B” (Freezer) repeatedly until the de-
sired temperature is ashing (Fig. 5.7.2-4). A signal
sounds at each key press.
The temperature increases in sequences of 1 °C
from -14 °C to -24 °C. The optimum temperature
in the freezer is -18 °C. Colder temperatures mean
unnecessary energy consumption.
4. Touch any key except „B“ (Freezer) to conrm, or
the setting conrms automatically after 5 seconds.
The displayed temperature stops ashing.
3 Sec. Super-Frz.
3 Sec. Super-Frz.
5.7.2-3 5.7.2-4
3 Sec. Super-Cool
5.8 5.8 Super-Cool function
Switch on the Super-Cool function if you want to add
a large quantity of food at once (for example after
purchase). The Super-Cool function accelerates the
cooling of fresh food and protects the goods already
stored from undesirable warming.
1. Unlock the panel by touching key “G” if it is locked
(Fig. 5.4).
2. Touch key “F” (Fridge) for 3 seconds. Indicator „f2“
lights up and the function is activated. (Fig. 5.8).
The same operation stops the Super-Cool function.
Notice: Automatic switch o
▶This function will be automatically disabled when the set temperature has been
reached.
▶The function is also disabled if the Fuzzy mode oder Vacation function are chosen.
Notice: Inuences on temperature
The indoor temperatures are inuenced by the following factors:
▶Ambient temperature
▶Frequency of door opening
▶Amount of stored foods
▶Installation of the appliance
Notice: Conict with other functions
The temperature cannot be adjusted, if any other function (Super Cool, Super Freeze,
Hoilday or Fuzzy) is activated or the display is locked. The corresponding indicator will
ash accompanied by a buzzer.

GB 5- Use
15
3 Sec. Super-Frz.
5.9
5.10 Vacation function
This function sets the fridge temperature to 17 °C.
This allows to keep the door of the empty fridge closed
without causing an odour or mold during a long ab-
sence (e.g. during holiday). The freezer compartment
is not aected by this setting.
1. Unlock the panel by touching key “G” if it is locked
(Fig. 5.4).
2. Touch key “A” (Vacation) for 3 seconds. Indicator “a”
lights up and the function is activated (Fig. 5.10).
By repeating the above steps or selecting another
function this function can be switched o.
5.10
5.9 Super-Freeze function
Fresh food should be frozen to the core as quickly as
possible. This preserves the best nutritional value, ap-
pearance and taste. The Super-Freeze function ac-
celerates the freezing of fresh food and protects the
goods already stored from undesirable warming. If you
need to freeze a large amount of food at once, it is rec-
ommended to set the Super-Freeze function ahead of
time 12 h before adding the food.
1. Unlock the panel by touching key “G” if it is locked
(Fig. 5.4).
2. Touch key “B” (Freezer) for 3 seconds Indicator
„b2“ lights up and the function is activated. (Fig.
5.9).
The same operation stops the Super-Freeze function.
Notice: Automatic switch o
▶The Super-Freeze function automatically switches o when the set temperature has
been reached. The appliance is then operated at the previously set temperature.
▶The function is also disabled if the Fuzzy mode oder Vacation function are chosen.
WARNING!
When the vacation function is activated, no goods must be stored in the fridge com-
partment. The temperature of + 17 °C is too high to store food.

5- Use GB
16
5.11 Ice Maker function
This function allows to produce ice, which can be re-
moved through the dispenser.
The ice maker periodically receives an automatic ow
of water which is frozen into ice cubes. Capacity of the
ice maker depends on the ambient temperature, fre-
quency of freezer door openings, and the tempera-
ture setting of the freezer compartment. The maxi-
mum quantity of ice production per day is 1.58 kg if the
freezer temperature is set at -24 °C.
1. Make sure the water supply valve is opened.
2. Unlock the panel by touching key “G” if it is locked
(Fig. 5.4).
3. Touch key “D” (Ice on/o).
4. Indicator “d” lights up and the function is activated
(Fig. 5.11).
By repeating the above steps, this function can be
switched o again.
5.11
Cubed
Ice on/off
Notice: Ice Maker function
▶When the application is powered on, the ice maker is o by default.
▶The Ice Maker function switches o automatically when the maximum ice level has
been reached.
▶Make sure that you empty the ice maker container before turning o the ice maker
function, as the ice will melt into water.
▶When you don‘t need ice cubes for a long period of time, please empty the container,
insert the cleaned container and close the water supply valve.
5.11.1 Getting ice cubes from the dispenser
1. Make sure the Ice Maker function is ON (Fig. 5.11).
2. Place a glass under the water and ice dispenser
(Fig. 5.11.1-1) on the front of the appliance.
3. Press the “Cubed” key to select ice cubes. The
“Cubed” icon lights up (Fig. 5.11.1-2).
4. Make sure the glass is in line with the dispenser to
prevent ice cubes from falling out.
5. Push the glass against the lever. Ice cubes fall into
the glass.
ICE & WATER DISPENSER
5.11.1-1 5.11.1-2
Notice: Getting ice
▶When the appliance is switched on for the rst time and if you start the ice function
while the container is empty, it may take up to 24 hours to make your rst batch of ice
cubes.
▶The rst production of ice cubes (approx. 20 pieces) should not be consumed after
rst use, after a long non-use of the Ice Maker function and after a lter change.

GB 5- Use
17
WARNING!
▶Do not use deep, narrow, fragile or delicate glasses or paper cups with the dispenser.
▶Never place canned drinks or food inside the dispenser, as this will damage the crush-
ing mechanism.
▶Do not touch the dispenser or remove the cover of the ice maker to avoid accidental
injury or damage to the appliance.
5.12 Cool Water function
With this function the tank in the fridge door is lled au-
tomatically with drinking water which is cooled to drink-
ing temperature and can be tapped.
1. Make sure the water supply valve is opened.
2. Unlock the panel by touching key “G” if it is locked
(Fig. 5.4).
3. Touch key “E” (Water) (Fig. 5.12-1).
4. Indicator “e1” lights up, the function is activated
(Fig. 5.12-2) and water can be tapped.
By repeating the above steps this function can be
switched o again.
3 Sec. Filter
3 Sec. Filter
5.12-1
5.12-2
Notice: Getting ice
▶Do not take the lled ice container out o the freezer longer than necessary as ice
cubes may melt.
▶In periods of infrequent ice withdrawal, cubes may stick together. This is normal.
▶If ice cubes get stale, throw them away and clean the ice container.
▶3 seconds after the delivery of ice, the dispenser ap closes with a ‘phutt’ sound. Don’t
remove the glass for 2 to 3 seconds as additional water or ice might be produced.
▶Crushed ice might be dispensed instead of cubed ice if crushed ice was the last opti-
on selected.
▶Do not place ice cubes which were not produced by the icemaker into the storage
drawer to prevent damage to the mechanism.
▶You can switch the setting of the dispenser to Water, Cubed, or Crushed even when
the display is locked.
▶To prevent the dispension of ice or water when the lever is touched accidentally, the
dispenser does not dispense any ice or water while all lights of the buttons are o.
5.11.1 Getting crushed ice from the dispenser
1. Make sure the Ice Maker function is ON (Fig. 5.11).
2. Place a glass under the water and ice dispenser (Fig. 5.11.1-1) on the front of the ap-
pliance.
3. Press the “Crushed” key to select crushed ice, The “Crushed” icon lights up.
4. Make sure the glass is in line with the dispenser to prevent crushed ice from falling out.
5. Push the glass against the lever. Crushed ice falls into the glass.

5- Use GB
18
5.13 Change lter indicator
Approximately every 6 months, the “Change Filter”
indicator light turns on (Fig. 5.13). This indicates that
the water lter has to be changed. Refer to CARE AND
CLEANING.
The lter in the water pipe absorbs impurities and
makes water/ice clean and hygienic. After a long time
of usage ice cubes can become smaller because the
lter is blocked by the impurities.
3 Sec. Filter Reset
5.13
5.13.1 Reset the Change lter indicator
Touch key “C” (3 Sec. Filter Reset) for 3 seconds, The “Change Filter” indicator (c) becomes
dark.
Notice: Water dispenser
▶For the rst use it is necessary to press the water dispenser several times for 1 minu-
te in order to clear the air in the line. Do not press for more than 3 minutes to prevent
overheating of the pad activator solenoid.
▶The rst 7 glasses of water should not be consumed after initial start up or following
a lengthy break in use.
▶The rst few glasses of water you take out are warmer than the next glasses. This is
normal.
▶If you like very cold water put some ice cubes from the freezer into the glass.
▶Water in the tray should be removed, as it could spill when the door opens and closes.
Notice: Filter change
▶For an impeccable quality of the ice cubes, it is important to change the water lter
regularly. If the water quality shows signs of deterioration, either visually or in taste,
the lter should be changed sooner – before the indicator light turns on.
▶After installation of new lter the next production of ice cubes (20 pieces approx)
should not be consumed.
Notice: Reset Change lter indicator
To avoid diseases, do not deactivate the Change Filter indicator without changing the
lter.
5.12.1 Getting water from the dispenser
1. Make sure the Ice Maker function is ON (Fig. 5.11).
2. Place a glass underneath the water and ice dispenser (Fig. 5.11.1-2) on the front of
the appliance.
3. Press the “Water” key to select cool water. The Water icon lights up.
4. Make sure the glass is in line with the dispenser to prevent water from splashing out.
5. Push the glass against the lever (Fig. 5.11.1). Water ows into the glass.

GB 5- Use
19
5.14 Tips on storing fresh food
5.14.1 Storing into the fridge compartment
▶Keep your fridge temperature below 5 °C.
▶Hot food must be cooled to room temperature before storing in the appliance.
▶Foods stored in the fridge should be washed and dried before storing.
▶Food to be stored should be properly sealed to avoid odour or taste alterations.
▶Do not store excessive quantities of food. Leave spaces between foods to allow cold
air owing around them, for a better and more homogeneous cooling.
▶Foods eaten daily should be stored at the front of the shelf.
▶Leave a gap between foods and the inner walls, allowing air ow. Especially don’t
store foods against the rear wall: foods could freeze against rear wall. Avoid direct
contact of food (especially oily or acidic food) with the inner liner, as oil/acid can
erode the inner liner. Clean away oily/acid dirt whenever it is found.
▶Defreeze frozen food in the fridge storage compartment. This way, you can use the
frozen food to decrease the temperature in the compartment and save energy.
▶The ageing process of fruit and vegetables such as courgettes, melons, papaya, ba-
nana, pineapple, etc. can be accelerated in the fridge. Therefore, it is not advisable to
store them in the fridge. However, the ripening of strongly green fruits can be pro-
moted for a certain period. Onions, garlic, ginger and other root vegetables should
also be stored at room temperature.
▶Unpleasant odours inside the fridge are a sign that something has spilled and clean-
ing is required. See CARE AND CLEANING.
▶Dierent kinds of food should be placed in dierent areas according to their proper-
ties (Fig. 5.14.1):
3
7
5
6
8
9
3
2
1
1
2
4
9
4
5
6
7
8
5.14.1
1 Butter, cheese etc.
2 Eggs, canned food, spices etc.
3 Drinks and bottled foods.
4 Pickled foods, canned food, etc.
5/6 Meat products, sh, raw food
7 Cans, dairy products etc.
8 Fruits, vegetables, lettuce, etc
9 Cooked meat, sausages, etc.

5- Use GB
20
1 Less weighty items, such as ice cream, vegeta-
bles, bread etc.
2 Large/heavier portions of food, such as meat
joints for roasting
3 Beverages without high alcohol and temporary
storage of spirits with a high alcohol content, small
parts like pizza or herbs.
3
16
15
14
13
12
11
10
17
1
2
5.14.2
5.14.2 Storage into the freezer compartment
▶Keep the freezer temperature at -18 °C.
▶12 hours before freezing additional items switch on the Super-Freeze function; for
small quantities of food 4-6 hours are sucient.
▶Hot food must be cooled to room temperature before storing in the freezer com-
partment.
▶Food cut into small portions will freeze faster and is easier to defrost and cook. The
recommended weight for each portion is less than 2.5 kg
▶It is better to pack food before putting it into the freezer. The outside of the pack-
aging must be dry to avoid bags sticking together. Packaging materials should be
odour-free, airtight, non-poisonous and nontoxic.
▶In order to avoid expiration of storage periods, please note the freezing date, time
limit and name of the food on the packaging according to the storage periods of dif-
ferent foods.
▶WARNING!: Acid, alkali and salt etc. could erode the internal surface of the freezer.
Do not place the food having these substances (e.g. sea sh) directly on the internal
surface. Salt water in the freezer should be cleaned up immediately.
▶Do not exceed the food storage times recommended by the manufacturers. Only
take the required amount of food out of the freezer.
▶Dierent kinds of food should be placed in dierent areas according to their proper-
ties (Fig. 5.14.2):
Notice: Storage
▶Please keep a distance of more than 10 mm between the food and the sensor to
ensure the cooling eect.
▶Please leave the lowest drawer in the appliance when it is working in order to ensure
the cooling eect.
▶Food items that include ice (like ice cream etc.) should be stored inside the freezer
compartment instead of in the bottle holders. The temperature changes the bottle
holders are exposed to, caused by opening and closing the door, may thaw the food.
This manual suits for next models
14
Table of contents
Other Haier Refrigerator manuals

Haier
Haier PRTS Series User manual

Haier
Haier HXC-258 User manual

Haier
Haier ECR1 7 User manual

Haier
Haier HSSR-N10A User manual

Haier
Haier AFL-AFD User manual

Haier
Haier HSP02WNB User manual

Haier
Haier MicroCool MC1366 User manual

Haier
Haier ECR27 User manual

Haier
Haier HC17SG42RB User manual

Haier
Haier HSBS562IS User manual

Haier
Haier ESRN025 User manual

Haier
Haier A2FE635CFJRU User manual

Haier
Haier HRF-261F User manual

Haier
Haier HT SERIES User manual

Haier
Haier HRF-522IS6 User manual

Haier
Haier CFL 533 User manual

Haier
Haier HRQ02WNA User manual

Haier
Haier HRQ04WNAWW User manual

Haier
Haier HBW5518D User manual

Haier
Haier HCR17B Assembly instructions