Strong
Middle
Soft
DelayTemp.Extra
rinse SpinPower Start/
Pause
Program
Hijab
Durm Clean
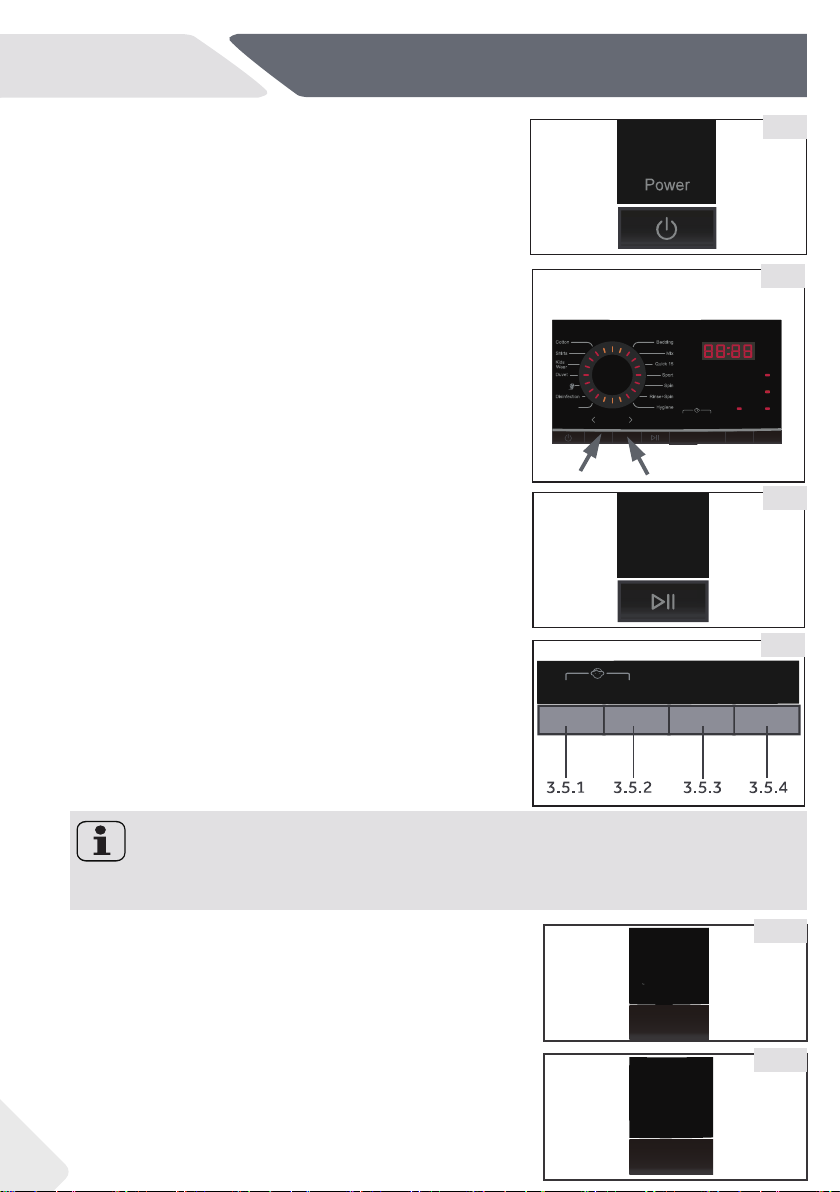
3-Control panel
3.2 “Power” button
3.4 “Start/Pause” button
Press this button (Fig. 3-2) gently to switch on, the
display is shining.Press it again for about 2 seconds to
switch off.If no panel element or programme is acti-
vated after a while machine will shut down automati-
cally.
The function buttons (Fig.3-5) enables additional op-
tions in the selected programme before programme
start. The related indicators are displayed.
g
By switching off the appliance or setting a new pro-
ramme, all options are disabled.
If a button hasmultiple options, the desired option can
be selected by pressing the button sequentially.
To delete the setting or to cancel the setting process,
p
or-in case of only one option-the LED switches off.
ress the function button until the desired LED lights
Note: Factory settings
Press this button (Fig. 3-4) gently to start or inter-
rupt the currently displayed programme. During pro-
gramme interruption the digits on the display are blink-
ing.
3-4
3-5.1
3-2
3.3 Programme selector
3.5 Function buttons
Pressone of these buttons (Fig.3-3) sequentially until
the indicator of the desired programme lights up, and
the default settings are displayed.
3-5
3.5.1-Function but ton“Extra rinse”
In conjunction with the “Temp.” button, the child lock
3.5.2-Function but t on “Temp.”
P
function can be switch on/off (see CHILD LOCK).
ress this button (Fig.3-5.2) to change the washing
temperature of the programme. If no value is illumi-
nated the water will not be heated.
Pressthis button (Fig.3-5.1) to rinsethe laundrymore
intense with fresh water. This is recommended for
people with sensitive skin. One or two additional rinse
cycles are available.
3-3
DelayTemp.Extra rinse Spin
To get best results in each programme Haier has well defined specific default sett-
ings. If there is no special requirement default settings are recommended.
Extra rinse
3-5.2
Temp.
Start/
Pause
9