manuals.online logo
Brands
  1. Home
  2. •
  3. Brands
  4. •
  5. Haier
  6. •
  7. Washer
  8. •
  9. Haier XPB68-114D User manual

Haier XPB68-114D User manual

This manual suits for next models

1

Other Haier Washer manuals

Haier HNS1460TVE User manual

Haier

Haier HNS1460TVE User manual

Haier RWT360BW User manual

Haier

Haier RWT360BW User manual

Haier HWM75-0528 A User manual

Haier

Haier HWM75-0528 A User manual

Haier THERMOCOOL TLSA13B User manual

Haier

Haier THERMOCOOL TLSA13B User manual

Haier DWE-355 User manual

Haier

Haier DWE-355 User manual

Haier XPB56-23S User manual

Haier

Haier XPB56-23S User manual

Haier HBF601 User guide

Haier

Haier HBF601 User guide

Haier HW100-B14636N User manual

Haier

Haier HW100-B14636N User manual

Haier XQBM22-C User manual

Haier

Haier XQBM22-C User manual

Haier HMS1000B User manual

Haier

Haier HMS1000B User manual

Haier HL800TX Quick start guide

Haier

Haier HL800TX Quick start guide

Haier HW80-IM12826TNZP User manual

Haier

Haier HW80-IM12826TNZP User manual

Haier HW F1081 User manual

Haier

Haier HW F1081 User manual

Haier HNS1060TVE Setup guide

Haier

Haier HNS1060TVE Setup guide

Haier HWM105-M186 User manual

Haier

Haier HWM105-M186 User manual

Haier ESL-T21 User manual

Haier

Haier ESL-T21 User manual

Haier HWM20-A

Haier

Haier HWM20-A

Haier HWT08AN1 User manual

Haier

Haier HWT08AN1 User manual

Haier HWM78-0528T User manual

Haier

Haier HWM78-0528T User manual

Haier HW90-BP14959 User manual

Haier

Haier HW90-BP14959 User manual

Haier HW-F1481 ME User manual

Haier

Haier HW-F1481 ME User manual

Haier HW80-B1239N User manual

Haier

Haier HW80-B1239N User manual

Haier HWF5300AW Assembly instructions

Haier

Haier HWF5300AW Assembly instructions

Haier HWM75TL User manual

Haier

Haier HWM75TL User manual

Popular Washer manuals by other brands

Zanussi ZWF 14080 W user manual

Zanussi

Zanussi ZWF 14080 W user manual

Zanussi FV 825 N Instruction booklet

Zanussi

Zanussi FV 825 N Instruction booklet

LG WM8000HVA Specifications

LG

LG WM8000HVA Specifications

Whirlpool 3RGSC9400 Use and care guide

Whirlpool

Whirlpool 3RGSC9400 Use and care guide

Zanussi TJ 1284 H instruction manual

Zanussi

Zanussi TJ 1284 H instruction manual

AEG KO-LAVAMAT 74740 User information

AEG

AEG KO-LAVAMAT 74740 User information

Beko WSRE7512PRA user manual

Beko

Beko WSRE7512PRA user manual

Whirlpool LA5OOOXP Use and care guide

Whirlpool

Whirlpool LA5OOOXP Use and care guide

Miele PW 6207 operating instructions

Miele

Miele PW 6207 operating instructions

GE GE Profile WWSE3160AAA Specifications

GE

GE GE Profile WWSE3160AAA Specifications

Bush WMNB712EB instruction manual

Bush

Bush WMNB712EB instruction manual

ALLIANCE UW60AV Information manual

ALLIANCE

ALLIANCE UW60AV Information manual

Bosch WAN280H3 User manual and installation instructions

Bosch

Bosch WAN280H3 User manual and installation instructions

Maytag MAT15MNAW installation instructions

Maytag

Maytag MAT15MNAW installation instructions

LG T2109VSAL owner's manual

LG

LG T2109VSAL owner's manual

Indesit IWC 61481 Instructions for use

Indesit

Indesit IWC 61481 Instructions for use

Electrolux EWF12843 user manual

Electrolux

Electrolux EWF12843 user manual

Indesit WIN 70 Instructions for use

Indesit

Indesit WIN 70 Instructions for use

manuals.online logo
manuals.online logoBrands
  • About & Mission
  • Contact us
  • Privacy Policy
  • Terms and Conditions

Copyright 2025 Manuals.Online. All Rights Reserved.

STRONG
STANDARD
DRAIN
Dear Friend,
At the outset, we at Haier thank you for your interest in our range of products. A unique and
international range of appliances designed solely with the purpose of making modern life
simpler. And how! The entire Haier range of appliances, ranging from refrigerators,
televisions, washing machines, airconditioners, microwave ovens, dishwashers and
wine-coolers, combines the best of technology, features, performance and styling. All, a result
of our perfect understanding of your lifestyle and your needs.
But what is a great product without great service? Leaving no stone unturned in giving you the
best of service, we have also established an extensive network of authorised dealers and
authorised service centres, so that you get a lifetime of great and timely service for your Haier
appliance.
It has been an honour and a pleasure bringing these hi-tech products to you and we hope that
you get as much happiness using them as we have got, creating them for you.
Happy Inspired Living!
Thanking you,
CONTENTS
NAMES OF THE PARTS 1
SAFETY PRECAUTIONS 2
INSTALLATION AND ADJUSTMENT 4
PREPARATION BEFORE WASHING 7
THE MANDATORIES FOR WAS HING 8
USAGE OF THE DETERGENT 8
WASHING SEQUENCE 9
TROUBLE-SHOOTING 13
PACKING LIST & SPECIFIC ATIONS 15
Pleasecheckifthepowerreceptacleisingoodearthingcondition
beforeuse,toguaranteeyoursafety.
Buzzer
Water-inlet
Water inlet selector handle
Wash selector
Wash/Soak timer
Control panel
Overflow filter
Quick water-filling entrance
Drain hose hook
Water level adjusting lever
Lint filter(Installed by user)
Drain hose
Wash tub cover
Outer cover of the spin tub
Inner cover of the spin tub
Spin timer
Spin tub frame
Spin tub
Cabinet
Base frame
Wash tub
Pulsator
MEANING AND DESCRIPTION OF THE SYMBOLS
Contentsmarkedwiththatsymbolarerelatedtothesafetyof
theproductandpersonalsafetyoftheusers.Pleaseoperate
instrictconformitytothecontents,otherwiseitmaycause
damagetothemachineorinjurethepersonalsafetyofthe
user.
Forbidding sign Contentsmarkedwiththatsymbolareforactionsforbidden
to perform. Performing of those actions may result in
damageofthemachineorinjurethepersonalsafetyofthe
user.
Warning sign
NAMES OF THE PARTS
1
INSTALLING THE WATER INLET HOSE;
SELECT THE WATER LEVEL
Insertthewaterinlethoseintothewater-fillingentranceonthecontrolpaneldirectly(Pullit
outtodismantleit).
Selectwaterlevelaccordingtothequantityofthelaundry.
Setthewaterleveladjustinglevertotherequiredline.
Usethenewwaterinlethoseprovidedwiththemachinetoconnecttothewaterfaucet.Old
hosesetsshouldnotbereused.
You can fill water into the wash tub directly through this entrance. It can reduce the
humidity inside the control panel significantly and prolong the operating life of the
components.
Insertthewaterinlethoseintothewater-fillingentrance,thenpushthewater-fillingjointer
intothequickwater-fillingentrance.(Todismantlethewaterinletpipe,justpushthecontrol
handleasindicatedinthefigureandpullitout.)
QUICK WATER-FILLING ENTRANCE
Quick water-filling entrance
Water inlet hose
Water inlet jointer
Control handle
Push
Quick water-filling entrance
6
HOW TO CHANGE THE DIRECTION OF THE
DRAIN HOSE
• Figure1indicatestheex-factoryinstallation
positionofthedrainhose.
Takeoffthedrainhosefromthehanginghole
ofthecabinet.Pullthedrainhosefixing hook
outwardsgentlytotakeoutthedrainhosefrom
thetwofixinghooks.(AsperFigure2)
o
Rotatethedrainhosefixinghookby90 totake
itoutfromtheinstallationhole.(AsperFigure
3).
Installthe two drain hose fixing hooks taken
outintotheinstallationholeattheothersideof
thebaseframe (toaimatthe installationhole 
accuratelyyoucanleanthewashingmachine
o
forwardslightly).Thenrotate90 (AsperFigure
4).
Pullthefixinghookoutwardsslightly.Inlaythe
drainhoseintothefixinghooksreliablyalong
thegrooveatspintubside,andmakeitextend
towardsthespintubside.
Thenhangthedrainhoseintothehanginghole
atthespintubside.(AsperFigure5).
EXTEND THE DRAIN HOSE FR OM
THE REAR SIDE
Takeoutthedrainhosefromthefixinghook.Extenditfromtherearside(Whenthedrain
hoseisextendedfromtherearside,itcanbehungonthepointfordrainhose,atthetwo
sidesofthecabinet.)(SeeFigure6).
EXTEND THE DRAIN HOSE FROM THE
SIDE OF SPIN TUB
Fig ur e 1 Drai n hose
fixi ng hook
Fig ure 2
Drain h ose
fixin g hook
Pull outwards
slightly
Side sectional view
Fixing hook
installation hole
Drain hose
Take off
the drain hose
Figu re 3
Take off the fi xing
hook dow nwards
Rotate the fixing
hook for 90
Figu re 4
Insert t he fixin g hook into t he
instal lation h ole upwar ds
Rotate the fixing
hook for 90
to fix it
Fig ure 5 Figure 6
5
SAFETY PRECAUTIONS
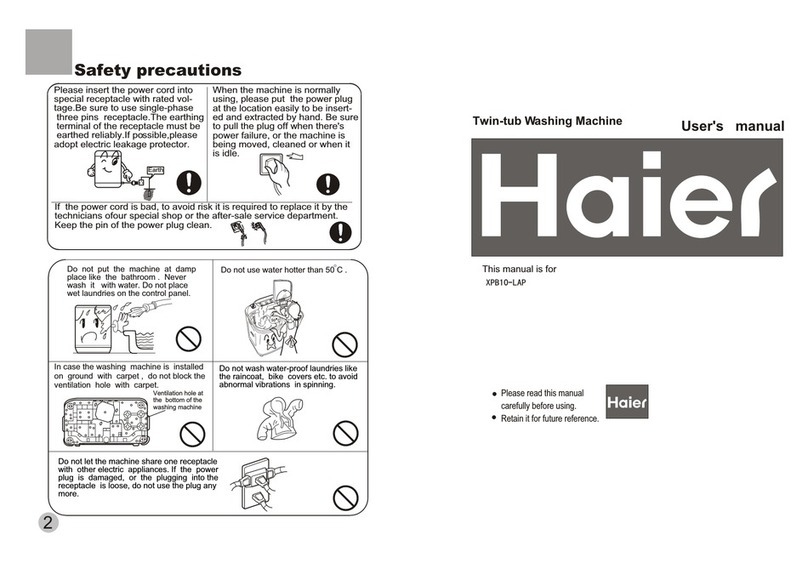
Donotputthemachineatadampplace
like the bathroom. Never wash it with
water.Do not place wet laundryonthe
controlpanel.
o
Donotusewaterhotterthan50 C.
For washing machines with ventilation
openingsat thebase,make sure thata
carpetdoesnotobstructtheopenings.
Ve nt il a ti on 
hole at the 
bottom  of 
thewashing
machine.
Do not wash water-proof laundry like
raincoat, bike covers etc. to avoid
abnormalvibrationsinspinning.
• Do not let the machine share one
rec eptac le wit h othe r elec trica l
appliances.
• Ifthepower plugis damaged,orthe
pluggingintothereceptacleisloose,
donotusethepluganymore.
When the machine is being used normally,
pleaseputthepowerplugatthelocationeasyto
beinsertedandextractedbyhand. Besureto
pulltheplug offwhenthere ispower failureor
themachineisbeingmoved,cleanedorwhenit
isidle.
Ifthe supplycord isdamaged, itmust bereplaced bythe manufactureror itsserviceagent ora
similarlyqualifiedpersoninordertopreventamishap.
Please insert the power cord into special
receptaclewith rated voltage. Be sureto use
single-phasethreepinreceptacle.Theearthing
terminal of the receptacle must be earthed
reliably. If possible, please adopt electric
leakageprotector.
2
PAY ATTENTION TO THE FOLLOWING BEFORE WASHING
THE LAUNDRY
a. Checkifthelaundryiscompatibletowashinginmachines.
b. Dividethelaundryinwhichcolourrunsandwashseparately.
c. Soakthelaundrywhichabsorbswaterwithdifficultybyhand.
d. Fortheheavilysoiledlaundry,firstremovedirtlikemudordust.Pleaseapplydetergentonthesoiledpartsin
advance.Thismakesiteasierforthestaintoclean.
e. Forlaundrywhichmaygetstuckinlintballorwithfur,pleaseturntheclothoverbeforeputtinginthemachine.
f. Donotputlaundrypollutedbychemicalsintothewashingmachinedirectly.
Checkifthe
laundry
hasspecial
requirement
for
washing.
Clearthe
pocket.Take
outthecoins,
sand,hairpins
etc.
Thequantity
ofthelaundry
shouldnotbe
toolarge.
Stretchand
loosenthe
laundry
beforeputting
itinthe
tub.
Whenthe
pulsatoris
running,the
buttons
ofthelaundry
maymakenoise.
Forthesake
ofdiscretion,
pleaseputthe
laundrywith
buttons
separately.
Tiethelong
strips,fasten
thebuttons,
closezippers.
7
SAFETY PRECAUTIONS
Do not stretch hands into the machine
whenit isswitchedON. Itisdangerous
eveniftherotationisslow.Takespecial
careofchildren.
Do not dismantle,repair or alter the
machinebyyourself.
Donotputanyhotorheavyitems(such
asakettlewithhotwater)onthewashing
machine.
Donotwashlaundrywithvolatilematerials
(suchasthinner,petroletc.).
Petrol
Thinner
Ha nd ica ppe d o r ch ild re n wi tho ut 
supervisionmustnotusethemachine.
Keep the machine away from direct
sunlightandheatsourcelikeheater.
• Toprotect your laundryandwashing
machine, please take out all coins,
buttons, sand, hairpins and other
foreign materials from the clothes
beforewashing.
• Please check if the water faucet is
open,andtheconnectionofthewater
inletpipeisproper.
• It is suggested to use foamless
washingpowder.
3
HOW TO USE WHITENER
• Fillwater to the decided level. Dilute
whitenerwithcontainer.Pouritslowly
intothewashingtub.
• Avoidusingwhitener on laundry with
coloursorpatternsas theyare prone
tolosingcolour.
• The whitener should not touch the
laundrydirectly.
• Refer to the user's manual for the
usageandquantityofthewhitenerto
beused.
• Pleasedissolvewhitenerbeforeusing.
• Thecapacityofwashingandspinning
of the machine refer to the largest
weightof the standardlaundryunder
dryconditionsthatcanbewashed or
spinnedatonetime.Laundryquantity
in one washing cycle should be less
thantheratedcapacityifwashingand
spinningatthesametime.
• Thethickness, size, type of cloth will
influencetheactualwashingcapacity.
It is suitable to put in reasonable
amountoflaundryandthelaundrycan
be turned round in washing for one
timewashing.
• Donotselect"Maximum"waterlevel
forlaundry less than 2.4kg.to avoid
splashingofwater.
• Itissuggestednottousehighsudsing
detergent.
HOW TO USE WASHING POWDER
• Todirectlydissolveitinthemachine:
1. Fillsmallquantityofwater.
2. Add the powder to it. Run for 3
secondstodissolveitcompletely.
3. Put in the laundry. Select the
suitablewaterlevel.
• Forinstantdissolvingofthewashing
powder:
o
1. Preparewarmwaterof30 C and
pourintoacontainer.
2. Addthepowderandkeepstirring
tofullydissolveit.
• Thepowderismorepronetopolluting
the laundry than the detergent.
Therefore please use in with proper
quantities.
• Dosageofdifferentwashingpowders
is different. Please refer to the
instructions of the washing powder
forthedetaileddosage.
THE MANDATORIES FOR WASHING
USAGE OF DETERGENT
8
INSTALLATION AND ADJUSTMENT
INSTALLING THE LINT FILTER
Overflowfilter
Lintfilter
Please install and adjust the machine according to the requirements mentioned in the
manual.Itisveryimportantforyoursecurityandcorrectoperationofthemachine.
Afteropeningthepackage,pleasetakeoutthelintfilter
fromthe document bag, and install it to the overflow
filterofthewashtub.(Seefigure)
USAGE OF THE DRAIN HOSE
TH E DR A I NAG E SH O U LD BE
SMOOTH WITH THE DRAIN HOSE.
1. The height of the drain hose should be
lessthan10cmelsethedrainagewillnot
besmoothandwillbeincomplete.
2. Donottramponorpressthedrainhose.
3. Ifthedrainhoseistoolong,cutitatmid
point.Forsmoothdrainage,cutthefront
endofthehoseataslant.
4. Ifextradrainhoseisneeded,pleasemake
aseparatepurchase.Theinnerdiameter
oftheextrahoseshouldnotbelessthan
30mm,andthelengthshouldnotexceed
1.5m.
Iftheextrahoseistoolong,cutiteitherat
pointAorB.(Seefigure)
<10cm
> 30mm
<1.5m
BA
4
9
WASHING SEQUENCE
Overfilling sign
Water-filling selector handle
Wash/Soak timer Wash selector Buzzer
Water inlet
(To set to below 2 minutes,
first set to 5 minutes then
turn it back. It increases
the life of the timer).
(Strong speed,
Standard speed)
(The buzzer will ring
whenthewashingcycle
finishes)
Spin timer
(To set to below 1 minute,
first set to 2 minutes then
turn it back. It increases
the life of the timer).
WASH
1. Water-fillingselector
(1) Set the water-filling selector to the
"WASH"side.(Figure1)
(2) Setthewaterleveladjustingleverto
thedesiredline.
2. Fill the water and add the dissolved
washingpowdertomakethewaterlevel
reachthepresetposition.(Figure2)
Runwashing program for some time to
stiranddissolvethepowdercompletely.
3. Putinthelaundry.Ifthewaterquantityis
insufficient,pleaseaddmorewater.
4. Selectthespeed.
 Select the streng th o f the speed
accordingtothelaundry.(Figure3)
5. Selectthewashingtime.
Selectthewashingtimeaccordingtothe
laundry.(Figure4)
6. After the washing cycle finishes, the
buz ze r will ri ng . S et the "W AS H
SELECTOR"at"DRAIN".(Figure5).
WASH SELECTOR
Figure 3
WASH SELECTOR
Figure 4
Figure 5
Figure 2
Figure 1
SPIN
WASH
# SOAK TIMER
INSTALLATION AND ADJUSTMENT
HOW TO CHANGE THE DIRECTION OF THE
DRAIN HOSE
INSTALLING THE WATER INLET HOSE;
SELECT THE WATER LEVEL
PREPARATION BEFORE WASHING
1. Connectthewaterinlethose.
2. Confirm that the washing machine is earthed
reliably. Then insert the power plug into the
receptacle.Donotconnecttheearthterminaltothe
gaspipeandtapwaterpipe.
3. Putdownthedrainhose.
4. Slantingor uneven ground may result in unstable
working or abnormal noise. Please make the
machinestandhorizontally.
Outercoverof
Thespintub
Innercoverof
Thespintub
Thelaundry
is slanting
Gland
Push
Proper
Push
Proper Nogland
SPIN
WASH
1.Putthelaundryintothespintubevenlyandsmoothly.
2.Spin
(1)Puttheglandinproperly,evenifthelaundryquantityissmall.
(2)Closetheinnerandoutercoverofthespintub.
(3)Spinfor1-2minutes.
3. Runthefoam-removingspin.
(1) Opentheoutercoverofthespintub.
(2) Setthewater-fillingselector controlrod
atthe"SPIN"side.Fillwaterforabout1
minute.Ifthewater quantityfilledis too
large, the water may flow out from the
washtubside.Pleasetwistthewatertap
tolimitthewaterlevel.
(3)Closetheoutercoverofthespintub.
 Spinfor1-2minutes.
MIDWAY SPINNING
RINSING
RINSE WITH WATER-FILLING
1. Putthe laundry intothewash tub. Select
suitablecurrentaccordingtothelaundry.
2. Adjustthewater level.Setthewaterlevel
adjustingleveraccordingtothequantityof
laundry.Thenfillsuitablequantityofwater
continuously.
3. Rinse:
Adjustthewashtimerto5-7minutestodo
rinsing.
(Repeatthemidwayspinningand
rinsing with stored water 2-3
times).
OVERFILL
If  you  fin d wa ter 
fl o w ing  o u t  her e , 
pleasetwistthewater
tap to limit the water
level.
RINSE WITH STORED WATER
1. Putthelaundryintothewashtub.Selectsuitablespeedaccordingtothelaundry.
2. Fillwatertopresetwaterlevel.
3. Rinse:
Adjustthewashtimerto2-3minutestodorinsing.
Whenthelaundryquantityisbelow2.4kg.,pleaseuse"Standard"speed.Ifyou
use"Strong"speed,watermaysplash.
7
STRONG
STANDARD
DRAIN
OFF
6
9
12
25
35
15
45
PROGRAM
SELECTOR
TIMER
SPIN
TIMER
OFF
1
2
3
OFF
MAX
BUZZER
OFF
6
9
12
25
35
15
45
TIMER
STRONG
STANDARD
DRAIN
OFF
MAX
BUZZER
STRONG
STANDARD
DRAIN
PROGRAM
SELECTOR
OFF
6
9
12
25
35
15
45
Water inlet hose
Water inlet
Maximum Max.
Minimum Min
Medium Med
Water level
indicator
STRONG
STANDARD
DRAIN
OFF
6
9
12
25
35
15
45
PROGRAM
SELECTOR
TIMER
SPIN
TIMER
OFF
1
2
3
OFF
MAX
BUZZER
Building No-1, Okhla Ind ustr ial E stat e, Ph ase I II, N ew De lhi- 1100 20
Tel. : 011-39496000, 306 7400 0. Fa x : 01 1-30 6740 88, W ebsi te : w ww.h aier .com /in
Haier Appliances (India) P. Limited
HAIER APPLIANCES (INDIA) PVT. LTD. (hereinafter referred to as “the Company”) hereby
offers the following warranty to the original domestic purchaser commencing from the date
of the purchase. The Company, at its sole discretion, will free of charge repair or replace
any defective part or parts which prove to be defective in workmanship and/or materials
and not due to abnormal or improper usage.
HAIER WARRANTY
Customer Name .... .... .... .... .... ............... .... .... .... .... .... .... .... .... Address .... .... .... .... .... .... .... .... .... ................... .... .... .... .... ....
Seria l No. .... ......... .... .... .... ......... .... .... .... ......... .... ..Da te of p urch ase. .... ......... .... .... .... ......... .... .... ..Mo del No .... .... .... ......... ..
Deale r Seal .... .... ............. .... .... ............. .... .... .... ......... .... .... .... ......... .... .... .... ......... .... .... .... ......... .... .... .... ......... .... .... .... ........
1) This warranty will automatically terminate on the
expiry of the warranty period from the date of
delivery.
2) The Company is not liable for any delay in
servicing due to reasons beyond the control of
the Company or any of its authorised service
centres.
3) Parts replaced or repaired under this warranty
are warranted throughout the remaining of the
original warranty period.
4) It is entirely left to the Company’s discretion to
repair/replace parts at the site of installation or at
the authorised service centre of the Company.
5) This warranty shall be strictly limited to the
repairs or replacement of defective parts
specified in the warranty. This warranty shall not
cover any consequential or resulting liability.
6) This warranty shall not, in any case, extend towards payment of any monetary consideration whatsoever or replacement
or return of the product.
7) The Company may repair/supply parts free of cost during the warranty period. This warranty does not cover any Excise
duty, Central or Sales tax, Octroi and other local taxes or levies on the components/parts.
8) The parts shall be replaced by functionally operating equivalent material only and not with brand new ones and are likely
to be different from the one originally fitted. The parts thus removed shall be taken back by the Company.
9) The Company reserves the right to retain any part or component replaced at its sole discretion during the warranty period.
10) In no event the Company or its authorised service centre be liable for any consequential damages or resulting liability,
damage or loss arising directly or indirectly out of any defect in the product.
11) This warranty is not valid in case of the following events:
a) If the Product has been Installed/Serviced/Repaired/Opened or Tampered by any unauthorised personnel.
b) If defects arise/caused by accidents, alteration, misuse, neglect, substitution of original components with
spurious/non-genuine components, attacked by household pest / rodents, fire, flood, earthquake, lightning and/or
any other act of God/natural calamities.
c) The product is shifted outside India.
12) (a) For any service under this warranty beyond city/town/municipal limits from the Company/authorised service centre, a
fixed charge of Rs. 50 will be collected from the customer in addition to the actual to and fro charges by the shortest
route
(b) Service charges applicable after expiry of comprehensive warranty i.e. 12 months.
13) Any change of location or change in the ownership during the warranty period must be intimated in writing to the
Company.
14) The Company’s employees or its authorised representatives have no authority to vary the terms of this warranty.
15) This warranty is effected in New Delhi and claims, if any, shall be made only before the courts having jurisdiction in New
Delhi and no claim shall be made against the Company outside Ne w Del hi notwit hstan ding that the Appli ance may
have been sold or delivere d elsewhe re
CONDITIONS OF WARRANTY
Custo mer Na me.. ..... .... .... ......... .... .... ..... .... .... ......... .... .... .. Addr ess. .... ......... .... .... ..... .... .... ......... .... ......... .... .... ..... .... .... ........
Seria l No.. .... ..... .... .... ......... .... .... ..... .... .... ......... Date o f purc hase. .... .... ......... .... .... ..... .... .... ..Model No. .... .... ..... .... .... ......... ....
Deale r Seal .... ......... .... ......... .... .... ..... .... .... ......... .... .... ..... .... .... ......... .... .... ..... .... .... ..... .... .... ......... .... .... ..... .... .... ......... .... .... ....
Todospinninganddrainingorrinsingwithwater-filling
together,pleasefirstdospinningforaround1minute,then
dodrainingorrinsingwithwater-filling.Otherwisethe
spinningwillstopowingtotoomuchwaterstoredinthe
spintub.
1. Putthelaundryintothespintubevenlyandsmoothly.
2. Presstheglandinthetubproperly.Closetheinnerandoutercoverofthespintub.
3. Spin:
Selectsuitablespintime accordingto thelaundry, anddothespinning.During
spinning,ifthereisanyabnormalsound,itisgenerallyowingtoslantingplacement
ofthelaundries.Pleasestopthemachineandrearrangethelaundryproperly.
• Inspinning,itwillpausetheworkifyouopentheoutercoverofthespintub.Close
ittoresumethespinning.
SPINNING
DISPOSAL AFTER WASHING
• Afterusing,pleasecleanthelintandforeignmaterialsofthelintfilterandoverflow
filterintime.Otherwiseitmayinfluenceyourusingthemachine.
• Pleasefirstpulloffthepowerplugfromthereceptaclebeforecleaning.
CLEANING THE LINT F ILTER
• Thelintfiltermustbeusedduringwashing.
• Itmustbecleanedintimeaftereachuse.
1. TAKE OFF THE LINT FILTER
 Puthandattheindicatedposition.Pushdown
totakeitoff.(SeeFigure1)
2. CLEAN THE LINT
Putitinwaterandcleanwhileitisstillwet.
(SeeFigure2)
3. INSTALL THE LINT FILTER
Aftercleaning,insertthebottomofthelintfilter
(markedwith "down side") into the overflow
filter,thenpushtheupperpartof the filterin
(markedwith"upside").(SeeFigure3)
Figure2
Figure3
Figure1
11
• It is the water remaining from factory
inspectionofperformance?
Th e re m a y be 
s o m e  w a t e r 
flowing out of the
drain hose in the
first use of the
machine
Themachinedoes
notstart
• Istherepowerfailure?
• Isthepowerplugloose?
• Isthepulsatortwistedbyforeignmaterials?
• Isthedrainhoseputdown?
• Isthedrainhosefrozen?
• Is the drain hose blocked by foreign
material?
• Isthe laundryfallingto theouter side of
thespintub?
Thedraining does
notwork
• Isthemachineslanting?
• Istheglandpressedevenly?
• Isthelaundryfallingtotheoutersideofthe
spintub?
• Is the laundry in spin tub too much in
quantity?
There's abnormal
soundand violent 
vibration during
spinning
• Are there hair pins, coins or metal items 
insidethetub?
There's abnormal
sound during
washing
TROUBLE-SHOOTING (cont.)
(Ifthere's a breakdown,please pulloff the power plugbefore checking). The
followingphenomenadonotnecessarilymeanbreakdownssometimes.Please
confirmagainbeforesending itforrepair. If therearerealbreakdowns,please
cometothespecialmaintenancedepartmentorafter-salesservicedepartmentof
ourcompany.Donotattempttorepairitbyyourself.
PHENOMENA POSSIBLE CAUSES
14
10
CLEANING THE OVERFLOW FILTER
• Too much lint on the overflow filter will
influencethenormalusageofthemachine.
Pleasecleaniteverytwomonths.
1. Takeofftheoverflowfilter.Asindicatedin
thefigure, nip the elastic fixing claw and
pullittothedirectionofthearrowtotakeit
off.
2. Take off the corrugation pipe. Dismantle
the upper part of the corrugation pipe
inside the overflow filter (as indicated in
Figure1).
3. Cleanthelintaroundthefilterandflushwith
tapwater.
4. Installtheoverflowfilter.
(1) Installthecorrugationpipe.
(2) Insertthemountingplateatthebottom        
ofthefilterintothevalvecover.
 (3) Hangupthehookattheleftupperside.
(4) Pushtheupper partin asindicated in
Figure2.
Elasticfixing
claw
Hook
Figure2
Corrugation
Pipe
Figure1
Waterlevel
adjustinglever
DISPOSAL OF THE COMPLETE UNIT
• After washing, dismount the water
inlethose.
• Donotstorewaterinthetubforalong
per i o d .  D i s c ha r g e t h e w a t er 
immediatelyaftereachuse.
• Pulloff the power plug andhangup
thepowercord.
• Hangupthedrainhose.Wipeoffthe
waterdropsonthesurfaceandinside
thetubwithacleansoftcloth.
• Openthe coverofthe wash tuband
theinner/outer cover ofthespin tub
forsometime(aboutonehour),then
closethem.
• Wipethe complete unitwithsoft
clothtwisteddry.
• Wipewithneutraldetergentiftoo
dirty.
• Donotwashitdirectlywithwater.
Thinner
Alcohol
Petrol
12
TROUBLE-SHOOTING
IF THE LAUNDRY FALLS TO THE
OUTER SIDE OF THE SPIN TUB
Ifthelaundryfallstotheoutersideofthespintub,
pleasetakeitoutimmediately.
1.DISMANTLE
Asindicatedinthefigure,pullthespintubframe
obliquelyupwardstodismantleit.
2. INSTALL
After installing the back edge of the spin tub
frametoproperposition,pushtheframeatfour
locationsasindicatedtoresetit.
Pleasecheckcarefully.Thelaundriesmayfallto
thelowerpartoftheoutersideofthespintub(as
indicatedinthefigure).
 Ifthelaundryfalltotheoutersideofthespintub,
duringspinningthedrainwillgetblockedandthe
rotationspeedofthespinwillreduce.
Spin tub
Laundry
Spin tub frame
WHEN THE REMAINING WATER IS FROZEN
• Preventthefreezing(besuretodischarge
thewatercompletelyafterusing)
Aftercomplete draining, set the "WASH
S E L E C T O R "  t o  " S T R O N G "  o r 
"STANDARD".Ifitissetat"DRAIN",itwill
bedifficultforthefrozenwatertomelt.
• Whenthewaterisfrozen,pourhotwater
O 
below50 C into thewashtubtosoak it

completely.Thenturnthe pulsatorgently
withyourhands.Pleaseconfirmthatthe
drainageisworkingnormallybeforenext
use.
2~3L
Below 50 c
13
NAME
PACKING LIST
• User's manual
• Warranty manual
• Water inlet hose
• Lint filter
• Water-filling jointer
• Gland
• Twin-tub washing machine
QUANTITY
• One piece
• One piece
• One piece
• One piece
• One piece
• One piece
• One set
Waterlevel/Waterquantity(about)
Injectionpressure(MPa)
Ratedwashing/spinningcapacity(kg.)
SPECIFICATIONS
Maximum/55LMedium/46LMinimum/36L
0.02~0.2
6.8/6.0(weightofstandarddrycloth)
15
1800-200-9999, 1800-102-9999
60
Plastic Parts,Top Lids,
Drain Pipe, Inlet Pipe,
Lint Filter
16) Demo will be done only on demand.
Building No-1, Okhla Industrial Estate, Phase III, New Delhi-20
Ph: 011-39496000, 30674000. Fax : 011-30674088, Website : www.haier.com/in
P. Limited,
Building No-1, Okhla Industrial Estate, Phase III, New Delhi-110020
Tel. : 011-39496000, 30674000. Fax : 011-30674088,
Website : www.haier.com/in
P. Limited,