USER INFORMATION BOOKLET
Your safety will be improved if you train yourself how to use your lifejacket. Please
read these instructions and practice donning and using the lifejacket in the water.
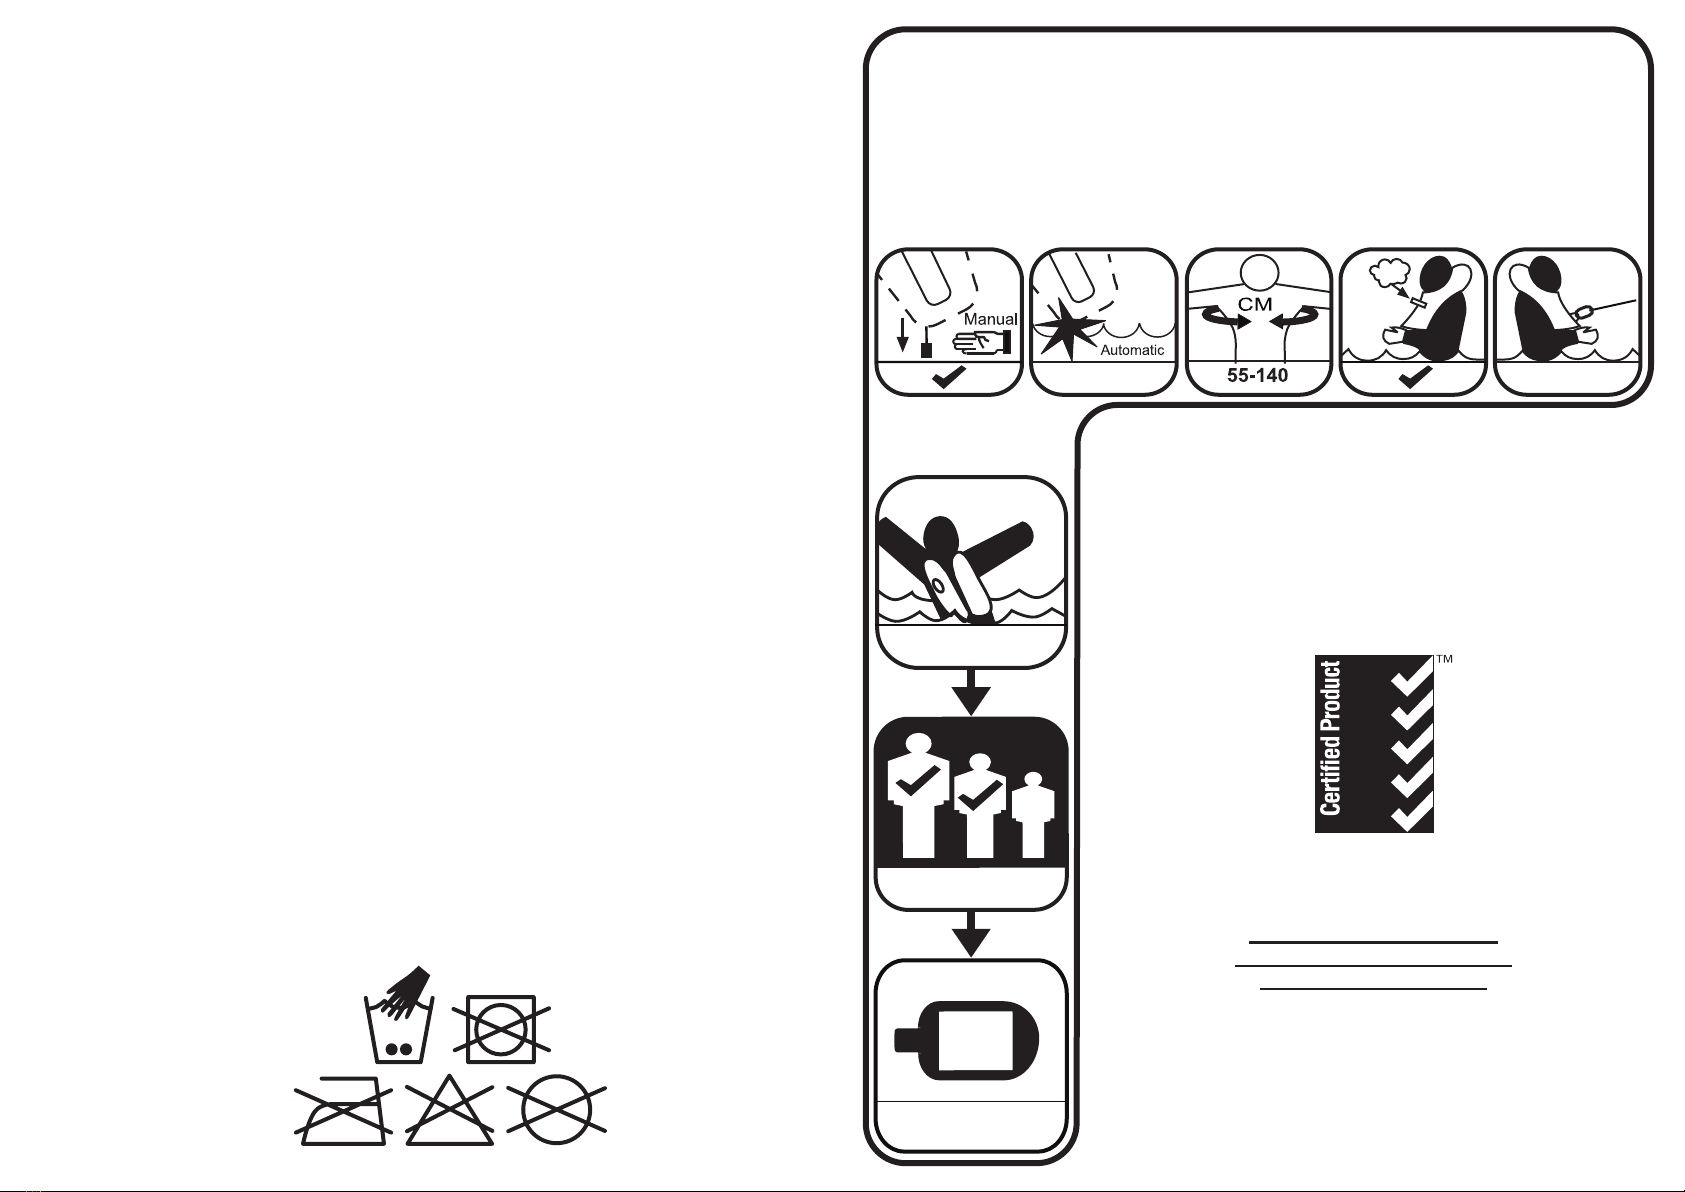
IN USE INSTRUCTIONS
• Compatible with safety harness.
• If entering the water with the lifejacket inated, arms should be crossed over the
jacket;
• Blow into the whistle to attract attention. If tted, light will activate upon immersion in
water;
• Always dry thoroughly after use;
• This is only a lifejacket when fully inated and when inated turns an unconscious
person face upwards with the mouth well clear of the water.
PRE-WEAR CHECK
1. Visually inspect for damage.
2. Check CO2 Cylinder is full and screwed in tight;
3. Ensure plunger cap (5) is screwed up tightly and that green button (6) is clearly
visible.
4. Check that the handle (1) is visible when donned.
CARE AND MAINTENANCE
The life of this lifejacket will be prolonged if routine maintenance is carried out at
least annually. Care & Maintenance intervals commence from date of purchase and
are as follows:
1. Rinse in fresh water, particularly if it is used in salt water. If oil, dirt or debris are
evident wash in soapy water. Automatic model: Remove the plunger cap (5) and
bobbin (4) rst. Dry before repacking - do not dry in excessive or direct heat.
2. Check CO2 Cylinder for corrosion and nozzle has not been punctured or marked by
ring needle.
3. Check for signs of excessive abrasion. Check webbing, stitching and buckles.
4. In commercial use, replace the ring bobbin (4) annually. In recreational use every
three years.
5. Ensure the date of manufacture is less than 2 years from the date of purchase,
otherwise replace ring bobbin.
6. Check the bladder by inating orally and leaving overnight. If the bladder leaks or is
damaged return to an approved service agent - never try to repair yourself. A record
of servicing should be made in the service grid on the lifejacket.
DONNING
Split Front Style: Put on as a jacket. Make sure front buckle is fully closed and secure.
Adjust belt to a snug t.
Pouch Style: Put on as a waist belt with jacket at front. Adjust to a snug t. When
required pull bladder overhead.
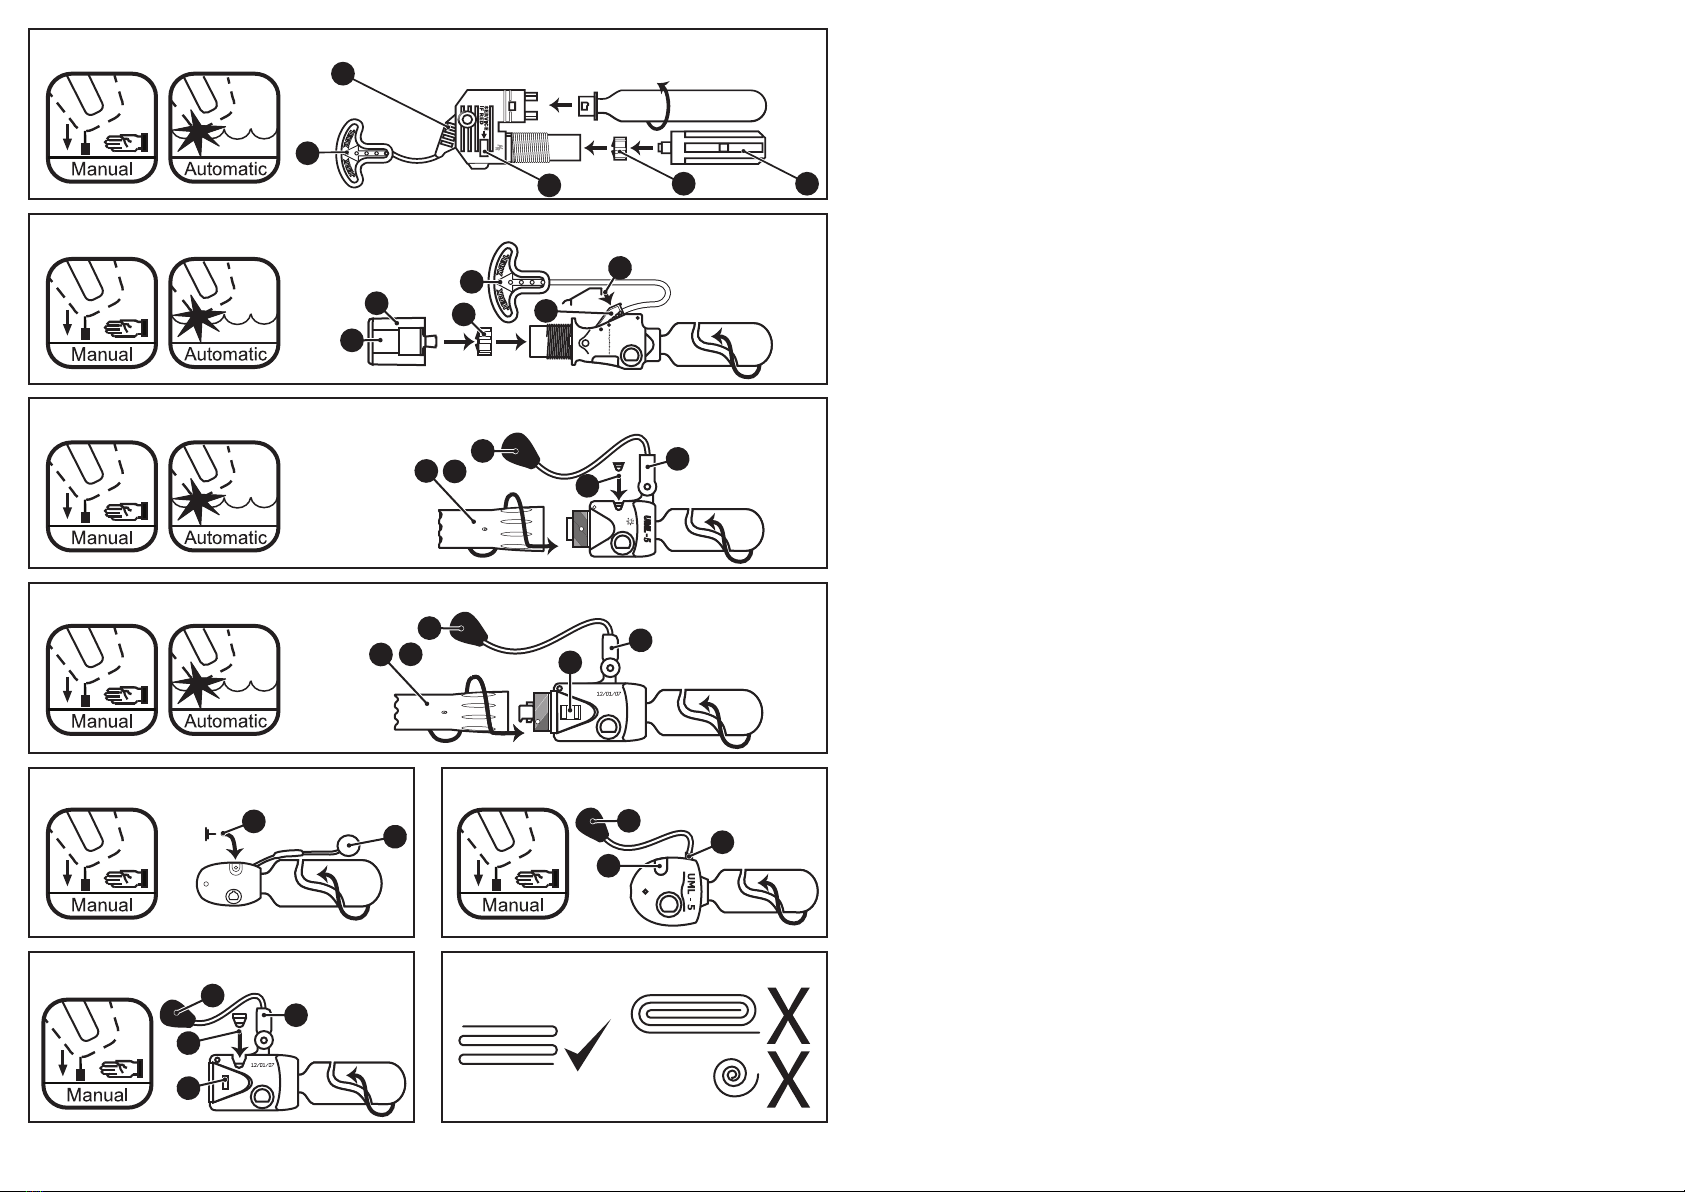
RE-ARMING THE LIFEJACKET
1. Make sure the lever (3) is in the upright position.
2. Push in coloured clip (2) to retain lever.
3. Check cylinder sealing washer is in good condition.
4. Firmly screw in the CO2cylinder.
Automatic only:
Undertake in dry conditions with dry hands.
5. Place the ring bobbin (4) into the mechanism (the slots on the HR Super Bobbin
ensure correct tting).
6. Firmly screw plunge cap (5) into place. Ensure the green button (6) is clearly visible.
Only use CO2 cylinders and bobbins as specied on the lifejacket and supplied by an
approved retailer or service station.
2
1
CO2
4
Halkey Roberts® Pro1F Inator
United Moulders Automatic Inator
United Moulders Pro Sensor Inator
Halkey Roberts®Alpha® Inator
Halkey Roberts® Manual Inator
United Moulders Pro Manual Inator
( )
( )
3
1
6 4 5
6
5
1
43
2
54
1
2
3
5 4
1
6
3
United Moulders Manual Inator
2 11
1
2
3
3
2
6
Repacking