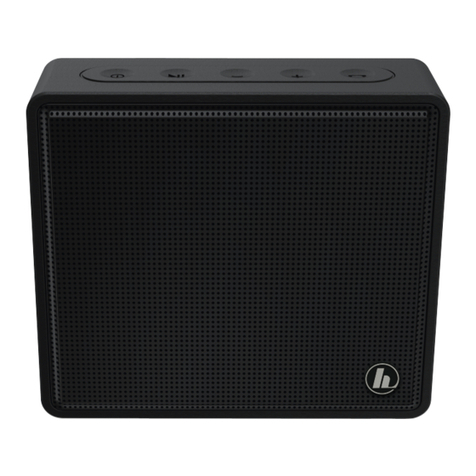
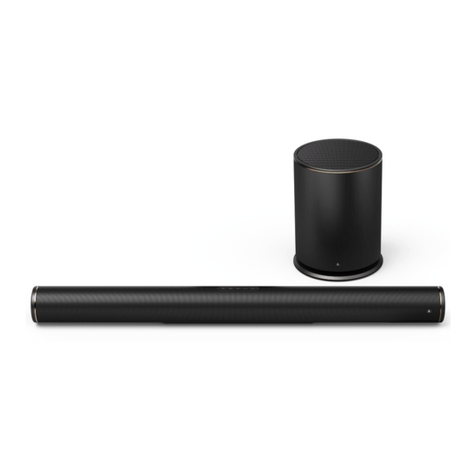
Hama 113776 User manual

uRage SoundZbar 2.1 Unleashed
E
CZ
F
D
GB
I
P
NL
TR
GR
H
FIN
PL
S
RUS
SK
Operating Instructions
Bedienungsanleitung
Manual de utilizare
Mode d‘emploi
Instrucciones de uso
Руководство по эксплуатации
Istruzioni per l‘uso
Gebruiksaanwijzing
Οδηγίες χρήσης
Instrukcja obsługi
Használati útmutató
Návod kpoužití
Návod na použitie
Manual de instruções
Kullanma kılavuzu
Bruksanvisning
Käyttöohje
Работна инструкция BG
RO
00
113776


B
2
134
w
C
1
2
3
A7
SOURCE MODE PAIR
8910 11 12 13
1
2
3
46
5

6
GOperating instruction
Controls and Displays SoundZbar
1. [POWER]
2. [SOURCE] for selecting the input mode
3. [MODE] for selecting the sound mode
4. [PAIR] for interrupting the Bluetooth connection
5. NFC interface
6. []Mute switch
7. VOL +/-
8. Optical input status LED
9. AUX status LED
10. Bluetooth status LED
11. Gaming mode status LED
12. Music mode status LED
13. Cinema mode status LED
B. SoundZbar rear
1. Optical In socket
2. AUX In socket
3. Charging status LED
4. Mains lead/DC-IN
C. Subwoofer
1. On/off switch
2. Bass rotary control
3. Status LED for connection between subwoofer and
SoundZbar
Thank you for choosing aHama product.
Take your time and read the following instructions and
information completely.Please keep these instructions
in asafe place for futurereference. If you sell the
device, please pass these operating instructions on to
the new owner.
1. Explanation of Warning Symbols and Notes
Risk of electric shock
This symbol indicates product parts energized with
adangerous voltage of sucient magnitude to
constitute arisk of electric shock.
Warning
This symbol is used to indicate safety instructions or
to draw your attention to specichazards and risks.
Note
This symbol is used to indicate additional information
or important notes.
2. Explanation of product marking symbols
•The product is intended for indoor use only.
•Electrical appliance Class II (double insulated).
3. Package Contents
•SoundZbar
•Subwoofer
•3.5-mm audio cable
•Power supply adapter
•These operating instructions
4. Safety Notes
•The product is intended for private, non-commercial
use only.
•Do not use the product in the immediate vicinity of
heaters or other heat sources or in direct sunlight.
•Protect the product from dirt, moistureand
overheating, and only use it in adry environment
•Keep this product, as all electrical products, out of the
reach of children!
•Do not drop the product and do not expose it to any
major shocks.
•Do not operate the product outside the power limits
given in the specications.
•Donot use the product in areas wherethe use of
electronic devices is not permitted.
•Be considerate. Loud volumes can have adetrimental
effect on your surroundings.
•Do not open the device or continue to operate it if it
becomes damaged.
•Since the battery is integrated and cannot be
removed, you will need to dispose of the product
as awhole. Do this in compliance with the legal
requirements.
•Keep the packaging material out of the reach of
children due to the risk of suffocation.
•Dispose of packaging material immediately according
to locally applicable regulations.
•Do not modify the product in any way.Doing so voids
the warranty.
•Do not expose the product to dripping or splashing
liquids and do not place objects lled with liquids, e.g
vases, on the product.

7
Risk of electric shock
•Do not open the device or continue to operate it if
it becomes damaged.
•Do not use the product if the AC adapter,adapter
cable or power cable is damaged.
•Do not attempt to service or repair the product
yourself.Leave any and allservice work to qualied
experts.
5. Startup and Operation
Note
•The product is mains or battery operated. Formains
operation, you merely have to connect the product
to the mains supply (see Section 5). Forbattery
operation, the product must rst be fully charged
(see Section 14).
Warning
•Connect the product only to asocket that has
been approved for the device. The socket must be
installed close to the product and must be easily
accessible.
•Disconnect the product from the network using the
power button –ifthis is not available, unplug the
power cordfromthe socket.
•The electrical socket must always be easily
accessible.
•If you will not be using the product for along
period of time, disconnect it from mains power.
•Connect the power cables of the SoundZbar and the
subwoofer to properly installed power sockets.
•Press [POWER](1) to switch on the SoundZbar.
•Press the on/off switch (1) to switch on the subwoofer.
•The connection status LED (3) on the subwoofer
begins to ash blue.
Note –Turning the radio on for the rst time
•The SoundZbar and subwoofer,once switched
on, will automatically connect to one another via
Bluetooth.
•After successful connection, the connection status
LED (3) on the subwoofer is constantly lit blue.
6. Bluetooth pairing
Youcan pair your terminal device with the SoundZbar
via Bluetooth and use the SoundZbar as aplayback
device for audio signals.
Note –
Bluetooth®
•Check whether your mobile device (smartphone,
tablet PC. etc.) is Bluetooth capable.
•Note that the maximum range for Bluetooth is 10
metres without obstacles such as walls, people,
etc.
•The Bluetooth connection may be disrupted by
other Bluetooth devices/ connections in the vicinity.
•It is only possible to connect the SoundZbar to one
terminal device.
•Note that compatibility depends on the supported
Bluetooth proles as well as the Bluetooth versions
being used. (see Technical Data, operating
instructions of the terminal device in use)
•Make surethat your Bluetooth capable terminal
device is on and Bluetooth is activated.
•Activate the Bluetooth mode by repeatedly pressing
[SOURCE](2) on the SoundZbar.
•The status LED for the Bluetooth connection (10)
begins to ash blue.
•Open the Bluetooth settings on your terminal device
and wait until uRage SoundZbar appears in the list of
Bluetooth devices found.
•Select the uRage SoundZbar in the list of available
devices and wait until the SoundZbar is shown as
connected in the Bluetooth settings on your terminal
device. The status LED for the Bluetooth connection
(10) is now constantly lit blue.
•Start and control audio playback using the controls of
the terminal device.

8
Note –
Bluetooth®password
•Some terminal devices requireapasswordinorder
to connect to another Bluetooth device.
•If your terminal device requests apasswordfor
connection to the radio, enter 0000.
7. Bluetooth pairing via NFC
•Make surethat NFC is supported by your smartphone
and activated.
•Activate the Bluetooth mode by repeatedly pressing
[SOURCE](2) on the SoundZbar.
•The status LED for the Bluetooth connection (10)
begins to ash blue.
•Touch the NFC interface (5) on the SoundZbar with
your smartphone.
•The status LED for the Bluetooth connection (10) is
now constantly lit blue.
•Start and control audio playback using the controls of
the terminal device.
8. Terminate Bluetooth connection
•Press and hold [PAIR](4) for about 2seconds to
terminate the Bluetooth connection to your terminal
device.
•The SoundZbar can now be connected to another
terminal device (see Section 5).
9. Connection via Auxiliary Input
Youcan use the AUX analogue audio input to connect
various terminal devices (for example, game console,
smartphone, tablet PC, MP3 player,etc.) as well as
older analogue sources (CD/DVD player etc.) to the
SoundZbar and play their audio signals using the
SoundZbar.
Note
•Switch off the SoundZbar beforeconnecting a
terminal device.
•Do not bend or crush the cable.
•Connect your terminal device to the AUX socket (2)
on the SoundZbar using the included 3.5-mm audio
cable (jack cable).
•Press [POWER](1) to switch on the SoundZbar.
•Activate the AUX mode by repeatedly pressing
[SOURCE](2) on the SoundZbar.
•The status LED for the AUX mode (9) is constantly lit.
•Start and control audio playback using the controls of
the terminal device.
10. Connection via optical audio cable
Youcan use the SoundZbar’sdigital audio input to
connect your terminal device (for example, game
console, TV set, etc.) and play its audio signals using
the SoundZbar.
Note
•Switch off the SoundZbar beforeconnecting a
terminal device.
•Remove the protective caps from both ends of the
optical signal cable beforeconnection.
•Do not bend or crush the cable.
•Connect one end of the optical signal cable to the
optical audio input (1) on the SoundZbar,the other
end to the optical audio output on your terminal
device.
•Press [POWER](1) to switch on the SoundZbar.
•Activate the OPT mode by repeatedly pressing
[SOURCE](2) on the SoundZbar.
•The status LED for the OPT mode (8) is constantly lit.
•Start and control audio playback using the controls of
the terminal device.
11. Sound modes
Youcan choose between three different modes for the
playback of your audio signals:
Gaming mode activates moretreble and bass for a
better gaming experience.
Music mode activates alinear frequency response for
powerful playback of avariety of music tracks.
Cinema mode activates an effect similar to surround
sound, and brings out every sound detail.
•Press [MODE](3) repeatedly to select the various
sound modes.
•The Gaming mode status LED (11) is constantly lit if
Gaming mode was selected.
•The Music mode status LED (12) is constantly lit if
Music mode was selected.
•The Cinema mode status LED (13) is constantly lit if
Cinema mode was selected.

9
12. Bass control
•Turn the rotary control (2) on the subwoofer to
increase or reduce the bass.
13. Volume control
•Press [VOLUME]+/- (7) on the SoundZbar to increase
or reduce the volume.
•Press [ ](6) to mute the SoundZbar.
14. Using the SoundZbar in battery mode
Warning –Battery
•Use only the included power supply unit for
charging.
•As arule, do not use charging devices that are
defective and do not try to repair them yourself.
•Avoid storing, charging or using batteries in
extreme temperatures.
•When stored over along period of time, batteries
should be charged regularly (at least every three
months).
•The SoundZbar has arechargeable battery.The
battery must be fully charged beforeusing the device
for the rst time.
•Ensurethat the SoundZbar is switched off before
charging.
•Begin charging by connecting the included power
supply unit to the mains lead (4) and to apower
socket.
•The Charging status LED (3) is constantly lit green
during charging.
•It can take up to 4hours to fully charge the battery.
•When the battery is fully charged, the Charging status
LED (3) willgoout.
•Disconnect all cable and mains connections after use.
Hinweis –Charging/battery capacity
•It takes about 3–4 hours to fully charge the battery.
•If the battery charge level is less than 10%, the
Charging status LED (3) ashes redquickly.You will
only receive this information if the SoundZbar is on.
15. Care and Maintenance
Only clean this product with aslightly damp, lint-free
cloth and do not use aggressive cleaning agents.
16. Warranty Disclaimer
Hama GmbH &CoKGassumes no liability and provides
no warranty for damage resulting from improper
installation/mounting, improper use of the product or
from failuretoobserve the operating instructions and/
or safety notes.
17. Service and Support
Please contact Hama Product Consulting if you have
any questions about this product.
Hotline: +49 9091 502-115 (German/English)
Further support information can be found here:
www.hama.com
18. Recycling Information
Note on environmental protection:
After the implementation of the European
Directive 2012/19/EU and 2006/66/EU in the
national legal system, the following applies:
Electric and electronic devices as wellas
batteries must not be disposed of with household
waste. Consumers areobliged by law to return electrical
and electronic devices as wellasbatteries at the end of
their service lives to the public collecting points set up
for this purpose or point of sale. Details to this are
dened by the national law of the respective country.
This symbol on the product, the instruction manual or
the package indicates that aproduct is subject to these
regulations. By recycling, reusing the materials or other
forms of utilising old devices/Batteries, you aremaking
an important contribution to protecting our
environment.
19. Declaration of Conformity
Hereby,Hama GmbH &CoKGdeclares that the
radio equipment type [00113776] is in
compliance with Directive 2014/53/EU.The full
text of the EU declaration of conformity is available at
the following internet address:
www.hama.com->00113776->Downloads.
Frequency band(s)
2.40GHz ~
2.48HGz
Maximum radio-frequency power
transmitted 5mW EIRP

10
20. Technical Data
Bluetooth®
technology
Bluetooth®
v2.1 +EDR
Supported proles A2DP,AVRCP
Frequency for Bluetooth® transfers 2.40GHz ~2.48HGz
Bluetooth®
transfer power Max. 10 dBm
Bluetooth®
range 10 m
Maximum number of paired devices 1
Performance
Sound system 2.1
Frequency SoundZbar frequency range: 160–20000 Hz
Subwoofer frequency range: 20–160 Hz
Max. music output
Total 100 W
SoundZbar 40 W
Subwoofer 60 W
Impedance 6 Ω
Distortion (THD) ≤0.5% (1K, 1W)
Connections
3.5-mm stereo plug AUX input
Optical input
Power input
Power supply 230 V~50Hz0.4 A
SoundZbar battery
Battery type 7.4 VLi-ion min. 2550 mAh /18.87 Wh
Charging time ~3-4h
Operating time
Via Bluetooth ~7h
Via AUX ~12h
(depending on volume and audio content)
Dimensions (W xDxH)/Weight
Weight
Total 5.1 kg
SoundZbar 1.3kg
Subwoofer 3.8kg
Dimensions SoundZbar 485 x68x72mm
Subwoofer 250 x270 x250 mm

11
DBedienungsanleitung
A. Bedienungselemente und Anzeigen SoundZbar
1. [POWER]
2. [SOURCE] für Wahl des Eingangsmodus
3. [MODE] für Wahl des Soundmodus
4. [PAIR] für Unterbrechen der Bluetooth Verbindung
5. NFC Schnittstelle
6. []Stummschaltung
7. VOL +/-
8. Status-LED Optischer Eingang
9. Status-LED AUX
10. Status-LED Bluetooth
11. Status-LED Gaming Modus
12. Status-LED Musik Modus
13. Status-LED Cinema Modus
B. Rückseite SoundZbar
1. Optical In Buchse
2. AUX In Buchse
3. Status-LED Laden
4. Netzzuleitung/DC-IN
C. Subwoofer
1. Ein-/Ausschalter
2. Drehregler Bass
3. Status-LED Verbindung Subwoofer und SoundZbar
Vielen Dank, dass Sie sich für ein Hama Produkt
entschieden haben!
Nehmen Sie sich Zeit und lesen Sie die folgenden
Anweisungen und Hinweise zunächst ganz durch.
Bewahren Sie diese Bedienungsanleitung anschließend an
einem sicheren Ort auf,umbei Bedarf darin nachschlagen
zu können. Sollten Sie das Gerät veräußern, geben Sie diese
Bedienungsanleitung an den neuen Eigentümer weiter.
1. Erklärung von Warnsymbolen und Hinweisen
Gefahr eines elektrischen Schlages
Dieses Symbol weist auf eine Berührungsgefahr mit nicht
isolierten Teilen des Produktes hin, die möglicherweise
eine gefährliche Spannung von solcher Höhe führen,
dass die Gefahr eines elektrischen Schlags besteht.
Warnung
Wirdverwendet, um Sicherheitshinweise zu
kennzeichnen oder um Aufmerksamkeit auf
besondereGefahren und Risiken zu lenken.
Hinweis
Wirdverwendet, um zusätzlich Informationen oder
wichtige Hinweise zu kennzeichnen.
2. Erklärung von Symbolen der
Produktkennzeichnung
•Das Produkt ist nur für den Gebrauch
innerhalb von Gebäuden vorgesehen.
•Elektrisches Gerät der Schutzklasse II
(doppelt isoliert).
3. Packungsinhalt
•SoundZbar
•Subwoofer
•3.5 mm Audiokabel
•Netzadapter
•diese Bedienungsanleitung
4. Sicherheitshinweise
•Das Produkt ist für den privaten, nicht-gewerblichen
Haushaltsgebrauch vorgesehen.
•Betreiben Sie das Produkt nicht in unmittelbarer Nähe
der Heizung, anderer Hitzequellen oder in direkter
Sonneneinstrahlung.
•Schützen Sie das Produkt vor Schmutz, Feuchtigkeit
und Überhitzung und verwenden Sie es nur in
trockenen Umgebungen.
•Dieses Produkt gehört, wie alle elektrischen Produkte,
nicht in Kinderhände!
•Lassen Sie das Produkt nicht fallen und setzen Sie es
keinen heftigen Erschütterungen aus.
•Betreiben Sie das Produkt nicht außerhalb
seiner in den technischen Daten angegebenen
Leistungsgrenzen.
•Benutzen Sie das Produkt nicht in Bereichen, in denen
elektronische Produkte nicht erlaubt sind.
•Nehmen Sie Rücksicht. Hohe Lautstärken können ihre
Umgebung stören oder beeinträchtigen.
•Öffnen Sie das Produkt nicht und betreiben Sie es bei
Beschädigungen nicht weiter.
•Der Akku ist fest eingebaut und kann nicht entfernt
werden, entsorgen Sie das Produkt als Ganzes gemäß
den gesetzlichen Bestimmungen.
•Halten Sie Kinder unbedingt von dem
Verpackungsmaterial fern, es besteht
Erstickungsgefahr.
•Entsorgen Sie das Verpackungsmaterial sofort gemäß
den örtlich gültigen Entsorgungsvorschriften.
•Nehmen Sie keine Veränderungen am
Produkt vor.Dadurch verlieren Sie jegliche
Gewährleistungsansprüche.
•Halten Sie das Produkt von tropfenden oder
spritzenden Flüssigkeiten fern und platzieren Sie keine
mit Flüssigkeiten gefüllten Gegenstände, z.B. Vasen,
auf dem Produkt.

12
Gefahr eines elektrischen Schlages
•Öffnen Sie das Produkt nicht und betreiben Sie es
bei Beschädigungen nicht weiter.
•Verwenden Sie das Produkt nicht, wenn der AC-
Adapter,das Adapterkabel oder die Netzzuleitung
beschädigt sind.
•Versuchen Sie nicht, das Produkt selbst zu warten
oder zu reparieren. Überlassen Sie jegliche
Wartungsarbeit dem zuständigen Fachpersonal.
5. Inbetriebnahme und Betrieb
Hinweis
•Sie haben die Möglichkeit, das Produkt im
Netzbetrieb und im Akkubetrieb zu nutzen. Um
das Produkt im Netzbetrieb zu nutzen, muss diese
lediglich an das Stromnetz angeschlossen werden
(siehe Kapitel 5).Um das Produkt im Akkubetrieb zu
nutzen, muss diese vorher vollständig aufgeladen
werden (siehe Kapitel 14).
Warnung
•Betreiben Sie das Produkt nur an einer dafür
zugelassenen Steckdose. Die Steckdose muss in
der Nähe des Produktes angebracht und leicht
zugänglich sein.
•Trennen Sie das Produkt mittels des Ein-/
Ausschalters vom Netz –wenn dieser nicht
vorhanden ist, ziehen Sie die Netzleitung aus der
Steckdose.
•Achten Sie bei Mehrfachsteckdosen darauf,dass
die angeschlossenen Verbraucher die zulässige
Gesamtleistungsaufnahme nicht überschreiten.
•Trennen Sie das Produkt vom Netz, wenn Sie es
längereZeit nicht benutzen.
•Verbinden Sie die Netzkabel der SoundZbar und
des Subwoofers mit ordnungsgemäß installierten
Steckdosen.
•Drücken Sie [POWER](1), um die SoundZbar
einzuschalten.
•Drücken Sie den Ein-/Ausschalter (1), um den
Subwoofer einzuschalten.
•Die Status-LED der Verbindung (3) am Subwoofer
beginnt blau zu blinken.
Hinweis –beim ersten Einschalten
•Nach dem Einschalten verbinden sich die
SoundZbar und der Subwoofer automatisch über
Bluetooth miteinander.
•Nach erfolgreicher Verbindung leuchtet die Status-
LED der Verbindung (3) am Subwoofer dauerhaft
blau.
6. Bluetooth Erstverbindung (Pairing)
Via Bluetooth können Sie IhreEndgeräte mit der
SoundZbar verbinden und diese als Wiedergabegerät
für Audiosignale nutzen.
Hinweis –
Bluetooth®
•Prüfen Sie, ob Ihr mobiles Endgerät (Smartphone,
Tablet-PC, etc.) Bluetooth-fähig ist.
•Beachten Sie, dass die Reichweite von Bluetooth
max. 10 Meter beträgt, ohne Hindernisse wie
Wände, Personen, etc.
•Es kann vorkommen, dass die Verbindung durch
weitereBluetooth Geräte/ Verbindungen in der
Umgebung gestört wird.
•Die SoundZbar kann immer nur mit einem
Endgerät gekoppelt werden.
•Beachten Sie, dass die Kompatibilität von den
unterstützten Bluetooth Proen sowie der
verwendeten Bluetooth Versionen abhängig ist.
(siehe: Technische Daten, Bedienungsanleitung des
verwendeten Endgeräts)
•Stellen Sie sicher,dass Ihr Bluetooth fähiges Endgerät
eingeschaltet ist und dass Bluetooth aktiviert ist.
•Aktivieren Sie durch wiederholtes Drücken von
[SOURCE](2) auf der SoundZbar den Bluetooth
Modus.
•Die Status-LED der Bluetooth Verbindung (10) beginnt
blau zu blinken.
•Öffnen Sie die Bluetooth Einstellungen auf Ihrem
Endgerät und warten Sie, bis in der Liste der
gefundenen Bluetooth Geräte uRage SoundZbar
angezeigt wird.
•Wählen Sie die SoundZbar uRage SoundZbar in der
Liste der verfügbaren Geräte aus und warten Sie,
bis die SoundZbar als verbunden in den Bluetooth
Einstellungen Ihres Endgerätes angezeigt wird.
•Die Status-LED der Bluetooth Verbindung (10)
leuchtet nun dauerhaft blau.
•Starten und steuern Sie die Audiowiedergabe
entsprechend über das Endgerät.

13
Hinweis –
Bluetooth®
Passwort
•Manche Endgeräte benötigen für die Einrichtung
der Verbindung mit einem anderen Bluetooth
Gerät ein Passwort.
•Geben Sie für die Verbindung mit dem Radio das
Passwort 0000 ein, wenn Sie zur Eingabe von
Ihrem Endgerät aufgefordert werden.
7. Bluetooth Erstverbindung (Pairing) über NFC
•Stellen Sie sicher,dass NFC von Ihrem Smartphone
unterstützt wirdund aktiviert ist.
•Aktivieren Sie durch wiederholtes Drücken von
[SOURCE](2) auf der SoundZbar den Bluetooth
Modus.
•Die Status-LED der Bluetooth Verbindung (10) beginnt
blau zu blinken.
•Berühren Sie mit Ihrem Smartphone die NFC
Schnittstelle (5) an der SoundZbar.
•Die Status-LED der Bluetooth Verbindung (10)
leuchtet nun dauerhaft blau.
•Starten und steuern Sie die Audiowiedergabe
entsprechend über das Endgerät.
8. Bluetooth Verbindung trennen
•Drücken und halten Sie [PAIR](4) für ca. 2Sekunden,
um die Bluetooth Verbindung zu Ihrem Endgerät zu
trennen.
•Die SoundZbar kann nun mit einem anderen Endgerät
verbunden werden. (siehe Kapitel 5)
9. Verbindung über Auxiliary Input
Über den analogen Audioeingang AUX können Sie
zahlreiche Endgeräte (z.B. Spielkonsole, Smartphone,
Tablet PC, MP3-Player,etc.) sowie ältereanaloge
Quellen (CD-/DVD-Player etc.) an die SoundZbar
anschließen und deren Audiosignal über die SoundZbar
wiedergeben.
Hinweis
•Schalten Sie die SoundZbar aus, bevor Sie ein
Endgerät daran anschließen.
•Knicken und quetschen Sie das Kabel nicht.
•Verbinden Sie Ihr Endgerät über die AUX Buchse
(2) mittels des beiliegenden 3,5mm Audiokabels
(Klinkenkabel) mit der SoundZbar.
•Drücken Sie [POWER](1), um die SoundZbar
einzuschalten.
•Aktivieren Sie durch wiederholtes Drücken von
[SOURCE](2) auf der SoundZbar den AUX-Modus.
•Die Status-LED des AUX-Modus (9) leuchtet
dauerhaft.
•Starten und steuern Sie die Audiowiedergabe
entsprechend über das Endgerät.
10. Verbindung über Optisches Audiokabel
Über den digitalen Audioeingang der SoundZbar
können Sie Ihr Endgerät (z.B. Spielkonsole, TV-Gerät
etc.) anschließen und dessen Audiosignal über die
SoundZbar wiedergeben.
Hinweis
•Schalten Sie die SoundZbar aus, bevor Sie ein
Endgerät daran anschließen.
•Entfernen Sie vor dem Anschließen die
Schutzkappen von beiden Enden des optischen
Signalkabels.
•Knicken und quetschen Sie das Kabel nicht.
•Schließen Sie ein optisches Signalkabel am optischen
Audioeingang (1) der SoundZbar und am optischen
Audioausgang Ihres Endgerätes an.
•Drücken Sie [POWER](1), um die SoundZbar
einzuschalten.
•Aktivieren Sie durch wiederholtes Drücken von
[SOURCE](2) auf der SoundZbar den OPT-Modus.
•Die Status-LED des OPT-Modus (8) leuchtet
dauerhaft.
•Starten und steuern Sie die Audiowiedergabe
entsprechend über das Endgerät.
11. Soundmodi
Für die Wiedergabe Ihrer Audiosignale haben Sie die
Wahl zwischen drei verschiedenen Modi:
Der Gaming Modus aktiviert zusätzlich mehr Höhen
und Tiefen für ein besseres Gaming-Erlebnis.
Der Musik Modus aktiviert einen linearen
Frequenzgang, um eine Vielfalt an Musikstilen kraftvoll
abspielen zu können.
Der Cinema Modus aktiviert einen raumklangähnlichen
Effekt, womit sich jedes klangliche Detail wahrnehmen
lässt.
•Drücken Sie wiederholt [MODE](3), um die
verschiedenen Soundmodi zu wählen.
•Die Status-LED (11) des Gaming Modus leuchtet
dauerhaft, wenn der Gaming-Modus gewählt wurde.
•Die Status-LED (12) des Musik Modus leuchtet
dauerhaft, wenn der Musik-Modus gewählt wurde.
•Die Status-LED (13) des Cinema Modus leuchtet
dauerhaft, wenn der Cinema-Modus gewählt wurde.

14
12. Regelung Bass
•Drehen Sie den Drehregler (2) am Subwoofer,umden
Bass zu erhöhen bzw.zuverringern.
13. Regelung Lautstärke
•Drücken Sie [VOLUME]+/- (7) an der SoundZbar,um
die Lautstärke zu erhöhen/zu verringern.
•Drücken Sie [ ](6), um die SoundZbar stumm zu
schalten.
14. Nutzung der SoundZbar im Akkubetrieb
Warnung –Akku
•Verwenden Sie nur das beiliegende Netzteil zum
Auaden.
•Verwenden Sie defekte Ladegeräte generellnicht
mehr und versuchen Sie nicht, diese zu reparieren.
•Vermeiden Sie Lagerung, Laden und Benutzung bei
extremen Temperaturen.
•Laden Sie bei längerer Lagerung regelmäßig (mind.
vierteljährig) nach.
•Die SoundZbar verfügt über einen wieder auadbaren
Akku. Vorder ersten Anwendung muss der Akku
vollständig aufgeladen werden.
•Stellen Sie sicher,dass die SoundZbar vor dem
Auaden ausgeschaltet ist.
•Starten Sie den Ladevorgang, indem Sie das
beiliegende Netzteil an die Netzzuleitung (4) und an
eine Steckdose anschließen.
•Die Status-LED Laden (3) leuchtet während des
Ladevorgangs dauerhaft grün.
•Es kann bis zu 4Stundendauern, bis der Akku
vollständig geladen ist.
•Ist der Akku vollständig geladen, erlischt die Status-
LED Laden (3).
•Trennen Sie anschließend alle Kabel- und
Netzverbindungen.
Hinweis –Ladevorgang/ Akkukapazität
•Ein kompletter Ladevorgang dauert ca. 3-4
Stunden.
•Beträgt die Akkukapazität weniger als 10%,
blinkt die Status-LED Laden (3) schnell rot. Diese
Information erhalten Sie nur bei eingeschalteter
SoundZbar.
15. Wartung und Pflege
Reinigen Sie dieses Produkt nur mit einem fusselfreien,
leicht feuchten Tuch und verwenden Sie keine
aggressiven Reiniger.
16. Haftungsausschluss
Die Hama GmbH &Co. KG übernimmt keinerlei
Haftung oder Gewährleistung für Schäden, die
aus unsachgemäßer Installation, Montage und
unsachgemäßem Gebrauch des Produktes oder einer
Nichtbeachtung der Bedienungsanleitung und/oder der
Sicherheitshinweise resultieren.
17. Service und Support
Bitte wenden Sie sich bei Fragen zum Produkt gerne an
die Hama-Produktberatung.
Hotline: +49 9091 502-115 (Deu/Eng)
WeitereSupportinformationen nden Sie hier:
www.hama.com
18. Entsorgungshinweise
Hinweise zum Umweltschutz:
Ab dem Zeitpunkt der Umsetzung der
europäischen Richtlinien 2012/19/EU und
2006/66/EG in nationales Recht gilt folgendes:
Elektrische und elektronische Geräte sowie
Batterien dürfen nicht mit dem Hausmüll entsorgt
werden. Der Verbraucher ist gesetzlich verpichtet,
elektrische und elektronische Geräte sowie Batterien am
Ende ihrer Lebensdauer an den dafür eingerichteten,
öffentlichen Sammelstellen oder an die Verkaufsstelle
zurückzugeben. Einzelheiten dazu regelt das jeweilige
Landesrecht. Das Symbol auf dem Produkt, der
Gebrauchsanleitung oder der Verpackung weist auf
diese Bestimmungen hin. Mit der Wiederverwertung,
der stoichen Verwertung oder anderen Formen der
Verwertung von Altgeräten/Batterien leisten Sie einen
wichtigen Beitrag zum Schutz unserer Umwelt.
19. Konformitätserklärung
Hiermit erklärt die Hama GmbH &CoKG, dass der
Funkanlagentyp [00113776] der Richtlinie
2014/53/EU entspricht. Der vollständige Text der
EU-Konformitätserklärung ist unter der folgenden
Internetadresse verfügbar:
www.hama.com->00113776->Downloads.
Frequenzband/Frequenzbänder
2.40GHz ~2.48HGz
Abgestrahlte maximale
Sendeleistung 5mW EIRP

15
20. Technische Daten
Bluetooth
®Technologie
Bluetooth®
v2.1 +EDR
unterstützte Prole A2DP,AVRCP
Frequenz für die
Bluetooth
®-Übertragungen 2.40GHz ~2.48HGz
Bluetooth
®Übertragungsleistung Max. 10 dBm
Bluetooth
®Reichweite 10 m
Max. gekoppelte Geräte 1
Leistung
Sound System 2.1
Frequenz Frequency range soundZbar :160 -20000 Hz
Frequency range subwoofer: 20 -160 Hz
Max. Musikleistung
total 100 W
soundZbar 40 W
subwoofer 60 W
Impedanz 6 Ω
Verzerrung THD ≤0.5% (1K, 1W)
Anschlüsse
3.5 mm stereo plug AUX input
Optical input
Power Input
Spannungsversorgung 230 V~50Hz0.4 A
Akku SoundZbar
Akkutyp 7.4V Li-Ion min. 2550mAh /18.87Wh
Auadezeit ~3-4h
Laufzeit
via Bluetooth ~7h
via AUX ~12h
(depending on volume and audio content)
Maße(B xTxH)/Gewicht
Gewicht
total 5.1 kg
SoundZbar 1.3kg
Subwoofer 3.8kg
Maße SoundZbar 485 x68x72mm
Subwoofer 250 x270 x250 mm

16
MManual de utilizare
A. Elemente de comandășiafișaje SoundZbar
1. [POWER]
2. [SOURCE] pentru alegereregim intrare
3. [MODE] pentru alegereregim sonor
4. [PAIR] pentru întrerupereconexiune Bluetooth
5. Interfață NFC
6. []Dezactivaresonor
7. VOL +/-
8. LED statut intrareoptică
9. LED statut AUX
10. LED statut Bluetooth
11. LED statut regim Gaming
12. LED statut regim Muzică
13. LED statut regim Cinema
B. Partea din spate SoundZbar
1. RacordOptical In
2. RacordAUX In
3. LED statut încărcare
4. Branșament rețea/DC-IN
C. Subwoofer
1. Comutator pornit/oprit
2. Regulator rotativ bass
3. LED statut conexiune Subwoofer șiSoundZbar
Vămulţumim căaţioptat pentru un produs Hama.
Pentru început vărugămsăvălăsațipuțin timp șisăcitiți
complet următoarele instrucțiuni șiindicații. Vărugămsă
păstraţimanualul de utilizarelaloc sigur pentru oconsultare
ulterioarăîn caz de nevoie. În caz de înstrăinareaaparatului
vărugămsăpredațișiacest manual noului proprietar.
1. Explicarea simbolurilor de avertizare și
indicații
Pericol de electrocutare
Acest simbol semnalizeazăpericol la atingerea cu
componentele neizolate ale produsului, caredatorită
tensiunii înalte indicate, poate duce la electrocutare.
Avertizare
Se folosește la marcarea instrucțiunilor de siguranță
sau la concentrarea atenției în caz de pericol șiriscuri
mari.
Instrucțiune
Se folosește pentru marcarea informațiilor și
instrucțiunilor importante.
2. Explicarea simbolurilor de marcare a
produsului.
•Produsul este conceput numai pentru
utilizarea în interiorul clădirilor.
•Aparat electric cu clasa de protecție II (dublu
izolat).
3. Conținutul pachetului
•SoundZbar
•Subwoofer
•Cablu audio 3.5 mm
•Adaptor rețea
•Acest manual de deservire
4. Instrucțiuni de siguranță
•Produsul este conceput numai pentru utilizareprivată
șinuprofesională.
•Evitaţifolosirea produsului în imediata apropierea
sistemului de încălzire, aaltor surse de căldurăsau în
radiația solarădirectă.
•Protejaţiprodusul de impurităţi, umiditate,
supraîncălzire şiutilizaţi-l numai în mediu uscat.
•Acest aparat, ca de altfel toatăaparaturaelectronică,
nu arececăuta în mâinile copiilor!
•Nu lăsațiprodusul săcadășinuîlsupuneți
trepidațiilor puternice.
•Nu exploataţiprodusul în afaralimitelor de putere
indicate în datele tehnice.
•Nu folosiţiprodusul în zone unde nu sunt admise
aparate electronice.
•Vărugămsăținețicont de aceasta. Intensitatea
ridicatăasonorului poate deranja sau inuența
negativ înprejurimile.
•Nu deschidețiprodusul șinu-l utilizațiîncontinuareîn
caz de deterioare.
•Acumulatorul este montat xșinupoate demontat,
salubrizațiprodusul ca un întreg conform prevederilor
legale.
•Nu lăsațicopiii săse joace cu materialul pachetului,
prezintăpericol de sufocare.
•Reciclarea materialului pachetului se execută
comform normelor locale de salubrizareînvigoare.
•Nu executaţimodicări la aparat. În acest fel pierdeţi
orice drept la garanţie.
•Nu apropiațiprodusul de lichide carepot picurasau
stropi șinuplasațiobiecte umplute cu lichide, de ex.
vaze, pe produs.

17
Pericol de electrocutare
•Nu deschidețiprodusul șinu-l utilizațiîn
continuareîncaz de deteriorare.
•Nu folosițiprodusul dacă
•adaptorul AC,cablul adaptor sau conductorul
rețelei sunt deteriorate.
•Nu încercațisădepanațisau săreparațiprodusul.
Lucrările de reparații se executănumai de personal
de specialitate.
5. Punere în funcțiune şiutilizare
Instrucțiune
•Avețiposibilitatea săutilizațiprodusul atât cu
alimentaredelarețea cât șidelaacumulator.
Pentru alimentaredelarețea produsul trebuie
conectat la orețea de curent (vezi capitolul 5).
Pentru alimentaredelaacumulator acesta trebuie
în prealabil complet încărcat (vezi capitolul 14).
Avertizare
•Exploataţiaparatul numai la oprizăde reţea
aprobatăîn acest sens. Priza trebuie plasatăîn
apropierea produsului șisăeușor accesibilă.
•Oprițialimentarea cu curent aprodusului printr-un
comutator pornit/oprit -dacăacesta nu există
scoatețicablul din priză.
•La prizele multiple trebuie sățiatent ca
consumatorii conectațisănu depășeascăconsumul
puterii totale admisibile.
•Dacănu este folosit timp mai îndelungat produsul
se deconecteazăde la rețea.
•Conectațicablurile de rețea ale SoundZbar-ului și
Subwoofer-ului cu prize instalate regulamentar.
•Pentru pornirea SoundZbar-ului apăsați[POWER](1).
•Pentru pornirea Subwoofer-ului apăsațicomutatorul
pornit/oprit (1).
•LED-ul de statut al conexiunii (3) la Subwoofer începe
sălumineze albastru intermitent.
Indicație -Prima pornire
•DupăpornireSoundZbar-ul șiSubwoofer-ul se
conecteazăreciproc automat prin Bluetooth.
•Dupăconectarea cu succes LED-ul de statut al
conexiunii Subwoofer-ului (3) lumineazăalbastru
continuu.
6. Prima conectare Bluetooth (Pairing)
Via Bluetooth putețisăconectațiaparate nale cu
SoundZbar-ul șiacesta folosit ca aparat de redare
pentru semnale audio.
Instrucțiune –
Bluetooth®
•Vericațidacăaparatul nal mobil (Smartphone,
tabletăPC, etc.) este compatibil Bluetooth.
•Avețiînvederefaptul căraza de acoperire
Bluetooth este de max. 10 m, fărăobstacole
precum pereți, persoane etc.
•Se poate întâmpla ca conexiunea săederanjată
prin alte conexiuni Bluetooth /dealte aparate
Bluetooth .
•SoundZbar-ul poate cuplat întotdeauna numai cu
un aparat nal.
•Compatibilitatea este dependentăde prolele
Bluetooth susținute precum șideversiunile
Bluetooth folosite. (vezi: Date tehnice, Instrucțiuni
de folosireale aparatului utilizat).
•Aparatul nal compatibil Bluetooth trebuie săe
pornit șifuncția Bluetooth activată.
•Pentru activarea regimului Bluetooth la SoundZbar
apăsațirepetat [SOURCE](2).
•LED-ul de statut al conexiunii Bluetooth (10) începe
sălumineze albastru intermitent.
•Deschidețisetările Bluetooth din aparatul nal și
așteptațipânăcând în lista aparatelor Bluetooth
găsite se așeazăuRage SoundZbar.
•Selectațidin listăaparatelor disponibile SoundZbar
uRage SoundZbar șiașteptațipânăcând SoundZbar
este așat în setările Bluetooth ale aparatului nal ca
ind conectat.
•LED-ul de statut al conexiunii Bluetooth (10)
lumineazăalbastru continuu.
•Pornițișicomandațicorespunzător redarea audio prin
aparatul nal.

18
Instrucțiune –
ParolăBluetooth®
•Pentru congurarea conexiunii cu un alt aparat
Bluetooth unele aparate nale au nevoie de o
parolă.
•Dacăpentru conexiunea cu radio aparatul nal vă
solicităoparolă,introduceți0000.
7. Prima conectare Bluetooth (Pairing) prin NFC
•NSC trebuie săesusținut de Smartphone șiactivat.
•Pentru activarea regimului Bluetooth la SoundZbar
apăsațirepetat [SOURCE](2).
•LED-ul de statut al conexiunii Bluetooth (10) începe
sălumineze albastru intermitent.
•AtingețicuSmartphone-ul interfațaNFC la
SoundZbar.
•LED-ul de statut al conexiunii Bluetooth (10)
lumineazăalbastru continuu.
•Pornițișicomandațicorespunzător redarea audio prin
aparatul nal.
8. Întrerupere conectare Bluetooth
•Pentru întreruperea conectării Bluetooth cu aparatul
nal apăsațicca 2secunde [PAIR](4).
•SoundZbar-ul poate conectat acum cu un alt aparat
nal (vezi capitolul 5).
9. Conectare prin Auxiliary Input
Prin intrarea audio analogicăAUX putețiconecta
numeroase aparate nale (de ex. consolăde joc,
Smartphone, tabletăPC, etc.) precum șisurse analogice
mai vechi (CD/DVD-Player etc.) la SoundZbar șireda
semnalullor audio.
Instrucțiune
•Înaintea conectării unui aparat nal închideți
SoundZbar-ul.
•Nu îndoițişinustriviţicablul.
•Cu ajutorul cablului audio de 3,5 mm livrat (cablu cu
Jack) conectațiaparatul nal prin racordul AUX (2) cu
SoundZbar-ul.
•PornițiSoundZbar-ul prin apăsarepe[POWER](1).
•Pentru activarea regimului AUX la SoundZbar apăsați
repetat [SOURCE](2).
•LED-ul de statut al regimului AUX (9) luminează
continuu.
•Pornițișicomandațicorespunzător redarea audio prin
aparatul nal.
10. Conectare prin cablu audio optic
Prin intrarea audio digitalăputețiconecta aparatul nal
(de ex. consolăde joc, aparat TV,etc.) la SoundZbar și
reda semnalul lor audio.
Instrucțiune
•Înaintea conectării unui aparat nal închideți
SoundZbar-ul.
•Înaintea conectării îndepărtațicalotele de protecție
de la capetele cablului optic de semnale.
•Nu îndoițişinustriviţicablul.)
•Conectațiintrarea opticăaudio (1) de la SoundZbar
cu ieșirea opticăaudio aaparatului nal cu un cablu
optic de semnale.
•PornițiSoundZbar-ul prin apăsarepe[POWER](1).
•Pentru activarea regimului OPT la SoundZbar apăsați
repetat [SOURCE](2).
•LED-ul de statut al regimului OPT (8) luminează
continuu.
•Pornițișicomandațicorespunzător redarea audio prin
aparatul nal.
11. Regim sonor
Pentru redarea semnalelor audio putețialege întretrei
regimuri diferite.
Pentru otrăiremai intensăajocului regimul Gaming
activeazăsuplimentar mai multe înalte șijoase.
Pentru redarea mai puternicăastilurilor muzicale
regimul Muzicăactiveazăocaracteristicăde frecvență
lineară.
Regimul Cinema activeazăun efect aproape stereofonic
prin caresepoate distinge ecaredetaliu al sunetului.
•Pentru alegerea unui regim de sunet apăsațirepetat
[MODE](3).
•Dacăațiales regimul Gaming LED-ul de statut (11)
lumineazăcontinuu.
•Dacăațiales regimul MuzicăLED-ul de statut (12)
lumineazăcontinuu.
•Dacăațiales regimul Cinema LED-ul de statut (13)
lumineazăcontinuu.

19
12. Reglare bass
•Pentru mărirea respectiv micșorarea bassului rotiți
regulatorul rotativ (2) la Subwoofer
13. Reglare volum sonor
•Pentru mărirea respectiv micșorarea volumului sonor
apăsați[VOLUME]+/- (7) la SoundZbar.
•Pentru dezactivarea sonorului la SoundZbar apăsați
[](6).
14. Funcționare SoundZbar cu acumulator
Avertizare–Acumulator
•Pentru încărcaresefolosește exclusiv elementul de
rețea livrat.
•Nu utilizațiîncărcătoaredefecte șinuîncercațisă
le reparați.
•Evitațidepozitarea, încărcarea șiutilizarea la
temperaturi extreme.
•La depozitaremai îndelungatăefectuați
reîncărcarea la intervale regulate (cel puțin
trimestrial).
•SoundZbar-ul este dotat cu un acumulator
reîncărcabil. Înaintea primei folosiri acumulatorul
trebuie complet încărcat.
•DeconectațiSoundZbar-ul înaintea încărcării.
•Pornițiîncărcarea prin conectarea elementului de
rețea livrat la racordul (4) șilaodozăde curent.
•Pe parcursul procesului de încărcareLED-ul de statut
al încărcării (3) lumineazăcontinuu verde.
•Încărcarea completăpoate durapânăla 4ore.
•Când acumulatorul este încărcat complet LED-ul de
statut al încărcării (3) se stinge.
•Întrerupețitoate contactele cablurilor șirețelei.
Instrucțiune –Proces încărcare/
Capacitate acumulator
•Un proces de încărcarecomplet dureazăcca 3-4
ore.
•Dacăcapacitatea acumulatorului scade sub
10% LED-ul de statut al încărcării (3) luminează
intermitent rapid roșu. Aceastăinformație este
primitănumai dacăSoundZbar-ul este pornit.
15. Întreţinere şirevizie
Curățațiacest produs numai cu ocârpăfărăscame,
puțin umedășinufolosițidetergențiagresivi. Avețigrijă
sănu intreapăîn produs.
16. Excludere de garanție
Hama GmbH &CoKGnuîşiasumănici orăspundere
sau garanție pentru pagube cauzate de montarea,
instalarea sau folosirea necorespunzătoareaprodusului
sau nerespectarea instrucțiunilor de folosiresau/șia
instrucțiunilor de siguranță.
17. Service șisuport
Dacăavețiîntrebări adresaţi-văla Hama consultanță
privind produsul.
Hotline: +49 9091 502-115 (Ger./Ang.)
Alte informații de suport găsițiaici:
www.hama.com
18. Informații pentru reciclare
Instrucţiuni pentru protecţia mediului
înconjurător:
Din momentul aplicării directivelor europene
2012/19/EU şi2006/66/EU în dreptul național
sunt valabile următoarele:
Aparatele electrice şielectronice nu pot
salubrizate cu gunoiul menajer.Consumatorul este obligat
conform legii săpredea aparatele electrice șielectronice la
sfârșitul duratei de utilizarelalocurile de colectarepublice
sau înapoi de unde au fost cumpărate.
Detaliile sunt reglementate de cătrelegislaţia țării
respective. Simbolul de pe produs, în instrucţiunile de
utilizaresau pe ambalaj indicăaceste reglementări. Prin
reciclarea, revaloricarea materialelor sau alte forme de
valoricareaaparatelor scoase din uz aducețiocontribuție
importantăla protecția mediului nostru înconjurător.
19. Declarație de conformitate
Prin prezenta, Hama GmbH &CoKG, declară
cătipul de echipamente radio [00113776] este
în conformitate cu Directiva 2014/53/UE. Textul
integral al declarației UE de conformitate este disponibil
la următoarea adresăinternet:
www.hama.com->00113776->Downloads.
Banda (benzile) de frecvențe
2.40GHz ~2.48HGz
Puterea maximă5mW EIRP

20
20. Date tehnice
Tehnologie Bluetooth® Bluetooth®
v2.1 +EDR
Proluri susținute A2DP,AVRCP
Frecvență pentru
transmisia Bluetooth® 2.40GHz ~2.48HGz
Capacitate de transmisie Bluetooth®
Max. 10 dBm
Razăde acțiune Bluetooth®
10 m
Nr max. de aparate cuplate 1
Putere
Sistem de sunet 2.1
Frecvență Gamăde frecvențeSoundZbar :160 -20000 Hz
Gamăde frecvențeSubwoofer: 20 -160 Hz
Max. muzicalămax.
Total 100 W
SoundZbar 40 W
Subwoofer 60 W
Impedanță 6Ω
Distorsiune THD ≤0.5% (1K, 1W)
Racorduri
3.5 mm stereo plug AUX input
Alimentarecutensiune
Power Input
Alimentarecutensiune 230 V~50Hz0.4 A
Acumulator SoundZbar
Tipacumulator 7.4V Li-Ion min. 2550mAh /18.87Wh
Timp încărcare~3-4h
Timp funcționare
via Bluetooth ~7h
via AUX ~12h
(în funcție de volum șiconținutul audio)
Dimensiuni (L xLxÎ)/Greutate
Greutate
Total 5.1 kg
SoundZbar 1.3kg
Subwoofer 3.8kg
Dimensiuni SoundZbar 485 x68x72mm
Subwoofer 250 x270 x250 mm

21
FMode d‘emploi
A.
Éléments de commande et d'affichage SoundZbar
1. [POWER]
2. [SOURCE] pour sélectionner le mode d’entrée
3. [MODE] pour sélectionner le mode sonore
4. [PAIR] pour interromprelaconnexion Bluetooth
5. Interface NFC
6. []Mise en sourdine
7. VOL +/-
8. LED d’état de l’entrée optique
9. LED d’état de la prise AUX
10. LED d’état pour Bluetooth
11. LED d’état du mode jeu
12. LED d’état du mode musique
13. LED d’état du mode cinéma
B. Face arrière de la SoundZbar
1. Entrée optique
2. Entrée AUX
3. LED d’état de charge
4. Alimentation/DC-IN
C. Caisson de graves
1. Interrupteur de mise sous/hors tension
2. Bouton rotatif des basses
3. LED d’état de connexion du caisson de graves et de
la SoundZbar
Nous vous remercions d’avoir choisi un produit Hama.
Veuillez prendreletemps de lirel‘ensemble des
remarques et consignes suivantes. Veuillez conserver
ce mode d‘emploi àportée de main andepouvoir le
consulter en cas de besoin. Transmettez-le au nouveau
propriétaireavec l’appareil le cas échéant.
1. Explication des symboles d‘avertissement et
des remarques
Risque d’électrocution
Ce symbole indique un risque de contact avec des parties
non isolées du produit susceptibles de conduireuncourant
électrique capable de provoquer un risque d‘électrocution.
Avertissement
Ce symbole est utilisé pour indiquer des consignes
de sécurité ou pour attirer votreattention sur des
dangers et risques particuliers.
Remarque
Ce symbole est utilisé pour indiquer des informations
supplémentaires ou des remarques importantes.
2. Explication des symboles d’étiquetage
•Ce produit est destiné àune utilisation
exclusivement àl‘intérieur d‘un bâtiment.
•Appareil électrique appartenant àlaclasse de
protection II (double isolation).
3. Contenu de l‘emballage
•SoundZbar
•Caisson de graves
•Câble audio de 3,5 mm
•Adaptateur secteur
•Mode d'emploi
4. Consignes de sécurité
•Ce produit est destiné àune installation domestique
non commerciale.
•N’utilisez pas le produit àproximité immédiate d‘un
chauffage, d’autres sources de chaleur ou exposé aux
rayons directs du soleil.
•Protégez le produit de toute saleté, humidité,
surchauffe et utilisez-le uniquement dans des locaux
secs.
•Cet appareil, comme tout appareil électrique, doit être
gardé hors de portée des enfants !
•Protégez le produit des secousses violentes et évitez
tout choc ou toute chute.
•N‘utilisez pas le produit en dehors des limites
de puissance indiquées dans les caractéristiques
techniques.
•N‘utilisez pas le produit dans les zones dans
lesquelles l‘utilisation d‘appareils électroniques est
interdite.
•Montrez-vous respectueux des personnes dans votre
environnement. Un volume excessif est susceptible de
déranger les personnes de votreenvironnement ou de
leur porter atteinte.
•Ne tentez pas d‘ouvrir le produit en cas de
détérioration et cessez de l’utiliser.
•La batterie est installée de façon permanente et ne
peut pas êtreretirée ;recyclezleproduit en bloc
conformément aux directives légales.
•Tenez les emballages d‘appareils hors de portée des
enfants, risque d‘étouffement.
•Recyclez les matériaux d’emballage conformément
aux prescriptions locales en vigueur.
•N’apportez aucune modication àl’appareil. Des
modications vous feraient perdrevos droits de
garantie
•Tenez ce produit éloigné de toute goutte ou projection
de liquide et ne placez aucun objet rempli de liquide
(par ex. vase) sur le produit.

22
Risque d’électrocution
•Ne tentez pas d‘ouvrir le produit en cas de
détérioration et cessez de l’utiliser.
•N‘utilisez pas le produit lorsque l‘adaptateur,le
câble de connexion ou le câble d‘alimentation sont
endommagés.
•Ne tentez pas de réparer l’appareil vous-même ni
d’effectuerdes travaux d’entretien. Déléguez tous
travaux d‘entretien àdes techniciens qualiés.
5. Mise en service et fonctionnement
Remarque
•Vous avez la possibilité d’utiliser l‘appareil sur
secteur ou sur batterie. Pour utiliser l‘appareil
sur secteur,celle-ci doit êtrebranchée au réseau
électrique (voir chapitre5). Pour utiliser l‘appareil
sur batterie, la batterie doit êtreentièrement
rechargée au préalable (voir chapitre14).
Avertissement
•Branchez l‘appareil àune prise de courant
appropriée. La prise de courant doit êtresituée
àproximité du produit et doit êtrefacilement
accessible
•Coupez le produit du secteur àl‘aide de
l‘interrupteur -débranchez la prise de courant en
cas d‘absence d‘interrupteur.
•La prise de courant doit êtrefacilement accessible
àtout moment.
•Débranchez l’appareil si vous ne l’utilisez pas sur
une période prolongée.
•Branchez les cordons d’alimentation de la SoundZbar
et du caisson de graves àdes prises correctement
installées.
•Appuyez sur [POWER](1) pour mettrelaSoundZbar
sous tension.
•Appuyez sur l'interrupteur de mise sous/hors tension
(1) pour mettrelecaisson de graves sous tension.
•La LED d’état de connexion (3) du caisson de graves
commence àclignoter en bleu.
Remarque -Premièremise sous tension
•Après leur mise sous tension, la SoundZbar et le
caisson de graves se connectent automatiquement
entreeux via Bluetooth.
•Une fois la connexion réussie, la LED d’état de
connexion (3) du caisson de graves s’allume en
bleu de façon permanente.
6. Première connexion Bluetooth (couplage)
Vous pouvez connecter vos appareils àlaSoundZbar via
Bluetooth et utiliser cette dernièrecomme appareil de
lecturedesignaux audio.
Remarque –
Bluetooth®
•Veuillez contrôler que votreappareil portable
(téléphone portable, etc.) est bien compatible
Bluetooth.
•Veuillez noter que la portée maximale de la
connexion Bluetooth est de 10 mètres sans
obstacles tels que parois, personnes, etc.
•Il est possible que la connexion soit gênée par
d'autres appareils/ d'autres connexions Bluetooth
dans votreenvironnement.
•La SoundZbar ne peut êtrecouplée qu'à un seul
appareil àlafois.
•Veuillez noter que la compatibilité dépend des
prols Bluetooth supportés et des versions
Bluetooth utilisées. (voir: Caractéristiques
techniques, mode d'emploi de l'appareil utilisé)
•Assurez-vous que votreappareil Bluetooth est bien
sous tension et que sa fonction Bluetooth est bien
activée.
•Activez le mode Bluetooth sur la SoundZbar en
appuyant plusieurs fois sur [SOURCE](2).
•La LED d’état de connexion Bluetooth (10) commence
àclignoter en bleu.
•Ouvrez les paramètres Bluetooth de votreappareil,
puis patientez jusqu'à ce que uRage SoundZbar
apparaisse dans la liste des appareils Bluetooth
détectés.
•Sélectionnez uRage SoundZbar dans la liste des
appareils disponibles, puis patientez jusqu’à ce que
cette SoundZbar apparaisse comme étant connectée
dans les paramètres Bluetooth de votreappareil.
•La LED d’état de connexion Bluetooth (10) s’allume
désormais en bleu de façon permanente.
•Vous pouvez démarrer et commander la lectureaudio
via l'appareil connecté.
This manual suits for next models
1
Table of contents
Languages:
Other Hama Speakers manuals

Hama
Hama 99014460 User manual

Hama
Hama R9173116 User manual

Hama
Hama E 300 User manual

Hama
Hama 00173103 User manual

Hama
Hama USB 2.0 / Fire Wire Combo User manual

Hama
Hama SONIC LS-206 User manual

Hama
Hama SOUNDCUP-D User manual

Hama
Hama SNAPDROP User manual

Hama
Hama Easy Line EL-300 User manual

Hama
Hama Sonic Mobil 100 User manual

Hama
Hama AC-150 User manual

Hama
Hama Soundcup-Z User manual

Hama
Hama 00124515-1800173117-19 User manual

Hama
Hama BTL-200 User manual

Hama
Hama E 400 User manual

Hama
Hama 00188200 Installation instructions

Hama
Hama E 200 User manual

Hama
Hama Gentleman-S User manual

Hama
Hama E 500 User manual

Hama
Hama CONES 00173165 User manual