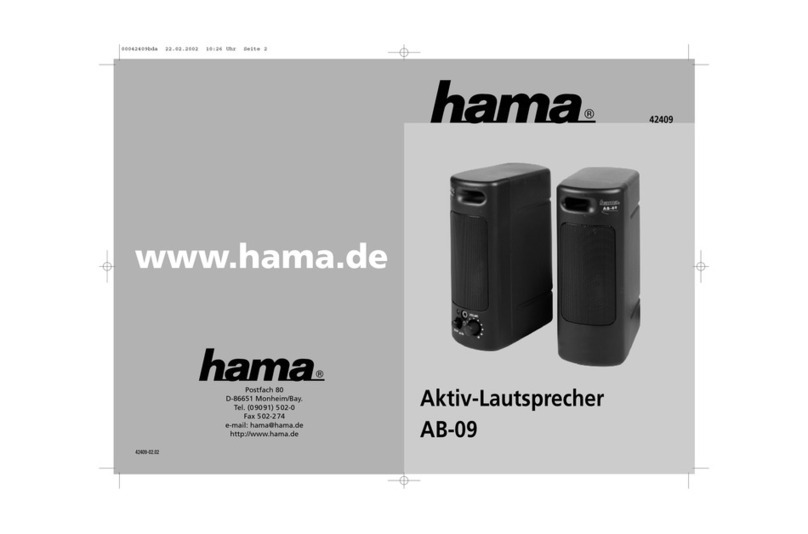
Hama 00173160 User manual

00
173160
Bluetooth
®Speaker + Qi Charger
Bluetooth
®-Lautsprecher + Qi-Ladegerät
E
CZ
F
D
GB
I
P
NL
RO
H
PL
SK
Operating Instructions
Bedienungsanleitung
Mode d‘emploi
Instrucciones de uso
Istruzioni per l‘uso
Gebruiksaanwijzing
Instrukcja obsługi
Használati útmutató
Návod k použití
Návod na použitie
Manual de instruções
Manual de utilizare

Pic. 1
1
2
3
4
9
5
6
7
8
10

Controls and Displays
1. On/off switch
2. AUX-IN input (3.5 mm stereo jack)
3. Micro-USB connection (USB CHARGE)
4. Integrated microphone
5. function button –
6. function button ►
|| (
7. function button +
8. Status LED
9. Qi – charging area
10. NFC connection area
Thank you for choosing a Hama product.
Take your time and read the following
instructions and information completely.
Please keep these instructions in a safe place
for future reference. If you sell the device,
please pass these operating instructions on to
the new owner.
1. Explanation of Warning Symbols
and Notes
Warning
This symbol is used to indicate safety
instructions or to draw your attention to
specic hazards and risks.
Note
This symbol is used to indicate
additional information or important
notes.
2. Package Contents
•
Bluetooth
®speaker + ‘Power Brick’
Qi charger
•Micro-USB charging cable
•3.5 mm audio cable
•These operating instructions
3. Safety Notes
•The product is intended for private, non-
commercial use only.
•Do not use the product in the immediate
vicinity of heaters or other heat sources or
in direct sunlight.
•Keep this product, as all electrical products,
out of the reach of children!
•Do not drop the product and do not expose
it to any major shocks.
•Do not operate the product outside the
power limits given in the specications.
•Do not use the product in areas where the
use of electronic devices is not permitted.
•In order to prevent damage caused by
overheating, make sure the product is not
covered by textiles, metal or other objects.
•Be considerate. Loud volumes can have a
detrimental effect on your surroundings.
•Do not open the device or continue to
operate it if it becomes damaged.
•Since the battery is integrated and cannot
be removed, you will need to dispose of the
product as a whole. Do this in compliance
with the legal requirements.
•Keep the packaging material out of
the reach of children due to the risk of
suffocation.
•Dispose of packaging material immediately
according to locally applicable regulations.
•Do not modify the product in any way.
Doing so voids the warranty.
4. Getting Started and Operation –
Speaker
4.1 Switching the product on and off
•Slide the on/off switch (1) upward to
switch on the speaker. An acoustic signal
will sound and the status LED (8) will light
up briey.
•Slide the on/off switch (1) downward to
switch off the speaker.
Note – Automatic shutdown
Note that the speaker will
automatically switch off after 10
minutes without action (no audio
playback/no
Bluetooth
®function).
4.2 Charging the battery
Warning – Rechargeable battery
•Only use suitable charging devices
with USB connections for charging.
•As a rule, do not use charging
devices or USB connections that are
defective and do not try to repair
them yourself.
•Avoid storing, charging or using
batteries in extreme temperatures.
•When stored for a long period of
time, batteries should be charged
regularly (at least every three
months).
GOperating instruction

•Charge the speaker fully before using it for
the rst time.
•Connect the included Micro-USB charging
cable to the speaker’s Micro-USB port (3).
•Connect the unused connector on the
Micro-USB charging cable to a suitable
USB charger. Please refer to the operating
instructions for the USB charger used.
•The status LED (8) lights up constantly in
red during the charging process.
If the battery is fully charged, the status LED
(8) will go out.
Note – Charging
•It takes approx. 6-7 hours to
completely charge the product.
•The speaker’s battery can be charged
whether the speaker is on or off.
•If the battery capacity is less than
10%, the speaker will emit two
acoustic signals. You will only receive
this information if the speaker is on.
•Depending on the terminal device
connected (
Bluetooth
®), the
speaker’s battery level will appear on
the device.
•The actual battery life varies depending
on use of the device, the settings and the
ambient conditions (rechargeable batteries
have a limited service life).
4.3 Audio playback via the included
audio cable (3.5 mm jack)
•Ensure that the speaker is switched off.
•Connect your mobile terminal device (MP3
player, smartphone, etc.) and the AUX-IN
input (2) of the speaker using the included
3.5 mm audio cable.
•Set the volume on your terminal device to
a low level.
•Switch on the speakers as described in
4.1,
Switching the product on and off.
•Press the function button – (7) to reduce
the volume.
•Press the function button + (5) to increase
the volume.
Note
Please note that you cannot establish the
Bluetooth
®connection described under 4.4
and 4.5 if an audio cable is connected.
4.4
Bluetooth®
pairing
Note
•Check whether your mobile device
(MP3 player, mobile phone, etc.) is
Bluetooth
®capable.
•If not, you can only use the speaker
for playback using the included
audio cable.
•Note that the maximum range for
Bluetooth
®is 10 metres without
obstacles such as walls, people, etc.
•Make sure that your
Bluetooth
®capable
terminal device is on and
Bluetooth®
is
activated.
•Make sure that the speaker is located within
the
Bluetooth
®range of max. 10 metres.
•Switch on the speakers as described in
4.1
Switching the product on and off.
•Press and hold the ►
|| (function button
(6) for approximately 3 seconds until an
acoustic signal sounds and the status LED
(8) ashes continually.
•Open the
Bluetooth®
settings on your
terminal device and wait until PowerBrick
appears in the list of
Bluetooth®
devices
found.
•Select PowerBrick and wait until the
speaker is listed as connected in the
Bluetooth®
settings on your terminal device.
An short acoustic signal conrms that
connection was successful.
•The status LED (8) now remains blue.
Note –
Bluetooth
®password
Some terminal devices require a
password in order to connect to another
Bluetooth
®device.
•If your terminal device requests
a password for connection to the
speaker, enter 0000.

Note – Connection to a new
device
•If you want to connect a new
Bluetooth®
terminal device to the
speaker, press and hold the ►
|| (
function button (6) for approximately
3 seconds until the status LED (8)
begins to ash blue and an acoustic
signal sounds.
•The current connection is
disconnected and the search for new
terminal devices starts.
•The speaker always stores the last
eight terminal devices paired.
•The speaker will automatically
connect to the last terminal device
paired when it is switched on the
next time.
4.5 Automatic
Bluetooth
®connection
(after successful pairing)
•Make sure that your
Bluetooth®
-capable
terminal device is on and
Bluetooth®
is
activated.
•Make sure that the speaker is located within
the
Bluetooth®
range of max. 10 metres.
•Switch on the speaker as described in 4.1
Switching the product on and off.
•After successful connection, the status LED
(8) will light up in blue. An acoustic signal
conrms that connection was successful.
Note – Connection impaired
After the speaker and terminal device
have been paired, a connection
is established automatically. If
the
Bluetooth
®connection is not
established automatically, check the
following:
•Check the
Bluetooth
®settings
of your terminal device to see
whether PowerBrick is connected.
If not, repeat the steps listed under
Bluetooth
®pairing.
•Check whether your terminal device
and the speaker are less than 10
metres apart. If not, move them
closer together.
•Check whether obstacles are
impairing the range. If so, move the
devices closer together.
•Check whether the audio cable is
connected to the speaker. If so,
disconnect it.
4.6 Audio playback (via
Bluetooth
®)
Start and control audio playback on the
connected terminal device accordingly.
Alternatively, audio playback can also be
controlled on the speaker (if the connected
device supports this function).
•Press the ►
|| (function button (6) to start
or pause audio playback.
•Briey press the function button + (5) to
increase the volume.
•Briey press the function button – (7) to
reduce the volume.
•Press and hold the + function button (5) to
jump forward one title.
•Press and hold the – function button (7) to
jump backward one title.
4.7 Hands-free function
You can use the speaker as a hands-free set
for your mobile phone. For this function,
the mobile phone must be connected to the
speaker via
Bluetooth®
.
•Press the function button ►
|| ((6) once to
answer an incoming call.
•Press and hold the function button ►
|| (
(6) for approx. 2 seconds to reject an
incoming call.
•You can put a call on hold by pressing and
holding the ►
|| (function button (6) for
approximately 2 seconds.
•Press and hold the ►
|| (function button (6)
again to continue the call.
•During a call, press the function button
►
|| ((6) once to end the call.
Note – Call quality
To increase the call quality, make sure
that you are near the speaker with your
mobile phone during the call.

5. Operation – Induction Charging
Function (Qi)
Do not put any bank cards or similar
cards with magnetic strips, or other
magnetically sensitive objects, on the
product. The data on the cards could be
damaged or deleted.
Warning – Qi charger
Ensure that there are no metal parts
(for example, metal plate for magnetic
holder) on the back of your terminal
device. Metal may heat up signicantly
in the eld of the induction charger,
causing damage to your terminal device
and/or the charger.
Note
•To be able to charge your terminal
device using the induction charging
function, your terminal device must be
compatible with induction charging
technology. For more information, please
refer to the operating instructions of
your terminal device.
•Note that the presence of mobile
phone cases, covers or other materials
between the induction charging area
and the back of your terminal device
can interfere with charging or even
prevent it.
•The induction charging function can
also be used without an external power
supply; in this case, the battery built into
the speaker is used. The battery should
be fully charged, and the rate at which it
discharges will depend on the number of
functions that are used simultaneously.
•Playback of audio les via
Bluetooth®
or
the included audio cable is not possible
while using the induction charging
function!
•Connect the included Micro-USB cable to
the Micro-USB input (3) on the speaker and
to a suitable USB charger if an external
power supply is available. Please refer
to the operating instructions for the USB
charger used.
•When the power supply is active, the status
LED (8) lights up.
•Lay your terminal device with the back to
the induction charging area (9).
•Charging starts as soon as an effective
induction eld has been generated. The
status LED (8) changes colour. The current
charging status appears on your terminal
device.
•If no connection can be established through
induction, you may have to change the
position of your terminal device (B).
•Charging stops automatically once your
device’s battery is fully charged. The status
LED (8) changes colour.
•Remove your terminal device from the
induction charging area and disconnect the
speaker from the power supply.
6. Operation – NFC Connection
Note
•To be able to connect your terminal
device to the speaker using NFC,
your terminal device must be
compatible with NFC technology.
For more information, please refer
to the operating instructions of your
terminal device.
•Note that the presence of mobile
phone cases, covers or other
materials between the speaker and
the back of your terminal device
can interfere with charging or even
prevent it.
•Note that NFC has a short
transmission range of about 10 cm.
•Switch on the speaker as described in 4.1
Switching the product on and off.
•Make sure that the NFC function on your
terminal device is turned on and the
terminal device is not in lock mode (lock
screen).
•Turn the speaker round and place your
terminal device on the NFC connection area
(10), marked by the NFC symbol on the
speaker’s device label. The status LED (8)
will ash during the connection attempt.

•After a successful NFC connection, the
status LED (8) is constantly lit. The speaker
can be put back in its normal position
and the terminal device placed on the
upper side.
7. Care and Maintenance
•Only clean this product with a slightly
damp, lint-free cloth and do not use
aggressive cleaning agents.
•Make sure that water does not get into
the product.
8. Warranty Disclaimer
Hama GmbH & Co. KG assumes no liability
and provides no warranty for damage resulting
from improper installation/mounting, improper
use of the product or from failure to observe
the operating instructions and/or safety notes.
9. Service and Support
Please contact Hama Product Consulting if you
have any questions about this product.
Hotline: +49 9091 502-115 (German/English)
Further support information can be found
here: www.hama.com
10. Recycling Information
Note on environmental protection:
After the implementation of the
European Directive 2012/19/EU and
2006/66/EU in the national legal
system, the following applies:
Electric and electronic devices as
well as batteries must not be disposed of with
household waste. Consumers are obliged by
law to return electrical and electronic devices
as well as batteries at the end of their service
lives to the public collecting points set up for
this purpose or point of sale. Details to this are
dened by the national law of the respective
country. This symbol on the product, the
instruction manual or the package indicates
that a product is subject to these regulations.
By recycling, reusing the materials or other
forms of utilising old devices/Batteries, you are
making an important contribution to
protecting our environment.
11. Declaration of Conformity
Hama GmbH & Co. KG hereby
declares that the device complies
with the essential requirements and
other relevant provisions of Directive 2014/53/
EU. See www.hama.com for the declaration of
conformity with the relevant directive.

12. Technical Data
Portable
Bluetooth
®speaker
Bluetooth
®technology
Bluetooth
®v4.0 Class II
Supported prolesA2DPV1.2,AVRCPV1.4,HFP V1.6
Frequency forthe
Bluetooth
®transfers 2,402GHz ~ 2,480GHz
Bluetooth
®transferpowerMax. 4dBm
Frequency 180Hz –20 kHz
Range <10 m
Maximum number of paireddevices1
NFC
NFC®-frequency 13.56MHz
Range ≤2.5 cm
NFC®transferPeer-to-Peer
Qi inductioncharger
Input Max. 5V 0,25V1500 mA
Output Max. 5V 0,25V1000 mA
Speaker
Max. musicoutput 10 W
SoundsystemStereo
Impedance 4 Ω
Distortion(THD)≤5%
Dimensions 14,1 x7,5 x 4,9cm
Weight 432 g
Connections 3.5mm stereo plug
AUXinput,Micro-USB forcharging function
Battery
Type 3.7V Li-Ion min.:4400 mAh / 16.28Wh
ChargingvoltageMax. 5V 0,25V900mA
Chargingtime ~ 6 – 7 h
Operating time
Via
Bluetooth
®: ~ 5 h
ViaAUX: ~30 h
Via a combination of
Bluetooth
®and
Qi inductive charging: ~ 2 h
(dependingon volumeandaudiocontent)

Bedienungselemente und Anzeigen
1. Ein-/Ausschalter
2. AUX IN-Eingang (3,5mm Stereoklinke)
3. Micro-USB-Anschluss (USB CHARGE)
4. eingebautes Mikrofon
5. Funktionstaste –
6. Funktionstaste ►
|| (
7. Funktionstaste +
8. Status LED
9. Qi – Ladebereich
10. NFC Verbindungsbereich
Vielen Dank, dass Sie sich für ein Hama
Produkt entschieden haben!
Nehmen Sie sich Zeit und lesen Sie die
folgenden Anweisungen und Hinweise
zunächst ganz durch. Bewahren Sie diese
Bedienungsanleitung anschließend an
einem sicheren Ort auf, um bei Bedarf
darin nachschlagen zu können. Sollten
Sie das Gerät veräußern, geben Sie diese
Bedienungsanleitung an den neuen
Eigentümer weiter.
1. Erklärung von Warnsymbolen und
Hinweisen
Warnung
Wird verwendet, um
Sicherheitshinweise zu kennzeichnen
oder um Aufmerksamkeit auf
besondereGefahrenundRisiken zu
lenken.
Hinweis
Wird verwendet, um zusätzlich
Informationen oder wichtige Hinweise
zu kennzeichnen.
2. Packungsinhalt
•
Bluetooth
®-Lautsprecher + Qi-Ladegerät
„Power Brick“
•Micro-USB Ladekabel
•3,5mm-Audiokabel
•diese Bedienungsanleitung
3. Sicherheitshinweise
•Das Produkt ist für den privaten,
nicht-gewerblichen Haushaltsgebrauch
vorgesehen.
•Betreiben Sie das Produkt nicht in
unmittelbarer Nähe der Heizung,
anderer Hitzequellen oder in direkter
Sonneneinstrahlung.
•Dieses Produkt gehört, wie alle elektrischen
Produkte, nicht in Kinderhände!
•Lassen Sie das Produkt nicht fallen
und setzen Sie es keinen heftigen
Erschütterungen aus.
•Betreiben Sie das Produkt nicht außerhalb
seiner in den technischen Daten
angegebenen Leistungsgrenzen.
•Benutzen Sie das Produkt nicht in
Bereichen, in denen elektronische Produkte
nicht erlaubt sind.
•Achten Sie darauf, dass das Produkt nicht
durch Textilien, Metall- oder sonstige
Gegenstände abgedeckt wird, um Schäden
durch Überhitzung zu vermeiden.
•Nehmen Sie Rücksicht. Hohe Lautstärken
können ihre Umgebung stören oder
beeinträchtigen.
•Öffnen Sie das Produkt nicht und betreiben
Sie es bei Beschädigungen nicht weiter.
•Der Akku ist fest eingebaut und kann
nicht entfernt werden, entsorgen Sie das
Produkt als Ganzes gemäß den gesetzlichen
Bestimmungen.
•Halten Sie Kinder unbedingt von dem
Verpackungsmaterial fern, es besteht
Erstickungsgefahr.
•Entsorgen Sie das Verpackungsmaterial
sofort gemäß den örtlich gültigen
Entsorgungsvorschriften.
•Nehmen Sie keine Veränderungen am
Produkt vor. Dadurch verlieren Sie jegliche
Gewährleistungsansprüche.
4. Inbetriebnahme und Betrieb
Lautsprecher
4.1 Ein-/ Ausschalten
•Schieben Sie den Ein-/Ausschalter (1) nach
oben, um den Lautsprecher einzuschalten.
Es ertönt ein akustisches Signal und die
Status-LED (8) leuchtet kurz auf.
•Schieben Sie den Ein-/Ausschalter (1) nach
unten, um den Lautsprecher auszuschalten.
Hinweis – Automatisches
Ausschalten
Beachten Sie, dass sich der
Lautsprecher nach 10 Minuten ohne
Aktion (keine Audiowiedergabe/ keine
Bluetooth
®Funktion) abschaltet.
DBedienungsanleitung

4.2 Aufladen des Akkus
Warnung – Akku
•Verwenden Sie nur geeignete
Ladegeräte mit USB Anschlüssen
zum Auaden.
•Verwenden Sie defekte Ladegeräte
oder USB Anschlüsse generell nicht
mehr und versuchen Sie nicht, diese
zu reparieren.
•Vermeiden Sie Lagerung, Laden
und Benutzung bei extremen
Temperaturen.
•Laden Sie bei längerer Lagerung
regelmäßig (mind. vierteljährig)
nach.
•Laden Sie vor dem ersten Gebrauch den
Lautsprecher einmal vollständig auf.
•Schließen Sie das mitgelieferte Micro-USB
Ladekabel am Micro-USB Anschluss (3) des
Lautsprechers an.
•Schließen Sie den freien Stecker des
Micro-USB Ladekabels an einem geeigneten
USB Ladegerät an. Beachten Sie hierzu die
Bedienungsanleitung des verwendeten USB
Ladegeräts.
•Die Status-LED (8) leuchtet während des
Ladevorgangs dauerhaft rot.
•Ist der Akku vollständig geladen, erlischt die
Status-LED (8).
Hinweis – Ladevorgang
•Ein kompletter Ladevorgang dauert
ca. 6-7 Stunden.
•Der Akku des Lautsprechers
kann sowohl in ein- als auch
ausgeschaltetem Zustand geladen
werden.
•Beträgt die Akkukapazität weniger
als 10%, ertönt ein 2-faches
Tonsignal. Diese Information
erhalten Sie nur bei eingeschaltetem
Lautsprecher.
•Abhängig vom verbundenen
Endgerät (
Bluetooth
®) wird die
Akkukapazität des Lautsprechers auf
diesem angezeigt.
•Die tatsächliche Akkulaufzeit variiert ja nach
Nutzung des Gerätes, den Einstellungen
und Umgebungsbedingungen (Akkus haben
eine begrenzte Lebensdauer).
4.3 Audiowiedergabe über das
beiliegende Audiokabel
(3.5mm-Klinke)
•Stellen Sie sicher, dass der Lautsprecher
ausgeschaltet ist.
•Verbinden Sie Ihr mobiles Endgerät (MP3-
Player, Smartphone, etc.) und den AUX
IN-Eingang (2) des Lautsprechers mittels
des beiliegenden 3,5mm-Audiokabels.
•Stellen Sie die Lautstärke Ihres Endgerätes
auf ein niedriges Niveau ein.
•Schalten Sie den Lautsprecher - wie in 4.1.
Ein-/ Ausschalten beschrieben – ein.
•Drücken Sie die Funktionstaste – (7), um
die Lautstärke zu reduzieren.
•Drücken Sie die Funktionstaste + (5), um
die Lautstärke zu erhöhen.
Hinweis
•Beachten Sie, dass das Einrichten
einer der unter 4.4. und 4.5.
beschriebenen
Bluetooth
®
Verbindung bei angestecktem
Audiokabel nicht möglich ist.
4.4
Bluetooth
®Erstverbindung
(Pairing)
Hinweis
•Prüfen Sie, ob ihr mobiles Endgerät
(MP3-Player, Mobiltelefon, etc.)
Bluetooth
®fähig ist.
•Wenn nicht, können Sie den
Lautsprecher nur mittels des
beiliegenden Audiokabels zur
Wiedergabe nutzen.
•Beachten Sie, dass die Reichweite
von
Bluetooth
®max. 10 Meter
beträgt, ohne Hindernisse wie
Wände, Personen etc.
•Stellen Sie sicher, dass Ihr
Bluetooth
®
fähiges Endgerät eingeschaltet ist und dass
Bluetooth
®aktiviert ist.
•Stellen Sie sicher, dass der Lautsprecher sich
innerhalb der
Bluetooth
®Reichweite von
max. 10 Metern bendet.
•Schalten Sie den Lautsprecher - wie in 4.1.
Ein-/ Ausschalten beschrieben – ein.
•Drücken Sie ca. 3Sek. die Funktionstaste
►
|| ((6), bis ein akustischen Signal ertönt
und die Status LED (8) dauerhaft blinkt.
•Öffnen Sie auf Ihrem Endgerät die
Bluetooth
®Einstellungen und warten Sie,

bis in der Liste der gefundenen
Bluetooth
®
Geräte PowerBrick angezeigt wird.
•Wählen Sie PowerBrick aus und warten
Sie, bis der Lautsprecher als verbunden
in den
Bluetooth
®Einstellungen Ihres
Endgerätes angezeigt wird. Ein kurzes
akustisches Signal bestätigt die erfolgreiche
Verbindung.
Die Status-LED (8) leuchtet dauerhaft
blau auf.
Hinweis –
Bluetooth
®Passwort
Manche Endgeräte benötigen für die
Einrichtung der Verbindung mit einem
anderen
Bluetooth
®Gerät ein Passwort.
•Geben Sie für die Verbindung mit
dem Lautsprecher das Passwort
0000 ein, wenn Sie zur Eingabe von
Ihrem Endgerät aufgefordert werden.
Hinweis – Verbindung mit
neuem Gerät
•Möchten Sie ein neues
Bluetooth
®
Endgerät mit dem Lautsprecher
verbinden, drücken Sie ca. 3Sek.
die die Funktionstaste ►
|| ((6), bis
die Status-LED (8) blau zu blinken
beginnt und ein akustisches Signal
ertönt.
•Die aktuelle Verbindung wird
getrennt und die Suche nach neuen
Endgeräten gestartet.
•Der Lautsprecher speichert immer die
acht zuletzt gekoppelten Endgeräte.
•Der Lautsprecher verbindet sich beim
nächsten Einschalten automatisch
mit dem zuletzt gekoppelten
Endgerät.
4.5 Automatische
Bluetooth
®
Verbindung (nach bereits
erfolgtem Pairing)
•Stellen Sie sicher, dass Ihr
Bluetooth
®
fähiges Endgerät eingeschaltet ist und dass
Bluetooth
®aktiviert ist.
•Stellen Sie sicher, dass der Lautsprecher sich
innerhalb der
Bluetooth
®Reichweite von
max. 10 Metern bendet.
•Schalten Sie den Lautsprecher - wie in 4.1.
Ein-/ Ausschalten beschrieben – ein.
•Nach erfolgter automatischer Verbindung
leuchtet die Status-LED (8) blau auf. Ein
akustisches Signal bestätigt die erfolgreiche
Verbindung.
Hinweis – Verbindung
beeinträchtigt
Nach einer erfolgreichen Erstverbindung
von Lautsprecher und Endgerät erfolgt
die Verbindung automatisch. Sollte
sich die
Bluetooth
®Verbindung nicht
automatisch wiederherstellen, prüfen
Sie die folgenden Punkte:
•Kontrollieren Sie in den
Bluetooth
®
Einstellungen des Endgerätes, ob
PowerBrick verbunden ist. Wenn
nicht, wiederholen Sie die unter
Bluetooth
®Erstverbindung genannten
Schritte.
•Kontrollieren Sie, ob Endgerät und
Lautsprecher weniger als 10 Meter
voneinander entfernt sind. Wenn
nicht, reduzieren Sie den Abstand
der Geräte.
•Kontrollieren Sie, ob Hindernisse die
Reichweite beinträchtigen. Wenn ja,
positionieren Sie die Geräte näher
zueinander.
•Kontrollieren Sie, ob das Audiokabel
am Lautsprecher gesteckt ist. Wenn
ja, entfernen Sie es.
4.6 Audiowiedergabe (via
Bluetooth
®)
Starten und steuern Sie die Audiowiedergabe
entsprechend auf dem verbundenen Endgerät.
Alternativ lässt sich die Audiowiedergabe auch
vom Lautsprecher aus steuern (sofern vom
verbundenen Gerät unterstützt).
•Drücken Sie die Funktionstaste ►
|| ((6),
um die Audio-Wiedergabe zu starten oder
anzuhalten.
•Drücken Sie kurz die Funktionstaste + (5),
um die Lautstärke zu erhöhen.
•Drücken Sie kurz die Funktionstaste – (7),
um die Lautstärke zu reduzieren.
•Drücken Sie lang die Funktionstaste + (5),
um einen Titelsprung vorwärts zu machen.
•Drücken Sie lang die Funktionstaste – (7),
um einen Titelsprung rückwärts zu machen.

4.7 Freisprechfunktion
Es besteht die Möglichkeit, den Lautsprecher
wie eine Freisprecheinrichtung für Ihr
Mobiltelefon zu verwenden. Das Mobiltelefon
muss für diese Funktion über
Bluetooth
®mit
dem Lautsprecher verbunden sein.
•Drücken Sie einmal die Funktionstaste
►
|| ((6), um einen eingehenden Anruf
anzunehmen.
•Drücken und halten Sie die Funktionstaste
►
|| ((6), für ca. 2 Sekunden, um den
eingehenden Anruf abzuweisen.
•Drücken und halten Sie während des
Gesprächs die Funktionstaste ►
|| ((6) für
ca. 2 Sekunden, um den Anruf zu halten.
•Drücken und halten Sie die Funktionstaste
►
|| ((6) erneut, um den Anruf fortzusetzen.
•Drücken Sie während des Gesprächs einmal
die Funktionstaste ►
|| ((6), um den Anruf
zu beenden.
Hinweis – Gesprächsqualität
Achten Sie darauf, dass Sie sich mit
Ihrem Mobiltelefon während eines
Anrufs in der Nähe des Lautsprechers
benden, um die Gesprächsqualität zu
erhöhen.
5. Betrieb Induktionsladefunktion (Qi)
Legen Sie keine EC- oder ähnliche
Karten mit Magnetstreifen sowie
magnetisch empndliche Gegenstände
auf das Produkt. Die Daten auf den
Karten können beschädigt oder gelöscht
werden.
Warnung – Qi Lader
Stellen Sie sicher, dass sich auf der
Rückseite ihres Endgerätes keine
Metallteile (z.B. Metallplatte für
Magnethalter) benden. Metall erwärmt
sich im Feld des Induktionsladegerätes
sehr stark und kann ihr Endgerät und/
oder das Ladegerät beschädigen.
Hinweis
•Um Ihr Endgerät über das
Induktionsladefunktion laden zu
können, muss dies kompatibel mit
der Induktionsladetechnologie
sein. Beachten Sie hierzu die
Bedienungsanleitung Ihres Endgerätes.
•Beachten Sie, dass Handytaschen,
Cover, etc. und sonstige Materialien
zwischen dem Induktionsladebereich
und der Rückseite Ihres Endgerätes
den Ladevorgang stören oder sogar
verhindern.
•Die Induktionsladefunktion kann auch
ohne externe Spannungsversorgung
genutzt werden – in dem Fall wird
der im Lautsprecher eingebaute Akku
verwendet. Dieser sollte voll aufgeladen
sein und leert sich entsprechend
schneller, je mehr Funktionen
gleichzeitig genutzt werden.
•Während der Nutzung der
Induktionsladefunktion ist die
Wiedergabe von Audiodateien über
Bluetooth
®oder das beiliegende
Audiokabel möglich!
•Verbinden Sie das beiliegende Micro-
USB-Kabel mit dem Micro-USB-Eingang
(3) des Lautsprechers und einem
geeigneten USB-Ladegerät, wenn Ihnen
eine externe Spannungsversorgung zur
Verfügung steht. Beachten Sie hierzu die
Bedienungsanleitung des verwendeten
USB-Ladegeräts.
•Bei aktiver Stromversorgung leuchtet die
Status-LED (8) auf.
•Legen Sie Ihr Endgerät mit der Rückseite auf
den Induktionsladebereich (9).
•Der Ladevorgang beginnt, sobald ein
wirksames Induktionsfeld aufgebaut ist.
Die Status-LED (8) wechselt die Farbe. Der
aktuelle Ladestatus wird auf Ihrem Endgerät
angezeigt.
•Kann keine Induktionsverbindung
hergestellt werden, verändern Sie ggfs. die
Position Ihres Endgerätes (B).
•Der Ladevorgang wird automatisch beendet,
wenn der Akku Ihres Endgerätes vollständig
geladen ist. Die Status-LED (8) wechselt
die Farbe.
•Nehmen Sie Ihr Endgerät vom
Induktionsladebereich und trennen Sie den
Lautsprecher von der Stromversorgung.

6. Betrieb NFC Verbindung
Hinweis
•Um Ihr Endgerät über NFC mit dem
Lautsprecher verbinden zu können,
muss dies kompatibel mit der NFC
Technologie sein. Beachten Sie
hierzu die Bedienungsanleitung Ihres
Endgerätes.
•Beachten Sie, dass Handytaschen,
Cover, etc. und sonstige Materialien
zwischen dem Lautsprecher und
der Rückseite Ihres Endgerätes den
Ladevorgang stören oder sogar
verhindern.
•Beachten Sie, dass die
Übertragungsreichweite der NFC
Technologie lediglich etwa 10cm
beträgt.
•Schalten Sie den Lautsprecher - wie in 4.1.
Ein-/ Ausschalten beschrieben – ein.
•Stellen Sie sicher, dass die NFC Funktion
Ihres Endgerätes eingeschaltet ist und dass
sich das Endgerät nicht im Sperrmodus
(Sperrbildschirm) bendet.
•Drehen Sie den Lautsprecher um und
platzieren Sie ihr Endgerät auf dem
NFC Verbindungsbereich (10), markiert
durch das NFC-Symbol auf dem
Gerätelabel des Lautsprechers. Während
des Verbindungsversuchs blinkt die Status
LED (8).
•Bei erfolgreicher NFC Verbindung zeigt die
Status LED (8) Dauerlicht. Der Lautsprecher
kann wieder in Normalposition aufgestellt
und das Endgerät auf der Oberseite
abgelegt werden.
7. Wartung und Pflege
•Reinigen Sie dieses Produkt nur mit einem
fusselfreien, leicht feuchten Tuch und
verwenden Sie keine aggressiven Reiniger.
•Achten Sie darauf, dass kein Wasser in das
Produkt eindringt.
8. Haftungsausschluss
Die Hama GmbH & Co. KG übernimmt
keinerlei Haftung oder Gewährleistung für
Schäden, die aus unsachgemäßer Installation,
Montage und unsachgemäßem Gebrauch
des Produktes oder einer Nichtbeachtung
der Bedienungsanleitung und/oder der
Sicherheitshinweise resultieren.
9. Service und Support
Bitte wenden Sie sich bei Fragen zum Produkt
gerne an die Hama-Produktberatung.
Hotline: +49 9091 502-115 (Deu/Eng)
Weitere Supportinformationen nden sie hier:
www.hama.com
10. Entsorgungshinweise
Hinweis zum Umweltschutz:
Ab dem Zeitpunkt der Umsetzung
der europäischen Richtlinien
2012/19/EU und 2006/66/EG in
nationales Recht gilt folgendes:
Elektrische und elektronische Geräte
sowie Batterien dürfen nicht mit dem
Hausmüll entsorgt werden. Der Verbraucher ist
gesetzlich verpichtet, elektrische und
elektronische Geräte sowie Batterien am Ende
ihrer Lebensdauer an den dafür eingerichteten,
öffentlichen Sammelstellen oder an die
Verkaufsstelle zurückzugeben. Einzelheiten
dazu regelt das jeweilige Landesrecht. Das
Symbol auf dem Produkt, der
Gebrauchsanleitung oder der Verpackung
weist auf diese Bestimmungen hin. Mit der
Wiederverwertung, der stoichen Verwertung
oder anderen Formen der Verwertung von
Altgeräten/Batterien leisten Sie einen
wichtigen Beitrag zum Schutz unserer Umwelt.
11. Konformitätserklärung
Hiermit erklärt Hama GmbH & Co.
KG, dass sich dieses Gerät in
Übereinstimmung mit den
grundlegenden Anforderungen und den
anderen relevanten Vorschriften der Richtlinie
2014/53/EU bendet. Die
Konformitätserklärung gemäß der
entsprechenden Richtlinie nden Sie unter
www.hama.com.

12. Technische Daten
Mobiler
Bluetooth
®Lautsprecher
Bluetooth
®Technologie
Bluetooth
®v4.0 Class II
UnterstützteProle A2DP V1.2,AVRCPV1.4,HFP V1.6
Frequenz fürdie
Bluetooth
®Übertragungen 2,402GHz ~ 2,480GHz
Bluetooth
®ÜbertragungsleistungMax. 4dBm
Frequenz 180Hz –20 kHz
Reichweite <10 m
Max. gekoppelte Geräte 1
NFC
NFC®-Frequenz13,56 MHz
Reichweite ≤2.5 cm
NFC®-ÜbertragungPeer-to-Peer
Qi-InduktionsLadegerät
EingangMax. 5V 0,25V1500 mA
Ausgang Max. 5V 0,25V1000 mA
Lautsprecher
Max. Musikleistung10 W
SoundSystem Stereo
Impedanz4Ω
Verzerrung THD≤5%
Maße 14,1 x7,5 x 4,9cm
Gewicht432 g
Anschlüsse 3.5mm Stereo Plug
AUX - Eingang, Micro USB zurLadefunktion
Akku
Typ3.7VLi-Ion min.: 4400 mAh /16.28Wh
LadespannungMax. 5V 0,25V900mA
Auadezeit ~ 6 – 7 h
Laufzeit
Via
Bluetooth®
: ~ 5 h
ViaAUX: ~30 h
ViaKombinationaus
Bluetooth
®und
QI Induktives Laden: ~ 2 h
(jenachLautstärke undAudioinhalt)

Éléments de commande et d'affichage
1. Interrupteur de mise sous/hors tension
2. Entrée AUX IN (jack stéréo 3,5 mm)
3. Port micro USB (USB CHARGE)
4. microphone intégré
5. Touche de fonction
6. Touche de fonction ►
|| (
7. Touche de fonction +
8. LED d’état
9. Zone de charge Qi
10. Zone de connexion NFC
Nous vous remercions d’avoir choisi un produit
Hama.
Veuillez prendre le temps de lire l‘ensemble
des remarques et consignes suivantes. Veuillez
conserver ce mode d‘emploi à portée de main
an de pouvoir le consulter en cas de besoin.
Transmettez-le au nouveau propriétaire avec
l’appareil le cas échéant.
1. Explication des symboles
d‘avertissement et des remarques
Avertissement
Ce symbole est utilisé pour indiquer des
consignes de sécurité ou pour attirer
votre attention sur des dangers et
risques particuliers.
Remarque
Ce symbole est utilisé pour indiquer des
informations supplémentaires ou des
remarques importantes.
2. Contenu de l‘emballage
•Haut-parleur
Bluetooth
®+ chargeur Qi «
Power Brick »
•Câble de charge micro USB
•Câble audio 3,5 mm
•Mode d'emploi
3. Consignes de sécurité
•Ce produit est destiné à une installation
domestique non commerciale.
•N’utilisez pas le produit à proximité
immédiate d‘un chauffage, d’autres sources
de chaleur ou exposé aux rayons directs
du soleil.
•Cet appareil, comme tout appareil
électrique, doit être gardé hors de portée
des enfants !
•Protégez le produit des secousses violentes
et évitez tout choc ou toute chute.
•N‘utilisez pas le produit en dehors des
limites de puissance indiquées dans les
caractéristiques techniques.
•N‘utilisez pas le produit dans les zones
dans lesquelles l‘utilisation d‘appareils
électroniques est interdite.
•Veillez à ne pas recouvrir le produit d’un
textile ou d’un objet métallique ou d’une
autre nature an d’éviter des dommages liés
à une surchauffe.
•Montrez-vous respectueux des personnes
dans votre environnement. Un volume
excessif est susceptible de déranger les
personnes de votre environnement ou de
leur porter atteinte.
•Ne tentez pas d‘ouvrir le produit en cas de
détérioration et cessez de l’utiliser.
•La batterie est installée de façon
permanente et ne peut pas être retirée ;
recyclez le produit en bloc conformément
aux directives légales.
•Tenez les emballages d‘appareils hors de
portée des enfants, risque d‘étouffement.
•Recyclez les matériaux d’emballage
conformément aux prescriptions locales
en vigueur.
•N’apportez aucune modication à
l’appareil. Des modications vous feraient
perdre vos droits de garantie.
4. Mise en service et fonctionnement
du haut-parleur
4.1 Mise sous/hors tension
•Poussez l'interrupteur de mise sous/hors
tension (1) vers le haut an de mettre
le haut-parleur sous tension. Un signal
sonore retentit et la LED d’état (8) s’allume
brièvement.
•Poussez l'interrupteur de mise sous/hors
tension (1) vers le bas an de mettre le
haut-parleur hors tension.
Remarque concernant la mise
hors tension automatique
Veuillez noter que les haut-parleurs se
mettent automatiquement hors tension
au bout de 10 minutes d‘inactivité
(aucune lecture / aucune fonction
Bluetooth
®).
FMode d‘emploi

4.2 Charge de la batterie
Avertissement concernant la
batterie
•Utilisez exclusivement un chargeur
approprié disposant d’une connexion
USB pour la recharge.
•Cessez d‘utiliser tout chargeur ou
toute connexion USB défectueux et
ne tentez pas de réparer ces derniers.
•Évitez un stockage, une recharge ou
une utilisation à des températures
extrêmes.
•Rechargez régulièrement le produit
(au moins une fois par trimestre) en
cas de longue période de stockage.
•Veuillez charger entièrement les haut-
parleurs lors de la première utilisation.
•Insérez la che micro USB du câble de
charge dans la connexion micro USB (3) des
haut-parleurs.
•Insérez la che libre du câble de charge
micro USB dans un chargeur USB adapté.
Veuillez, dans ce cas, également consulter le
mode d’emploi du chargeur USB utilisé.
•La LED d’état (8) s’allume en rouge en
permanence pendant la charge.
•La LED d’état (8) s‘éteint automatiquement
dès que la batterie est entièrement chargée.
Remarque concernant le cycle
de charge
•Un cycle de charge complet dure
environ 6-7 heures.
•Il est possible de recharger la
batterie d’une enceinte sous ou hors
tension.
•Si la capacité de la batterie est
inférieure à 10 %, un double signal
sonore retentit. Vous n’entendez ce
message que si le haut-parleur est
sous tension.
•En fonction de l’appareil (
Bluetooth
®)
connecté, la capacité de la batterie
du haut-parleur est achée sur
celui-ci.
•La durée de fonctionnement réelle de la
batterie varie en fonction de l’utilisation de
l’appareil, des réglages et des conditions
environnementales (les batteries ont une
durée de vie limitée).
4.3 Lecture audio via la câble audio
fourni (câble à jacks 3,5 mm)
•Vériez que l’enceinte soit hors tension.
•Connectez votre appareil portable (lecteur
MP3, smartphone, etc.) à l‘entrée AUX IN
(2) du haut-parleur à l‘aide du câble audio
3,5 mm fourni.
•Réglez le volume de votre appareil à un
niveau bas.
•Mettez le haut-parleur sous tension -
comme décrit au point 4.1. Mise sous/
hors tension.
•Appuyez sur la touche de fonction – (7) an
de baisser le volume.
Remarque
•Notez qu‘il n’est pas possible de
congurer une des connexions
Bluetooth
®décrites aux points 4.4.
et 4.5. quand le câble audio est
raccordé.
4.4 Première connexion
Bluetooth
®
(couplage)
Remarque
•Veuillez contrôler que votre appareil
portable (lecteur MP3, téléphone
portable, etc.) est bien compatible
Bluetooth
®.
•Si tel n‘est pas le cas, vous pourrez
utiliser les haut-parleurs uniquement
à l‘aide du câble audio fourni.
•Veuillez noter que la portée
maximale de la connexion
Bluetooth
®
est de 10 mètres sans obstacles tels
que parois, personnes, etc.
•Assurez-vous que votre appareil
Bluetooth
®
est bien sous tension et que sa fonction
Bluetooth
®est bien activée.
•Assurez-vous que le haut-parleur se trouve
dans un rayon ne dépassant pas la portée
Bluetooth
®max. de 10 mètres.
•Mettez le haut-parleur sous tension -
comme décrit au point 4.1. Mise sous/
hors tension.
•Appuyez pendant env. 3 secondes sur la
touche de fonction ►
|| ((6) jusqu’à ce
qu’un signal acoustique retentisse et que la
LED d’état (8) clignote en permanence.
•Ouvrez le menu des paramètres
Bluetooth
®
sur votre appareil portable et attendez que
l’appareil PowerBrick apparaisse dans la

liste des appareils
Bluetooth
®détectés.
•Sélectionnez PowerBrick et attendez que
le haut-parleur soit aché avec le statut
connecté dans les paramètres
Bluetooth
®
de votre appareil. Un bref signal sonore
conrme que la connexion est établie.
La LED d‘état (8) s‘allume en bleu en
permanence.
Remarque concernant le mot de
passe
Bluetooth
®
Certains appareils requièrent un mot
de passe pour l‘établissement de la
connexion avec un appareil
Bluetooth
®.
•Saisissez le mot de passe 0000 lors
de la connexion avec des haut-
parleurs dans le cas où l‘appareil
exige la saisie d‘un mot de passe.
Remarque concernant la
connexion à un nouvel appareil
•Si vous souhaitez connecter un
nouvel appareil
Bluetooth
®au
haut-parleur, appuyez pendant env.
3 secondes sur la touche de fonction
►
|| (jusqu’à ce que la LED d’état
(8) commence à clignoter en bleu et
qu’un signal sonore retentisse.
•La connexion actuelle est alors
coupée et la recherche de nouveaux
appareils démarre.
•Le haut-parleur enregistre toujours
les huit derniers appareils couplés.
•À la prochaine réactivation,
le haut-parleur se connectera
automatiquement au dernier
appareil couplé.
4.5 Connexion
Bluetooth
®
automatique (après un premier
couplage réussi)
•Assurez-vous que votre appareil
Bluetooth
®
est bien sous tension et que sa fonction
Bluetooth
®est bien activée.
•Assurez-vous que le haut-parleur se trouve
dans un rayon ne dépassant pas la portée
Bluetooth
®max. de 10 mètres.
•Mettez le haut-parleur sous tension -
comme décrit au point 4.1. Mise sous/
hors tension.
•La LED d'état (8) s'allume en bleu
dès l'établissement de la connexion
automatique. Un signal sonore conrme
que la connexion est établie.
Remarque concernant la
connexion
Après que la première connexion
entre le haut-parleur et l‘appareil
portable s‘est déroulée avec succès,
les connexions suivantes sont établies
automatiquement. Dans le cas où la
connexion
Bluetooth
®ne s’établit pas
automatiquement, vériez les points
suivants :
•Vériez, dans les paramètres
Bluetooth
®de votre appareil que
PowerBrick est bien connecté. Si ce
n’est pas le cas, réitérez les étapes
décrites dans le paragraphe Première
connexion
Bluetooth
®.
•Vériez que la distance séparant
l’appareil portable du haut-parleur
est inférieure à 10 mètres. Si ce n’est
pas le cas, diminuez la distance
séparant les appareils.
•Vériez s’il existe des obstacles
pouvant réduire la portée. Si tel est
le cas, rapprochez les appareils l’un
de l’autre.
•Regardez si le câble audio est
raccordé au haut-parleur. Si c’est le
cas, débranchez-le.
4.6 Lecture audio (via
Bluetooth
®)
Démarrez et pilotez la lecture audio sur
l‘appareil connecté. Vous pouvez également
pilote la lecture audio depuis les haut-parleurs
(pour autant que cette fonction soit prise en
charge par l‘appareil connecté).
•Appuyez sur la touche de fonction ►
|| ((6)
an de lancer la lecture audio ou la mettre
en pause.
•Appuyez brièvement sur la touche de
fonction + (5) an d‘augmenter le volume.
•Appuyez brièvement sur la touche de
fonction – (7) an de baisser le volume.
•Appuyez longtemps sur la touche de
fonction + (5) pour passer au titre suivant.
•Appuyez longtemps sur la touche de
fonction - (7) pour passer au titre précédent.

4.7 Fonction mains libres
Il est possible d’utiliser le haut-parleur comme
kit mains-libres pour votre téléphone mobile.
Pour permettre cette fonction, le téléphone
mobile doit être connecté au haut-parleur via
Bluetooth
®.
•Appuyez une fois sur la touche de fonction
►
|| ((6) an de répondre à un appel
entrant.
•Appuyez pendant env. 2 secondes sur la
touche de fonction ►
|| ((6) an de refuser
un appel entrant.
•Pendant une conversation, appuyez pendant
env. 2 secondes sur la touche de fonction
►
|| ((6) an de mettre un appel entrant
en veille.
•Appuyez à nouveau sur la touche de
fonction ►
|| ((6) et maintenez-la enfoncée
an de reprendre l’appel.
•Pendant une conversation, appuyez une fois
sur la touche de fonction ►
|| ((6) an de
terminer un appel.
Remarque concernant la qualité
de la communication
Pendant un appel, veillez à rester avec
votre téléphone portable à proximité du
haut-parleur an d'augmenter la qualité
de la conversation.
5. Fonctionnement avec la fonction de
charge à induction (Qi)
Ne posez pas de cartes de crédit ou
d’autres cartes à bande magnétique,
voire d’objets à sensibilité magnétique
sur le produit. Les données stockées sur
les cartes seraient susceptibles d'être
corrompues, voire effacées.
Avertissement – Chargeur Qi
Assurez-vous qu’aucune pièce
métallique (par ex. plaque métallique
pour support magnétique) ne se trouve
au dos de votre appareil. Le métal
chauffe très fortement dans le champ
du chargeur à induction, ce qui peut
endommager votre appareil et/ou le
chargeur.
Remarque
•Pour charger votre appareil en utilisant
la fonction de charge à induction,
celui-ci doit être compatible avec la
technologie de charge à induction.
Veuillez consulter le mode d’emploi de
votre appareil à ce sujet.
•Veuillez noter que les housses de
téléphones portables, les étuis, etc...
ainsi que d’autres objets situés entre la
zone de charge à induction et le dos de
votre appareil peuvent perturber, voire
empêcher le processus de charge.
•La fonction de charge à induction peut
être utilisée même sans alimentation
externe – dans ce cas, c’est la batterie
intégrée dans le haut-parleur qui est
utilisée. Celle-ci doit être entièrement
rechargée : plus il y a de fonctions
utilisées simultanément, plus elle se vide
rapidement.
•Lorsque vous utilisez la fonction de
charge à induction, vous pouvez lire des
chiers audio en utilisant la fonction
Bluetooth
®ou le câble audio fourni !
•Connectez le câble micro USB fourni à
l’entrée micro USB (3) du haut-parleur et à
un chargeur USB adapté si une alimentation
externe est à votre disposition. Veuillez,
dans ce cas, également consulter le mode
d’emploi du chargeur USB utilisé.
•Le voyant LED d'état (8) s'allume en cas de
branchement électrique conforme.
•Posez le dos de votre appareil sur la zone de
charge à induction (9).
•Le processus de charge commence dès
lors qu’un champ d’induction effectif est
établi. La LED d’état (8) change de couleur.
L’état de charge actuel est aché sur votre
appareil.
•Si aucune connexion par induction ne peut
être établie, changez la position de votre
appareil (B), le cas échéant.
•Le processus de charge s’arrête
automatiquement lorsque la batterie de
votre appareil est entièrement chargée. La
LED d’état (8) change de couleur.
•Retirez votre appareil de la zone de charge
à induction et coupez l’alimentation en
électricité du haut-parleur.

6. Fonctionnement avec la connexion
NFC
Remarque
•Pour connecter votre appareil au
haut-parleur par NFC, celui-ci doit
être compatible avec la technologie
NFC. Veuillez consulter le mode
d’emploi de votre appareil à ce sujet.
•Veuillez noter que les housses de
téléphones portables, les étuis, etc...
ainsi que d’autres objets situés entre
le haut-parleur et le dos de votre
appareil peuvent perturber, voire
empêcher le processus de charge.
•Veuillez noter que la portée de
transmission de la technologie NFC
est de seulement 10 cm environ.
•Mettez le haut-parleur sous tension -
comme décrit au point 4.1. Mise sous/
hors tension.
•Assurez-vous que la fonction NFC de votre
appareil est activée et que l’appareil n’est
pas en mode de verrouillage (écran de
verrouillage).
•Retournez le haut-parleur et placez votre
appareil sur la zone de connexion NFC (10),
marquée du symbole NFC sur le label
du haut-parleur. Pendant la tentative de
connexion, la LED d’état (8) clignote.
•Lorsque la connexion NFC a réussi, la LED
d’état (8) reste allumée en permanence.
Le haut-parleur peut être remis dans une
position normale et l’appareil déposé sur la
face supérieure.
7. Soins et entretien
•Nettoyez la balance uniquement à l’aide
d’un chiffon non breux légèrement
humide ; évitez tout détergent agressif.
•Veillez à ce qu’aucun liquide ne pénètre
dans le produit.
8. Exclusion de garantie
La société Hama GmbH & Co. KG décline toute
responsabilité en cas de dommages provoqués
par une installation, un montage ou une
utilisation non conformes du produit ou encore
provoqués par un non respect des consignes
du mode d‘emploi et/ou des consignes de
sécurité.
9. Service et assistance
En cas de question concernant le produit,
veuillez vous adresser au service de conseil
produits de Hama.
Ligne téléphonique directe : +49 9091 502-
115 (allemand/anglais)
Vous trouverez ici de plus amples informations
concernant l‘assistance : www.hama.com
10. Consignes de recyclage
Remarques concernant la protection de
l’environnement:
Conformément à la directive
européenne 2012/19/EU et
2006/66/CE, et an d‘atteindre un
certain nombre d‘objectifs en
matière de protection de
l‘environnement, les règles suivantes doivent
être appliquées: Les appareils électriques et
électroniques ainsi que les batteries ne doivent
pas être éliminés avec les déchets ménagers.
Le pictogramme “picto” présent sur le produit,
son manuel d‘utilisation ou son emballage
indique que le produit est soumis à cette
réglementation. Le consommateur doit
retourner le produit/la batterie usager aux
points de collecte prévus à cet effet. Il peut
aussi le remettre à un revendeur. En
permettant enn le recyclage des produits
ainsi que les batteries, le consommateur
contribuera à la protection de notre
environnement. C‘est un acte écologique.
11. Déclaration de conformité
La société Hama GmbH & Co. KG
déclare par la présente que cet
appareil est conforme aux exigences
essentielles et aux autres dispositions de la
directive 2014/53/UE. Voss trouverez la
déclaration de conformité selon la directive
correspondante sur notre site: www.hama.
com.

12. Caractéristiques techniques
Enceinte portable
Bluetooth
®
Technologie Bluetooth
®
Bluetooth
®v4.0 Class II
Prolssupportés A2DP V1.2,AVRCPV1.4,HFP V1.6
Fréquence pour lestransmissions
Bluetooth
®2,402GHz ~ 2,480GHz
Puissancede transmission
Bluetooth
®Nombre maxi 4 dBm
Fréquence 180Hz –20 kHz
Portée <10 m
Nombre maximald’appareilspouvant
être couplés 1
NFC
Fréquence NFC®13,56MHz
Portée ≤2.5 cm
TransmissionNFC®Peer-to-Peer
Chargeur à inductionQi
Entrée Nombre maxi5V 0,25V1500 mA
Sortie Nombre maxi5V 0,25V1000 mA
Haut-parleur
Nombremaxi Puissancemusicale 10 W
SystèmesonoreStéréo
Impédance 4 Ω
DistorsionTHD≤5%
Dimensions 14,1 x7,5 x 4,9cm
Poids 432 g
Connexions Prise jackstéréo 3,5 mm
EntréeAUX, microUSB pour fonctionde charge
Batterie
Type 3.7V Li-Ion min.: 4400 mAh /16.28Wh
Tensionde chargeNombremaxi 5V 0,25V900mA
Tempsde recharge~6 – 7 h
Autonomie
Via
Bluetooth
®: ~ 5 h
ViaAUX:~30 h
Viacombinaison
Bluetooth
®et
charge àinductionQi : ~ 2 h
(enfonction du volumeet du contenuaudio)
Table of contents
Languages:
Other Hama Speakers manuals
Popular Speakers manuals by other brands

Edwards Signaling
Edwards Signaling Adaptatone Millennium Speaker 5553 Series Installation sheet

Valcom
Valcom VIP-432A-DF-IC quick start guide

Russound
Russound Complement LCR7 instruction manual

Harman
Harman Axys ABF-260/100W PA6 V0 Low Profile installation manual

CABASSE
CABASSE ARCHIPEL 17 owner's manual

Sony
Sony WS-IT1000F datasheet