6
How to Use DRY VAC & SEAL or WET VAC & SEAL
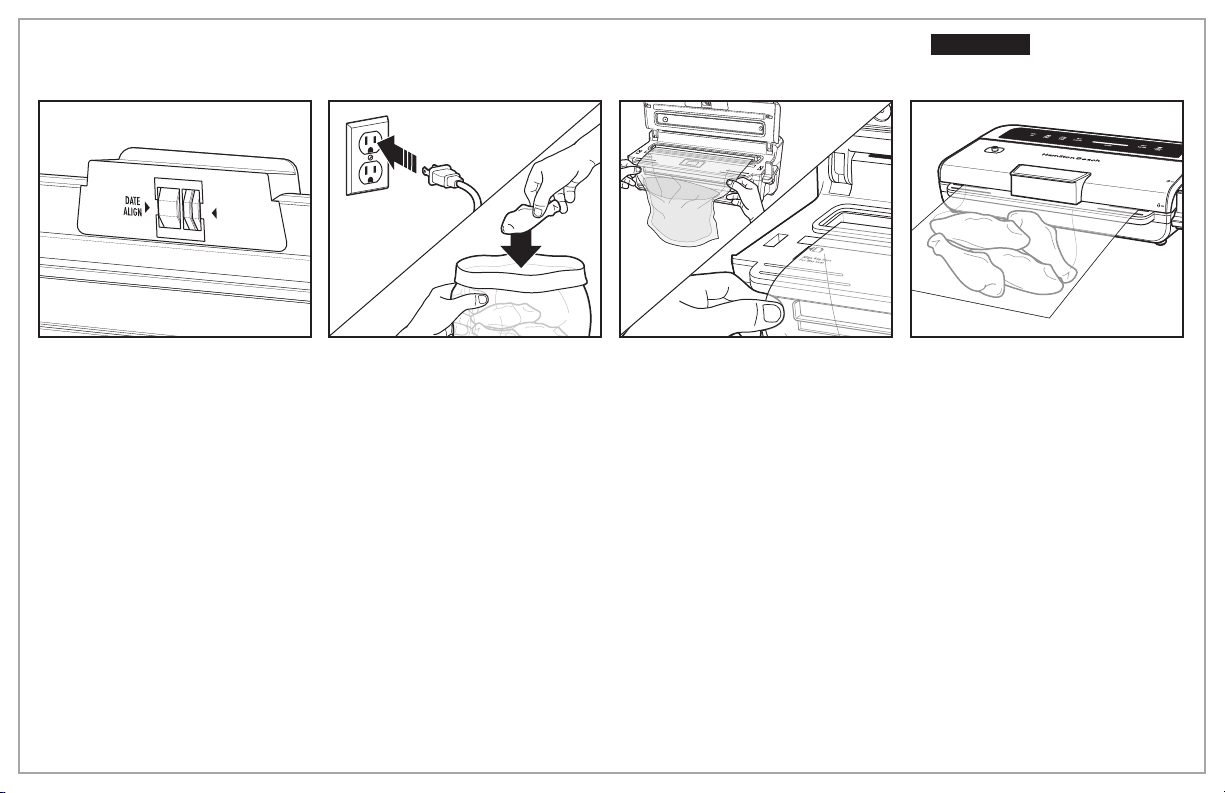
1.
Plug into outlet.
2.
Open Lid and rotate month and date
wheels on Date Coder until desired
date lines up with indicator arrows.
3.
To turn Date Coder on or off, press
DATE CODE Button. The Date Coder
is enabled when the blue indicator
light above the Date Code Button is
on.
NOTE: Vacuum Sealer will remember
date code setting from last time it was
used.
4.
To turn off Date Coder, press DATE
CODE Button and the blue indicator
light will go out.
5.
Use with Roll Caddy when sealing
liquids or wet foods. Use with or
without Roll Storage Caddy when
sealing dry foods or nonfood items.
6.
For better sealing, fold over top of
bag to keep clean while adding food.
Unfold top of bag after filling.
7.
Center the open edge of bag within
the Vacuum Chamber. Ensure entire
edge of bag is inside chamber and
bag is flat with no folds or wrinkles.
8.
Lower Lid and push Lid Lock Lever
down to lock Lid. Press DRY VAC &
SEAL or WET VAC & SEAL Button.
9.
PROGRESS Bar lights will gradually
lluminate green and beep at end of
cycle.
10.
Pull Lid Lock Lever up to release Lid
and remove bag.
11.
Unplug when finished vacuum
sealing bags.
12.
To prevent damage to the seals,
store Vacuum Sealer with Lid Lock
Lever in the unlocked position.
WET VAC & SEAL Tips
• If sealing liquid or moist food, place
Vacuum Sealer on top of Roll Caddy to
elevate bag and only fill bag halfway.
• Stand bag up on counter vertically to
eliminate air bubbles. If necessary, rest
bag in an open kitchen drawer in order
to keep it upright. For best results,
use Hamilton Beach Easy Fill Vacuum
Sealer bags and do not exceed MAX
LIQUID FILL line (approximately half
full).
• Lift Lid and align left edge of bag to the
left indicator line and ensure the open
end of bag is centered within Vacuum
Chamber.
• Cycle time will be longer for WET VAC
& SEAL than DRY VAC & SEAL.
• A small amount of liquid may collect in
the chamber. This is normal. Wipe out
Vacuum Chamber between each cycle
as needed.
NOTES:
• Red lights on the PROGRESS
Bar indicate an error. See
Troubleshooting section.
• To prevent overheating, allow 20
seconds between each bag that is
vacuum-sealed.
• To ensure proper seal, keep Lid
closed during use.
• Wipe out Vacuum Chamber
between each cycle.
wCAUTION
Burn Hazard.
Seal bar and Date Code Heater
are hot. Avoid touching.
JAN
DEC
FEB
8
7
9
2
1
3
DRY VAC & SEAL TIPS
• If using DRY VAC & SEAL, you may
use the Vacuum Sealer with or without
Roll Caddy.