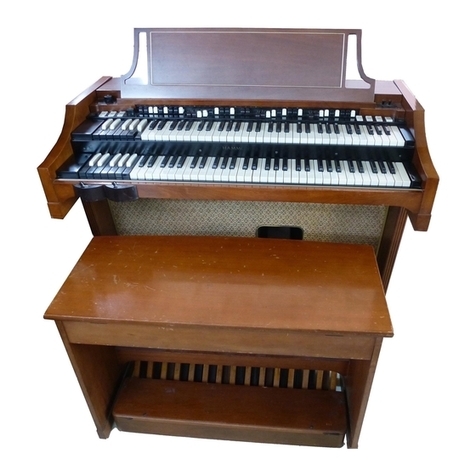
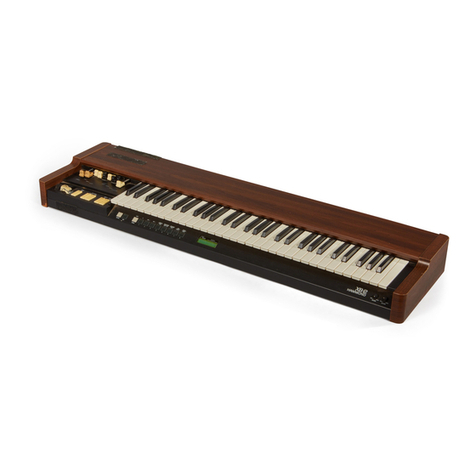
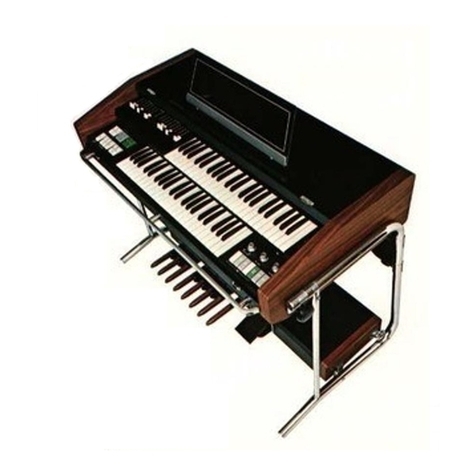
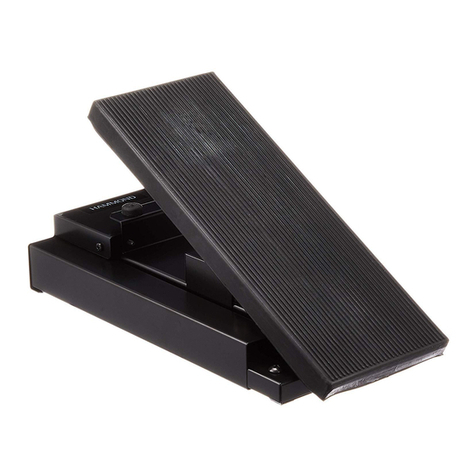
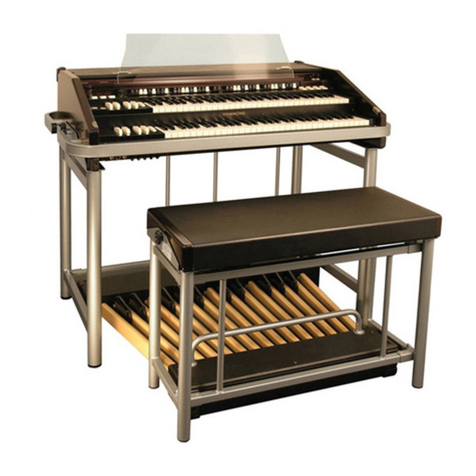
Hammond A-3 User manual

OWNER’S PLAYING GUIDE
Model:
ank you, and congratulations on your choice of the Hammond XK-5
/ A-3 Organ
e XK-5 / A-3 is an all-new instrument which produces the sound and
contains the features of a classic Hammond “Tone Wheel” organ,
Please take a moment to review this manual thoroughly in order to famil-
iarize yourself with the features of this instrument as well as the installa-
tion procedures. Keep this manual for future reference.
UPPER
BANK KEY PATCH
PEDAL LOWER
~HA<O>
Model: A-3

HA<O> XK-5 Owner’s Playing Guide
2IMPORTANT SAFETY INSTRUCTIONS
Read these instructions.
Keep these instructions.
Heed all warnings.
Follow all instructions.
Do not use this apparatus near water.
Clean only with dry cloth.
Do not block any ventilation openings.
Install in accordance with the manufacturer’s instructions.
Do not install near any heat sources such as radiators, heat registers,
stoves or other apparatus (including ampliers) that produce heat.
Do not defeat the safety purpose of the polarized or grounding-type
plug. A polarized plug has two blades with one wider than the other.
A grounding type plug has two blades and a third grounding prong.
The wider blade or third prong is provided for your safety. If the pro-
vided plug does not t into your outlet, consult an electrician for re-
placement of the obsolete outlet.
Protect the power cord from being walked on or pinched, particu-
larly at plugs, convenience receptacles, and the point where they exit
from the apparatus.
Only use attachments/accessories specied by the manufacturer.
Use only with the cart, stand, tripod, bracket,
or table specied by the manufacturer, or sold
with the apparatus. When cart is used: use cau-
tion when moving the cart/apparatus combi-
nation to avoid injury from tip-over.
Unplug this apparatus during lightning storms,
or when unused for long periods of time.
Refer all servicing to qualied service personnel. Servicing is required
when the apparatus has been damaged in any way, such as power-
supply cord or plug is damaged, liquid has been spilled or objects
have fallen into the apparatus, the apparatus has been exposed to
rain or moisture, does not operate normally, or has been dropped.
Apparatus shall not be exposed to dripping or splashing and no ob-
jects lled with liquids, such as vases, shall be placed on the appara-
tus.
WARNING: To reduce the risk of re or electric shock, do not expose
this apparatus to rain or moisture.
ATTENTION: Pour réduire les risques de choc électrique ou
d’incendie, ne pas exposer cet appareil à la pluie ou à l’humidité.
The lightning ash with arrowhead symbol within an equilateral tri-
angle, indicates that dangerous voltage constituting a risk of electric
shock is present within this unit.
The exclamation point within equilateral triangle, indicates that there
are important operating and maintenance instructions in the litera-
ture accompanying this unit.
In case in the future your instrument gets too old to play/use or
malfunctions beyond repair, please observe the instructions of
this mark, or, if any question, be sure to contact your dealer or
your nearest town or municipal oce for its proper disposal.
-THIS APPARATUS MUST BE EARTHED.
-The socket-outlet shall be installed near the apparatus and shall be easily accessible.
注 意:感 電 の 恐 れ あ り キ ャ ビ ネ ッ ト を あ け る な
ATTENTION : RISQUE DE CHOC ELECTRIQUE NE PAS OUVRIR
WARNING:
TO REDUCE THE RISK OF FIRE OR ELECTRIC SHOCK,
DO NOT EXPOSE THIS APPLIANCE TO RAIN OR MOISTURE.

3
HA<O> XK-5 Owner’s Playing Guide
FOR UNITED KINGDOM:
FOR YOUR SAFETY, PLEASE READ THE FOLLOWING TEXT CAREFULLY
This appliance is supplied with a molded 3-pin mains plug for your safety and convenience.
The plug contains a 5 amp fuse.
Should the fuse need to be replaced, please ensure that the replacement fuse has a rating of 5
amps and that it is approved by ASTA or BSI to BSI1362.
Check for the ASTA mark or the BSI mark on the body of the fuse.
If the plug contains a removable fuse cover, you must ensure that it is retted when the fuse is
replaced.
If the fuse cover is lost, the plug must not be used until a replacement cover is obtained.
A replacement fuse cover can be obtained from your local Hammond Dealer.
IF THE FITTED MOULDED PLUG IS UNSUITABLE FOR THE SOCKET OUTLET IN YOUR HOME, THEN
THE FUSE SHOULD BE REMOVED AND THE PLUG CUT OFF AND DISPOSED OF SAFELY.
THERE IS A DANGER OF SEVERE ELECTRICAL SHOCK IF THE CUT-OFF PLUG IS INSERTED INTO ANY
13 AMP SOCKET.
If a new plug is to be attached to the cord, please observe the wiring code as shown below.
If in any doubt, please consult a qualied electrician.
IMPORTANT - The wires in this mains lead are coloured in accordance with the following code:
Blue: Neutral
Brown: Live
As the colours of the wires in the mains lead of this unit may not correspond with the coloured
marking identifying the terminals in your plug, proceed as follows.
The wire which is coloured BLUE must be connected to the terminal in the plug which is marked
with the letter N or coloured BLACK.
The wire which is coloured BROWN must be connected to the terminal in the plug which is
marked with the letter L or coloured RED.
Under no circumstances should either of these wires be connected to the earth terminal of the
three-pin plug, marked with the letter E or the Earth Symbol .
To replace the fuse, open the fuse compartment with a screwdriver and replace the fuse and
fuse cover.

HA<O> XK-5 Owner’s Playing Guide
4IMPORTANT - PLEASE READ
uPower Supply
uDo not use this unit on the same power circuit with any
device that will generate line noise (such as an electric
motor or variable lighting system).
uBefore connecting this unit to other devices, turn o the
power to all units. is will help prevent malfunctions and/
or damage to speakers or other devices.
uis unit features an Auto Power O function that auto-
matically turns the power o if the unit is not operated for a
specied period of time. e setting will revert to its default
value if not backed up before the power is turned o.
uPlacement
uUsing the unit near power ampliers (or other equipment
containing large power transformers) may induce hum. To
alleviate the problem, change the orientation of this unit; or
move it farther away from the source of interference.
uis device may interfere with radio and television recep-
tion. Do not use this device in the vicinity of such receivers.
uNoise may be produced if wireless communications devices,
such as cell phones, are operated in the vicinity of this unit.
Such noise could occur when receiving or initiating a call,
or while conversing. Should you experience such problems,
you should relocate such wireless devices so they are at a
greater distance from this unit, or switch them o.
uDo not expose the unit to direct sunlight, place it near
devices that radiate heat, leave it inside an enclosed vehi-
cle, or otherwise subject it to temperature extremes. Also,
do not allow lighting devices that normally are used while
their light source is very close to the unit (such as a piano
light), or powerful spotlights to shine upon the same area
of the unit for extended periods of time. Excessive heat can
deform or discolor the unit.
uWhen moved from one location to another where the tem-
perature and/or humidity is very dierent, water droplets
(condensation) may form inside the unit. Damage or mal-
function may result if you attempt to use the unit in this
condition. erefore, before using the unit, you must allow
it to stand for several hours, until the condensation has
completely evaporated.
uDo not allow rubber, vinyl, or similar materials to remain
on the unit for long periods of time. Such objects can dis-
color or otherwise harmfully aect the nish.
uDo not paste stickers, decals, or the like to this instrument.
Peeling such matter o the instrument may damage the
exterior nish.
uMaintenance
uTo clean the unit, use a dry, soft cloth; or one that is slightly
dampened.
uTo remove stubborn dirt o plastic parts, use a cloth
impregnated with a mild, non-abrasive detergent. After-
wards, be sure to wipe the unit thoroughly with a soft, dry
cloth. Try to wipe the entire surface using an equal amount
of strength, moving the cloth along with the grain of the
wood. Rubbing too hard in the same area can damage the
nish.
uNever use benzine, thinners, alcohol or solvents of any
kind, to avoid the possibility of discoloration and/or defor-
mation.
uAdditional Precautions
uPlease be aware that the contents of memory can be irre-
trievably lost as a result of a malfunction, or the improper
operation of the unit. To protect yourself against the risk of
losing important data, we recommend that you periodically
save a backup copy of important data you have stored in the
unit’s memory in USB Flash drive.
uUnfortunately, it may be impossible to restore the contents
of data that was stored in another MIDI device (e.g., a
sequencer) once it has been lost. Hammond assumes no
liability concerning such loss of data.
uUse a reasonable amount of care when using the unit’s but-
tons, sliders, or other controls; and when using its jacks and
connectors. Rough handling can lead to malfunctions.
uWhen connecting / disconnecting all cables, grasp the
connector itself - never pull on the cable. is will avoid
causing short circuits, or damage to the cable’s internal ele-
ments.
uTo avoid disturbing your neighbors, try to keep the unit's
volume at reasonable levels. You may prefer to use head-
phones, so you do not need to be concerned about those
around you (especially when it is late at night).
uWhen you need to transport the unit, package it in the box
(including padding) that it came in, if possible. Otherwise,
you will need to use equivalent packaging materials.

5
HA<O> XK-5 Owner’s Playing Guide
INTRODUCTION

HA<O> XK-5 Owner’s Playing Guide
6
Table Of Contents
IMPORTANT SAFETY INSTRUCTIONS .......................................................... 2
IMPORTANT - PLEASE READ......................................................................... 4
INTRODUCTION ....................................... 5
MAIN FEATURES............................................................................................ 9
FEATURE CALLOUT .....................................................................................10
CONTROL PANEL ..........................................................................................................10
ACCESSORY PANEL (Recessed)................................................................................12
ACCESSORIES.................................................................................................................12
REAR PANEL ...................................................................................................................13
SOUND ENGINE STRUCTURE...................................................................... 14
MAKING THE CONNECTIONS ................ 17
BASIC CONNECTIONS ................................................................................. 18
CONNECTING THE CONTROLLERS .............................................................19
CONNECTING THE EXPRESSION PEDAL ...............................................................19
uCONNECTING AN EXP-100F ........................................................................19
uCONNECTING AN EXP-50/50J/20/30.........................................................19
CONNECTING THE CU-1 LESLIE SWITCH (purchased separately) ...............19
CONNECTING A LESLIE SPEAKER...............................................................20
CONNECTING A SINGLE-CHANNEL LESLIE SPEAKER.......................................20
BASIC CONNECTION ...................................................................................................20
WHAT IS A “STATIONARY SPEAKER?”......................................................................20
ADDING STATIONARY SPEAKERS............................................................................20
BASIC CONNECTION ...................................................................................................21
MIDI CONTROL OF THE LESLIE SPEAKER .............................................................21
CONNECTING A MULTI-CHANNEL LESLIE SPEAKER.........................................21
EXPANDING THE XK-5.................................................................................22
2 MANUALS AND PEDALS (USING XLK-5 XPK-250ND 22) ............................22
2 MANUALS AND PEDALS (USING MIDI KEYBOARD & PEDAL CLAVIER) ..23
uRECOMMENDED MIDI KEYBOARDS...........................................................23
2 MANUALS WITH XLK-5 LOWER MANUAL.........................................................24
H-BUS........................................................................................................... 24
2 MANUALS WITH MIDI KEYBOARD.......................................................................25
SINGLE MANUAL WITH MIDI PEDAL CLAVIER ....................................................26
SPECIAL NOTE - MODEL A-3....................................................................... 26
TURN ON & PLAY.................................... 27
POWER ON................................................................................................... 28
HOW TO POWER ON ...................................................................................................28
BACK UP ..........................................................................................................................28
AUTO POWER OFF .......................................................................................................28
RESET TO FACTORY SETTINGS.................................................................................28
USING CONTROLLERS.................................................................................29
Expression Pedal ..........................................................................................................29
Foot Switch ....................................................................................................................29
CU-1 LESLIE MODE SWITCH (Optional) ................................................................29
MAKE YOUR OWN SOUND.......................................................................... 30
SELECT THE “B” Preset Key ........................................................................................30
PULL OUT THE “B” DRAWBARS.................................................................................31
ADD “TOUCH-RESPONSE PERCUSSION”...............................................................31
“UPPER” and “LOWER” MANUALS ...........................................................................31
ADD EFFECTS ................................................................................................................32
uVIBRATO AND CHORUS..................................................................................32
uLESLIE ...................................................................................................................32
uOVERDRIVE.........................................................................................................32
uMULTI EFFECT....................................................................................................32
SPLIT - DIVIDE THE KEYBOARD BY PARTS............................................................33
PEDAL TO LOWER - ADD BASS TO LOWER...........................................................33
PEDAL SUSTAIN - SMOOTH DECAY WHEN RELEASE........................................33
INFORMATION CENTER ......................... 35
INFORMATION CENTER ..............................................................................36
PLAY MODE .................................................................................................37
HOW TO READ THE DISPLAY ....................................................................................37
OPERATION IN THIS MODE .......................................................................................37
MENU MODE ............................................................................................... 38
HOW TO READ THE DISPLAY ....................................................................................38
OPERATION IN THIS MODE .......................................................................................38
MENU MODE CONTENTS...........................................................................................39
FUNCTION MODE........................................................................................ 40
HOW TO READ THE DISPLAY ....................................................................................40
OPERATION IN THESE MODES .................................................................................40
SHORTCUTS.................................................................................................41
SHORTCUT EXAMPLE:.................................................................................................41
IF YOU FREQUENTLY USE A CERTAIN PAGE...............................................41
EXAMPLE OF OPERATION:.........................................................................................41
HOW TO CHANGE PARAMETERS.............................................................................42
DISPLAY LOCK MODE.......................................................................................................
............................................................................................................................................44
DRAWBARS & PERCUSSION .................. 45
HARMONIC DRAWBARS™...........................................................................46
DRAWBARS FOR UPPER AND LOWER MANUALS..............................................47
uPRESET KEYS AND DRAWBARS....................................................................47
DRAWBAR REGISTRATION PATTERNS....................................................................48
MODERN DRAWBAR REGISTRATIONS...................................................................49
MATCH THE REGISTRATION TO THE DRAWBAR SETTING...............................50
PEDAL DRAWBARS ......................................................................................................50
PEDAL SUSTAIN ............................................................................................................51
uSETTING THE AMOUNT OF PEDAL SUSTAIN...........................................51
PEDAL TO LOWER.........................................................................................................51
uSETTING THE NOTE RANGE OF THE PEDAL TO LOWER.......................51
DRAWBAR Edit Menu..................................................................................52
uLOWER & UPPER MANUALS..........................................................................52
uPEDALS ................................................................................................................53
PED. REG (Pedal Registration) Edit Menu .................................................54
uCUSTOM PEDAL REGISTRATION PARAMETERS......................................54
CREATING & RECORDING A CUSTOM PEDAL REGISTRATION .......................55
NAMING A CUSTOM PEDAL REGISTRATION .......................................................56
PERCUSSION ...............................................................................................57
PERCUSSION Edit Menu (PERCUSS) .......................................................... 58
DRAWBAR ORGAN TYPE.............................................................................59
uDRAWBAR ORGAN TYPE - “Vx”.....................................................................59
uDRAWBAR ORGAN TYPE - “Farf”..................................................................60
uDRAWBAR ORGAN TYPE - “Pipe”................................................................61
PIPE Edit Menu............................................................................................62
uCUSTOM PIPE PARAMETERS.........................................................................62
CREATING & RECORDING A CUSTOM PIPE ..........................................................64
NAMING A CUSTOM PIPE..........................................................................................65
SPLIT ............................................................................................................66
uSPECIAL NOTE ...................................................................................................66
uSPLIT .....................................................................................................................66
u“UPPER” AND “LOWER” MANUALS..............................................................66
uCHANGING THE SPLIT POINT .......................................................................66
OCTAVE........................................................................................................67
uOCTAVE................................................................................................................67
DRAWBAR EFFECTS ............................... 69
VIBRATO & CHORUS....................................................................................70
VIBRATO & CHORUS Edit Menu (VIB&CHO) ..............................................71
LESLIE ..........................................................................................................72
uWHAT IS THE LESLIE EFFECT?.......................................................................72
uLESLIE PARAMETERS .......................................................................................73

7
HA<O> XK-5 Owner’s Playing Guide
uWHAT IS A “CUSTOM LESLIE CABINET?”...................................................73
LESLIE Edit Menu ........................................................................................74
uCABINET NUMBER............................................................................................74
uCUSTOM LESLIE CABINET PARAMETERS..................................................74
uEXTERNAL LESLIE SPEAKER ..........................................................................76
CREATING AND RECORDING A LESLIE CABINET................................................77
NAMING A LESLIE CABINET ......................................................................................78
OVERDRIVE .................................................................................................79
TEMPORARY EQUALIZING (MASTER EQUALIZER)....................................80
uWHAT IS “EQUALIZATION?”...........................................................................80
EQUALIZ (Equalizer) ...................................................................................81
uPATCH EQUALIZER ...........................................................................................81
uPATCH EQUALIZER AND MASTER EQUALIZER........................................81
MULTI EFFECTS ........................................................................................... 82
AMP/EFF (Pre-Amplifier / Multi-Effects) ...................................................83
uTUBE PRE-AMPLIFIER ......................................................................................83
uMATCHING TRANSFORMER ..........................................................................83
uOVERDRIVE.........................................................................................................83
uMULTI EFFECTS .................................................................................................84
REVERB ........................................................................................................91
REVERB Edit Menu...................................................................................... 92
CUSTOM TONE WHEELS......................... 93
CUSTOM TONE WHEELS.............................................................................................94
uWHAT ARE “TONE WHEELS?” ........................................................................94
uWHAT IS “LEAKAGE?”.......................................................................................94
uWHAT IS “MOTOR NOISE?”.............................................................................94
uWHAT ARE “CUSTOM TONE WHEELS?”......................................................95
CUST. TW Edit Menu ...................................................................................96
uCUSTOM TONE WHEEL PARAMETERS .......................................................96
CREATING AND RECORDING A CUSTOM TONE WHEEL..................................98
NAMING A CUSTOM TONE WHEEL.........................................................................99
VIRTUAL MULTI- CONTACTS................ 101
CONTACTS OF A TONE-WHEEL ORGAN & VIRTUAL MULTI-CONTACTS.. 102
uWHAT IS A “CUSTOM CONTACT?”............................................................ 102
CONTACT Edit Menu .................................................................................103
uCUSTOM CONTACT PARAMETERS........................................................... 103
uSELECT CONTACT.......................................................................................... 103
uCONDITION ..................................................................................................... 104
uPHYSICAL CONTACT..................................................................................... 104
CREATING AND RECORDING A CUSTOM CONTACT...................................... 105
NAMING A CUSTOM CONTACT ............................................................................ 106
PATCHES & FAVORITES ........................ 107
PATCHES ....................................................................................................108
WHAT IS A “PATCH?”.................................................................................................. 108
HOW TO RECALL A PATCH...................................................................................... 108
uExample: Recall Patch U41........................................................................ 108
USER AND FACTORY PATCHES .................................................................109
USER AND FACTORY................................................................................................. 109
PATCH Edit Menu ......................................................................................110
uPATCH NAME................................................................................................... 110
uPATCH LEVEL................................................................................................... 110
uPATCH RECALL................................................................................................ 110
uPATCH LOAD ................................................................................................... 111
uPRESET KEYS .......................................................111
uFAVORITE..............................................................111
PATCH BANKS............................................................................................112
WHAT ARE “PRESET KEYS?”.................................................................................... 112
RECALL BY PRESET KEYS......................................................................................... 112
uex: Recall C#-G................................................................................................ 112
RECORD THE PATCH TO MEMORY ....................................................................... 113
uExample: RECORD TO U32 ......................................................................... 113
uExample: RECORD TO D#-D (U32) ........................................................... 113
ASSIGNING PATCHES (FAVORITES)..........................................................114
WHAT IS A “FAVORITE?” .......................................................................................... 114
USING THE PRESET KEYS TO STORE FAVORITES ............................................. 114
uFavorites is “OFF”........................................................................................... 114
uFavorites is “ON”............................................................................................. 114
SWITCHING“FAVORITE”ON AND OFF................................................................ 115
ASSIGN A PATCH TO A PRESET KEY (“FAVORITE”)........................................... 116
NAMING A PATCH...................................................................................................... 117
SPECIAL ADVANCED FEATURES.......... 119
TRANSPOSE...............................................................................................120
TUNE ..........................................................................................................121
uMASTER TUNE................................................................................................. 121
CONTROL Edit Menu.................................................................................122
uFOOT CONTROLLER...................................................................................... 122
uEXPRESSION.................................................................................................... 123
uGLIDE................................................................................................................. 123
uDAMPER............................................................................................................ 124
uSUSTAIN............................................................................................................ 124
uASSIGN.............................................................................................................. 124
uDRAWBARS...................................................................................................... 124
uDISPLAY ............................................................................................................ 125
Using EXPRESSION and LESLIE MODE............................................................... 126
DEFAULT ....................................................................................................127
SYSTEM Edit Menu....................................................................................128
uPOWER.............................................................................................................. 128
uUSB..................................................................................................................... 128
uPERIPHERAL DEVICE..................................................................................... 128
uSOFTWARE VERSION .................................................................................... 128
MIDI/USB .............................................. 129
MIDI/USB ...................................................................................................130
WHAT IS “MIDI?”......................................................................................................... 130
WHAT IS “USB?”........................................................................................................... 130
MIDI/USB JACKS ON THE XK-5.............................................................................. 130
WHAT MIDI CAN DO ON THE XK-5 ...................................................................... 130
WHAT “USB TO HOST” CAN DO ON THE XK-5.................................................. 130
WHAT IS “USB AUDIO?”........................................................................................... 130
WHAT IS A “MIDI CHANNEL?”................................................................................ 131
MAIN MIDI MESSAGE............................................................................................... 131
uCHANNEL MESSAGE..................................................................................... 131
uSYSTEM MESSAGE......................................................................................... 131
WHAT IS A “MIDI TEMPLATE?”............................................................................... 131
MIDI STRUCTURE ......................................................................................132
uKEYBOARD CHANNELS ............................................................................... 132
uEXTERNAL ZONE CHANNELS .................................................................... 132
uEXPANDED KEYBOARDS............................................................................. 133
USING EXTERNAL MIDI EQUIPMENT .......................................................134
BASIC CONNECTION ................................................................................................ 134
MIDI Edit Menu .........................................................................................135
uMIDI TEMPLATE.............................................................................................. 135
uMASTER ............................................................................................................ 135
uKEYBOARD CHANNEL.................................................................................. 136
uSYSTEM EXCLUSIVE MESSAGE.................................................................. 136
WHAT ARE “ZONES?”................................................................................................ 137
ZONE Edit Menu........................................................................................137
uWHAT IS DISPLAYED ON THE UPPER LEFT?.......................................... 137
uINTERNAL ZONE ............................................................................................ 137
uEXTERNAL ZONE............................................................................................ 137
uSWITCH ON/OFF THE MESSAGES ............................................................ 138
uMIDI ALL NOTES OFF AND RESET CONTROLLERS ............................. 138
USING AN EXTERNAL SEQUENCER ..........................................................139
uRecording a performance to a Sequencer/DAW ............................... 139
uSequencer playback..................................................................................... 139
HA<O> XK-5 Owner’s Playing Guide
8
RECORD AND PLAYBACK........................................................................................ 140
uRecording to a sequencer/DAW along with a synthesizer............. 140
uPlaying back a performance ..................................................................... 140
uRecording a performance to a computer DAW over USB...............141
uRecording a performance using the XLK-5 XPK-250nd 141.......... 141
uRecording a performance including External Zones over USB.... 142
USING THE USB PORTS ........................ 143
USING THE USB PORTS .............................................................................144
WHAT YOU CAN DO WITH A USB FLASH DRIVE.............................................. 144
ABOUT USB FLASH DRIVES.................................................................................... 144
uCOMPATIBLE USB FLASH DRIVE ............................................................... 144
uCONNECTING A USB FLASH DRIVE ......................................................... 144
uFOLDER STRUCTURE.................................................................................... 144
FORMATTING A USB FLASH DRIVE..........................................................145
SETUP FILES ..............................................................................................146
USB MASS STORAGE.................................................................................147
WHAT IS “USB MASS-STORAGE?”......................................................................... 147
SWITCHING THE FUNCTION OF THE USB TO HOST JACK............................ 147
SAVE Edit Menu.........................................................................................148
HOW TO READ THE DISPLAY ................................................................................. 148
SAVING A SETUP........................................................................................................ 148
LOAD Edit Menu........................................................................................150
HOW TO READ THE DISPLAY ................................................................................. 150
LOAD THE SETUP....................................................................................................... 150
DELETE Edit Menu ....................................................................................152
HOW TO READ THE DISPLAY ................................................................................. 152
DELETING A SETUP................................................................................................... 152
UPDATE Edit Menu....................................................................................154
FREQUENTLY ASKED QUESTIONS....... 157
TROUBLESHOOTING.................................................................................158
APPENDIX............................................. 159
MIDI TEMPLATE.........................................................................................160
MIDI TEMPLATE.......................................................................................................... 160
FACTORY PATCHES....................................................................................161
MIDI INFORMATION..................................................................................162
DRAWBAR ORGAN TYPES.........................................................................173
CUSTOM SETS LIST ...................................................................................174
MIDI IMPLEMENTATION CHART...............................................................175
MIDI CHANNEL AND MESSAGE................................................................176
SPECIFICATIONS .......................................................................................177
SERVICE .....................................................................................................179

9
HA<O> XK-5 Owner’s Playing Guide
MAIN FEATURES
uAUTHENTIC HAMMOND DRAWBAR ORGAN
e XK-5 is rst and foremost a genuine Hammond Organ with Virtual Tone Wheels to
provide the traditional sound.
uVIRTUAL MULTI-CONTACT KEYBOARD
e XK-5 is equipped with a Virtual Multi-Contact Keyboard to produce the comfortable
feeling and quick response of models such as the B-3 and C-3. e unique “touch” of a Vin-
tage Hammond, where the dierent harmonics sound in sequence as a key is pressed, is now
at your ngertips. All of the iconic Hammond performance techniques or “Moves” used by
legendary Hammond players have the familiar response and sound.
u5 SETS OF DRAWBARS & PRESET KEYS
e XK-5 has the same conguration of 5 sets of Drawbars and reverse-color Preset Keys as
the B-3 and C-3. ey are equipped to enable instant switching of Drawbar settings and
dynamic tone changes during performance.
uVIBRATO & CHORUS
You can control the degrees of Vibrato and Vibrato Chorus wuth two ON/OFF controls and
a six-position switch just as on the B-3 and C-3.
uLESLIE
A digital and programmable Leslie is available for the Drawbar tones. Also, an 11-pin Leslie
jack is provided which allows you to use the XK-5 with a Leslie Speaker having an 11-pin
interface.
uAMPLIFIER SIMULATOR/EFFECTS
e tube circuits simulate the pre-amplier of the B-3/C-3 to provide “tube warmth.” Four
dierent “Overdrive” Preamp Emulation Proles allow you to add varying degrees of “crunch”
to the sound.
uMULTI-EFFECTS
Also equipped are an Equalizer, Multi-Eects, and, in addition, a Master Equalizer for adjust-
ing the total tonal quality. is corresponds with the sporadic unexpected requirements dur-
ing performance.
uMIDI MASTER KEYBOARD
Six (6) External Zones are available to enable the XK-5 to be used as a MIDI master keyboard.
uPATCHES AND FAVORITES
e XK-5 has several dierent “Preset Banks” which allow the reverse-color Preset Keys to be
programmed with a number of dierent settings. e Preset Keys can be assigned to patches
within the selected Bank, or can be re-assigned as “Favorites” recalling your choice of patches
from any of the Preset Banks.
uSYSTEM EXPANSION
You can expand the XK-5 to a console-style organ by adding the optional Lower Keyboard
XLK-5 and the Pedal Keyboard XPK-250.
uUSB COMPATIBILITY
e XK-5 has both USB “A” and “B” ports. e “A” port (“USB to Host”) enables easy Sys-
tem, MIDI, and Audio Communications with your Computer. e “B” port allows Backups
and Software Upgrades which are simple procedures, using common USB ‘Flash’ Drives.

HA<O> XK-5 Owner’s Playing Guide
10
UPPER
BANK KEY PATCH
PEDAL LOWER
FEATURE CALLOUT
CONTROL PANEL
uUPPER LEFT
❶MASTER VOLUME Rotary Knob
Controls the volume of the entire instrument. (P. 28)
❷DRAWBAR Touch Button
Locates DRAWBAR FUNCTION Mode. (P. 52)
❸CONTROL Touch Button
Sets the various controllers such as Foot Switch or Expression
Pedal.(P. 122)
uCONTROL PANEL
❹DISPLAY
Shows the current registration or currently selected Menu.
❺PLAY Touch Button
Locates the PLAY or performance mode. (P. 37)
❻MENU/EXIT Touch Button
Locates the MENU Mode and exits from various function pages.
(P. 38)
❼NAVIGATION Touch Buttons
Moves the cursor in the display or locates other pages.
❽VALUE Rotary Knob
Increases/Decreases Patch numbers(P. 108) while performing or
adjusts values(P. 40) during editing.
❾ENTER Touch Button
Conrms the current entry or procedure.
uPRESETS
❿PRESET SELECTOR Touch Buttons
is allows you to select whether the Preset Keys change Upper
or Lower Manual registrations when the XK-5 is used as a single-
manual instrument. (P. 112)
⓫BANK Touch Button
is allows you to select dierent Preset Banks called up by the
Preset Keys. (P. 112)
⓬RECORD Touch Button
Records a Patch, Favorite, Leslie Cabinet, etc. (P. 113)
⓭PRESET KEYS
Recalls and Records the Patch or Favorites.
NOTE: The “A<” and “B” Preset Keys are associated with Upper
and Lower Drawbars. See the next page for more detailS.
uKEYBOARD CONTROL
⓮PEDAL SUSTAIN Touch Button
Turns Pedal Sustain “ON” and “OFF.” (P. 51)
⓯PEDAL TO LOWER Touch Button
Couples the Pedal registration to the Lower Manual. (P. 51)
⓰SPLIT Touch Button
Divides the keyboard into Upper (right) and Lower (left) Manuals.
(P. 66)
⓱TRANSPOSE Touch Button
Shifts the musical key of the entire instrument. (P. 120)
⓲OCTAVE Touch Buttons
Moves the pitch of the Upper Manual “UP” or “DOWN” by
octaves. (P. 66)
⓳OCTAVE LOWER Touch Button
Moves the pitch of the Lower Manual “UP” or “DOWN” by
octaves when used with the OCTAVE Touch Buttons. (P. 66)
uLESLIE
⓴BYPASS Touch Button
Changes the sounds produced by the Drawbars from the Leslie
channel to the stationary channel. (P. 72)
㉑STOP Touch Tab
Stops the Leslie Rotors from turning when the [FAST] Touch Tab
is “OFF.” (P. 72)
㉒FAST Touch Tab
Selects “Fast” Leslie Rotor speed. (P. 72)
❶
❷
❸❺
❻❼
❽
❾
❿
⓫
⓬
⓭
⓲ ⓳
㉑
㉓
㉒
㉔
㉕
㉖㉗
⓮ ⓯ ⓰
⓱
㉘
㊺
❹
⓴

11
HA<O> XK-5 Owner’s Playing Guide
uVIBRATO AND CHORUS
㉓UPPER Touch Tab
Turns the Vibrato/Chorus “ON” for the Upper Manual. (P. 70)
㉔LOWER Touch Tab
Turns the Vibrato/Chorus “ON” for the Lower Manual. (P. 70)
㉕VIBRATO & CHORUS MODE Rotary Knob
Selects the depth of both Vibrato and Chorus. (P. 70)
uHARMONIC DRAWBARS
ese provide all the basic tones of the instrument. (P. 46)
㉖UPPER “A<“ DRAWBAR SET
Plays on the Upper Manual when the ❿[UPPER] PRESET
SELECTOR is “ON” and the ⓭“A#” Preset Key is selected.
㉗UPPER “B” DRAWBAR SET
Plays on the Upper Manual when the ❿[UPPER] PRESET
SELECTOR is “ON” and the ⓭“B” Preset Key is selected.
㉘PEDAL DRAWBAR SET
Plays from a connected MIDI Pedal Clavier or from the Manual
when the PEDAL TO LOWER feature is selected.
㉙LOWER “A<“ DRAWBARS
Plays on the Lower Manual when the ❿[LOWER] PRESET
SELECTOR is “ON” and the ⓭“A#” Preset Key is selected.
㉚LOWER “B” DRAWBARS
Plays on the Lower Manual when the ❿[LOWER] PRESET
SELECTOR is “ON” and the ⓭“B” Preset Key is selected.
uPERCUSSION
㉛ON Touch Tab
Adds the Percussion eect to the Upper Manual. (P. 57)
㉜SOFT Touch Tab
Selects “NORMAL” or “SOFT” Percussion Volume. (P. 57)
㉝FAST Touch Tab
Selects “SLOW” or “FAST” Percussion decay time. (P. 57)
㉞THIRD/SECOND Touch Tab
Selects “SECOND” or “THIRD” Percussion harmonic. (P. 57)
uMASTER EQUALIZER
㉟BASS Rotary Knob
Adjusts the gain of the bass range. (P. 80)
㊱MID FREQUENCY Rotary Knob
Adjusts the frequency of the middle range. (P. 80)
㊲MID GAIN Rotary Knob
Adjusts the gain of the middle range. (P. 80)
㊳TREBLE Rotary Knob
Adjusts the gain of the treble range. (P. 80)
uEFFECTS
㊴OVERDRIVE Touch Button
Turns the Overdrive eect “ON” or “OFF.” (P. 79)
㊵OVERDRIVE Rotary Knob
Adjusts the depth of the Overdrive eect. (P. 79)
㊶EFFECT Touch Button
Turns Multi-Eects “ON” or “OFF.” (P. 82)
㊷EFFECT AMOUNT Rotary Knob
Adjusts the amount of selected Multi-Eects. (P. 82)
㊸REVERB Touch Button
Turns the Reverb eect “ON” or “OFF.” (P. 82)
㊹REVERB DEPTH Rotary Knob
Adjusts the depth of the Reverb eect. (P. 82)
uMANUAL
㊺MANUAL
Square-front, “waterfall”-style keys, non-weighted, Virtual Multi-
Contacts (P. 101). 61 playing keys, 12 Preset Keys.
UPPER
BANK KEY PATCH
PEDAL LOWER
㉙ ㉚
㉛㉜㉝㉞
㉟ ㊱ ㊲ ㊳
㊴
㊵
㊶
㊷
㊸
㊹

HA<O> XK-5 Owner’s Playing Guide
12 FEATURE CALLOUT - continued
ACCESSORIES
❶AC POWER CORD
Plug into the AC Power Receptacle of the XK-5.
ACCESSORY PANEL (Recessed)
❶HEADPHONE jack
Connect a set of stereo headphones.
NOTE: Connecting headphones does not mute the LINE OUT jacks
or the 11-pin Leslie connector.
❷CU-1 jack
Connect the CU-1 Leslie mode switch.
❸H-BUS jack
Connect an XLK-5 Lower keyboard or XPK-250 Pedal Clavier
using a Hammond -BUS cable.
PHONES
HEAD CU-1
TO KEYBOARD PEDAL
❶
❶ ❷ ❸

13
HA<O> XK-5 Owner’s Playing Guide
uPOWER
❶AC POWER RECEPTACLE
Connect the female end of a grounded AC Power Cord here, and
the male end into a grounded A.C. power outlet.
❷ON/OFF POWER SWITCH
Turns the AC power to the instrument “ON” or “OFF..”
uUSB PORTS
❸USB “A” PORT (TO FLASH DRIVE)
Insert a USB peripheral device such as a Flash Drive. (P. 130)
❹USB “B” PORT (TO HOST)
Connect to a host device such as a computer. (P. 144)
uMIDI PORTS
❺MIDI OUT port
Sends performance information. (P. 130)
❻MIDI IN 1/PEDAL port
Use to connect the MIDI OUT of a Hammond Pedal Clavier such
as an XPK-200L. (P. 130)
❼MIDI IN 2/OTHER port
Use to connect a Lower Manual such as the Hammond XLK-5.
(P. 130)
uCONTROLLER JACKS
❽EXP. PEDAL jack
Use to connect the optional EXP-100F Expression Pedal to control
the volume while playing. (P. 19)
❾FOOT CONTROLLER 1 jack
❿FOOT CONTROLLER 2 jack
Use to connect a Foot Switch (FS-9H) or Expression Pedal (EXP-
50/50J/20/30). (P. 19)
Use the [POLARITY] switch for each FOOT CONTROLLER
jack to condiagram the connected Foot Controller.
The following Foot Controllers have been approved for use on
the XK-5:
HAMMOND
FS-9H, EXP-50, EXP-50J, EXP-20, VFP1, V-20H, V-20R: NORM
KORG
EXP-2, XVP-10: REV
ROLAND
EV-5, EV-7: NORM
YAMAHA
FC4, FC5: NORM
FC3, FC7: REV
uAUDIO OUTPUT JACKS
⓫LINE OUT R jack
⓬LINE OUT L/MONO jack
Use these jacks to connect an exteral amplier. If the connected
mixer or monitor speaker is stereophonic, connect both L and R. If
monaural, connect only the L/MONO terminal. (P. 18)
⓭HEADPHONES jack
Use to connect a set of stereo headphones.
NOTE: The HEADPHONE jack does not mute the LINE OUT or
LESLIE audio outputs. If you wish the sound to go through only
the Headphones, disconnect all other audio outputs. If you are
using an amplier, be sure to turn the power to the amplier
“OFF” before disconnecting the audio cables.
⓮LESLIE 11-PIN jack
Use to connect a Leslie Speaker cabinet. (P. 20)
IMPORTANT NOTE: The XK-5 is designed to be connected to a
Leslie Speaker having an 11-pin interface. Connecting the instru-
ment to other Leslie Speakers may require a special adapter kit
and/or Connector Cable. Contact your Hammond Organ Dealer
for more information regarding which adapter kit and/or cable
you may need.
REAR PANEL
❶❷
❸ ❹ ❺ ❻ ❼ ❽ ❾ ❿ ⓫ ⓬ ⓭ ⓮

HA<O> XK-5 Owner’s Playing Guide
14
Reverb
switched if Leslie
on Reverb
Pedal V&C
Line Out Phones
Leslie 11Pin
without Leslie simulator
USB Audio
Leslie
Simulator
Vibrato & Chorus
Tube 1 Tube 2Overdrive
Matching
Transformer
TC & Equalizer Master
Equalizer
Patch Level
Virtual
Tonewheel Set
Pedal
Drawbars
Lower
Drawbars
Upper
Drawbars
Percussion
Pedalboard Lower Keyboard
Upper Keyboard
Multi Effect 2
Multi Effect 1
Exp.
Expression
SOUND ENGINE STRUCTURE

15
HA<O> XK-5 Owner’s Playing Guide
To fully understand this instrument, read the following detailed explanations about the various functions.
TONE WHEELS
e sound source or “engine” of the classic Hammond Organ is the electromagnetic “Tone Wheel Generator.” e XK-5 contains a digital
Tone Wheel Generator which gives the same musical performance as the earlier instruments but with no moving parts.
NOTE: The Tone Wheel Generator is explained in more detail in the CUSTOM TONE WHEELS section of this Manual.
KEYBOARDS
When a playing key is depressed, the tone signals created by the Virtual Tone Wheels are allowed to sound. e instrument will play whatever
registration is currently selected on the manual being played.
DRAWBARS
A note of the instrument, played on either manual or a pedal keyboard, will generally consist of a fundamental pitch and a number of har-
monics, or multiples of the fundamental frequency. e fundamental and eight harmonics available on each playing key are individually
controllable by means of “Drawbars.” Each Drawbar represents a particular harmonic, and each Drawbar adjusts the volume of its harmonic.
TOUCH-RESPONSE PERCUSSION
is adds a percussive attack. It is controlled by four Touch Tabs at the upper right of the control panel. Percussion is available only on the
Upper Manual and normally only when the ‘B’ Preset Key is active.
MATCHING TRANSFORMER
e Matching Transformer on a tone-wheel Hammond Organ matches the low impedance of the Tone Wheels and key circuits to the high
impedance amplier input. It serves also, through taps on its primary winding, to establish a series of intensity levels for the Drawbars. is
feature reproduces these characteristics digitally.
VIBRATO & CHORUS
e Vibrato & Chorus gives depth and richness to the organ sound by slightly varying the pitch (Vibrato), or doubling the voice by mixing
the original sound, with a duplicate, slightly detuned one (Chorus).
PRE AMPLIFIER, OVERDRIVE
“Pre-amplier” recreates the performance of the pre-amplier of a B-3-type tone-wheel organ. “Overdrive” adds distortion to the sound by
increasing the pre-amplier input gain.
MULTI-EFFECTS
e Multi-Eects section create various eects such as Tremolo, Wah-Wah, .
EQUALIZER, LESLIE, REVERB
Other on-board Eects are as follows: an Equalizer for sculpting the tonal response, a Leslie eect for rotary speaker eects, and Reverb.
NOTE: The built-in digital Leslie eect is disengaged when an external Leslie Speaker cabinet is connected to the instrument the 11-pin
terminal.
MASTER EQUALIZER
e Master Equalizer allows you to adjust the overall frequency response of the entire instrument in real time.

HA<O> XK-5 Owner’s Playing Guide
16
***THIS PAGE INTENTIONALLY LEFT BLANK TO PRESERVE PAGE FORMATTING ***

17
HA<O> XK-5 Owner’s Playing Guide
MAKING THE
CONNECTIONS

HA<O> XK-5 Owner’s Playing Guide
18
IMPORTANT: Make sure both the instrument and amplier are“OFF” before connecting ampliers or headphones.
Connect audio cables and accessories as shown below.
Tne XK-5 is not self-contained - an external amplier/speaker system is required in order to hear the sound. However, if you connect
a set of stereo headphones to the HEADPHONES jack, you can hear the sound through the headphones even if an external amplier
is not connected.
TO AC OUTLET
NOTE: The Expression Pedal and Foot Switch parameters must be set properly. For
more information, consult the [CONTROL] section of this Manual.
BASIC CONNECTIONS
CAUTION
Do not place the instrument in direct sunlight, near heat sources, or in a hot location. Doing so may result in damage
to the instrument.
Expression Pedal
EXP-50/50J/20/30
(optional)
Foot Switch
FS-9H (optional)
Powered Speakers
(optional)

19
HA<O> XK-5 Owner’s Playing Guide
CONNECTING THE CU-1 LESLIE SWITCH (purchased separately)
Connect the CU-1 to the CU-1 jack found on the
recessed Accessory Panel (see page 12).
CONNECTING THE EXPRESSION PEDAL
uCONNECTING AN EXP-100F
CONNECTING THE CONTROLLERS
uCONNECTING AN EXP-50/50J/20/30
UPPER
BANK KEY PATCH
PEDAL LOWER
UPPER
BANK KEY PATCH
PEDAL LOWER UPPER
BANK KEY PATCH
PEDAL LOWER
Connect the EXP-100F to the EXP. PEDAL jack.
NOTE: In order to use the EXP-100F Expression Pedal, the EXP-
SOURCE switch in the CONTROL Edit Menu must be set either to
“EXP. PEDAL” or “BOTH.” This is explained on page 123.
1. Make sure the power to the instrument is “OFF.”
2. Connect the EXP-50/20/30 to either the CONTROL 1 or
CONTROL 2 jack.
3. Set the [POLARITY] at “NORM.”
4. Turn the power to the instrument “ON.”
NOTE: In order to use the EXP-50, EXP-50J, EXP-20 or EXP-30, the
CONTROL MODE switch in the CONTROL Edit Menu must be set
to “EXPRESSION.” This is explained on page 122.
PHONES
HEAD CU-1
TO KEYBOARD PEDAL
Use the two thumbscrews provided with the CU-1 to secure
it to the underside of the Lower Manual.

HA<O> XK-5 Owner’s Playing Guide
20
A Leslie speaker with an 11-pin interface can be directly connected to this keyboard.
CONNECTING A LESLIE SPEAKER
CONNECTING A SINGLE-CHANNEL LESLIE SPEAKER
UPPER
BANK KEY PATCH
PEDAL LOWER
BASIC CONNECTION
1. Set the LESLIE - EXT. LESLIE CH at “1.” See page 76 for instructions on how to do this.
2. Connect the Leslie Cabinet to the XK-5 using the 11-pin cable.
3. Make sure the [BYPASS] Touch Button is “OFF” (LED not lit) and set the volume of the Leslie Speaker at the level
desired.
WHAT IS A “STATIONARY SPEAKER?”
A “Stationary Speaker” is a speaker with no rotating baes, such as a separate amplier or the non-rotary channel(s) of a multi-
channel Leslie Speaker.
e XK-5 has a built-in digital Leslie system which provides the essential sound even without the presence of a Leslie Speaker
cabinet. We recommend the Leslie 2121, Leslie LS-2215 or Leslie LS-2210 Keyboard Ampliers for these applications; how-
ever, any high-quality keyboard amp may be used.
1. Connect the LINE OUT jacks on the XK-5 to the desired inputs on the Leslie amp (or your chosen amp).
2. Be sure the [BYPASS] Touch Button is “OFF.” Use the normal Leslie functions.
NOTE: If you wish, you can use a single cable for MONO operation. In this case, use the L/MONO jack.
ADDING STATIONARY SPEAKERS
You can create the eect of a Leslie Speaker used in conjunction with a non-rotary tone cabninet by connecting a separate amp-
plier to the instrument via the LINE OUT jacks.
1. Repeat steps 1 to 3 above.
2. Turn the [BYPASS] Touch Button “OFF” and set the [ROTARY VOLUME] control of the 2101/2101mk2 at the
desired volume.
NOTE: If you are using either a single-channel Leslie Speaker along with a separate amplier or a multi-channel Les-
lie Speaker such as the 2101/2101mk2, turn the [BYPASS] Touch Button “ON” and “OFF” repeatedly and play notes
to balance the Rotary and Stationary channels against each other.
This manual suits for next models
1
Table of contents
Other Hammond Musical Instrument manuals

Hammond
Hammond SK1 User manual

Hammond
Hammond Exceed M-44 User manual

Hammond
Hammond XK-5 User manual

Hammond
Hammond A-162 User manual

Hammond
Hammond Model A User manual

Hammond
Hammond X-5 User manual

Hammond
Hammond XT-100 Owner's manual

Hammond
Hammond Sk Series User manual

Hammond
Hammond SKX User manual

Hammond
Hammond XK-5 User manual

Hammond
Hammond RT-3 User manual

Hammond
Hammond XKL-5 User manual

Hammond
Hammond B-3 User manual

Hammond
Hammond XPK-250W User manual

Hammond
Hammond SK1 User manual

Hammond
Hammond B-3P User manual

Hammond
Hammond A-405SP User manual

Hammond
Hammond B-3 User manual

Hammond
Hammond XB2 User manual

Hammond
Hammond Super-B User manual