Handpresso AUTO 12V User manual

designed by Handpresso in Fontainebleau, France
“espresso on board”

“espresso on board”

4 5
table of content
English ............................................ 6
Warranty ....................................... 15
Français ........................................ 16
Garantie ....................................... 25
Italiano ......................................... 26
Garanzia ....................................... 35
Español ........................................ 36
Garantia ....................................... 45
Dansk ........................................... 46
Garanti .......................................... 55
Deutsch ........................................ 56
Garantie ....................................... 65
Nederlands .................................. 66
Garantie ....................................... 75
РУССКИЙ ..................................... 76
Гарантия ...................................... 85
notes
.......................................................................................................................................................................
.......................................................................................................................................................................
.......................................................................................................................................................................
.......................................................................................................................................................................
.......................................................................................................................................................................
.......................................................................................................................................................................
.......................................................................................................................................................................
.......................................................................................................................................................................
.......................................................................................................................................................................
.......................................................................................................................................................................
.......................................................................................................................................................................
.......................................................................................................................................................................
.......................................................................................................................................................................
.......................................................................................................................................................................
.......................................................................................................................................................................
.............................................................................. ........................................................................................
.......................................................................................................................................................................
.......................................................................................................................................................................
.......................................................................................................................................................................
.......................................................................................................................................................................
..................................................................................................................................................

6 7
for E.S.E. pods
for ground coffee
rst steps
Thank you for choosing Handpresso. Here are some instructions before using your espresso
machine:
● Read all the instructions before using the machine and do not throw them away.
● Before using the machine for the first time, wash it with hot water to remove any residue and
dust. Make the Handpresso AUTO work once and throw the first coffee away.
● Handpresso AUTO is now ready for use.
ENGLISH
nozzle
ground coffee
portalter
power cord
cigarette lighter plug
ground coffee
portalter
ground coffee
adapter
ground coffee ring
E.S.E. portalter
locking indicators
locking indicators
locking indicators
safety ring
stop button
thermometer
ON button
espresso button
power cord
lter
portalter
water level indicators
water level indicators
drip rail
pod holder
O-ring
reservoir lling area
locking indicators

89
12 V
12 V
2’
bip x3
OK NO
OK NO
234
1
7
6
5
910
8
11 12
14
13
15 16 17
89
instructions
for use with E.S.E. pods
1 – Before using Handpresso Auto, make sure that the
vehicle is stationary, the parking brake engaged and the
engine turned on.
2 – Uncoil the power cord before installing Handpresso
AUTO vertically in the cup holder.
3 – Plug the power cord to a 12V cigarette lighter plug.
4 – Unscrew the portalter.
5 – If the ground coffee ring is placed, remove it.
6 – Fill the cup with water up to the black line, then pour
the water in the machine.If you do not have the cup,
beware not to pour too much water ! Therefore, watch
the water level indicators. They get darker clockwise, the
one after the other, as you add water. Pour slowly. Stop
adding water as soon as the last indicator turns black.
7 – Put an E.S.E. pod in the pod holder.
8 – Close the E.S.E. portalter by rotating it 60 degrees
clockwise… up to the locking indicator. Beware: the
brewing will not be possible if the E.S.E. portalter is
not properly locked!
9 – Press the ON button to start the heating cycle of the
machine.
10 – Wait until you hear 3 bleeps (approx. 2 minutes).
Beware: When the motor noise stops, it does not mean
that the machine is ready! Wait until you really hear the
machine bleeps three times. At the end of the cycle, when
the machine is ready, the thermometer will show the
correct water temperature and the ON button will remain
lit for 1 minute.
11 – Unplug the machine.
12 – Flip the machine around, place it over a cup and
push the espresso button till the end (a safety ring
appears) to pour the coffee.
13 – When the cup is lled to your liking, press the STOP
button - until the safety ring disappears – in order to stop
the coffee.
14 – Turn over the machine and place it back vertically in
its housing.
15 – Re-open the E.S.E. portalter to remove and dispose
of the used pod.
16 – Pour out any excess water from the water reservoir.
17 – Enjoy your espresso.
To prepare the second espresso, go back to step 4.

10 11
12 V
12 V
2’
bip x3
OK NO
OK NO
234
1
7
6
5
910
8
11 12 13
15
14
16 17 18
instructions
for ground coffee
1 – Before using Handpresso Auto, make sure that the
vehicle is stationary, the parking brake engaged and the
engine turned on.
2 – Uncoil the power cord before installing Handpresso
AUTO vertically in the cup holder.
3 – Plug the power cord to a 12V cigarette lighter plug.
4 – Unscrew the portalter.
5 – Place the ground coffee ring in the pod holder if it is
not there.
6 – Fill the cup with water up to the black line, then pour
the water in the machine.If you do not have the cup,
beware not to pour too much water ! Therefore, watch the
water level indicators. They get darker clockwise, the one
after the other, as you add water. Pour slowly. Stop adding
water as soon as the last indicator turns black.
7 - Prepare your coffee dose by lling the ground coffee
adapter evenly with the espresso coffee of your choice.
Please check that the coffee does not exceed the upper
edge of the ground coffee adapter. Please refer to “some
useful recommendations” on p.12 to optimize the lling
and the tamping of the ground coffee adapter.
8 – Put the ground coffee adapter in the ground coffee
ring.
9 – Close the ground coffee portalter by rotating it 60
degrees clockwise… up to the locking indicator. Beware:
the brewing will not be possible if the ground coffee
portalter is not properly locked!
10 – Press the ON button to start the heating cycle of the
machine.
11 – Wait until you hear 3 bleeps (approx. 2 minutes).
Beware: When the motor noise stops, it does not mean
that the machine is ready! Wait until you really hear the
machine bleeps three times. At the end of the cycle, when
the machine is ready, the thermometer will show the
correct water temperature and the ON button will remain
lit for 1 minute.
12 – Unplug the machine.
13 – Flip the machine around, place it over a cup and
push the espresso button till the end (a safety ring
appears) to pour the coffee.
14 – When the cup is lled to your liking, press the STOP
button - until the safety ring disappears – in order to stop
the coffee.
15 – Turn over the machine and place it back vertically in
its housing.
16 – Re-open the ground coffee portalter and remove the
ground coffee adapter. Remove the brewed coffee from
the ground coffee adapter by squeezing the sides and
pressing the mesh lter. Throw out the coffee and rinse
the ground coffee adapter. Beware of the water which may
still be in the water reservoir.
17 – Pour out any excess water from the water reservoir.
18 – Enjoy your espresso.
To prepare the second espresso, go back to step 4.

12 13
● I nd it difcult to ll the reservoir to the right level?
The water level indicators get darker if you place your look just above the machine.
Pour the water slowly and steadily. The water level indicators show the water level in the reservoir.
Watch carefully and clockwise the water level indicators as they get darker, starting with the
indicator having an arrow.
Stop pouring when the last indicator (having a STOP) gets black. Go back to step 6 in the
instructions.
● I cannot close the portalter?
A safety device prevents you from handling the portalter if the Espresso button is not in the right
position. See if the safety ring is visible. If it’s not the case, press the STOP button till the end. Place
the portalter and close it up to the locking indicator.
● When I press the ON button, the machine does not heat?
a/ Make sure that the cigarette lighter plug is well plugged-in. The logo of the machine’s cigarette
lighter is lit up when it is properly connected.
b/ Check that the 12V cigarette lighter plug is powered.
In any case, make sure that your vehicle is in working order so as to power the 12V cigarette lighter
plug properly.
● The water drips from the portalter during the heating cycle of the machine (when the ON
button is pressed)?
There is too much water in the reservoir. Make sure not to exceed the recommended water level. Go
back to step 6 in the instructions.
● I cannot press the Espresso button?
Handpresso AUTO is tted with a safety device blocking the use of the Espresso button if the
machine is not turned over.
Make sure that the portalter is tightly closed up to the locking indicators.
Flip the machine around, portalter above the cup (step 12 in the instructions); press the Espresso
button till the end.
● I press the Espresso button but the coffee does not run?
Make sure that the Espresso button is pressed till the end.
● The water drips from the portalter during the brewing?
a/ Check the presence and position of the O-ring on the pod holder.
Replace the O-ring if it is not there or if it is faulty (dry, cracked, damaged or cut), you can get one
from your retailer.
b/ Make sure to close the portalter tightly up to the locking indicators (go back to step 8 in the
instructions).
● My espresso is too short?
Make sure to ll the reservoir up to the recommended water level. Go back to step 6 in the
instructions.
● My espresso is cold?
The heating of the water continues after the machine stops making noise. You can follow the
heating of the water on the thermometer.
● For any other question please contact your retailer.
warnings
Please read the instructions before using the machine, Handpresso would decline all responsibility in case
of incorrect use.
HANDPRESSO AUTO SHALL NEVER BE USED WHEN THE VEHICLE IS RUNNING.
Always make sure that the machine is stowed after use to prevent risks of injury in case of impact.
To be used, Handpresso Auto requires the user’s full attention. Handpresso Auto is an espresso machine
that raises water to a temperature close to 100°C. TO AVOID RISKS OF BURNING, HANDLE WITH CARE.
Prepare it beforehand, or park in a safe spot for you and the other road-users. Handpresso would decline
all responsibility for any road accident.
Keep away from children & uninstructed persons. Avoid leaving the machine unwatched.
For your own safety and that of the people around you, do not plunge the cigarette lighter plug, the power
cord nor any other part of the machine into water or any other liquid. Do not use the machine if it has
accidentally been in contact, even partially, with a liquid.
Never press the ON button if the portalter is not properly locked and tightened up to the locking
indicators, step 8 in the instructions!
Do not try to remove the portalter during usage and before having pushed the STOP button back.
After having made your espresso, while removing the portalter, beware not to spill hot water possibly
some useful recommendations
to get a premium quality espresso
● Always use mineral water.
● Only use E.S.E. pods (most recognized coffee brands propose E.S.E. pods also called « espresso
pods », « hard pods », 44 mm pods) – A whole range of E.S.E. pods are on sale at
http://www.handpresso.com
● With the ground coffee adapter: Only use coffee grounded for espresso (very ne grinds). The
coffee grind differs from one brand to the other and explains the variety in quality. Do not hesitate
to make tests by changing the quantity of coffee, the coffee grind you use in the ground coffee
adapter and how hard you tamp the coffee. Thus, you dene your espresso yourself. A grind, which
is too ne and compact, has a very long brewing time and gives a very strong espresso. On the
other hand, too coarse a grind, which is not tamped, has a very short brewing time, thus reducing
the strength of espresso.
A whole range of ground coffee is on sale at http://www.handpresso.com
● We remind you that a good espresso is obtained with approximately 7 grams of coffee, a brewing
time of around 25 seconds and a water temperature of between 90 to 95°C.
● With Handpresso AUTO, you are able to prepare a longer or a shorter espresso. Just press the
STOP button when the strength of your espresso is to your liking.
● To obtain a beautiful crema in the cup, press the STOP button early enough, just before the rst
bubbles appear.
● If you like very strong coffee (Ristretto), Handpresso advises you to use the special “intense”
portalter (optional).
● Handpresso offers a range of accessories for your machine dedicated to mobility: unbreakable
cups, Auto set, 220/12V power adapter, tamper …
cleaning and maintenance
● Always remove the used pods from the machine after use.
● Remove and empty the ground coffee adapter by pressing the lter mesh and knocking it slightly
on the edge of a container.
● Unplug your Handpresso AUTO before cleaning.
● Clean the machine with a wet cloth (only water).
● Do not use alcohol or detergents. These products could change the characteristics of the
machine and make it dangerous.
● Do not put Handpresso AUTO in the dishwater or the microwave oven.
● Do not plunge Handpresso AUTO into water.
descaling
● Descale the machine regularly (every 2nd month or every 100 coffees) in order to increase its
performance and life.
● In order to descale Handpresso AUTO, use regular 8° white vinegar. Fill Handpresso AUTO with 25
ml vinegar. Let it work 1 hour without heating it.
● Pour the vinegar and rinse 5 or 6 times with water.
● Repeat if necessary. Never use any other descaling method than the one recommended here.
storage
● Owing to its small size, Handpresso AUTO is easy to store in a car, in a glove or a map
compartment, under the seat or in the trunk.
● Never leave Handpresso AUTO visible in a parked vehicle to prevent theft.
● Never leave Handpresso AUTO in a parked vehicle in the sun.
● In order to keep Handpresso AUTO in good condition, we advise you to store it in its AUTO case.
● Avoid storing Handpresso AUTO in humid places.
repair
What to do in the following cases:
● I cannot open the portalter?
Handpresso AUTO works at a pressure of 16 bar. In order to avoid injuries or damage to the product
due to the pressure, a safety device prevents you from handling the portalter if the Espresso
button is not in the right position.
A safety ring tells you when the machine is under pressure. You cannot open the machine if the
safety ring is visible.
Press the STOP button till the end so the safety ring disappears. As the machine is no longer under
pressure, you can open the portalter.

14 15
warranty
Special conditions for our 1-year guarantee
Our guarantee covers any manufacturing and material defect as well as any internal operational
defect (not excluded below) duly certied by our after-sales technician.
This guarantee is not transferable and does not give any entitlement to compensation in cash or in
kind, nor to any extension while the machine is under repair.
Not covered by our guarantee
- Damage resulting from commercial, professional, collective or industrial use.
- The transport costs of the machine, the technician’s travel and labour costs related to any damage
or repair not guaranteed nor certied by the after-sales service approved by our company.
- Damage to the machine due to re, explosion, lightning, insofar as it originates from other
machines.
- Damage not caused by the machine itself such as misuse, abuse or mistreatment, theft, lightning,
ood, re…
- Damage due to corrosion or the gradual deterioration of the machine, a bad connection or a bad
electricity supply...
- Travel costs related to portable machines.
- The replacement of parts: joint, ground coffee adapter...
- Damage of an aesthetic nature such as varnish, enamel, lacquer, paint…
- Costs for adjustments the user could make without dismantling the machine, checks, cleaning
and tests which do not follow a damage covered by the guarantee.
- Repairs by persons not authorized by the brand’s after-sales service. The customer remains
responsible for any makeshift or provisional repair as well as for the resulting possible worsening of
the damage.
-- Damage due to the use of consumables different from those recommended by the manufacturer.
- In all these instances, the legal guarantee covering the faults and hidden defects will be applicable
according to the law.
How to invoke the guarantee of a product?
The guarantee runs for one year as of the date on the proof of purchase (receipt or invoice) and
must be attached to the guarantee for any claim.
If your product is still under warranty, please contact your shop, which will advise you on how to
reduce the period of repair.
remaining in the reservoir, namely if you have made a short espresso called “Ristretto”.
If you burn yourself, immediately pour cold water on the burnt area and call a doctor if necessary.
Inspect the machine carefully before use and make sure that there is no crack, no deep scratch nor any
other damage preventing it from being in working order.
Do not use your machine if the cigarette lighter plug, the power cord or any other part of the machine
seems damaged.
After each heating cycle, the pressure has to be eliminated by pressing the Espresso button, even if the
brewing has not taken place.
Do not use the machine for any other purpose than what it is intended for. Handpresso cannot accept
responsibility or liability in case of incorrect use or of application the machine is not intended for.
During usage, put the machine on a at and dry surface, not subject to vibrations.
Beware of coffee projections and beware of the direction of the nozzle during use.
Handpresso AUTO works only with a connection like the cigarette lighter socket powered with 12V DC
(direct current). Please check that the tension available in your vehicle is really 12V. This machine is not
suitable for a 24V supply.
Only use E.S.E. pods. Only pour water in the reservoir, except white vinegar for descaling.
The machine should be used between 5°C and 50°C (41°F and 122°F), and under normal atmospheric
pressure conditions (from 0 to 3000 m altitude).
Handpresso AUTO’s electricity consumption is pretty large. We strongly recommend that you always use
the machine when the engine is turned on. Handpresso Auto is tted with a safety system protecting your
battery if the voltage is insufcient. If your battery is low, it will only work if the engine of your vehicle is
turned on.
The machine stops automatically if the voltage provided by the battery is below 9.5V.
The machine is not suited for any professional use whatsoever. Maximum 10 espressos in a row. In case of
intensive use, a 1 hour-break is absolutely necessary after 10 espressos.
Descale your Handpresso AUTO regularly. Our warranty does not cover machines which do not work or do
not work properly due to a lack of descaling.
Apart from the replacement of the fuse, DO NOT TRY TO REPAIR THE MACHINE OR REPLACE PARTS
YOURSELF: contact an authorized retailer for this type of repair. DISMANTLING THE MACHINE CAN BE
DANGEROUS AND CANCELS THE WARRANTY.
customer service
If you require any further information please visit our customer service at :
http://www.handpresso.com
technical data
Water reservoir capacity.................................................................................................... 1.7 .oz(50 ml)
Capacity of a ground coffee adapter.............................................................................aroud 0.24oz. (7g)
Pods................................................................................................................ E.S.E. and compatible pods
Maximum pressure .......................................................................................................................... 16 bar
Dimensions L x l x h (inches)………………………........................…….............................. 2.95 x 2.95 x 8.46
(mm) ..................................................................................................................................... 75 x 75 x 215
Weight................................................................................................................................ 1.94 lbs (880 g)
Voltage. ..………………………...................................................................................................……….. 12 V DC
Power consumption….. ..…………………............................................................…….……..........…… 140 Watt
patents & trademarks
This machine is protected by international patents and patent applications. Handpresso is a
registered trademark.
E.S.E. is a registered trademark belonging to the E.S.E. consortium.
address
Handpresso
77300 Fontainebleau, FRANCE
www.handpresso.com

16 17
for E.S.E. pods
for ground coffee
première utilisation
Merci d’avoir choisi Handpresso. Voici quelques conseils avant de commencer à utiliser votre
machine expresso :
● Lisez les instructions complètes avant l’utilisation de l’appareil et conservez-les.
● Avant la première utilisation, lavez l’appareil à l’eau chaude pour éliminer les éventuels résidus
et poussières. Faites ensuite fonctionner Handpresso Auto une première fois et jetez le premier
café.
● Handpresso AUTO est maintenant prêt à l’emploi.
porte ltre pour café
moulu
adaptateur pour café
moulu
bague pour café
moulu
porte-ltre E.S.E.
repère de serrage
repère de serrage
repère de serrage
bague de sécurité
bouton stop
thermomètre
bouton ON
bouton expresso
cordon d’alimentation
FRANÇAIS
buse
porte ltre pour café
moulu
cordon d’alimentation
prise allume-cigare
ltre perforé
porte-ltre
indicateurs de
remplissage
indicateurs
de remplissage
joint gouttière
porte-dosette
joint torique
zone de
remplissage
du réservoir
repère de serrage

18 19
12 V
12 V
2’
bip x3
OK NO
OK NO
234
1
7
6
5
910
8
11 12
14
13
15 16 17
18 19
mode d’emploi
pour dosettes E.S.E.
1 - Avant d’utiliser le Handpresso Auto, assurez-vous que
votre véhicule est à l’arrêt, que le frein à main est serré, et
que le moteur est allumé.
2 – Déroulez le cordon d’alimentation avant de poser
Handpresso AUTO en position verticale dans le porte
gobelet.
3 - Branchez le cordon d’alimentation à une prise 12 V
type allume-cigare.
4 - Dévissez le porte-ltre.
5 - Si la bague pour café moulu est présente, retirez-la.
6 - Remplissez la tasse d’eau jusqu’au trait noir puis
versez l’eau dans la machine. Si vous n’avez pas la tasse,
attention à ne pas mettre trop d’eau ! Pour cela observez
les indicateurs de remplissage qui deviennent noirs les
uns après les autres, dans le sens horaire, au fur et à
mesure que vous versez l’eau. Versez lentement. Arrêtez
de verser lorsque le dernier indicateur devient noir.
7 - Placez une dosette E.S.E. dans le porte-dosette.
8 - Refermez le porte-ltre E.S.E. en le vissant jusqu’au
repère de serrage. Attention : la percolation du café
ne sera pas possible si le porte-ltre E.S.E. n’est pas
correctement serré !
9 - Appuyez sur le bouton ON pour lancer le cycle de
préparation de l’appareil.
10 - Attendez que l’appareil émette 3 bips (2’ environ).
Attention : l’arrêt du bruit du moteur ne signie pas
que la machine est prête ! Attendez bien que l’appareil
émette 3 bips. À la n du cycle, quand l’appareil est prêt,
le thermomètre indique la bonne température de l’eau et
l’illumination du bouton ON reste xe pendant 1 minute.
11 - Débranchez l’appareil.
12 - Retournez l’appareil, placez-le au-dessus d’une
tasse et enfoncez le bouton expresso jusqu’en butée
(apparition de la bague de sécurité) pour verser le café.
13 - Lorsque la tasse est remplie à votre goût, actionnez le
bouton STOP - jusqu’à disparition de la bague de sécurité
- pour arrêter le café.
14 - Retournez l’appareil et reposez-le en position verticale
dans son logement.
15 - Ouvrez à nouveau le porte-ltre E.S.E et retirez la
dosette usagée.
16 - Videz le reste d’eau du réservoir.
17 - Dégustez votre expresso.
Pour la préparation d’un second café, reprendre à l’étape 4.

20 21
12 V
12 V
2’
bip x3
OK NO
OK NO
234
1
7
6
5
910
8
11 12 13
15
14
16 17 18
mode d’emploi
pour café moulu
1 - Avant d’utiliser le Handpresso Auto, assurez-vous que
votre véhicule est à l’arrêt, que le frein à main est serré, et
que le moteur est allumé.
2 – Déroulez le cordon d’alimentation avant de poser
Handpresso AUTO en position verticale dans le porte
gobelet.
3 - Branchez le cordon d’alimentation à une prise 12 V
type allume-cigare.
4 - Dévissez le porte-ltre.
5 - Placez la bague pour café moulu dans le porte-dosette
s’il n’est pas déjà présent.
6 - Remplissez la tasse d’eau jusqu’au trait noir puis
versez l’eau dans la machine. Si vous n’avez pas la tasse,
attention à ne pas mettre trop d’eau ! Pour cela observez
les indicateurs de remplissage qui deviennent noirs les
uns après les autres, dans le sens horaire, au fur et à
mesure que vous versez l’eau. Versez lentement. Arrêtez
de verser lorsque le dernier indicateur devient noir.
7 – Préparez votre dose de café en remplissant
uniformément l’adaptateur avec le café moulu de votre
choix. Veillez à ce que le café ne dépasse pas le bord
supérieur de l’adaptateur pour café moulu. Reportez-
vous à la rubrique « quelques conseils » en page 22 pour
optimiser le remplissage et le tassage de l’adaptateur
pour café moulu.
8 – Placez l’adaptateur pour café moulu dans la bague
pour café moulu.
9 - Refermez le porte ltre pour café moulu en le vissant
jusqu’au repère de serrage. Attention : la percolation
du café ne sera pas possible si le porte ltre pour café
moulu n’est pas correctement serré !
10 - Appuyez sur le bouton ON pour lancer le cycle de
préparation de l’appareil.
11 - Attendez que l’appareil émette 3 bips (2’ environ).
Attention : l’arrêt du bruit du moteur ne signie pas
que la machine est prête ! Attendez bien que l’appareil
émette 3 bips. À la n du cycle, quand l’appareil est prêt,
le thermomètre indique la bonne température de l’eau et
l’illumination du bouton ON reste xe pendant 1 minute.
12 - Débranchez l’appareil.
13 - Retournez l’appareil, placez-le au-dessus d’une
tasse et enfoncez le bouton expresso jusqu’en butée
(apparition de la bague de sécurité) pour verser le café.
14 - Lorsque la tasse est remplie à votre goût, actionnez le
bouton STOP - jusqu’à disparition de la bague de sécurité
- pour arrêter le café.
15 - Retournez l’appareil et reposez-le en position verticale
dans son logement.
16 – Ouvrez à nouveau le porte ltre pour café moulu pour
café moulu et retirez l‘adaptateur pour café moulu. Retirez
le café de l’adaptateur pour café moulu en pressant les
bords et en appuyant sur le ltre. Jetez le café et rincez
l‘adaptateur pour café moulu. Faites attention à l’eau
restant éventuellement dans le réservoir.
17 - Videz le reste d’eau du réservoir.
18 - Dégustez votre expresso.
Pour la préparation d’un second café, reprendre à l’étape 4.

22 23
quelques conseils
pour obtenir un expresso de qualité
● Utilisez toujours de l’eau minérale.
● Utilisez uniquement des dosettes E.S.E. (la plupart des grandes marques de café proposent
des dosettes E.S.E. également appelées «dosettes expresso», «dosettes rigides», «dosettes dures»,
dosettes 44 mm) – Une gamme de dosettes E.S.E. est en vente sur le site:
http://www.handpresso.com
● Avec l’adaptateur pour café moulu : N’utilisez que du café moulu pour expresso (mouture très
fine). La mouture du café diffère d’une marque à l’autre et son influence est très importante sur
la qualité du café. N’hésitez pas à faire plusieurs essais en variant la quantité, le tassage voire la
mouture du café que vous utilisez dans l’adaptateur pour café moulu. Vous définissez ainsi vous-
même « votre expresso ». Une mouture très fine et trop tassée donne un long temps d’infusion et
donc un expresso très fort. A l’inverse, une mouture trop grossière et peu tassée donne un temps
d’infusion très court et un expresso trop léger.
Une gamme de café moulu est en vente sur le site http://www.handpresso.com
● Pour rappel, un bon expresso est obtenu avec +/-7 g de café, un temps d’infusion de 25
secondes environ et une eau entre 90 et 95°C.
● Handpresso AUTO permet de réaliser un expresso plus ou moins long. Il suffit d’appuyer sur le
bouton stop quand votre expresso a atteint la contenance désirée.
● Pour obtenir une belle mousse dans la tasse, appuyez sur le bouton stop suffisamment tôt, avant
l’apparition de bulles.
● Si vous êtes amateur de café très serré (Ristretto), Handpresso vous conseille d’utiliser le porte-
filtre spécial « intense » (en option).
● Pour une qualité optimale, Handpresso propose pour votre machine, une gamme d’accessoires
dédiés à la mobilité : tasses incassables, mallette de transport, alimentation 220/12V, tasseur …
nettoyage et entretien
● Retirez les dosettes usagées de l’appareil après chaque utilisation.
● Retirez et videz l’adaptateur pour café moulu en appuyant sur le filtre et en le tapant doucement
contre le bord d’un réceptacle.
● Débranchez toujours votre Handpresso AUTO avant le nettoyage.
● Nettoyez votre appareil avec un chiffon humide (eau uniquement).
● N’utilisez pas d’alcool ni de détergent. Ces produits pourraient modifier les caractéristiques de
l’appareil et rendre son utilisation dangereuse.
● Ne mettez pas Handpresso AUTO au lave-vaisselle ni au micro-onde.
● Ne plongez pas Handpresso AUTO dans l’eau.
détartrage
● Détartrez l’appareil régulièrement (tous les 2 mois ou tous les 100 cafés) afin d’en augmenter les
performances et la durée de vie.
● Pour détartrer Handpresso AUTO, utilisez un détartrant adapté. Reportez-vous aux
recommandations du fabricant pour le dosage et la durée d’application du détartrant.
● Rincez 5 ou 6 fois à l’eau claire.
● Recommencez si nécessaire. N’utilisez jamais une autre méthode de détartrage que celle
préconisée.
rangement
● Comme il est petit, Handpresso AUTO est facile à ranger dans un véhicule, dans une boite à gant
ou un vide-poche, sous le siège ou dans le coffre.
● Ne laissez jamais Handpresso AUTO visible dans un véhicule en stationnement afin d’éviter toute
tentative le vol.
● Ne laissez jamais Handpresso AUTO dans un véhicule stationné en plein soleil.
● Afin de conserver Handpresso AUTO en bon état, il est fortement conseillé de le ranger dans sa
mallette.
● Évitez de stocker Handpresso AUTO dans des endroits humides
dépannage
Que faire si :
● Je ne peux pas ouvrir le porte-filtre ?
Handpresso AUTO fonctionne à une pression de service de 16 bars. Afin de prévenir les risques de
blessure et de détérioration du produit liés à la pression, un dispositif de sécurité vous empêche
de manipuler le porte-filtre si le bouton expresso n’est pas dans la bonne position. La présence de
bague de sécurité vous indique que l’appareil est sous pression. Vous ne pouvez donc pas ouvrir
le produit si la bague de sécurité est visible. Appuyez sur le bouton stop jusqu’en butée pour que
la bague de sécurité disparaisse. L’appareil n’est alors plus sous pression, vous pouvez ouvrir le
porte-filtre.
● J’ai des difficultés pour remplir le réservoir au bon niveau ?
Le noircissement des indicateurs est bien visible si vous placez votre regard juste au-dessus du
produit. Versez l’eau lentement et régulièrement. Les indicateurs de remplissage vous permettent
de connaître le niveau d’eau dans le réservoir. Observez attentivement le noircissement progressif
des indicateurs dans le sens horaire, en commençant par l’indicateur marqué d’une flèche. Arrêtez
de verser quand le dernier indicateur (marqué STOP) devient noir. Reportez-vous à l’étape 6 du
mode d’emploi.
● Je ne peux pas fermer le porte-filtre ?
Un dispositif de sécurité vous empêche de manipuler le porte-filtre si le bouton expresso n’est pas
dans la bonne position. Vérifiez que la bague de sécurité n’est pas visible. Si ce n’est pas le cas,
enfoncez le bouton stop jusqu’en butée. Mettez en place le porte-filtre et vissez jusqu’au repère de
serrage.
● Lorsque j’appuie sur le bouton ON, le produit ne chauffe pas ?
a/ Vérifiez que la prise allume-cigare est bien branchée. Le logo de la prise allume-cigare de
l’appareil s’illumine lorsqu’elle est correctement connectée.
b/ Vérifiez que la prise 12 V type allume-cigare de votre véhicule est bien alimentée. Dans tous les
cas, assurez-vous que votre véhicule est en état pour alimenter correctement la prise 12 V type
allume-cigare.
● L’eau coule par le porte-filtre pendant le cycle de préparation de l’appareil ?
Il y a trop d’eau dans le réservoir. Veillez à ne pas dépasser le niveau d’eau préconisé. Reportez-
vous à l’étape 6 du mode d’emploi.
● Je n’arrive pas à appuyer sur le bouton expresso ?
Handpresso AUTO est muni d’un dispositif de sécurité bloquant la manipulation du bouton expresso
si l’appareil n’est pas retourné. Assurez-vous que le porte-filtre soit serré jusqu’au repère de
fermeture. Retournez le produit, porte-filtre au-dessus de la tasse (étape 12 du mode d’emploi) ;
appuyez sur le bouton expresso jusqu’en butée.
● J’appuie sur le bouton expresso mais le café ne coule pas ?
Assurez-vous d’avoir enfoncé le bouton expresso poussoir jusqu’en butée.
● L’eau coule par le porte-filtre lors de la percolation ?
a/ Vérifiez la présence et la position du joint torique sur le porte-dosette. Remplacez le joint si
celui-ci est absent ou défectueux (sec, craquelé, endommagé ou sectionné) vous pouvez vous en
procurer auprès de votre revendeur.
b/ Veillez à serrer correctement le porte-filtre jusqu’aux repères de serrage (reportez-vous à l’étape
8 du mode d’emploi).
● Mon expresso est trop court ?
Assurez-vous de bien remplir le réservoir jusqu’au niveau d’eau préconisé. Pour cela, reportez-vous
à l’étape 6 du mode d’emploi.
● Mon café est froid ?
Attendez bien que le bouton marche soit éteint avant de faire votre expresso. La montée en
température de l’eau continue après l’arrêt du bruit émis par votre machine. Vous pouvez suivre
l’évolution de la température de l’eau sur le thermomètre.
● Pour toute autre question contactez votre revendeur.
mises en garde
Veillez à bien lire les instructions complètes avant l’utilisation de l’appareil; une utilisation non-conforme
dégagerait Handpresso de toute responsabilité.
HANDPRESSO AUTO NE DOIT JAMAIS ÊTRE UTILISÉ LORSQUE LE VÉHICULE ROULE.
Veillez à bien ranger la machine après utilisation pour éviter tout risque de blessure en cas de choc.
Handpresso AUTO nécessite toute l’attention de l’utilisateur pour être utilisé. Handpresso AUTO est une
machine à café qui fait monter l’eau à une température proche de 100°C. POUR EVITER TOUT RISQUE DE
BRÛLURE, IL DOIT ÊTRE MANIPULE AVEC PRECAUTIONS.
Préparez-le avant, tranquillement, ou garez-vous dans un endroit sécurisé pour vous et les autres usagers
de la route. Handpresso ne saurait être tenu responsable de tout accident de la route.
Maintenez Handpresso AUTO hors de portée des enfants et des personnes n’ayant pas été instruites sur
son utilisation. Ne laissez pas l’appareil sans surveillance.
Pour votre sécurité et celle de votre entourage, n’immergez jamais la prise allume-cigare, le cordon
d’alimentation ou toute autre partie de votre appareil dans l’eau ou tout autre liquide. N’utilisez pas
l’appareil s’il a été accidentellement en contact même partiel avec un liquide.
N’actionnez jamais le bouton ON si le porte-ltre n’est pas correctement verrouillé et serré jusqu’au repère

2524
de serrage ; étape 8/9 du mode d’emploi !
Ne tentez pas de retirer le porte-ltre pendant l’utilisation ou avant d’avoir poussé le bouton stop.
Après avoir fait votre expresso prenez garde, en retirant le porte-ltre, à ne pas renverser l’eau chaude
restant éventuellement dans le réservoir, notamment dans le cas de la préparation d’un expresso court de
type « ristretto ».
En cas de brûlure, placez immédiatement la zone brûlée sous un ux continu d’eau froide et contactez un
médecin si nécessaire.
Faites une inspection visuelle de la machine avant chaque utilisation et assurez-vous de l’absence
de ssures, de rayures profondes ou de toute autre déformation qui pourrait en altérer le bon
fonctionnement. N’utilisez plus votre appareil si la prise allume-cigare, le câble électrique ou toute autre
partie de votre appareil semble être endommagé.
Après chaque cycle de chauffage, la pression doit être évacuée en appuyant sur le bouton expresso,
même si la percolation n’est pas effectuée.
N’utilisez pas l’appareil autrement que dans le but prévu. La responsabilité de Handpresso ne saurait être
engagée en cas d’utilisation incorrecte ou détournée.
Pendant l’utilisation, posez l’appareil sur une surface plane, sèche et non soumise aux vibrations.
Méez-vous des projections de café et prenez garde à la direction de la buse du porte-ltre pendant
l’utilisation.
Handpresso AUTO fonctionne uniquement à partir d’un branchement type allume-cigare alimenté en
courant continu 12 V CC. Assurez-vous que la tension disponible dans votre véhicule correspond bien à 12
V. Ce produit ne convient pas pour les alimentations 24 V.
Pour une utilisation optimale branchez l’appareil directement sur la prise allume-cigare. N’utilisez pas de
prises multiples.
N’utilisez que des dosettes E.S.E.. N’introduisez rien d’autre que de l’eau dans le réservoir, à l’exception
du vinaigre blanc pour les opérations de détartrage.
L’appareil doit être utilisé entre 5°C et 50°C et dans des conditions de pression atmosphérique normales
(de 0 à 3 000 m d’altitude).
La consommation électrique de Handpresso AUTO est importante. Nous recommandons vivement de
toujours utiliser la machine avec le moteur allumé. Handpresso AUTO dispose d’un système de sécurité
pour préserver votre batterie si la tension de celle-ci est insufsante. Dans le cas d’une batterie faible, il
ne fonctionnera que si le moteur de votre véhicule est allumé.
La machine s’arrête automatiquement si la tension fournie par la batterie est inférieure à 9.5V.
Cet appareil n’est en aucun cas destiné à un usage professionnel. Maximum 10 expressos à la suite. En
cas d’utilisation intensive, faites impérativement une pause d’une heure après 10 expressos.
Veillez à détartrer votre Handpresso AUTO régulièrement. Notre garantie exclut les produits qui ne
fonctionnent pas ou mal du fait de l’absence de détartrage.
NE TENTEZ PAS DE RÉPARER L’APPAREIL OU DE REMPLACER DES PIÈCES PAR VOUS-MÊME : adressez-
vous à un distributeur autorisé pour ce type d’intervention. LE FAIT DE DÉMONTER L’APPAREIL PEUT ÊTRE
DANGEREUX ET ANNULE LA GARANTIE.
données techniques
Contenance du réservoir d’eau ...................................................................................................... 50 ml
Contenance de l’adaptateur pour café moulu………....………..............................................…..environ 7g
Dosettes ................................................................................................................. E.S.E. et compatibles
Pression maximale ....................................................................................................................... 16 bars
Dimensions L x l x h (mm) ................................................................................................. 75 x 75 x 215
Poids ................................................................................................................................................ 880 g
Tension d’alimentation ..………………………................................................................................... 12 V CC
Puissance consommée ..…………………...................................................................................… 140 Watt
brevets & marques
Ce produit est protégé par des brevets et des demandes de brevets internationaux.
Handpresso & E.S.E. sont des marque déposées.
service consommateurs
Notre service consommateurs est à votre disposition pour répondre à toutes vos questions. Vous
pouvez le contacter sur internet à l’adresse suivante : http://www.handpresso.com
adresse
Handpresso
77300 Fontainebleau, FRANCE
www.handpresso.com
garantie
Conditions particulières concernant notre garantie (1 an)
Notre garantie couvre tous les vices de fabrication ou de matière ainsi que tous les défauts de
fonctionnement internes (non exclus ci-après) dûment constatés par notre technicien d’après-
vente.
Cette garantie n’est pas cessible. Elle ne donne droit à aucune indemnité en espèces ou en nature
et à aucune extension de sa durée pour immobilisation de l’appareil pendant le temps de sa
réparation.
Ne sont pas couverts par notre garantie
- Les dommages résultant d’une utilisation à caractère commercial, professionnel, collectif ou
industriel.
- Les frais de transport de l’appareil, de déplacement du réparateur et de main d’œuvre relatifs à
un dommage non justié ou un dépannage non garanti ou non constaté par le service après-vente
agréé par notre société.
- Les dommages occasionnés à l’appareil par incendie, explosion, foudre, pour autant qu’ils
prennent naissance dans d’autres biens que l’appareil lui-même.
- Les dommages ayant pour origine une cause externe à l’appareil : choc, chute, mauvaise
utilisation, erreur de manipulation, vol, foudre, inondation, incendie, etc...
- Les dommages dus à la corrosion ou à la détérioration graduelle de l’appareil, aux mauvais
branchements ou alimentation...
- Les frais de déplacement relatifs à des appareils portables.
- Le remplacement des pièces consommables : joint, adaptateur pour café moulu...
- Les dommages d’ordre esthétique, tels que les parties extérieures, à savoir : les vernis, les émaux,
les laques, les peintures, etc...
- Les frais pour un réglage accessible à l’utilisateur sans démontage de l’appareil, les vérications,
les nettoyages et les essais non consécutifs à un dommage garanti.
- L’intervention ou le dépannage effectué par des personnes non autorisées par le service après-
vente de la marque, toute réparation de fortune ou provisoire restant à la charge du client qui
supporterait en outre, les conséquences de l’aggravation éventuelle du dommage en résultant.
-- Les dommages dus à l’utilisation de consommables autres que ceux recommandés par le
fabricant.
- Dans tous les cas, la garantie légale concernant les défauts et les vices cachés sera appliquée
conformément à la loi.
Comment faire jouer la garantie sur un produit ?
La garantie est valable un an à compter de la date indiquée sur la preuve d’achat (ticket de caisse
ou facture). Conservez la preuve d’achat et joignez-la à la garantie pour toute réclamation.
Si votre produit est encore sous garantie, prenez contact avec votre magasin qui vous orientera de
façon à réduire les délais.

26 27
for E.S.E. pods
for ground coffee
ITALIANO
primo uso
Grazie di aver scelto Handpresso. Ecco qualche avvertenza prima di usare la vostra macchina
espresso:
● Leggete tutte le istruzioni prima di usare l’apparecchio e conservatele.
● Prima di usare l’apparecchio per la prima volta, lavatelo con acqua calda per eliminare eventuali
residui e polvere. Quindi, fate funzionare l’Handpresso Auto una prima volta e gettate il primo caffè.
● Adesso l’Handpresso AUTO è pronto ad essere utilizzato.
beccuccio
porta-ltro per caffè
sciolto
cavo di collegamento
presa accendisigari
porta-ltro per caffè
sciolto
indicatori di bloccaggio
adattatore per caffè
sciolto
anello per caffè
sciolto
porta-ltro E.S.E.
indicatori di bloccaggio
indicatori di bloccaggio
anello di sicurezza
pulsante STOP
termometro
pulsante ON
pulsante espresso
cavo di
collegamento
ltro perforato
porta-ltro
indicatori di
riempimento
indicatori di
riempimento
guarnizione con
scanalatura
porta-cialde
guarnizione
zona di riempimento
del serbatoio
indicatori di bloccaggio

28 29
12 V
12 V
2’
bip x3
OK NO
OK NO
234
1
7
6
5
910
8
11 12
14
13
15 16 17
28 29
istruzioni
per cialde ESE
1 – Prima di usare Handpresso Auto, assicuratevi che il
veicolo sia fermo, il freno di stazionamento inserito ed il
motore acceso.
2 – Tirate il cavo di collegamento prima di mettere
l’Handpresso AUTO verticalmente nel porta-bicchieri.
3 – Collegate il cavo di collegamento ad un accendisigari
12V.
4 – Svitate il porta-ltro.
5 - Se l’anello per caffè sciolto è posto, rimuovetelo.
6 – Riempite la tazza con acqua no alla linea nera poi
versate l’acqua nella macchina. Se non avete la tazza,
fate attenzione a non mettere troppa acqua ! Percio’,
osservate gli indicatori di riempimento che anneriscono
l’uno dopo l’altro, in senso orario, a misura che versate
l’acqua. Versatela lentamente. Smettete di versare
quando l’ultimo indicatore diventa nero.
7 – Inserite una cialda E.S.E. nel porta-cialde.
8 – Bloccate il porta-ltro E.S.E. ruotandolo sino
all’indicatore di bloccaggio. Attenti : la preparazione del
caffè non è possibile nché il porta-ltro E.S.E. non sia
correttamente bloccato !
9 – Premete il pulsante ON per iniziare il ciclo di
preparazione dell’apparecchio.
8 – Attendete nché non sentite 3 segnali sonori (circa 2
minuti). Fate attenzione: quando il rumore del motore
cessa, non signica che la macchina sia pronta!
Attendete nché la macchina non emette tre segnali
sonori. Al termine del ciclo, quando la macchina è pronta,
il termometro mostra la corretta temperatura dell’acqua e
il pulsante ON rimane acceso per 1 minuto.
11 – Staccate la spina.
12 – Girate l’apparecchio, tenetelo sopra una tazzina e
premete il pulsante Espresso no all’arresto (appare
l’anello di sicurezza) per versare il caffè.
13 – Quando la tazzina è riempita a vostro gradimento,
premete il pulsante STOP – sino a sparizione dell’anello
di sicurezza – per fermare il caffè.
14 – Rigirate l’apparecchio e collocatelo verticalmente nel
suo alloggiamento.
15 – Aprite di nuovo il porta-ltro E.S.E. ed estraete la
cialda usata.
16 – Eliminate l’acqua in eccesso che potrebbe essere
rimasta nel serbatoio.
17 – Ecco il vostro espresso è pronto !
Per preparare un secondo espresso, vedi punto 4

30 31
12 V
12 V
2’
bip x3
OK NO
OK NO
234
1
7
6
5
910
8
11 12 13
15
14
16 17 18
istruzioni
per caffè sciolto
1 – Prima di usare Handpresso Auto, assicuratevi che il
veicolo sia fermo, il freno di stazionamento inserito ed il
motore acceso.
2 – Tirate il cavo di collegamento prima di mettere
l’Handpresso AUTO verticalmente nel porta bicchieri.
3 – Collegate il cavo di collegamento ad un accendisigari
12V.
4 – Svitate il porta-ltro.
5 – Inserite l’anello per caffè sciolto nel porta-cialde se
non è posto.
6 – Riempite la tazza con acqua no alla linea nera poi
versate l’acqua nella macchina. Se non avete la tazza,
fate attenzione a non mettere troppa acqua ! Percio’,
osservate gli indicatori di riempimento che anneriscono
l’uno dopo l’altro, in senso orario, a misura che versate
l’acqua. Versatela lentamente. Smettete di versare quando
l’ultimo indicatore diventa nero.
7 – Preparate il vostro caffè riempiendo l’adattatore per
caffè sciolto in maniera uniforme con la miscela di vostra
scelta. Vericate che il caffè non superi il bordo superiore
dell’adattatore per caffè sciolto. Fate riferimento al
paragrafo “Qualche consiglio” a pagina 32 per riempire e
pressare in maniera ottimale l’adattatore per caffè sciolto.
8 – Inserite l’adattatore per caffè sciolto nell’anello per
caffè sciolto.
9 – Bloccate il porta-ltro per caffè sciolto ruotandolo
sino all’indicatore di bloccaggio. Attenti : la preparazione
del caffè non è possibile nché il porta-ltro per caffè
sciolto non sia correttamente bloccato !
10 – Premete il pulsante ON per iniziare il ciclo di
preparazione dell’apparecchio.
11 – Attendete nché non sentite 3 segnali sonori (circa
2 minuti). Fate attenzione: quando il rumore del motore
cessa, non signica che la macchina sia pronta!
Attendete nché la macchina non emette tre segnali
sonori. Al termine del ciclo, quando la macchina è pronta,
il termometro mostra la corretta temperatura dell’acqua e
il pulsante ON rimane acceso per 1 minuto.
12 – Staccate la spina.
13 – Girate l’apparecchio, tenetelo sopra una tazzina e
premete il pulsante Espresso no all’arresto (appare
l’anello di sicurezza) per versare il caffè.
14 – Quando la tazzina è riempita a vostro gradimento,
premete il pulsante STOP – sino a sparizione dell’anello
di sicurezza – per fermare il caffè.
15 – Rigirate l’apparecchio e collocatelo verticalmente nel
suo alloggiamento.
16 – Aprite di nuovo il porta-ltro per caffè sciolto caffè
sciolto e estraete l’adattatore per caffè sciolto. Svuotate il
caffè dell’adattatore per caffè sciolto premendo sui lati e
spingendo il ltro. Buttate il caffè e sciacquate l’adattatore
per caffè sciolto. Fate attenzione a eccessive fuoriuscite
di acqua.
17 – Eliminate l’acqua in eccesso che potrebbe essere
rimasta nel serbatoio.
18 – Ecco il vostro espresso è pronto !
Per preparare un secondo espresso, vedi punto 4.

32 33
qualche consiglio
Per ottenere un espresso di qualità
● Usate sempre acqua minerale.
● Utilizzate solo cialde E.S.E. (la maggior parte delle grandi marche di caffè propongono cialde
E.S.E. pure chiamate «cialde espresso», «cialde rigide», «cialde dure», cialde 44 mm) – Una gamma
di cialde E.S.E. è in vendita sul sito http://www.handpresso.com
● Con l’adattatore per caffè sciolto : usate solamente caffè macinato per espresso (miscela molto
ne). Le miscele di caffè variano a seconda della marca e consentono quindi di ottenere caffè
qualitativamente diversi. Non esitate a fare degli esperimenti modicando la quantità di caffè, la
miscela utilizzata nell’adattatore per caffè sciolto e la forza che mettete nel pressare il caffè. È
quindi possibile creare il proprio espresso su misura. Una miscela estremamente ne e compatta
richiede un tempo di preparazione molto lungo e consente di ottenere un espresso particolarmente
forte. Una miscela a grana grossa e non pressata, invece, ha un tempo di preparazione molto breve
e produce un espresso meno forte. Una gamma di cialde ESE è in vendita sul sito: http://www.
handpresso.com
● Vi ricordiamo che un buon espresso si ottiene con approssimativamente 7 grammi di caffè, un
tempo di preparazione di circa 25 secondi e una temperatura dell’acqua compresa tra i 90 e 95°.
● L’Handpresso AUTO vi permette di preparare un espresso più o meno lungo. Basta premere il
pulsante STOP per ottenere un espresso più o meno ristretto.
● Per ottenere una bella crema nella tazzina, premete il pulsante STOP abbastanza presto, prima
che appaiano bollicine.
●Se amate il caffè ristretto, vi consigliamo di utilizzare l’apposito ltro (opzionale).
● Per offrirvi la massima qualità, Handpresso dispone di una gamma di accessori dedicati alla
mobilità: tazzine infrangibili, Auto set, adattatore di alimentazione 220/12V, tamper …
Pulizia e manutenzione
● Rimuovete le cialde usate dall’apparecchio dopo ogni utilizzo.
●Rimuovete e svuotate l’adattatore per caffè sciolto spingendo il ltro e dandogli dei colpetti
sull’orlo di un contenitore.
● Scollegate sempre l’Handpresso AUTO prima di pulirlo.
● Pulite l’apparecchio con un panno umido (solo acqua).
● Non utilizzate alcool o detergenti per pulirlo. Questi prodotti potrebbero modicare le
caratteristiche dell’apparecchio e renderlo pericoloso.
● L’apparecchio necessita un trattamento anticalcare regolare (ogni 2 mesi o ogni 100 caffè)
per aumentarne le prestazioni e la durata. Per il trattamento anticalcare del Handpresso AUTO,
utilizzare aceto bianco ordinario a 8°. Riempite l’Handpresso AUTO con 25 ml di aceto. Lasciate
agire 1 ora a freddo. Gettate l’aceto e sciacquate 5 o 6 volte. Ricominciate se necessario. Non
utilizzate mai un altro trattamento anticalcare.
● Non mettete l’Handpresso AUTO né in lavastoviglie né nel forno a microonde.
● Non immergete l’Handpresso AUTO in acqua.
conservazione
● Grazie alle sue dimensioni ridotte, l’Handpresso AUTO può facilmente essere risposto nel veicolo,
nel cruscotto, sotto il sedile o nel bagagliaio.
● Non lasciate mai l’Handpresso AUTO visibile in un veicolo parcheggiato per evitare tentativi di
furto.
● Non lasciate mai l’Handpresso AUTO in un veicolo parcheggiato in pieno sole.
● Per conservare l’Handpresso AUTO in buono stato, è fortemente consigliato di rimetterlo sua
valigetta.
● Evitate di conservare l’Handpresso AUTO in posti umidi.
riparazione
Che cosa fare se :
● Non riesco ad aprire il porta-ltro ?
L’Handpresso AUTO funziona ad una pressione di servizio di 16 bar. Per prevenire il rischio di lesioni
e di danni al prodotto dovuti alla pressione, un dispositivo di sicurezza impedisce la manipolazione
del porta-ltro se il pulsante Espresso non è nella posizione giusta.
La presenza dell’anello di sicurezza indica che l’apparecchio è sotto pressione. Non è possibile
aprire l’apparecchio se l’anello di sicurezza è visibile.
Premete il pulsante STOP no all’arresto afnché l’anello di sicurezza sparisca. L’apparecchio non è
più sotto pressione, adesso potete aprire il porta-ltro.
● Faccio fatica a riempire il serbatoio al livello giusto ?
L’annerimento è ben visibile se guardate attentamente il prodotto da sopra.
Versate l’acqua lentamente e regolarmente. Gli indicatori di riempimento vi permettono di
conoscere il livello d’acqua nel serbatoio. Osservate attentamente gli indicatori che anneriscono
progressivamente, in senso orario, cominciando dall’indicatore contrassegnato con una freccia.
Smettete di versare quando l’ultimo indicatore (contrassegnato con STOP) diventa nero. Vedi punto
6 delle istruzioni.
● Non riesco a chiudere il porta-ltro ?
Un dispositivo di sicurezza impedisce la manipolazione del porta-ltro se il pulsante Espresso non è
nella posizione corretta. Controllate che l’anello di sicurezza non sia visibile. Se non è il caso, premete
il pulsante STOP no all’arresto. Mettete il porta-ltro ruotandolo sino all’indicatore di bloccaggio.
● Quando premo il pulsante ON, l’apparecchio non si scalda ?
a/ Controllate che la presa accendisigari sia ben collegata. Il logo della presa accendisigari si
accende quando è correttamente collegata.
b/ Controllate che la presa accendisigari 12V del vostro veicolo sia ben alimentata.
In ogni caso, assicuratevi che il vostro veicolo sia in stato di alimentare correttamente la spina
accendisigari 12V.
● L’acqua scorre dal porta-ltro durante il ciclo di preparazione dell’apparecchio ?
C’è troppa acqua nel serbatoio. Badate a non superare il livello d’acqua raccomandato. Vedi punto
6 delle istruzioni.
● Non riesco a premere il pulsante Espresso ?
L’ Handpresso AUTO è munito di un dispositivo di sicurezza che blocca la manipolazione del
pulsante Espresso se l’apparecchio non è capovolto. Assicuratevi che il porta-ltro sia bloccato sino
all’indicatore di bloccaggio.
Girate l’apparecchio afnché il porta-ltro si trovi sopra la tazzina (punto 12 delle istruzioni) ;
premete il pulsante Espresso no all’arresto.
● Premo il pulsante Espresso pero’ il caffè non scorre ?
Assicuratevi di aver premuto il pulsante Espresso no all’arresto.
● L’acqua fuoriesce dal porta-ltro durante la preparazione ?
a/ Vericate la presenza e la posizione della guarnizione sul porta- cialde Sostituite la guarnizione
se assente o difettosa (secca, crepata, danneggiata o tagliata). Potete procurarvela presso la vostra
rivendita.
b/ Badate a stringere correttamente il porta-ltro sino agli indicatori di bloccaggio (vedi punto 8
delle istruzioni).
● Il mio espresso è troppo stretto ?
Assicuratevi di aver riempito il serbatoio sino al livello raccomandato. Vedi punto 6 delle istruzioni.
● Il mio caffè è freddo ?
Il riscaldamento dell’acqua continua dopo che l’apparecchio ha smesso di far rumore. Potete
seguire il riscaldamento dell’acqua sul termometro.
● Per qualsiasi altra domanda, rivolgetevi alla vostra rivendita.
avvertenze
Leggete tutte le istruzioni prima di usare l’apparecchio; Handpresso non può essere considerata
responsabile in caso di uso improprio.
L’HANDPRESSO AUTO NON DEVE MAI ESSERE USATO QUANDO IL VEICOLO E’ IN MOTO.
Controllate che l’apparecchio sia riposto dopo l’uso per evitare ogni rischio di lesione in caso di impatto.
Handpresso Auto richiede la massima attenzione dell’utente. Handpresso Auto è una macchinetta da caffè
che scalda l’acqua ad una temperatura vicino ai 100 gradi Celsius. PER EVITARE RISCHI DI SCOTTURA,
MANIPOLATELO CON CURA.
Preparatelo in anticipo, tranquillamente, o parcheggiate il veicolo in un luogo sicuro per voi e gli altri utenti
stradali. Handpresso non può essere ritenuto responsabile per qualsiasi incidente stradale.
Tenete l’Handpresso AUTO lontano dalla portata dei bambini e di persone non informate. Evitate di lasciare
l’apparecchio incustodito.
Per la vostra sicurezza e quella delle persone intorno a voi, non immergete mai la presa accendisigari, il
cavo di collegamento o tutt’altra parte dell’apparecchio in acqua o qualsiasi altro liquido. Non utilizzate
l’apparecchio se è stato accidentalmente in contatto anche parziale con un liquido.
Non azionate il pulsante ON se il porta-ltro non è chiuso correttamente e stretto no all’indicatore di
bloccaggio (vedi punto 8/9 delle istruzioni) !
Non tentate di rimuovere il porta-ltro durante l’utilizzo né prima di aver premuto il pulsante STOP.
Dopo aver preparato il vostro espresso, fate attenzione, quando rimuovete il porta-ltro all’acqua calda
avanzata nel serbatoio, soprattutto se avete preparato un caffè ristretto.
In caso di scottatura, passate immediatamente la zona interessata sotto l’acqua fredda e chiamate un
medico se necessario.
Fate un’ispezione visiva dell’apparecchio prima di ogni utilizzo e assicuratevi che non ci siano presenti
crepe, rigature profonde o altre deformazioni che potrebbero alterarne il normale funzionamento. Non
utilizzate il vostro apparecchio se la presa accendisigari, il cavo elettrico o tutt’altra parte del vostro
apparecchio sembra danneggiato.
Dopo ogni ciclo di riscaldamento, la pressione deve essere liberata premendo il pulsante Espresso, anche
se la preparazione non è eseguita.
Non usate l’apparecchio per uno scopo diverso da quello previsto. Handpresso non può essere
considerato responsabile in caso di uso improprio.
Durante l’utilizzo, posate l’apparecchio su un supercie piana, secca e non sottomessa a vibrazioni.
Fate attenzione agli schizzi di caffè e alla direzione del beccuccio del porta-ltro durante l’utilizzo.
L’Handpresso AUTO funziona solo con un collegamento tipo accendisigari alimentato con corrente continua
12V CC. Assicuratevi che la tensione del vostro veicolo corrisponda a 12V. Questo apparecchio non
conviene ad alimentazioni 24V.
Eccetto l’aceto bianco per il trattamento anticalcare.
L’apparecchio deve essere usato tra 5°e 50°C ed in ambienti con pressione atmosferica normale (da 0 a
3 000 m di altitudine).
Il consumo di energia di Handpresso Auto è importante. Si consiglia di usare sempre la macchina con il

34 35
motore acceso. Handpresso Auto dispone di un sistema di sicurezza che protegge la batteria in caso di
tensione insufciente. In caso di batteria bassa, quest’ultimo funziona solo a motore acceso.
L’apparecchio si ferma automaticamente se la tensione fornita dalla batteria è sotto i 9,5V.
L’apparecchio non è adatto ad uso professionale. È possibile preparare un massimo di 10 espressi senza
interruzioni. Nel caso di uso intensivo, dopo 10 espressi è assolutamente necessaria una pausa di un’ora.
Il vostro Handpresso AUTO necessita un trattamento anticalcare regolare. La nostra garanzia esclude gli
apparecchi che non funzionano o che funzionano male per via di mancato trattamento anticalcare.
Eccetto la sostituzione del fusibile, NON TENTATE MAI DI REPARARE L’APPARECCHIO NÉ DI SOSTITUIRNE
I PEZZI DA SOLI ; rivolgetevi a un distributore autorizzato per questo tipo d’intervento. SMONTARE
L’APPARECCHIO PUÒ ESSERE PERICOLOSO E ANNULLA LA GARANZIA.
servizio clienti
Se necessitate ulteriori informazioni, vi preghiamo di visitare il nostro servizio clienti all’indirizzo
http://www.handpresso.
dati technici
Capacità serbatoio dell’acqua .......................................................................................................... 50 ml
Capacità adattatore per caffè sciolto ........................................................................................ circa(7 g)
Cialde ........................................................................................................................... E.S.E. e compatibili
Pressione massima ......................................................................................................................... 16 bar
Dimensioni Lungh. x largh. x alt. (mm) ............................................................................... 75 x 75 x 215
Peso ................................................................................................................................................... 880 g
Tensione di alimentazione ....……………….................................................................…..........…….. 12 V CC
Consumo di energia ..…..………………….............................................................…………….........… 140 Watt
brevetti & marchi
Questo apparecchio è protetto da brevetti e richieste di brevetti internazionali. Handpresso è una
marca depositata.
E.S.E. è una marca depositata dal consorzio E.S.E.
indirizzo
Handpresso
77300 Fontainebleau, FRANCE
www.handpresso.com
GARANZIA
Condizioni speciche della nostra garanzia (1 anno)
La garanzia copre tutti i difetti di fabbricazione o di materie cosi come i difetti interni di
funzionamento (non esclusi sotto) debitamente accertati dal nostro Servizio Assistenza Clienti.
Detta garanzia non è cessibile. Non dà il diritto a indennità in contanti o in natura né a
un’estensione della garanzia per la durata di riparazione dell’apparecchio.
Non sono coperti dalla nostra garanzia
- I danni che risultano da un uso commerciale, professionale, collettivo o industriale.
- Le spese di trasporto dell’apparecchio, di spostamento del tecnico o della manodopera per un
danno non giusticato o una riparazione non garantita o non accertata dal Servizio Assistenza
Clienti riconosciuto dalla nostra ditta.
– I danni causati all’apparecchio per via d’incendio, esplosione, fulmine, allagamento, a patto che
l’origine del danno sia in altri apparecchi diversi dall’apparecchio stesso.
– I danni dovuti ad una causa esterna all’apparecchio : urto, caduta, uso errato, errore di
manipolazione, ecc...
- I danni dovuti alla corrosione o al deterioramento graduale dell’apparecchio, a un’alimentazione o
un collegamento errato...
- Le spese di trasporto quando si tratta di apparecchi portatili.
– La sostituzione di pezzi consumabili : giunto, adattatore per caffè sciolto...
- I danni di carattere estetico sulle parti esterne come la vernice, lo smalto, la lacca…
- Le spese per un aggiustamento per il quale il cliente non deve smontare l’apparecchio, le
veriche, la pulitura e le prove non susseguente ad un danno garantito.
- La riparazione o l’intervento di persone non autorizzate dal Servizio Assistenza Clienti della
nostra marca. Ogni riparazione di fortuna o provvisoria rimane a carico del cliente che sarà anche
responsabile delle conseguenze o dell’eventuale peggioramento del danno.
– I guasti dovuti all’uso di prodotti di consumo distinti da quelli consigliati dal costruttore.
– In tutti i casi, la garanzia legale riguardo ai difetti e ai vizi occulti sarà applicata rispetto alla legge.
Come far valere la garanzia su un prodotto ?
La garanzia vale un anno a decorrere dalla data menzionata sulla prova di acquisto (scontrino o
fattura). Conservare la prova di acquisto e allegarla alla garanzia per qualsiasi reclamo.
Se il prodotto è ancora coperto dalla garanzia, contattare il vostro negozio in modo da ridurre la
durata dell’intervento.

36 37
for E.S.E. pods
for ground coffee
ESPAÑOL
portaltro para café
molido
Anillo para café
molido
Adaptador para café
molido
portaltro E.S.E.
junta de seguridad
botón STOP
termómetro
botón ON
botón espresso
cable de corriente
ltro
portaltro
indicadores del
nivel de agua
indicadores del
nivel de agua
raíl antigoteo
porta dosis
junta tórica
área del depósito
para llenar
indicadores de bloqueo
boca
portaltro para café
molido
cable de corriente
adaptador de mechero
primeros pasos
Gracias por elegir Handpresso. Aquí hay unas advertencias antes de usar la máquina espresso:
● Leer todas las instrucciones antes de utilizar la máquina y no deshacerse de ellas.
● Antes de utilizar la máquina por primera vez, lavarla con agua caliente para eliminar cualquier
residuo o polvo. Utilizar la Handpresso AUTO una primera vez y tirar el primer café de prueba.
● Ahora la Handpresso AUTO ya está lista para usarse.
indicadores de bloqueo
indicadores de bloqueo
indicadores de bloqueo

38 39
12 V
12 V
2’
bip x3
OK NO
OK NO
234
1
7
6
5
910
8
11 12
14
13
15 16 17
38 39
instrucciones de uso
para unidosis E.S.E.
1 – Antes de usar Handpresso Auto, asegúrese de que su
vehículo esté estacionado, el freno de mano echado y el
motor encendido.
2 – Extender el cable de corriente antes de instalar la
Handpresso AUTO verticalmente en el portavasos.
3 – Conectar el cable de alimentación a un adaptador de
mechero de 12 V.
4 – Aojar el portaltro.
5 - Si el anillo para café molido está colocado, quitarlo.
6 – Rellenar la taza con agua hasta la línea negra,
despues echar el agua en la máquina. Al no tener la
taza, tener cuidado de no echar demasiada agua ! Para
ello, observar atentamente los indicadores de nivel. Se
oscurecen en sentido horario, uno tras otro, a medida que
se incorpora el agua. Verter lentamente. Dejar de echar
agua tan pronto como el último indicador se ponga negro.
7 – Colocar una unidosis E.S.E. en el porta dosis.
8 – Cerrar el portaltro E.S.E. girándolo 60 grados en
sentido horario hasta el indicador de bloqueo. Atención:
el café no podrá hacerse si el portaltro E.S.E. está mal
bloqueado.
9 – Pulsar el botón ON para iniciar el ciclo de
calentamiento de la máquina.
10 – Esperar hasta que suenen tres pitidos (aprox. 2
minutos). Atención: ¡cuando cesa el ruido del motor
no signica que la máquina haya terminado! Debe
esperar a que la máquina emita tres pitidos. Al nal del
ciclo, cuando la máquina está preparada, el termómetro
mostrará la temperatura correcta del agua y el botón ON
permanecerá encendido durante un minuto.
11 – Desenchufar la máquina.
12 – Para verter el café, voltear la máquina, colocarla
sobre una taza y pulsar el botón Espresso hasta el nal
(verá una junta de seguridad).
13 –Una vez llena la taza, para dejar de verter el café,
pulsar el botón STOP - hasta que desaparezca la junta de
seguridad.
14 – Volver a voltear la máquina y colocarla verticalmente
en su alojamiento.
15 – Volver a abrir el portaltro E.S.E. para extraer y tirar
la unidosis utilizada.
16 – Vaciar el depósito de agua si queda un resto.
17 – Saborear su espresso.
Para preparar un segundo espresso, volver al paso 4.
Table of contents
Languages:
Other Handpresso Coffee Maker manuals
Handpresso
Handpresso handcoffee truck 24V User manual

Handpresso
Handpresso Wild User manual

Handpresso
Handpresso Pump User manual
Handpresso
Handpresso Wild User manual
Handpresso
Handpresso DOMEPOD User manual

Handpresso
Handpresso Handcoffee Auto User manual
Handpresso
Handpresso AUTO E.S.E. User manual

Handpresso
Handpresso Wild User manual
Handpresso
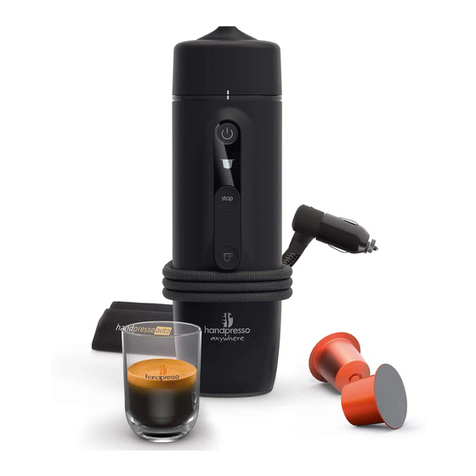
Handpresso anywhere Auto Capsule User manual
