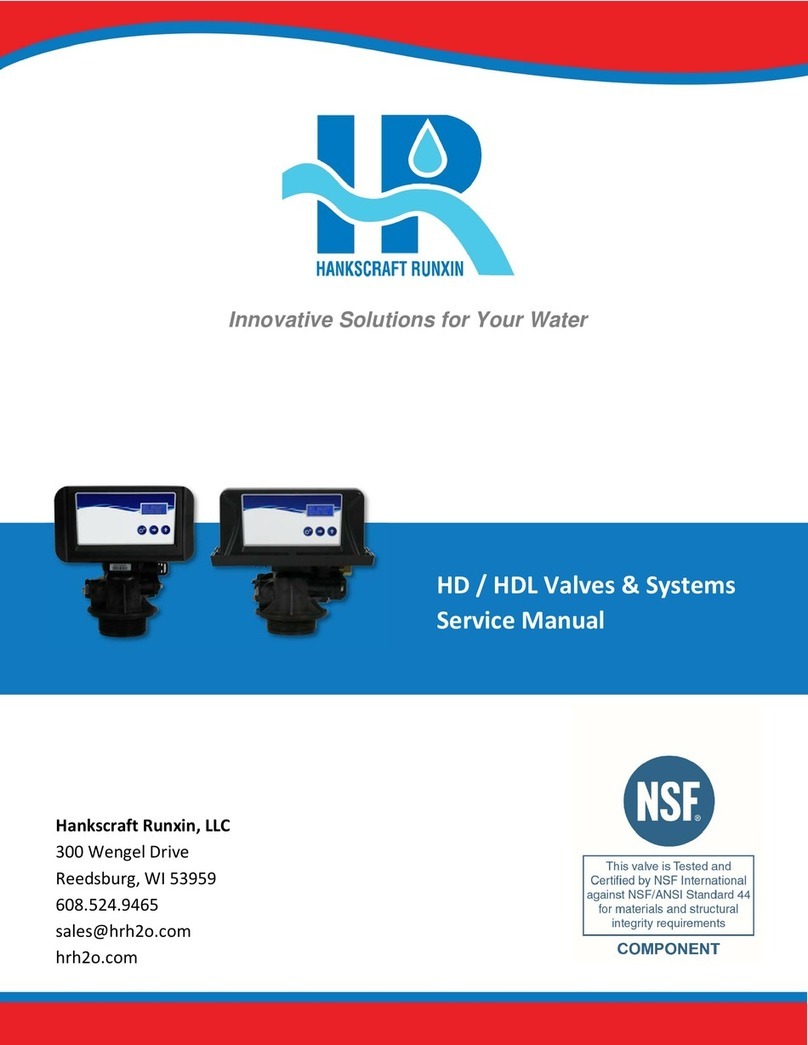
Hankscraft Runxin RevV4 User manual

Innovative Solutions for Your Water
Hankscraft Runxin, LLC
300 Wengel Drive
Reedsburg, WI 53959
608.524.9465
hrh2o.co
RevV4 Valves & Systems
Service Manual

RevV4 Valves & Systems Service Manual
2
Table of Contents
1. Introduction ................................................................................................................................................ 4
2. Product Features and Applications ............................................................................................................ 5-6
3. Product Dimensions and Specifications ...................................................................................................... 7-8
4. Pre-Installation Checklist ......................................................................................................................... 9-10
5. Valve Installation ................................................................................................................................... 11-14
a. Control Valve Installation .................................................................................................................. 11-12
b. Syste Sizing Chart ................................................................................................................................ 13
c. Control Valve Configuration ................................................................................................................... 14
6. Ceramic Bypasses ................................................................................................................................... 14-15
7. Pro rammin ......................................................................................................................................... 16-24
a. Display and Instructions .................................................................................................................... 16-17
b. Progra ing Modes A-01 to A-07 ................................................................................................... 18-24
8. PCB Functions and Connections .............................................................................................................. 25-32
a. Overview .............................................................................................................................................. 25
b. Signal Output........................................................................................................................................ 26
c. Signal Output Connector ................................................................................................................. 27-29
d. Interlock ............................................................................................................................................... 30
e. Alternating Interlock ............................................................................................................................ 30
f. Re ote Handling Connector ................................................................................................................ 31
g. Interlock Options .................................................................................................................................. 31
h. Using One Flow Meter with Interlock .................................................................................................. 32

RevV4 Valves & Systems Service Manual
3
9. System Installation ............................................................................................................................... 32-44
a. Plu bing Connections ......................................................................................................................... 32
b. Drain Line Installation .......................................................................................................................... 32
c. Brine Line and Brine Tank Installation ............................................................................................. 33-36
d. Syste Installation Chart ..................................................................................................................... 37
e. Syste Start-Up............................................................................................................................... 38-39
f. Sanitization Procedure ......................................................................................................................... 40
g. Water Flow Diagra s ...................................................................................................................... 41-44
10. Assembly Drawin s and Parts List ........................................................................................................... 45-46
a. Valve Exploded View ............................................................................................................................ 45
b. Valve Parts List ...................................................................................................................................... 46
11. Troubleshootin ..................................................................................................................................... 47-49
a. Control Valve ................................................................................................................................... 47-48
b. Electronics ............................................................................................................................................ 49
12. Replacement Parts ..................................................................................................................................... 50
13. Accessories ................................................................................................................................................ 51
14. Packin List ............................................................................................................................................ 52-53
a. Valve ..................................................................................................................................................... 52
b. Syste .................................................................................................................................................. 53
15. Warranty ............................................................................................................................................... 53-54
16. System Confi uration and Settin s ............................................................................................................. 55
17. Factory Default Settin s ............................................................................................................................. 56
18. Contact Information ................................................................................................................................... 57

RevV4 Valves & Systems Service Manual
4
1. Introduction
Thank you for choosing a Hankscraft Runxin RevV4 Ceramic Rotary Valve. RevV4 valves are designed with high
flow rates to handle any residential or light co ercial application. They feature innovative, patented cera ic
discs for ulti ate perfor ance and reliability. The discs are abrasion and corrosion resistant, extending the life
of the valve and significantly reducing aintenance costs.
RevV4 valves have 7 advanced progra ing options with fully adjustable cycles to ini ize water usage
during regeneration. They utilize up-flow regeneration which efficiently washes the edia, exchanging ore
grains per pound of salt. RevV4 valves have signal output for external devices, progra functions that re ain
in long ter e ory, and 72-hour e ory backup should a power outage occur, giving you the confidence
that your custo ers are receiving a cost-effective, high-quality water treat ent solution.
Hankscraft Runxin’s RevV4 valves have an interlock function to connect ultiple valves in series or in parallel.
There is an alternate interlock function, used with twin de and syste s and 3-way ball valves to supply
treated water 24/7. The RevV4’s si ple, yet powerful user interface has an easy to read LCD display and the
valve offers re ote handling to accept input fro a PLC or co puter. Advanced work odes are available with
adjustable settings and three different cycle sequences to get the exact configuration needed for any job.
RevV4 Valves Feature:
• Patented cera ic discs for longer life and reduced aintenance
• Highly configurable with easy to use progra interface
• Long-ter e ory for progra functions
• 72-hour e ory backup
• 4 language options: English, Spanish, Chinese, French

RevV4 Valves & Systems Service Manual
5
2. Product Features and Applications
Primary Applications
Reco ended for co ercial and residential softening or de ineralization water treat ent syste s
.
•Softening Syste
•Iron Re oval Syste
•Ion Exchange Equip ent
•Boiler Softening Water Treat ent
•RO Pre-treat ent
Product Characteristics
Mechanical Components
The RevV4 uses internal cera ic discs which are corrosion and abrasion resistant to for a her etic seal. Rotation of the
upper disc aligns to the corresponding lower disc ports for Service, Backwash, Brine & Slow Rinse, Brine Refill and Fast
Rinse odes.
Hard Water/No Hard Water Bypass
Up-flow regeneration with no hard water and hard water bypass options. This valve operates as a hard water bypass.
Excellent Flow Rate: 20 gp @ 15 psi drop.
365-Day Usa e Memory
Manual / Delayed Re eneration
Pressing at any ti e results in an i ediate anual regeneration.
Pressing and holding for 3 seconds, when syste is locked, results in a delayed regeneration at the preselected ti e.
Extended Power Outa e Indicator
If outage exceeds 3 days, the ti e of day indicator “
” will flash 12:12. The current ti e of day needs to be re-set. All
other set para eters re ain stored in e ory. The valve will resu e to operate fro the point of the power outage.
Three Re eneration Sequences
Lockout Function
Keypad will lock after 5 inutes without use. To access the para eter changes press and hold and
si ultaneously for 3 seconds to unlock.

RevV4 Valves & Systems Service Manual
6
LCD Display Screen
Advanced Valve and External Device Connections
•Interlock and Alternate Interlock
•Re ote Handling
•Solenoid Valve
7 Re eneration Mode Options with Adjustable Cycle Times
Maximum Day Re eneration Interval
When the valve reaches the axi u progra ed service days, without reaching the set service capacity, it will trigger
a regeneration at the pre-progra ed ti e of day. Regeneration(s) reset both the axi u day regeneration value and
the service capacity value.
One Button to Chan e the Current Time
Pressing and holding the button for 3 seconds, when syste is locked, allows the current ti e of day to be adjusted.
Service Alarm
When the service alar feature counts-down and reaches set point, (Selectable 30 day in to 900 day ax in 30 day
incre ents) the alar will activate at 8p . The alar will sound for 2 inutes and then shut off auto atically. To silence
alar within the 2 inute period, press any button. A service call essage will then appear on the screen as a signal for
the ho eowner to contact a water treat ent professional for routine service. To eli inate this essage fro the screen,
unlock the valve progra ing by pressing the UP and DOWN arrows si ultaneously until the padlock in the upper left
corner of the screen disappears (approxi ately 3 seconds). Next, enter the progra ing enu by pressing the
MENU/CONFIRM button once and then pressing the BACK/REGENERATION button once. The syste will then go back to
nor al status and the operational days will re-start new count-down. Note: The syste will operate nor ally when it is
displaying the service alar essage.

RevV4 Valves & Systems Service Manual
7
3. Product Dimensions and Specifications
Len th (max.) Width (max.) Hei ht (max.) Re eneration Mode
8.3" 8.75" 7.5" Up-flow
These valve dimensions are for reference only.
Connect Port Dimensions
Product Model Inlet Port Outlet Port Drain Port Brine Port Base Riser Pipe
Hard Water Bypass
72605-HK 1" NPT 1" NPT 3/4" NPT 3/8" 2.5" 8NPSM 32 No
72605B-HK 1" NPT 1" NPT 3/4" NPT 3/8" 2.5" 8NPSM 32 Yes
Main Technical Parameters
Water Capacity
See Perfor ance Data Sheet
Power Input 100-240VAC / 50-60Hz
Power Output 12VDC / 2A
Regeneration
Cycles
Sequence 1: Service → Backwash → Brine & Slow Rinse → Fast Rinse → Brine Refill
Sequence 2: Service → Backwash → Brine & Slow Rinse → Backwash → Fast Rinse → Brine Refill
Sequence 3: Service → Brine Refill → Service (180 in-ti e fixed) → Backwash → Brine & Slow Rinse →
Backwash → Fast Rinse

RevV4 Valves & Systems Service Manual
8
Regeneration
Mode
A-01 Meter Delay: Regeneration happens when the capacity reaches zero and the preset ti e of
regeneration is reached.
A-02 Meter I ediate: Regeneration happens when the capacity reaches zero.
A-03 Intelligent Meter Delay: The sa e delay function as A-01 but the capacity is deter ined by entering
the total Resin Capacity, Feed Water Hardness, and the Nu ber of People in the household. The control
valve auto atically calculates the gallons for regeneration.
A-04 Intelligent Meter I ediate: The sa e function as A-02 but the capacity is deter ined by entering
the Total Resin Capacity and Feed Water Hardness. The control valve auto atically calculates the gallons
for regeneration.
A-05 Re aining Co pare: Co pares current usage with previous 365 day daily usage to intelligently
deter ine when regeneration will occur. Regeneration starts at the set regeneration ti e.
A-06 By Day (ti er): Service days count down to zero (0) and regeneration starts at the set regeneration
ti e.
A-07 Filter Meter: Filter ode, regeneration occurs when the capacity reaches zero and the preset ti e
for regeneration is reached.

RevV4 Valves & Systems Service Manual
9
4. Pre-Installation Checklist
IMPORTANT NOTICE
Read through the instructions thoroughly and obtain all aterials and tools before proceeding with the
installation. Be sure to follow all applicable national, state, county and local plu bing codes and regulations.
All plu bing and electrical work should be perfor ed by an accredited professional to ensure all local, state,
and unicipal guidelines are et.
During cold weather it is reco ended that the installer war the valve to roo te perature before
operating.
Required Operatin Conditions
Workin Conditions
Working Pressure 20psi
~
120psi
Water Te perature 35 °F
~
125 °F
Workin Environment
Environ ent Te perature 35 °F
~
125 °F
Relative Hu idity ≤95%
Power Source 100-240VAC / 50-60Hz
Inlet Water Quality
Turbidity
<
2FTU
Hardness 20 grains per gallon
Chlorine
<
0.1pp
Iron
2+
<
0.3pp
CAUTION
Do not exceed 120 psi water pressure.
Do not exceed 35° C / 125° F water te perature.
Do not subject unit to freezing conditions.
Failure to use this product within the described conditions ay void the warranty.

RevV4 Valves & Systems Service Manual
10
•Do not use the syste with water that is icrobiologically unsafe or of unknown quality without
adequate disinfection before or after the syste .
•Do not use the brine tube, injector body, or other connectors on the RevV4 valve as a handle to carry
the syste .
•Ensure there is salt in the brine tank at all ti es when this valve is used for softening. The brine tank
should contain clean water softening salt only, at least 99.5% pure. Do not use s all grain salt.
•When there is oderate to high turbidity, a filter should be installed before the water softening syste
on the inlet side.
•If the water pressure exceeds 120psi, a pressure reducing valve ust be installed before the water inlet. If
the water pressure exceeds 80 psi, installing a pressure reducing valve before the water inlet is highly
reco ended. If the water pressure is under 20 psi, a booster pu p ust be installed before the
water inlet.
•Replace ent parts for the RevV4 valve should only be purchased through Hankscraft Runxin resellers.
Electrical co ponents, such as transfor ers, are specific to the RevV4 valve fro Hankscraft.
•Regular interval onitoring of the water quality and work environ ent is reco ended to ensure
proper operation of the valve and syste .
•Any odification to Hankscraft equip ent, which is outside the standard scope of supply, voids the
product warranty.
•Hankscraft equip ent, like all odern electronic devices, can be da aged by electrical surges or brown
outs. Every effort has been taken to harden the circuits, by design, to protect against such events. These
precautions, or even additional surge protection, are not 100% effective. Therefore, equip ent da age
caused by abnor al electrical events is not covered by warranty.

RevV4 Valves & Systems Service Manual
11
5. Valve Installation
Unit Location
•The filter or softener should be located close to a floor drain away fro direct sunlight and any heat
sources.
•Protect equip ent fro direct sunlight and precipitation exposure.
•Install equip ent in a location safe fro unauthorized access or vandalis .
•Ensure that the unit is installed with enough space for operation and aintenance.
•The installation surface should be clean and level.
•Install the unit in an environ ent which ini izes consu er risk of loss in the event of alfunction.
•Hankscraft Runxin offers any different products for any different applications, for both indoor and
outdoor environ ents. If you are not 100% sure the equip ent purchased is suitable for the installation
application or environ ent, please check with a Hankscraft representative, or your local equip ent
provider, to ensure the proper equip ent is selected. Equip ent installed in inappropriate applications
or environ ents are not covered by warranty.
•Brine tank should be installed close to the RevV4 control valve.
Plumbin and Mechanical Setup
If the water outlet or water tank is installed higher than control valve, or parallel interlock system with multi-
outlets, a liquid level controller must be installed in the brine tank. If not, the water outlet or source tank will
flow backwards into brine tank during backwashes.
If making a soldered copper installation, all sweat soldering should be done before connecting pipes to the valve.
Torch heat will damage plastic parts.
When turning threaded pipe fittings onto plastic fitting, take precaution not to cross thread or over tighten.

RevV4 Valves & Systems Service Manual
12
Control Valve Installation
1. As Figure 5-1 shows; insert a 32 riser pipe with
botto basket into the center of the ineral tank. If pipe
is higher than the top of the pressure tank, ark it,
re ove fro tank, and cut. Take care to keep foreign
aterial out of pressure tank.
The length of riser pipe should be below tank flange.
The distance from the top of the tank to the top of the
pipe should be between 3/16" and 1". The edges of the
pipe should not be sharp to avoid damage to the seal
inside the Rev 4 valve.
2. If ineral tank was not purchased as part of a co plete
syste fro Hankscraft Runxin be sure to plug the riser
pipe prior to filling with edia. Media quantity is relative
to desired capacity and tank size. See Product Sizing Chart
on Page 13.
3. Install Valve Base O-ring around the neck of the valve.
4. Lubricate the center hub O-ring of the RevV4 valve.
5. Install the top basket with a twist and lock action to center
hub of the RevV4 valve.
6. Place RevV4 valve onto tank with the distributor pipe
inserted down the iddle of the top basket. Rotate
clockwise to secure onto
the tank.
Do not overtighten! Overtightening ay cause the valve
to crack and void the warranty.
Figure 5-1

RevV4 Valves & Systems Service Manual
13
System Sizin Chart
Tank
Size
Resin
Volume
cu. ft.
Total
System
Grains
Salt
Settin
Injector
Part No. Color DLFC Part No. Color BLFC Part No. Color
9x48 0.9375 16,577 Low 6302 Pink 2.02 8468060 White 0.3 8468056
White
9x48 0.9375 21,746 Standard 6302 Pink 2.02 8468060 White 0.3 8468056
White
9x48 0.9375 26,488 High 6302 Pink 2.02 8468060 White 0.3 8468056
White
9x48 1 17,682 Low 6302 Pink 2.02 8468060 White 0.3 8468056
White
9x48 1 23,196 Standard 6302 Pink 2.02 8468060 White 0.3 8468056
White
9x48 1 28,254 High 6302 Pink 2.02 8468060 White 0.3 8468056
White
10x44 1.25 22,102 Low 6302 Pink 2.86 8468061 Black 0.39 8468052
Brown
10x44 1.25 28,995 Standard 6302 Pink 2.86 8468061 Black 0.39 8468052
Brown
10x44 1.25 35,317 High 6302 Pink 2.86 8468061 Black 0.39 8468052
Brown
9x48 1.3 23,163 Low 6302 Pink 2.86 8468061 Black 0.39 8468052
Brown
9x48 1.3 30,387 Standard 6302 Pink 2.86 8468061 Black 0.39 8468052
Brown
9x48 1.3 37,013 High 6302 Pink 2.86 8468061 Black 0.39 8468052
Brown
10x54 1.5 26,523 Low 6302 Pink 2.86 8468061 Black 0.39 8468052
Brown
10x54 1.5 34,794 Standard 6302 Pink 2.86 8468061 Black 0.39 8468052
Brown
10x54 1.5 42,381 High 6302 Pink 2.86 8468061 Black 0.39 8468052
Brown
10x54 1.55 27,584 Low 6302 Pink 2.86 8468061 Black 0.39 8468052
Brown
10x54 1.55 36,186 Standard 6302 Pink 2.86 8468061 Black 0.39 8468052
Brown
10x54 1.55 44,076 High 6302 Pink 2.86 8468061 Black 0.39 8468052
Brown
12x52 2 35,364 Low 6303 Yellow
4.22 8468045 Blue 0.83 8468053
Pink
12x52 2 46,392 Standard 6303 Yellow
4.22 8468045 Blue 0.83 8468053
Pink
12x52 2 56,508 High 6303 Yellow
4.22 8468045 Blue 0.83 8468053
Pink

RevV4 Valves & Systems Service Manual
14
Control Valve Confi uration (refer to chart on Page 13 for specific recommendations)
Drain Line Flow Control (DLFC) Button Installation
•If you wish to change the DLFC button, unscrew drain barb collar and re ove drain barb.
•Re ove current DLFC button and replace with desired DLFC button.
•Replace drain barb and tighten down drain barb collar.
Brine Line Flow Control (BLFC) Button Installation
•If you wish to change the BLFC button, re ove brine connector clip and then brine connector fro valve.
•Re ove current BLFC button and replace with desired BLFC button.
•Replace brine connector to valve and insert brine connector clip.
Injector Throat and Nozzle Installation
•If you wish to change the injector, unscrew the two screws fro the injector body and re ove the cover.
•Unscrew, in a counter-clockwise direction, re ove the nozzle and throat.
•Replace with desired nozzle and throat. Tighten in a clockwise direction until seated.
•Take care not to over tighten or strip the parts.
6. Bypasses
Ceramic Bypass – 41206 / 41207
Before attaching the bypass to the valve, verify the meter is installed into the outlet side of the bypass
with the impeller facing in.
•As Figure 5-2 shows; install the seals into the ani ated connector.
•Attach ani ated connectors to the inlet/outlet and grease the O-rings.
•Attach the bypass valve and insert the clips.
•Meter cable is installed into cable port on outlet side during syste start-up. See Pages 38-39.
Figure 5-2

RevV4 Valves & Systems Service Manual
15
Ceramic Bypasses
41206

RevV4 Valves & Systems Service Manual
16
7. Pro rammin : Display and Instructions
Manual / Delayed Re eneration
1. Pressing at any ti e results in an i ediate anual regeneration.
2. Pressing and holding for 3 seconds, when syste is locked, results in a delayed regeneration at the
preselected ti e.
One Button to Chan e the Current Time
Pressing and holding the button for 3 seconds, when syste is locked, allows the current ti e of day to
be adjusted.
Unlockin the Keypad
The icon indicates the buttons are locked within 5 inutes of idle use. To unlock press and hold and
for 3 seconds until the icon is off.
Enter Key
Press button to enter the basic progra ing ode, odify highlighted options, and return to the ain
enu.

RevV4 Valves & Systems Service Manual
17
Manual Re en/Esc. Key
Press at any phase during anual regeneration to advance to the next phase or press during progra ing to exit
to the ho e screen without odifying the current highlighted option.
Up and Down Arrows
and buttons are used to scroll through the various basic progra ing options as well as adjust values.
Basic Pro rammin
Allows you to adjust the ti e values for each phase. To enter basic progra ing, follow the directions below.
1. When the icon is on, press and hold both and for 3 seconds to unlock the keypad.
2. Press to enter the ain enu; press or to highlight each option.
3. Press to enter highlighted option.
4. Press or to adjust the value.
5. Press to accept changes.
6. Press to exit back to service status.
Advanced Pro rammin
Allows you to set the Regen Cycle and Regen Mode that will work best for your custo er; as well as adjust or
set each phase ti e. To enter advanced progra ing, follow the directions below.
1. Plug in the RevV4. I ediately press in sequence to enter into the advanced setting.
2. Press or to select the enu ite to be changed.
3. Press to return to the previous enu.
If valve locks while programming, unplug power supply and repeat step above.
4. Press to enter the ain enu; press or to highlight each option.
5. Press to enter highlighted option.
6. Press or to adjust the value.
7. Press to accept changes.
8. Press to advance to service status.

RevV4 Valves & Systems Service Manual
18
Pro rammin : Mode A-01
Parameter Unit Default Description
Review Co pany Info Displays current progra ed co pany infor ation.
Language *
English
Set Co pany Info * Set co pany infor ation for display. Three lines available for input.
Set Ti e of Day 24-hr. Clock
Set current ti e of day. 24-hour clock for at.
Set Date Set current onth, day, and year. XX/XX/20XX
Set Progra Type *
Interlock / Alternate Interlock
Interlock Used as a stand-alone installation and twin de and in conjunction with No Hard
Water version of the RevV4.
Set Regen Cycles * 1, 2, 3 2 Reco ended setting to Sequence 2. See Pages 7-8. Service → Backwash →
Brine & Slow Rinse → Back Wash → Fast Rinse → Brine Refill.
Set Clear Data * Close/Open Close Skip during initial set-up. Clears all stored e ory
and restores default settings.
Close = Data saved Open = Reset data
Set Regen Mode: A-01-A-07 *
A-03 Change to A-01 Meter Delayed.
Set Capacity Grains 2100
To figure capacity, take the total resin volu e ultiplied by .75. Divide by grains
hardness of water supply. Ex: 1 Cu/Ft =32,000 x .75 at 15 grains hardness.
(32,000 x .75) ÷ 15=1,600 gal. Enter that value here.
Set Regen Ti e 24-hr. Clock 02:00 The ti e of day the syste will regenerate when it reaches syste capacity.
Set Backwash Ti e Min. 0 Set to 0 (zero) when using Sequence 2 as a softener install.
Set B.S.R. Ti e Min. 60 Brine Slow Rinse Stage of Regeneration.
Set Secondary B.W.T.
(Backwash Ti e) Min. 10
Set Fast Rinse Ti e Min. 10
Set B.R. Ti e (Brine Refill) Min:Sec 10:00 Refill ti e is calculated based on total resin volu e. Note: 1 gal. water dissolves
3 lbs. of salt. See note below for refill ti e.
Max Days for Regeneration Days 30 A regeneration is forced every 30 days if water capacity is not reached.
Signal Output Mode b-01 (02) * b-01 Used for external device. b-01. Disregard for standard installation.
Set Service Alar * Days 730 Alar rings to pro pt a service call. Occurs at the nu ber of days set at 8p for
2 inutes. Display changes to pro pt the ho eowner to call their dealer.
Daily Usage Log Gal. Shows the gallons used each day for the last 7 days.
Daily Peak Usage Gal. Shows the highest gallon usage day for the last 7 days.
Weekly Usage Log Gal. Shows the gallons used each week for the last 52 weeks.
Weekly Peak Usage Gal. Shows the highest gallon usage week for the last 52 weeks.
Monthly Usage Log Gal. Shows the gallons used each onth for the last 12 onths.
Monthly Peak Usage Gal. Shows the highest gallon usage onth for the last 12 onths.
Review Regen Ti es Displays the nu ber of ti es the valve has regenerated independently.
Review Software Ver. Shows current software version of RevV4 valve.
Above parameters are located in standard program settings menu. (*) Denotes parameters located in advanced program settings menu.

RevV4 Valves & Systems Service Manual
19
Pro rammin : Modes A-02
Parameter Unit Default Description
Review Co pany Info Displays current progra ed co pany infor ation.
Language *
English
Set Co pany Info * Set co pany infor ation for display. Three lines available for input.
Set Ti e of Day 24-hr. Clock
Set current ti e of day. 24-hour clock for at.
Set Date Set current onth, day, and year. XX/XX/20XX
Set Progra Type *
Interlock / Alternate Interlock
Interlock Used as a stand-alone installation and twin de and in conjunction with No
Hard Water version of the RevV4.
Set Regen Cycles * 1, 2, 3 2 Reco ended setting to Sequence 2. See Pages 7-8. Service → Backwash →
Brine & Slow Rinse → Back Wash → Fast Rinse → Brine Refill.
Set Clear Data * Close/Open Close Skip during initial set-
up. Clears all stored e ory and restores default settings.
Close = Data saved Open = Reset data
Set Regen Mode: A-01-A-07 *
A-03 Change to A-02 Meter I ediate.
Set Capacity Grains 2100
To figure capacity, take the total resin volu e ultiplied by .75. Divide by grains
hardness of water supply. Ex: 1 Cu/Ft =32,000 x .75 at 15 grains hardness.
(32,000 x .75) ÷ 15=1,600 gal. Enter that value here.
Set Backwash Ti e Min. 0 Set to 0 (zero) when using Sequence 2 as a softener install.
Set B.S.R. Ti e Min. 60 Brine Slow Rinse Stage of Regeneration.
Set Secondary B.W.T.
(Backwash Ti e) Min. 10
Set Fast Rinse Ti e Min. 10
Set B.R. Ti e (Brine Refill) Min:Sec 10:00 Refill ti e is calculated based on total resin volu e. Note: 1 gal. water dissolves
3 lbs. of salt. See note below for refill ti e.
Max Days for Regeneration Days 30 A regeneration is forced every 30 days if no water has been used.
Signal Output Mode b-01 (02) * b-01 Used for external device. b-01. Disregard for standard installation.
Set Service Alar * Days 730 Alar rings to pro pt a service call. Occurs at the nu ber of days set at 8p
for 2 inutes. Display changes to pro pt the ho eowner to call their dealer.
Daily Usage Log Gal. Shows the gallons used each day for the last 7 days.
Daily Peak Usage Gal. Shows the highest gallon usage day for the last 7 days.
Weekly Usage Log Gal. Shows the gallons used each week for the last 52 weeks.
Weekly Peak Usage Gal. Shows the highest gallon usage week for the last 52 weeks.
Monthly Usage Log Gal. Shows the gallons used each onth for the last 12 onths.
Monthly Peak Usage Gal. Shows the highest gallon usage onth for the last 12 onths.
Review Regen Ti es Displays the nu ber of ti es the valve has regenerated independently.
Review Software Ver. Shows current software version of RevV4 valve.
Above parameters are located in standard program settings menu. (*) Denotes parameters located in advanced program settings menu.

RevV4 Valves & Systems Service Manual
20
Pro rammin : Modes A-03
Parameter Unit Default Description
Review Co pany Info Displays current progra ed co pany infor ation.
Language *
English
Set Co pany Info * Set co pany infor ation for display. Three lines available for input
Set Ti e of Day 24-hr. Clock
Set current ti e of day. 24-hour clock for at.
Set Date Set current onth, day, and year. XX/XX/20XX
Set Progra Type *
Interlock / Alternate Interlock
Interlock Used as a stand-alone installation and twin de and in conjunction with No
Hard Water version of the RevV4.
Set Regen Cycles * 1, 2, 3 2 Reco ended setting to Sequence 2. See Pages 7-8. Service → Backwash →
Brine & Slow Rinse → Back Wash → Fast Rinse → Brine Refill.
Set Clear Data * Close/Open Close Skip during initial set-up. Clears all stored e ory and restores default
settings. Close = Data saved Open = Reset data
Set Regen Mode: A-01-A-07 *
A-03 A-03 Intelligent Meter Delayed.
Set Total Capacity Grains 32000 Total Volu e of Media in Syste . 1 cubic foot (32,000 grains) is default.
Set Water Hardness Grains per
Gallon (gpg) 10 Total water hardness of inco ing water supply. A ount varies per location. It
is highly reco ended to have tested for correct function/perfor ance.
Set Nu ber of People 4 The nu ber of people in the residence
Set Regen Ti e 24-hr. Clock 02:00 The ti e of day the syste will regenerate when it reaches syste capacity.
Set Backwash Ti e Min. 0 Set to 0 (zero) when using Sequence 2 as a softener install.
Set B.S.R. Ti e Min. 60 Brine Slow Rinse Stage of Regeneration.
Set Secondary B.W.T. (Backwash Ti e)
Min. 10
Set Fast Rinse Ti e Min. 10
Set B.R. Ti e (Brine Refill) Min:Sec 10:00 Refill ti e is calculated based on total resin volu e. Note: 1 gal. water
dissolves 3 lbs. of salt. See note below for refill ti e.
Max Days for Regeneration Days 30 A regeneration is forced every 30 days if no water has been used.
Signal Output Mode b-01 (02) * b-01 Used for external device. b-01. Disregard for standard installation.
Set Service Alar * Days 730 Alar rings to pro pt a service call. Occurs at the nu ber of days set at 8p
for 2 inutes. Display changes to pro pt the ho eowner to call their dealer.
Daily Usage Log Gal. Shows the gallons used each day for the last 7 days.
Daily Peak Usage Gal. Shows the highest gallon usage day for the last 7 days.
Weekly Usage Log Gal. Shows the gallons used each week for the last 52 weeks.
Weekly Peak Usage Gal. Shows the highest gallon usage week for the last 52 weeks.
Monthly Usage Log Gal. Shows the gallons used each onth for the last 12 onths.
Monthly Peak Usage Gal. Shows the highest gallon usage onth for the last 12 onths.
Review Regen Ti es Displays the nu ber of ti es the valve has regenerated independently.
Review Software Ver. Shows current software version of RevV4 valve.
Above parameters are located in standard program settings menu. (*) Denotes parameters located in advanced program settings menu.
Table of contents
Other Hankscraft Runxin Control Unit manuals
Popular Control Unit manuals by other brands
ABB
ABB FPBA-01 PROFIBUS DP Quick installation and start-up guide

EKE-Electronics
EKE-Electronics EKE-Trainnet MVB2791B Technical manual

Feig Electronic
Feig Electronic OBID i-scan ID ISC.MAT-A Installation
Interlogix
Interlogix TruPortal TP-ADD-2D-BRD quick reference
Afag
Afag RM 12 Maintenance instructions

CRE Technology
CRE Technology UNIGEN Plus Technical documentation
