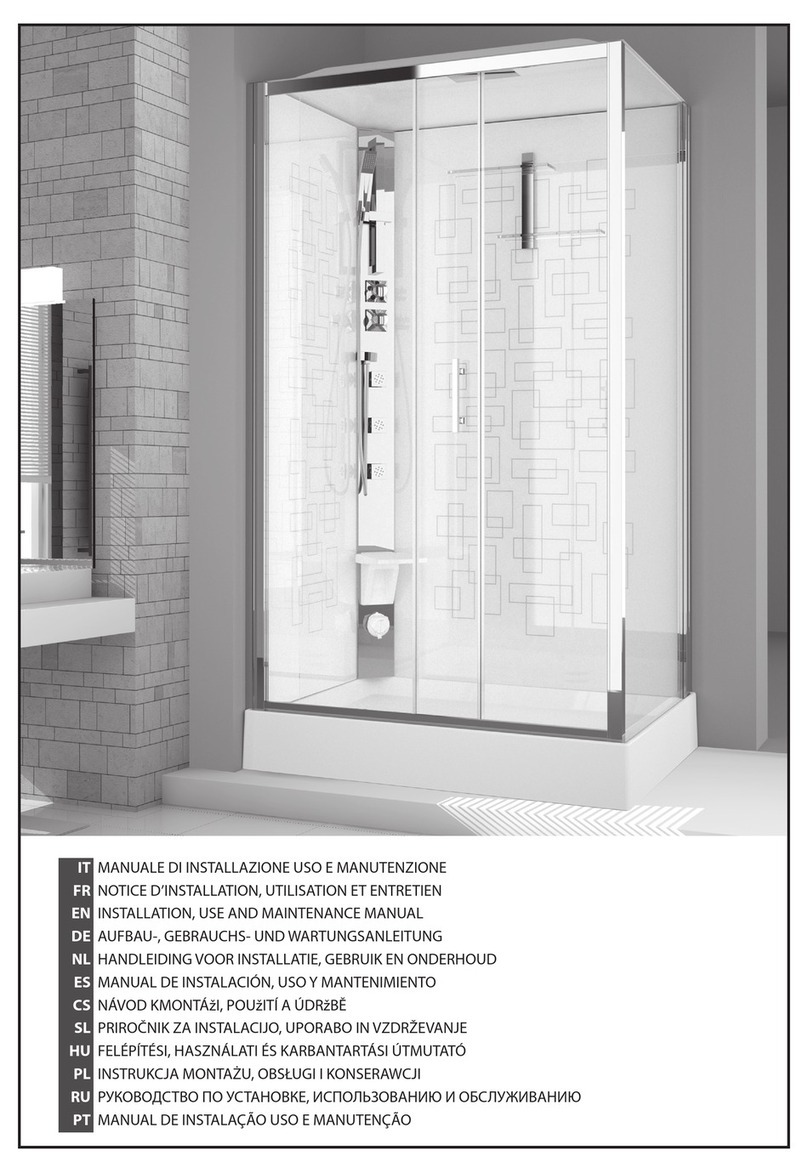
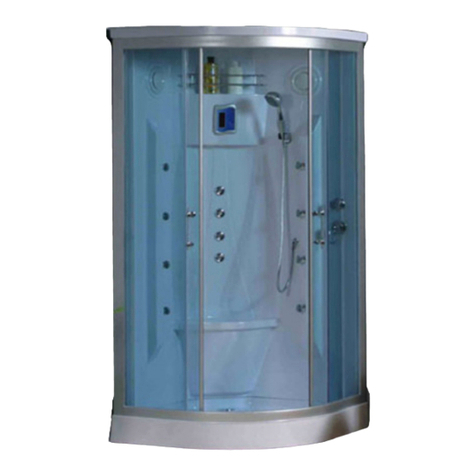
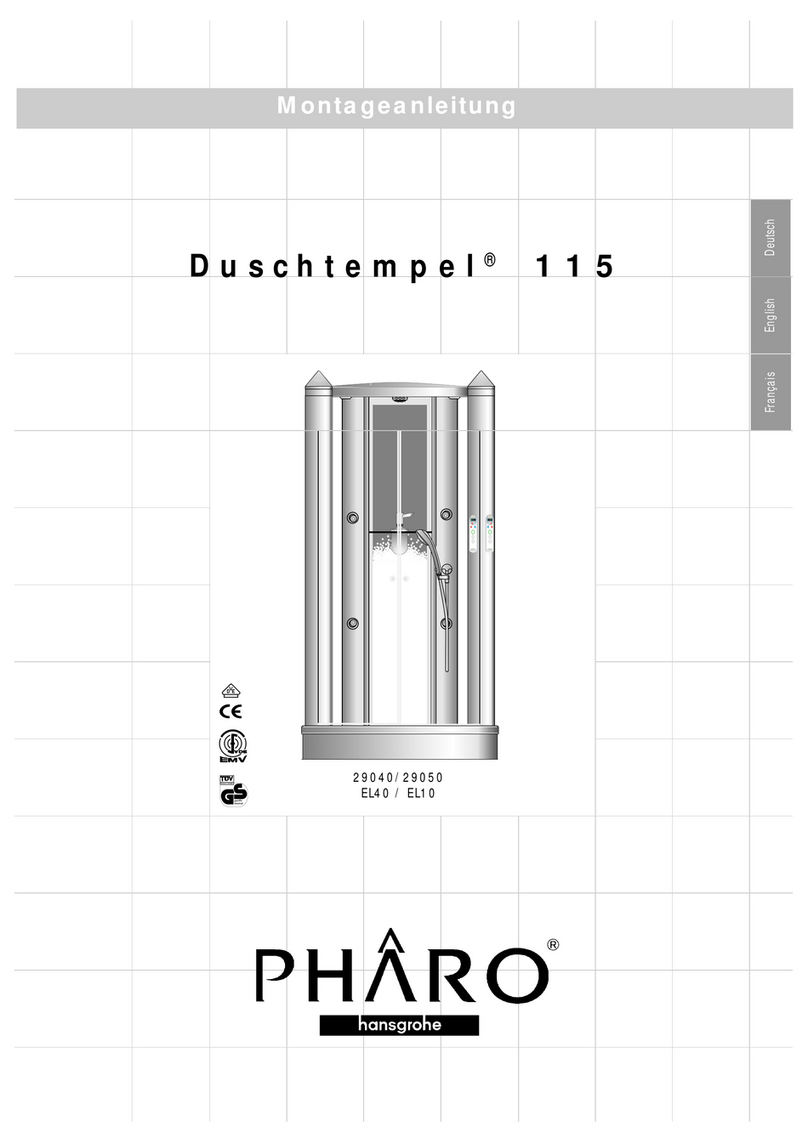
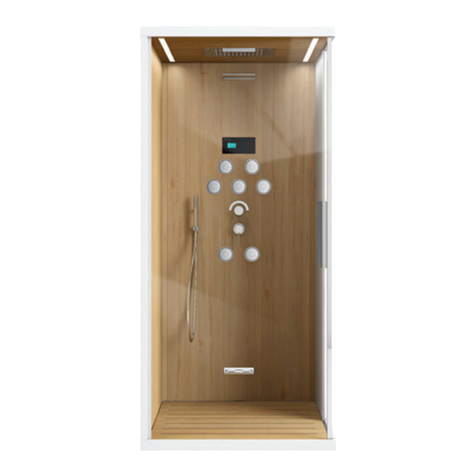
Hans Grohe PHARO Aquafun 140 DL 10 Comfort User manual

Aquafun
Montageanleitung
Aquafun 140 DL 10 Comfort 21116000
Aquafun 140 DL 10 Deluxe 21124000
Deutsch
Installation Instructions
English
Istruzioni di montaggio
Italiano

2
3
Deutsch
Deutsch
Inhaltsverzeichnis
Vorwort/Anschlussmaße 4
Ansichten vermaßt 5
Ausstattung 6
Serviceteile 8
Sicherheitshinweise 10
Verwendete Symbole 11
Technische Daten 13
Checkliste 14
Verpackungsinhalt 15
Benötigte Werkzeuge 16
Einstellung Wannenfüße/Ausrichtung Duschwanne 18
Seitenverkleidung abnehmen 20
Montage Rückwand 22
Vorbereitung Montage Türrahmen 24
Schiebetür einbauen/einstellen 30
Montage obere Abdeckung (Dach) 32
Erdungsmaßnahme/Stromversorgung 34
Anschluss Beleuchtung/Lautsprecher 36
Montage Verbindungsschläuche/Kopfbrause 38
Montage Dampfdusche/Dachabdeckung/Seitenverkleidung
42
Schiebetür einstellen 44
Montage Schlauch/Handbrause 46
Thermostat einstellen/warten 48
Brausenfunktionen 50
Elektronisches Bedienelement 54
Störungen und Abhilfen 70
English
English
Contents
Preface/Connection Dimensions 4
Preface/Connection Dimensions 5
Equipment 6
Spare Parts 8
Safety Instructions 10
Used Symbols 11
Technical Information 13
Check list 14
Packaging Contents 15
Required Tools 16
Shower Tray Feet Setting/Shower Tray Alignment 18
Removing the Side Casing 20
Installing the Rear Panel 22
Preparing the Door frame Installation 24
Installing/Adjusting the Slide Door 30
Installing the Top Cover 32
Earthing Measure/Power Supply 34
Connecting the Illumination/Loudspeaker 36
Installing the Connection Tubes/Head Shower 38
Installing the Steam Shower/Roof Cover/Side Casing 42
Adjusting the Slide Door 44
Installing the Tube/Hand Shower 46
Thermostat Adjusting/Servicing 48
Shower Functions Setting 50
Electronic Operating Element 54
Failures and Rectications 70
Italiano
Indice

2
3
Deutsch
Inhaltsverzeichnis
English
Contents
Italiano
Italiano
Indice
Introduzione/quote di collegamento 4
Quote di collegamento 5
Equipaggiamento 6
Parti Di Ricambio 8
Norme di sicurezza 10
Simboli utilizzati 11
Dati tecnici 13
Elenco di controllo 14
Contenuto della confezione 15
Attrezzi necessari 16
Regolazione dei piedi del piatto doccia/posizionamento del
piatto doccia 18
Smontaggio del pannello laterale 20
Montaggio della parete 22
Preparativi per la chiusura 24
Montaggio/regolazione della porta scorrevole 30
Montaggio della copertura superiore 32
Messa a terra/alimentazione elettrica 34
Collegamento dell‘illuminazione/altoparlante 36
Montaggio dei tubi essibili di raccordo/sofone doccia
38
Montaggio della doccia a vapore/copertura del tetto/
pannello laterale 42
Regolazione della porta scorrevole 44
Montaggio del tubo essibile/doccia manuale 46
Regolazione/manutenzione del termostatico 48
Funzioni della doccia 50
Elemento di comando elettronico (Deluxe) 54
Anomalie e rimedi 70

4
5
Deutsch
Deutsch
Die Montageanleitung enthält die wichtigsten
Montageschritte und Installationshinweise für
die auf der Titelseite bezeichneten Produkte.
Lesen Sie die Montageanleitung aufmerksam,
um Montagefehler zu vermeiden. Die Dampf-
dusche wurde nach den geltenden Richtlinien
hergestellt. Unsachgemäße Montage kann zu
Verletzungen führen!
Information
Die Dampfdusche wurde konform mit den
Niederspannungsrichtlinien 73/23/EWG,
93/68 EWG und der Norm CEI 64-8 (IEC
364) hergestellt. Die Schutzart der Dampfdu-
sche ist IPX4, die Nennspannung ist 230 V,
die Nennleistung ist 2400 W für die Ausfüh-
rung Steam und Deluxe.
Die von der "Europarichtlinie" für elektro-
magnetische Verträglichkeit auferlegten Si-
cherheitsanforderungen (Richtlinie 89/336/
EWG, 92/31/EWG, 93/68/EWG) und die
Konformität wird durch die Anwendung fol-
gender europäischer Normen gewährleistet;
EN 55014, EN 55104, EN 61000-3-2 und
EN 61000-3-3.
Anschlussmaße
(Abb. B)
Position 1: Empfohlene Stelle für den
Austritt der elektrischen Versorgung aus der
Wand (Kabel 3 x 1,5 mm2 / Kabellänge
2600 mm).
Position 2: Empfohlene Stelle für den Kalt-
wasseranschluss DN 15 1/2" Innengewinde
für die Verbindung zum Thermostat.
Position 3: Empfohlene Stelle für den
Warmwasseranschluss DN 15 1/2" Innenge-
winde für die Verbindung zum Thermostat.
Position 4: Empfohlener Bereich für den
Wasserablauf DN 50.
Hinweis:
Mindestraumhöhe von 2400 mm notwendig!
Einbau in fertig geiestes Bad mit
"Fliesenspiegel" auf mindestens 2300
mm!
Erdungskabel: Querschnitt von mindestens
4 mm2 und einer Länge von ca. 2600 mm!
Vorwort/Anschlussmaße
English
English
These installation instructions contain the most
important installing procedures and installa-
tion notes for the products stated on the front
page. Please read these instructions care-
fully in order to avoid incorrect installation.
The steam shower has been manufactured
in accordance with the applicable regula-
tions. Any improper installation may lead to
injuries!
Information
The steam shower has been manufactured in
compliance with the 73/23/EEC Low-Voltage
Electrical Equipment Directive, 93/68 EEC
Low-Voltage Electrical Equipment Directive
and the CEI 64-8 (IEC 364) standard. The
steam shower's degree of protection is IPX4,
its rated voltage is 230 V, its rated output for
the Steam and Deluxe versions is 2400 W.
The compliance with the safety requirements
(89/336/EEC, 92/31/EEC, 93/68/EEC
guidelines) specied by the "European
Guideline" for electro-magnetic compatibility
is assured by the application of the following
European standards; EN 55014, EN 55104,
EN 61000-3-2 and EN 61000-3-3.
Connection dimensions
(Fig. B)
Position 1: Recommended position for elec-
trical supply cable exit from the wall (cable
3 x 1.5 mm2 / cable length 2600 mm).
Position 2: Recommended position for
cold water connection DN 15 1/2" internal
thread for connection to the thermostat.
Position 3: Recommended position for
warm water connection DN 15 1/2" internal
thread for connection to the thermostat.
Position 4: Recommended area for water
drainage DN 50.
Note:
A minimum room height of 2400 mm is
required! Installation into completely
tiled bathroom with a minimum "tiled
area" of 2300 mm!
Earthing cable: Cross section of at least
4 mm2 and a length of approx. 2600 mm!
Preface/Connection Dimensions
Italiano
Italiano
Le istruzioni di montaggio descrivono le
più importanti operazioni di montaggio e
le avvertenze di installazione per i prodotti
indicati nella pagina di copertina. Leggere
attentamente le istruzioni di montaggio per
evitare errori. La doccia a vapore è stata
realizzata conformemente alle direttive
vigenti. Il montaggio scorretto può provocare
lesioni!
Informazione
La doccia a vapore è stata realizzata
conformemente alla direttiva sulla bassa
tensione 73/23/CEE, 93/68 CEE ed alla
norma CEI 64-8 (IEC 364). La classe di
protezione della doccia a vapore è IPX4,
la tensione nominale di 230 V e la potenza
nominale di 2400 W per i modelli Steam e
Deluxe.
I requisiti di sicurezza previsti dalla direttiva
europea sulla compatibilità elettromagnetica
(direttiva 89/336/CEE, 92/31/CEE, 93/
68/CEE) e la conformità vengono garantiti
dall'applicazione delle seguenti norme
europee: EN 55014, EN 55104, EN 61000-
3-2 e EN 61000-3-3.
Quote di collegamento
(g. B)
Posizione 1: punto consigliato per la
fuoriuscita del cavo di alimentazione elettrica
dalla parete (cavo 3 x 1,5 mm2 / lunghezza
2600 mm).
Posizione 2: punto consigliato per il
raccordo dell'acqua fredda DN 15 1/2"
con lettatura interna per il collegamento al
termostatico.
Posizione 3: punto consigliato per il
raccordo dell'acqua calda DN 15 1/2"
con lettatura interna per il collegamento al
termostatico.
Posizione 4: zona consigliata per lo
scarico dell'acqua DN 50.
Avvertenza:
Altezza minima del locale 2400 mm!
Montaggio in stanza da bagno
piastrellata con altezza minima della
piastrellatura di 2300 mm!
Cavo di terra: sezione minima
4 mm2 e lunghezza di circa 2600 mm!
Introduzione/quote di collegamento
4
5
A
B
C
1
2
3
4
1
2
3
4
Deutsch
Deutsch
Innenansicht
Grundriss
Anschlussmaße
Markierter Bereich (4): Ideal für Wasserablauf
Ansichten vermaßt
English
English
Inside view
Ground plan
Connection dimensions
Marked area (4): ideal for water drainage
Preface/Connection Dimensions
Italiano
Italiano
Vista interna
Pianta
Quote di collegamento
Zona a tratteggio (4): raccomandata per lo scarico
Quote di collegamento

6
7
Deutsch
Deutsch
Ausstattung
Grundausstattung:
1. Deckel
2. Obere Abdeckung (Dach)
3. Rückwand
4. Ausgleichsprol (vorne rechts)
5. Trägerrahmen
6. Duschwanne
7. Wannenschürze
8. Schiebetür (links oder rechts)
9. Ausgleichsprol (vorne links)
10. Seitenverkleidung
Aquafun Deluxe
Duschkabine, Duschwanne und Wannen-
schürze sind aus ABS/PMMA. Schiebetür
aus Sicherheitsglas zum Wenden (Links- oder
Rechtsanschlag in einem).
Steuerung der Duschfunktion:
Thermostat (1/2") manuell, Ab- und Umstel-
lung manuell.
Brausenbestückung (Anzahl):
- 8 Pharo Seitenbrausen (Massagestrahl)
- 12 Pharo Rückenbrausen (Massagestrahl)
- 8 Nackenjets
- Handbrause Mistral 3 (3 Strahlarten)
- Raindance Kopfbrause (5 Strahlarten)
- Unica D Brausenstange
(höhenverstellbar um 600 mm)
- Kombination der Brausen
Steuerung der Dampffunktion über ein elek-
tronisches Bedienelement:
- Dampf an/aus (Leistung Dampfgenerator
2,4 kW)
- Einstellbare Dampfzeit
- Leistungsregulierung
- Dufteinlass mit Aromasieb
Kaskadenfunktion und schottische Dusche,
Beleuchtung mit Farblicht (LED) und einem
integrierten Radio.
English
English
Equipment
Basic equipment:
1. Cover
2. Top cover (roof)
3. Rear panel
4. Compensation prole (right front)
5. Support frame
6. Shower tray
7. Tray skirt
8. Slide door (left or right)
9. Compensation prole (left front)
10. Side casing
Aquafun Deluxe
The shower cabin, shower tray and tray skirt
are made of ABS/PMMA. Reversible slide
door made of safety glass (combining a left
and right hinging option).
Shower function control:
Manual thermostat (1/2"), manual off-switch
and adjustment.
Shower equipment (number):
- 8 Pharo side showers (massaging jet)
- 12 Pharo back showers (massaging jet)
- 8 neck jets
- Mistral 3 hand shower (3 jet types)
- Raindance head shower (5 jet types)
- Unica D shower bar
(height-adjustable by 600 mm)
- Shower combination
Steam control function via an electronic oper-
ating element:
- Steam on/off (The steam generator's out
put amounts to 2.4 kW.)
- Adjustable steam time
- Output regulation
- Fragrance admission via an aroma lter
Cascades function and Scotch shower, color-
ed-light illumination (LED) and an integrated
radio. (Further equipment identical with the
Aquafun Shower version!)
Italiano
Italiano
Equipaggiamento
Equipaggiamento di base:
1. Controcappello
2. Cappello
3. Parete doccia
4. Prolato di compensazione
(anteriore destro)
5. Telaio
6. Chiusura
7 Pannello piatto doccia
8. Porta scorrevole (a sinistra o a destra)
9. Prolato di compensazione
(anteriore sinistro)
10. Pannello laterale
Aquafun Deluxe
La cabina doccia, il piatto doccia ed il pan-
nello del piatto doccia e sono di ABS/PMMA.
Porta scorrevole con vetro di sicurezza inverti-
bile (apertura verso destra o verso sinistra).
Controllo della funzione doccia:
termostatico (1/2") manuale, spegnimento e
commutazione manuali.
Numero di docce:
- 8 docce laterali Pharo (per massaggio)
- 12 docce posteriori Pharo (per massag-
gio)
- 8 ugelli per la nuca
- doccia manuale Mistral 3 (3 tipi di getto)
- sofone doccia Raindance (5 tipi di getto)
- asta scorrevole Unica D
(regolabile in altezza di 600 mm)
- combinazione delle docce
Controllo della funzione vapore mediante
elemento di comando elettronico
- vapore on/off (Potenza del generatore di
vapore 2,4 kW)
- durata del vapore regolabile
- regolazione della potenza
- ingresso essenze con ltro aroma
Funzione a cascata e doccia scozzese, illumi-
nazione con luce colorata (LED) ed apparec-
chio radio integrato.

6
7
1
2
34
5
6
78
910
10
Deutsch
Deutsch
Ausstattung
English
English
Equipment
Italiano
Italiano
Equipaggiamento

8
9
Pos.
1
2
3
4
5
6
7
8
9
10
11
12
13
14
15
16
17
18
19
20
21
22
23
24
25
26
27
28
29
30
31
32
33
34
---
---
Nr.
96949000
97974000
96950000
96951000
97454000
96645000
36093000
96944000
96945000
94282000
36391000
96946000
96952000
25957000
96190000
28524000
28246000
96954000
25944000
96955000
97374000
96956000
96957000
96958000
97352000
96959000
96960000
97124000
96962000
96963000
60055000
96964000
96965000
96967000
96973320
96974320
96978000
97366000
96987320
96989000
96990000
96999000
97003000
97004000
96992000
96991000
96993000
97353000
97005000
97007000
97015320
97018320
97115320
97023320
96970000
97434000
VE
1
1
1
1
1
1
1
1
1
1
1
1
1
1
1
1
1
1
1
1
1
1
1
1
1
1
1
1
1
1
1
1
1
1
1
1
1
1
1
1
1
2
1
1
1
1
2
1
1
1
1
1
1
1
Deutsch
Serviceteile
Bezeichnung
Chromotherapielicht kpl.
Weißlicht (Comfort)
Lautsprecher
Deckel für Lautsprecher
Abdeckung
Ab- / Umstellventil
Griff
Rosette Ø 68 mm
Mutter
Temperatur Regeleinheit
Thermostatgriff
Anschlaghülse
Bedienelement
Wandstange
Schieber U‘D kpl.
Handbrause
Brauseschlauch
Nacken Düse
Seitenbrause
Magnetventil 1 Weg / 12V
Bajonettverschluss 3/4" M
Dampfgenerator kpl.
Wasserstandsensor
Potentiometer für Wasserstand-
sensor
Magnetventil
Zulauf Dampfgenerator
Magnetventil Wasserabuss
ampfgenerator
Heizspirale (230V/2400W)
Überhitzungsschutz Thermostat
Schaltkasten
Dampfaustritt
Staro 90 Color Set
Staro 90 Grundset
Reling (240mm)
Wannenfüße
Seitenverkleidung rechts
Seitenverkleidung links
Wandausgleichschiene
(links/rechts)
Kopfbrause
Wannenschürze
Türgriff
Türstopper
Schiebetür
Gleitrolle
Dichtung (Tür unten)
Dichtung (Tür oben)
Dichtung
Glasabtrennung/Duschwanne
Ausgleichsprol
Dichtung
Tür fest
Eckprol
Duschwanne inkl. Ventil
Dachabdeckung
Dach (Deluxe)
Dach (Comfort)
Befestigungssatz
Satz Zierkappen
English
Spare Parts
Description
chromptherapy lamp
light (Comfort)
speaker
cover for speaker
cover
shut off unit with selector
handle
escutcheon Ø 68 mm
nut
thermostat cartridge
handle for thermostat
sleeve
control panel
wall bar
support U‘D
handshower
shower hose
neck jet
body shower
1 way 12V solenoid valve
3/4“ male bayonet tting
boiler
water level sensor
potentiometer for water level
sensor
solenoid valve
water supply boiler
solenoid drain valve
heating spiral(230V/2400W)
overheating protection for ther-
mostat
control unit
steam outlet
Staro 90 coloure kit
Staro 90 basic kit
rail (240mm)
shower tray feet
side casing right
side casing left
wall closure rail (right/left)
head shower
skirt
door handles
door stopper
sliding door
sliding roller
seal (bottom of the door)
seal (top of the door)
seal
glass/shower tray
closure rail
seal
xed door
corner prole
shower tub incl. drain outlet
top cover
top (Deluxe)
top (Comfort)
mounting kit
set of caps
Italiano
Parti Di Ricambio
Descrizione
cromoterapia
luce bianca (Comfort)
altoparlante
altoparlante
cappello
cartuccia deviatore
maniglia deviatore
copertura Ø 68 mm
ghiera di ssaggio
cartuccia termostatica
maniglia termostatico
cappuccio
display di comando
asta doccia
supporto doccetta
doccetta
essibile
getti cervicali
doccia laterale
elettrovalvola 1 via 12V
Raccordo 3/4“ M con innesto a
Baionetta
corpo caldaia
asta livello
sensore di livello
elettrovalvola
connessione caldaia
elettrovalvola scarico
resistenza (230V/2400W)
termofusibile
centralina
diffusore di vapore
set colorato Staro 90
corpo base Staro 90
ferma oggetti (240mm)
piedini del piatto doccia
pannello ispezionabile dx
pannello ispezionabile sx
prolo compensatore
(sinistro/destro)
sofone doccia
pannello frontale piatto
maniglie per porte
ferma porta
anta scorrevole
porta scorrevole
guarnizione
(parte inferiore dell‘anta ssa)
guarnizione
(parte superiore anta ssa)
guarnizione piatto
prolo compensatore
guarnizione
anta ssa
raccordo unione
piatto completo di scarico
sovracappello
capello (Deluxe)
capello (Comfort)
set di ssaggio
set di cappa

8
9
1
2
3
5
4
6
7
8
10
9
11
14
30
16
20
15
17
18
13
12
22
23
24
25
26
21
27
28
19
29
31 32
33
34
Deutsch
Serviceteile
English
Spare Parts
Italiano
Parti Di Ricambio

10
11
Deutsch
Deutsch
Deutsch
Sicherheitshinweise
Vor dem Einbau bitte prüfen:
1. Die Tragfähigkeit des Fußbodens muss
einer Belastung von 200 kg/m2 entsprechen.
2. Der Fußboden muss ausreichend nivelliert
sein, d.h. ein waagerechter und ebener Fuß-
boden.
3. Der Fußboden muss im Einbaubereich
geiest sein.
Gefahr!
Allgemein:
Während Reinigungs- und Wartungsarbeiten
muss der Hauptschalter auf "OFF" gestellt
sein.
Wartungs- und Einstellarbeiten dürfen nur von
einem Fachmann durchgeführt werden.
Nach Wartungsarbeiten müssen die Ser-
viceabdeckungen ordnungsgemäß montiert
werden.
Bestehende Sicherheitsvorkehrungen und Si-
cherheitseinrichtungen dürfen nicht verändert
oder entfernt werden.
Hinweis:
Die Dampfdusche darf in ihrer Bauart nicht
verändert werden. Nur Originalersatzteile
verwenden.
Stromversorgung:
Der Elektroanschluss sollte ausschließlich vom
Elektrofachmann, Ihrem Elektro-Installateur
durchgeführt werden. Die gesamte Stromver-
sorgung erfolgt über einen 230 V/50 Hz
Wechselstromanschluss und muss über einen
2-poligen FI-Schalter mit 30 mA Fehlerstrom
abgesichert werden.
Bei der Elektro-Installation sind die entspre-
chenden VDE-, Landes- und EVU-Vorschriften
in der jeweils gültigen Fassung einzuhalten.
Die Installations- und Prüfungsarbeiten sind
von einem zugelassenen Elektrofachmann
auszuführen, unter Berücksichtigung von VDE
0100 Teil 701. Sämtliche Arbeiten an der
Dampfdusche dürfen nur im spannungsfreien
Zustand vorgenommen werden!
English
English
English
Safety Instructions
Please assure before installation:
1. The oor's carrying capacity must corre-
spond to a load of 200 kg/m2.
2. The oor must be sufciently leveled, i.e. it
must be horizontal and even.
3. The oor's installation area must be tiled.
Danger!
General:
The main switch must be set to "OFF" during
cleaning and maintenance works.
Maintenance and adjustment works must be
carried out by experts only.
All service covers must be appropriately re-
installed after maintenance works.
Any installed safety provisions or safety
equipment may not be modied or removed.
Note:
The steam shower's construction must not be
changed. Only original components may be
used.
Power supply:
The electrical connection should only be car-
ried out by an electrician, i.e. your electrical
installer. The entire power supply is realized
via a 230 V/50 Hz AC connection and must
be fused via a 2-pole RCCB with a residual
current of 30 mA.
For electrical installation, all applicable VDE,
country-specic and EVU regulations in their
respectively valid versions must be observed.
All installation and inspection works must be
carried out by an approved electrician and
in accordance with VDE 0100 Part 701. All
works at the steam shower may only be car-
ried out in a de-energized state!
Italiano
Italiano
Italiano
Norme di sicurezza
Da controllare prima del montaggio:
1. La portata minima del pavimento deve
essere di 200 kg/m2.
2. Il pavimento deve essere livellato e suf-
cientemente piano.
3. La zona del pavimento su cui si monta la
cabina deve essere piastrellata.
Pericolo!
Generalità:
Durante i lavori di pulizia e di manutenzione,
l'interruttore generale deve essere su "OFF".
Gli interventi di manutenzione e regolazione
devono essere svolti solo da un tecnico auto-
rizzato.
Al termine della manutenzione si devono
rimontare correttamente le coperture di ser-
vizio.
I dispositivi di sicurezza installati non devono
essere né modicati né rimossi.
Avvertenza:
La struttura della doccia a vapore non deve
essere modicata. Usare solo ricambi origi-
nali.
Alimentazione elettrica:
L'allacciamento elettrico deve essere esegui-
to solo da un tecnico (elettricista esperto).
L'intero sistema viene alimentato a tensione
alternata a 230 V/50 Hz e l'impianto deve
possedere un interruttore di sicurezza per
correnti di guasto (salvavita) bipolare con
corrente di apertura di 30 mA.
Per l'impianto elettrico si devono rispettare le
norme CEI e dell'azienda elettrica vigenti.
I lavori di installazione e di collaudo devo-
no essere svolti da un tecnico autorizzato.
Qualsiasi intervento sulla doccia a vapore va
eseguito solo dopo aver staccato la tensione
elettrica!

10
11
Deutsch
Deutsch
Deutsch
Verwendete Symbole
Die in der Montageanleitung verwendeten
Symbole sind im folgenden Text näher be-
schrieben.
Gefahr durch Stromschlag!
Gefahr!
Bezeichnet eine unmittelbar drohende Ge-
fahr durch Stromschlag. Wenn diese nicht
gemieden wird, sind Tod oder schwerste
Verletzungen die Folge!
Warnung!
Bezeichnet eine möglicherweise gefährliche
Situation. Wenn diese nicht gemieden wird,
können Tod oder schwerste Verletzun-
gen die Folge sein!
Vorsicht!
Bezeichnet eine möglicherweise gefährliche
Situation. Wenn diese nicht gemieden wird,
können leichte oder geringfügige Ver-
letzungen sowie Sachschäden die Folge
sein!
Achtung, zwei Personen
notwendig!
Achtung!
Bezeichnet eine bestimmte Vorgehensweise.
Wenn diese nicht eingehalten wird kann das
Produkt oder etwas in seiner Umgebung be-
schädigt werden. (Die Montage der Dampf-
dusche muss von zwei Personen durchgeführt
werden)!
English
English
English
Used Symbols
The symbols used within these installation
instructions are further described within the
following text.
Danger of electric shock!
Danger!
Describes an imminent danger of electric
shock. If this danger is not evaded, the con-
sequences are death or serious injuries!
Warning!
Describes a possibly dangerous situation. If
this situation is not evaded, the consequences
are death or serious injuries!
Caution!
Describes a possibly dangerous situation. If
this situation is not evaded, the consequences
are slight or insignicant injuries as
well as property damage!
Attention, two persons required!
Attention!
Describes a specic procedure. If this proce-
dure is not observed, the product or objects
within its environment may be damaged. (The
steam shower's installation must be carried
out by two persons!)
Italiano
Italiano
Italiano
Simboli utilizzati
I simboli utilizzati in queste istruzioni di mon-
taggio vengono descritti dettagliatamente qui
di seguito.
Pericolo di folgorazione elettrica!
Pericolo!
Indica un pericolo imminente di folgora-
zione elettrica. Ne derivano la morte o
gravissime lesioni!
Avvertimento!
Indica una situazione pericolosa. Ne possono
derivare la morte o gravissime lesioni!
Cautela!
Indica una situazione pericolosa. Ne posso-
no derivare lievi lesioni o danni materiali!
Attenzione: sono necessarie
due persone!
Attenzione!
Indica un determinato procedimento. Se non
viene rispettato, il prodotto o oggetti nelle
sue vicinanze possono essere danneggiati (il
montaggio della doccia a vapore deve esse-
re eseguito da due persone)!

12
13
Deutsch
Deutsch
Deutsch
Verwendete Symbole
Hinweis:
(Hinweisschild z.B. i )
Bezeichnet Anwendungstipps und andere
besondere nützliche Situationen, wobei keine
gefährlichen oder schädlichen Situationen
auftreten.
Installateur notwendig!
Installateur!
Beschreibt Montagearbeiten die nur von einem
Installateur durchgeführt werden dürfen.
Elektriker notwendig!
Elektriker!
Beschreibt Montagearbeiten, die nur von
einem Elektrofachmann durchgeführt werden
dürfen.
English
English
English
Used Symbols
Note:
(Note sign, e.g. i )
Describes application tips and further particu-
larly useful situations, however, no dangerous
or harmful situations.
Installer required!
Installer!
Describes installation works that may only be
carried out by an installer.
Electrician required!
Electrician!
Describes installation works that may only be
carried out by an electrician.
Italiano
Italiano
Italiano
Simboli utilizzati
Avvertenza:
(cartello di avvertenza, ad esempio "i")
Indica suggerimenti ed altre azioni partico-
larmente utili per le quali non si presentano
situazioni dannose o pericolose.
Necessità di un installatore!
Installatore!
Descrive lavori di montaggio che devono esse-
re svolti solo da un installatore auto-rizzato.
Necessità di un elettricista!
Elettricista!
Descrive lavori di montaggio che devono es-
sere svolti solo da un elettricista
auto-rizzato
.

12
13
Deutsch
Deutsch
Deutsch
Technische Daten
Technische Daten :
Mindestießdruck: 2 bar
Betriebsdruck: max. 10 bar
Empfohlener Betriebsdruck: 2 – 5 bar
Prüfdruck: 16 bar
Heißwassertemperatur: max. 70 °C
Empfohlene Heißwasser-
Temperatur: 60 °C
Temperaturskala: 20 – 60 °C
Sicherheitssperre: 38 °C
Durchussleistung bei 3 bar:
Handbrause: 15,3 l/min
Hand- und Kopfbrause: 20,5 l/min
Hand- und Rückenbrause: 21,4 l/min
Seitenbrausen: 22,1 l/min
Kopfbrause: 16,9 l/min
Kopf- und Seitenbrause: 22,5 l/min
Nackenbrause: 13,6 l/min
Rückenbrause: 18,8 l/min
Rücken- und Nackenbrause: 21,4 l/min
Dampferzeuger:
2,0l/30min
Funktionstüchtig ab 2 bar. Es dürfen maxi-
mal 2 Verbraucher zusammengeschaltet
werden. Anschluss für Wasserzulauf und
Wasserablauf sind nach den derzeit gültigen
DIN 1988/EN1717 und den örtlichen Vor-
schriften zu installieren.
Hinweis:
Durchlauferhitzer:
Die Dampfdusche kann nicht in Verbindung
mit hydraulisch, elektronisch und thermisch
gesteuerten Durchlauferhitzern eingesetzt
werden.
Druckunterschiede:
Die Drücke zwischen den Kalt- und Warm-
wasseranschlüssen müssen ausgeglichen
werden.
Werkstoff:
Sanitäracryl mit ABS als Verbundwerkstoff.
English
English
English
Technical Information
Technical information:
Minimum ow pressure: 2 bar
Operating pressure: max. 10 bar
Recommended operating
pressure: 2 – 5 bar
Test pressure: 16 bar
Hot water temperature: max. 70 °C
Recommended hot water
temperature: 60 °C
Temperature scale: 20 – 60 °C
Safety barrier: 38 °C
Flow rate at 3 bar:
Hand shower: 15.3 l/min
Hand and head shower: 20.5 l/min
Hand and back shower: 21.4 l/min
Side showers: 22.1 l/min
Head shower: 16.9 l/min
Head + side shower: 22.5 l/min
Neck shower: 13.6 l/min
Back shower: 18.8 l/min
Back and neck shower: 21.4 l/min
Steam generator:
2.0l/30min
Operable as of 2 bar. A maximum of two
loads may be interconnected. The connec-
tions for water intake and water drainage
must be installed in accordance with the
currently valid DIN 1988/EN1717 standard
and the local regulations.
Note:
Flow-type water heater:
The steam shower cannot be applied in con-
nection with hydraulically, electronically or
thermally controlled ow-type water heaters.
Pressure differentials:
The pressure values between the cold and
warm water connections must be compen-
sated.
Material:
Sanitary acrylic with ABS as compound mate-
rial.
Italiano
Italiano
Italiano
Dati tecnici
Dati tecnici:
Pressione dinamica minima: 2 bar
Pressione di esercizio: max. 10 bar
Pressione di esercizio
consigliata: 2 – 5 bar
Pressione di prova: 16 bar
Temperatura dell'acqua calda: max. 70 °C
Temperatura consigliata
dell'acqua calda: 60 °C
Scala della temperatura: 20 – 60 °C
Blocco di sicurezza: 38 °C
Portata a 3 bar:
Doccia manuale: 15,3 l/min
Doccia manuale e sofone: 20,5 l/min
Doccia manuale e posteriore: 21,4 l/min
Docce laterali: 22,1 l/min
Doccia di testa: 16,9 l/min
Doccia manuale e laterale: 22,5 l/min
Doccia della nuca: 13,6 l/min
Doccia posteriore: 18,8 l/min
Doccia posteriore e della nuca: 21,4 l/min
Generatore di vapore: 4,0 l/h
Funzionalità a partire da 2 bar. Si possono
collegare insieme massimo 2 utenze. I raccor-
di di mandata e di scarico dell'acqua vanno
installati conformemente alle DIN 1988/
EN1717 ed alle norme locali.
Avvertenza:
Scaldaacqua istantaneo:
La doccia a vapore non può essere impia-
gata in combinazione con uno scaldaacqua
istantaneo controllato idraulicamente, elettro-
nicamente o termicamente.
Differenze di pressione:
Le pressioni tra i raccordi dell'acqua fredda e
calda devono essere compensate.
Materiale:
Acrilico per articoli igienico-sanitari con ABS
come materiale composito.

14
15
Deutsch
Deutsch
Checkliste
A. Duschwanne/Dach/Schürze/
Montagezubehör
Duschwanne
Wannenschürze
Brauseschlauch
Handbrause
Türgriffe
Schrauben-Set
Montage-Set (Befestigungswinkel)
B. Dach
Obere Abdeckung (Dach)
Deckel
C. Rückwand
Rückwand
Ausgleichsprol
Wandausgleichsprol
Seitenverkleidung
D. Tür, Türrahmen
Schiebetür
Trägerrahmen
English
English
Check list
A. Shower tray/cover/skirt/
installation accessories
Shower tray
Tray skirt
Shower tube
Hand shower
Door handles
Screw set
Installation set (angle brackets)
B. Roof
Top cover (roof)
Cover
C. Rear panel
Rear panel
Compensation prole
Wall compensation prole
Side casing
D. Door, Door Frame
Slide door
Support frame
Italiano
Italiano
Elenco di controllo
A. Piatto doccia / cappello /
con troccappelo / accessori di
montaggio
Vasca della doccia
Fascia di copertura del piatto doccia
Tubo essibile della doccia
Doccia manuale
Maniglie della porta
Kit di viti
Kit di montaggio (angolari di ssaggio)
B. Tetto
Copertura superiore (tetto)
Coperchio
C. Parete
Parete
Prolato di compensazione
Prolato di compensazione a parete
Pannello laterale
D. Chiusura
Porta scorrevole
Anta ssa

14
15
AB
CD
Deutsch
Deutsch
Verpackungsinhalt
Duschwanne/Schürze/Montagezubehör Dach
Rückwand Tür/Türrahmen
English
English
Packaging Contents
Shower tray/roof/skirt/installation accessories Roof
Door/Door FrameRear panel
Italiano
Italiano
Contenuto della confezione
Piatto doccia / pannello del piato doccia / accessori di
montaggio Cappello
Chiusura ssa e scorrevoleParette

16
17
Deutsch
Deutsch
Folgend aufgeführtes Werkzeug und Zu-
behör ist für die Montage notwendig:
- Wasserwaage
- Meterstab
- Zeichenstift und Körner
- Wasserpumpenzange
- Maulschlüssel-Set (SW 8, 10, 15, 22, 24)
- Inbusschlüssel (SW 2, 4)
- Vielzahnschraubendreher (4 mm)
- Kreuzschlitzschraubendreher (6, 8 mm)
- (Flach-) Schraubendreher (6, 8, 10 mm)
- Hammer (kleiner Schlosserhammer)
- Armaturenfett
- Silikon (essigsäurefrei)
- Bohrer (2, 6 mm)
- Messer
- Bohrmaschine
- Akkuschrauber
- 4 Montageböcke
- Leiter
Benötigte Werkzeuge
English
English
The following tools and accessories are
required for installation:
- Spirit level
- Pocket rule
- Pencil and punch
- Water pump pliers
- Wrench set (SW 8, 10,15, 22, 24)
- Socket wrench (SW 2, 4)
- Multi-tooth screwdriver (4 mm)
- Crosstip screwdriver ( 6, 8 mm)
- (Flat) screwdriver (6, 8, 10 mm)
- Hammer (small tter's hammer)
- Fittings grease
- Silicone (free of acetic acid)
- Drill (2, 6 mm)
- Knife
- Drilling machine
- Electric screwdriver
- 4 installation blocks
- Step ladder
Required Tools
Italiano
Italiano
Per il montaggio sono necessari i seguenti
attrezzi ed accessori:
- Livella a bolla d'aria
- Metro
- Matita e punzone (per piastrelle)
- Chiave stringitubo
- Set di chiavi sse (da 8, 10,15, 22, 24)
- Chiave a brugola (da 2, 4)
- Cacciavite dentato (4 mm)
- Cacciavite a stella (6, 8 mm)
- Cacciavite (piatto) (6, 8, 10 mm)
- Martello (non da fabbro)
- Grasso per rubinetteria
- Silicone (privo di acido acetico)
- Punta (2, 6 mm)
- Coltello
- Trapano
- Avvitatore
- 4 cavalletti di montaggio
- Scala
Attrezzi necessari

16
17
Armaturenfett =
Silikon =
Deutsch
Deutsch
Benötigte Werkzeuge
English
English
Required Tools
Fittings grease
Silicone
Italiano
Italiano
Attrezzi necessari
Grasso per rubinetteria
Silicone

18
19
Deutsch
Deutsch
Einstellung Wannenfüße/Ausrichtung Duschwanne
Voreinstellung (Abbildung A und B):
• Die Wannenfüße (3) am Duschwannen-
gestell so einstellen, dass der Abstand von
Unterkante Duschwanne (5) zum Fußboden
195 mm beträgt.
Achtung!
• Die Duschwanne zu zweit sehr vorsichtig in
die Einbauposition bringen.
• Einbauposition Wannenschürze (6) prüfen.
• Hinterer Wannenfuß (2) nach der Feinjus-
tierung mit dem Maulschlüssel SW 15 durch
die Kontermutter sichern!
Feineinstellung (Abbildung C):
• Duschwanne (1) mit Wasserwaage (4)
ausrichten. Feinjustierung durch Ein- oder
Ausdrehen der Wannenfüße (3). Kontermut-
ter der Wannenfüße mit dem Maulschlüssel
SW 15 sichern.
Hinweis:
Die Vorderkante der Duschwanne (Abb. C)
muss mit der Wasserwaage (4) geprüft und
an den Wannenfüßen (3) feinjustiert werden!
Zum leichteren Aufbauen der Kabine, die
Duschwanne zu zweit wieder ein Stück aus
dem Eck heraussetzen.
English
English
Shower Tray Feet Setting/Shower Tray Alignment
Pre-adjustment (Fig. A and B):
• Adjust the tray feet (3) at the shower tray
framing in a way which ensures that the
clearance between the shower tray's lower
edge (5) and the oor amounts to 195 mm.
Attention!
• Two persons must very carefully place the
shower tray in its installation position.
• Check the tray skirt's (6) installation posi-
tion.
• After ne adjustment, the rear tray foot's (2)
counter nut must be secured using an SW 15
wrench!
Fine adjustment (Fig. C):
• Position the shower tray (1) with the help
of a spirit level (4). Carry out the ne adjust-
ment by screwing the tray feet (3) in or out.
Secure the tray feet's counter nut using an
SW 15 wrench.
Note:
The position of the shower tray's front edge
(Fig. C) must be measured with the spirit level
(4) and nely adjusted at the tray feet (3)!
The shower tray should be slightly reposi-
tioned away from the corner by two persons
in order to facilitate the cabin’s assembly.
Italiano
Italiano
Regolazione dei piedi del piatto doccia/posizionamento del piatto doccia
Operazioni preliminari (gg. A e B):
• Regolare i piedi (3) del telaio del piatto
doccia in modo che la distanza dal bordo
inferiore del piatto doccia (5) al pavimento
sia di 195 mm.
Attenzione!
• Collocare il piatto doccia in posizione
di montaggio (in due persone) con estrema
cautela.
• Controllare la posizione di montaggio della
pannello piatto doccia (6).
• Dopo la regolazione di precisione blocca-
re il piede posteriore (2) con il controdado
mediante la chiave ssa da 15!
Regolazione di precisione (g. C):
• Livellare il piatto doccia (1) con la li-
vella a bolla d'aria (4). Regolazione di
precisione avvitando o svitando i piedi (3).
Bloccare il controdado con la chiave ssa
da 15.
Avvertenza:
Il bordo anteriore del piatto doccia (g. C)
deve essere controllato con la livella a bolla
d'aria (4) e regolato agendo sui piedi (3)!
Per facilitare il montaggio della cabina, al-
lontanare in due il piatto doccia di un tratto
dall‘angolo.

18
19
12
63
14
3
AB
C
5
SW 15
Deutsch
Deutsch
Einstellung Wannenfüße/Ausrichtung Duschwanne
English
English
Shower Tray Feet Setting/Shower Tray Alignment
Italiano
Italiano
Regolazione dei piedi del piatto doccia/posizionamento del piatto doccia

20
21
Deutsch
Deutsch
Seitenverkleidung abnehmen
• Seitenverkleidung (2) und Wandausgleichs-
prol (1) von der Rückwand entfernen.
• Mit Schraubendreher (5) Schrauben (3)
lösen und mit den Unterlegscheiben (4) ent-
fernen (Abb. B).
• Seitenverkleidung und Wandausgleichspro-
l abnehmen.
Hinweis:
Das Wandausgleichsprol (1) ist mit einer
Klemmleiste versehen und kann so zur Wand
hin verschoben werden (Abb. A).
English
English
Removing the Side Casing
• Remove the side casing (2) and the wall
compensation prole (1) from the rear panel.
• Loosen the screws (3) with the screwdriver
(5) and remove them together with the wash-
ers (4) (Fig. B).
• Remove the side casing and the wall com-
pensation prole.
Note:
The wall compensation prole (1) is equipped
with a terminal block and can therefore be
moved towards the wall (Fig. A).
Italiano
Italiano
Smontaggio del pannello laterale
• Togliere il pannello laterale (2) e il prolo
di compensazione a parete (1) dal pannello
posteriore.
• Con il cacciavite (5) allentare e svitare le
viti (3) insieme alle rondelle (4) (g. B).
• Togliere il pannello laterale ed il prolo di
compensazione a parete.
Avvertenza:
Il prolo di compensazione a parete (1) pos-
siede un morsetto per poterlo spostare verso
la parete (g. A).
This manual suits for next models
3
Table of contents
Other Hans Grohe Shower Cabin manuals
Popular Shower Cabin manuals by other brands

US HORIZON
US HORIZON SORRENTO Series Assembly instructions

Arblu
Arblu PERSEO ANGOLO Q-R 2SL+1LF Assembling instructions

ELEGANT
ELEGANT SPR870 quick start guide

RIHO
RIHO SCANDIC NXT X101 installation manual

Aquadart
Aquadart Rolla 8 installation instructions

Arblu
Arblu DEDALO PLUS NICCHIA 1AB+1LF Assembly instructions