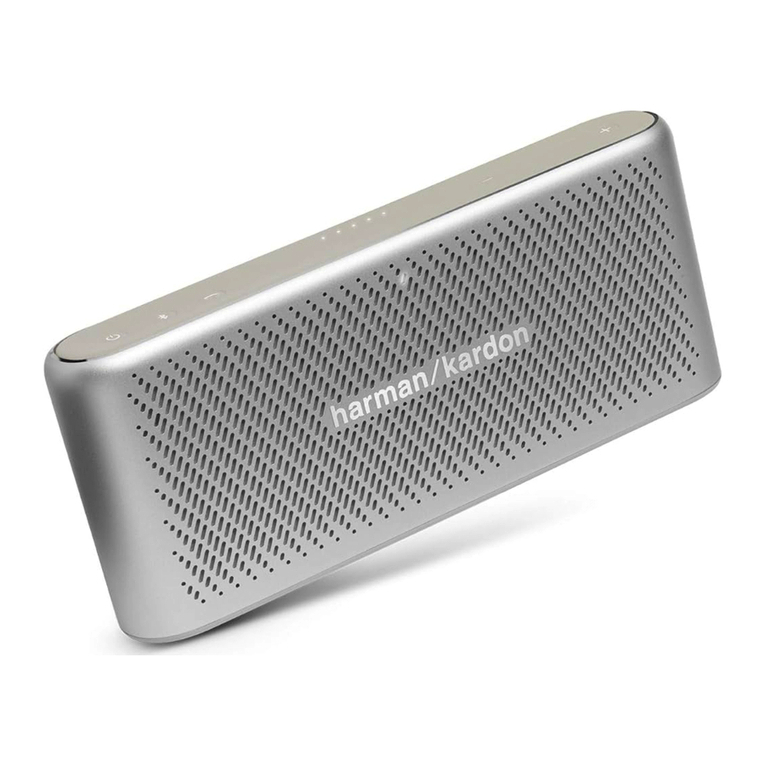
Harman Kardon JBL TUNER XL User manual

澾澶激澔濈濉濂澹濆澔濌激
濄濃濆濈澵澶激澹澔濄濃濋澹濆澺濉激澔澸澵澶澣澸澵澶澟澣澔澺濁澔濆澵澸澽濃澔濋澽濈澼澔澶激濉澹濈濃濃濈澼
濇澿濉澮澔澾澶激濈濉濂澹濆濌激澶激澿澹濉澠澔澾澶激濈濉濂澹濆濌激澶激澿澵濇澠澔澾澶激濈濉濂澹濆濌激澺濁澶激澿澵濁澠澔澾澶激濈濉濂澹濆濌激澺濁澶激澿濆濉澠澔澾澶激濈濉濂澹濆濌激澺濁澶激澿澷濂濦濴濹濸瀇瀌澳濜瀁瀆瀇瀅瀈濶瀇濼瀂瀁澳濁濁濁濁濁濁濁濁濁濁濁濁濁濁濁濁濁濁濁濁濁濁濁濁濁濁濁濁濁濁濁濁濁濁濁濁濁濁濁濁濁濁濁濁濁濁濁濁濁濁濁濁濁濁濁濁濁濁濁濁濁濁濁濁濁濁濁濁濁濁濁濁濁濁濁濁濁濁濁濁濁濁濁濁濁濁濁濁濁濁濁濁濁濁濁濁濁濁濁濁濁濁濁濁濁濁濁濁濁濁濁濁濁濁濁濁濁濁濁濁濁濁濁濁濁濁濁濁濁濁濁濁濁濁濁濁濁濁濁濁濁濁濅澳澳濧濸濶濻瀁濼濶濴濿澳濦瀃濸濶濼濹濼濶濴瀇濼瀂瀁瀆澳濁濁濁濁濁濁濁濁濁濁濁濁濁濁濁濁濁濁濁濁濁濁濁濁濁濁濁濁濁濁濁濁濁濁濁濁濁濁濁濁濁濁濁濁濁濁濁濁濁濁濁濁濁濁濁濁濁濁濁濁濁濁濁濁濁濁濁濁濁濁濁濁濁濁濁濁濁濁濁濁濁濁濁濁濁濁濁濁濁濁濁濁濁濁濁濁濁濁濁濁濁濁濁濁濁濁濁濁濁濁濁濁濁濁濁濁濁濁濁濁濁濁濁濁濁濁濁濁濁濈澳濦瀂濹瀇瀊濴瀅濸澳瀈瀃濺瀅濴濷濸澳濜瀁瀆瀇瀅瀈濶瀇濼瀂瀁澳澹澳濥濸瀆濸瀇澳濣瀅瀂濶濸濷瀈瀅濸澳濁濁濁濁濁濁濁濁濁濁濁濁濁濁濁濁濁濁濁濁濁濁濁濁濁濁濁濁濁濁濁濁濁濁濁濁濁濁濁濁濁濁濁濁濁濁濁濁濁濁濁濁濁濁濁濁濁濁濁濁濁濁濁濁濁濁濁濁濁濁濁濁濁濁濁濁濁濁濁濉濧瀅瀂瀈濵濿濸瀆濻瀂瀂瀇濼瀁濺澳濖濻濴瀅瀇瀆澳濁濁濁濁濁濁濁濁濁濁濁濁濁濁濁濁濁濁濁濁濁濁濁濁濁濁濁濁濁濁濁濁濁濁濁濁濁濁濁濁濁濁濁濁濁濁濁濁濁濁濁濁濁濁濁濁濁濁濁濁濁濁濁濁濁濁濁濁濁濁濁濁濁濁濁濁濁濁濁濁濁濁濁濁濁濁濁濁濁濁濁濁濁濁濁濁濁濁濁濁濁濁濁濁濁濁濁濁濁濁濁濁濁濁濁濁濁濁濁濁濁濁濁濁濁濁濁濁濁濊濗濼瀆濴瀆瀆濸瀀濵濿瀌澳濜瀁瀆瀇瀅瀈濶瀇濼瀂瀁澳濁濁濁濁濁濁濁濁濁濁濁濁濁濁濁濁濁濁濁濁濁濁濁濁濁濁濁濁濁濁濁濁濁濁濁濁濁濁濁濁濁濁濁濁濁濁濁濁濁濁濁濁濁濁濁濁濁濁濁濁濁濁濁濁濁濁濁濁濁濁濁濁濁濁濁濁濁濁濁濁濁濁濁濁濁濁濁濁濁濁濁濁濁濁濁濁濁濁濁濁濁濁濁濁濁濁濁濁濁濁濁濁濁濁濁濁濁濁濁濁濁濁濁濁濁濁濁濄濅濕濿瀂濶濾澳濗濼濴濺瀅濴瀀濁濁濁濁濁濁濁濁濁濁濁濁濁濁濁濁濁濁濁濁濁濁濁濁濁濁濁濁濁濁濁濁濁濁濁濁濁濁濁濁濁濁濁濁濁濁濁濁濁濁濁濁濁濁濁濁濁濁濁濁濁濁濁濁濁濁濁濁濁濁濁濁濁濁濁濁濁濁濁濁濁濁濁濁濁濁濁濁濁濁濁濁濁濁濁濁濁濁濁濁濁濁濁濁濁濁濁濁濁濁濁濁濁濁濁濁濁濁濁濁濁濁濁濁濁濁濁濁濁濁濁濁濁濁濁濁濁濁濁濁濁濁濁濁濁澳濄濊濪濼瀅濼瀁濺澳濗濼濴濺瀅濴瀀澳濁濁濁濁濁濁濁濁濁濁濁濁濁濁濁濁濁濁濁濁濁濁濁濁濁濁濁濁濁濁濁濁濁濁濁濁濁濁濁濁濁濁濁濁濁濁濁濁濁濁濁濁濁濁濁濁濁濁濁濁濁濁濁濁濁濁濁濁濁濁濁濁濁濁濁濁濁濁濁濁濁濁濁濁濁濁濁濁濁濁濁濁濁濁濁濁濁濁濁濁濁濁濁濁濁濁濁濁濁濁濁濁濁濁濁濁濁濁濁濁濁濁濁濁濁濁濁濁濁濁濁濁濁濁濁濁濁濁濁濁濁濁濁濄濋濖濼瀅濶瀈濼瀇澳濗濼濴濺濴瀅瀀瀆澳澹澳濣濖濕濔澳濟濴瀌瀂瀈瀇澳濁濁濁濁濁濁濁濁濁濁濁濁濁濁濁濁濁濁濁濁濁濁濁濁濁濁濁濁濁濁濁濁濁濁濁濁濁濁濁濁濁濁濁濁濁濁濁濁濁濁濁濁濁濁濁濁濁濁濁濁濁濁濁濁濁濁濁濁濁濁濁濁濁濁濁濁濁濁濁濁濁濁濁濁濁濁濁濁濁濁濁濁濁濁濁濁濁濁濁濁濁濁濁濁濁濁濁濁濁濁濄濌濠濸濶濻濴瀁濼濶濴濿澳濘瀋瀃濿瀂濷濸濷澳濩濼濸瀊澳濁濁濁濁濁濁濁濁濁濁濁濁濁濁濁濁濁濁濁濁濁濁濁濁濁濁濁濁濁濁濁濁濁濁濁濁濁濁濁濁濁濁濁濁濁濁濁濁濁濁濁濁濁濁濁濁濁濁濁濁濁濁濁濁濁濁濁濁濁濁濁濁濁濁濁濁濁濁濁濁濁濁濁濁濁濁濁濁濁濁濁濁濁濁濁濁濁濁濁濁濁濁濁濁濁濁濁濁濁濁濁濁濁濁濁濁濁濁濁濁濁濁濆濇濦瀃濴瀅濸澳濣濴瀅瀇瀆澳濟濼瀆瀇澳濁澳濁濁濁濁濁濁濁濁濁濁濁濁濁濁濁濁濁濁濁濁濁濁濁濁濁濁濁濁濁濁濁濁濁濁濁濁濁濁濁濁濁濁濁濁濁濁濁濁濁濁濁濁濁濁濁濁濁濁濁濁濁濁濁濁濁濁濁濁濁濁濁濁濁濁濁濁濁濁濁濁濁濁濁濁濁濁濁濁濁濁濁濁濁濁濁濁濁濁濁濁濁濁濁濁濁濁濁濁濁濁濁濁濁濁濁濁濁濁濁濁濁濁濁濁濁濁濁濁濁濁濁濁濁濁濁濁濁濁濁濁濁濁濆濈濞濸瀌澳濖瀂瀀濵濼瀁濴瀇濼瀂瀁澳濕濸濻濴瀉濼瀂瀅澳濁濁濁濁濁濁濁濁濁濁濁濁濁濁濁濁濁濁濁濁濁濁濁濁濁濁濁濁濁濁濁濁濁濁濁濁濁濁濁濁濁濁濁濁濁濁濁濁濁濁濁濁濁濁濁濁濁濁濁濁濁濁濁濁濁濁濁濁濁濁濁濁濁濁濁濁濁濁濁濁濁濁濁濁濁濁濁濁濁濁濁濁濁濁濁濁濁濁濁濁濁濁濁濁濁濁濁濁濁濁濁濁濁濁濁濁濁濁濁濁濁濁濆濉澳濥濸瀉濼瀆濼瀂瀁澳濟濼瀆瀇澳濁濁濁濁濁濁濁濁濁濁濁濁濁濁濁濁濁濁濁濁濁濁濁濁濁濁濁濁濁濁濁濁濁濁濁濁濁濁濁濁濁濁濁濁濁濁濁濁濁濁濁濁濁濁濁濁濁濁濁濁濁濁濁濁濁濁濁濁濁濁濁濁濁濁濁濁濁濁濁濁濁濁濁濁濁濁濁濁濁濁濁濁濁濁濁濁濁濁濁濁濁濁濁濁濁濁濁濁濁濁濁濁濁濁濁濁濁濁濁濁濁濁濁濁濁濁濁濁濁濁濁濁濁濁濁濁濁濁濁濁濁濁濁濁濁濁濁濁濁濁濁濆濊濥濸濿濸濴瀆濸濷澳濵瀌澳濚濿瀂濵濴濿澳濤瀈濴濿濼瀇瀌澳澳澳澳澳澳濻濴瀅瀀濴瀁濂濾濴瀅濷瀂瀁澿澳濜瀁濶濁濩濸瀅濁澳濄濁濅澳澳澳澳濝瀈瀁濂濅濃濅濃濋濈濃濃澳濕濴濿濵瀂濴澳濕濿瀉濷濁濡瀂瀅瀇濻瀅濼濷濺濸澿澳濖濔澳濌濄濆濅濌
濇濙濦濪濝濗濙澔濁濕濢濩濕濠
澷濃濂濈澹濂濈濇
濩濸瀅濁濄濁濆澳澳澳澳濡瀂瀉濂濅濃濅濃

1. Read these instructions.
2. Keep these instructions.
3. Heed all warnings.
4. Follow all instructions.
5. Do not use this apparatus near water.
6. Clean only with a dry cloth.
7. Do not block any ventilation openings.Install in accordance with the manufacturer’s instructions.
8. Do not install near any heat sources such as radiators, heat registers, stoves or other apparatus (including
amplifiers) that produce heat.
9. Do not defeat the safety purpose of the polarized or grounding-type plug. A polarized plug has two blades with one
wider than the other. A grounding-type plug has two blades and a third grounding prong. The wide blade or the
third prong is provided for your safety. If the provided plug does not fit into your outlet, consult an electrician for
replacement of the obsolete outlet.
10. Protect the power cord from being walked on or pinched, particularly at plugs, convenience receptacles and the
point where they exit from the apparatus.
11. Only use attachments/accessories specified by the manufacturer.
12. Use only with the cart, stand, tripod, bracket or table specified by the manufacturer or sold with the
apparatus. When a cart is used, use caution when moving the cart/apparatus combination to avoid
injury from tip-over.
13. Unplug this apparatus during lightning storms or when unused for long periods of time.
14. Refer all servicing to qualified service personnel. Servicing is required when the apparatus has been damaged
in any way, such as power supply cord or plug is damaged, liquid has been spilled or objects have fallen into the
apparatus, or the apparatus has been exposed to rain or moisture, does not operate normally or has been dropped.
15. Do not expose this apparatus to dripping or splashing and ensure that no objects filled with liquids, such as vases,
are placed on the apparatus.
16. To completely disconnect this apparatus from the AC Mains, disconnect the power supply cord plug from the AC
receptacle.
17. The mains plug of the power supply cord shall remain readily operable.
18. Do not expose batteries to excessive heat such as sunshine, fire or the like.
For Products That Transmit and
Receive RF Energy:
FCC Regulations (USA Only)
FCC Information For Users
This device complies with Part 15 of the FCC Rules. Operation
is subject to the following two conditions: (1) This device
may not cause harmful interference; and (2) this device must
accept any interference received, including interference that
may cause undesired operation.
Radio and Television Interference
This equipment has been tested and found to comply with
the limits for a Class B digital device, pursuant to Part 15
of the FCC Rules. These limits are designed to provide
reasonable protection against harmful interference in a
residential installation. This equipment generates, uses and
can radiate radio frequency energy and, if not installed and
used in accordance with the instructions, may cause harmful
interference to radio communications. However, there is no
guarantee that interference will not occur in a particular
installation. If this equipment does cause interference to radio
or television reception, which can be determined by turning
the equipment off and then on, the user is encouraged to try
to correct the interference by one or more of the following
measures:
•Increase the separation between the equipment and
receiver.
•Connect the equipment to a different outlet so that the
equipment and receiver are on different branch circuits.
•Consult the dealer or an experienced radio/TV technician
for help.
NOTE: Changes or modifications not expressly approved
by Harman could void the user’s authority to operate the
equipment.
IC Statement and Warning (Canada Only)
This Class B digital apparatus complies with Canadian ICES-
003. Cet appareil numérique de la classe B est conforme à la
norme NMB-003 du Canada.
For Canadian Model
This Class B digital apparatus complies with Canadian
ICES-003.
Modèle pour les Canadien
Cet appareil numérique de la classe B est conforme à la
norme NMB-003 du Canada.
For Products with Radio Receivers
That Can Use an External Antenna:
CATV or Antenna Grounding
If an outside antenna or cable system is connected to this
product, be certain that it is grounded so as to provide some
protection against voltage surges and static charges. Section
810 of the National Electrical Code, ANSI/NFPA No. 70-1984,
provides information with respect to proper grounding of the
mast and supporting structure, grounding of the lead-in wire
to an antenna discharge unit, size of grounding conductors,
location of antenna discharge unit, connection to grounding
electrodes and requirements of the grounding electrode.
Note to CATV System Installer:
This reminder is provided to call the CATV (cable TV) system
installer’s attention to article 820-40 of the NEC, which
provides guidelines for proper grounding and, in particular,
specifies that the cable ground shall be connected to the
grounding system of the building, as close to the point of
cable entry as possible.
For CD/DVD/Blu-ray Disc™Players:
Caution:
This product uses a laser system. To prevent direct exposure
to the laser beam, do not open the cabinet enclosure or defeat
any of the safety mechanisms provided for your protection.
DO NOT STARE INTO THE LASER BEAM.To ensure proper use
of this product, please read the owner’s manual carefully and
retain it for future use. Should the unit require maintenance
or repair, please contact your local Harman Kardon service
center. Refer servicing to qualified personnel only.
For Products That Include Batteries:
Instructions for Users on Removal and Disposal of
Used Batteries.
CAUTION
Risk of explosion if battery is incorrectly replaced.
Replace only with the same or equivalent type.
Alkaline batteries are considered nonhazardous.
Rechargeable batteries (i.e., nickel cadmium, nickel metal-
hydride, lithium and lithium-ion) are considered hazardous
household materials and may pose an unnecessary health
and safety risk.
In the European Union and other locations, it is illegal to
dispose of any battery with household trash. All batteries
must be disposed of in an environmentally sound manner.
Contact your local waste management officials for information
regarding the environmentally sound collection, recycling and
disposal of used batteries.
To remove the batteries from your equipment or remote
control, reverse the procedure described for inserting
batteries in the owner’s manual.
For products with a built-in battery that lasts for the lifetime of
the product, removal may not be possible for the user. In this
case, recycling or recovery centers handle the dismantling of
the product and the removal of the battery. If, for any reason, it
becomes necessary to replace such a battery, this procedure
must be performed by authorized service centers.
Important Safety Instructions
CAUTION
RISK OF ELECTRIC SHOCK. DO NOT OPEN.
THE LIGHTNING FLASH WITH AN ARROWHEAD SYMBOL,
WITHIN AN EQUILATERAL TRIANGLE, IS INTENDED TO
ALERT THE USER TO THE PRESENCE OF UNINSULATED
“DANGEROUS VOLTAGE” WITHIN THE PRODUCT’S
ENCLOSURE THAT MAY BE OF SUFFICIENT MAGNITUDE TO
CONSTITUTE A RISK OF ELECTRIC SHOCK TO PERSONS.
THE EXCLAMATION POINT WITHIN AN EQUILATERAL
TRIANGLE IS INTENDED TO ALERT THE USER TO
THE PRESENCE OF IMPORTANT OPERATING AND
MAINTENANCE (SERVICING) INSTRUCTIONS IN THE
LITERATURE ACCOMPANYING THE PRODUCT.
WARNING: TO REDUCE THE RISK OF FIRE OR ELECTRIC
SHOCK, DO NOT EXPOSE THIS APPARATUS TO RAIN OR
MOISTURE.
BDS 270 / BDS 570 harman/kardon
2 of 86
Each precaution in this manual should be followed during servicing.
Components identified with the IEC symbol in the parts list are special significance to safety. When replacing a component identified with
, use only the replacement parts designated, or parts with the same ratings or resistance, wattage, or voltage that are designated in the
parts list in this manual. Leakage-current or resistance measurements must be made to determine that exposed parts are acceptably
insulated from the supply circuit before retuming the product to the customer.
Some semiconductor (solid state) devices can be damaged easily by static electricity. Such components commonly are called
Electrostatically Sensitive (ES) Devices. Examples of typical ES devices are integrated circuits and some field effect transistors and
semiconductor "chip" components.
The following techniques should be used to help reduce the incidence of component damage caused by static electricity.
1. Immediately before handling any semiconductor component or semiconductor-equipped assembly, drain off any electrostatic charge on
your body by touching a known earth ground. Alternatively, obtain and wear a commercially available discharging wrist strap device,
which should be removed for potential shock reasons prior to applying power to the unit under test.
2. After removing an electrical assembly equipped with ES devices, place the assembly on a conductive surface such as aluminum foil, to
prevent electrostatic charge build-up or exposure of the assembly.
3. Use only a grounded-tip soldering iron to solder or unsolder ES devices.
4. Use only an anti-static solder removal device. Some solder removal devices not classified as "anti-static" can generate electrical charges
sufficient to damage ES devices.
5. Do not use freon-propelled chemicals. These can generate electrical change sufficient to damage ES devices.
6. Do not remove a replacement ES device from its protective package until immediately before you are ready to install it. (Most replacement
ES devices are packaged with leads electrically shorted together by conductive foam, aluminum foil or comparable conductive material.)
7. Immediately before removing the protective material from the leads of a replacement ES device, touch the protective material to the
chassis or circuit assembly into which the device will be installed.
Be sure no power is applied to the chassis or circuit, and observe all other safety precautions.
8. Minimize bodily motions when handling unpackaged replacement ES devices. (Otherwise harmless motion such as the brushing together
or your clothes fabric or the lifting of your foot from a carpeted floor can generate static electricity sufficient to damage an ES devices.
CAUTION :

SAFETY PRECAUTIONS
The following check should be performed for the continued
protection of the customer and service technician.
LEAKAGE CURRENT CHECK
Measure leakage current to a known earth ground (water
pipe, conduit, etc.) by connecting a leakage current tester
between the earth ground and all exposed metal parts of the
appliance (input/output terminals, screwheads, metal
overlays, control shaft, etc.). Plug the AC line cord of the
appliance directly into a 120V AC 60Hz outlet and turn the
AC power switch on. Any current measured must not exceed
o.5mA.
ANY MEASUREMENTS NOT WITHIN THE LIMITS
OUTLINED ABOVE ARE INDICATIVE OF A
POTENTIAL SHOCK HAZARD AND MUST BE
CORRECTED BEFORE RETURNING THE APPLIANCE
TO THE CUSTOMER.
Device
under
test
Test all
exposed metal
surfaces
Also test with
plug reversed
(Using AC adapter
plug as required)
AC Leakage Test
Leakage
current
tester
Reading should
not be above
0.5mA
Earth
ground

Technical Specifications:
>Transducer: 1 x 2.75”
>Rated output power: 10W RMS
>Frequency response: 70 Hz - 20 kHz(-6 dB
)
>Signal-to-noise ratio: >80 dB
>Battery type: Lithium-ion polymer 11.7 Wh
>Battery charge time: 4 hours(5 V / 0.9 A
)
>Charging input: 5 V, 1.2 A
>Music playing time: up to 15 hours for radio listening
(dependent on volume level and audio content)
>Bluetooth® version: 4.2
>Bluetooth® profile: A2DP V1.2, AVRCP V1.5
>Bluetooth® transmitter frequency range: 2.402 - 2.480 GHz
>Bluetooth® transmitter power: 0 - 9 dBm (EIRP
)
>Bluetooth® transmitter modulation: GFSK, π/4 DQPSK, 8DPSK
>DAB Tuning range: 174.928 MHz - 239.200 MHz(Band-III
)
>FM Tuning range: 76 MHz - 108 MHz(varies by countries
)
>Dimensions(W x H x D): 145 x 167 x 103(mm)/ 5.7” x 6.6” x 4.1
”
>Weight: 1.15 kg (2.54 lb
)
What’s in the box
JBL Tuner XL
5V/1.2A Harman designed power adapter with fixed USB Type-C cable.
(1.5m) including shielding core.
Safety sheet
Quick startguide
Warranty card

Software upgrade Instruction& Reset Procedure
1) Restore factory setting
①Long press Preset 1& Bluetooth (>10S) ,Reset to factory default. (Both DAB/FM model and FM model for user);
Below only for FM model:
②Long press Preset 1 & Scan(>3S) ,Set FM REGION 1 range(50KHZ steps),Reset to factory default. (FM model only)
③Long press Preset 2 & Scan(>3S) ,Set FM REGION 2 range(100KHZ steps),Reset to factory default. (FM model only)
④Long press Preset 3 & Scan(>3S) ,Set FM REGION 3 range(Japan 100KHZ steps),
Reset to factory default. (FM model only)
.
2) Check software version
1)long press the preset1 & preset5(>10s),the device will voice out the firmware version. And at the same time, the LCD
display the software version. Note: for the DAB or BT firmware, each is divided into FM version and DAB version.
For example:
Tuner 2 DAB version :T2 - DD: 0017 ; (DAB firmware version)
T2 - BD: 0020 ; (BT firmware version)
Tuner 2 FM version : T2 - DF: 0017 ; (DAB firmware version)
T2 - BF: 0020 ; (BT firmware version)
2) it will exit the version display mode after voice version finished.
3) Software Upgrade
一、DAB FIRMWARE UPGRADE GUIDE:
1. Connect USB cable between PC and JBL TUNER XL.
2. Press the power button to power on JBL TUNER XL.
3. Long press Preset 5 & DAB (>10S), enter DAB upgrade mode. The screen will scroll “connect to PC or MAC then
copy update file”. Entering F/W Update Mode.
4. Copy F/W binary file into USB removable disk.
5. Disconnect USB device (by remove USB cable or eject USB device).
6. Wait until F/W update was finished. ---the LCD display “update done “and then it will power cycle by itself.
二、BT FIRMWARE UPGRADE GUIDE:
1. Plug USB burn line in DUT, DUT connect to PC by USB burn line.
2. Long press Preset 1 & Preset 5 & BT Button (>=10s) enter BT DFU mode in DUT.
3. Run SPTestTool.exe in PC.
4. Burn image as follows 1-5 steps of screen capture.
5. When the the Tool display “PASSED”, the upgrade done.
6

Software upgrade Instruction& Reset Procedure
6. Then you should unplug the USB and power cycle the speaker.
Note: Don’t unplug USB or cut off power when burning.
7

澵澶澷澸澹
濔濿濿澳濙瀈瀁濶瀇濼瀂瀁澳濡瀂澳濪瀂瀅濾濼瀁濺 濔濿濿澳濙瀈瀁濶瀇濼瀂瀁澳濡瀂
濦瀂瀈瀁濷 濔濨濫澳濜濡澳濡瀂澳濦瀂瀈瀁濷 濕濿瀈濸瀇瀂瀂瀇濻澳濡瀂
濦瀂瀈瀁濷
濗濔濕澳濡瀂
濦瀂瀈瀁濷
澺澻澼澽
濙濠澳濡瀂澳濦瀂瀈瀁濷 濨濦濕澳濡瀂
濙瀈瀁濶瀇濼瀂瀁 濶濻濴瀅濺濸澳濡瀂澳瀊瀂瀅濾濼瀁濺 濗濔濕濂濙濠澳濡瀂
瀊瀂瀅濾濼瀁濺
澵澶
濔濿濿澳濙瀈瀁濶瀇濼瀂瀁澳濡瀂澳濪瀂瀅濾濼瀁濺 濔濿濿澳濙瀈瀁濶瀇濼瀂瀁澳濡瀂
濦瀂瀈瀁濷
濖濻濸濶濾澳瀆瀌瀆瀇濸瀀澳濴濿濿澳濶濴濵濿濸濼瀆
濿瀂瀂瀆濸澳瀂瀅澳濵濴濷澳濜濡濧
濬濘濦
濥濸激濼瀁瀆濸瀅瀇澳濴瀁濷
濹濼瀋澳瀇濻濸澳濶濴濵濿濸
濖濻濸濶濾澳濔濠濣澳濣濖濕濔
濶瀂瀁瀁濸濶瀇瀂瀅澳濖濡濄澳濣濼瀁濄
濣濼瀁濅澳濗濖濈濩澳瀊濻濸瀇濻濸瀅
濢濞
濬濘濦 濖濻濸濶濾澳濦濣濸濴濾濸瀅
濴瀁濷澳濖瀂瀁濽瀂濼瀁瀇
濣濴瀅瀇
濡濢 濡濢
濖濻濸濶濾澳濶瀂瀁瀁濸濶瀇瀂瀅澳濖濡濆
濕濴瀇瀇濸瀅瀌澳濩濖濖澳濆濁濈瀑濇濁濅濩
瀊濻濸瀇濻濸瀅澳濢濞
濡濢
濖濻濸濶濾澳濕濴瀇瀇濸瀅瀌
濖濻濸濶濾澳濔濠濣澳濣濖濕濔
濶瀂瀁瀁濸濶瀇瀂瀅澳濖濡濅澳濣濼瀁濈
濗濖濆濁濆濩澳瀊濻濸瀇濻濸瀅澳濢濞
濬濘濦
濖濻濸濶濾澳濔濠濣
濣濖濕濔
濬濘濦 濡濢
濻瀂濿濷澳濣瀂瀊濸瀅澳濞濘濬澳濖濻濸濶濾
濗濔濕澳濣濖濕澳濖濡濄濄澳濣濜濡濊澳澳濆濁濆濩
瀊濻濸瀇濻濸瀅澳濢濞
濡濢
濖濻濸濶濾澳濞濘濬澳濣濖濕濔 濖濻濸濶濾澳濄濉濣濜濡澳濙濟濔濧
濖濔濕濟濘澳瀊濻濸瀇濻濸瀅澳濢濞
濬濘濦 濖濻濸濶濾澳濄濉濣濜濡
濙濟濔濧澳濖濔濕濟濘
濬濘濦 濡濢
濖濻濸濶濾澳濗濔濕澳濠濔濜濡澳濣濖濕濔 濖濻濸濶濾澳濗濔濕澳濠濔濜濡
濣濖濕濔
濈濩濢濙濦澔濌激澔濆澹濄澵澽濆澔澷澼澵濆濈
Troubleshootin
g
Charts
8

澷澸
濔濨濫澳濜濡澳濡瀂澳濦瀂瀈瀁濷 濕濿瀈濸瀇瀂瀂瀇濻澳濡瀂澳濦瀂瀈瀁濷
濬濘濦
濖濻濸濶濾澳濦濼濺瀁濴濿澳濦瀂瀈瀅濶濸
瀂瀈瀇瀃瀈瀇澳瀊濻濸瀇濻濸瀅澳濢濞
濡濢 濜瀁瀆瀇濸濴濷澳濦濼濺瀁濴濿
濦瀂瀈瀅濶濸
濖濻濸濶濾澳濪濻濸瀇濻濸瀅澳瀇濻濸
瀃濻瀂瀁濸澳濼瀆澳瀃濿濴瀌濼瀁濺
濡濢
濣濿濴瀌澳瀀瀈瀆濼濶
濬濘濦 濬濘濦
濖濻濸濶濾澳濖濡濃濆澳濣濼瀁濅澳濦濼濺瀁濴濿
濦瀂瀈瀅濶濸澳瀂瀈瀇瀃瀈瀇澳瀊濻濸瀇濻濸瀅
濢濞
濡濢 濖濻濸濶濾澳瀇濻濸
濻濸濴濷瀆濸瀇澳濣濖濕濔
濵瀂濴瀅濷
濖濻濸濶濾澳濪濻濸瀇濻濸瀅澳瀇濻濸
瀉瀂濿瀈瀀濸澳濼瀆澳瀀濼瀁濼瀀瀈瀀
濬濘濦
濧瀈瀅瀁澳瀇濻濸
瀉瀂濿瀈瀀濸澳瀈瀃
濬濘濦 濡濢
Check if CN4 PIN7
Signal Source output
whether OK
濡濢
濖濻濸濶濾澳濋濣濜濡
濙濟濔濧澳濖濔濕濟濘
濖濻濸濶濾澳濗濔濕濔澳濠濔濜濡
濣濖濕
濬濘濦
濖濻濸濶濾澳濖濡濉澳瀃濼瀁濄濇澳濦濼濺瀁濴濿
濦瀂瀈瀅濶濸澳瀂瀈瀇瀃瀈瀇澳瀊濻濸瀇濻濸瀅
濢濞
濡濢 濖濻濸濶濾澳濄濉濣濜濡
濙濟濔濧澳濖濔濕濟濘
濬濘濦
濖濻濸濶濾澳濗濔濕濔澳濠濔濜濡澳濣濖濕濔
Troubleshootin
g
Charts
9

澹澺
濗濔濕澳濡瀂澳濦瀂瀈瀁濷 濙濠澳濡瀂澳濦瀂瀈瀁濷
濬濘濦 濬濘濦
濖濻濸濶濾澳濗濔濕澳濥濸濶濸濼瀉濼瀁濺
瀆瀇濴瀇濼瀂瀁澳瀊濻濸瀇濻濸瀅澳濢濞
濡濢
濖濻濸濶濾澳濥濸濶濸濼瀉濼瀁濺 濖濻濸濶濾澳濙濠澳濥濸濶濸濼瀉濼瀁濺
瀆瀇濴瀇濼瀂瀁澳瀊濻濸瀇濻濸瀅澳濢濞
濡濢 濖濻濸濶濾
濥濸濶濸濼瀉濼瀁濺
濬濘濦 濬濘濦
濖濻濸濶濾澳濪濻濸瀇濻濸瀅澳瀇濻濸
瀉瀂濿瀈瀀濸澳濼瀆澳瀀濼瀁濼瀀瀈瀀
濬濘濦 濧瀈瀅瀁澳瀇濻濸澳瀉瀂濿瀈瀀濸
瀈瀃
濖濻濸濶濾澳濪濻濸瀇濻濸瀅澳瀇濻濸
瀉瀂濿瀈瀀濸澳濼瀆澳瀀濼瀁濼瀀瀈瀀
濬濘濦 濧瀈瀅瀁澳瀇濻濸
瀉瀂濿瀈瀀濸澳瀈瀃
濡濢 濡濢
濖濻濸濶濾澳濗濔濕濔澳濠濔濜濡澳濣濖濕 濖濻濸濶濾澳濗濔濕濔澳濠濔濜濡
濣濖濕
Troubleshootin
g
Charts
10

澻濛
濨濦濕澳濡瀂澳濙瀈瀁濶瀇濼瀂瀁 濶濻濴瀅濺濸澳濡瀂澳瀊瀂瀅濾濼瀁濺
濬濘濦 濬濘濦
濖濻濸濶濾澳濖濡濃濇澳濣濼瀁濄澳濗濖濈濩澿
濣濼瀁濅澳濗澾澳濣濼瀁濆澳濗激澳濦濼濺瀁濴濿
瀊濻濸瀇濻濸瀅澳濢濞
濡濢
濖濻濸濶濾澳濨濦濕澳濣濖濕濔 濖濻濸濶濾澳濴濷濴瀃瀇濸瀅澳濗濖濈濩
瀂瀈瀇瀃瀈瀇澳瀊濻濸瀇濻濸瀅澳濢濞
濡濢
濖濻濸濶濾澳濴濷濴瀃瀇濸瀅
瀂瀅澳濔濖澳濣瀂瀊濸瀅
濬濘濦 濬濘濦
濖濻濸濶濾澳濖濡濅澳濣濼瀁濉澳濗濖濈濩澿
濣濼瀁濋澳濗澾澳濣濼瀁濊澳濗激澳濦濼濺瀁濴濿
瀊濻濸瀇濻濸瀅澳濢濞
濡濢 濖濻濸濶濾澳濋濣濜濡
濙濟濔濧澳濖濔濕濟濘
濖濻濸濶濾澳濖濡濃濇澳濣濜濡濄
濗濖濈濩澳瀂瀈瀇瀃瀈瀇
瀊濻濸瀇濻濸瀅澳濢濞
濡濢 濖濻濸濶濾澳濨濦濕
濣濖濕濔
濬濘濦 濬濘濦
濖濻濸濶濾澳濖濡濉澳濣濼瀁濉澳濗濖濈濩澿
濣濼瀁濋澳濗澾澳濣濼瀁濊澳濗激澳濦濼濺瀁濴濿
瀊濻濸瀇濻濸瀅澳濢濞
濡濢
濖濻濸濶濾澳濄濉濣濜濡
濙濟濔濧澳濖濔濕濟濘
濖濻濸濶濾澳濖濡濆澳濣濜濡濄
濗濖濆瀑濇濁濅濩澳瀂瀈瀇瀃瀈瀇
瀊濻濸瀇濻濸瀅澳濢濞
濡濢
濖濻濸濶濾澳濔濠濣
濣濖濕濔
濬濘濦 濬濘濦
濖濻濸濶濾澳濗濔濕濔澳濠濔濜濡澳濣濖濕 濖濻濸濶濾澳濕濴瀇瀇濸瀅瀌
濜
濗濔濕濂濙濠澳濡瀂澳瀊瀂瀅濾濼瀁濺
濬濘濦
濖濻濸濶濾澳瀀濴瀆瀇澳瀊濻濸瀇濻濸瀅澳濢濞 濡濢 濖濻濸濶濾澳瀀濴瀆瀇
濬濘濦
濖濻濸濶濾澳濴瀁瀇濸瀁瀁濴澳濼瀁瀆濸瀅瀇濸濷
濼瀁瀇瀂澳瀇濻濸澳濖濡濆濃濄澳瀊濻濸瀇濻濸瀅
濢濞
濡濢 濖濻濸濶濾澳濄濣濜濡
濔瀁瀇濸瀁瀁濴
濬濘濦
濖濻濸濶濾澳濗濔濕濔澳濠濔濜濡澳濣濖濕
Troubleshootin
g
Charts
11

澸澽濇澵濇濇澹濁澶激濍澔澸澽澵澻濆澵濁
澸濝濧濡濕濢濨濠濝濢濛澔濣濚澔濨濜濙澔澶濣濨濨濣濡澔澷濣濪濙濦澔濕濢濘澔澻濦濝濠濠
濄澼濥濸瀀瀂瀉濸澳濥瀈濵濵濸瀅澳濙瀂瀂瀇澳濔 濴瀁濷澳濉澳瀆濶瀅濸瀊瀆澳濕澳濴瀆澳濼瀁濷濼濶濴瀇濸濷澳瀇瀂澳瀅濸瀀瀂瀉濸澳瀇濻濸澳濵瀂瀇瀇瀂瀀澳濶瀂瀉濸瀅
濅澼濥濸瀀瀂瀉濸澳濨瀆濸澳瀃濴瀁濸濿澳濖澳澳濴瀁濷澳濅澳瀆濶瀅濸瀊瀆澳濗澳濴瀆澳濼瀁濷濼濶濴瀇濸濷澳瀇瀂澳瀅濸瀀瀂瀉濸澳瀇濻濸澳濚瀅濼濿濿
澵
澶
澷
澸
12

澸澽濇澵濇濇澹濁澶激濍澔澸澽澵澻濆澵濁
澸濝濧濡濕濢濨濠濝濢濛澔濣濚澔濨濜濙澔濁濝濘濘濠濙澔澼濣濩濧濝濢濛澔
濄澼濥濸瀀瀂瀉濸澳濣濖濕澳濘澳濴瀁濷澳濇 瀆濶瀅濸瀊瀆澳濙澳澳濴瀆澳濼瀁濷濼濶濴瀇濸濷澳瀇瀂澳瀅濸瀀瀂瀉濸澳瀇濻濸澳濦瀃濸濴濾濸瀅
濅澼濥濸瀀瀂瀉濸澳濅澳瀆濶瀅濸瀊瀆澳濚 濴瀁濷澳濅澳瀆濶瀅濸瀊瀆澳濛澳濴瀁濷澳濊澳瀆濶瀅濸瀊瀆澳濛 濴瀆澳濼瀁濷濼濶濴瀇濸濷澳瀇瀂澳瀅濸瀀瀂瀉濸澳瀇濻濸澳濠濼濷濷濿濸澳濻瀂瀈瀆濼瀁濺
澺
澼
澻
澼
澹
13

澸澽濇澵濇濇澹濁澶激濍澔澸澽澵澻濆澵濁
澸濝濧濡濕濢濨濠濝濢濛澔濣濚澔濨濜濙澔澶濩濨濨濣濢澔濕濢濘澔澵濢濨濙濢濢濕
濄澼濥濸瀀瀂瀉濸澳濆澳瀆濶瀅濸瀊瀆澳濝 濴瀆澳濼瀁濷濼濶濴瀇濸濷澳瀇瀂澳濿瀂瀂瀆濸瀁澳瀇濻濸澳濔瀁瀇濸瀁瀁濴
濅澼濥濸瀀瀂瀉濸澳濅澳瀆濶瀅濸瀊瀆澳濞澳濴瀁濷澳瀃瀂濾濸濷澳瀇濻瀅瀂瀈濺濻澳瀇濻濸澳濻瀂濿濸澳濟澳瀈瀆濸澳瀇濻濸澳瀇瀂瀂濿澳濴瀆澳瀆濻瀂瀊瀁
澾
澿
激
濂
濁
濅澼濥濸瀀瀂瀉濸澳瀆濶瀅濸瀊澳瀁瀈瀇澳濠澳濴瀁濷澳瀃瀂濾濸濷澳瀇濻瀅瀂瀈濺濻澳瀇濻濸澳濻瀂濿濸澳濡澳瀈瀆濸澳瀇濻濸澳瀇瀂瀂濿澳濴瀆澳瀆濻瀂瀊瀁澳澿澳濴瀁濷澳瀇濻濸瀁澳瀅濸瀀瀂瀉濸澳瀆濶瀅濸瀊澳瀁瀈瀇澳濣
濄
14

澸澽濇澵濇濇澹濁澶激濍澔澸澽澵澻濆澵濁
澸濝濧濡濕濢濨濠濝濢濛澔濣濚澔濨濜濙澔濈濣濤澔澼濣濩濧濝濢濛澔濕濢濘澔濈濣濤澔濄濕濢濙濠
濄澼濥濸瀀瀂瀉濸澳濄濄澳瀆濶瀅濸瀊瀆澳濣澳濴瀆澳濼瀁濷濼濶濴瀇濸濷澳瀇瀂澳濿瀂瀂瀆濸瀁澳瀇濻濸澳瀇瀂瀃澳濻瀂瀈瀆濼瀁濺澳濴瀁濷澳瀇瀂瀃澳瀃濴瀁濸濿
濅澼濥濸瀀瀂瀉濸澳濆澳瀆濶瀅濸瀊瀆澳濥澳濴瀆澳濼瀁濷濼濶濴瀇濸濷澳瀇瀂澳濿瀂瀂瀆濸瀁澳濞濸瀌澳濣濖濕
濅
濆
15

澸澽濇澵濇濇澹濁澶激濍澔澸澽澵澻濆澵濁
澸濝濧濡濕濢濨濠濝濢濛澔濣濚澔濨濜濙澔濉濧濖 澼濣濠濘濙濦澔濕濢濘澔濇濗濦濙濙濢澔
濄澼濥濸瀀瀂瀉濸澳濈澳瀆濶瀅濸瀊瀆澳濦澳濴瀆澳濼瀁濷濼濶濴瀇濸濷澳瀇瀂澳濿瀂瀂瀆濸瀁澳瀇濻濸澳濦濶瀅濸濸瀁
濅澼濥濸瀀瀂瀉濸澳濇澳瀆濶瀅濸瀊瀆澳濧澳濴瀁濷澳瀆濶瀅濸瀊瀆澳濨澳濴瀆澳濼瀁濷濼濶濴瀇濸濷澳瀇瀂澳濿瀂瀂瀆濸瀁澳濨瀆濵 濛瀂濿濷濸瀅
濇濈
濉
16

1
1
2
2
3
3
4
4
5
5
6
6
7
7
8
8
D D
C C
B B
A A
Titel.
Description.
Model NO REV
*
Block.SchDoc
Approver Checker Designer
Sheet **
of
ISSUE DATE REV DATE
Issue Change Order
Initial-Date
*
11JBL Tuner XL
A1.3
2019.12.26
Block Dia
g
ram
17

澺濁澔澬澭澢澭濁澼濮
激澷澸
濆濁濉瀉澳濆濅濈濃瀀濔濻
濌激澔濋濝濦濝濢濛澔澸濝濕濛濦濕濡
1
2
3
4
5
6
7
8
0 0
(CN4)
8P PH=2mm
PIN1
PIN1
PIN1
PIN1
PIN1
PIN1
PIN1
PIN1
PIN1
PIN1
PIN1
18

1
1
2
2
3
3
4
4
5
5
6
6
7
7
8
8
D D
C C
B B
A A
Titel.
Description.
Model NO REV
*
TUNER-XL AMP-PV201991213.SchDoc
*
Approver Checker Designer
Sheet **
of
ISSUE DATE REV DATE
Issue Change Order
Initial-Date
*
Q1
BR8050M
R4
100K
R1
100K R2
10K
AMP_SDZ-A
SPK_A_P-A
SPK_A_N-A
C17
1uF/16V
Q2
BR8050M
R13
100K NC
C1
220nF/25V
C5 220nF/25V
C8 220nF/25V
C7
220nF/25V
L1
10uH/4A
L3
10uH/4A
R3
NC
VCC_AMP
2A*
2A*
+
-
SPK 4 Ohm 10W
GND1
GND1
GND1
GND1
C3 1uF/10V
C4 1uF/10V
R16
0R
R15
0R
R14
0R
MODSEL
1
SDZ
2
FAULTZ
3
RINP
4
RINN
5
PLIMIT
6
GVDD
7
GAIN/SLV
8
GND
9
LINP
10
LINN
11
MUTE
12
AM2
13
AM1
14
AM0
15
SYNC
16 AVCC 17
PVCC 18
PVCC 19
BSNL 20
OUTNL 21
GND 22
OUTPL 23
BSPL 24
GND 25
BSNR 26
OUTNR 27
GND 28
OUTPR 29
BSPR 30
PVCC 31
PVCC 32
T_PAD 0
IC1
TPA3130D2DAPR
GND1
GND1
G
4D5
S
1
D6
D7
D8
S
2
S
3
Q3
MTD010P03V8
V_B AT1
C38
NC
R22
NC
C28 100nF/50V
R20
300K
C36
4.7uF/16V
GND1
GND1
R28 120K
R26
130K
R27
10K
BOOST_EN-A
C39
100nF/50V
GND1
R23
47K
C40
10nF/50V
Q4
BR8050M
R19
1K
C27 100nF/50V
R17 120K
VCC_AMP
C35
10uF/16V
R1= (VOUT-VREF)xR2
VREF
VREF=1.212
VCC_AMP
11.2V
VSG=?V ID=?A
BOOST CONVERTER
L4
2.2uH/8.4A
I=7.29A
AMP
FB8
600R@100MHz
FB1 120R@100MHz
FB2 120R@100MHz
53JBL Tuner XL
A1.3
2019.12.26
R12
20K
R11
100K
OUT=8V I=2AMAX
GND1
FSW
1
VCC
2
FB 3
COMP 4
GND 5
VOUT 6
EN
7
ILIM 8
VIN
9
BOOT
10
SW
11
IC2 TPS61089
R35 1K
USB_+5V-A V_BAT1
R30
0
R34 1K
R29 NC
R31 NC
Li-Ion Battery
3.7V 3300mAh(Tuner XL)
F1
FSMD110-16-R
CHARGE
GND1
Hold=1.1A
Trip=1.9A
D6 ESD05V88DULC
CHG-A NTC1-A
T-Pad
0
IN
1
ISET
2
VSS
3
PRE-TERM
4
PG 5
NC 6
ISET2
7
CHG 8
TS 9
OUT 10
IC3
SN2040
NTC2
A_GND-A
1
2
3
4
5
6
7
8
CN4
8P PH=2mm
USB_GND
USB1_P
USB1_N
AUX_IN-A
AUX_DET-A
TO JACK PCB
NTC1-A
CHG-A
USB_+5V-A
V_B AT1
BOOST_EN-A
USB1_P- A
USB1_N-A
USB1_N-A
USB1_P- A
A_GND-A
AUX_DET-A
AUX_IN-A
SPK_A_P-A
SPK_A_N-A
AMP_SDZ-A
AMP_MUTE-A
GND2
GND1
GND1 GND1 GND1
AMP_MUTE-A
TO DAB PCB
A_GND-A
D1 ESD05V88DULC
D2 ESD05V88DULC
D3 ESD05V88DULC
1
2
3
D4 ESD05V88DULC
D5 ESD05V88DULC
GND2
FB6
600R@100MHz
FB5
600R@100MHz
FB3
600R@100MHz
FB4
600R@100MHz
TS
GND2
TS
1
2
3
4
5
6
7
8
9
10
11
12
13
14
15
16
CN2
16P PH=1.25mm
1
2
3
4
5
6
CN3
6P PH=2.5mm
R18
820K
R33 0R
R32 560R R50 2K
R01 3.9K
R02 3.9K
R21
56K
DV1
delete FB11 FB12 L2
R50->2K R30->0 OHM R01 02->3.9KChange
ADD:C69 C70-->0.1uF
DV2
delete :CN01
Circuit Dia
g
ram-AMP PCBA
19

La
y
out Dia
g
ram View-AMP PCBA
20
This manual suits for next models
5
Table of contents
Other Harman Kardon Portable Speakers manuals

Harman Kardon
Harman Kardon GO + PlAy User manual

Harman Kardon
Harman Kardon Go+Play User manual

Harman Kardon
Harman Kardon Go + Play II User manual

Harman Kardon
Harman Kardon Go+Play User manual

Harman Kardon
Harman Kardon Go+Play Mini User manual

Harman Kardon
Harman Kardon TRAVELER User manual

Harman Kardon
Harman Kardon GO+PLAY II User manual

Harman Kardon
Harman Kardon Go+Play User manual

Harman Kardon
Harman Kardon TRAVELER User manual

Harman Kardon
Harman Kardon Nova User manual