manuals.online logo
Brands
  1. Home
  2. •
  3. Brands
  4. •
  5. Hayward
  6. •
  7. Control Unit
  8. •
  9. Hayward SP0735 User manual

Hayward SP0735 User manual

This manual suits for next models

1

Other Hayward Control Unit manuals

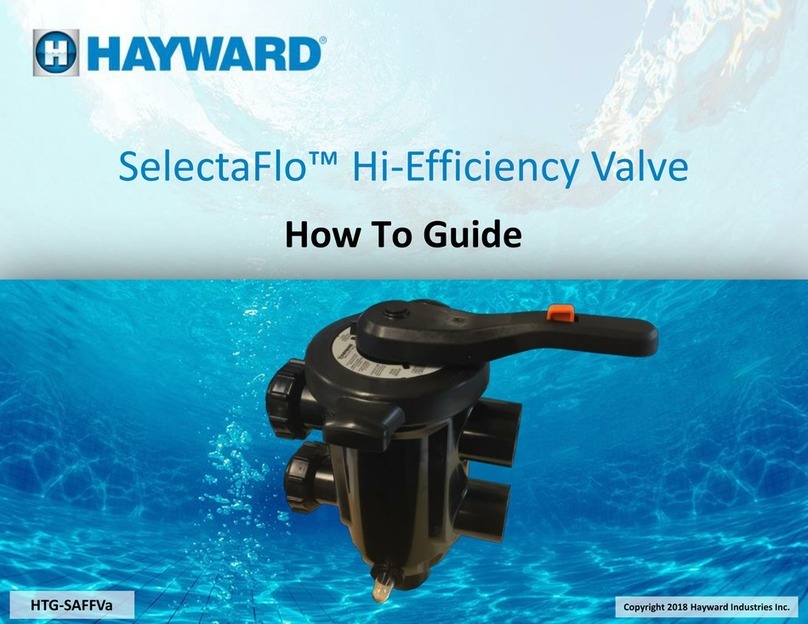
Hayward SelectaFlo Administrator Guide

Hayward

Hayward SelectaFlo Administrator Guide

Hayward OmniPL HLPRO4NSW User manual

Hayward

Hayward OmniPL HLPRO4NSW User manual

Hayward PSV series User manual

Hayward

Hayward PSV series User manual

Hayward VariFlo Multiport SP0715ALL User manual

Hayward

Hayward VariFlo Multiport SP0715ALL User manual

Hayward VariFlo Multiport SP0710X62 User manual

Hayward

Hayward VariFlo Multiport SP0710X62 User manual

Hayward HCV20715 User manual

Hayward

Hayward HCV20715 User manual

Hayward H-Power HPOW230BDT50 User manual

Hayward

Hayward H-Power HPOW230BDT50 User manual

Hayward SP0730 User manual

Hayward

Hayward SP0730 User manual

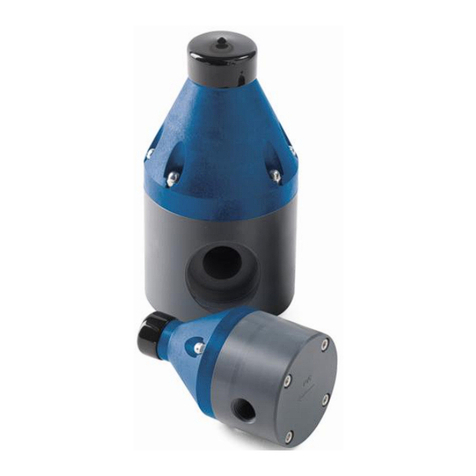
Hayward PBV series Manual

Hayward

Hayward PBV series Manual

Hayward OmniPL HLBPRO4SW User manual

Hayward

Hayward OmniPL HLBPRO4SW User manual

Hayward HCV30798 User manual

Hayward

Hayward HCV30798 User manual

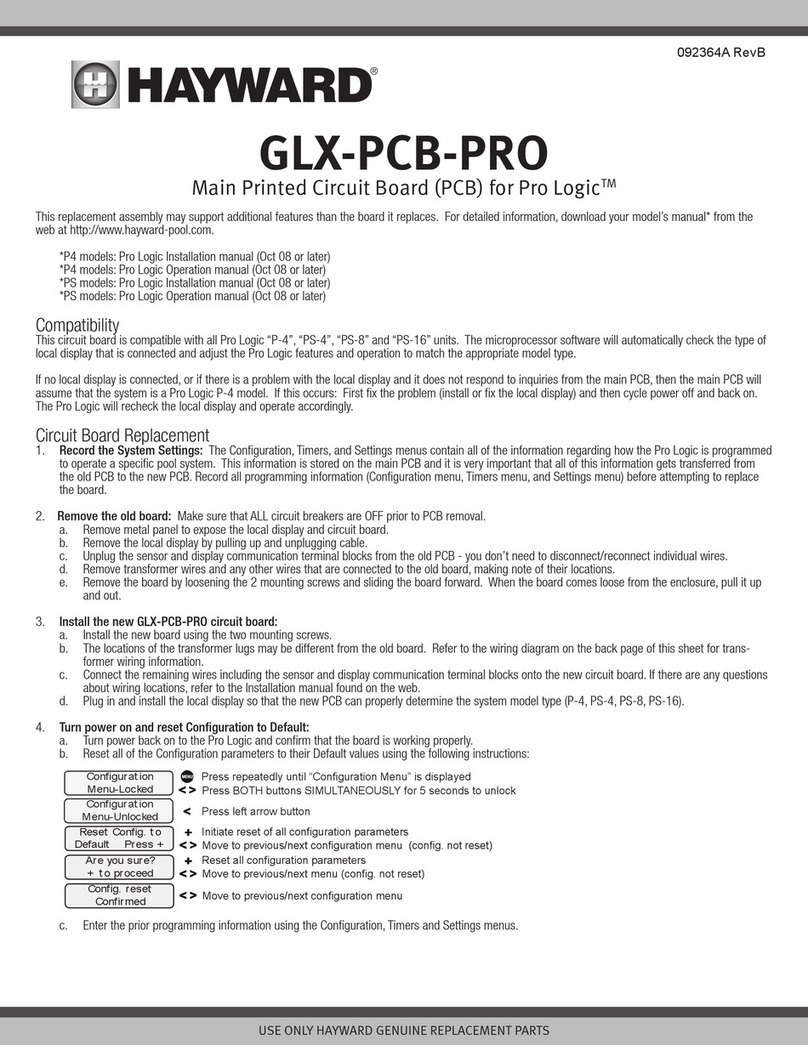
Hayward GLX-PCB-PRO Operating and safety instructions

Hayward

Hayward GLX-PCB-PRO Operating and safety instructions

Hayward CAT 5000 User manual

Hayward

Hayward CAT 5000 User manual

Hayward TC Series Manual

Hayward

Hayward TC Series Manual

Hayward BYCS Series Manual

Hayward

Hayward BYCS Series Manual

Hayward AquaTrol User manual

Hayward

Hayward AquaTrol User manual

Hayward HCV375 User manual

Hayward

Hayward HCV375 User manual

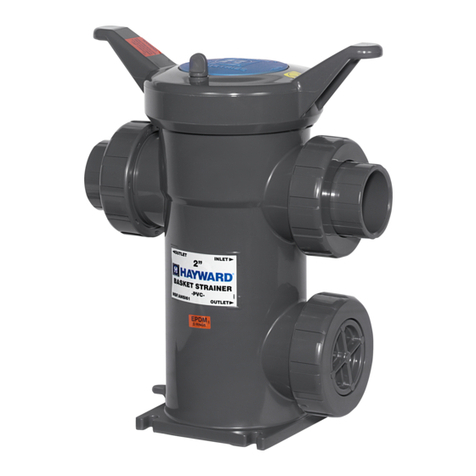
Hayward PVC Series Manual

Hayward

Hayward PVC Series Manual

Hayward VariFlo SP0712 User manual

Hayward

Hayward VariFlo SP0712 User manual

Hayward SelectaFlo SP0425 User manual

Hayward

Hayward SelectaFlo SP0425 User manual

Hayward SP0710XR50 User manual

Hayward

Hayward SP0710XR50 User manual

Hayward TB SERIES Manual

Hayward

Hayward TB SERIES Manual

Hayward SP0722 User manual

Hayward

Hayward SP0722 User manual

Popular Control Unit manuals by other brands

Seitz 14A80 user manual

Seitz

Seitz 14A80 user manual

Wilo RS485 Installation and operating instructions

Wilo

Wilo RS485 Installation and operating instructions

Becker CentralControl CC41 Commissioning Instruction

Becker

Becker CentralControl CC41 Commissioning Instruction

SICK CDB650 operating instructions

SICK

SICK CDB650 operating instructions

Panduit NetKey NKP5E88M Series installation instructions

Panduit

Panduit NetKey NKP5E88M Series installation instructions

MX Options Concentric Petite Fitting instructions

MX

MX Options Concentric Petite Fitting instructions

Clean Water Systems Fleck 2510 Installation & start?up guide

Clean Water Systems

Clean Water Systems Fleck 2510 Installation & start?up guide

Fairchild FSB44104A user guide

Fairchild

Fairchild FSB44104A user guide

LEGRAND Wattstopper LMIN-104 installation instructions

LEGRAND

LEGRAND Wattstopper LMIN-104 installation instructions

PMK ATT10BNCS instruction manual

PMK

PMK ATT10BNCS instruction manual

Tektronix TDS3FFT user manual

Tektronix

Tektronix TDS3FFT user manual

Woodward easYgen Technical manual

Woodward

Woodward easYgen Technical manual

Balluff BNI EIP-502-105-R015 user guide

Balluff

Balluff BNI EIP-502-105-R015 user guide

NXP Semiconductors TWR-LS1021A Getting started

NXP Semiconductors

NXP Semiconductors TWR-LS1021A Getting started

Advantech PCM-3117 Startup manual

Advantech

Advantech PCM-3117 Startup manual

Danfoss MCO 101 manual

Danfoss

Danfoss MCO 101 manual

Moons' Lin Engineering R701P user manual

Moons'

Moons' Lin Engineering R701P user manual

Aventics RV1 operating instructions

Aventics

Aventics RV1 operating instructions

manuals.online logo
manuals.online logoBrands
  • About & Mission
  • Contact us
  • Privacy Policy
  • Terms and Conditions

Copyright 2025 Manuals.Online. All Rights Reserved.

1
USE ONLY HAYWARD GENUINE REPLACEMENT PARTS
4 WAY BALL VALVE
Owner’s Manual
MODELS: SP0735 AND SP0735S
IMPORTANT SAFETY INSTRUCTIONS
Basic safety precautions s
h
ou
ld
a
l
ways
b
e fo
ll
owe
d
, inc
l
u
d
ing t
h
e fo
ll
owing: Fai
l
ure to fo
ll
ow instructions
can cause severe injury and/or death.
This is the safety-alert symbol. When you see this symbol on your equipment or in this manual, look for
one of the following signal words and be alert to the potential for personal injury.
WARNING warns about hazards that could cause serious personal injury, death or major property
damage and if ignored presents a potential hazard.
CAUTION warns about hazards that will or can cause minor or moderate personal injury and/or property
damage and if ignored presents a potential hazard. It can also make consumers aware of actions that are
unpredictable and unsafe.
The NOTICE label indicates special instructions that are important but not related to hazards.
Hayward Pool Products
620 Division Street, Elizabeth, NJ 07207
Phone: (908) 355-7995
www.hayward.com
Contents
General Warnings…………….……2
Replacement Parts…….…..…..…4
Valve Installation…….……….……4
Valve Operation………..……………4
Winterization…………..…….………4
IS0735 Rev B
WA
R
follow ins
t
WA
R
Suction in
s
severe inju
Hair Entra
Limb Entr
a
cracked, m
Body Suc
t
Eviscerati
sump or s
u
disembow
e
Mechanic
opening of
WAR
o
W
b
e
a
p
oD
oD
oN
oR
e
oI
n
g
u
oI
n
WA
R
suction o
u
WA
R
material c
a
WA
R
replaced
a
CAU
T
being use
d
on this pro
positioned
WAR
start up, n
o
follow safe
and clamp
pool and s
p
be in open
back to th
e
open filter
is dischar
g
WAR
of pump a
n
servicing p
circulation
circulation
circulatio
n
air can cau
high volu
m
R
NING
-
Re
a
t
ructions can
c
R
NING
– Suc
s
uction outlets
ry and/or deat
h
pment
- Hair c
a
a
pment
- A lim
b
issing, or not s
t
ion Entrapm
e
on/ Disembo
w
u
ction outlet co
v
e
lment.
a
l Entrapmen
a suction outl
e
NING
- To R
e
W
hen outlets ar
e
e
installed. Su
c
p
art, as measu
r
ual suction fitt
i
ual suction fitt
i
ever use Pool
o
e
place damag
e
n
addition two
o
u
idelines, follo
w
n
stallation of a
v
R
NING
–Fail
u
u
tlets can resu
R
NING
– Fail
a
n result in an
R
NING
– Suc
a
t least every s
T
ION
– Com
p
d
as means of
d
uct. Closely
s
to prevent chil
NING
– Haz
o
rmal operatio
n
ty and operati
o
due to pressur
e
p
a water circul
a
position. Befo
e
pool. Do not
c
manual air reli
e
ed.
NING
–Sep
n
d/or filter com
ool and spa cir
system if a sys
system unless
n
system at m
o
se component
s
m
e blower when
U
S
a
d and foll
o
c
ause severe i
n
tion Entrap
m
and/or suctio
n
h
due to the fol
a
n become ent
a
b
inserted into
ecurely attach
e
e
nt
- A negative
w
elment
- A n
e
v
er which is, d
a
t
- There is pot
e
e
t cover resulti
n
e
duce the ris
e
small enough
c
tion outlets in
r
ed from near
p
ngs shall be pl
ngs shall not b
o
r Spa if any su
c
e
d, broken, cra
c
o
r more suction
w
all National,
v
acuum releas
e
u
re to remove
lt in an increa
s
ure to keep su
increase pot
e
tion outlet co
m
even years or
p
onents such
access to the
upervise child
r
dren from usin
g
ardous Pres
s
n
, and after pu
m
o
n instructions
e
in the system
a
tion system, a
re starting sys
t
c
hange filter co
e
f valve. Do no
aration Haza
ponents. Strai
culation syste
m
tem compone
n
f
ilter manual a
o
re than 50 PS
I
s
to explode, w
i
air purging th
e
S
E ONLY HAYWA
R
o
w all inst
r
n
jury and/or d
m
ent Hazard.
n
outlet covers
w
lowing entrap
m
a
ngled in sucti
o
an opening of
a
e
d can result in
pressure appli
e
gative pressu
r
a
maged, broke
n
e
ntial for jewelr
y
n
g in mechanic
a
k of Entrapm
to be blocked
the same plan
p
oint to near po
aced in such l
o
e located on s
e
c
tion outlet co
m
c
ked, missing,
o
outlets per pu
m
State, and Loc
a
e
or vent syste
m
pressure test
s
e potential f
o
ction outlet c
o
e
ntial for sucti
o
m
ponents hav
e
if found to be
as the filtrati
o
pool by young
r
en at all times
.
g
them as a m
e
s
ure.
Pool an
d
m
p shut off. St
a
could result in
, which could
c
ll system and
p
em pump, all s
ntrol valve pos
t close filter m
a
rd. Failure to
f
ner cover must
m
, filters manu
a
n
t is not assem
b
ir relief valve b
I
. Do not purg
e
i
th risk of seve
r
e
pump, filter,
o
R
D GENUINE RE
P
r
uctions
in
t
eath.
w
hich are, da
m
m
ent hazards:
o
n outlet cover
.
a
suction outle
t
a mechanical
b
e
d to a large p
o
r
e applied dire
c
n
, cracked, mis
y
, swimsuit, ha
a
l entrapment.
ent Hazards:
by a person, a
m
e (i.e. floor or
w
int.
o
cations and di
s
e
ating areas or
m
ponent is da
m
o
r not securely
m
p installed in
a
l codes applic
a
m
, which reliev
e
plugs and/or
p
o
r suction entr
a
o
mponents cl
e
o
n entrapmen
t
e
a finite life,
t
damaged, bro
n system, pu
m
children. To
r
.
Components
s
e
ans of access
t
d
spa water circ
a
nd clear of cir
c
violent separa
t
c
ause property
p
ump controls
m
ystem valves
m
ition while sys
t
a
nual air relief
v
f
ollow safety a
n
be properly se
a
l air relief valv
b
led properly,
d
ody is in locke
d
e
the system
w
r
e injury or dea
t
o
r piping.
P
LACEMENT PAR
T
t
his owner’s m
m
aged, broken,
.
t
sump or sucti
o
b
ind or swellin
g
o
rtion of the bo
c
tly to the intes
s
sing, or unsec
u
a
ir decorations,
:
minimum of tw
w
all), must be i
stances to avo
i
on the backre
s
m
aged, broken,
attached sucti
o
accordance w
i
able.
e
s entrapping
s
p
lugs used in
w
a
pment as de
s
e
ar of debris,
s
t
as described
t
he cover/grat
ken, cracked,
m
ps and heate
r
educe risk of i
n
such as the filt
t
o the pool.
ulation system
c
ulation syste
m
t
ion of the pum
damage, seve
r
m
ust be in off
p
m
ust be set in a
t
em pump is ru
v
alve until a st
e
n
d operation in
cured to pump
e must be in o
p
d
amaged, or m
i
d
position in fil
w
ith compress
e
t
h to anyone n
e
T
S
m
anual and on
cracked, missi
on outlet cove
r
g
of the limb.
o
dy or limbs ca
n
tines through
a
u
red can result
finger, toe or
k
w
o functioning
s
nstalled a mini
i
d “dual block
a
s
t for such seat
i
cracked, miss
i
o
n outlet comp
i
th latest ASM
E
s
uction, is reco
w
interization
o
s
cribed above
.
s
uch as leaves
above.
e should be i
n
missing, or n
o
r must be pos
n
jury, do not p
e
ration system,
s operate und
e
m
equipment d
u
p housing and
r
e personal inj
u
p
osition and fil
t
position to all
o
nning. Before
s
e
ady stream of
structions cou
l
housing with
s
p
en position.
D
i
ssing. Do not
o
ter upper body
ed air. Purgin
g
e
arby. Use onl
y
the equipmen
ng, or unsecur
e
r
that is damag
e
n
result in an e
n
a
n unprotected
in evisceratio
n
k
nuckle to be c
a
s
uction outlets
mum of three
f
a
ge” by a user.
i
ng areas.
i
ng, or not sec
u
onents immed
i
E
, APSP Standa
r
mmended.
o
f the pool/sp
.
, dirt, hair, pa
p
n
spected freq
u
o
t securely att
a
itioned so as
t
e
rmit children t
o
pumps, and h
e
e
r hazardous p
r
u
ring pump sta
cover, and/or
f
u
ry, or death. B
t
er manual air r
o
w system wat
e
s
tarting syste
m
water (not air
o
l
d result in viol
e
s
trainer cover l
o
D
o not operate
p
o
perate pool a
n
.Never opera
t
g
the system wi
y
a low pressur
2
t. Failure to
e
d can cause
e
d, broken,
n
trapment.
suction outlet
n
/
a
ught in an
per pump mus
t
f
eet (3’) [1 met
e
u
rely attached.
i
ately.
r
ds and CPSC
a from the
p
er and other
u
ently and
a
ched.
t
o prevent the
i
o
use or climb
e
aters must be
r
essure during
rt up. Failure t
o
f
ilter housing
efore servicing
elief valve mu
s
e
r to return
m
pump, fully
o
r air and wate
r
e
nt separation
o
ck ring. Befor
e
p
ool and spa
n
d spa
t
e or test the
th compresse
d
e (below 5 PSI)
2
t
e
r]
r
o
t
r
)
e
,
3
USE ONLY HAYWARD GENUINE REPLACEMENT PARTS
WARNING – Risk of Electric Shock. All electrical wiring MUST be in conformance with applicable local codes,
regulations, and the National Electric Code (NEC). Hazardous voltage can shock, burn, and cause death or serious property
damage. To reduce the risk of electric shock, do NOT use an extension cord to connect unit to electric supply. Provide a properly
located electrical receptacle. Before working on any electrical equipment, turn off power supply to the equipment. To reduce
the risk of electric shock replace damaged wiring immediately. Locate conduit to prevent abuse from lawn mowers, hedge
trimmers and other equipment. Do NOT ground to a gas supply line.
WARNING – Risk of Electric Shock Failure to ground all electrical equipment can cause serious or fatal electrical shock
hazard. Electrical ground all electrical equipment before connecting to electrical power supply.
WARNING – Risk of Electric Shock Failure to bond all electrical equipment to pool structure will increase risk for
electrocution and could result in injury or death. To reduce the risk of electric shock, see installation instructions and consult a
professional electrician on how to bond all electrical equipment. Also, contact a licensed electrician for information on local
electrical codes for bonding requirements.
Notes to electrician: Use a solid copper conductor, size 8 or larger. Run a continuous wire from external bonding lug to
reinforcing rod or mesh. Connect a No. 8 AWG (8.4 mm2) [No. 6 AWG (13.3 mm2) for Canada] solid copper bonding wire to the
pressure wire connector provided on the electrical equipment and to all metal parts of swimming pool, spa, or hot tub, and metal
piping (except gas piping), and conduit within 5 ft. (1.5 m) of inside walls of swimming pool, spa, or hot tub.
IMPORTANT - Reference NEC codes for all wiring standards including, but not limited to, grounding, bonding and other general
wiring procedures.
WARNING – Risk of Electric Shock . The electrical equipment must be connected only to a supply circuit that is
protected by a ground-fault circuit-interrupter (GFCI). Such a GFCI should be provided by the installer and should be tested on a
routine basis. To test the GFCI, push the test button. The GFCI should interrupt power. Push reset button. Power should be
restored. If the GFCI fails to operate in this manner, the GFCI is defective. If the GFCI interrupts power to the electrical equipment
without the test button being pushed, a ground current is flowing, indicating the possibility of an electrical shock. Do not use this
electrical equipment. Disconnect the electrical equipment and have the problem corrected by a qualified service representative
before using.
CAUTION – HAYWARD®pumps are intended for use with permanently-installed pools and may be used with hot tubs and
spas if so marked. Do not use with storable pools. A permanently-installed pool is constructed in or on the ground or in a
building such that it cannot be readily disassembled for storage. A storable pool is constructed so that it is capable of being
readily disassembled for storage and reassembled to its original integrity.
WARNING – Risk of Hyperthermia. To avoid hyperthermia the following “Safety Rules for Hot Tubs” are recommended by
the U.S. Consumer Product Safety Commission.
1. Spa or hot tub water temperatures should never exceed 104°F [40°C]. A temperature of 100°F [38°C] is
considered safe for a healthy adult. Special caution is suggested for young children. Prolonged immersion in
hot water can induce hyperthermia.
2. Drinking of alcoholic beverages before or during spa or hot tub use can cause drowsiness, which
could lead to unconsciousness and subsequently result in drowning.
3. Pregnant women beware! Soaking in water above 100°F [38°C] can cause fetal damage during the
first three months of pregnancy (resulting in the birth of a brain-damaged or deformed child). Pregnant women
should adhere to the 100°F [38°C] maximum rule.
4. Before entering the spa or hot tub, users should check the water temperature with an accurate ther-
mometer; spa or hot tub thermostats may err in regulating water temperatures by as much as 4°F (2.2°C).
5. Persons taking medications, which induce drowsiness, such as tranquilizers, antihistamines or anti-
coagulants, should not use spas or hot tubs.
6. If the pool/spa is used for therapy, it should be done with the advice of a physician. Always stir pool/ spa
water before entering the pool/spa to mix in any hot surface layer of water that might exceed healthful
temperature limits and cause injury. Do not tamper with controls, because scalding can result if safety controls
are not in proper working order.
7. Persons with a medical history of heart disease, circulatory problems, diabetes or blood pressure
problems should obtain a physicians advice before using spas or hot tubs.
8. Hyperthermia occurs when the internal temperature of the body reaches a level several degrees above
normal body temperature of 98.6°F [37°C]. The symptoms of Hyperthermia include: drowsiness, lethargy,
dizziness, fainting, and an increase in the internal temperature of the body.
The effects of Hyperthermia include:
1. Unawareness of impending danger.
2. Failure to perceive heat.
3. Failure to recognize the need to leave the spa.
4. Physical inability to exit the spa.
5. Fetal damage in pregnant women.
6. Unconsciousness resulting in danger of drowning.
SAVE THESE INSTRUCTIONS
4
USE ONLY HAYWARD GENUINE REPLACEMENT PARTS
This valve is rated for swimming pool or spa service to 50 PSI maximum at water temperatures not to exceed 150 °F
VALVE INSTALLATION
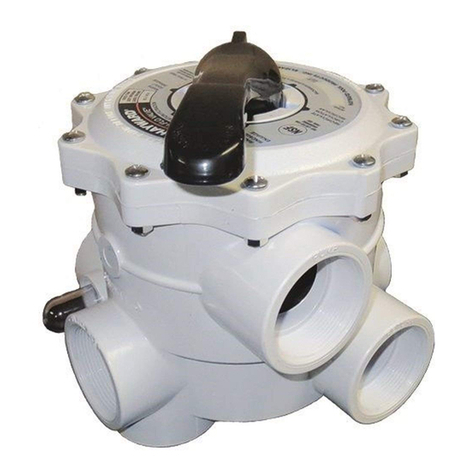
1. The SP0735 Series 4 Way valve has three ports in the body and four ports in the ball. The two side ports are directional, and the
third port is common. The common port (3) can be connected to either the suction or discharge line of the system.
2. For Female Threaded SP0735 VALVE:
Wrap threads of the 1 ½” pipe with Teflon tape of 3 to 3-1/2 mil thickness. The tape should be wrapped in a clockwise direction
starting at the first or second full thread. Overlap each wrap by, 1/2 the width of the tape. The wrap should be applied with
sufficient tension to allow the threads of a single wrapped area to show through without cutting the tape. The wrap should
continue for the full effective length of the thread. To provide a leak proof joint, the fitting should be threaded into the pipe
“hand tight”. Using a strap wrench only. (Never use a stillson type wrench) tighten the joint an additional 1/2 to 1-1/2 turns past
hand tight. Tightening beyond this point may induce excessive stress that could cause failure.
3. For Female Socket SP0735S VALVE:
The SP0735S VALVE is manufactured utilizing ABS. Utilize a solvent cement made for both PVC and ABS. Cut pipe square.
Chamfer and deburr pipe. Surfaces must be cleaned and free of dirt, moisture, oil and other foreign material. Apply primer to
inside socket surface. Use a scrubbing motion. Repeat applications may be necessary to soften the surface of the socket. Next,
liberally apply primer to the male end of the pipe to the length of the socket depth. Again apply to the socket, without delay,
apply cement to the pipe while the surface is still wet with primer. Next apply cement lightly, but uniformly to the inside of the
socket. Apply a second coat of cement to the pipe, and assemble the pipe into the socket, rotating the pipe 1/4 turn in one
direction as it is slipped to full depth of the socket. The pipe should be held in position for approx. 30 seconds to allow the
connection to “set”. After assembly wipe off excess cement. Full set time is a minimum of 30 minutes at 60 to 100 F. For full cure
see the information on the Solvent cement can.
4. After making connections, hand tighten the Assembly Nut. This will ensure proper seating and alignment of ball. DO NOT
OVERTIGHTEN.
VALVE OPERATION:
The above diagrams of flow variations, represented with the valve installed on the discharge side of the pump. (Return to the pool)
The SP-735 4-way valve is a multi-functional valve. It allows flow to be directed, controlled, mixed, proportioned or to be shut off
completely.
FUNCTIONS NOTE: When changing flow positions, move handle smoothly and slowly.
1. Valve allows diversion of flow to or from either Port 1 or Port 2. Ports are color coded and referenced to colors on valve label. When
handle points to "FULL", all flow is thru that port. Optional suction manifold label: SKIMMER is Port 1; MAIN DRAIN is Port 2.
2. Decreasing flow thru one port is accomplished by varying the handle from "FULL" to "OFF" position.
3. Valve is closed when handle points to either "OFF" position.
4. Simultaneous flow (mixing, blending, proportioning) in both port directions is achieved when the handle is in the label regions
between "FULL" and ½/½. At ½/½, flow is equal to (or from from) both Port 1 and Port 2. By turning the handle toward the "FULL"
position of the specific port, the flow increases for that port and decreases at the opposite port. Label is color coordinated to show the
ratio/proportion of flow when throttling is required.
SERVICING
1. Disassembly
a. Place Handle pointer over label referencing "lug" (notch on inside of label).
b. Disengage Assembly Nut and remove End Connector and 0-Ring from valve body.
c. Remove Ball from valve body. IMPORTANT — Note position of Ball relative to handle pointer. Valve must be assembled with
same Ball/Handle relationship to ensure proper operation. NOTE: The two (2) side holes in Ball face same side of valve as
Handle pointer.
d. Remove Handle by exerting a strong upward pull. Note the position of groove on stem.
e. Press Stem DOWN into valve body and remove.
f. Inspect O-rings, Seats and Ball for cuts, scoring or wear, and replace as necessary.
g. The Ball Seats are easily removed by prying out of recesses. Be careful not to nick or damage them.
2. Assembly
a. Lightly lubricate O-rings with silicon or light oil to make assembly easier. Be sure all Seals are clean and firmly in place.
b. Assemble in reverse order of disassembly ensuring Ball and Handle are properly positioned.
WINTERIZING
Drain all liquid from line and valve. Place valve in either ½/½ position and loosen Assembly Nut halfway.
SPARE PARTS
Item Part Number Description QTY
1 SPX0735D HANDLE 1
2 SPX0735F STEM 1
3 SPX0735GH O-RING SET OF TWO 1
4 SPX0735P2 VALVE SEAT SET OF 2 1
5 SPX0735C VALVE 4 WAY BALL 1
6a SPX0735B END CONNECTOR 1 ½” NPTF
6b SPX0735BS END CONNECTOR 1 ½” SOCKET
7 SPX0735E ADJUSTING NUT 1