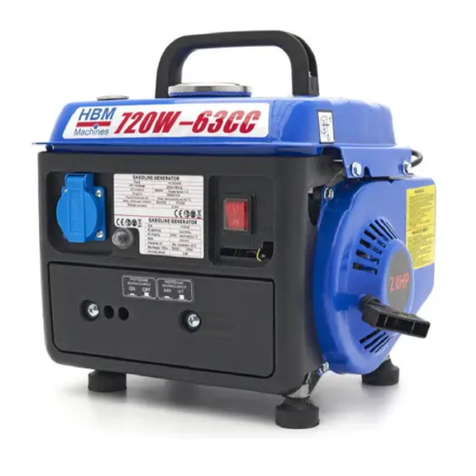
HBM Machines 55019HBM User manual

55019HBM
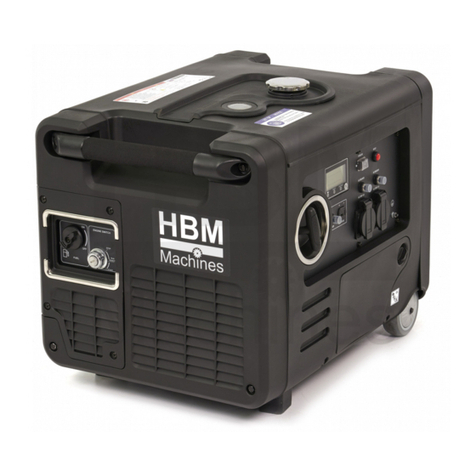
SILENT INVERTER GENERATOR
GEBRUIKSAANWIJZING
INSTRUCTION MANUAL
MANUEL D’UTILISATION
ANLEITUNG
INSTRUCCIONES
ISTRUZIONI
FR
DE
ES
IT
PROFESSIONAL
GROUPE ÉLECTROGÈNE INVERTER SILENCIEUX
LEISER WECHSELRICHTER STROMERZEUGER
GENERADOR INVERSOR SILENCIOSA
GENERATORE AD INVERTER SILENZIOSO
NL
EN
STILLE INVERTER
AGGREGAAT

2
NEDERLANDS 8
ENGLISH 12
FRANÇAIS 16
DEUTSCH 21
ESPAÑOL 26
ITALIANO 30
DECLARATION OF CONFORMITY 35

3
OFF
START/OFF
ESC
THROTTLE
ENGINE
START
STOP
ON
OFF
FUEL
+ -
0%
50%
100%
OUTPUT OVERLOAD
0%
50%
100%
AC RESET
BUTTON
DC BREAKER
DC 12V 8.3A
5VDC 1A/2.1A
5V2.1A
5V1.0A
5VDC PARALLEL
OPERATION
OUTLETS
GROUND
AC 230V AC 230V
ON
A
B
1
10 11
15 17 18 19 2016
13 14 12
4 8 6 7
9
3 12
5
ON ON
START/OFF
ENGINE
START
STOP
Remote Starter

4
DC
E
F
RED MARK
23
Degrees Celsius° (outside)
Degrees Fahrenheit° (outside)
-20 0 20 40 8060 100 120
-28.9 -17.8 -6.7 4.4 36.715.6 37.8 48.9
Full Synthetic 5W-30
5W-30
10W-30
10W-40
6 2122

5
PRESS 1-3 SEC.
OR
23
24
25
0.7 - 0.8 mm
0.028 - 0.031 inch
J
H
I
K L

6
M
N
P
CR2016
3V
CR2016
3V
CR2016
3V
CR2016
3V
CR2016
3V
CR2016
3V
CR2016
3V
CR2016
3V
CR2016
3V
CR2016
3V
CR2016
3V
CR2016
3V
O

7

8
STILLE INVERTER AGGREGAAT
WAARSCHUWING
Lees voor uw eigen veiligheid deze handleiding voordat u de
machine in gebruik neemt. Het niet opvolgen van de instructies kan
leiden tot ernstig persoonlijk letsel. Neem de tijd om voor elk gebruik
vertrouwd te raken met de machine. Als u deze machine aan iemand
anders geeft, overhandig deze gebruiksaanwijzing dan ook.
VEILIGHEIDSVOORSCHRIFTEN
Volg bij gebruik van de machine altijd de bijgesloten veiligheidsvoorschriften en
onderstaande aanvullende veiligheidsvoorschriften nauwkeurig op.
In deze handleiding worden de volgende pictogrammen gebruikt:
Gevaar voor lichamelijk letsel of materiële schade.
AANVULLENDE VEILIGHEIDSVOORSCHRIFTEN
VOOR GENERATOREN
WERKOMGEVING
• Plaats de machine op een stevig oppervlak. Plaats de machine niet op een
metalen oppervlak.
• Bewaar geen brandstof in de buurt van de machine.
ELEKTRISCHE VEILIGHEID
• Controleer voor gebruik of het opgenomen vermogen van de aan te sluiten
uitrusting kleiner is dan het maximale uitgangsvermogen van de generator.
• Sluit de uitrusting uitsluitend aan wanneer de generator op volle snelheid draait.
Koppel de uitrusting los voor het uitschakelen van de generator.
PERSOONLIJKE VEILIGHEID
• Vermijd aanraking van hete onderdelen van de machine.
• Vul nooit brandstof bij terwijl de machine draait. Laat de machine na gebruik
minimaal 15 minuten afkoelen alvorens brandstof bij te vullen.
GEBRUIK EN ONDERHOUD VAN MACHINE
• Waarschuw bij gebruik van een generator voor back-upstroom het nutsbedrijf.
• Gebruik een aardlekschakelaar (GFCI) in elk vochtig of sterk geleidend gebied,
zoals metalen vlonders of staalwerk.
• Raak geen blootliggende draad of stopcontacten aan.
• Gebruik de machine niet met elektrische snoeren die versleten, gerafeld, kaal of
anderszins zijn beschadigd.
• Gebruik de machine niet voor het voeden van elektrische apparatuur (als
externe spanningsbron).
• Plaats de machine niet in de felle zon. Stel de machine niet bloot aan
temperaturen boven 40 °C.
• Gebruik de generator niet in de regen of in een vochtige omgeving
• Raak de generator of elektrische snoeren niet aan terwijl u in water staat,
blootsvoets of terwijl handen of voeten zijn nat.
• Berg de machine op in een droge omgeving.
• Kinderen moeten onder toezicht staan om ervoor te zorgen dat ze niet met het
apparaat spelen.
• Zorg ervoor dat de generator bij aangesloten belasting voldoende brandstof
heeft.
• De geluidsdemper en het luchtfilter fungeren als vlamvangers in het geval dat
na-ontsteking optreedt. Zie er derhalve op toe dat ze zijn gemonteerd en in een
technisch perfectie conditie verkeren.
• Schakel de generator onmiddellijk uit als zich een van de volgende situaties
voordoet:
- haperen of instabiel draaien van de motor
- afname van het elektrisch vermogen
- oververhitting van de aangesloten belasting
- excessief trillen van de generator
- vonkvorming
- aanwezigheid van rook of vuur
Uitlaatwarmte/-gassen kunnen brandbare stoffen en constructies doen
ontbranden of de brandstoftank beschadigen waardoor brand ontstaat,
met als gevolg overlijden of ernstig letsel en/of materiële schade.
Contact met de geluiddemper kan brandwonden veroorzaken bij ernstig letsel.
SYMBOLEN OP DE MACHINE
Lees de gebruiksaanwijzing
Brandgevaar
Explosiegevaar
Gevaar voor inhallatie van giftige stoffen
Gevaarlijk hete delen
Niet in huis gebruiken
Niet in garage of schuur gebruiken
Alleen buitenshuis gebruiken
92
Geluidsniveau
Olie vullen
PRESS 1-3 SEC.
OR
Startprocedure
BESCHRIJVING (FIG. A)
Deze generator is ontworpen voor het opwekken van elektriciteit om elektrische
machines of apparaten te voeden. De machine wordt niet geleverd met olie en
brandstof.
1. Handgreep
2. Tank dop
3. Brandstofmeter
4. Controlepaneel
5. Terugloopstarter
6. Olievuldeksel
7. Geluiddemper
8. Koelluchtinlaat
9. Afstandsbediening
INHOUD VERPAKKING
• Inverter generator
• Afstandsbediening
• Bougiesleutel
• Gebruiksaanwijzing
• Veiligheidsvoorschriften
• Garantie en service
CONTROLEPANEEL (FIG. B)
10. Multischakelaar
11. Start-/stopknop
12. AC-contactdoos (230 V/50 Hz)
13. ESC-gasklepschakelaar
14. AC resetknop
15. LED data overzicht
16. DC-circuit beveiliging
17. DC-stopcontact
18. USB ingang
19. Parallelle uitgangen
20. Aardeconnector
PLAATSING VAN DE MACHINE (FIG. C-D)
Uitlaatgas bevat giftig koolmonoxide, een kleurloos, reukloos gas.
Ademhaling uitlaat kan bewustzijnsverlies veroorzaken en kan leiden tot
de dood. Als u in een besloten of gedeeltelijk afgesloten ruimte bent, kan
de lucht een gevaarlijke hoeveelheid of koolmonoxide bevatten. Gebruik
daarom de machine altijd buiten op voldoende afstand van gebouwen.

9
NEDERLANDS
Koolmonoxide kan binnen enkele minuten leiden tot overlijden.
Gebruik altijd koolmonoxide detectoren op batterijen. Bij duizeligheid of
zwak voelen tijdens het gebruik van de generator, sluit de machine af
en ga onmiddellijk naar frisse lucht. Raadpleeg een arts in verband met
mogelijke koolmonoxidevergiftiging.
• Gebruik de machine buitenshuis op voldoende afstand van woonruimtes.
• Gebruik de machine niet in huis, niet in de kelder, niet op zolder en niet in een
garage of schuur.
• Let bij gebruik buitenshuis op het sluiten van alle ramen, deuren en ventilatie.
• Zorg ervoor dat de uitblaaszijde niet richting gebouw staat.
VOOR HET EERSTE GEBRUIK
De bedrijfsspanning en frequentie van alle elektronische apparatuur
moeten worden gecontroleerd voordat ze op deze machine mag worden
aangesloten. Er kan schade ontstaan als de apparatuur niet is ontworpen
om te werken binnen een spanningsvariatie van +/- 10% en een variatie
van +/- 3 hz ten opzichte van de machine.
VULLEN MET BRANDSTOF (FIG. E)
Gebruik altijd brandstof die voldoet aan de volgende specificaties: ongelode
benzine, octaangehalte minimaal 87.
Vul nooit brandstof bij terwijl de machine draait. Laat de machine na
gebruik minimaal 15 minuten afkoelen alvorens brandstof bij te vullen.
Rook niet in de buurt van de machine of in de buurt van de brandstof. Vul
nooit brandstof bij in de buurt van vonken, vlammen of open vuur.
Op de brandstofniveaumeter (22) op de bovenzijde van de machine kunt u de
hoeveelheid brandstof in de tank controleren. F = volle tank, E = tank is bijna leeg
en moet worden bijgevuld.
1. Schakel de machine uit en wacht tot deze is afgekoeld.
2. Schroef de tankdop eraf (2).
3. Vul de tank langzaam met het mengsel. Overschrijd de maximale capaciteit
niet (vul de tank bij voorkeur tot 80% van de capaciteit). (3)
4. Plaats de dop op de brandstoftank en draai deze vast.
5. Verwijder indien nodig gemorste brandstof.
BRANDSTOF OPSLAAN
• Brandstof moet in een schoon en veilig reservoir worden opgeslagen, dat altijd
moet worden afgesloten.
• Als de machine 2 maanden niet zal worden gebruikt, moet de brandstof worden
afgetapt en in het reservoir worden bewaard.
• Laat geen brandstof voor lange tijd in de machine. Hierdoor kan de carburateur
verstopt raken en de motor niet juist meer werken.
• Wanneer brandstof niet meer wordt gebruikt moet het op een verantwoorde
manier worden afgevoerd. Raadpleeg de lokale wetgeving met betrekking tot de
verwijdering van brandstoffen.
CONTOLEER OLIEPEIL (FIG. F)
Gebruik 4-taktmotorolie. SAE 10W-30 is geschikt voor algemeen gebruik bij
alle temperaturen. Andere viscositeiten kunnen gebruikt worden wanneer de
gemiddelde omgevingstemperatuur binnen de opgegeven bereiken is.
• Schakel de machine uit en wacht tot deze is afgekoeld.
• Verwijder eventuele oude olie (20)
• Verwijder de peilstok (21) van het vulpunt.
• Vul het carter met de voorgeschreven hoeveelheid olie.
• Breng de peilstok weer aan.
DE ACCU
De machine wordt verzonden met de negatieve (-) pool van de lithium-in-accu
losgekoppeld om de veiligheid te maximaliseren. Om de generator met elektrische
start te starten, moet de accu worden aangesloten.
De accu geeft explosief waterstofgas af.
• Houd de accu uit de buurt van vonken, vlammen of open vuur.
• Sluit of ontkoppel de accu niet terwijl de generator draait.
• Onderhoud of gebruik de accu alleen in goed geventileerde ruimtes.
Accu bevat zwavelzuur. Zwavelzuur is giftig. Als u de machine kantelt
terwijl de accu is geïnstalleerd, kan er zwavelzuur worden gemorst.
• Draag beschermende kleding en oogbescherming bij het onderhoud aan de accu.
• Buiten bereik van kinderen bewaren.
• Als u zwavelzuur op uw huid krijgt, was deze dan onmiddellijk met water.
• Als er zwavelzuur in uw ogen komt, spoel dan minimaal 15 minuten met water en
bel onmiddellijk uw arts.
DE ACCU AANSLUITEN (FIG. i)
1. Verwijder het deksel van het accuvak.
2. Verbind de negatieve (-) kabel.
3. Plaats het deksel (23) terug en zet deze vast.
DE ACCU VERVANGEN (FIG. J)
1. Maak de rubberen riemen los en trek de oude accu eruit.
2. Verwijder het deksel (23) van de minpool (-) van de accu en ontkoppel eerst de
zwarte kabel (24) van de minpool (-) los van de accu, ontkoppel vervolgens de
kabel (25) van de pluspool (+).
3. Verwijder de oude accu en plaats de nieuwe.
4. Sluit eerst de kabel (25) van de pluspool (+) aan en daarna de zwarte kabel
(24) van de minpool (-)
5. Plaats de nieuwe accu terug op zijn plaats en gebruik de rubberen riemen om
de accu vast te maken.
6. Plaats het deksel (23) terug en zet deze vast.
AARDEN VAN DE MACHINE
• Om het risico op elektrische schokken te verminderen en om de veiligheid te
maximaliseren, moet de generator goed worden geaard.
• Aard de machine door de aardingsmoer op het voorste bedieningspaneel vast te
draaien met een aardingsdraad.
• Deze aardingsdraad moet aan het andere uiteinde worden aangesloten op een
aardleiding van koper, messing of staal die in de aarde wordt gedreven. Draad
en aardingskabel zijn niet inbegrepen.
Het niet goed aarden van de machine verhoogt het risico op elektrische
schokken.
ENGINE SMART CONTROL (ESC)
• Wanneer de ESC-schakelaar op “ON” wordt gezet, regelt de gashendel het
motortoerental afhankelijk van de belasting door aangesloten apparaten. Het
resultaat is een beter brandstofverbruik en minder lawaai.
• Wanneer de ESC-schakelaar naar “OFF” wordt gedraaid, draait de motor met het
nominale toerental (4500 t / min) ongeacht of er een belasting is aangesloten of niet.
GEBRUIK
Gebruik de machine niet in de onmiddellijke nabijheid personen en/of
dieren, Houd altijd tenminste 15 meter afstand.
Lees, voordat u uw machine gebruikt, alle instructies zorgvuldig door. Neem,
voor uw persoonlijke bescherming, de veiligheidsmaatregelen in acht.
STARTEN VAN DE MACHINE (FIG. A,B+H)
HANDMATIGE START
1. Zet de ESC-gasklepschakelaar (13) naar positie “I”.
2. Draai de multischakelaar (10) naar positie “ON”.
3. Trek 4-6 keer aan het startkoord totdat de motor start.
ELEKTRONISCHE START
1. Zet de ESC-gasklepschakelaar (13) naar positie “I”.
2. Draai de multischakelaar (10) naar positie “ON”.
3. Houd de start-/stopknop (11) 1-3 seconden ingedrukt.
Als de motor niet start: de start-/stopknop loslaten en opnieuw indrukken.
De start-/stopknop te lang ingedrukt houden kan de starter beschadigen.
STARTEN MET DE AFSTANDSBEDIENING
1. Zet de ESC-gasklepschakelaar (13) naar positie “I”.
2. Draai de multischakelaar (10) naar positie “ON”.
3. Houd de startknop op de afstandsbediening (9) 1-3 seconden ingedrukt.
Als de motor niet start: de start-/stopknop loslaten en opnieuw indrukken.
De start-/stopknop te lang ingedrukt houden kan de starter beschadigen.
Laat de machine enkele minuten draaien voordat u elektrische apparaten
aansluit. Hierdoor kan de machine zijn snelheid en temperatuur stabiliseren.
CONTROLEPANEEL (FIG. B)
Kijk tijdens gebruik regelmatig op het controlepaneel:
• “output” brandt groen als de motor draait en stroom produceert.
• “overload” brandt rood als een aangesloten apparaat meer stroom verbruikt
dan de generator kan leveren.
• “olie” alarm; het oliepijl is te laag.

10
Ga als volgt te werk als het overbelastings-indicatielampje (“overload”) gaat
branden en de stroomopwekking stopt:
1. Schakel alle aangesloten elektrische apparaten uit en stop de machine.
2. Verlaag het totale wattage van aangesloten elektriciteit apparaten binnen het
nominale vermogen.
3. Koelluchtinlaat controleren op eventuele verstopping en schoonmaken.
4. Start na controle de motor opnieuw.
Wanneer het oliepeil onder te laag niveau zakt, gaat het oliepeilalarm aan (rood) en
dan stopt de motor automatisch. De motor start pas als er voldoende olie aan het
apparaat is toegevoegd.
STOPPEN VAN DE MACHINE
1. Zet alle aangesloten elektrische apparaten uit en verwijder de snoeren uit de
AC-contactdoos (12).
2. Zet de aan-uitschakelaar op “O” om de machine te stoppen.
3. Draai de multischakelaar (9) naar “OFF”.
4. U kunt ook de start-/stopknop gebruiken of de afstandbediening.
Laat de machine afkoelen voordat u deze aanraakt.
WERKEN OP GROTE HOOGTE BOVEN 3.000 VOET
(900 METER)
• Het brandstofsysteem van deze machine kan worden beïnvloed door gebruik op
grote hoogte. Een goede werking kan worden gegarandeerd door een hoogte-kit
te installeren op hoogtes hoger dan 3.000 voet (± 900 meter) boven zeeniveau.
• Op een hoogte boven 8.000 voet (± 2.400 meter) kan de motor minder gaan
presteren, zelfs met de hoogte-kit.
• Het gebruik van deze machine zonder hoogte-kit kan de uitstoot van de motor
en het brandstofverbruik verhogen en de prestaties verminderen.
• Neem contact op met uw geautoriseerde servicecentrum voor belangrijke
informatie over werken op hoogte.
ONDERHOUD, TRANSPORT EN OPSLAG
ONDERHOUD
• Onderhoud de machine regelmatig. Dit zorgt ervoor dat uw machine in goede
staat blijft en de levensduur ervan word verlengd.
• Gebruik geen schurende en bijtende producten om de machine te reinigen. Deze
kunnen de machine beschadigen.
• Repareer de machine niet zelf. Reparaties en controles moeten worden
uitgevoerd door een gekwalificeerd persoon of een erkend servicecentrum
(neem contact op met uw verkoper).
NA ELK GEBRUIK
Controleer de machine op slijtage, schade, enz. Bij schade, slijtage of een storing
de machine niet meer gebruiken maar inleveren bij een gekwalificeerde service
voor controle en reparatie.
VERVANGEN VAN OLIE (FIG. F)
Gebruik 4-taktmotorolie. SAE 10W-30 is geschikt voor algemeen gebruik bij
alle temperaturen. Andere viscositeiten kunnen gebruikt worden wanneer de
gemiddelde omgevingstemperatuur binnen de opgegeven bereiken is.
1. Schakel de machine uit en wacht tot deze is afgekoeld.
2. Verwijder eventuele oude olie (21)
3. Verwijder de peilstok (22) van het vulpunt.
4. Vul met het carter met de voorgeschreven hoeveelheid olie.
5. Breng de peilstok weer aan.
6. ONDERHOUD LUCHTFILTER (FIG. K)
Om het luchtfilter te inspecteren en te reinigen:
1. Draai de bouten van het onderhoudsdeksel los en verwijder het deksel van het
zijpaneel.
2. Verwijder het deksel van het luchtfilter.
3. Verwijder het schuimrubberen luchtfilterdeel uit de behuizing. Veeg overtollige
olie en eventueel vuil van de binnenkant van de luchtfilterbehuizing.
4. Controleer en reinig het schuimrubberen luchtfilterdeel. De elementen kunnen
worden gewassen in een sopje. Droog het element in een schone doek (niet
verdraaien).
5. Voeg een paar druppels motorolie toe aan het schuimrubberen luchtfilterdeel
en verdeel het gelijkmatig.
6. Als het schuimrubberen luchtfilterdeel is beschadigd, vervang het dan
door een nieuw exemplaar. Neem contact op met uw geautoriseerde
servicecentrum.
7. Plaats het luchtfilter, het luchtdeksel en de onderhoudsdeksel terug.
ONDERHOUD BOUGIE (FIG. L)
Om de bougie te inspecteren of te vervangen:
1. Draai de knop van het onderhoudsdeksel los en verwijder het deksel vanaf het
zijpaneel.
2. Verwijder de bougiekap. Gebruik de meegeleverde bougiesleutel om los te
schroeven en verwijder voorzichtig de bougie van de motor.
3. (TIP: Er is beperkte ruimte voor de sleutel om te draaien. Gebruik allebei rijen
gaten in de bougiesleutel om hefboomwerking op te krijgen.)
4. Maak de plug los.
5. Inspecteer de bougie visueel: als deze gebarsten of afgestoken is, of als de
elektroden zijn versleten en verbrand, gooi ze dan weg en vervang ze door een
nieuwe bougie.
6. Als u de bougie opnieuw kunt gebruiken, gebruik dan een staalborstel om vuil
rond de bougiebasis te verwijderen en plaats de bougie terug.
VERVANGEN VAN DE BATTERIJ VAN DE AFSTANDSBEDIENING
(FIG. M, N, O + P)
M. Verwijder de 3 schroeven aan de achterkant met een kleine
kruiskopschroevendraaier (+3.0 Phillips = 3mm) en verwijder de printplaat.
N. Vervang de 2 oude batterijen door 2 nieuwe (CR2016 3V).
O. Zorg ervoor dat de batterijen elkaar overlappen, de positieve elektrode (+)
is verbonden met de negatieve elektrode. Plaats de positieve (+) elektrode
omhoog in het circuit.
P. Plaats ten slotte de printplaat in de schaal, bedek de achterkant en draai de
schroeven vast.
TRANSPORT
• Laat de machine volledig afkoelen voordat u deze vervoert.
• Tap de brandstof af in een geschikte opvangbak.
• Verwijder de bougiekabel om onbedoeld starten te voorkomen.
• Beveilig de machine zodat deze niet kan bewegen tijdens transport.
Houd de machine tijdens transport uit de buurt van ontstekingsbronnen.
OPSLAG
• Bewaar de machine op een droge en veilige plek.
• Houd de machine buiten het bereik van kinderen.
• Stel de machine niet onnodig lang bloot aan direct zonlicht. Uv-stralen kunnen het
materiaal van de behuizing broos maken, wat kan leiden tot lekken of breken.
• Bij langdurige opslag langer dan 2 maanden moet de brandstoftank volledig
worden geledigd. Koppel de zwarte kabel (24) van de minpool (-) los van de accu.

11
NEDERLANDS
ONDERHOUDSSCHEMA
De hieronder beschreven onderhoudswerkzaamheden kunnen door de gebruiker worden uitgevoerd. U kunt ook een bevoegde technicus vragen om deze onderhoudswerken
uit te voeren.
Iedere 8 uur of
dagelijks
Iedere 25 uur Na 3 maanden
of 50 uur
Na 6 maanden
of 100 uur
Voor opslag Indien nodig
Motorolie Het oliepeil controleren X
Olie vervangen X X X
Luchtfilter Controleren X*
Reinigen X*
Bougie Reinigen of afstellen X
Vervangen X X
Brandstof
tank
Het brandstofpeil controleren X
Afvoer X X
Carburateur Afvoer X
Vonkenvanger Controleer/reinig X
Accu Afsluiten X
* Reining/vervang vaker in stoffige omstandigheden of bij intensief gebruik.
PROBLEMEN EN OPLOSSINGEN
Probleem Oorzaak Oplossing
Machine start niet. Accu is niet geladen. Vervang de accu.
De multischakelaar staat op “OFF” Draai de multischakelaar naar “ON”.
Geen benzine. Vul de benzine tank.
Oude benzine of water in benzine. Vervang de benzine.
Oliepeil is laag. De machine schakelt uit bij laag oliepeil. Vul het oliepeil aan.
Brandstofschakelaar staat op “OFF”. Draai de brandstofschakelaar naar “ON”.
Bougie defect, vervuild of onjuist
tussenruimte.
Stel af of vervang de bougie.
Motor gestald zonder benzine aftappen. Tap de brandstof af. Tank de motor bij met nieuwe benzine.
Het luchtfilter is vervuild. Reinig of vervang het luchtfilter.
De motor heeft geen vermogen. Het luchtfilter is vervuild. Reinig of vervang het luchtfilter.
Motor gestald zonder benzine aftappen. Tap de brandstof af. Tank de motor bij met nieuwe benzine.
Ac-resetknop werkt niet. Output-indicator is “UIT”, en
Overbelasting-indicator is “AAN”.
Controleer AC-belasting. Stop en start de motor opnieuw. Controleer
de koelluchtinlaat. Stop en start de motor opnieuw.
AC Circuitbeveiliging is geactiveerd. Controleer de AC-belasting en reset de AC-circuitbeveiliging.
GFCI-systeem geactiveerd. Reset de aardlekschakelaar.
Het apparaat dat is aangesloten, is defect. Probeer een ander apparaat.

12
TECHNISCHE GEGEVENS
55019HBM
Nominale frequentie Hz 50
Nominale spanning V 230
Vermogen kW 3.8
Startvermogen kW 4.2
Overbelastingsbeveiliging DC zonder zekering
Fase enkelvoudig
Motor 4-takt, luchtgekoeld
Cilinderinhoud cc 223
Brandstof ongelood Euro 95 (E10)
Capaciteit brandstoftank l 10
Brandstofverbruik g/kW-h < 395
Continu gebruik uren 5
Olie 4-takt. SAE 10W-30
Capaciteit olie l 0.55
Bougie type F6RTC/F7RTC
Afmetingen mm 605×432×493
Gewicht kg 95
Geluid (K=3 dB(A))
LpA geluidsdruk dB(A) 92
LWA geluidsvermogen dB(A) 45
GARANTIE
Voor de garantiebepalingen wordt verwezen naar de bijgevoegde
garantievoorwaarden.
MILIEU
VERWERKING
Uw product, accessoires en verpakking moet worden gesorteerd voor
milieuvriendelijke verwerking.
UITSLUITEND VOOR EG-LANDEN
Werp elektrisch gereedschap niet bij het huisvuil. Volgens de Europese Richtlijn
2002/96/EG voor Afgedankte Elektrische en Elektronische Apparatuur en de
implementatie ervan in nationaal recht moet niet langer te gebruiken elektrisch
gereedschap gescheiden worden verzameld en op een milieuvriendelijke wijze
worden verwerkt.
ACCU’S/BATTERIJEN
Ongewenste accu’s/batterijen moeten op een milieuvriendelijke wijze en
in overeenstemming met de lokale voorschriften worden verwerkt.
• Ontlaad de accu/batterij door de machine onbelast te laten draaien tot de motor stopt.
• Verwijder de accu/batterij uit de machine.
• Breng de accu/batterij als chemisch afval naar het verwerkingsstation in uw gemeente.
UITSLUITEND VOOR EG-LANDEN
Defecte of lege accu’s/batterijen moeten worden verwerkt volgens de richtlijn
91/157/EEG.
Wijzigingen voorbehouden; specificaties kunnen zonder opgave van redenen
worden gewijzigd.

13
ENGLISH
SILENT INVERTER GENERATOR
WARNING
For your own safety, please read this manual before attempting to
operate the machine. Failure to follow instructions can result in serious
personal injury. Spend a few moments to familiarize yourself with your
machine before each use. If you give this tool to another person, also
hand over this manual.
SAFETY INSTRUCTIONS
When using the machine, always carefully follow the enclosed safety instructions
and the additional safety instructions below.
The following icons are used in this manual:
Danger of personal injury or material damage.
ADDITIONAL SAFETY REGULATIONS FOR
GENERATORS
WORKING ENVIRONMENT
• Place the machine on a solid surface. Do not place the machine on a metal
surface.
• Do not store fuel near the machine.
ELECTRICAL SAFETY
• Before use, check that the power consumption of the equipment to be
connected is less than the maximum output power of the generator.
• Only connect the equipment when the generator is running at full speed.
Disconnect the equipment before turning off the generator.
PERSONAL SAFETY
• Avoid contact with hot parts of the machine.
• Never add fuel while the machine is running. After use, allow the machine to
cool for at least 15 minutes before refuelling.
USE AND MAINTENANCE OF ELECTRICAL TOOLS
• If using a backup power generator, notify the utility company.
• Use a residual current device (GFCI) in any damp or highly conductive area, such
as metal decking or steelwork.
• Do not touch exposed wires or outlets.
• Do not operate the machine with electrical cords that are frayed, bare, or
otherwise damaged.
• Do not use the machine to power electrical equipment (as an external power source).
• Do not place the machine in direct sunlight. Do not expose the machine to
temperatures above 40° C.
• Do not use the generator in the rain or in a damp environment
• Do not touch the generator or electrical cords while standing in water, barefoot,
or while hands or feet are wet.
• Store the machine in a dry environment.
• Children must be supervised to ensure that they do not play with the appliance.
• Make sure that the generator has enough fuel with a connected load.
• The silencer and air filter act as flame arresters in the event that post-ignition
occurs. Therefore, make sure that they are assembled and in a technically
perfect condition.
• Turn off the generator immediately if any of the following occurs:
- faltering or unstable running of the engine
- decrease in electrical power
- overheating of the connected load
- excessive vibration of the generator
- sparking
- presence of smoke or fire
Exhaust heat / gases can ignite flammable materials and structures or
damage the fuel tank causing a fire, resulting in death or serious injury
and / or property damage.
Contact with the silencer can cause burns in the event of serious injury.
SYMBOLS ON THE MACHINE
Read the manual
Fire hazard
[
Explosion hazard
Danger of inhaling toxic substances
Dangerously hot parts
Do not use at home
Do not use in garage or shed
Only use outdoors
92
Noise level
Add oil
PRESS 1-3 SEC.
OR
Start procedure
DESCRIPTION (FIG. A)
This generator is designed to generate electricity to power electrical machines or
appliances. The machine does not come with oil and fuel.
1. Handle
2. Tank cap
3. Fuel gauge
4. Control panel
5. Starter cord
6. Oil filler cover
7. Silencer
8. Cooling air inlet
9. Remote control
CONTENT PACKAGING
• Inverter generator
• Remote control
• Spark plug wrench
• Instructions
• Safety regulations
• Warranty and service
CONTROL PANNEL (FIG. B)
10. Multi switch
11. Start / stop button
12. AC socket (230 V / 50 Hz)
13. ESC throttle switch
14. AC reset button
15. LED data overview
16. DC circuit protection
17. DC power socket
18. USB port
19. Parallel outputs
20. Earth connector
POSITIONING THE MACHINE (FIG. C-D)
Exhaust gas contains poisonous carbon monoxide, a colourless, doorless
gas. Breathing exhaust can cause loss of consciousness and can lead
to death. If you are in a confined or partially enclosed space, the air can
contain dangerous amounts of carbon monoxide. Therefore, always use
the machine outdoors at a sufficient distance from buildings.
Carbon monoxide can cause death within minutes. Always use battery-
powered carbon monoxide detectors. If you feel dizzy or faint while using
the generator, shut down the machine and move to fresh air immediately.
Consult a physician regarding possible carbon monoxide poisoning.

14
• Use the machine outdoors at a sufficient distance from living areas.
• Do not use the machine indoors, in the basement, in the attic, or in a garage or shed.
• When using outdoors, be sure to close all windows, doors and ventilation.
• Make sure that the discharge side is not facing the building.
BEFORE THE FIRST USE
The operating voltage and frequency of all electronic equipment must be
checked before connecting to this machine. Damage may occur if the
equipment is not designed to operate within +/- 10% voltage variation
and +/- 3 Hz variation from the machine.
FILLING WITH FUEL (FIG. E)
Always use fuel that meets the following specifications: unleaded gasoline,
minimum degree of 87 octane.
Never add fuel while the machine is running. After use, allow the machine
to cool for at least 15 minutes before refuelling.
Do not smoke near the machine or near the fuel. Never add fuel near
sparks, flames or open flames.
You can check the amount of fuel in the tank on the fuel level gauge (22) on the top
of the machine. F = full tank, E = tank is almost empty and needs to be refilled.
1. Turn off the machine and wait 15 minutes for it to cool down.
2. Unscrew the fuel cap (2).
3. Slowly fill the tank with the fuel. Do not exceed the maximum capacity
(preferably fill the tank to 80% of the capacity). (3)
4. Place the cap on the fuel tank and tighten it.
5. Clean up spilled fuel if necessary.
STORE FUEL
• Fuel should be stored in a clean and safe container, which should always be
closed off.
• If the machine will not be used for 2 months, the fuel should be drained and
stored in the reservoir.
• Do not leave fuel in the machine for a long time. This can clog the carburettor
and cause the engine to malfunction.
• When fuel is no longer being used, it must be disposed of responsibly. Consult
local laws regarding fuel disposal.
CHECK OIL LEVEL (FIG. F)
Use 4-stroke engine oil. SAE 10W-30 is suitable for general use at all
temperatures. Other viscosities can be used when the average ambient
temperature is within the specified ranges.
1. Turn off the machine and wait for it to cool down.
2. Remove any old oil (21).
3. Remove the dipstick (22) from the filling point.
4. Fill the crankcase with the specified amount of oil.
5. Reinstall the dipstick.
DE BATTERY
The machine is shipped with the negative (-) terminal of the lithium-ion battery
disconnected to maximize safety. To start the generator with electric start, the
battery must be connected.
The battery gives off explosive hydrogen gas.
• Keep the battery away from sparks, flames or open flames.
• Do not connect or disconnect the battery while the generator is running.
• Only maintain or use the battery in well-ventilated areas.
Battery contains sulfuric acid. Battery acid is poisonous. Tipping the
machine with the battery installed can cause battery acid to spill.
• Wear protective clothing and eye protection when servicing the battery.
• Keep out of reach of children.
• If you get battery acid on your skin, wash it immediately with water.
• If battery acid gets into your eyes, flush with water for at least 15 minutes and
call your doctor immediately.
CONNECTING THE BATTERY (FIG. I)
1. Remove the cover from the battery compartment.
2. Connect the negative (-) cable.
3. Replace and tighten the cover (23).
REPLACE THE BATTERY (FIG. J)
1. Loosen the rubber straps and pull out the old battery.
2. Remove the cover (23) from the negative (-) battery terminal and disconnect
the black cable (24) from the negative (-) terminal of the battery first, then
disconnect the cable (25) from the positive (+) terminal.
3. Remove the old battery and install the new one.
4. First connect the cable (25) from the positive pole (+) and then the black cable
(24) from the negative pole (-)
5. Replace the new battery and use the rubber straps to secure the battery.
6. Replace and tighten the cover (23).
GROUNDING THE MACHINE
• To reduce the risk of electric shock and to maximize safety, the generator must
be properly grounded.
• Ground the machine by tightening the ground nut on the front control panel with
a ground wire.
• This ground wire must be connected at the other end to a copper, brass, or
steel ground wire that is driven into the ground. Wire and ground cable are not
included.
Failure to properly ground the machine can increase the risk of electric
shock.
ENGINE SMART CONTROL (ESC)
When the ESC switch is turned “ON”, the throttle controls the engine speed
depending on the load from connected devices. The result is better fuel
consumption and less noise.
When the ESC switch is turned to “OFF”, the motor will run at rated speed (4500
rpm) regardless of whether a load is connected or not.
USE
Do not use the machine in the immediate vicinity of persons and / or
animals. Always keep at least 15 metres away.
Read all instructions carefully before using your machine. For your
personal protection, observe the safety precautions.
STARTING THE MACHINE (FIG. A,B+H)
MANUAL START
1. Set the ESC throttle switch (13) to position “I”.
2. Turn the multi-switch (10) to the “ON” position.
3. Pull the starter rope 4-6 times until the engine starts.
ELECTRONIC START
1. Set the ESC throttle switch (13) to position “I”.
2. Turn the multi-switch (10) to the “ON” position.
3. Press and hold the start/stop button (11) for 1-3 seconds.
If the engine does not start: release the start/stop button and press it
again. Holding the start/stop button for too long may damage the starter.
STARTING WITH THE REMOTE CONTROL
1. Set the ESC throttle switch (13) to position “I”.
2. Turn the multi-switch (10) to the “ON” position.
3. Press and hold the start button on the remote (9) for 1-3 seconds.
IIf the engine does not start: release the start/stop button and press it
gain. Holding the start/stop button for too long may damage the starter.
Let the machine run for a few minutes before connecting electrical
appliances. This allows the machine to stabilize its speed and temperature.
CONTROL PANEL (FIG. B)
Check the control panel regularly during use:
• “output” lights up green when the motor is running and producing power.
• “overload” lights up red when a connected device is consuming more power
than the generator can supply.
• “oil” alarm; the oil level is too low.
If the overload indicator light comes on and power generator stops, do the
following:
1. Turn off all connected electrical devices and stop the machine.
2. Reduce the total wattage of connected electrical appliances within the rated power.
3. Check the cooling air inlet for any blockages and clean it.
4. Restart the engine after checking.
When the oil level falls below too low level, the oil level alarm will turn on (red) and
the engine will stop automatically. The engine will not start until sufficient oil has
been added to the unit.

15
ENGLISH
STOPPING THE MACHINE
1. Turn off all connected electrical devices and remove the cords from the AC
outlet (12).
2. Set the power switch to “O” to stop the machine.
3. Turn the multi switch (10) to “OFF”.
4. You can also use the start / stop button or the remote control.
Let the machine cool down before touching it.
WORKING AT HIGH ALTITUDE ABOVE 3,000 FEET (900 METRES)
The fuel system of this machine can be affected by use at high altitudes. Proper
operation can be guaranteed by installing an elevation kit at altitudes higher than
3,000 feet (± 900 metres) above sea level.
At altitudes above 8,000 feet (± 2,400 metres) the engine may start to perform
less, even with the altitude kit.
Using this machine without a height kit can increase engine emissions and fuel
consumption and decrease the performance.
Please contact your authorized service centre for important information about
working at height.
MAINTENANCE, TRANSPORT AND STORAGE
MAINTENANCE
• Maintain the machine regularly. This will keep your machine in good working
order and extend its life.
• Do not use abrasive and corrosive products to clean the machine. These can
damage the machine.
• Do not repair the machine yourself. Repairs and checks must be carried out by a
qualified person or an authorized service centre (contact your dealer).
AFTER EVERY USE
Check the machine for wear, damage, etc. In case of damage, wear or a
malfunction, stop using the machine and take it to a qualified service centre for
inspection and repair.
REPLACING OIL (FIG. F)
Use 4-stroke engine oil. SAE 10W-30 is suitable for general use at all
temperatures. Other viscosities can be used when the average ambient
temperature is within the specified ranges.
1. Turn off the machine and wait for it to cool down.
2. Remove any old oil (21)
3. Remove the dipstick (22) from the filling point.
4. Fill the crankcase with the specified amount of oil.
5. Reinstall the dipstick.
MAINTENANCE AIR FILTER (FIG. K)
To inspect and clean the air filter:
1. Loosen the maintenance cover bolts and remove the side panel cover.
2. Remove the cover from the air filter.
3. Remove the foam air cleaner section from the housing. Wipe excess oil and
any debris from the inside of the air cleaner housing.
4. Check and clean the foam air filter part. The elements can be washed in soapy
water. Dry the element in a clean cloth (do not twist).
5. Add a few drops of engine oil to the foam air cleaner section and spread it evenly.
6. If the foam air cleaner part is damaged, replace it with a new one. Contact
your authorized service centre.
7. Replace the air filter, air cover and service cover.
MAINTENANCE SPARK PLUG (FIG. L)
To inspect or replace the spark plug:
1. Loosen the knob on the maintenance cover and remove the cover from the
side panel.
2. Remove the spark plug cap. Use the supplied spark plug wrench to unscrew
and carefully remove the spark plug from the engine.
3. (TIP: There is limited space for the wrench to turn. Use both rows of holes in
the spark plug wrench to gain leverage).
4. Loosen the plug.
5. Visually inspect the spark plug: if it is cracked or chipped, or if the electrodes
are worn and burnt, discard and replace with a new spark plug.
6. If you can reuse the spark plug, use a wire brush to remove any debris from
around the spark plug base and reinstall the spark plug.
REPLACING THE REMOTE CONTROL BATTERY (FIG. M, N + O)
M. Remove the 3 screws on the back with a small Phillips screwdriver (+3.0
Phillips = 3mm) and remove the printed circuit board.
N. Replace the 2 old batteries with 2 new ones (CR2016 3V).
O. Make sure the batteries overlap, the positive electrode (+) is connected to the
negative electrode. Place the positive (+) electrode up in the circuit.
P. Finally, place the circuit board in the shell, cover the back and tighten the screws.
TRANSPORT
• Allow the machine to cool completely before transporting it.
• Drain the fuel into a suitable container.
• Remove the spark plug wire to prevent accidental starting.
• Secure the machine so that it cannot move during transport.
• Keep the machine away from ignition sources during transport.
STORAGE
• Store the machine in a dry and safe place.
• Keep the machine out of the reach of children.
• Do not expose the machine to direct sunlight for an unnecessary period of time. UV
rays can make the housing material brittle, which can lead to leakage or breakage.
• If stored for longer than 2 months, the fuel tank must be completely emptied.
Disconnect the black cable (24) from the negative (-) terminal of the battery.

16
MAINTENANCE SCHEDULE
The maintenance operations described below can be performed by the user. You can also ask a qualified technician to perform these maintenance works.
Every 8 hours
or daily
Every 25 hours After 3 months
or 50 hours
After 6 months
or 100 hours
For storage If necessary
Engine oil Check the oil level X
Change oil X X X
Air filter Check X*
Clean X*
Spark plug Clean or adjust X
Replace X X
Fuel tank Check the fuel level X
Drain X X
Carburettor Drain X
Spark arrester Check / clean X
Battery Shutdown X
* Clean / replace more often in dusty conditions or with intensive use.
PROBLEMS AND SOLUTIONS
Problem Cause Solution
Machine does not start. Battery is not charged. Replace the battery.
The multi switch is set to “OFF” Rotate the Multi Switch to “ON”.
No gasoline. Fill the fuel tank.
Stale gasoline or water in gasoline. Replace the gasoline.
Oil level is low. The machine shuts down when the oil level is low. Top up the oil level.
Fuel switch is set to “OFF”. Turn the fuel switch to “ON”.
Spark plug defective, dirty or incorrectly
spaced.
Adjust or replace the spark plug.
Engine stored without draining gasoline. Drain the fuel. Refuel the engine with new gasoline.
The air filter is dirty. Clean or replace the air filter.
The motor has no power. The air filter is dirty. Clean or replace the air filter.
Engine stored without draining gasoline. Drain the fuel. Refuel the engine with new gasoline.
AC reset button not working. Output indicator is “OFF”, and overload
indicator is “ON”.
Check AC load. Stop and restart the engine. Check the cooling air intake. Stop
and restart the engine.
AC circuit protection has tripped. Check the AC load and reset the AC circuit protector.
GFCI system is activated. Reset the RCD.
The device that is connected is defective. Try another device.

17
ENGLISH
TECHNICAL DATA
55019HBM
Nominal frequency Hz 50
Nominal voltage V 230
Power kW 3.8
Starting power kW 4.2
Overload protection DC without fuse
Phase single
Motor 4-stroke, air-cooled
Engine displacement cc 223
Fuel unleaded Euro 95 (E10)
Fuel tank capacity l 10
Fuel consumption g/kW-h < 395
Continuous use hours 5
Oil 4-stroke SAE 10W-30
Oil reservoir capacity l 0.55
Spark plug type F6RTC/F7RTC
Dimensions mm 605×432×493
Weight kg 95
Sound (K=3 dB(A))
LpA sound pressure dB(A) 92
LWA sound power dB(A) 45
GUARANTEE
Refer to the enclosed guarantee conditions for the terms and conditions of
guarantee.
ENVIRONMENT
DISPOSAL
Your product, accessories and packaging should be sorted for
environmental-friendly recycling.
ONLY FOR EC COUNTRIES
Do not dispose of power tools into domestic waste. According to the European
Guideline 2002/96/EC for Waste Electrical and Electronic Equipment and its
implementation into national right, power tools that are no longer usable must be
collected separately and disposed of in an environmentally friendly way.
BATTERIES
Unwanted batteries must be disposed of in an environmentally friendly
manner and in accordance with local regulations.
• Discharge the battery by running the machine at no load until the engine stops.
• Remove the battery from the machine.
• Take the battery as chemical waste to the recycling station in your municipality.
ONLY FOR EC COUNTRIES
Defective or dead (rechargeable) batteries must be disposed of in accordance with
Directive 91/157 / EEC.
Subject to change; specifications can be changed without further notice.

18
GROUPE ÉLECTROGÈNE INVERTER SILENCIEUX
AVERTISSEMENT
Pour votre propre sécurité, veuillez lire ce manuel avant d’essayer
d’utiliser la machine. Le non-respect de ces instructions peut provoquer
des blessures graves. Passez un peu de temps pour vous familiariser avec
ce groupe électrogène avant chaque utilisation. Si vous donnez cette
machine à une personne, donnez-lui également ce manuel.
CONSIGNES DE SÉCURITÉ
Lorsque vous utilisez cette machine, suivez minutieusement les consignes de
sécurité ci-jointes et les consignes de sécurité supplémentaires ci-dessous.
Les icônes suivantes sont utilisées tout au long de ce manuel :
Danger de blessure ou de dégât matériel.
CONSIGNES DE SÉCURITÉ SUPPLÉMENTAIRES
POUR LES GROUPES ÉLECTROGÈNES
ENVIRONNEMENT DE TRAVAIL
• Placez la machine sur une surface solide. Ne placez pas la machine sur une
surface métallique.
• Ne stockez pas d’essence près de la machine.
SÉCURITÉ ÉLECTRIQUE
• Avant utilisation, vérifiez que la consommation électrique de l’équipement
à connecter est inférieure à la puissance électrique maximale du groupe
électrogène.
• Ne connectez l’équipement que lorsque le groupe électrogène fonctionne à
pleine vitesse. Déconnectez l’équipement avant d’arrêter le groupe électrogène.
SÉCURITÉ PERSONNELLE
• Évitez le contact avec les parties chaudes de la machine.
• N’ajoutez jamais d’essence pendant que la machine est en marche. Après
utilisation, laissez la machine refroidir pendant au moins 15 minutes avant de
remettre du carburant.
UTILISATION ET ENTRETIEN DES OUTILS ÉLECTRIQUES
• Si vous utilisez un groupe électrogène de secours, informez le fournisseur.
• Utilisez un disjoncteur différentiel dans toute zone humide ou à conductivité
élevée, comme un platelage métallique ou des charpentes en acier.
• Ne touchez pas les fils ou les prises de courant exposées.
• Ne faites pas fonctionner la machine avec des câbles électriques effilochés, à
nu ou endommagés.
• N’utilisez pas la machine pour alimenter un équipement électrique (en tant que
source d’électricité externe).
• Ne placez pas la machine à la lumière directe du soleil. N’exposez pas la
machine à une température supérieure à 40 °C.
• N’utilisez pas le groupe électrogène sous la pluie ou dans un environnement
humide.
• Ne touchez pas le groupe électrogène ou les câbles électriques lorsque vous
avez les pieds dans l’eau, que vous êtes pieds nus ou lorsque vos mains et vos
pieds sont mouillés.
• Stockez la machine dans un endroit sec.
• Les enfants doivent être supervisés afin de s’assurer qu’ils ne jouent pas avec
l’appareil.
• Assurez-vous que le groupe électrogène a assez d’essence et une puissance
raccordée.
• Le silencieux et le filtre à air agissent en tant que coupe-flammes au cas où un
feu se déclenche après l’allumage. Ainsi, assurez-vous qu’ils sont bien montés
et dans un état technique irréprochable.
• Éteignez immédiatement le groupe électrogène si l’une des situations suivantes
se produit :
- fonctionnement défaillant ou instable du moteur
- diminution de l’alimentation électrique
- surchauffe de la puissance raccordée
- vibration excessive du groupe électrogène
- étincelles
- présence de fumée ou de feu
La chaleur/les gaz d’échappement peuvent mettre le feu à des matériaux
et des structures inflammables ou endommager le réservoir d’essence, et
provoquer un incendie, pouvant causer la mort ou des blessures sérieuses
et/ou des dégâts matériels.
Tout contact avec le silencieux peut causer des brûlures en cas de
blessure sérieuse.
SYMBOLES SUR LA MACHINE
Lisez le manuel
Risque d’incendie
Risque d’explosion
Risque d’inhalation de substances toxiques
Pièces dangereusement chaudes
Ne pas utiliser à la maison
Ne pas utiliser dans un garage ou une cabane
N’utiliser qu’à l’extérieur
92
Niveau de bruit
Ajouter de l’huile
PRESS 1-3 SEC.
OR
Démarrer la procédure
DESCRIPTION (FIG. A)
Ce groupe électrogène est conçu pour générer de l’électricité pour alimenter des
machines ou des appareils électriques. La machine n’est pas fournie avec de
l’huile et de l’essence.
1. Poignée
2. Bouchon du réservoir
3. Jauge à essence
4. Panneau de commande
5. Corde du démarreur
6. Bouchon de remplissage d’huile
7. Silencieux
8. Arrivée d’air refroidissant
9. Télécommande
CONTENU DU PAQUET
• Groupe électrogène inverter
• Télécommande
• Clé à bougie d’allumage
• Instructions
• Consignes de sécurité
• Garantie et entretien
PANNEAU DE COMMANDE (FIG. B)
10. Commutateur multiple
11. Bouton Marche/Arrêt
12. Prise d’alimentation secteur (230 V/50 Hz)
13. Commande des gaz (contrôle électronique des vitesses)
14. Bouton de réinitialisation AC
15. Aperçu des données LED
16. Protection de circuit DC
17. Prise électrique DC
18. Port USB
19. Sorties parallèles
20. Connecteur de mise à la terre
POSITIONNEMENT DE LA MACHINE (FIG. C-D)
Le gaz d’échappement contient du monoxyde de carbone toxique, un
gaz incolore et inodore. Respirer ce gaz peut entraîner une perte de
conscience et causer la mort. Si vous êtes confiné dans un espace

19
FRANÇAIS
partiellement fermé, l’air peut contenir une quantité dangereuse de
monoxyde de carbone. Ainsi, utilisez toujours la machine à l’extérieur
et à une distance suffisante des bâtiments.
Le monoxyde de carbone peut causer la mort en quelques minutes.
Utilisez toujours des détecteurs de monoxyde de carbone à pile. Si vous
vous sentez étourdi ou faible lorsque vous utilisez le groupe électrogène,
éteignez la machine, puis allez immédiatement dans un endroit pour y
respirer de l’air frais. Consultez un médecin pour un empoisonnement
possible au monoxyde de carbone.
• Utilisez toujours la machine à l’extérieur et à une distance suffisante des lieux
de vie.
• N’utilisez pas la machine à l’intérieur, au sous-sol, dans un grenier, dans un
garage ou une cabane.
• Lorsque vous utilisez la machine à l’extérieur, assurez-vous de fermer toutes les
fenêtres, les portes et les aérations.
• Assurez-vous que la sortie d’air ne se trouve pas face au bâtiment.
AVANT LA PREMIÈRE UTILISATION
La tension de fonctionnement et la fréquence de tous les équipements
électroniques doivent être vérifiées avant de connecter cette machine.
Des dégâts peuvent se produire si l’équipement n’est pas conçu pour
fonctionner avec une variation de tension de +/- 10 % et une variation de
la machine de +/- 3 Hz.
FAIRE LE PLEIN DE CARBURANT (FIG. E)
Utilisez toujours du carburant conforme aux spécifications suivantes : essence
sans plomb, indice d’octane de 87 au minimum.
N’ajoutez jamais d’essence pendant que la machine est en marche. Après
utilisation, laissez la machine refroidir pendant au moins 15 minutes avant
de remettre du carburant.
Ne fumez pas près de la machine ou près de l’essence. N’ajoutez jamais
de l’essence à proximité d’étincelles, de flammes ou de flammes nues.
Vous pouvez vérifier la quantité d’essence dans le réservoir sur la jauge de niveau
d’essence (22) au-dessus de la machine. F = réservoir plein, E = le réservoir est
presque vide et a besoin d’être rempli.
1. Arrêtez la machine, puis attendez pendant 15 minutes qu’elle refroidisse.
2. Dévissez le robinet d’essence (2).
3. Remplissez lentement le réservoir avec du carburant. Ne dépassez pas la
capacité maximale (remplissez le réservoir de préférence à 80 % de sa
capacité). (3)
4. Placez le bouchon sur le réservoir d’essence, puis serrez-le.
5. Nettoyez toute éclaboussure de carburant si nécessaire.
STOCKAGE DU CARBURANT
• Le carburant doit être stocké dans un conteneur propre et sécurisé qui doit
toujours être fermé.
• Si la machine n’est pas utilisée pendant 2 mois, le carburant doit être vidé et
stocké dans un réservoir.
• Ne laissez pas de carburant dans cette machine pendant trop de temps. Cela
peut boucher le carburateur et causer un mauvais fonctionnement du moteur.
• Lorsque vous n’utilisez plus le carburant, vous devez vous en débarrasser de
manière responsable. Consultez les lois locales relatives à l’élimination de
l’essence.
VÉRIFIER LE NIVEAU D’HUILE (FIG. F)
Utilisez de l’huile moteur 4 temps. L’huile SAE 10W-30 convient pour une utilisation
générale à toutes les températures. Vous pouvez utiliser une huile avec une autre
viscosité lorsque la température moyenne ambiante se situe dans les limites
indiquées.
• Arrêtez la machine, puis attendez pendant qu’elle refroidit.
• Évacuez toute huile usagée (21).
• Retirez la jauge (22) du point de remplissage.
• Remplissez le carter avec la quantité d’huile indiquée.
• Réinstallez la jauge.
LA BATTERIE
La machine est livrée avec la borne négative (-) de la batterie lithium-ion
déconnectée, pour une meilleure sécurité. Pour démarrer le groupe électrogène
avec un démarrage électrique, la batterie doit être connectée.
La batterie émet un gaz hydrogène très explosif.
• Gardez la batterie éloignée d’étincelles, de flammes ou de flammes nues.
• Ne connectez pas et ne déconnectez pas la batterie pendant que le groupe
électrogène est en marche.
• Ne faites l’entretien ou n’utilisez la batterie que dans des zones bien ventilées.
La batterie contient de l’acide sulfurique. L’acide de la batterie
est toxique. Incliner la machine avec la batterie peut causer des
éclaboussures d’acide de batterie.
• Portez des vêtements de protection et des lunettes de protection lorsque vous
entretenez la batterie.
• Tenez hors de portée des enfants.
• En cas de contact de votre peau avec de l’acide de batterie, lavez-la
immédiatement avec de l’eau.
• En cas de contact de vos yeux avec de l’acide de batterie, rincez-les avec de
l’eau pendant au moins 15 minutes et appelez immédiatement votre médecin.
CONNECTER LA BATTERIE (FIG. I)
1. Retirez le couvercle du boîtier de la batterie.
2. Connectez le câble négatif (-).
3. Replacez, puis serrez le couvercle (23).
CONNECTER LA BATTERIE (FIG. J)
1. Desserrez les sangles en caoutchouc, puis retirez l’ancienne batterie.
2. Retirez le couvercle (23) de la borne négative (-) de la batterie, puis
débranchez le câble noir (24) de la borne négative (-) de la batterie en premier.
Ensuite, déconnectez le câble (25) de la borne positive (+).
3. Retirez l’ancienne batterie, puis installez la nouvelle.
4. Tout d’abord, connectez le câble (25) du pôle positif (+), puis le câble noir (24)
du pôle négatif (-).
5. Placez la nouvelle batterie, puis utilisez les sangles en caoutchouc pour
sécuriser la batterie.
6. Replacez, puis serrez le couvercle (23).
METTRE LA MACHINE À LA TERRE
• Pour réduire le risque d’électrocution et optimiser la sécurité, le groupe
électrogène doit être correctement mis à la terre.
• Mettez la machine à la terre en serrant l’écrou de mise à la terre sur le panneau
de commande avec un câble de mise à la terre.
• Ce câble de mise à la terre doit être connecté à l’autre extrémité à un câble en
cuivre, en laiton ou en acier connecté à la terre. Le câble et le câble de mise à la
terre ne sont pas inclus.
Le non-respect des consignes de mise à la terre de la machine peut
augmenter le risque d’électrocution.
CONTRÔLE INTELLIGENT DU MOTEUR (ESC)
• Lorsque l’ESC est sur « ON », la commande contrôle la vitesse du moteur en
fonction de la charge des appareils connectés. Le résultat est une meilleure
consommation du carburant et une diminution du bruit.
• Lorsque le bouton ESC est sur « OFF », le moteur va tourner à une vitesse
nominale (4 500 tr/min), qu’une charge soit connectée ou non.
UTILISATION
N’utilisez pas la machine à proximité immédiate de personnes et/ou
d’animaux. Restez toujours au moins à 15 mètres de distance.
Lisez attentivement toutes les instructions avant d’utiliser votre machine.
Respectez les précautions de sécurité pour votre protection personnelle.
DÉMARRER LA MACHINE (FIG. A, B + H)
DÉMARRAGE MANUEL
1. Mettez la commande des gaz ESC (13) en position « I ».
2. Faites tourner le commutateur multiple (10) en position « ON ».
3. Tirez sur le cordon du démarreur 4 à 6 fois jusqu’à ce que le moteur démarre.
DÉMARRAGE ÉLECTRONIQUE
1. Mettez la commande des gaz ESC (13) en position « I ».
2. Faites tourner le commutateur multiple (10) en position « ON ».
3. Appuyez et maintenez le bouton Start/Stop (11) enfoncé pendant 1 à 3
secondes.
Si le moteur ne démarre pas : relâchez le bouton Start/Stop et appuyez
de nouveau dessus. Le fait de maintenir le bouton de Start/Stop trop
longtemps peut endommager le démarreur.

20
DÉMARRAGE À L’AIDE DE LA TÉLÉCOMMANDE
1. Mettez la commande des gaz ESC (13) en position « I ».
2. Faites tourner le commutateur multiple (10) en position « ON ».
3. Appuyez et maintenez le bouton Start/Stop de la télécommande (9) enfoncé
pendant 1 à 3 secondes.
Si le moteur ne démarre pas: relâchez le bouton Start/Stop et appuyez
de nouveau dessus. Le fait de maintenir le bouton de Start/Stop trop
longtemps peut endommager le démarreur.
Laissez la machine tourner pendant quelques minutes avant de
connecter les appareils électriques. Cela permet à la machine de
stabiliser sa vitesse et sa température.
PANNEAU DE COMMANDE (FIG. B)
Vérifiez le panneau de commande régulièrement pendant l’utilisation :
• Le voyant « OUTPUT » s’allume en vert lorsque le moteur est en marche et qu’il
produit de l’électricité.
• Le voyant « OVERLOAD » s’allume en rouge lorsqu’un appareil connecté
consomme plus d’électricité que le groupe électrogène peut en produire.
• L’alarme « OIL » s’allume en rouge lorsque le niveau d’huile est trop bas.
Si le voyant OVERLOAD s’allume et que le groupe électrogène d’électricité s’arrête,
procédez comme suit :
1. Arrêtez tous les appareils électriques connectés, puis arrêtez la machine.
2. Réduisez la puissance électrique des appareils connectés à la puissance
nominale appropriée.
3. Vérifiez que l’arrivée d’air refroidissant n’est pas bloquée et nettoyez-la.
4. Redémarrez le moteur après l’avoir vérifié.
Lorsque le niveau d’huile se situe en dessous du niveau minimum, le voyant de
niveau d’huile va s’allumer (rouge) et le moteur va s’arrêter automatiquement. Le
moteur ne démarrera pas avant qu’assez d’huile ait été ajoutée dans la machine.
ARRÊTER LA MACHINE
1. Arrêtez tous les appareils électriques connectés, puis débranchez les câbles
des prises secteur AC (12).
2. Mettez l’interrupteur Marche/Arrêt sur « O » pour arrêter la machine.
3. Faites tourner le commutateur multiple (10) sur « OFF ».
4. Vous pouvez également utiliser le bouton Marche/Arrêt ou la télécommande.
Laissez la machine refroidir avant de la toucher.
TRAVAILLER À HAUTE ALTITUDE À PLUS DE 900 MÈTRES
• Le circuit de carburant de cette machine peut être affecté par une utilisation
à haute altitude. Vous pouvez assurer un bon fonctionnement de la machine
en installant un kit pour des altitudes supérieures ou égales à 900 mètres au-
dessus du niveau de la mer.
• À des altitudes supérieures ou égales à 2 400 mètres, le moteur peut
commencer à être moins performant, même avec le kit d’altitude.
• Utiliser cette machine avec un kit d’altitude peut augmenter les émissions du
moteur et la consommation de carburant, et diminuer les performances.
• Veuillez contacter votre centre de réparation agréé pour obtenir des informations
importantes relatives aux hautes altitudes.
ENTRETIEN, TRANSPORT ET STOCKAGE
ENTRETIEN
• Entretenez la machine régulièrement. Cela permettra de garder votre machine
en bon état de marche et de prolonger sa durée de vie.
• N’utilisez pas des produits abrasifs et corrosifs pour nettoyer la machine. Ceux-
ci peuvent endommager la machine.
• Ne réparez pas la machine vous-même. Les réparations et les contrôles doivent
être effectués par une personne qualifiée ou un centre de réparation agréé
(contactez votre fournisseur).
APRÈS CHAQUE UTILISATION
Vérifiez que la machine n’est pas usée ou abîmée, etc. Si elle est abîmée, usée ou
fonctionne mal, arrêtez de l’utiliser et amenez-la dans un centre de réparation pour
la faire vérifier et réparer.
REMPLACER L’HUILE (FIG. F)
Utilisez de l’huile moteur 4 temps. L’huile SAE 10W-30 convient pour une utilisation
générale à toutes les températures. Vous pouvez utiliser une huile avec une autre
viscosité lorsque la température moyenne ambiante se trouve dans les limites
indiquées.
1. Arrêtez la machine, puis attendez pendant qu’elle refroidit.
2. Évacuez toute huile usagée (21).
3. Retirez la jauge (22) du point de remplissage.
4. Remplissez le carter avec la quantité d’huile indiquée.
5. Réinstallez la jauge.
ENTRETIEN DU FILTRE À AIR (FIG. K)
Pour inspecter et nettoyer le filtre à air :
1. Desserrez les vis du couvercle de révision, puis retirez le volet du panneau de
commande.
2. Retirez le couvercle du filtre à air.
3. Retirez la partie en mousse du boîtier du filtre à air. Essuyez tout écoulement
d’huile et saletés à l’intérieur du boîtier du filtre à air.
4. Vérifiez et nettoyez la partie du filtre à air en mousse. Les éléments peuvent
être nettoyés avec de l’eau savonneuse. Séchez les éléments avec un chiffon
propre (ne les tordez pas).
5. Ajoutez quelques gouttes d’huile moteur à la partie en mousse du boîtier du
filtre à air et étalez-la de façon uniforme.
6. Si la partie en mousse du boîtier du filtre à air est abîmée, remplacez-la avec
une neuve. Contactez votre centre de réparation agréé.
7. Remplacez le filtre à air, le couvercle du filtre à air et le couvercle de révision.
ENTRETIEN DE LA BOUGIE D’ALLUMAGE (FIG. L)
Pour inspecter ou remplacer la bougie d’allumage :
1. Desserrez le bouton du couvercle de révision, puis retirez le volet du panneau
de commande.
2. Retirez la borne de la bougie d’allumage. Utilisez la clé à bougie d’allumage
pour dévisser et retirer avec précaution la bougie d’allumage du moteur.
3. (ASTUCE : L’espace pour tourner la clé est limité. Utilisez les deux rangées des
trous de la clé à bougie d’allumage pour avoir plus de marge de manœuvre.)
4. Desserrez la bougie.
5. Inspectez visuellement la bougie d’allumage : si elle est fêlée ou ébréchée, ou si
les électrodes sont usées et brûlées, jetez-la et remplacez-la avec une neuve.
6. Si vous pouvez réutiliser la bougie d’allumage, utilisez une brosse métallique
pour retirer toute saleté de la base de la bougie d’allumage, puis réinstallez-la.
REMPLACER LES PILES DE LA TÉLÉCOMMANDE (FIG. M, N + O)
M. Retirez les 3 vis à l’arrière de la télécommande avec un petit tournevis Phillips
(+3.0 Phillips = 3 mm), puis retirez la carte de circuit imprimé.
N. Remplacez les 2 anciennes piles par 2 nouvelles (CR2016 3V).
O. Vérifiez que les 2 piles se chevauchent, et que l’électrode positive (+) est
connectée à l’électrode négative. Placez l’électrode positive (+) en haut du circuit.
P. Enfin, placez la carte de circuit imprimé dans son emplacement, remettez le
couvercle, puis serrez les vis.
TRANSPORT
• Laissez la machine refroidir complètement avant de la transporter.
• Videz le carburant dans un conteneur adapté.
• Retirez le câble de la bougie d’allumage afin d’éviter tout démarrage accidentel.
• Placez la machine de manière sécurisée afin qu’elle ne bouge pas pendant le
transport.
• Tenez la machine éloignée de toute source d’ignition pendant le transport.
STOCKAGE
• Stockez la machine dans un endroit sec et sécurisé.
• Tenez la machine hors de portée des enfants.
• N’exposez pas la machine à la lumière directe du soleil pendant de longues
périodes non nécessaires. Les rayons du soleil peuvent rendre la matière du
boîtier plus fragile, ce qui peut causer des fuites ou de la casse.
• Pour un stockage supérieur à 2 mois, le réservoir d’essence doit être
entièrement vidé. Déconnectez le câble noir (24) du terminal négatif (-) de la
batterie.
Table of contents
Languages:
Other HBM Machines Portable Generator manuals
Popular Portable Generator manuals by other brands

Subaru
Subaru RGX6500/E Instructions for use

Champion Global Power Equipment
Champion Global Power Equipment 100396 Operator's manual

Atlas Copco
Atlas Copco QAC 1100 Sd instruction manual

RDL
RDL STICK-ON ST-RG1 quick start guide

Westinghouse
Westinghouse iGen4000c user manual

Pulsar
Pulsar PG7500B owner's manual

Chicago Electric
Chicago Electric 39461 Generator Generator user manual

Rohde & Schwarz
Rohde & Schwarz SMBV-K52 operating manual

Kohler
Kohler EKOZD Series Service

Greencut
Greencut ATS-14000 instruction manual

Champion Global Power Equipment
Champion Global Power Equipment 100415 Operator's manual

Maruyama
Maruyama MC2602RS Owner's/operator's manual